High Performance Programming
by Tyler Swann, in collaboration with Monash DeepNeuron
Welcome
Welcome to Monash DeepNeuron's High Performance Programming (C++ edition), a book aimed at teaching techniques for developing programs that are both fast and safe. Throughout this book you will be learning the C++ programming language along with techniques for; computer memory, algorithm intuition, parallel computing and more.
How to use this book
This book is designed to be read cover-to-cover. Concepts in later chapters will build upon concepts from previous chapters. On either side of the page there are arrow buttons that will move you between pages and chapters. You can also search for specific content using the search button in the top left or by pressing the S key.
Synopsis
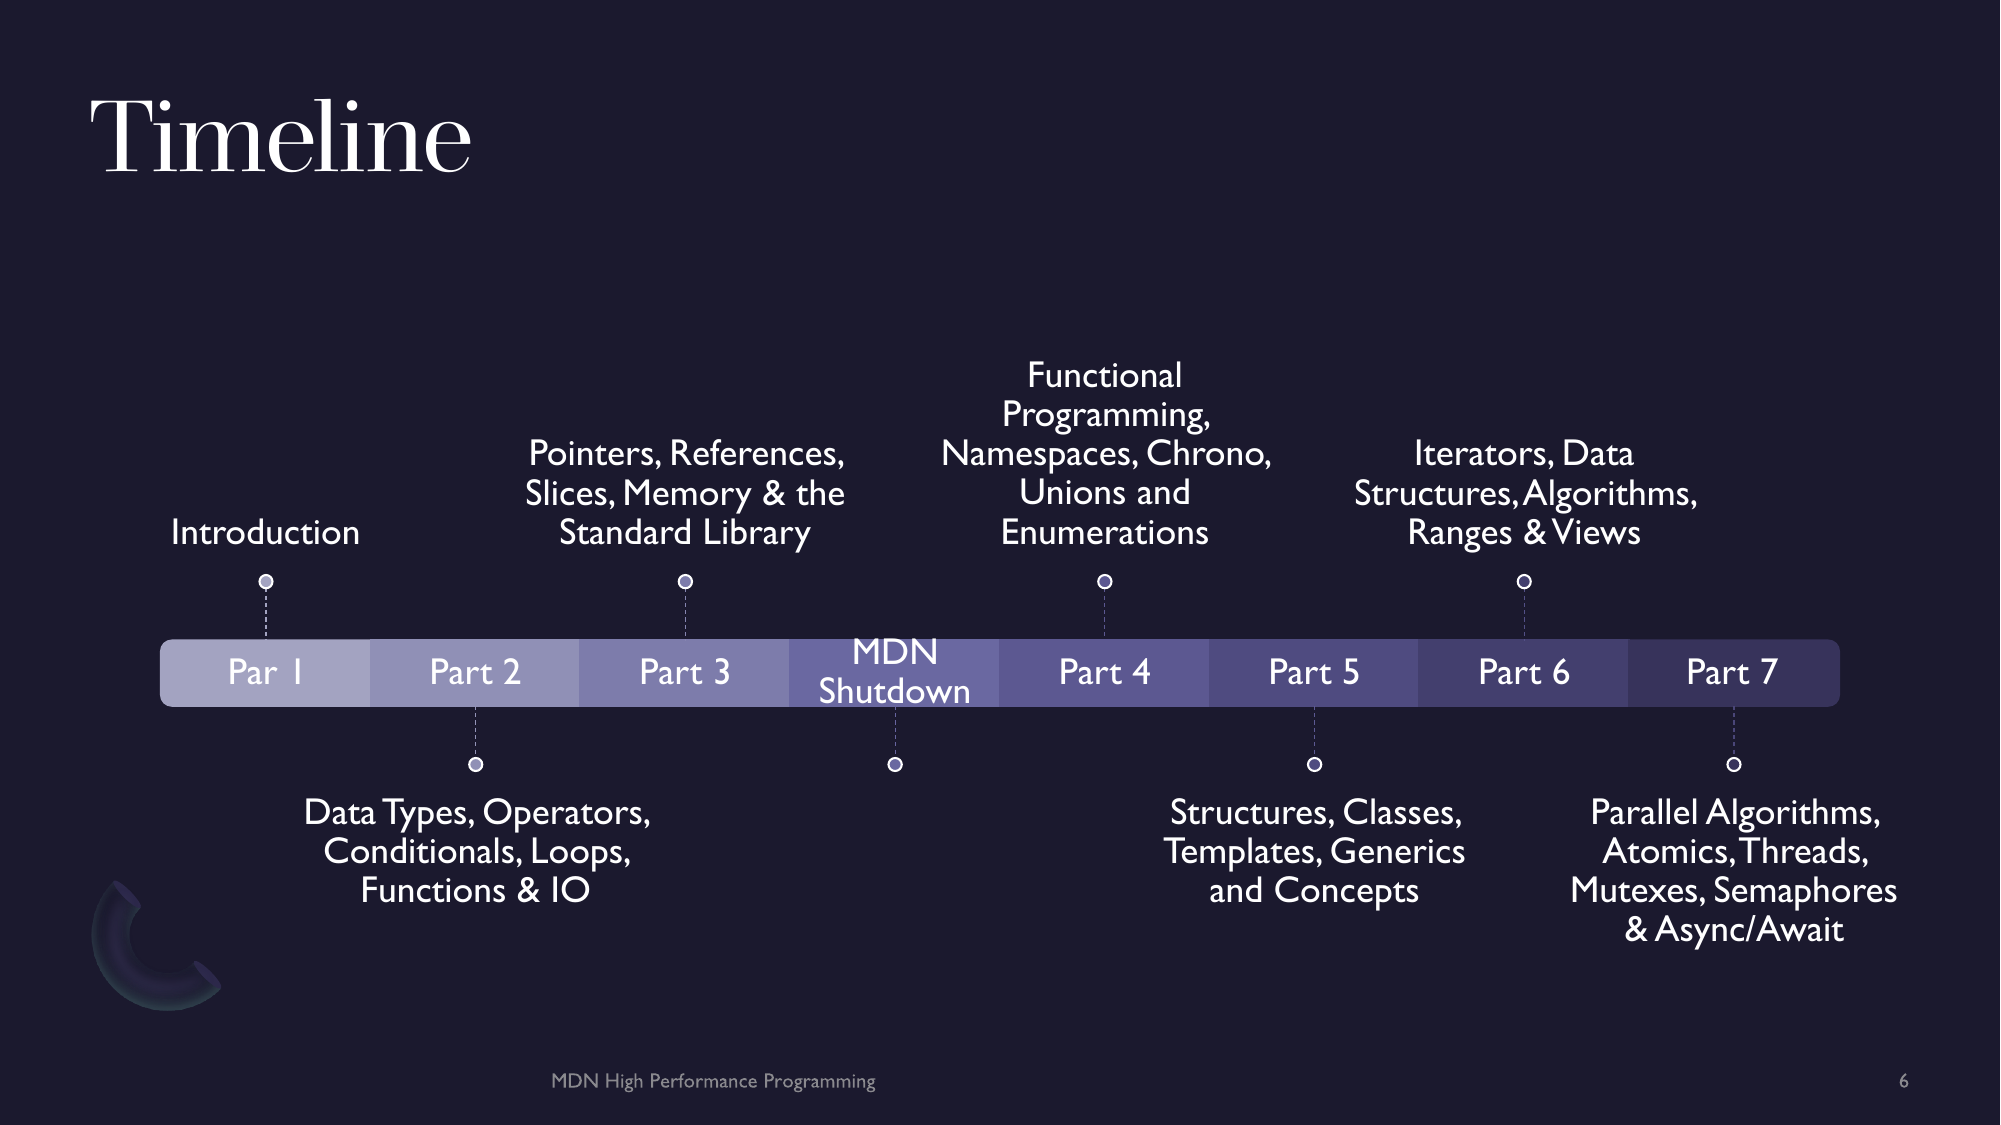
- Chapter 1 - Getting Started - Setup & Introduction to C++
- Chapter 2 - Basics of C++ - Types, Variables, Operators, IO, Conditionals, Loops and Functions
- Chapter 3 - Memory - Pointers, Slices, References, Dynamic Memory and The Standard Library
- Chapter 4 - Intermediate C++ - Functional Programming, Namespaces, Enumerations, Unions, Structures
- Chapter 5 - Generic Programming - Classes, Templates, Generics and Concepts
- Chapter 6 - Algorithms & Data Structures - Iterators, Data Structures, Algorithms, Ranges and Views
- Chapter 7 - Parallel Programming - Parallel Algorithms, Atomics, Threads, Mutexes & Locks and Async
Suggestions, Fixes and Contributions
Refer to the source code of this book for details on how to contribute changes, fix typos or create new content for this book.
External Resources
version: 1.0.0
Getting Started
Let's begin by setting up your device for developing with C++. In this chapter we will discuss:
- Installing WSL (Windows)
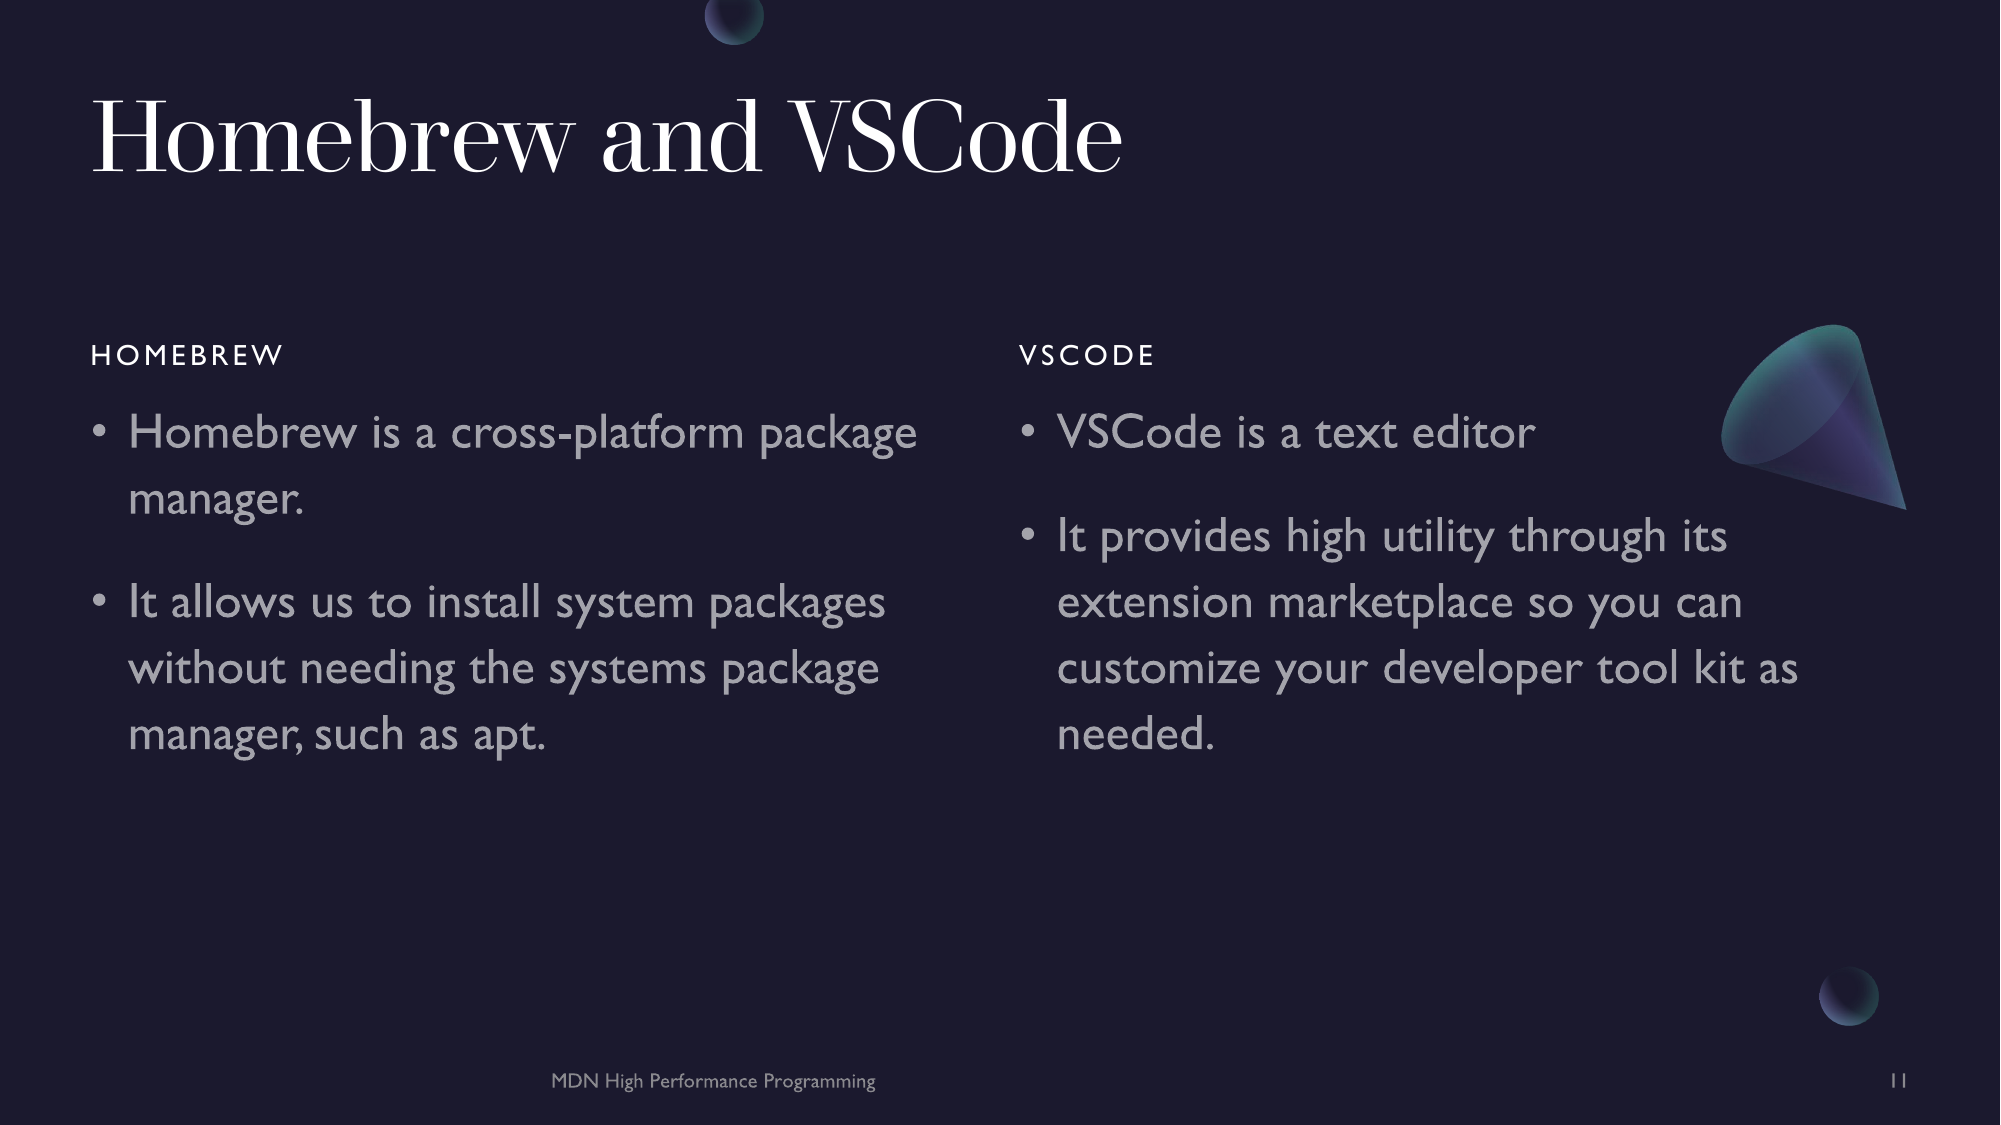
- Installing Homebrew for system package management
- Setting up Git and the basics of source version control
- Installing a C++ compiler
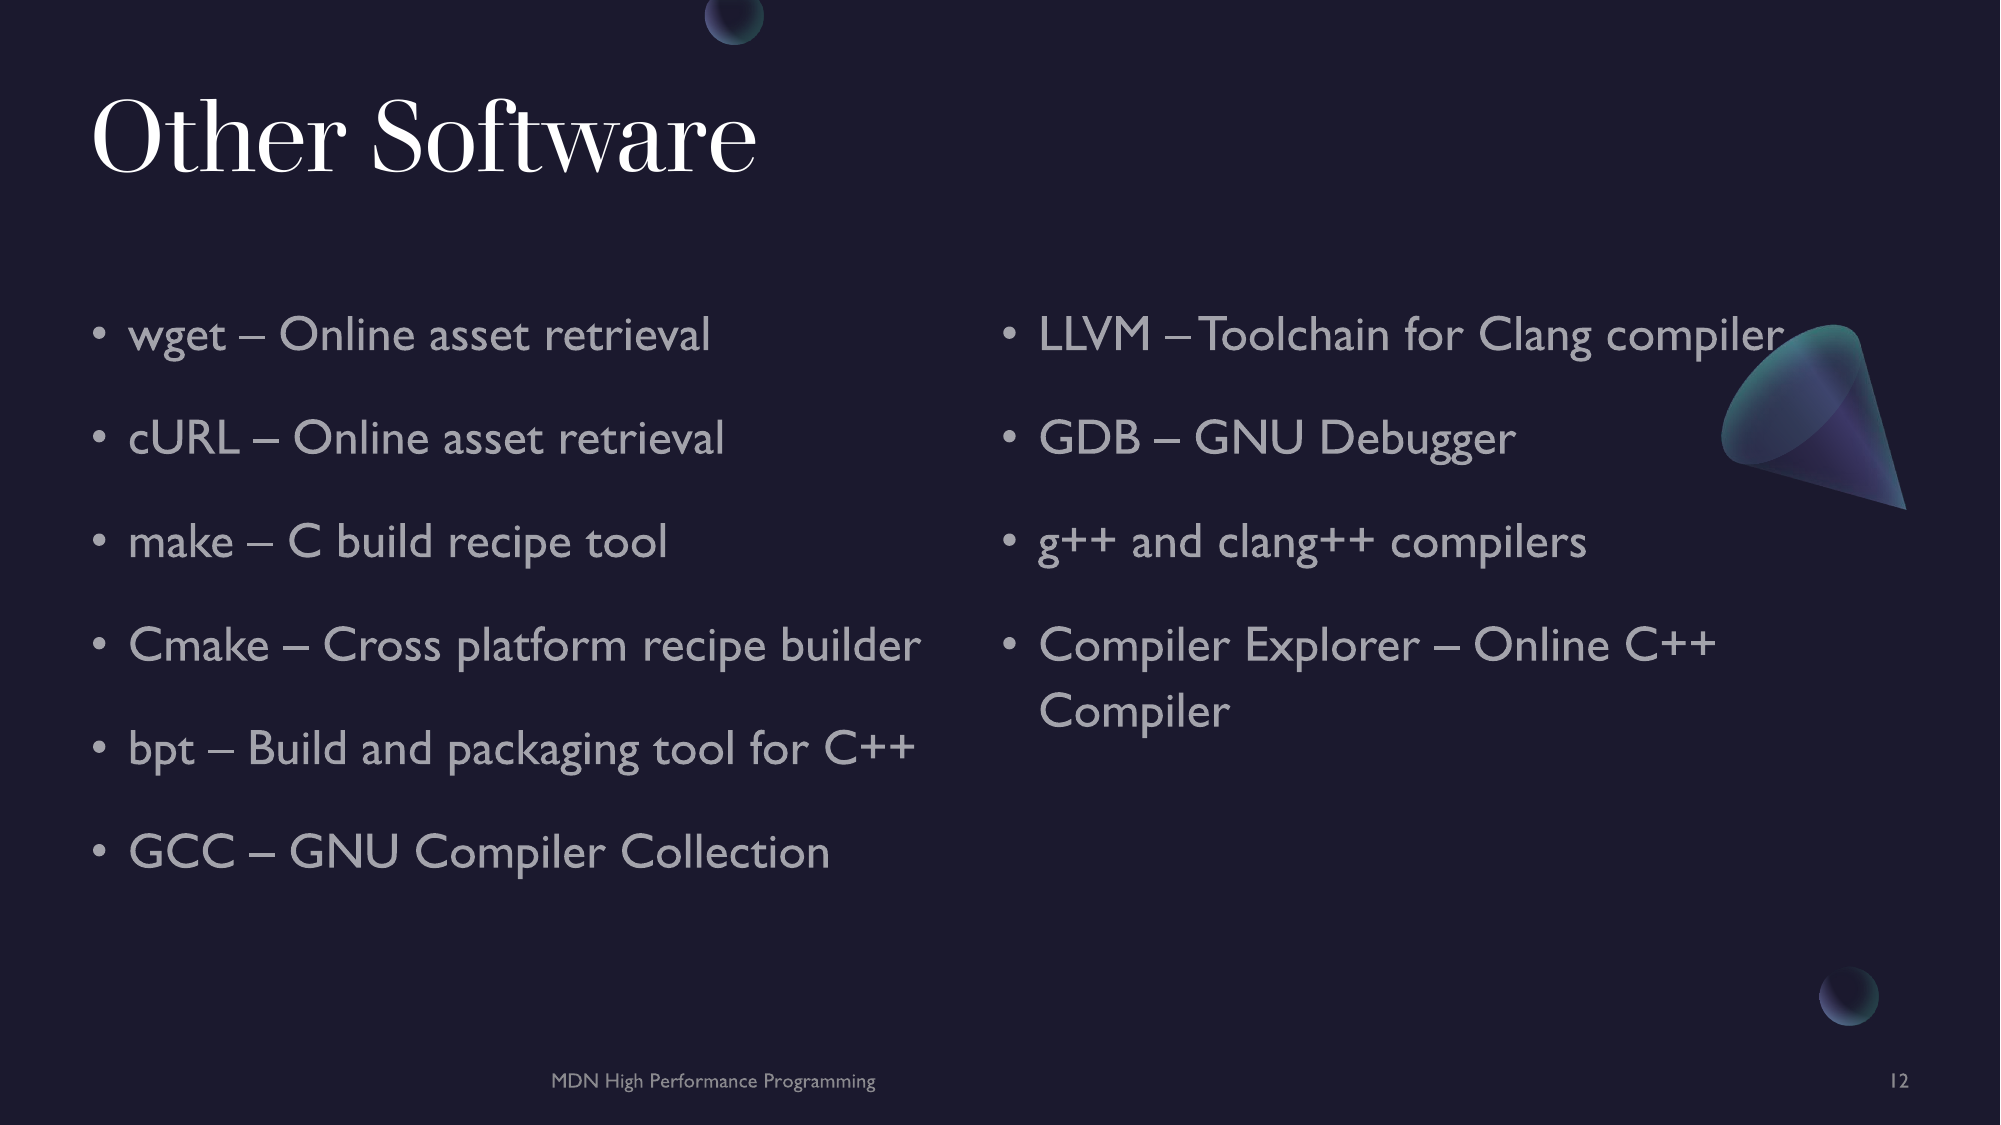
- Installing bpt, a C++ package and build tool
- Installing VSCode, a text editor
- Writing a C++ program that prints "Hello World!"
- How to compile and execute programs
- How to use Compiler Explorer to share code snippets.
WSL
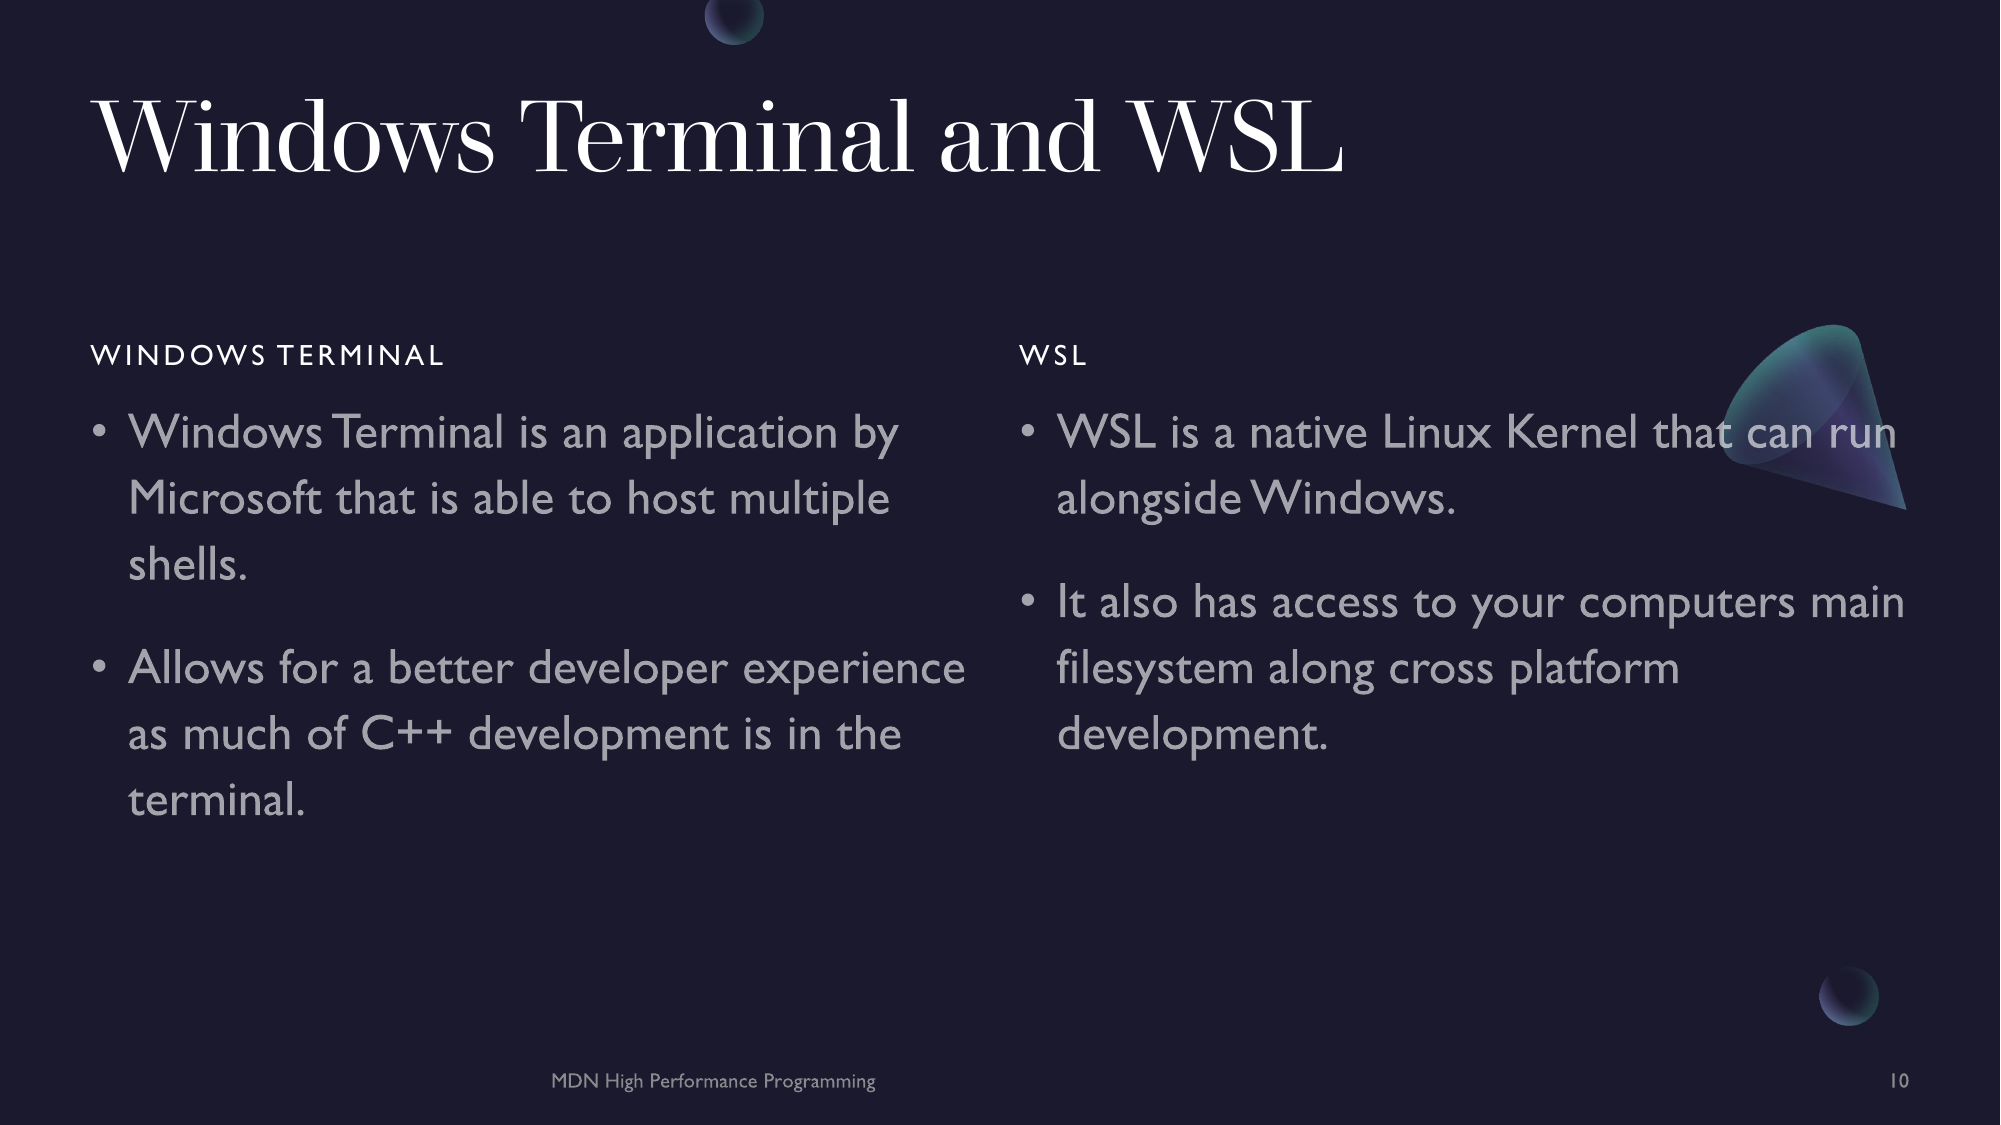
In this section we will install WSL. This is a virtualized Linux Kernel for Windows. This makes managing developer tools far easier and separates your development OS (Linux) from your personal OS (Windows).
Note: This section only applies to Windows users.
Update Windows and Virtualization Check
Before we begin, it is best to ensure we have the most recent Windows update available. Go to Settings > Updates and install any updates to your system.
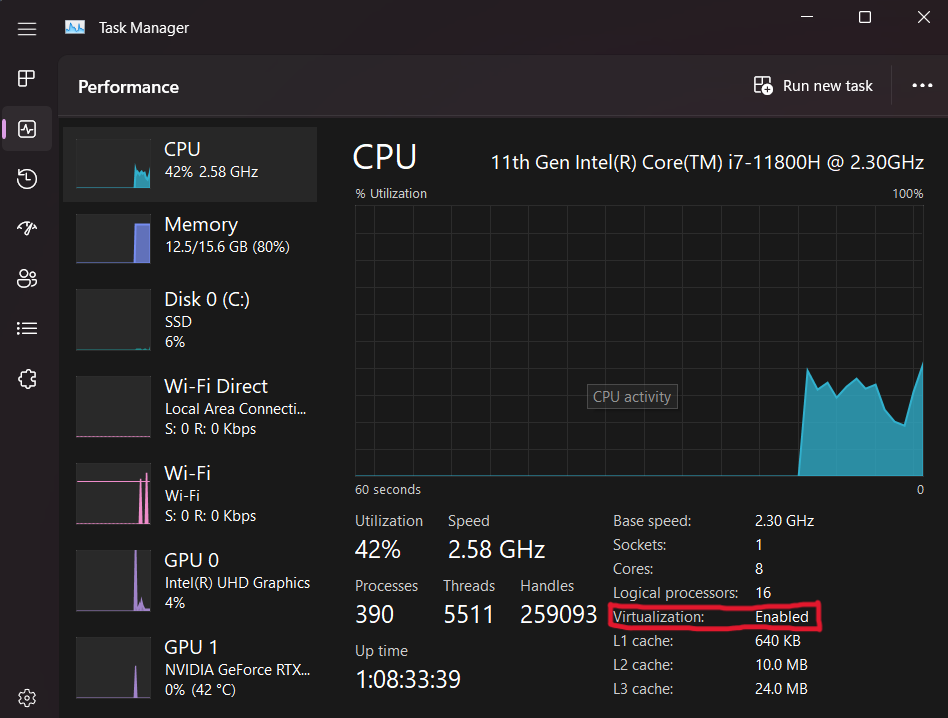
Secondly, you will want to ensure that virtualization is enabled on your device. To do this open 'Task Manager', click more details, open the performance tab and make sure you are on the CPU performance section. In the details below the CPU's graph there should be an option called 'virtualization'. This should have the value 'Enabled' next to it. If it doesn't, you will need to enable a feature called SVM in your computers BIOS. If you are comfortable doing this; go for it but if you do not want to do this yourself do not worry. We will ensure everyone is setup correctly in the first meetup. Continue reading through as there will be a way you can start coding at the end of the sections.
Windows Terminal
To get started with WSL we will want a new terminal environment for the WSL shell. Fortunately, Microsoft has an awesome project called Windows Terminal (WT). It is able to hold many instances of different shells an dis fully customizable. To install it, simply open the Microsoft Store apps and search for "Windows Terminal" and click "install".
WSL Install
To install WSL, we need to open PowerShell terminal with administrative privileges. Click on the Windows Start button (bottom left icon on the sectionbar) and type "PowerShell", select "Run as Administrator". This will open a new shell. Now run:
> wsl --install -d Ubuntu-20.04
This may require a reboot. This will install WSL as well as an image of Ubuntu. Click Start again and type "Ubuntu" and run the application. Follow the on screen instructions to create your user and password for WSL. This is different from you Windows credentials. Now open WT and press ctrl + , again. On the settings page that pops up, the first drop down called "Default Profile" should now have an option called Ubuntu (or something similar). Choose this as your default profile.
WSL is now installed. Create a new shell tab with ctrl + shift + t and the shell prompt should now display you WSL username.
Command Line Notation
In this chapter and throughout the book, we’ll show some commands used in the terminal. Lines that you should enter in a terminal all start with
$. You don’t need to type the$character; it’s the command line prompt shown to indicate the start of each command. Lines that don’t start with$typically show the output of the previous command. Additionally, PowerShell-specific examples will use>rather than$.
APT & Packages
Before you begin, you will need to update your systems packages. Packages on Ubuntu are managed by a tool called apt. For some context, updating packages takes two steps typically, first you update the package index, then you can update the relevant packages.
# `sudo` represents 'super user do'.
# This runs a command with admin. privileges.
# Update apt's local package index.
$ sudo apt update

# The `-y` flag means upgrade yes to all.
# This bypasses confirming package upgrades.
# Upgrade packages with new versions
$ sudo apt upgrade -y
You will also want some packages apt that we will need for C++ development.
# Installs specified packages (separated by spaces).
$ sudo apt install git curl wget ca-certificates build-essential
WSL should be installed and ready to go.
Installing Software
In this section we will install all the relevant software for developing C++ programs.
WSL & Linux
To get started open a new terminal session (for WSL, use the WSL terminal) and update your system package managers local package index. This is a list of all available packages and their versions. We can then install some system critical packages that we need in order to develop C++ programs. From there we can install Homebrew, a cross platform package manager which we will use to install our C++ compiler(s) and debuggers.
# Update apt (replace apt with relevant package manager if you are not on Ubuntu)
$ sudo apt update
$ sudo apt upgrade -y

# Install system packages
$ sudo apt install git curl wget ca-certificates build-essential

# Install Homebrew and update
$ /bin/bash -c "$(curl -fsSL https://raw.githubusercontent.com/Homebrew/install/HEAD/install.sh)"
$ brew update
$ brew upgrade

# Install C++ compiler(s), debuggers
$ brew install gcc llvm gdb
MacOS
To begin, open a new terminal session install Homebrew, a cross platform package manager which will then use to install our C++ compiler(s), debuggers, cURL and Git.
$ /bin/bash -c "$(curl -fsSL https://raw.githubusercontent.com/Homebrew/install/HEAD/install.sh)"
$ brew update
$ brew upgrade
$ brew install gcc llvm gdb curl git
Verify Installation
You can verify that GCC installed the correct version by running the following command. The output should be similar to this.
$ gcc-12 -v
Reading specs from /home/linuxbrew/.linuxbrew/Cellar/gcc/12.2.0/bin/../lib/gcc/current/gcc/x86_64-pc-linux-gnu/12/specs
COLLECT_GCC=gcc-12

# Other info ...

gcc version 12.2.0 (Homebrew GCC 12.2.0)
Authenticating Git with GitHub
If you have a GitHub (or other) account and you want to link it to your machine, run the following commands, replacing <> with your personal details.
$ git config --global user.name "<github-username>"
$ git config --global user.email "<github-email>"
Installing bpt
bpt is a build and packaging tool for C++. It makes consuming C++ libraries, running tests and packaging your code much easier compared to conventional methods (notably Cmake).
# Linux (WSL included)
curl bpt.pizza/get/linux -Lo bpt

# MacOS
curl bpt.pizza/get/macos -Lo bpt

# Both
chmod a+x bpt
./bpt install-yourself
Installing VSCode
Go to VSCode's Download page and install it for your machines host OS.
Note: For WSL users, this means install on the Windows side.
On its own VSCode is just a text editor like Windows Notepad but with coloured text however, using extensions we can set it up for developing with any language. Open VSCode as you would any other app in Windows, MacOS or Linux. In VSCode, open the extension marketplace tab. In the search bar, search for the following extensions click on the extension and click and click the install button for them.
Note: For WSL users, only install the extensions marked 'WSL only' on the Windows side. The other extensions must be installed on the WSL. Install the them after opening VSCode in WSL (instructions below).
- C/C++
- GitLens
- Git Graph
- GitHub Pull Requests and Issues
- Sonarlint
- Remote development (WSL only)
- WSL (WSL only)
- Remote SSH (WSL only)
You may have to restart VSCode for the extensions to load. Finally, press ctrl + , to open settings. in the search bar search for "cpp default standard". In the drop down select c++20.
To open VSCode from the terminal, open a new terminal window and type.
# `.` represents 'this' directory
$ code .
This will open VSCode in the current user directory which should be ~ which represents your users home directory. WSL users, make sure to launch VSCode from your WSL terminal this time. And that is it, everything should be set up and ready to go.
Hello World!
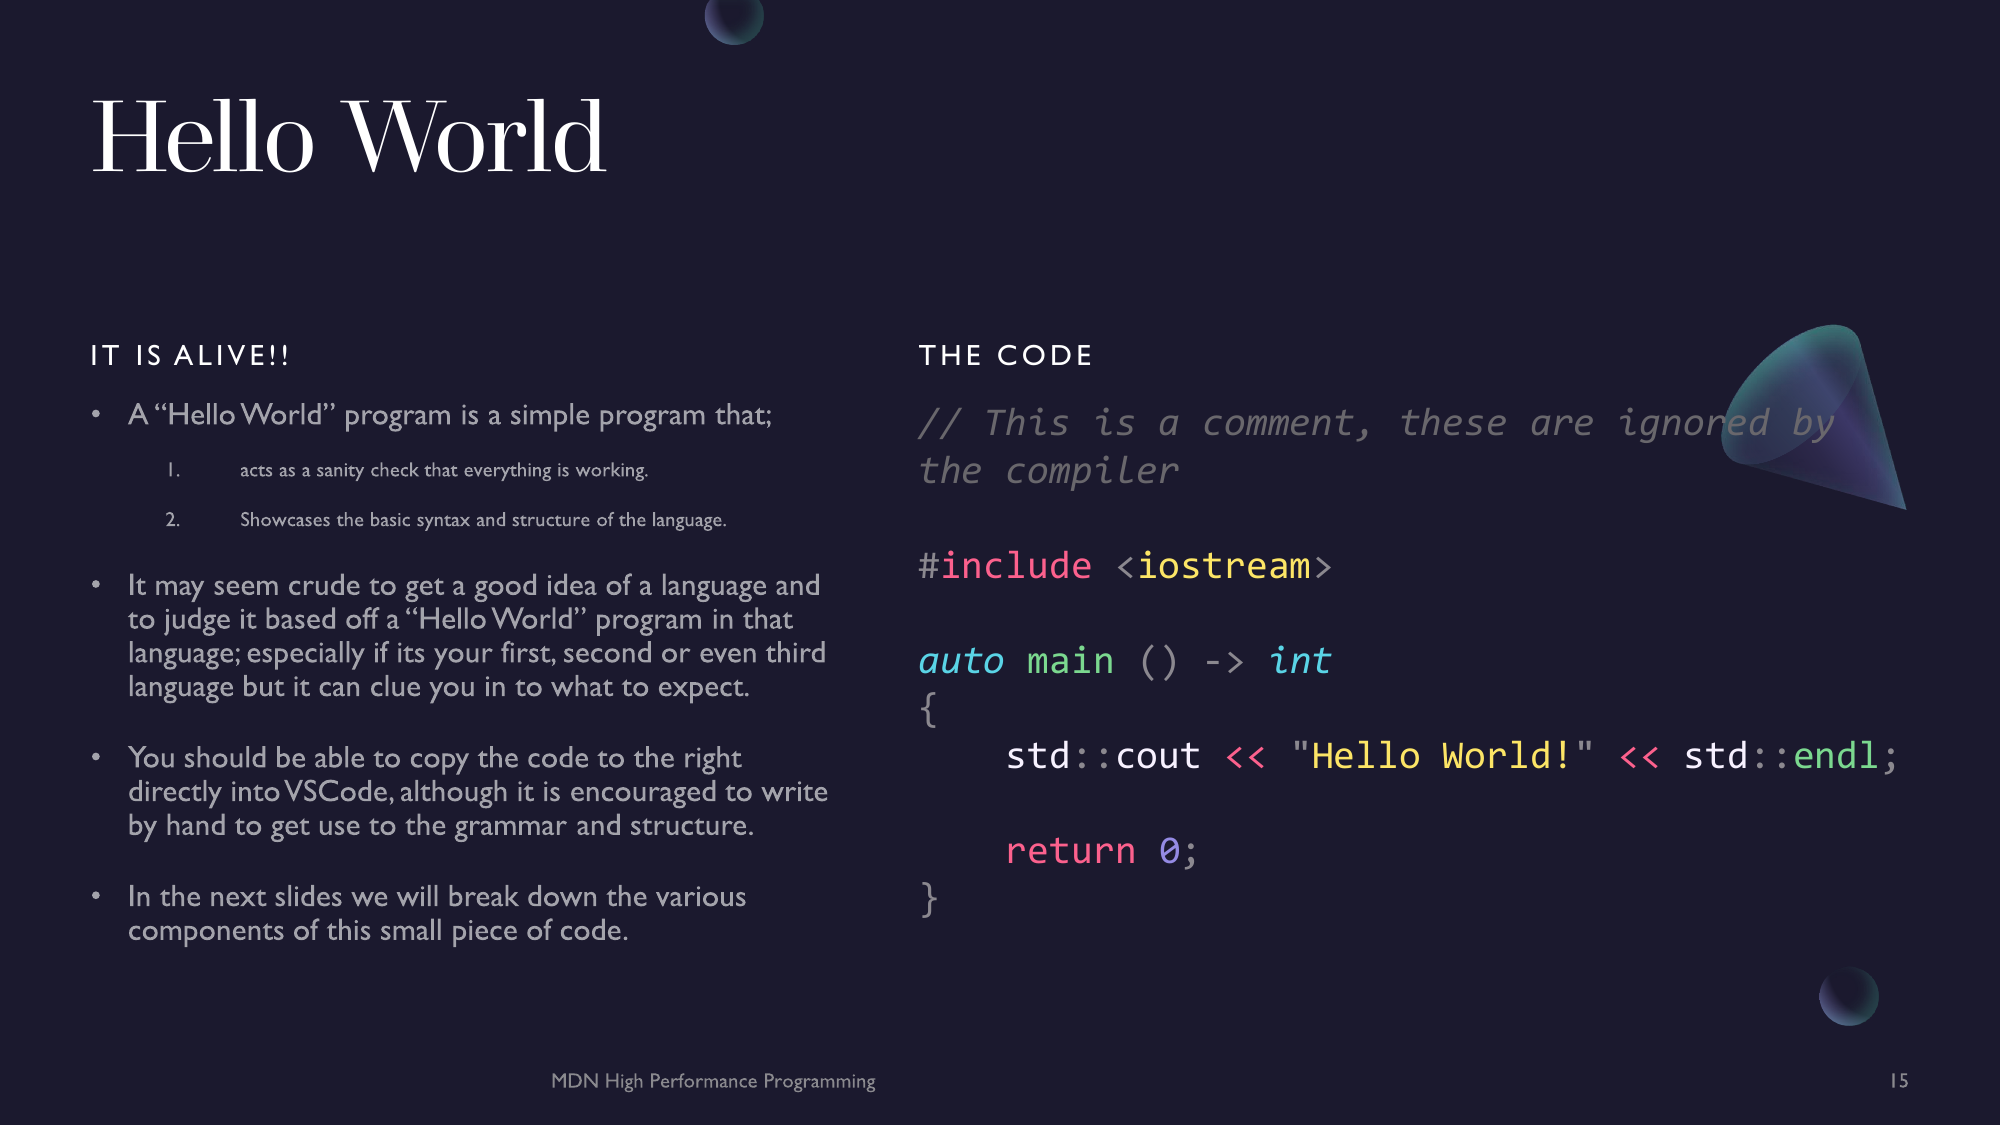
If you've never programmed before, a "Hello World" program is a simplest program and is often used to introduce a language. The first Hello World was created in Brian Kernighan's 1972 "A Tutorial Introduction to the Language B".
Introducing C++
Before you write you first C++ program I will cover a basic synopsis of the language's features.
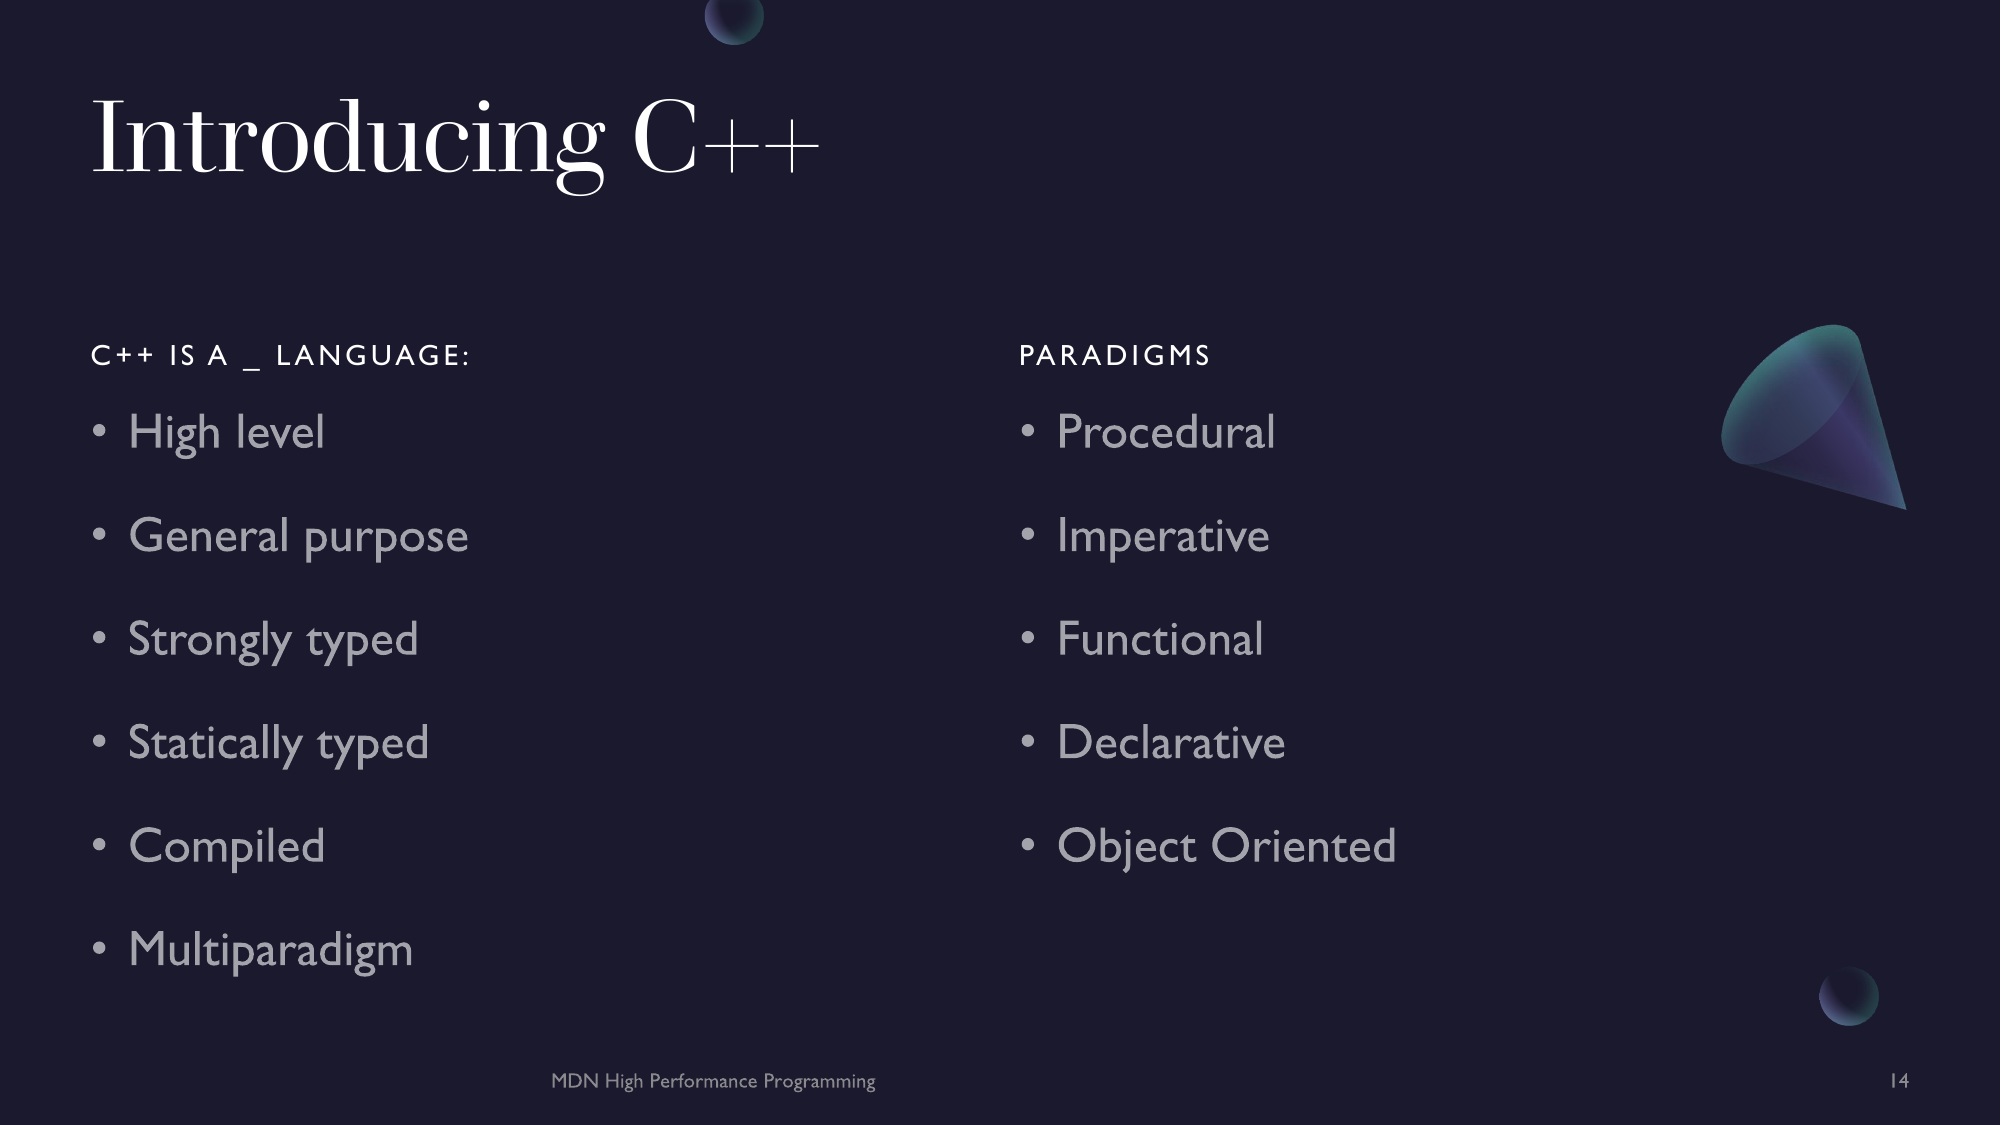
C++ is a high-level, general purpose compiled programming language. It is strongly-typed with a static-type system and supports multi-paradigm programming.
Most of you would have had exposure to interpreted languages (Python, Ruby, Java, Bash etc.) who have a secondary program; called the interpreter, that runs alongside your code, converting the "higher level" instructions into machine code (binary) as it reads through the code.
C++ works differently, it is a compiled language. This simply means all of the C++ code is converted into machine instructions (by a compiler) before you execute the program. This has the benefit of allowing software to run on "bare metal", meaning the code you write is actually running on the machine (to some degree).
Because of C++ ability to run on baremetal, many people claim it is a "low-level" language however, this could not be more false. Almost all programming languages are mid-to-high level. This is because most support general abstraction techniques take you away from dealing with the machine directly. Only assembly and bytecode languages could be considered "low-level" like; LLVM, x86_64 etc., as these give control over memory and CPU instructions.
But C++ can style more directly interact with the hardware, how can that be if it isn't a low level language. Two things give C++ its power over hardware, first is its memory model. Many languages have little or no notion of memory. Data is data and it is as big or small as it is. How big is int in Python? To many this doesn't cross their minds when writing Python because you don't need to and that is one of the many benefits of Python. However, there is limits to resources you can use in some circumstances and sometimes you need to be able to guarantee certain memory usages from your software. C++ is one of the language that has a "conscious" notion of memory usage and gives you control over these resources. There is one problem with this, not all computer architectures are the same and don't have the same notion of memory. To tackle this, C++ uses the notion of a universal abstract machine. This is C++ second power over hardware. It has mechanisms for interacting with the underlying hardware through the OS but how it gets there is not to the concern of the developer (unless developing in kernel-space as opposed to user-space). You can use standardized features to access these resources effectively.
I mentioned above that C++ is strongly typed with a static type system. What does this mean? A strong typing basically means that types will not be implicitly cast (converted) to a different type (there are some exceptions to this but we'll cover this in chapter 2). A static type system means that all data must have an explicit type that must be known at compile time.
To wrap it off I'll briefly discuss the paradigms and styles you can write C++ in. The most obvious is procedural, similar to C. This paradigm simply uses free functions that operate on free data, performing instructions according to a procedure or set of instructions. Paired with procedural programming, C++ also allows for imperative programming style programming which consists of functions changing the systems state. This style centers mostly on telling the computer what exactly what you want done. C++ also support object-oriented-programming (OOP) with its primary IO library using many OOP patterns to create runtime polymorphism. The most popular paradigm used in C++ today is generic programming. C++ has many features that allows you to write code for generic types as opposed to creating new functions for every possible combination of types. Finally, C++ also supports functional programming patterns that allow for for creating general purpose algorithms that are composed create more specific data manipulation.
Hopefully this gives you an idea into the kind of language C++.
Hello C++
To begin we are going to open a new terminal window. We are going to create a directory called "hello", enter it and create some files and open VSCode there.
# Makes new directory
$ mkdir hello

# Enter `hello`
$ cd hello

# Create files `hello.cxx` and `README.md`
$ touch hello.cxx README.md

# Open VSCode
$ code .
Open the hello.cxx file by clicking it on the left file view.
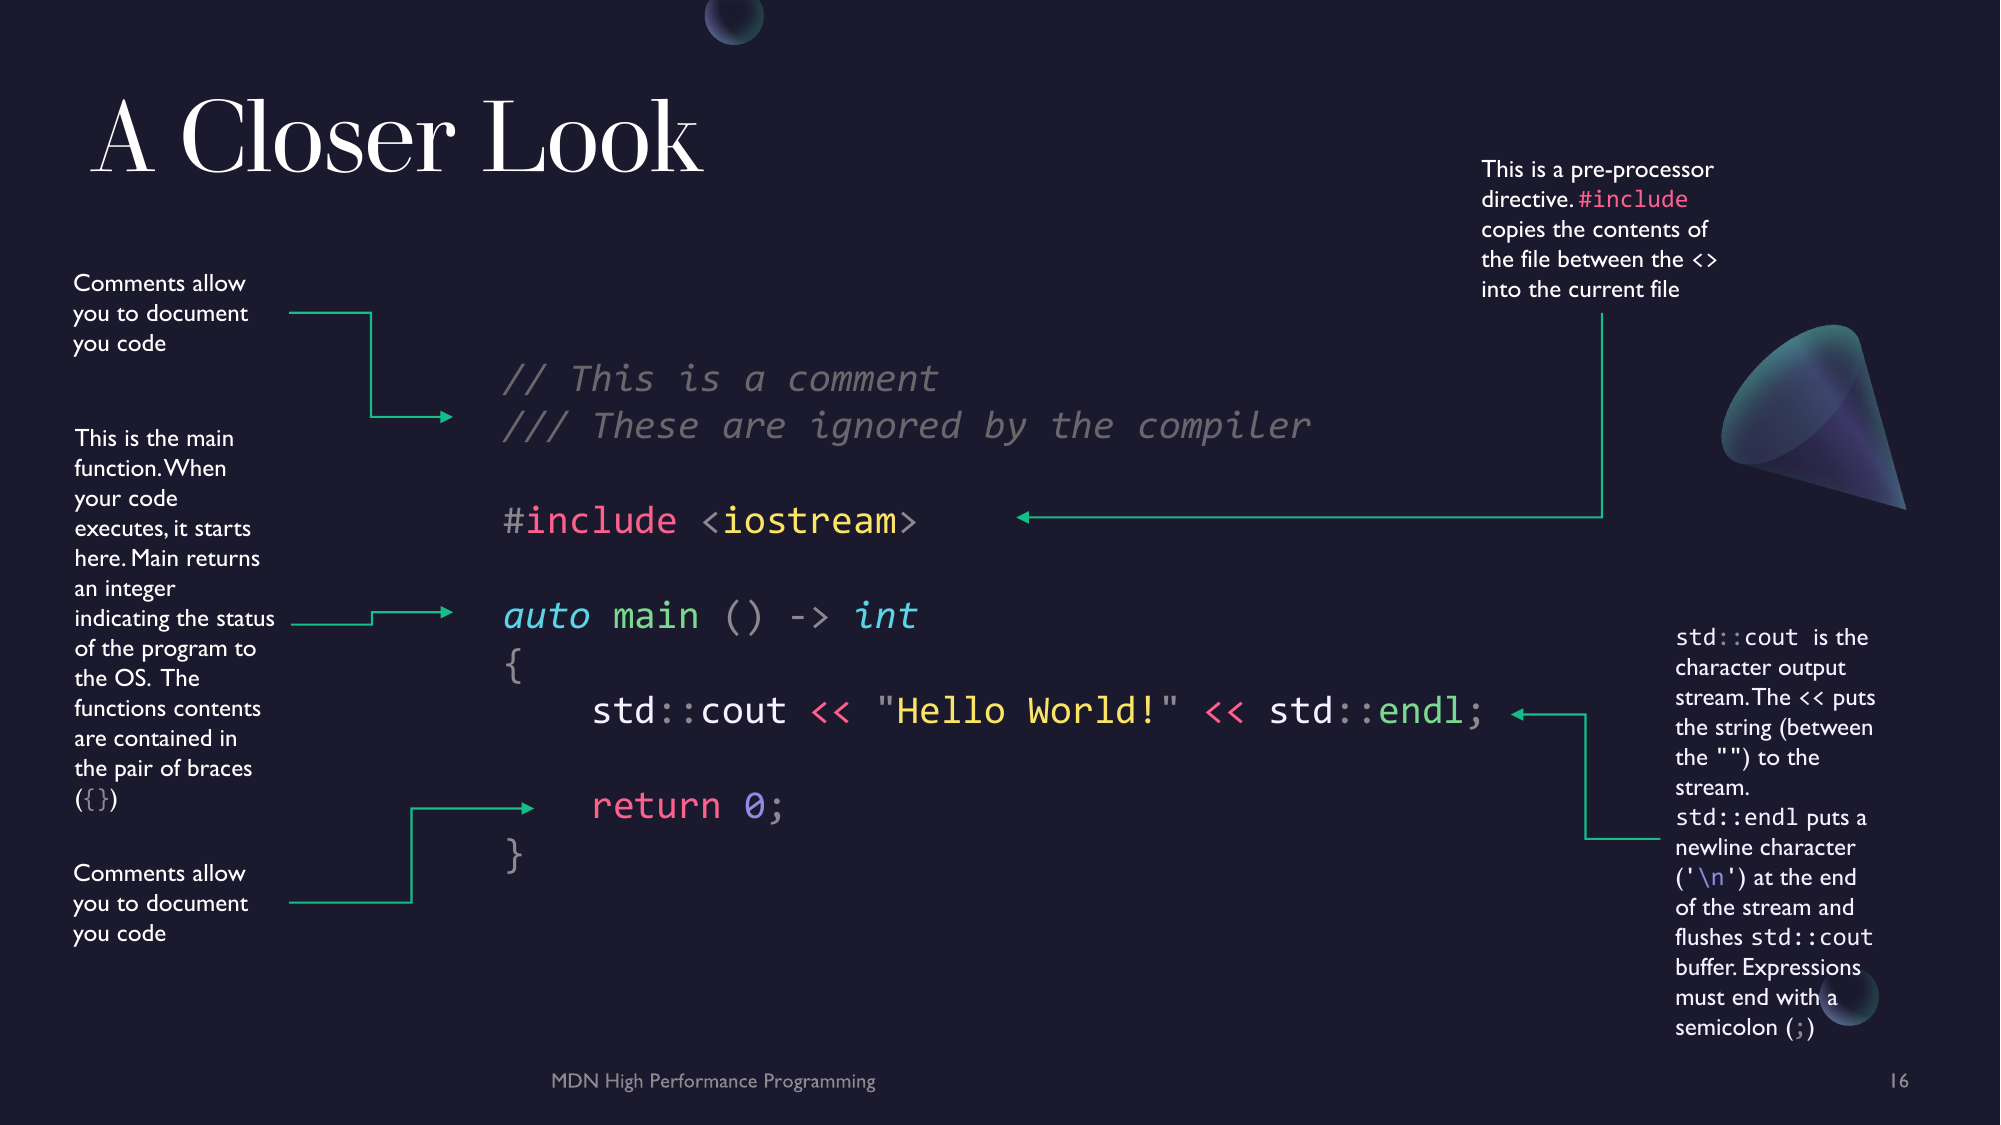
Here is "Hello World" in C++.
// This is a comment, these are ignored by the compiler

/// Preprocessor statement using `#` symbol
/// The preprocessor runs at compile time before the code is compiled
/// `#include` copies the header `iostream` into the current file
#include <iostream>

/// Main function
/// Entry point of the executable.
/// Takes no arguments and returns an `int`.
auto main () -> int
{
    /// From the namespace `std`.
    /// Use `cout` (character out).
    /// Put (<<) the string literal to stream.
    /// From `std` put a `endl` specifier.
    std::cout << "Hello World!" << std::endl;

    /// Return 0 on successful termination.
    return 0;
}
Build and Run
Press ctrl + ` to open an integrated terminal window in VSCode. Make a new directory called build and run the following command to compile the code.
# Make `build` directory
$ mkdir build

# Compile with GCC
$ g++-12 -std=c++20 -o build/hello hello.cxx

$ ./build/hello
Hello World!
Let's break this command down.
g++-12- This is the GNU C++ compiler from the GCC package. The-12just indicates that this is version twelve of GCC.-std=c++20- This sets the C++ standard. The C++ standard is like the version of the language. C++20 is the most recent version.-o build/hello- The-oflag indicates and output file name. Because we wrote it with a path in front of it (build/*), it will output to that path.hello.cxx- The source file we want to compile.
Debugging
Debugging is the crux of fixing issues in code. Debuggers allow us to step through the running code and diagnose any issues that are occurring as they occur. Debugging a single executable is pretty trivial but a sufficiently large codebase can become quite complex.
For that reason we are going to go into debugging a little bit more at the meetup as configuring VSCode is a bit tricky. The debugging also doesn't show anything particularly interesting for a simple "Hello World" program.
If you know how a debugger works, you can have a play with VSCode and see if you can get it to work.
Hello World using bpt
make is a useful tool and paired with cmake you can configure and build very large and complex code bases, but these configuration files are hard to read, tedious to write and error prone. Cmake is also a good and pretty standard in industry for C and C++ developers, but this standard is pretty outdated. So for the majority of this series we're going to be using a new tool called bpt. bpt is a lot like pip (Python), gem (Ruby), hackage (Haskell) and cargo (Rust) allow near seamless control over control over dependencies, testing and distribution of our software.
Note: bpt is experimental but robust enough to handle most cases. bpt only has a few libraries however, we won't need any dependencies as we are mostly look at the C++ language and C++ Standard Library.
To start off open a new terminal window and run the following command. Keep the default options by pressing enter for each instruction.
$ bpt new hello-bpt
$ code hello-bpt
The directory structure should look like this:
hello-bpt
├── README.md
├── bpt.yaml
└── src
    └── hello-bpt
        ├── hello-bpt.cpp
        └── hello-bpt.hpp
You can delete the hello-bpt directory that is within the src/ directory as these are just template files. Create a file in src/ called hello.main.cxx. Copy the "Hello World" program from your other directory (or above again) and past into the newly created file.
Note: bpt uses 'stem-leaf' file extensions to determine the purpose of a file. e.g. the
*.main.*middle stem indicates to bpt that this is a executable that is run (as opposed to a library). You'll learn more about these as we go along.
Now simply run the following command to build the bpt project.
$ bpt build -t :c++20:gcc-12 -o build
This will spit out the binary into build/, dropping both file extensions. To run the program, simply call.
$ ./build/hello
Hello World!
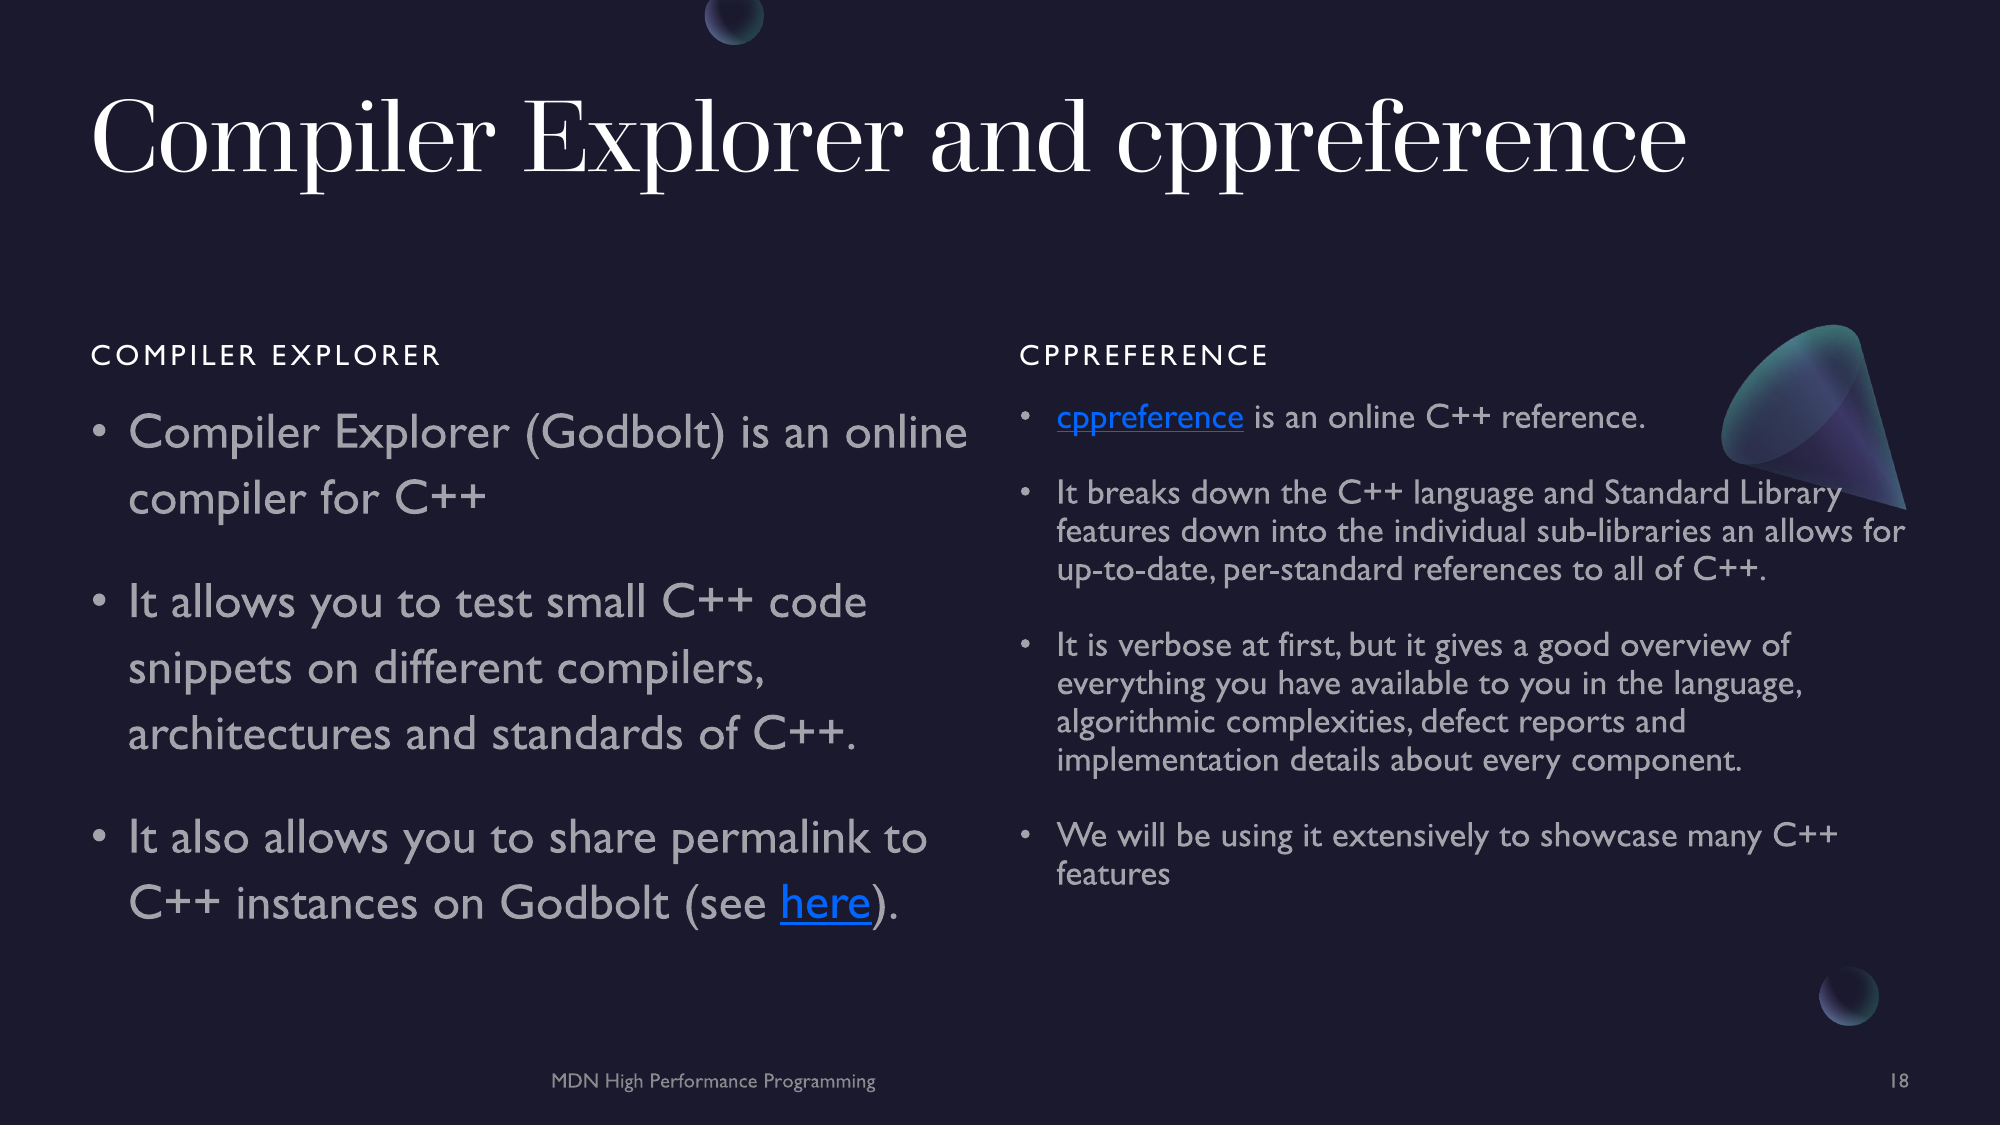
Compiler Explorer
Compiler Explorer; sometimes referred to as Godbolt (after its creator Matthew Godbolt) is an online compiler for C++. It is good for testing and prototyping small code snippets from C++ across many different compiler versions, from different vendors and on different architectures.
It also displays the assembly output allowing you to have a closer look at what goes on under the hood in C++. It also allows sharing permalinks to instances of Godbolt with specific code and configuration running so you xan distribute working code to anyone as long as they got a browser.
Godbolt ⚡
Head on over to Compiler Explorer and copy the "Hello World" program into the editor window. It should automatically compile, build and display the results in one of the screens. An example of a sharable link from Godbolt is here.
Slides


Basics of C++
In this chapter you will be introduced to C++ the type system, how it differs from other languages and how types reflect machine architecture. You will also learn about variable declarations, type qualifiers and a few of the key operators and IO facilities in C++. You will also be exposed to the concept of ordering, equality and the logical operators in C++. You will also learn about conditional logic and how it can be used to create structure and control the flow of a program. You will also learn about C++ looping facilities and how it can be used to perform iterative programming. Finally, you will learn the basics of functions in C++.
The C++ Type System
Strong vs Weak Typing
In 1.3 Hello World we discussed a bit about C++'s types system. But what is a type system? A type system is a formal notion of which terms have which properties. The rules and constructs of a type system underpin the meaning help by any discourse written in any and all programming languages. Without a type system, programming languages cannot construct grammar or structure and thus cannot become coherent and cohesive expressions of language.
This is all a bit abstract and delves into Type Theory which is a more formal, mathematical notion of types. For our purposes we will just look at what C++'s type system does.
First and foremost, C++ is considered by many (but not universally) to be a strongly typed language. There isn't a universal definition of a strong or weak types but the basic premise is based around the question:
Does the type system allow implicit conversions between type?
In the case of C++, 90% of types have no implicit conversions. The only contradiction to this is type promotion or narrowing, this is when types of the same kind get promoted or narrowed to a similar yet different type. This occurs for some type in C++ because the bit width, layout and structure are so similar; due to how memory in computers work, that some types will implicitly meet the requirements of of another type. While this can occur in C++, it is limited to only a handful of primitive data types. Weaker typing allows for this implicit conversions to happen more frequently (think JavaScript's type system).
Static vs Dynamic Type Systems
So what about static and dynamic typing? These characterisations refer to the type checking techniques used in a language and how a language expresses the notion of types. These are the two key ways to look at either static or dynamic typing.
In a dynamically typed language, the type of an object does not have to be explicitly stated, but is inferred at runtime based on its contexts and the surrounding expressions. Python is a good example of this as you can create an object and assign it a type without ever declaring what type the object should be. This allows interpreters to forego type checking until a particular operation is performed on an object which may or may not fail. In a statically typed language, this is the opposite. You must formally declare the type of an object and i must be known to the system before the program ever runs. Most often, it must be known at compile time. However, some languages can forego an explicit notation of an object type and allow the compiler to infer the type. C++ and many other compiled languages; like Rust, are capable of type inference using various argument deduction techniques.
A Pinch of Type Theory
Before we move on, there a some important definitions that are good to know going forward.
- Literals - A literal is a constant that refers to a determined value. For example, the character for 'three',
3, has the value of three. - Values - A value is the independent data of a type. Think of it as an instance or object.
- Types - A type is the formal definition and classification of values that is exhibit particular properties related properties. Examples of types include primitive data; like
intfrom Python, as well as user defined types, often called classes in many languages. In C++ types are created using thestructandclasskeywords. - Typeclasses - A typeclass is a polymorphic type constraint. It defines the expected properties of a type including methods, functions and patterns. In C++ typeclasses are created using the
conceptkeyword. - Kinds - A kind is, well; to put it bluntly, a type of a type. It describes the type of a nullary type constructor, ie. the constructor of primitive data-types which take no parameters. What this basically means is something that can hold a value.
In C++ supports everything except Kinds. We will go more into a little more depth during Chapter 5.
Primitive Types
Like most languages, C++ comes with a small set of types that are built into the language. Almost every other type created and used in the language is some combination or composition of these types.
Size and Width
In C++, all types have an implicit property called width or size. This refers to how much memory; in bits or bytes, a given type maximally occupies. This leaves enough room for any value of the given type to fit in the allocated spot. The minimum size a type can occupy in C++ is 8-bits or a byte.
Integral Types
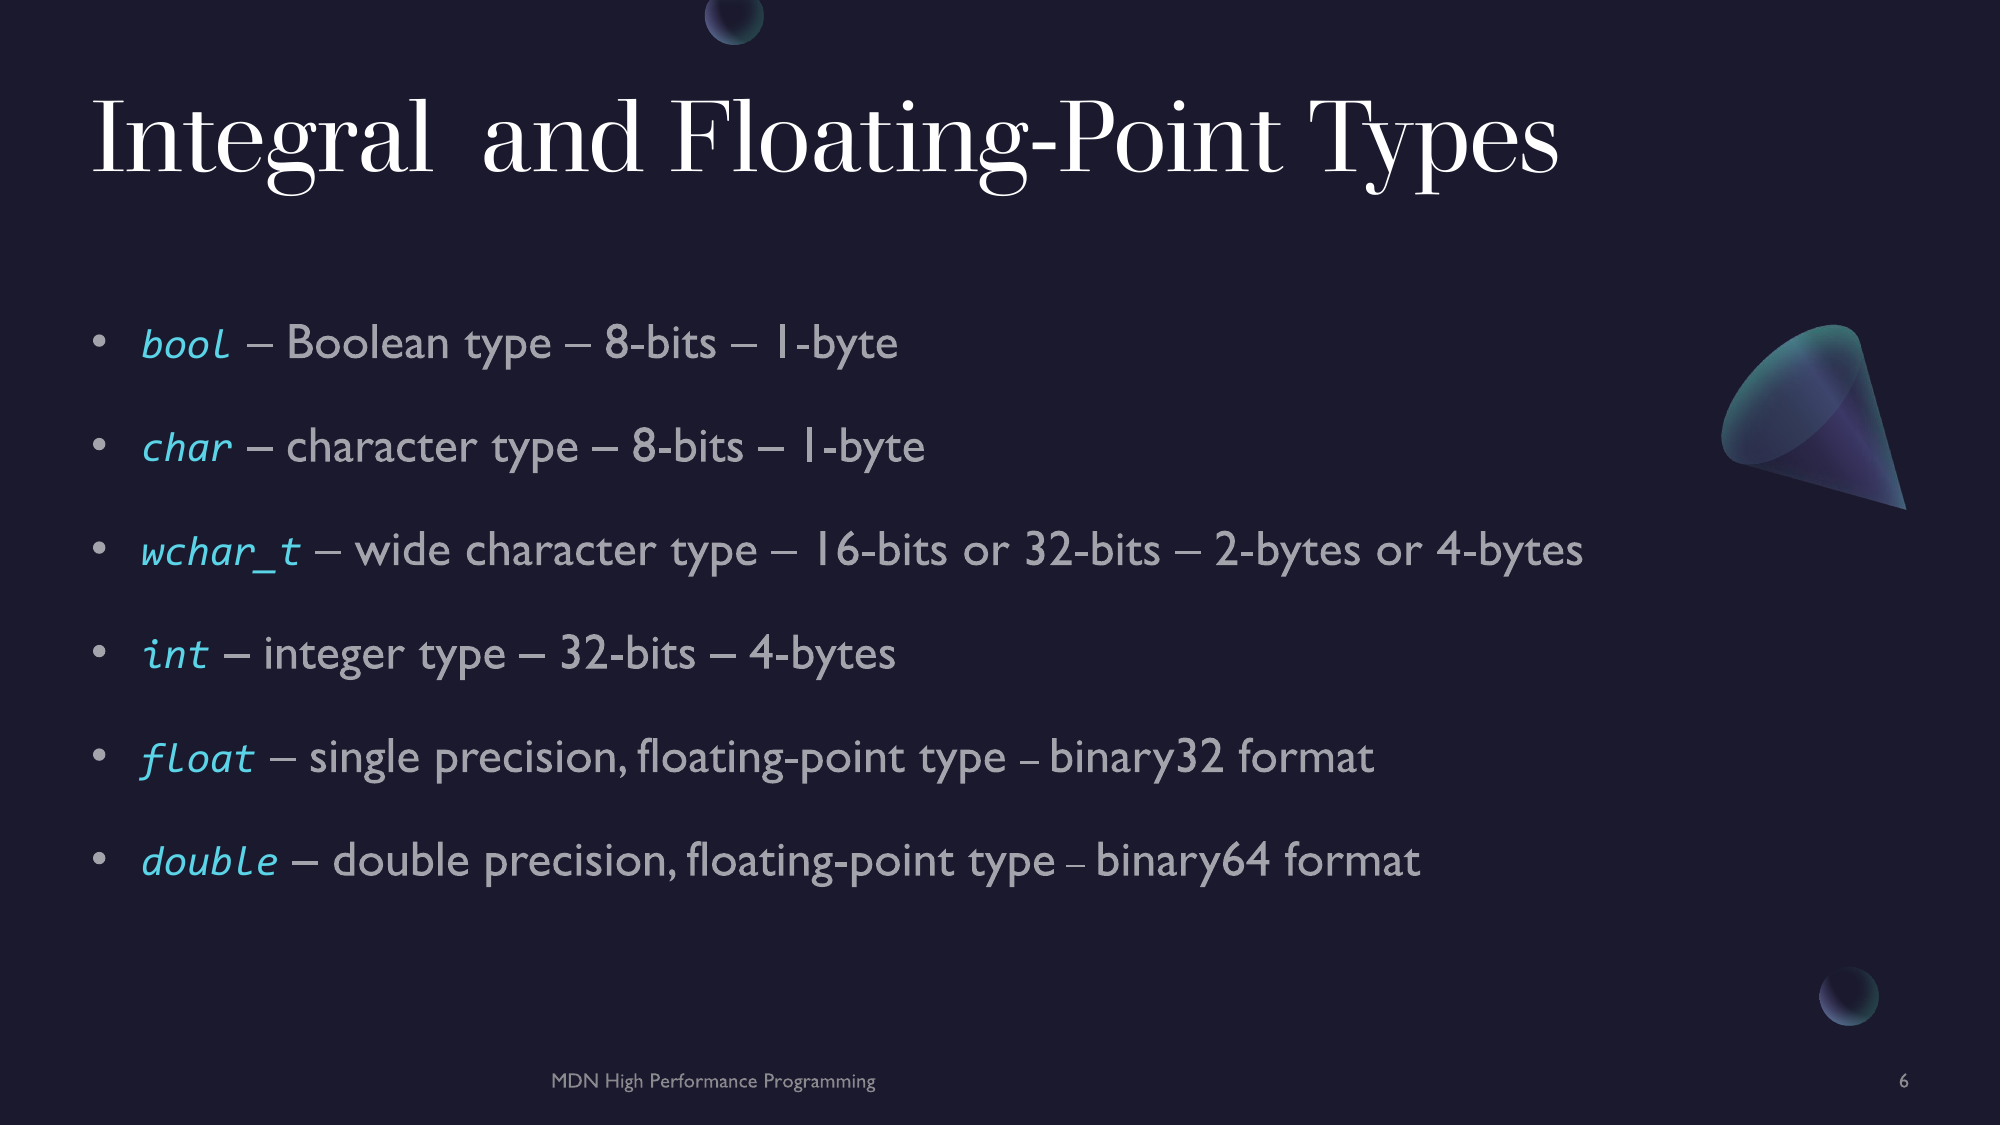
Integral types are the most basic kind of type in C++. These types represent whole numerical values of varying sizes. Some are used to represent logical values, other character code point and some are just plain old number types.
Boolean Type
The first type we will look at is bool. bool represents a Boolean value, meaning it is either true or false. This is a specialization of a unique type-function called a sum type. A sum type is a type that can hold one of its possible variants (also called 'appends' or 'injections'), in this case these are the type constructors true and false. However, in C++ bool is built-in to the language and thus these properties are hidden away.
bool occupies a memory space of 8-bits or a byte. It is also worth pointing out that true and false are literals (as they are built-in keywords) holding there respective values independently. Booleans are used to denote truthiness and logic in a programming language. In C++, bool can be implicitly promoted to another integral type such as int with false becoming 0 and true becoming 1. Other integral types also can be narrowed to a bool with 0 becoming false and anything else becoming true.
Character Types
The next type we will look is the char. This is C++ standard character type. These are values such as 'a' or even escape characters like '\n'. It holds only a single byte (same as bool) allowing it to represent \( 2^8 = 256 \) different values. Depending on the system is is either signed or unsigned, meaning either the leading bit is dedicated to the sign of the value or is another number point. Depending on the representation, char can have a value between 0..255 (unsigned) or -127..128 (signed). Character literals exclusively use single quotes in C++.
There is another character type in C++ called wchar_t. This is a 'wide character' which can hold more bits than the char type. On Windows systems it is 16-bits (2-bytes) while on Unix based systems (Linux, macOS etc.) this is typically 32-bits (4-bytes). This allows for wchar_t to be to store many more different codepoints. A wide character literal also uses single quotes however, the quote pair is prefixed with a 'L' eg. 'a' as a wchar_t literal looks like L'a'.
Like bool, char and wchar_t are integral types, this means that they are really numbers however, the system will treat them differently, eg. for IO.
Number Types
There is only one primary number type in C++ called int. This represents a (typically) 32-bit (4-byte), signed number. It can store \( 2^{32} = 4,294,967,296 \) values has a value range of -2'147'483'647..2'147'483'648. int is probably the most basic type in terms of bit layout in C++ with every bit storing data from the number with only the first bit indicating the sign of the number.
Float Point Types
C++ has two distinct floating point number types. These are float and double. float implements the IEEE-754 binary32 floating point format while double implements the IEEE-754 binary64 floating point format, hence the name double indicating double floating point precision.
Floating point numbers are a unique problem in computing. It is impossible to represent all precisions a decimal number can have (number of decimal places) which still being able to compute large numbers with limited memory. To tackle this, floating point numbers break up the bit-space of the floating point into the sign, fraction and exponents chapters. The IEEE-754 binary32 format uses 1-bit for the sign, 8-bits (a byte) for the exponent and and 23-bits (3-bytes - 1-bit) for the fraction. The IEEE-754 binary64 format has; again 1-bit for the sign, 11-bits for the exponent and 52-bits for the fraction chapter. This gives you (greater than) double the number bits you can use represent your fraction chapter or \( 536,870,912 \) times more possible values for the fraction chapter of a double over a float (\( 2^{52}=4.5035996\cdot10^{15} \) vs \( 2^{23}=8,388,608 \)).
Void
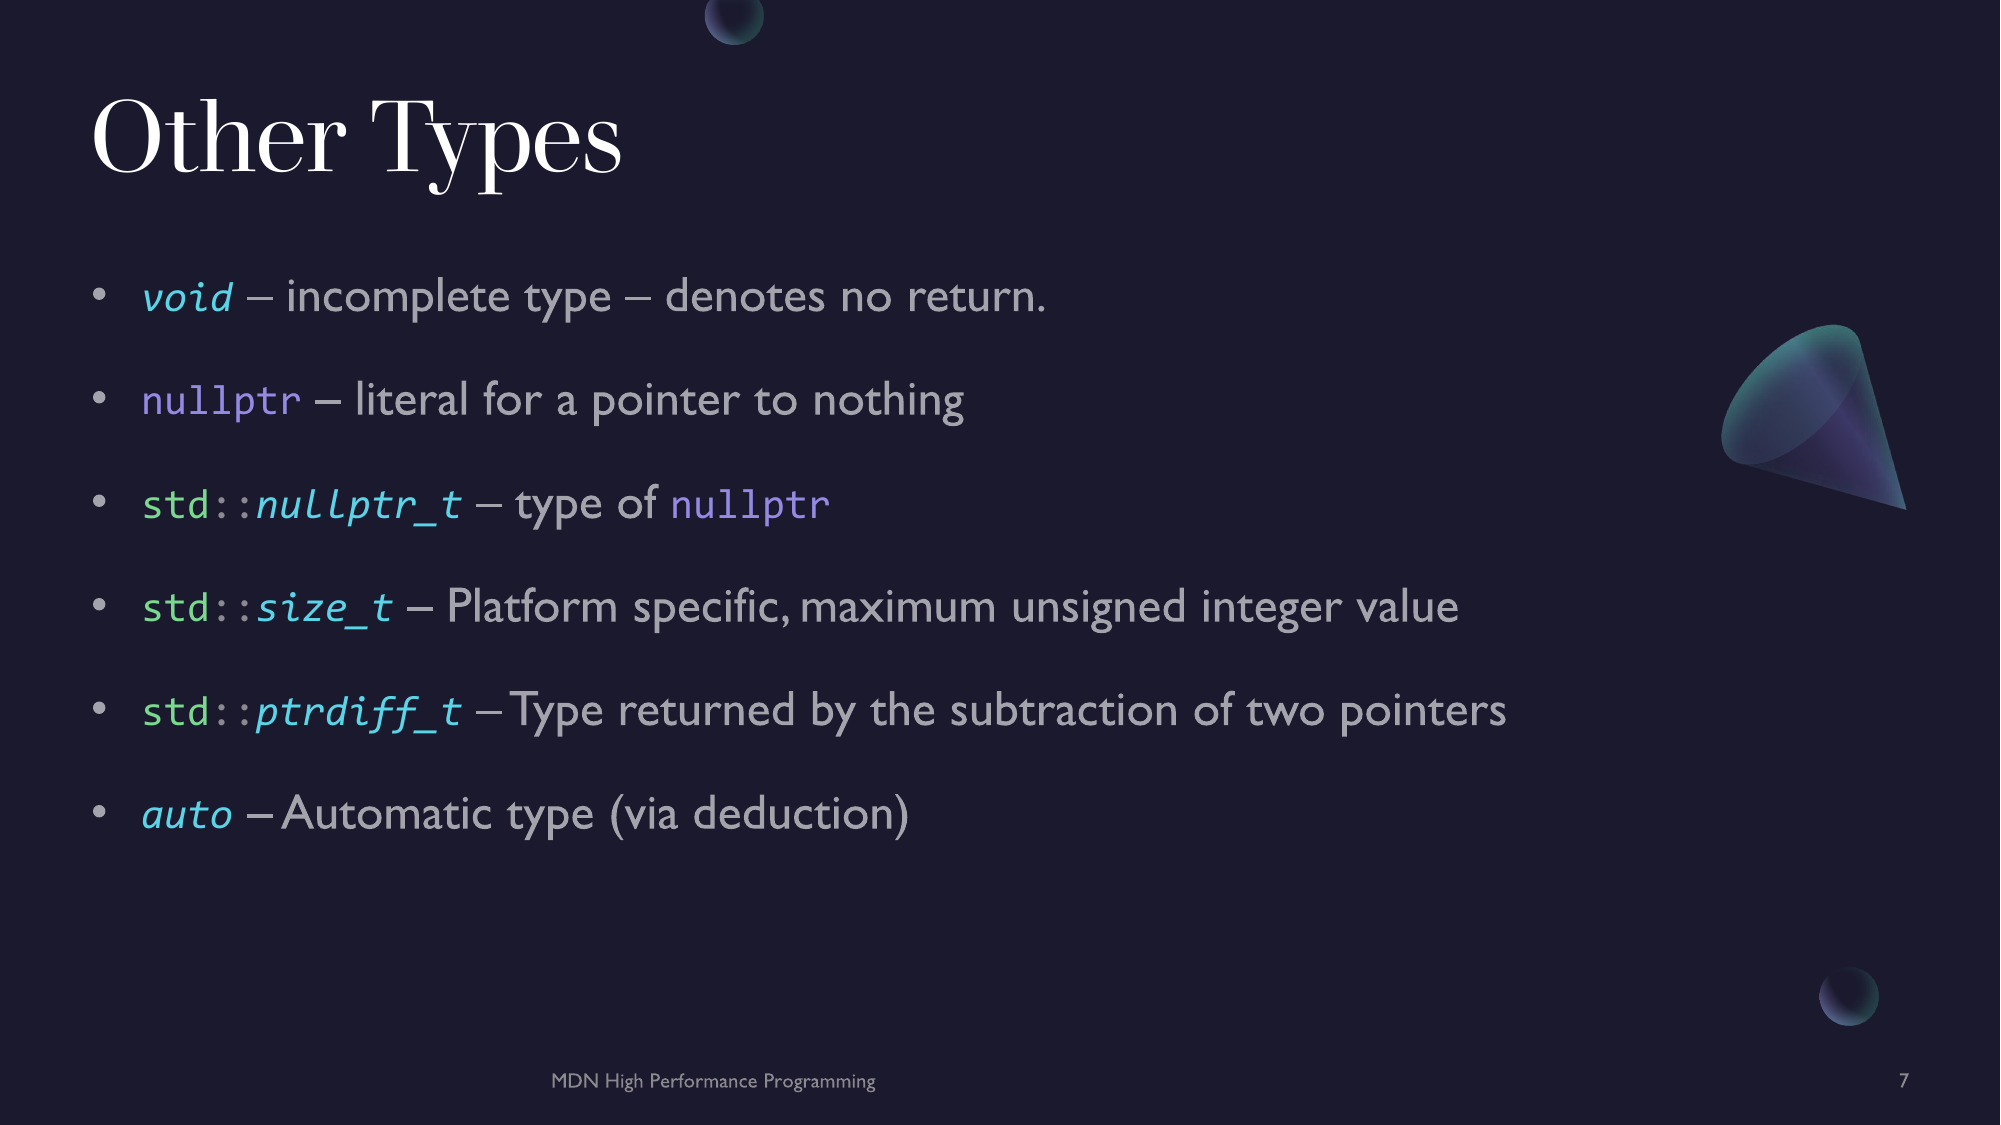
In C++ there is a unique type called called void. This is an incomplete and it can not be completed. It is a unique type of literal but it holds no value. void is used to indicate the absence of a return value (and input parameter value in C). It is different from the unit type (which is not explicitly present in C++) which has the type () and value (), void has the type of void but not the value of void. It has no value.
Nullptr
nullptr is a literal type which has type of std::nullptr_t and value of nullptr. This is a unique type used by pointers to indicate that they point to nothing.
Other Types
There are two more types in C++ that are worth talking about. These are std::size_t and std::ptrdiff_t. std::size_t is a platform dependent type that indicates the maximum possible size of an unsigned integer in C++. This is typically a 32-bit or 64-bit number types.
std::ptrdiff_t is a signed number type that is returned by subtracting two pointers in C++.
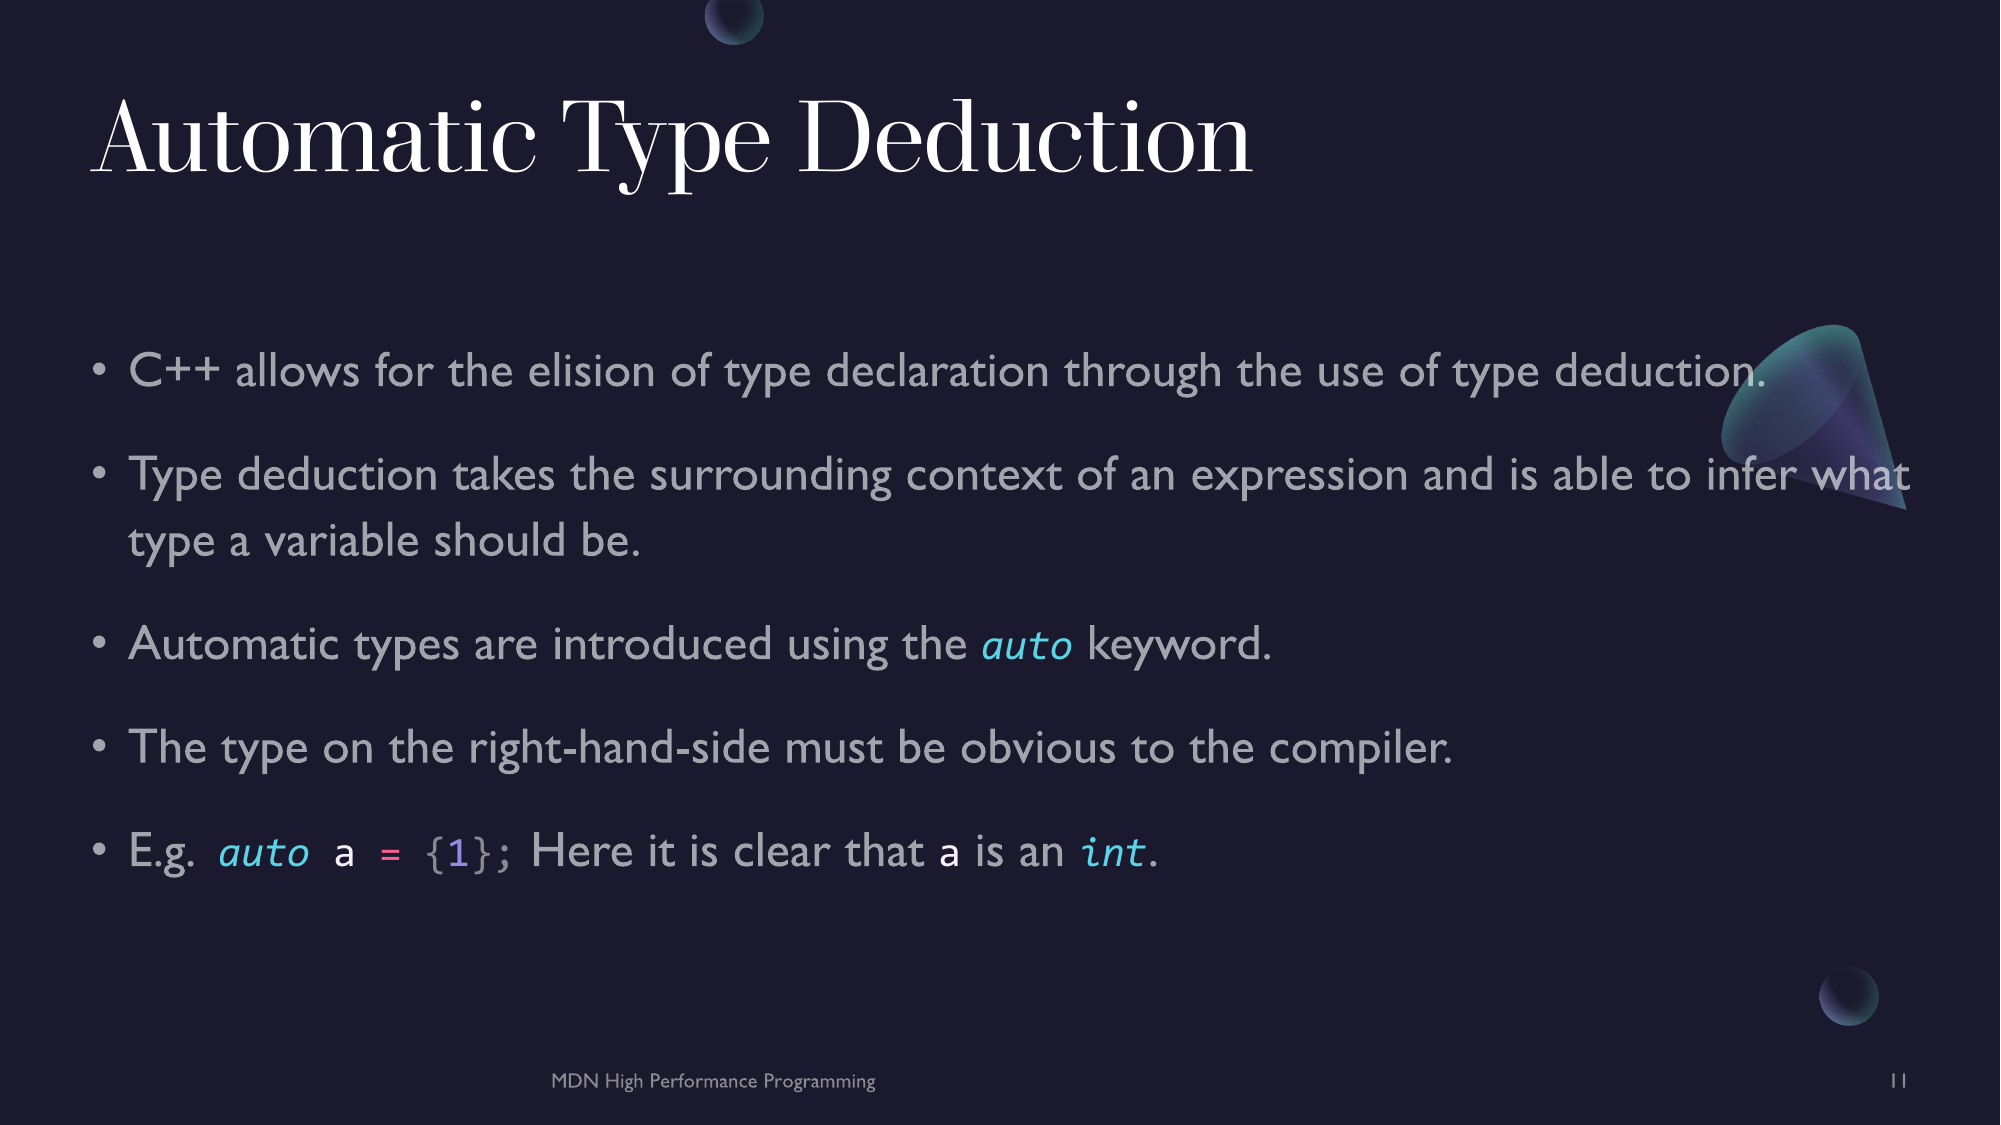
Auto
While C++ is a statically typed language, it is able to infer and deduce the types of many things at compile time. This is achieve with a non-type keyword called auto. While auto is used in many places that type specifiers are used (more on this in the next section), it is important to note that it itself is not a type but rather a automatic type, essentially a placeholder for the to-be deduced type.
Variables
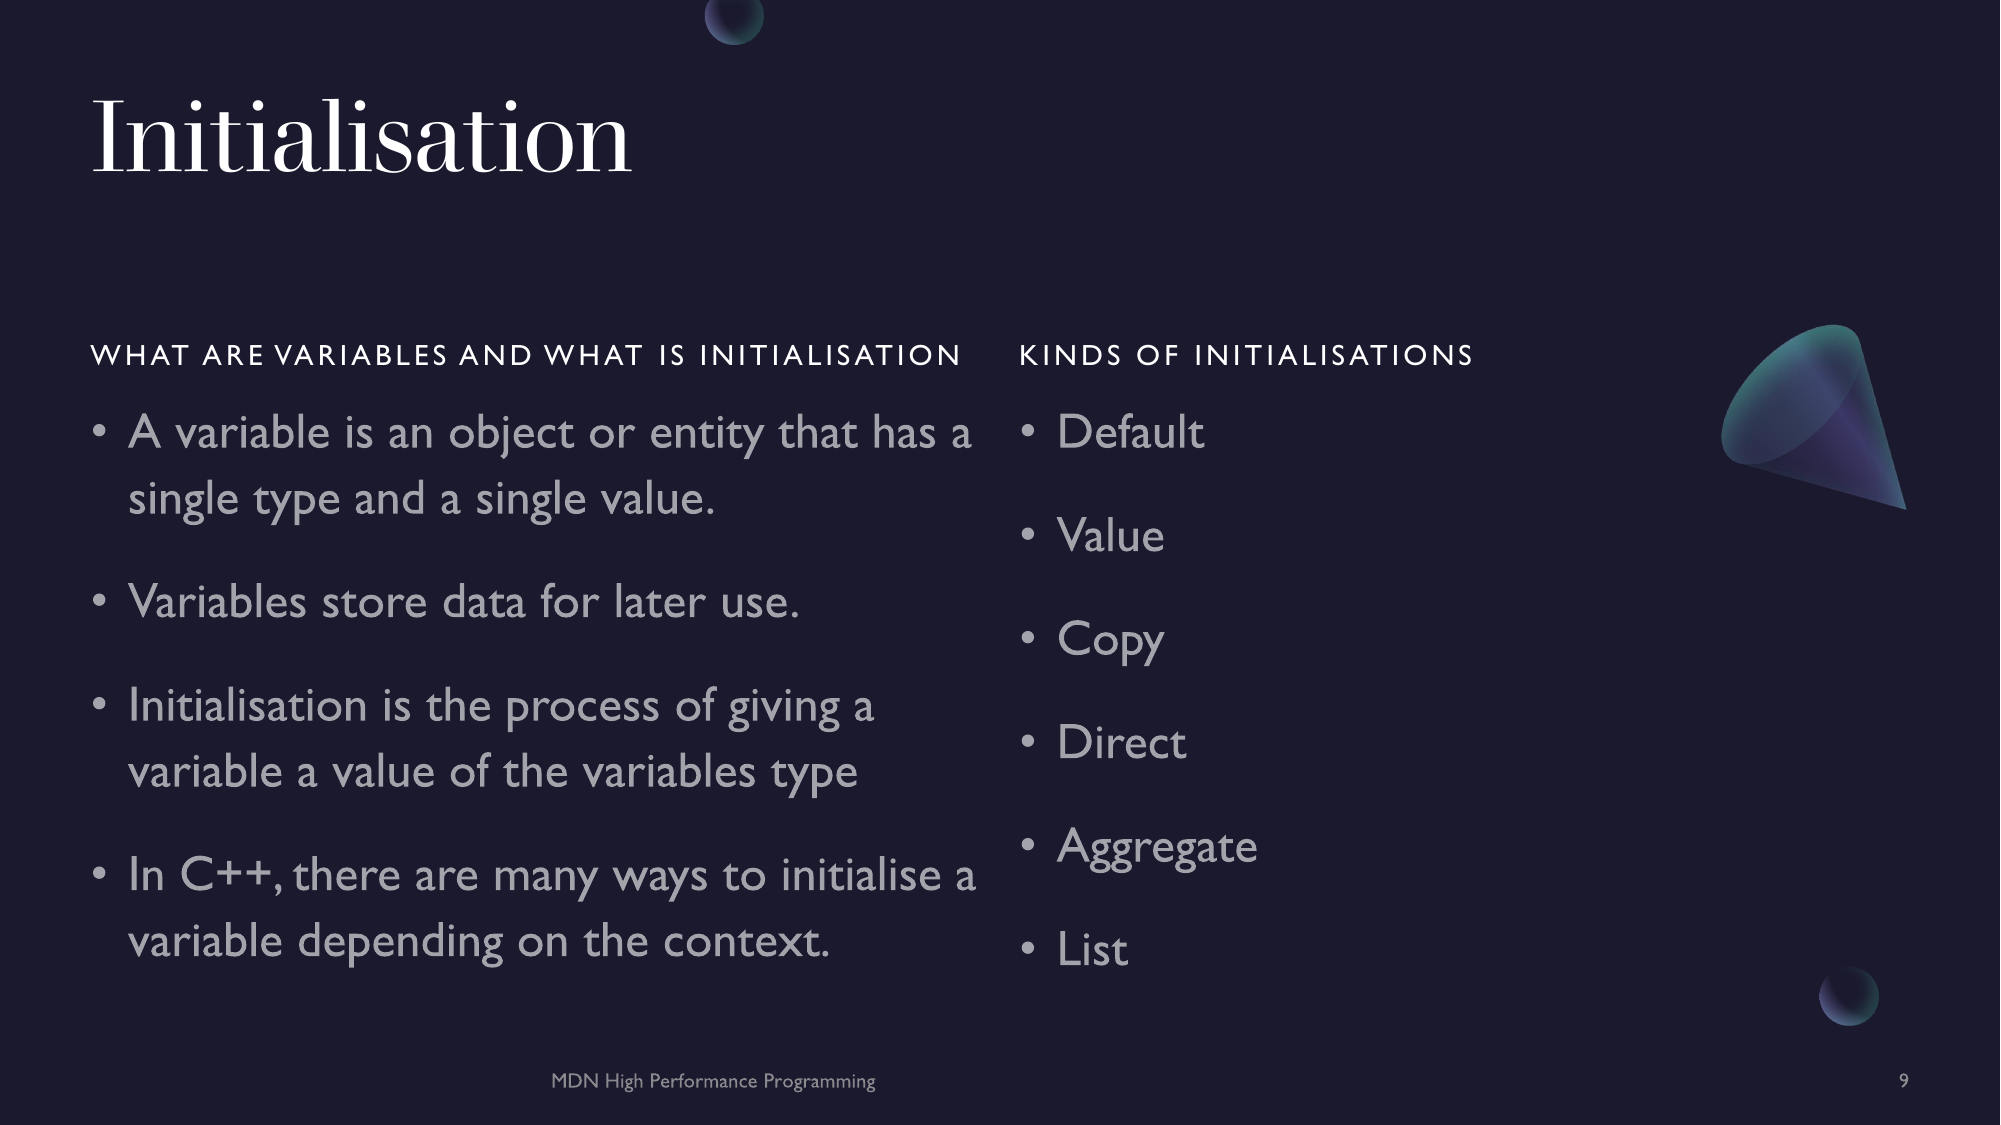
Variables are the first form of abstraction in any mathematical and logical system and computers are no exception. In C++ a variable is an owner of some value. You can use variables to store the value of something and use it in different places throughout your software. Variables can only be of one type, this is the type of the value they hold.
To declare a variable in C++ is super simple and follows the following pattern <type> <name> <initialiser>;. That's it, pretty simple. However, like many things in C++ there is a slight catch. How does a variable acquire a value. In C++ there is a concept known as Resource Acquisition Is Initialisation (RAII). This essentially means that when a type obtains a resource; or rather, obtains all its necessary resources it can be considered initialised.
So what does this all mean? This means that C++ has strict rules about how values can be given to variables and that certain requirements need to be made by the constructor of a type and the variable receiving the newly constructed value of that type. However, this is mostly technical speak but seeing a bit of it now can give you a better foundation to understand some weird quirks C++ has that you will most likely encounter in the future. We will cover constructors at a later date and focus on how to initialise a variable.
Initialisation
To begin, open a new file or compiler explorer window so we can start writing. Make sure to have the main function so the program can run. Look in /resources/blueprint.cxx for a copy of main.
Default Initialisation
Before we saw that creating a variable has the pattern <type> <name> <initialiser>. <type> can be any type we've seen so far or the auto keyword. <name> can be any alphanumeric (plus _) combination of characters (as long as the first character is not a number). For example an int called i would be.
int i /* <initialiser> */;
But what is an initialiser? This is something that creates a value for a variable. In fact we can remove the comment as i has already been initialised at this point. What you are seeing above is what is called default initialisation. This is when a type is in its default or empty state which is typically an undetermined state. For int and in fact for all builtin types, the default initialiser will leave the corresponding variable; i in this case` in what's called an indeterminate state, as in its value cannot be guaranteed. In accessing default initialised variable is undefined behavior (UB) so there is no telling what can happen if you do but most like and hopefully, it will fail to compile or the program will crash when it gets to the line accessing the default initialised variable.
/// Primitive Data Types
bool b = true
int i;
char c;
wchar_t wc;
float f;
double d;
void foo();
std::nullptr_t;
nullptr;
std::size_t sz;
std::ptrdiff_t pd;
auto a = {1};  ///< must have initialiser for type deduction.
Value Initialisation
Value initialisation is used to zero-initialise a scalar variable (eg. int etc.) or default initialise a user defined type such as a class. The syntax for value initialisation varies but it typically uses <type> <name> {} or <type> (). This is the preferred and recommended way to to initialise variables without giving them an explicit value.
int a{};                ///< zero-initialises `a` to `0`.
int();                  ///< zero-initialises a temporary to `0`.
T t{};                  ///< Default initialises `t` using `T` default constructor
Copy Initialisation
Copy initialisation is the most common type of initialisation found in C++ as it is the method originally derived from C. Copy initialisation revolves around the assignment operator = but is not exclusive to it. By default, most operations in C++ use copies and thus are initialised using copy initialisation. Copy initialisation copies any expression on the right-hand-side of the =, provided the type is correct.
int a = 1;              ///< Copies the value of the literal `1`.
int b = {2};            ///< List initialisation through copy. Narrowing conversions are prohibited.
int c = foo();          ///< Copies through `return` of `foo`.
T t2(t1);               ///< Copies `t1` to `t2` using `T` copy constructor.
Up until now, we haven't been able to give our variables custom values. With copy initialisation we can copy literals and values from other variables giving use access to any and all data. While T t = v is allowed for any correct value v of type T, it is preferred to use T t = {v} as this prevents implicit conversions.
Direct Initialisation
Direct initialisation allows you to initialise a variable with an explicit set of constructor arguments. This is mostly useful for custom constructor beyond the trivial ones the compiler can provide.
int a{1};       ///< Single element, brace-enclosed initialiser. Must be of the same type.
T t(2, 3);      ///< Direct initialisation of `t` with literals `2` and `3`.
U u(v);         ///< Direct initialisation of `u` with `v` which may be of a different type `V`.
W(x);           ///< Direct initialisation of temporary of type `W` with existing `x` of possible different type `X`.
Y(4, 6, 5);        ///< Direct initialisation of temporary of type `Y` with literals `4`, `5` and `6`.
Aggregate Initialisation
Aggregate initialisation is special list initialisation for aggregate types. These are slice, struct, class or union types with (for the formers) no private data-members or user-defined constructors. This allows them to be initialised with a list.
T t = {1, 2, 3};                ///< Copy list initialisation of aggregate `t` of type `T`.
U u{ 4, 5, 6};                  ///< List initialisation of aggregate `u` of type `U`.
V v = { .v1 = 7, .v2{8} };      ///< Copy list initialisation of aggregate `v` of type `V` with designated initialisers for `v`'s members.
W w{ .w1 = 9, .w2{10} };        ///< List initialisation of aggregate `w` of type `W` with designated initialisers for `w`'s members.
We want use this directly all to much as list initialisation generally applies in more cases.
List Initialisation
List initialisation is a generalisation of aggregate initialisation but can be applied to user-defined types. This allows you to specify a list of values to be used as arguments for a constructor.
T t {1, 2, 3, 4};           ///< Direct-list initialisation.
U u = {5, 6, 7, 8};         ///< Copy-list initialisation.
t = {4, 3, 2, 1};           ///< Copy-list assignment.
foo({1, 2, 3});             ///< Argument copy-list initialisation.
W w({4, 5, 6});             ///< Direct constructor list initialisation.
Have a play with with these and see what works with the compiler. In general, stick to using copy and direct initialisation. It might be easier to play with on Example _
Qualifiers
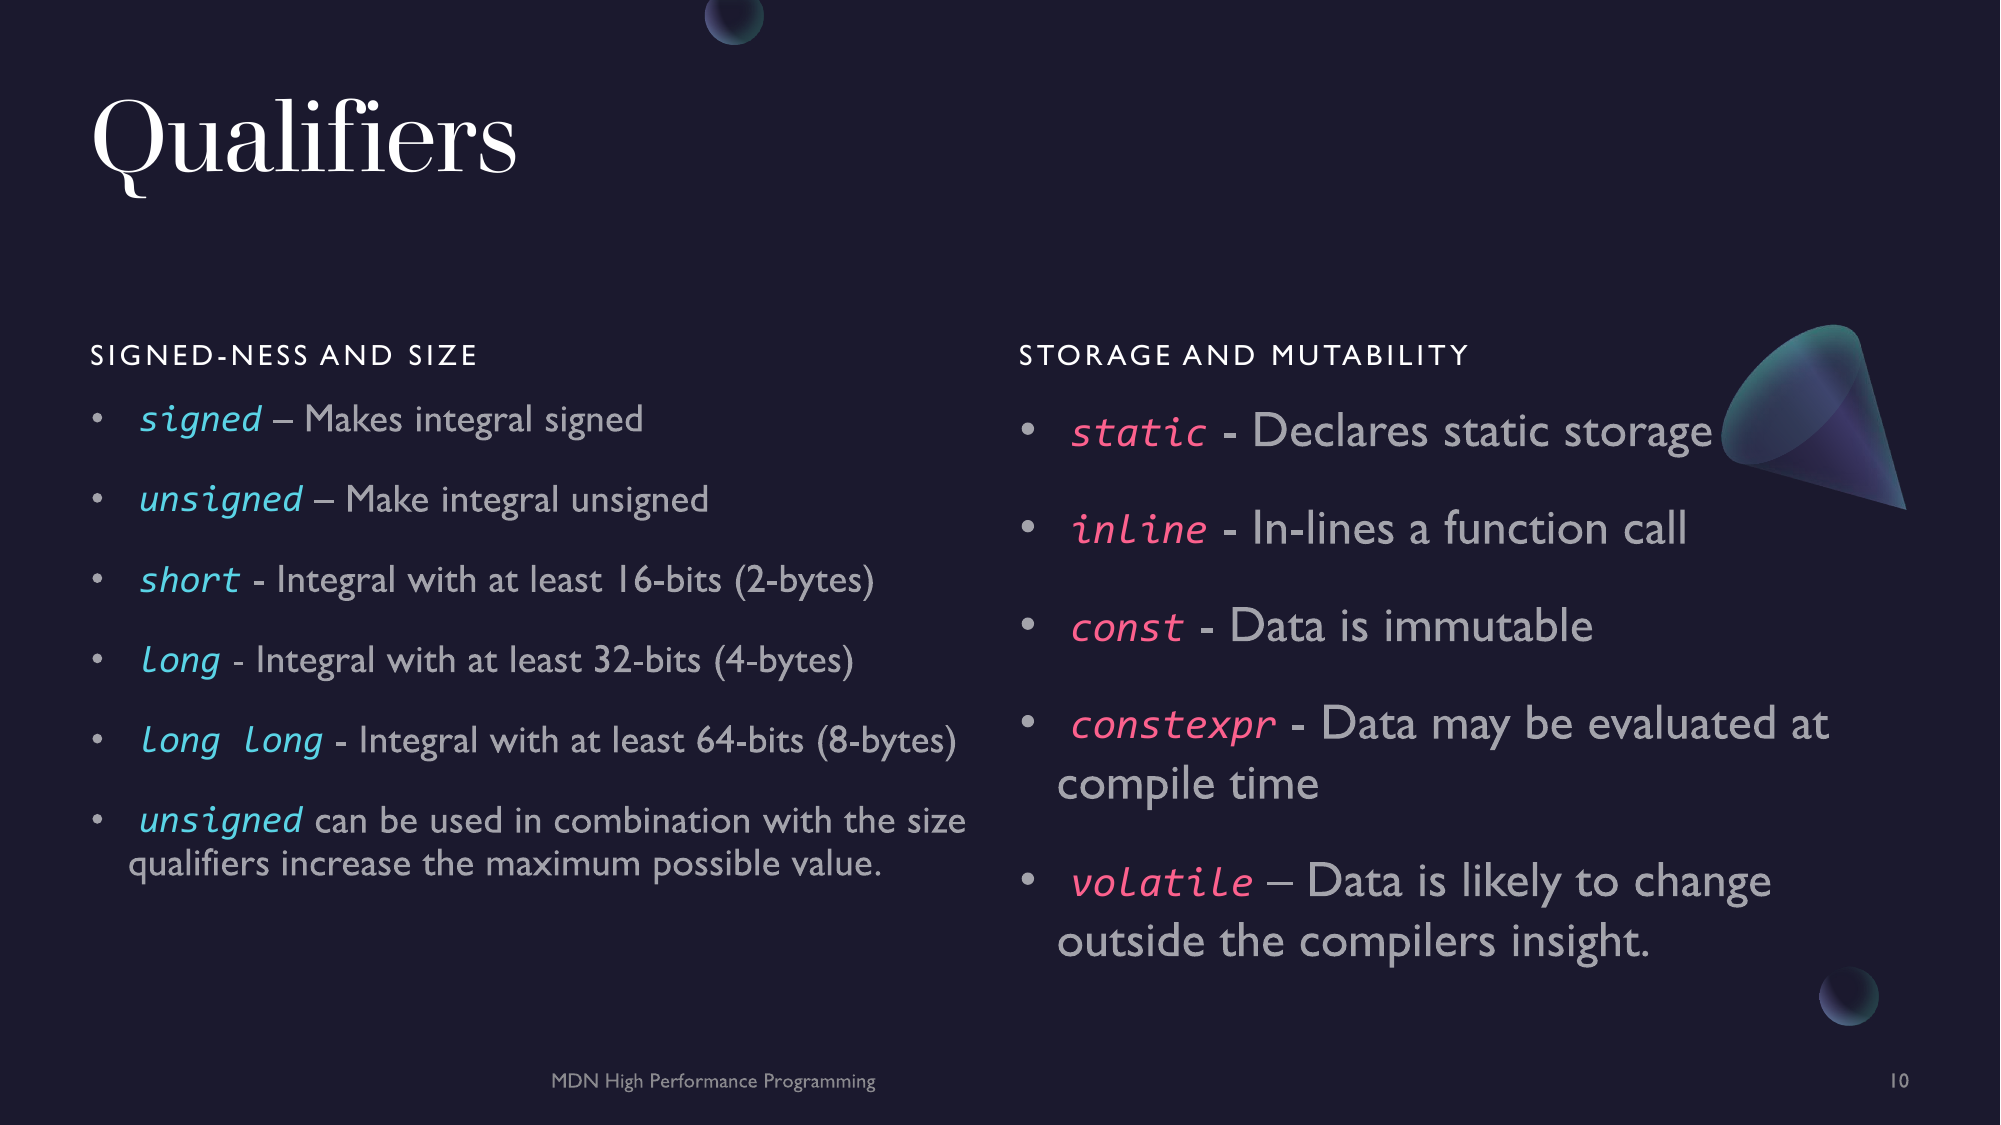
Types can have different qualifiers that change how a type behaves from its size to mutability. Qualifiers go before the type declaration.
Signed-ness
The signed and unsigned qualifiers are used to indicate whether the first bit of the integral type is used for the sign of a number or not. All integral types are implicitly signed (char can vary). unsigned increases the maximum number an integral can be but disallows negative values. unsigned only works on integer types and not floating point types.
Size
Size qualifiers are used to indicate the number of bits (which is platform specific) an int type must have at least.
short int- 16-bits at leastint- 16-bits at least (typically 32-bits)long int- 32-bits at leastlong long int- 64-bits at least
You can also combined size qualifiers with the unsigned (and signed though not strictly necessary) to allow much larger numbers. You are also able to drop the int type in favour of just the size qualifiers and C++ will infer it to be int. long can also be used with double to create a (on some systems) binary128 floating point number.
| Size Qualifiers / Primitive Type | short | unsigned short | signed | unsigned | long | unsigned long | long long | unsigned long long |
|---|---|---|---|---|---|---|---|---|
bool | ❌ | ❌ | ❌ | ❌ | ❌ | ❌ | ❌ | ❌ |
char | ❌ | ❌ | ✅ | ✅ | ❌ | ❌ | ❌ | ❌ |
wchar_t | ❌ | ❌ | ❌ | ❌ | ❌ | ❌ | ❌ | ❌ |
int | ✅ | ✅ | ✅ | ✅ | ✅ | ✅ | ✅ | ✅ |
float | ❌ | ❌ | ❌ | ❌ | ❌ | ❌ | ❌ | ❌ |
double | ❌ | ❌ | ❌ | ❌ | ✅ | ❌ | ❌ | ❌ |
Storage
Storage qualifiers allow you to specify the lifetime of variables. All variables implicitly have automatic storage duration. The exist only in a certain scope, are created when the program enters that scope and dropped at the end of that scope. static (and implicitly global variables) are created at the beginning of the program and are dropped only at the end of the program. Only one variable of the same name can be declared static in a given translation unit.
static int si = {1};  ///< static variables

{
    int li = {2};  ///< local automatically dropped variable
}
inline is more of a hint to the compiler for functions and methods. It indicates to the compiler that a function call should be inlined at call, ie. the functions definition gets moved to the call site. This qualifier is mostly used in OOP classes hierarchies as its more general use has be dropped in favour of a different qualifier.
Mutability
In C++, variables are mutable by default. There are various ways to limit the mutability of variables as well as constrain the optimisations a compiler can apply.
const- Aconstobject is an immutable object, it cannot be changes. It must be initialised with a values.constexpr- Aconstexpris; as the names suggests, a constant expression. It is an expression that may be evaluated at compile time. Similar toconst.volatile- Indicates to the compiler that the variable may change in ways that it is unaware of and to avoid optimising this variables use in case of undesired behavior.mutable- Indicates a member variable may be modified even through const-qualified methods (we'll see this in Week 5).
int i = {0};
const int ci = {1};
constexpr int cx = {2};
volatile int vi = {3};
const volatile int cv = {4};

i = 6;      ///< Ok
ci = 7;     ///< Error
cx = 8;     ///< Error
vi = 9;     ///< Ok
cv = 10;    ///< Error
Note: The usage of
volatileis highly discouraged.
Automatic Types
The final type we look at is an automatic type. As we will see later, declaring the type of variables can get cumbersome. Since C++11, a new type introducer was create with the keyword auto. Variables with type auto will have there true type deduced at compile time based on the initialiser.
auto ai int{1};                 ///< `ai` deduced to have the type `int`
auto al = {2L};                 ///< `al` deduced to have the type `long` or `long int` (uses 'L' literal)
auto ac {'c'};                  ///< `ac` deduced to have the type `char`
auto as = "hello";              ///< `as` deduced to have the type `const char*` (more on these later)
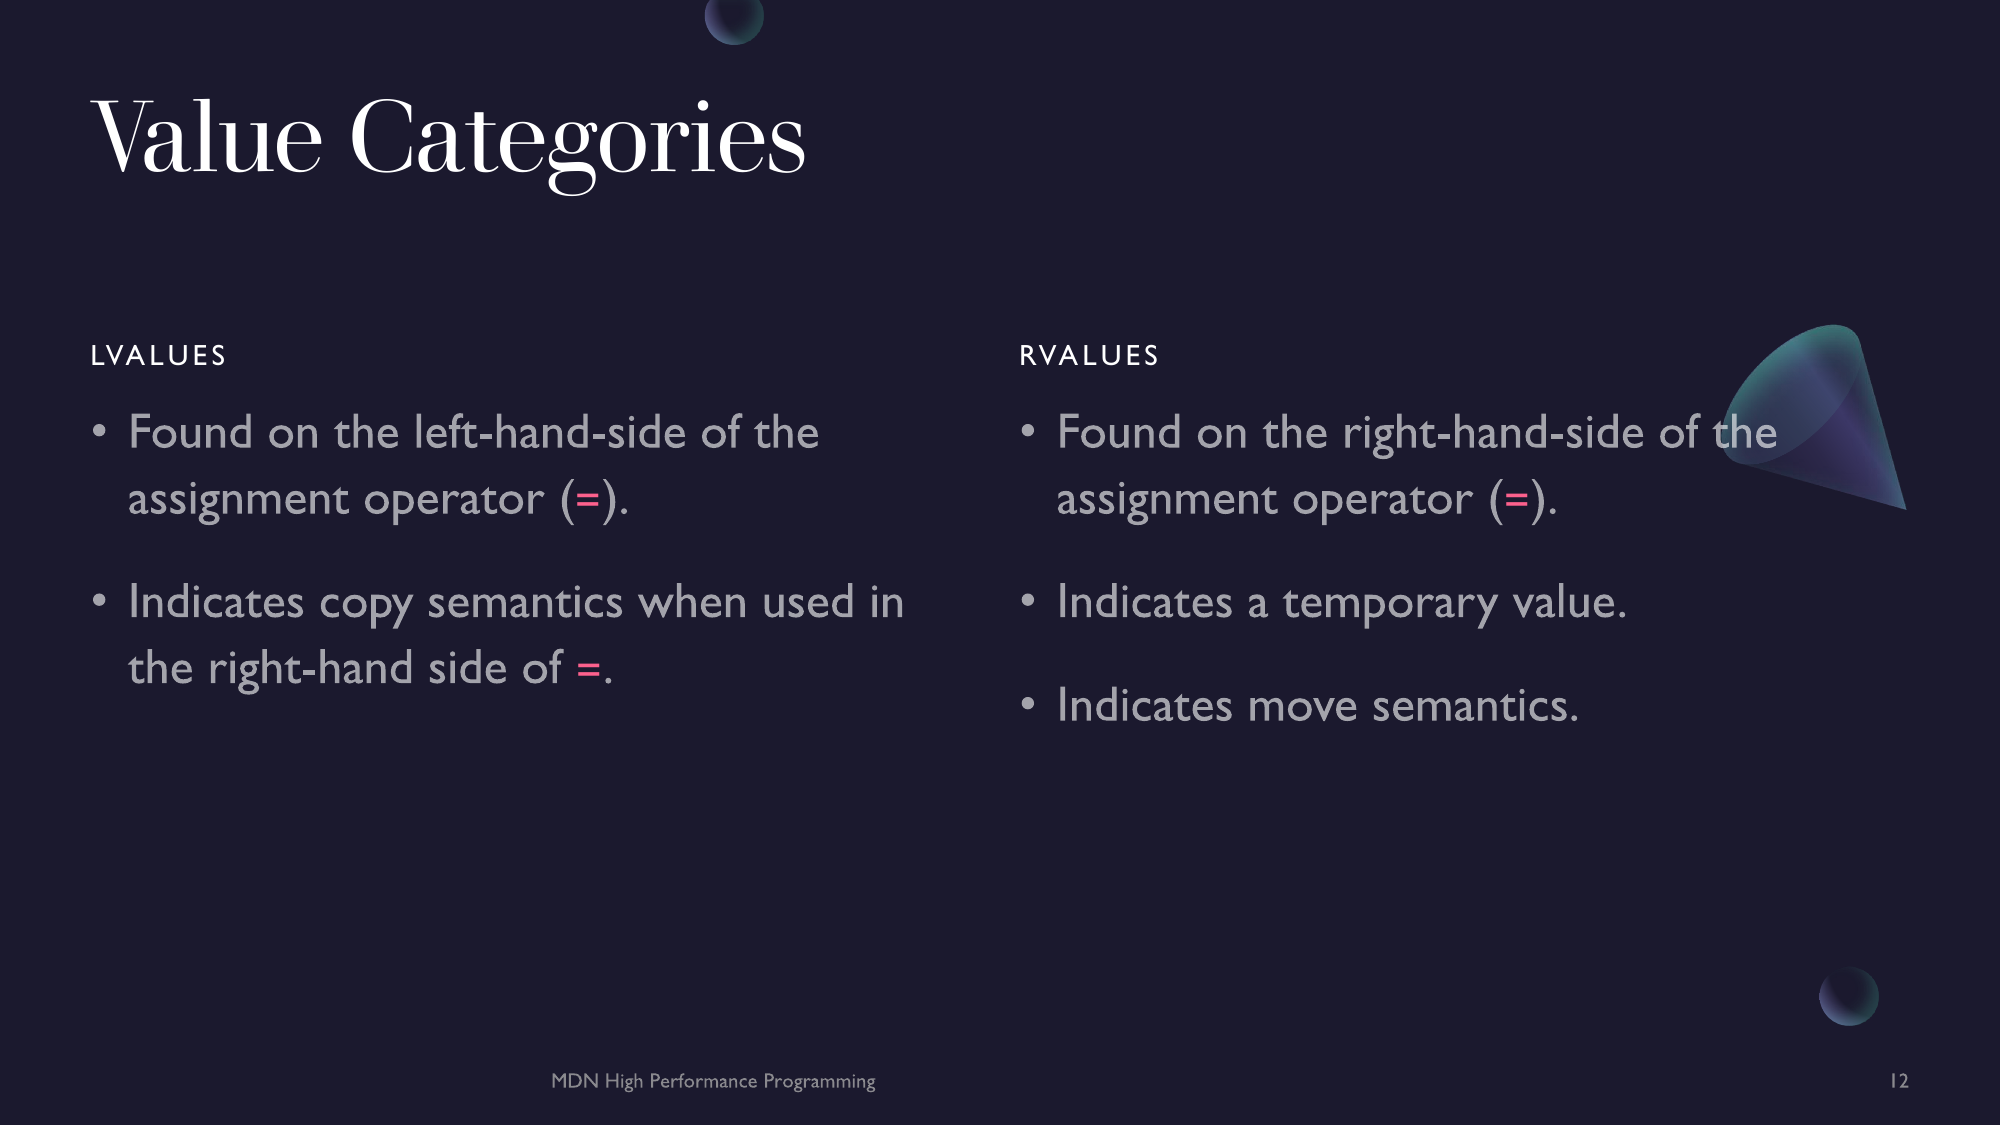
Value Categories
In C++, there are different categories of values. These determine the operations that can be performed on them. There are a few value categories in C++ but we will focus on only two of them, lvalues and rvalues.
lvalues
In C++ and lvalue is kind of value that you would find on the left-hand-side of the =, hence the name lvalue or 'left-value'. You can also find lvalues on the right-hand-side of =. This is the semantics of a copy (may or may not be an initialisation). Typically, a variable that has an assigned value is an lvalue.
rvalues
rvalues are; as the name suggests, variables or values found on the right-hand-side of =. This includes literals, temporaries and moves. For example the literal 3 is an rvalue. rvalues are also used to indicate move-semantics (more on this later on).
Literals
Literals are types that have a explicit value to them. The literal 0 has the value of int{0} and type int. Literals allow the to be common code-point to define values into a specific character or character sequence. Essentially, literals hold the value and type they indicate.
Operators
Operators are unique symbols that are used to perform changes to data. They often have infix notation with some having prefix or postfix notation. In C++, all operators are functions however, they are built into the language fpr primitive data types.
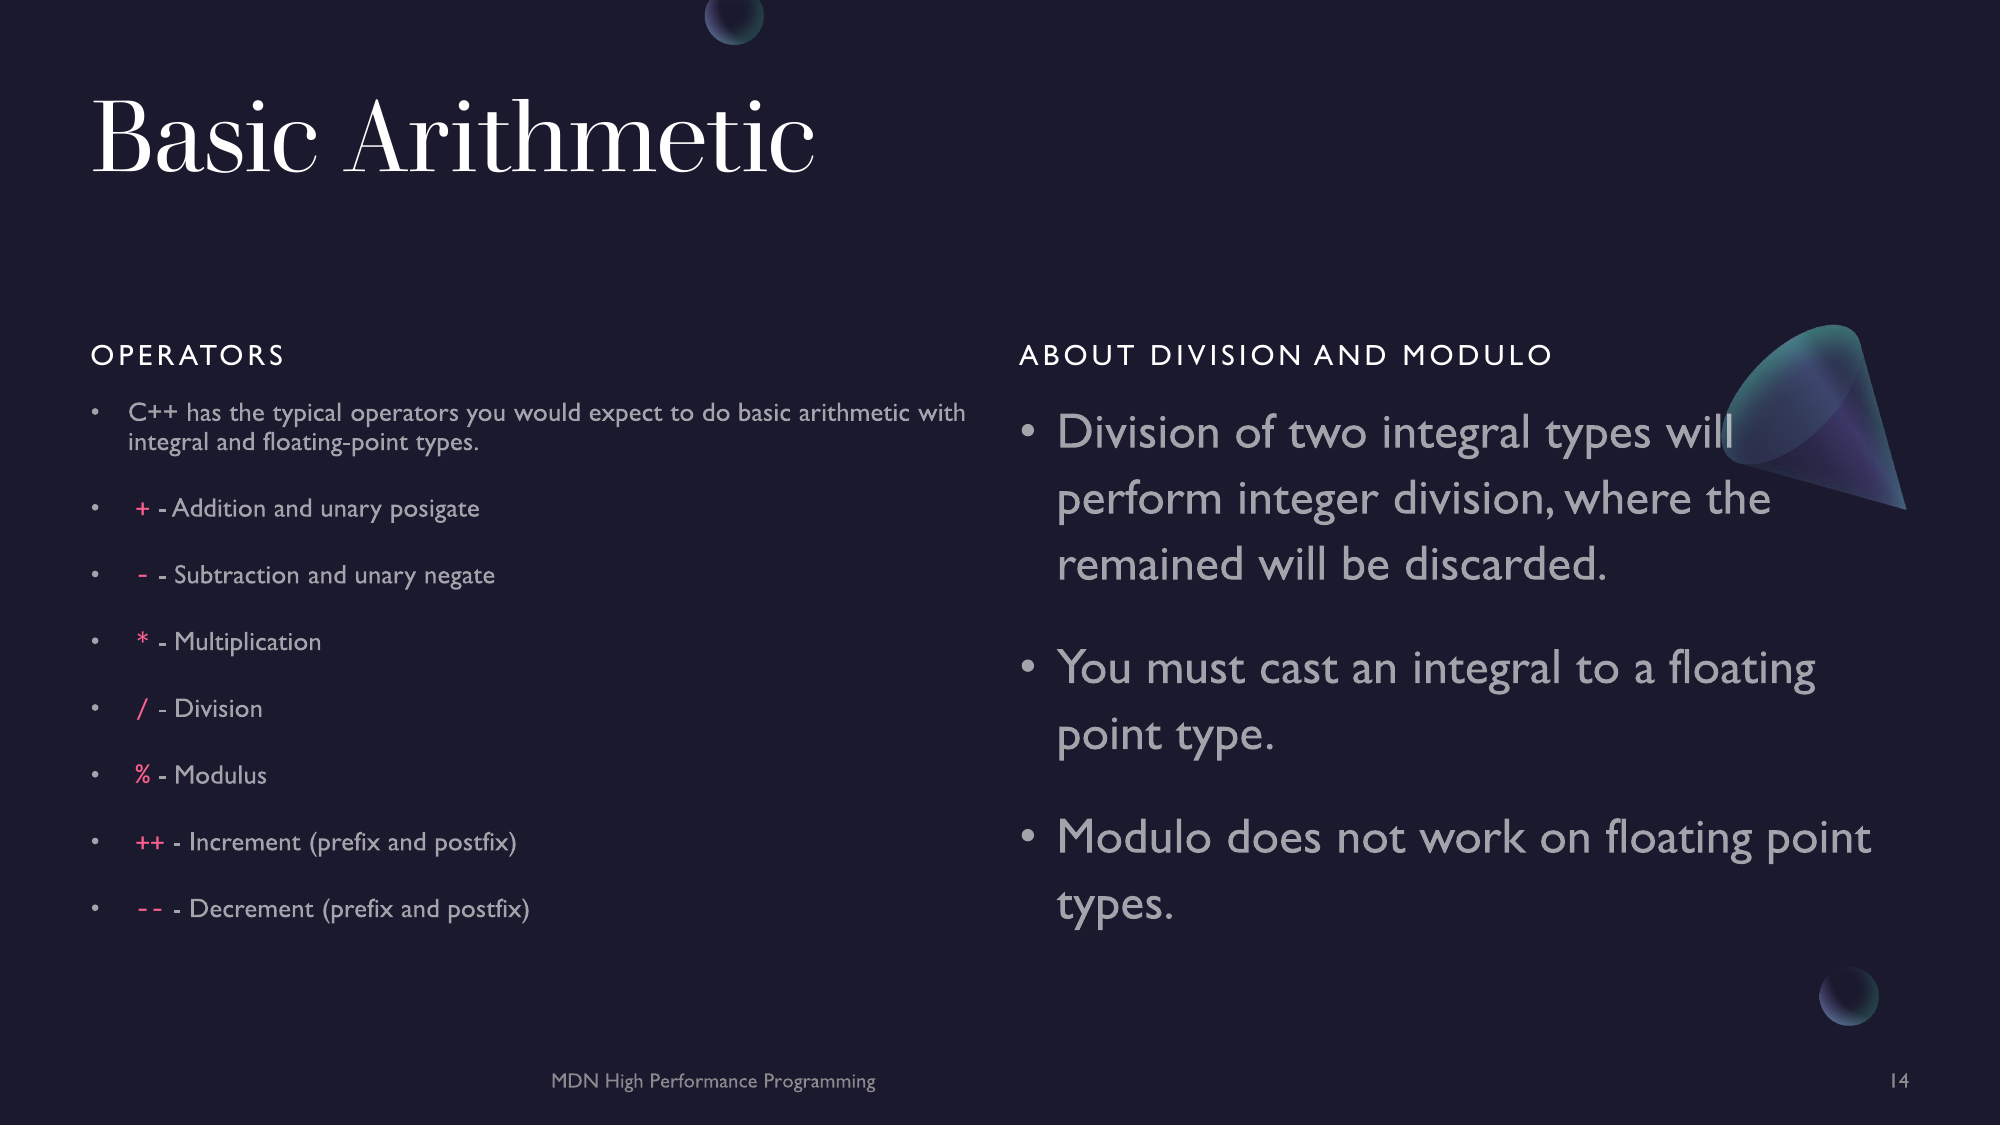
Basic Arithmetic
So enough about types and values. Lets write some code that does something. In C++ there are a lot, and I mean a lot of operators but we will only cover the arithmetic based one this week. The first ones we will look at are the basic arithmetic operators. These include your standard:
+- Addition-- Subtraction*- Multiplication/- Division%- Modulo
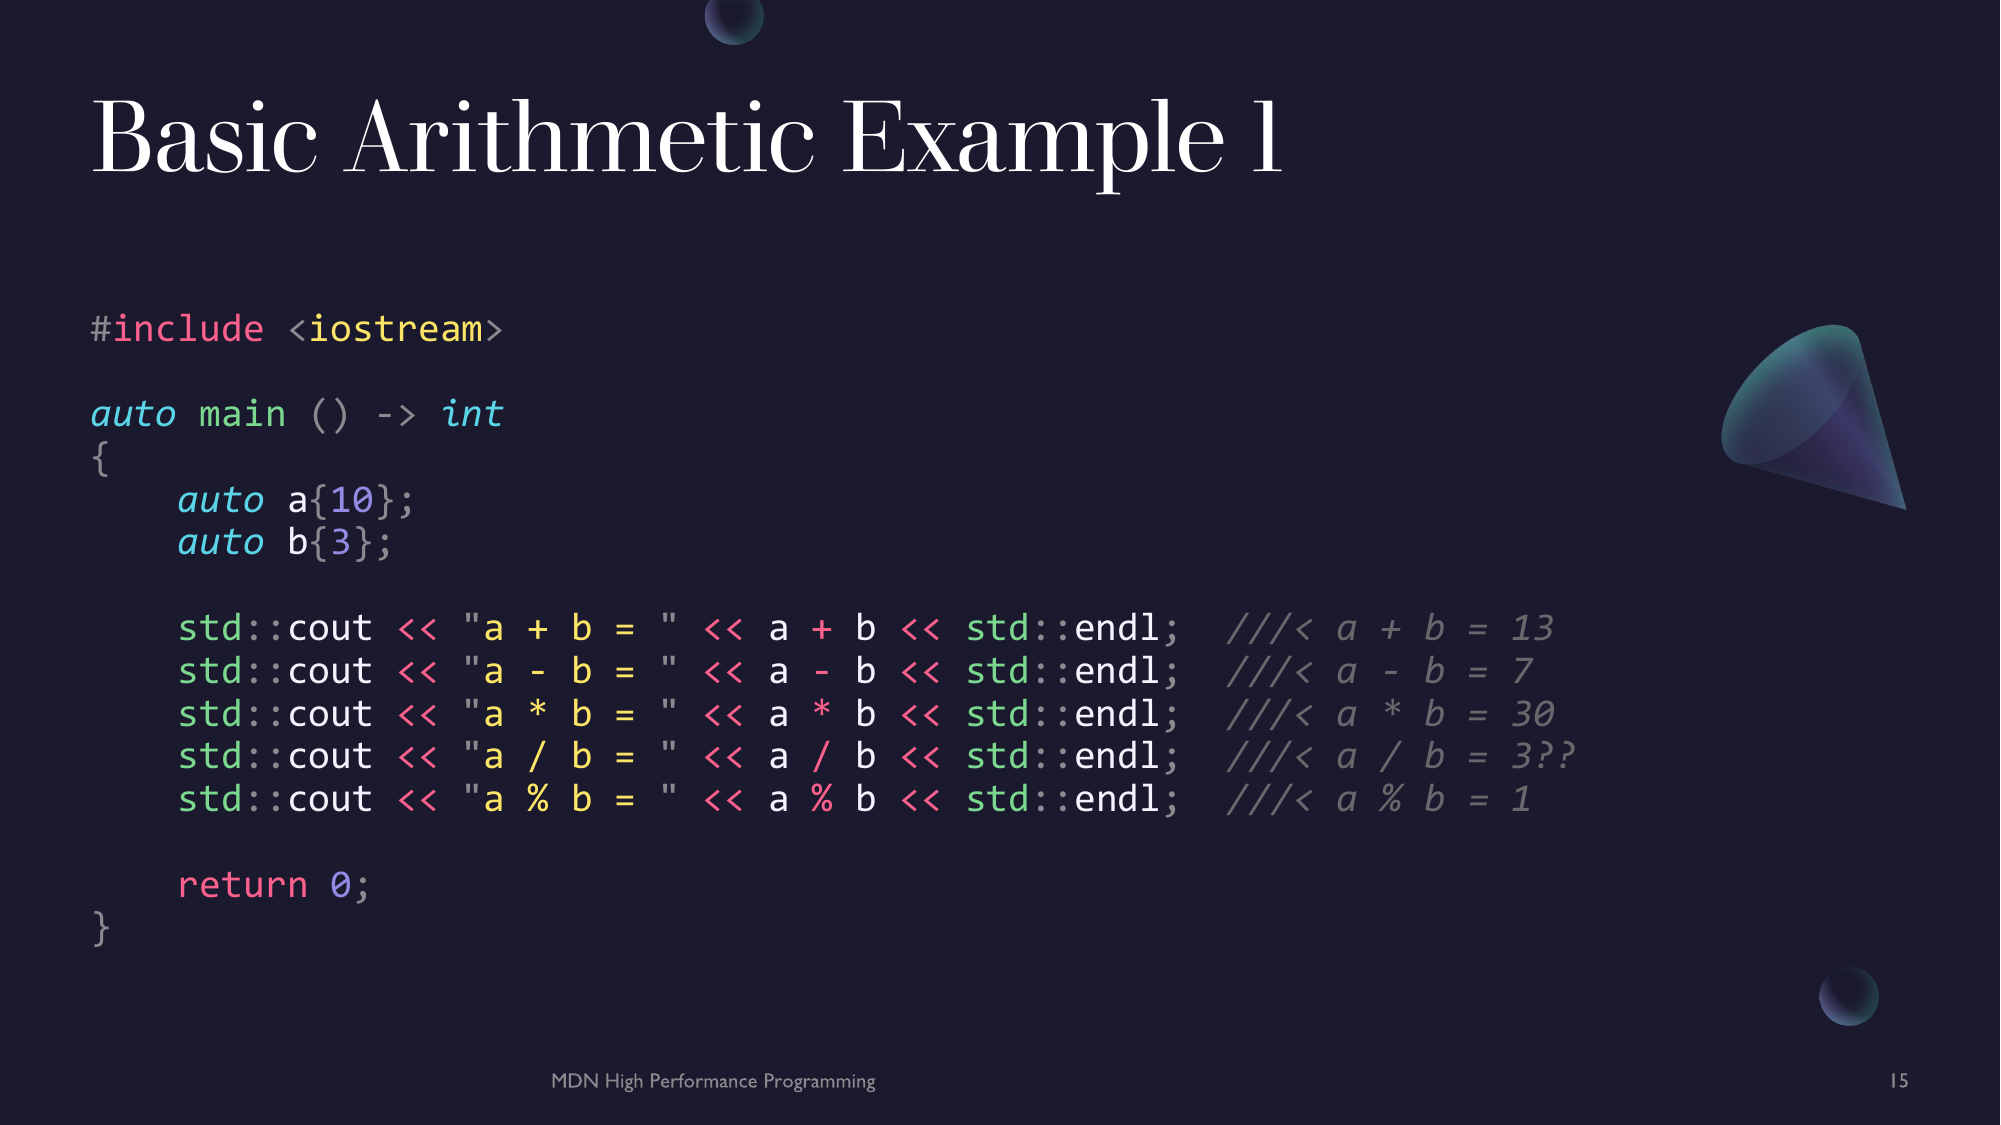
For the meanwhile we will only look at operations on integers and floating point types. For these types the operators do what you would expect. Try out the following operations.
#include <iostream>

auto main () -> int
{
    auto a{10};
    auto b{3};

    std::cout << "a + b = " << a + b << std::endl;  ///< a + b = 13
    std::cout << "a - b = " << a - b << std::endl;  ///< a - b = 7
    std::cout << "a * b = " << a * b << std::endl;  ///< a * b = 30
    std::cout << "a / b = " << a / b << std::endl;  ///< a / b = 3??
    std::cout << "a % b = " << a % b << std::endl;  ///< a % b = 1

    return 0;
}
Note: for those unaware,
%returns the remained of the division of \( \frac{a}{b} \)
But hold up, why does a / b return 3, should it not be 3.33...? This correct.. sorta. In C++ when two integers divide it performs integer division, thus throwing away any remainder after the maximum even divisions. This is the same as Pythons // operator. To perform floating point division, either the numerator or denominator needs to be of a floating point type. This is so the alternate one (if it is an integer type) can be promoted to a floating point type to perform the floating point division.
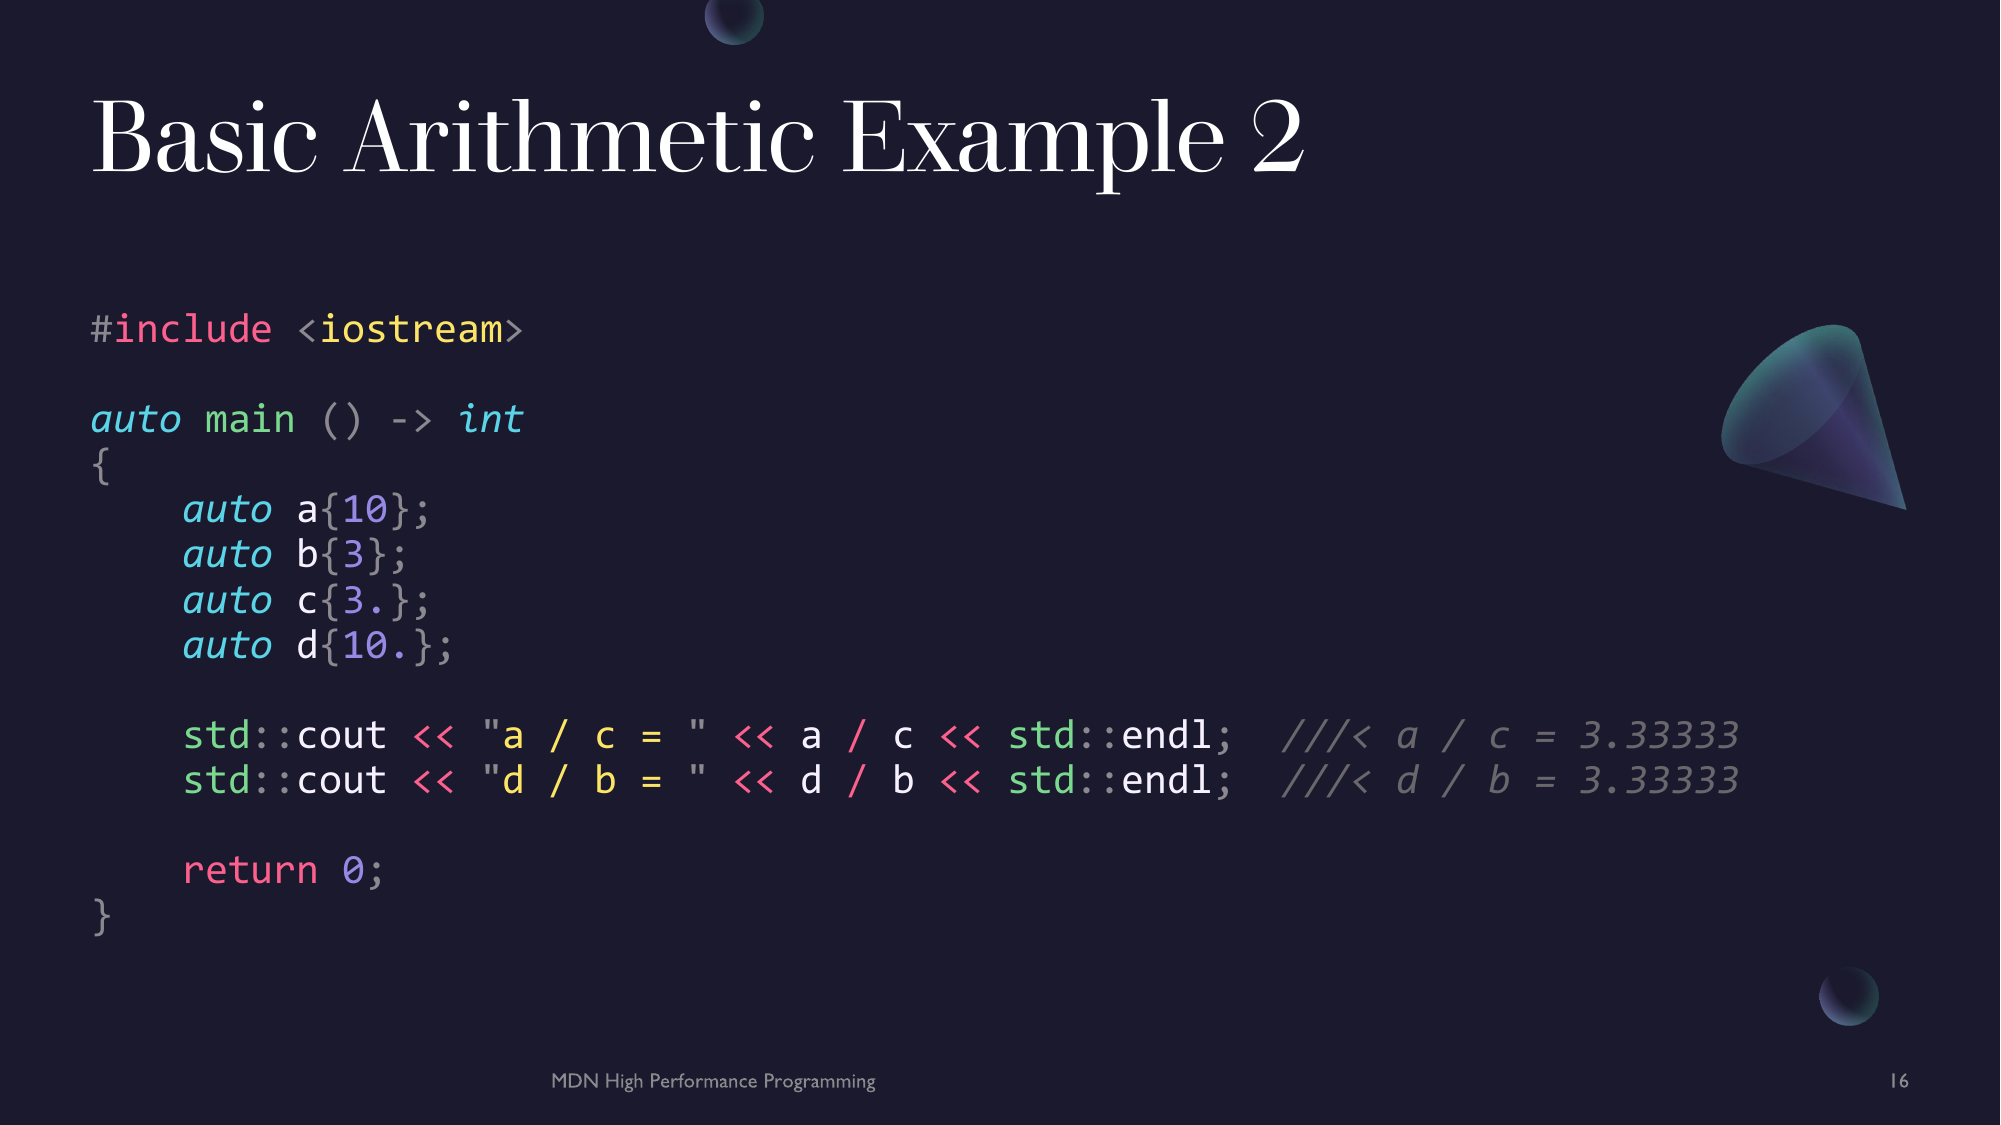
#include <iostream>

auto main () -> int
{
    auto a{10};
    auto b{3};
    auto c{3.};
    auto d{10.};

    std::cout << "a / c = " << a / c << std::endl;  ///< a / c = 3.33333
    std::cout << "d / b = " << d / b << std::endl;  ///< d / b = 3.33333

    return 0;
}
Note: The modulo operator does not work for floating point types as this illogical (can't return remainder of a floating point division as it is near impossible to regain the information).
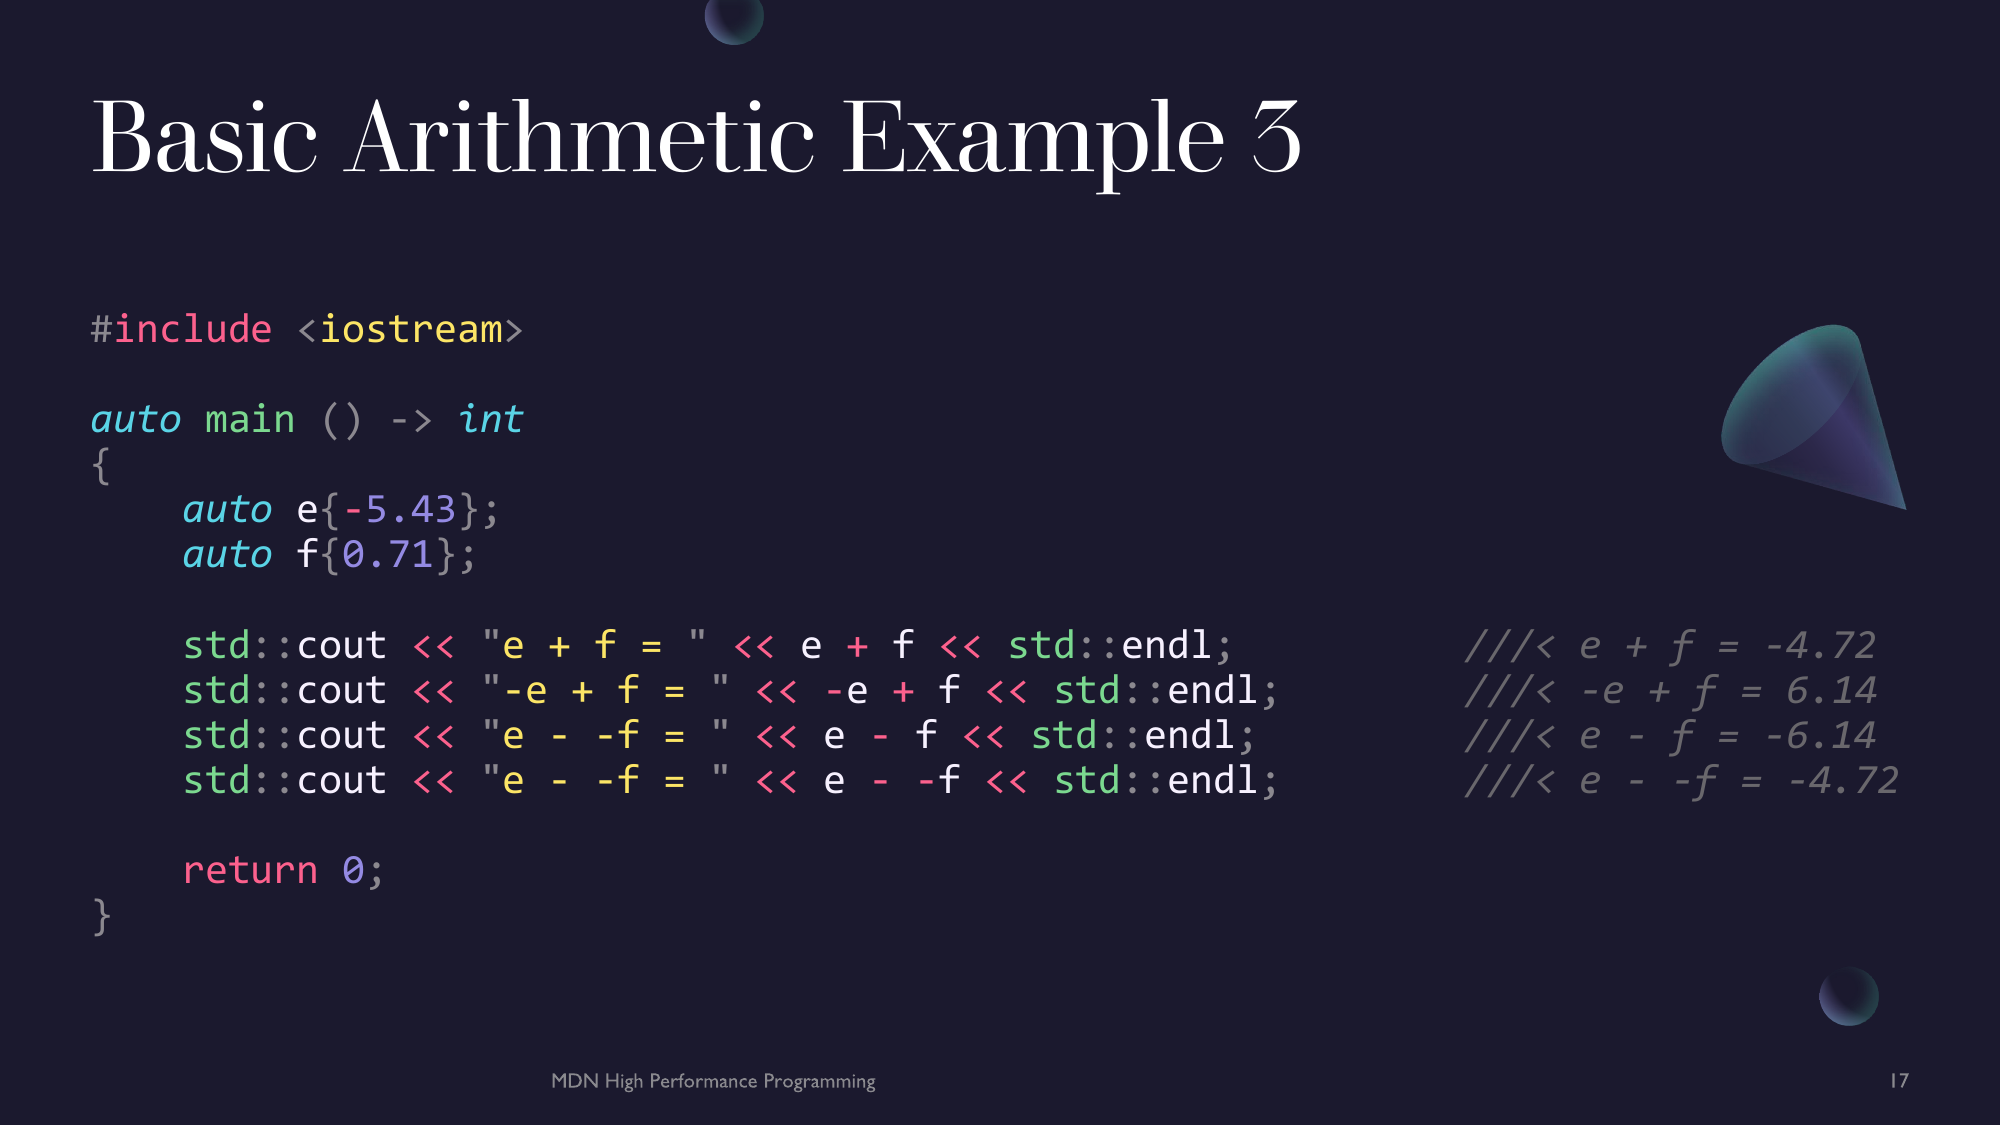
You can also use + and - to change/force the sign of a integer or floating point type.
#include <iostream>

auto main () -> int
{
    auto e{-5.43};
    auto f{0.71};

    std::cout << "e + f = " << e + f << std::endl;          ///< e + f = -4.72
    std::cout << "-e + f = " << -e + f << std::endl;        ///< -e + f = 6.14
    std::cout << "e - -f = " << e - f << std::endl;         ///< e - f = -6.14
    std::cout << "e - -f = " << e - -f << std::endl;        ///< e - -f = -4.72

    return 0;
}
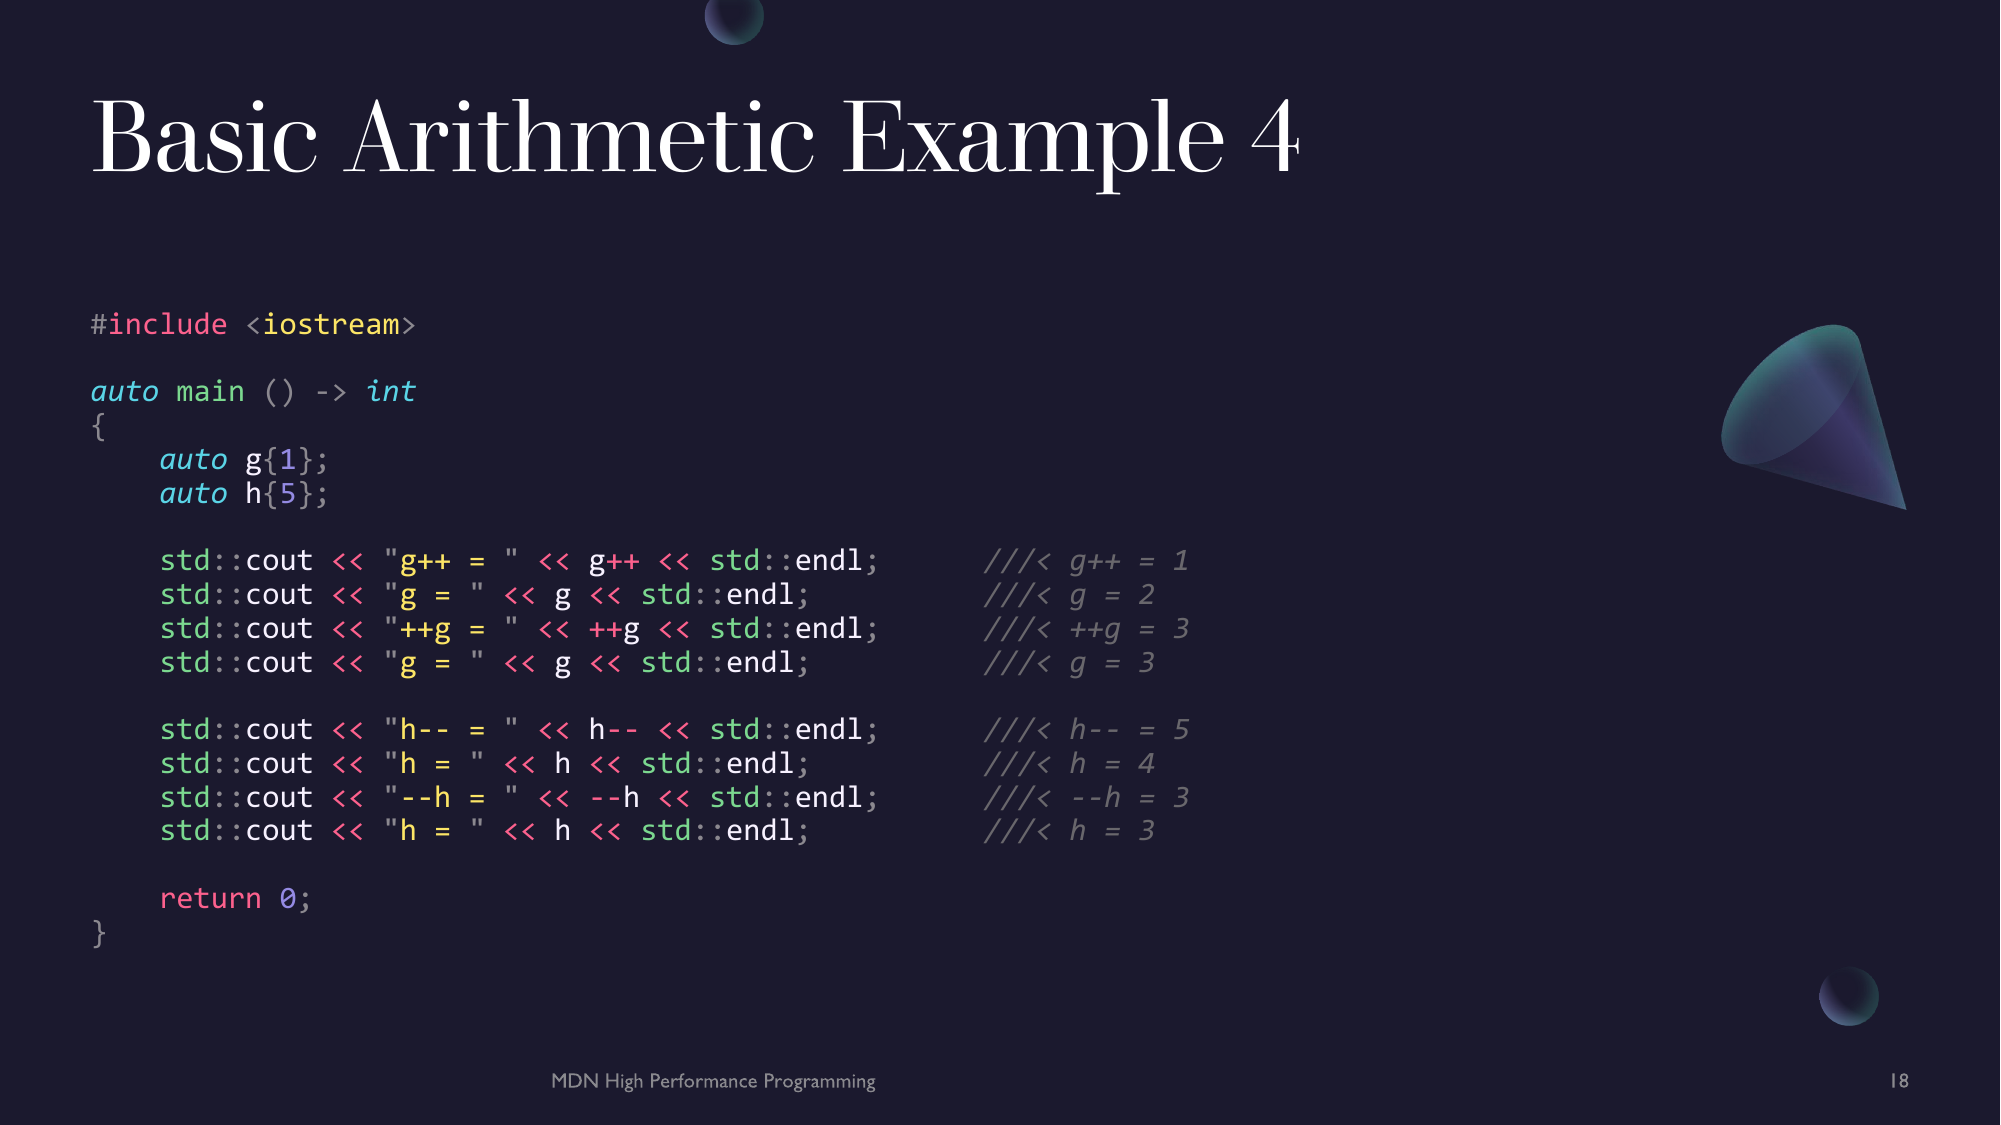
There are also in-place operators ++ and --. These allow you to increment/decrement integer types in place. There are two variations, prefix and postfix. Prefix will increment/decrement the value and then provide a lvalue of the new value of the object to whatever is reading it (if any). Postfix will provide an lvalue to copy of the old value and then increment/decrement the value.
#include <iostream>

auto main () -> int
{
    auto g{1};
    auto h{5};

    std::cout << "g++ = " << g++ << std::endl;      ///< g++ = 1
    std::cout << "g = " << g << std::endl;          ///< g = 2
    std::cout << "++g = " << ++g << std::endl;      ///< ++g = 3
    std::cout << "g = " << g << std::endl;          ///< g = 3

    std::cout << "h-- = " << h-- << std::endl;      ///< h-- = 5
    std::cout << "h = " << h << std::endl;          ///< h = 4
    std::cout << "--h = " << --h << std::endl;      ///< --h = 3
    std::cout << "h = " << h << std::endl;          ///< h = 3

    return 0;
}
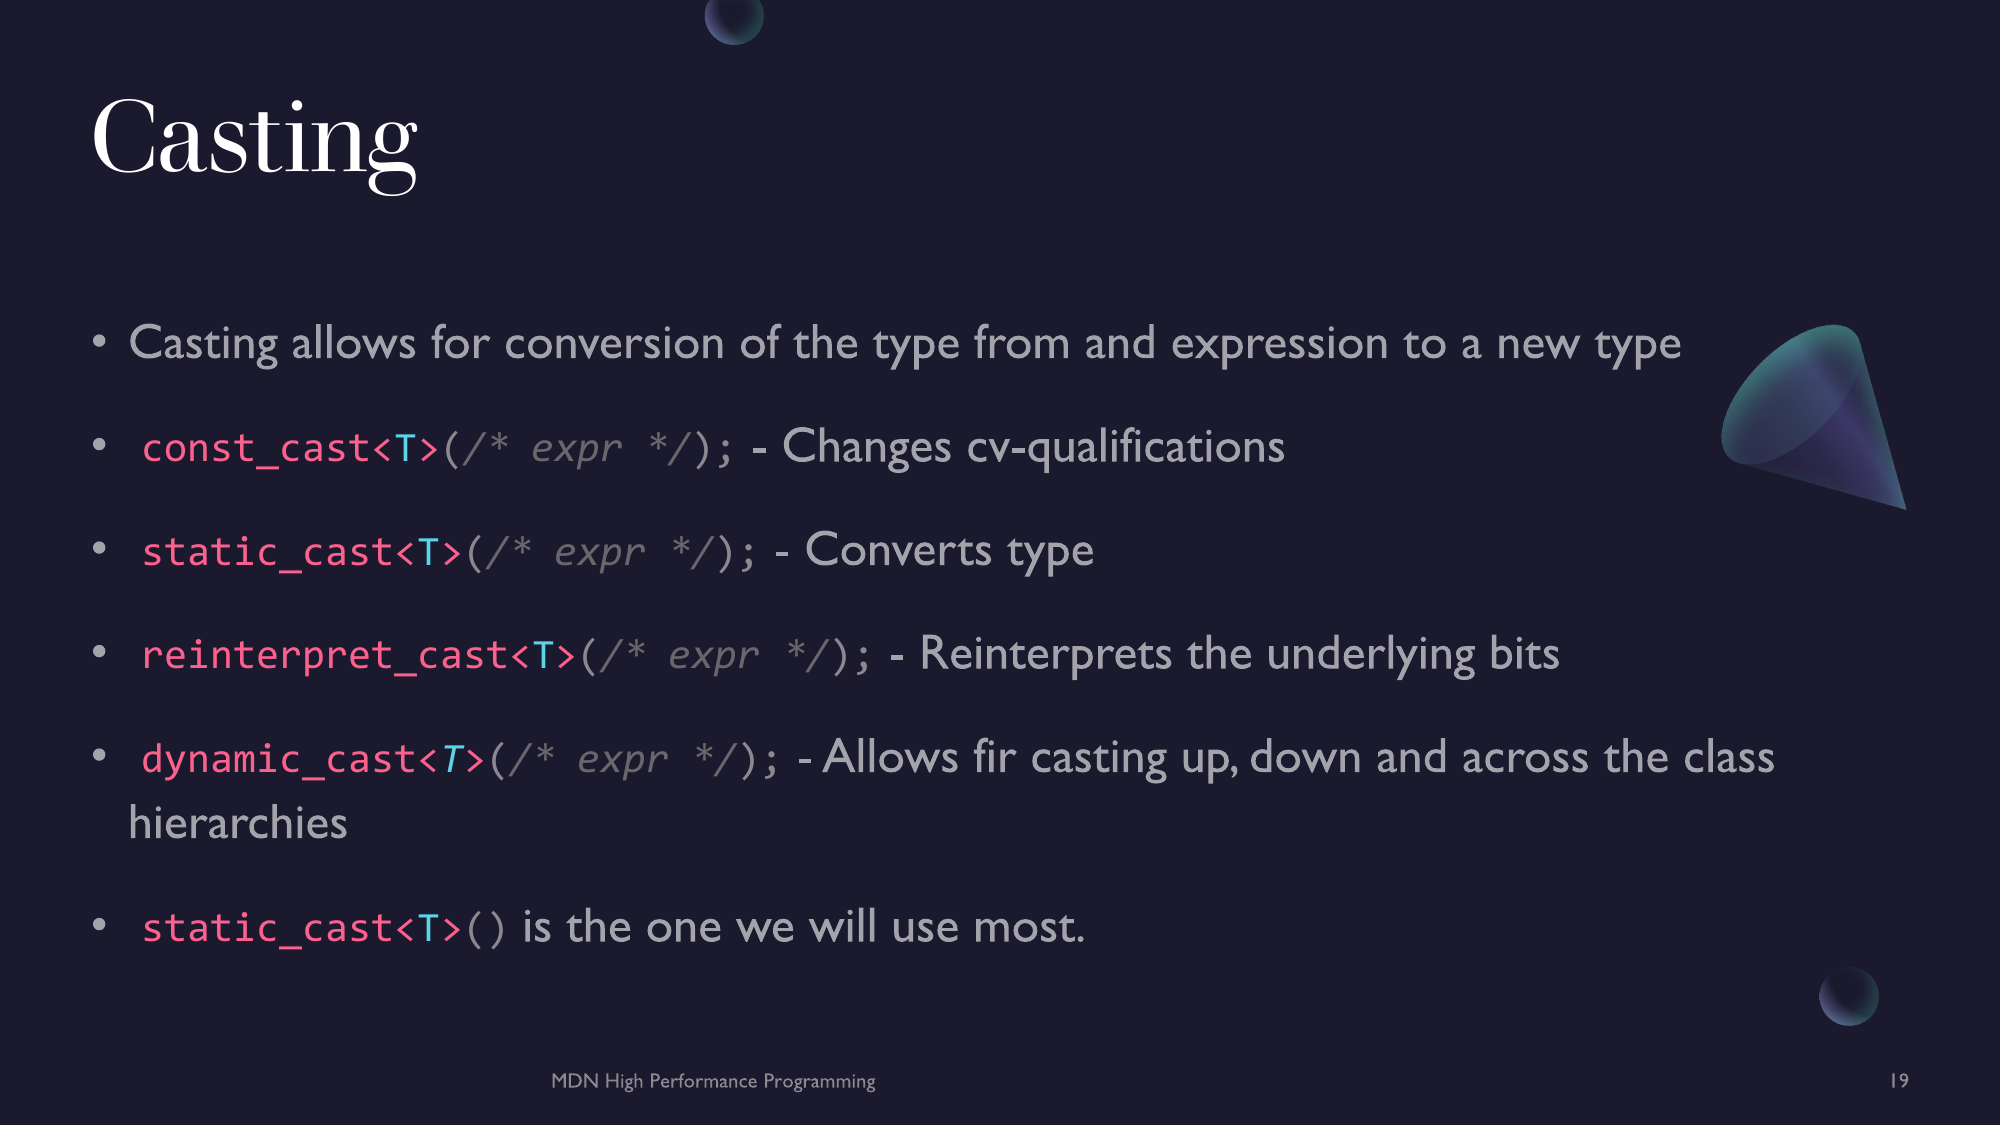
Casts
In C++ you can change the type of an object via casting. There are quite a few different casting operators.
const_cast<T>(expr)- Changes cv-qualifications (cv := const-volatile)static_cast<T>(expr)- Attempts to castexprentirely different typeT.reinterpret_cast<T>(expr)- Reinterprets the underlying bit pattern ofexpr.dynamic_cast<T>(expr)- Allows for casting up, down and sideways through class hierarchies.
Note:
Tis the type that theexpris being cast to.
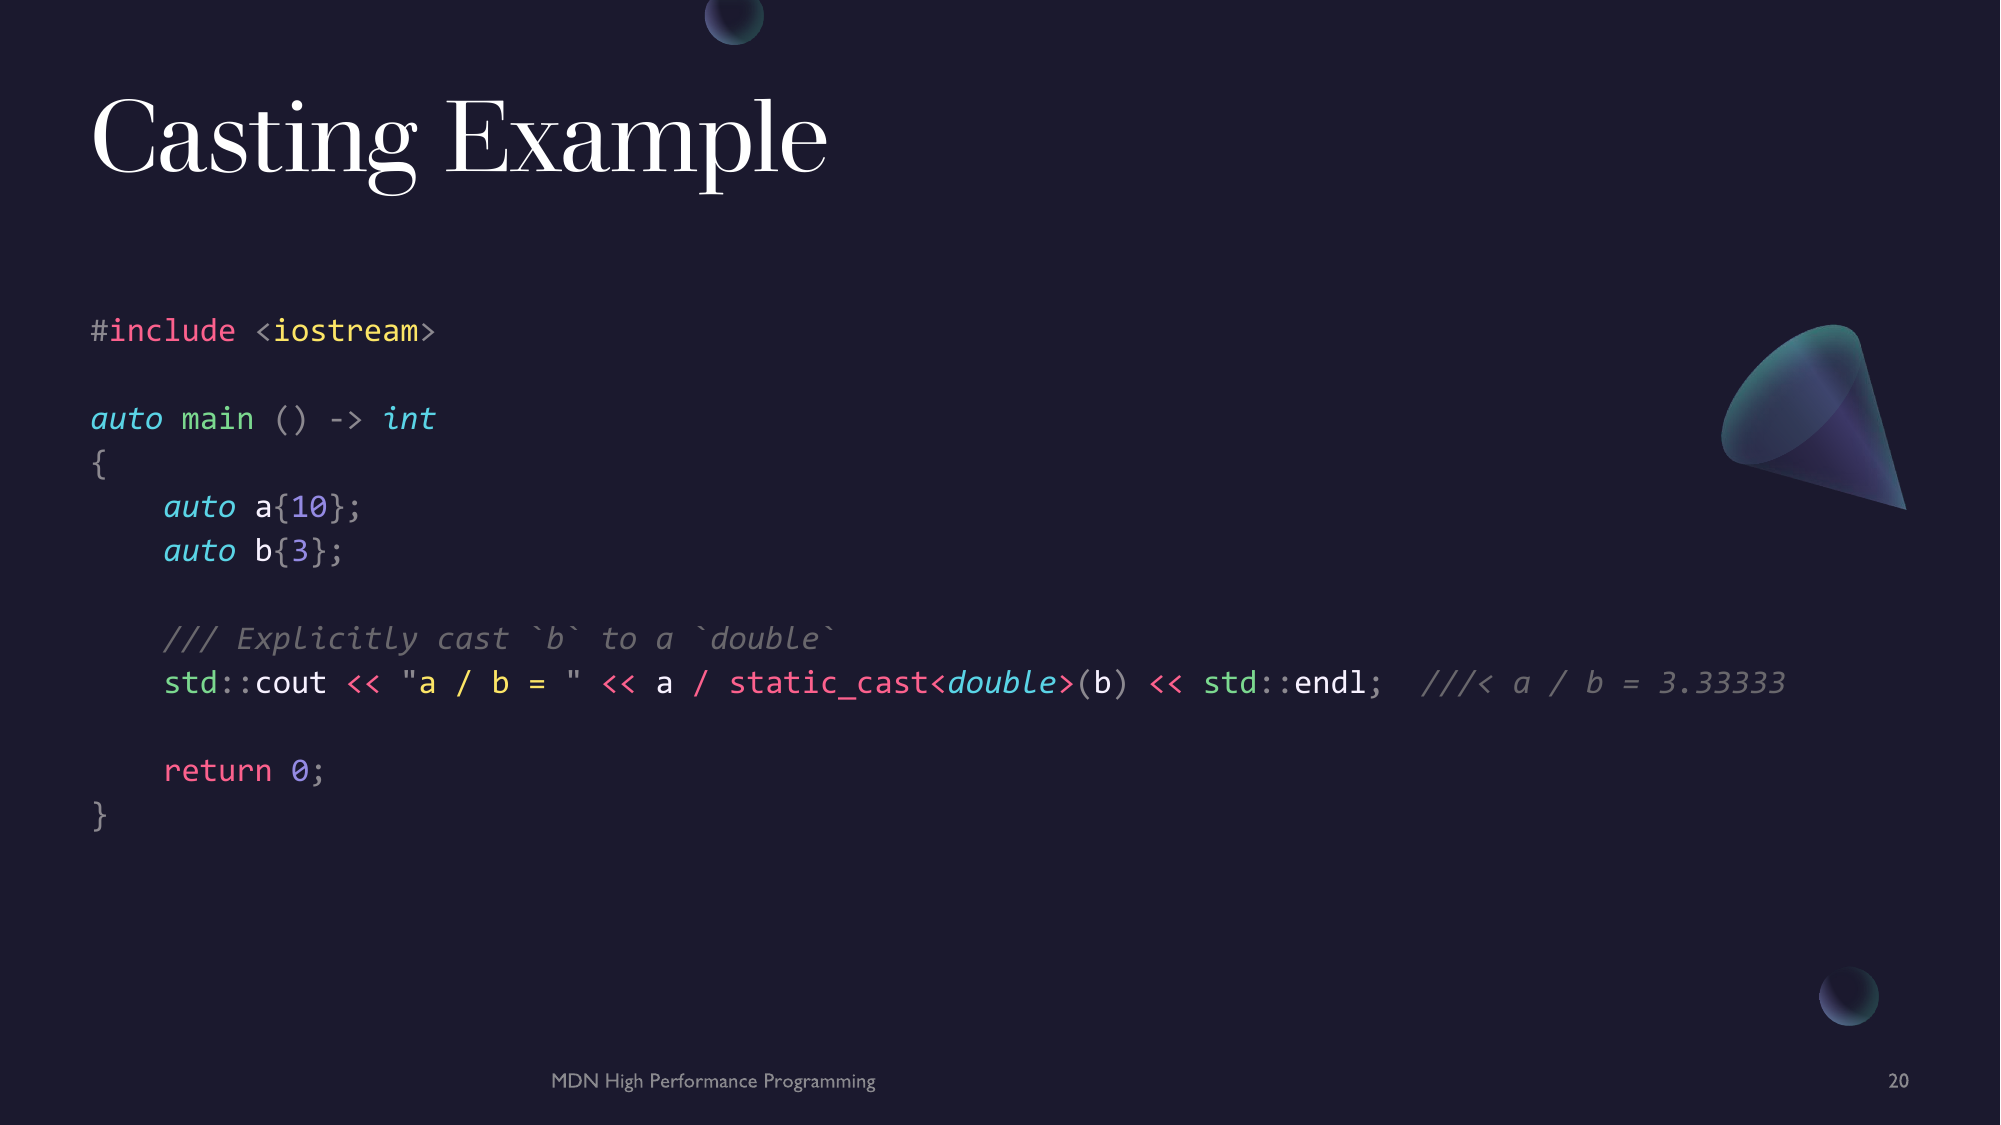
You will likely not come across needing to any of the casts except static_cast<T>(expr). Reach for this first.
#include <iostream>

auto main () -> int
{
    auto a{10};
    auto b{3};

    /// Explicitly cast `b` to a `double`
    std::cout << "a / b = " << a / static_cast<double>(b) << std::endl;  ///< a / b = 3.33333

    return 0;
}
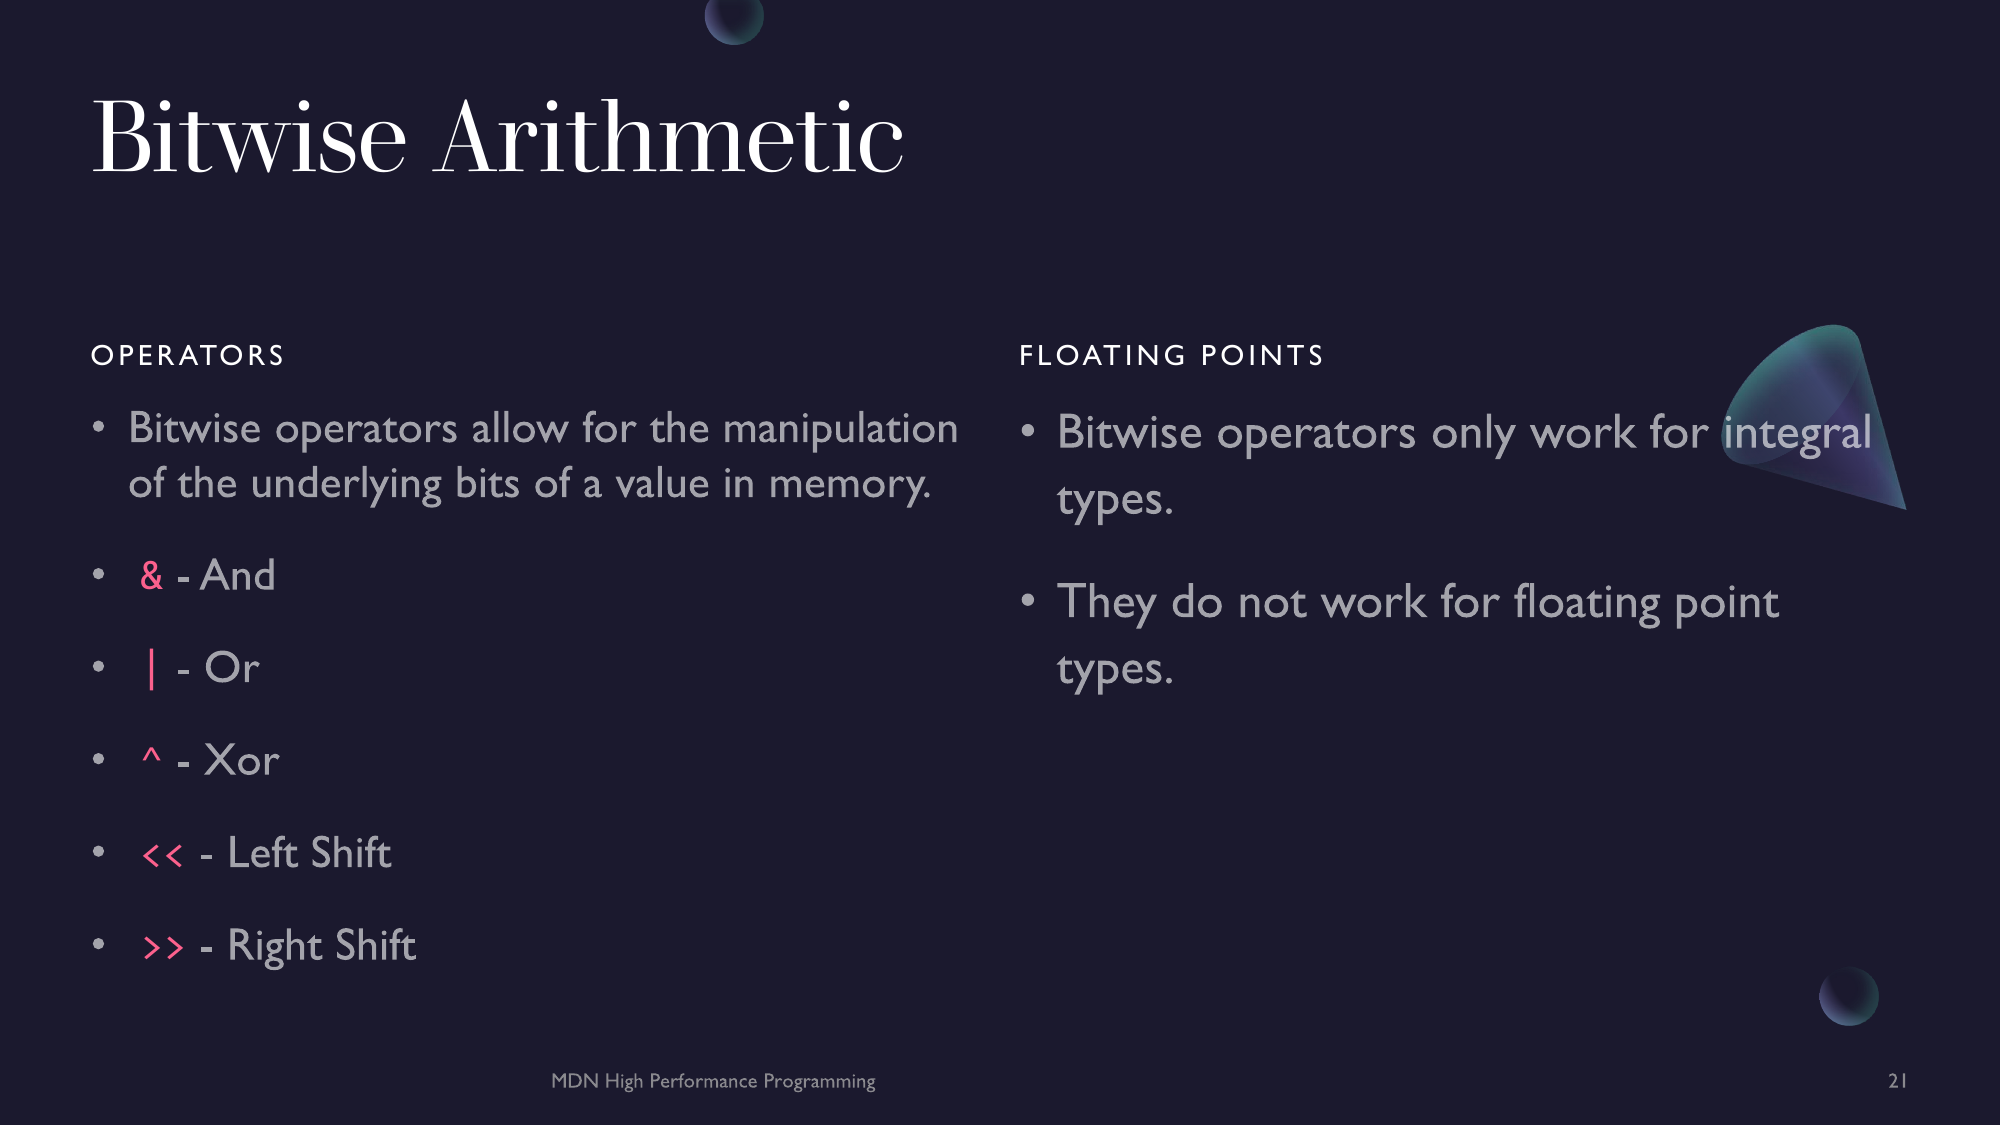
Bitwise Operations
In C++ there is another category of operators called bitwise operators. These operators only apply to integer types but allow for you to individually control the bits of an integer.
&- Bitwise And|- Bitwise Or^- Bitwise Xor<<- Bitwise Left Shift (Left Rotate)>>- Bitwise Right Shift (Right Rotate)
Note: We've seen
<<before withstd::cout. In the case ofstd::cout<<means 'put (to)'. It is simply an overloaded operator used for ease of use. It doesn't correlate to the bitwise meaning.
Each of the bitwise operators perform their respective logical operations on each of the bits the the two values or points and returns the new value.
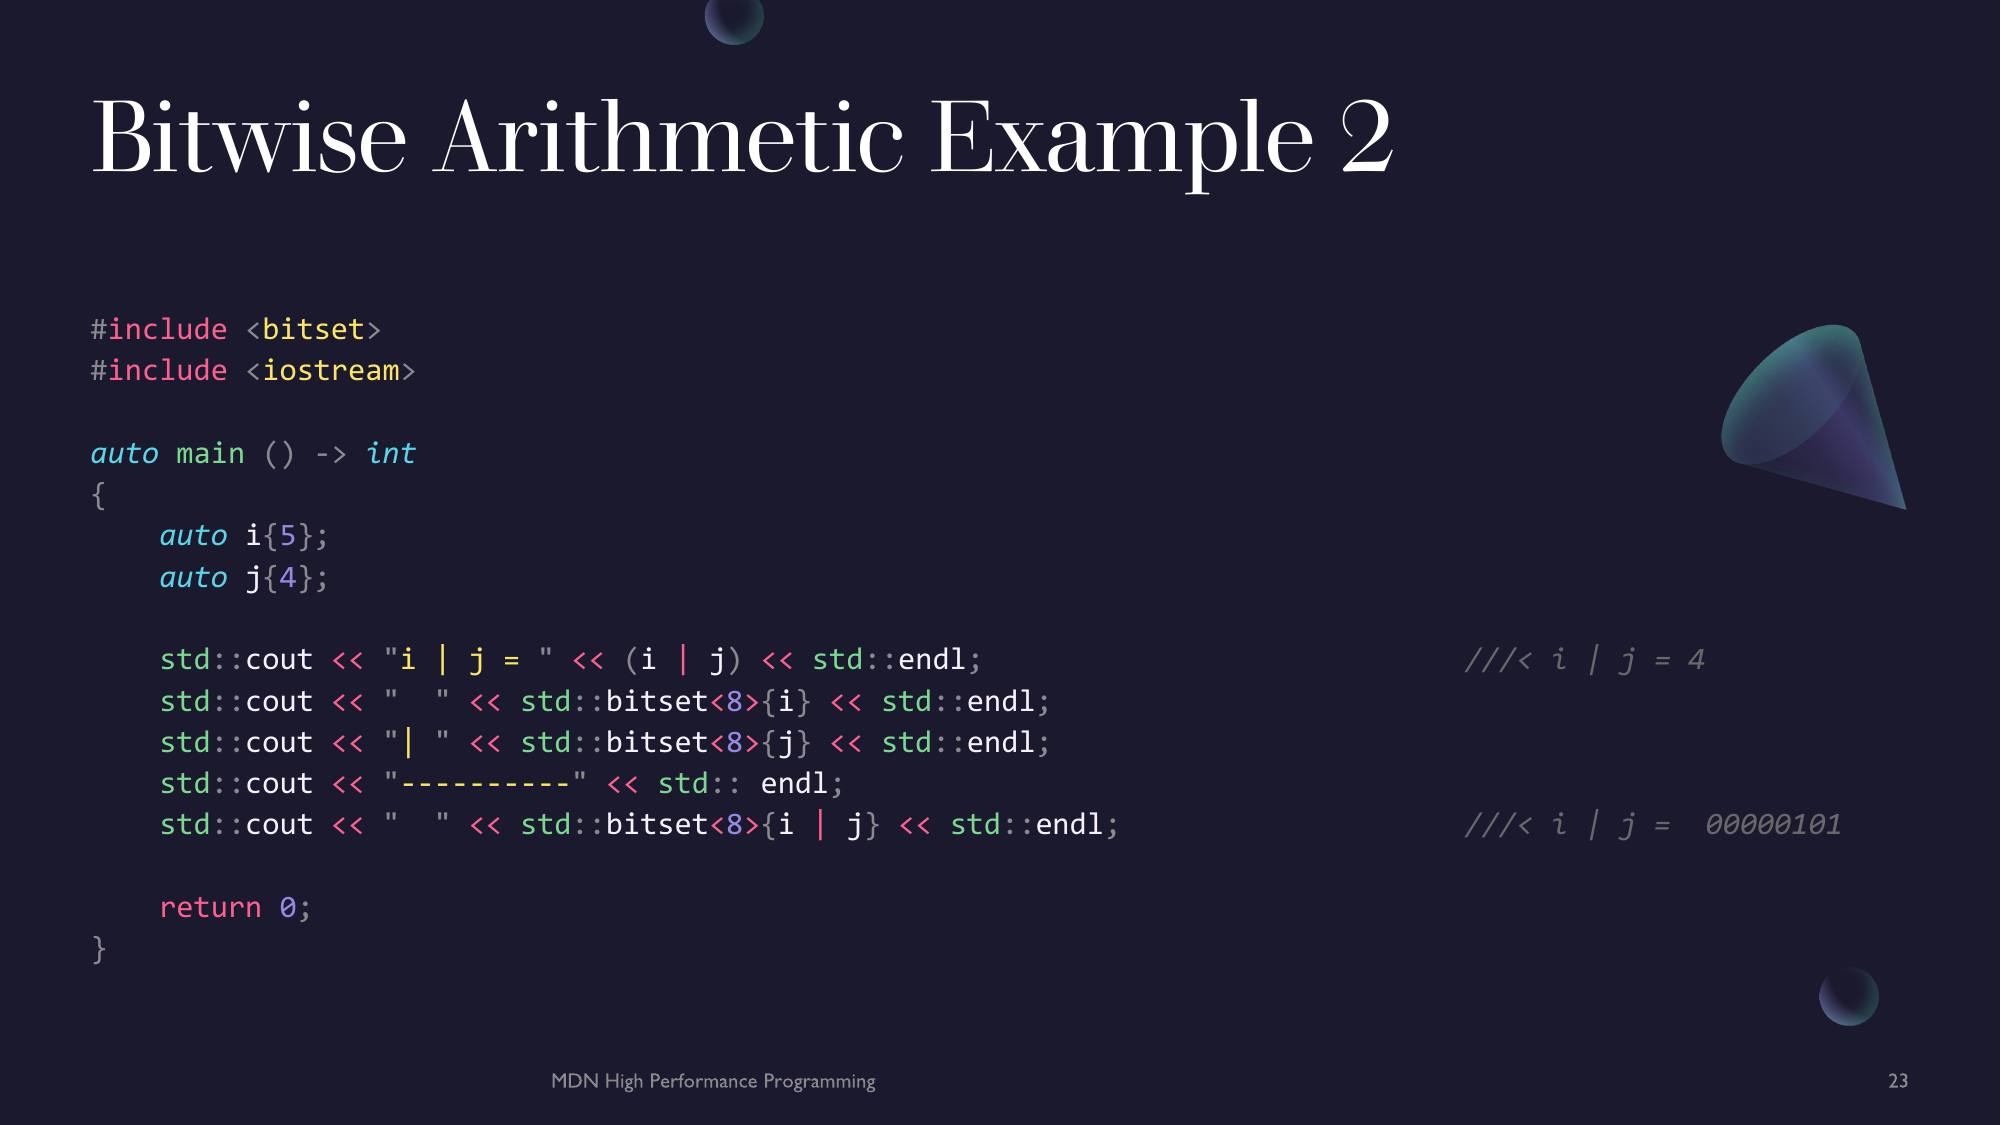
#include <bitset>
#include <iostream>
auto main () -> int
{
auto i{5};
auto j{4};
std::cout << "i & j = " << (i & j) << std::endl; ///< i & j = 4
std::cout << " " << std::bitset<8>{i} << std::endl;
std::cout << "& " << std::bitset<8>{j} << std::endl;
std::cout << "----------" << std:: endl;
std::cout << " " << std::bitset<8>{i & j} << std::endl; ///< i & j = 00000100
std::cout << "i | j = " << (i | j) << std::endl; ///< i | j = 4
std::cout << " " << std::bitset<8>{i} << std::endl;
std::cout << "| " << std::bitset<8>{j} << std::endl;
std::cout << "----------" << std:: endl;
std::cout << " " << std::bitset<8>{i | j} << std::endl; ///< i | j = 00000101
std::cout << "i ^ j = " << (i ^ j) << std::endl; ///< i ^ j = 4
std::cout << " " << std::bitset<8>{i} << std::endl;
std::cout << "^ " << std::bitset<8>{j} << std::endl;
std::cout << "----------" << std:: endl;
std::cout << " " << std::bitset<8>{i ^ j} << std::endl; ///< i ^ j = 00000001
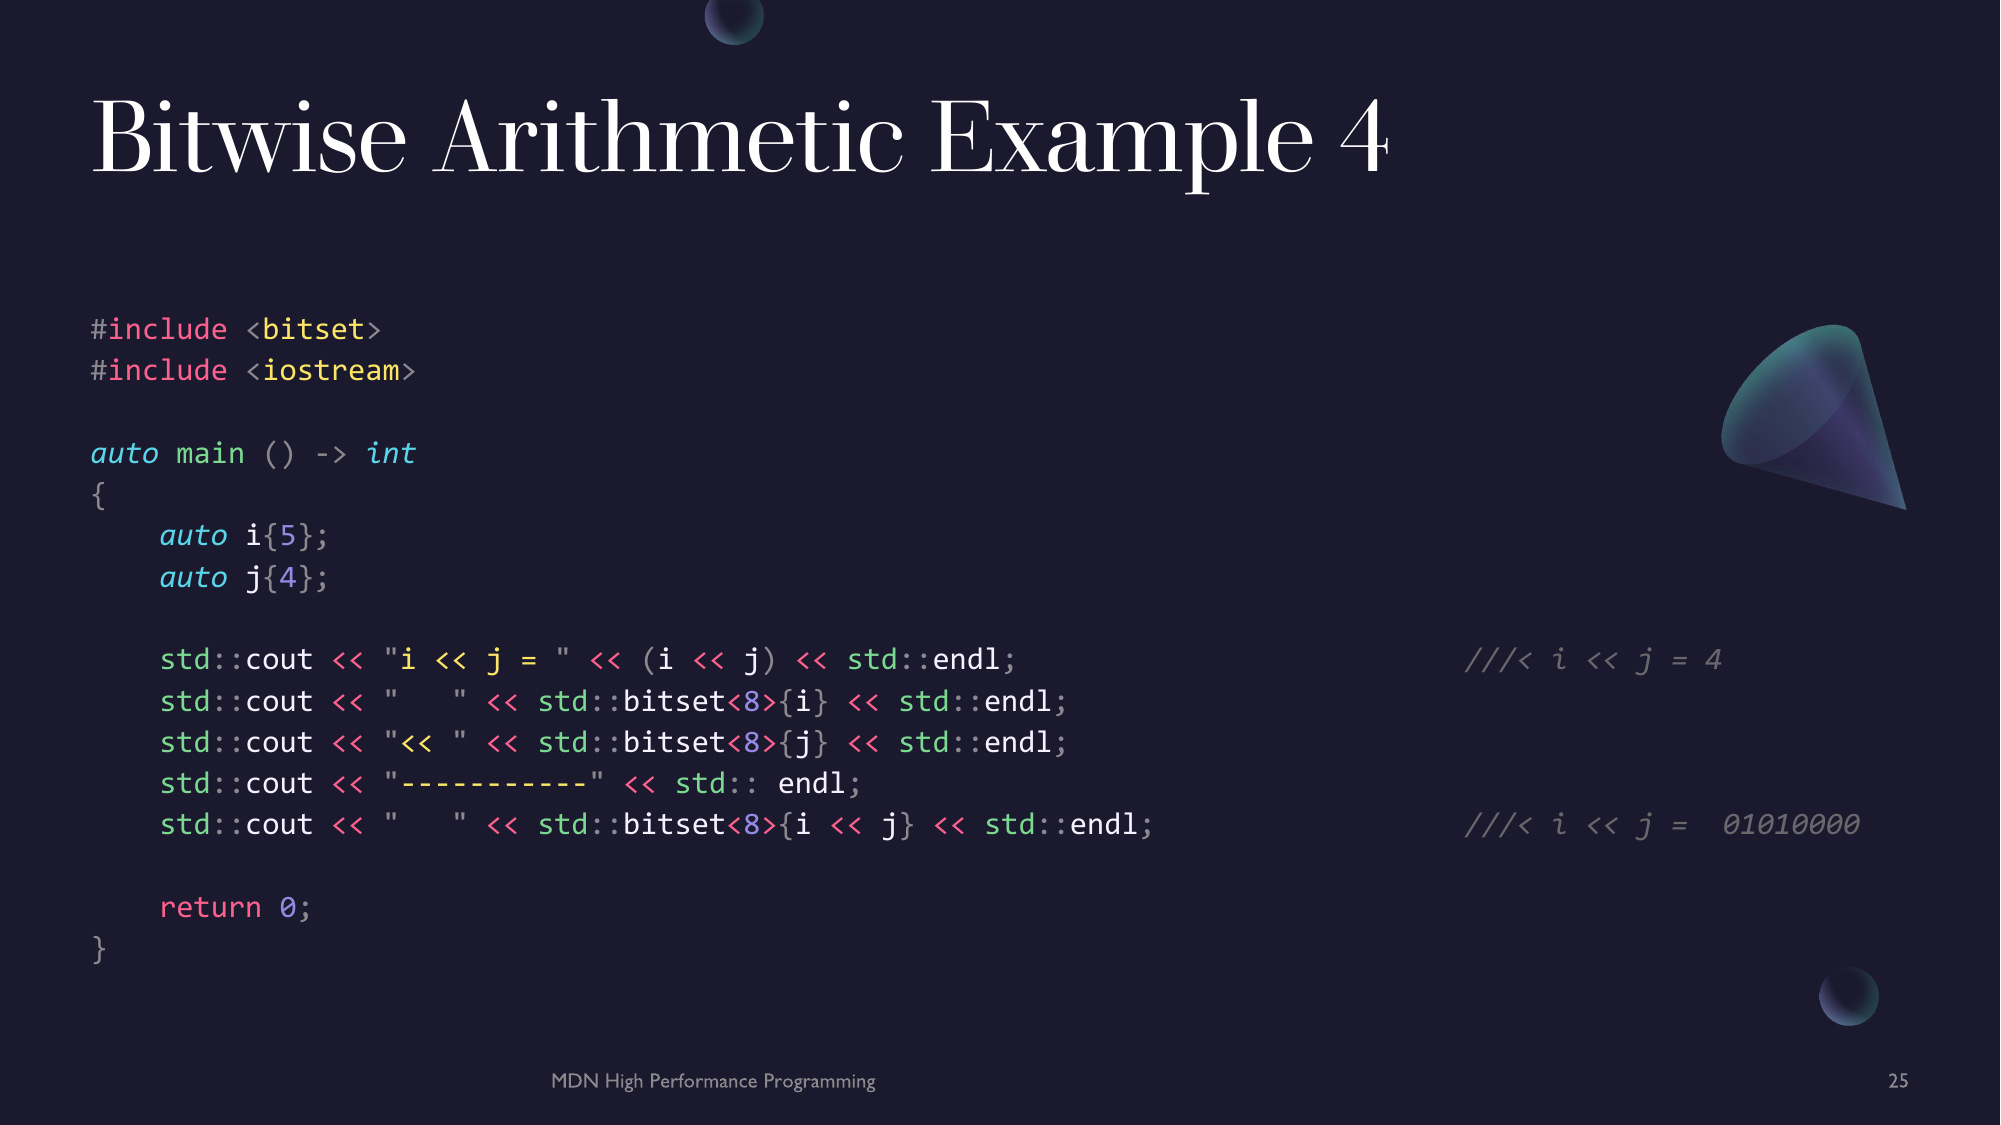
std::cout << "i << j = " << (i << j) << std::endl; ///< i << j = 4
std::cout << " " << std::bitset<8>{i} << std::endl;
std::cout << "<< " << std::bitset<8>{j} << std::endl;
std::cout << "-----------" << std:: endl;
std::cout << " " << std::bitset<8>{i << j} << std::endl; ///< i << j = 01010000
std::cout << "i >> j = " << (i >> j) << std::endl; ///< i >> j = 4
std::cout << " " << std::bitset<8>{i} << std::endl;
std::cout << ">> " << std::bitset<8>{j} << std::endl;
std::cout << "-----------" << std:: endl;
std::cout << " " << std::bitset<8>{i >> j} << std::endl; ///< i >> j = 00000000
return 0;
}
A bit about shift operations
For the shift operations, the general pattern is as follows <shifted> <shift-op> <additive>. This means the value that is being shifted is always on the left-hand-side and is always shifted by the number indicated on the right-hand-side. For left-shifts, the bit pattern is moved N spot to the left, pushing zeros at the end of the right side and popping any bit off the left end. For right shifts, the opposite occurs. The bit pattern is move right by N spots, popping any bit off the right end and push the same bit as the sign bit of the number being shifted (1's if negative and 0's if positive).
Arithmetic Assignment
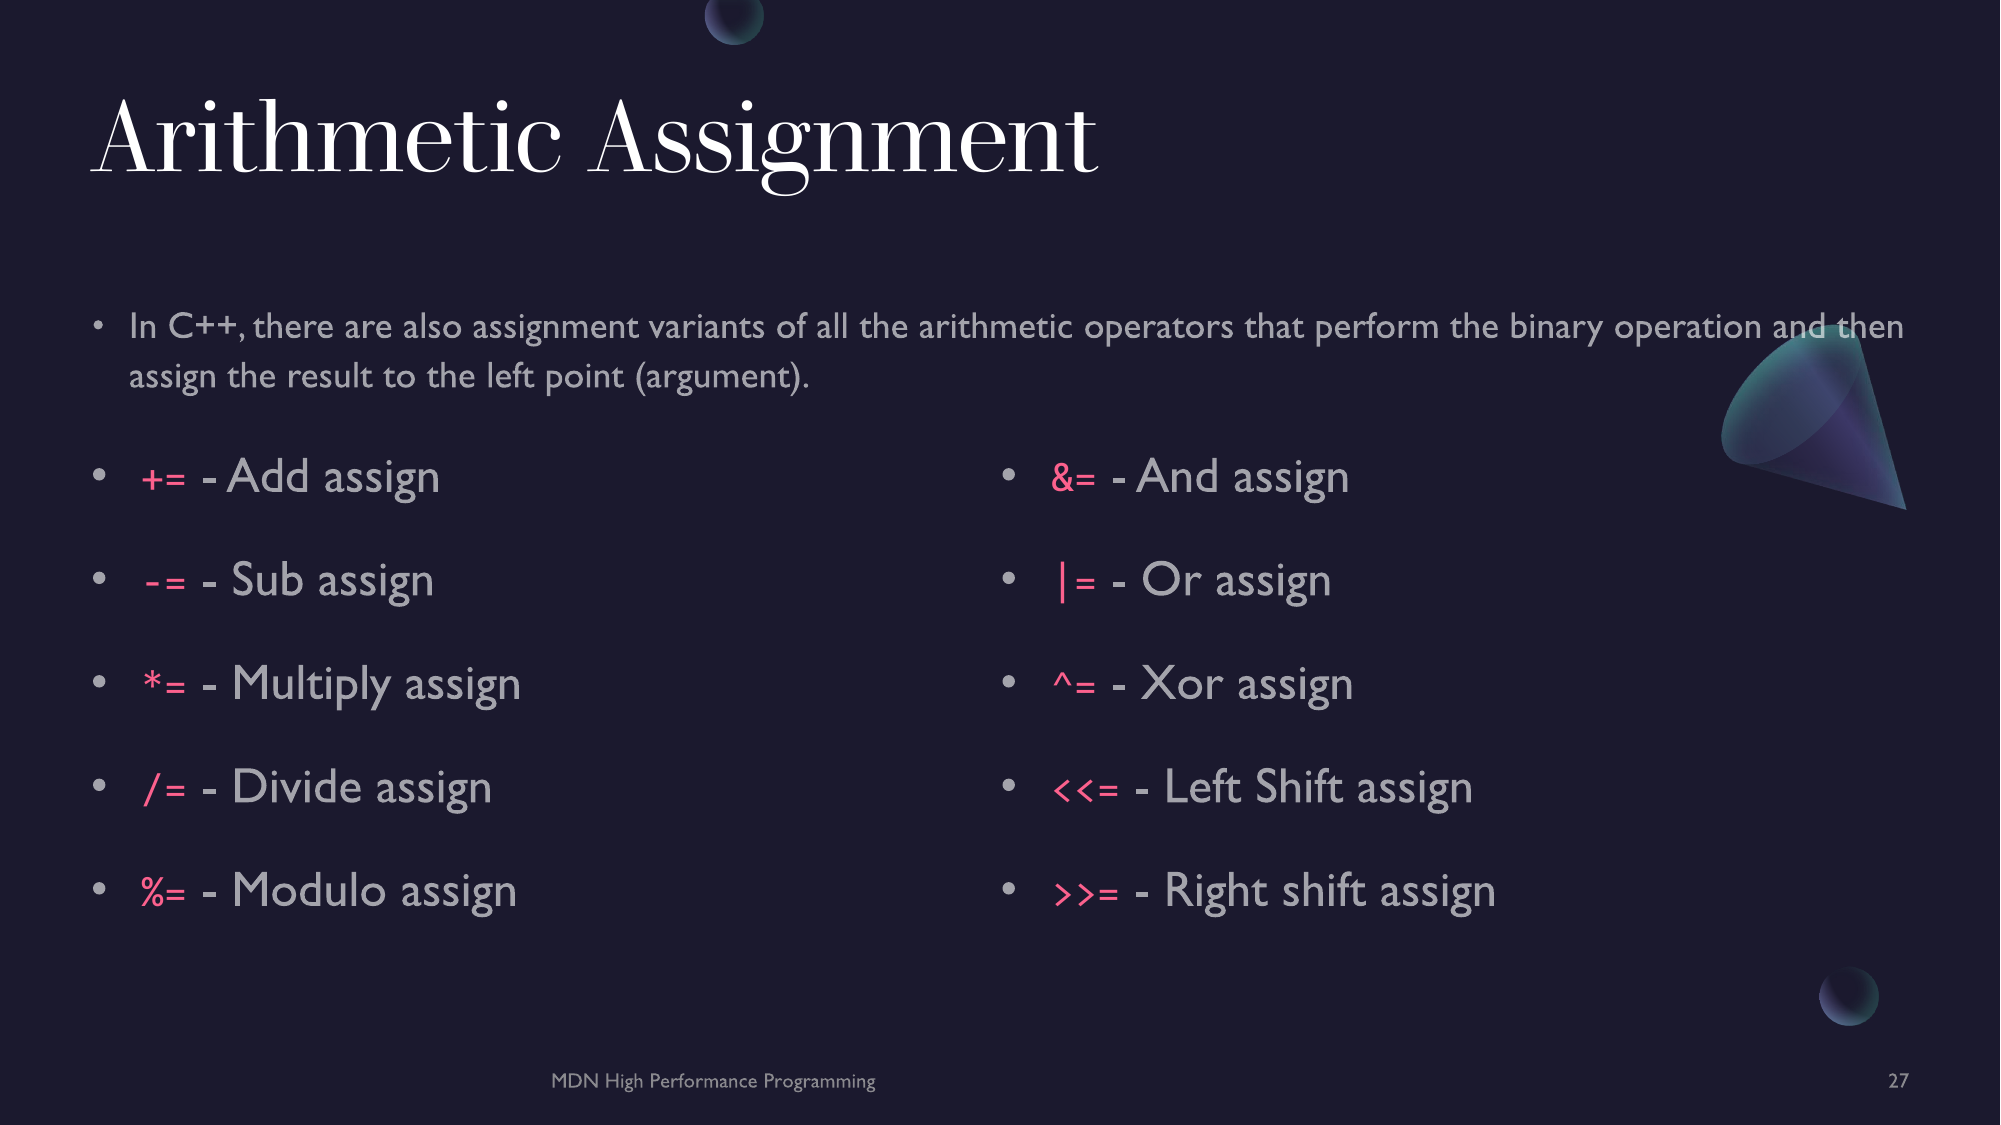
There is one final set of arithmetic operators in C++. These are the arithmetic assignment operators. These will perform the operation between two points and assign the result to the left point.
+=- Add assign -a = a + b == a += b-=- Subtract assign -a = a - b == a -= b*=- Multiply assign -a = a * b == a *= b/=- Divide assign -a = a / b == a /= b%=- Modulo assign -a = a % b == a %= b&=- And assign -a = a & b == a &= b|=- Or assign -a = a | b == a |= b^=- Xor assign -a = a ^ b == a ^= b<<=- Left-shift assign -a = a << b == a <<= b>>=- Right-shift assign -a = a >> b == a >>= b
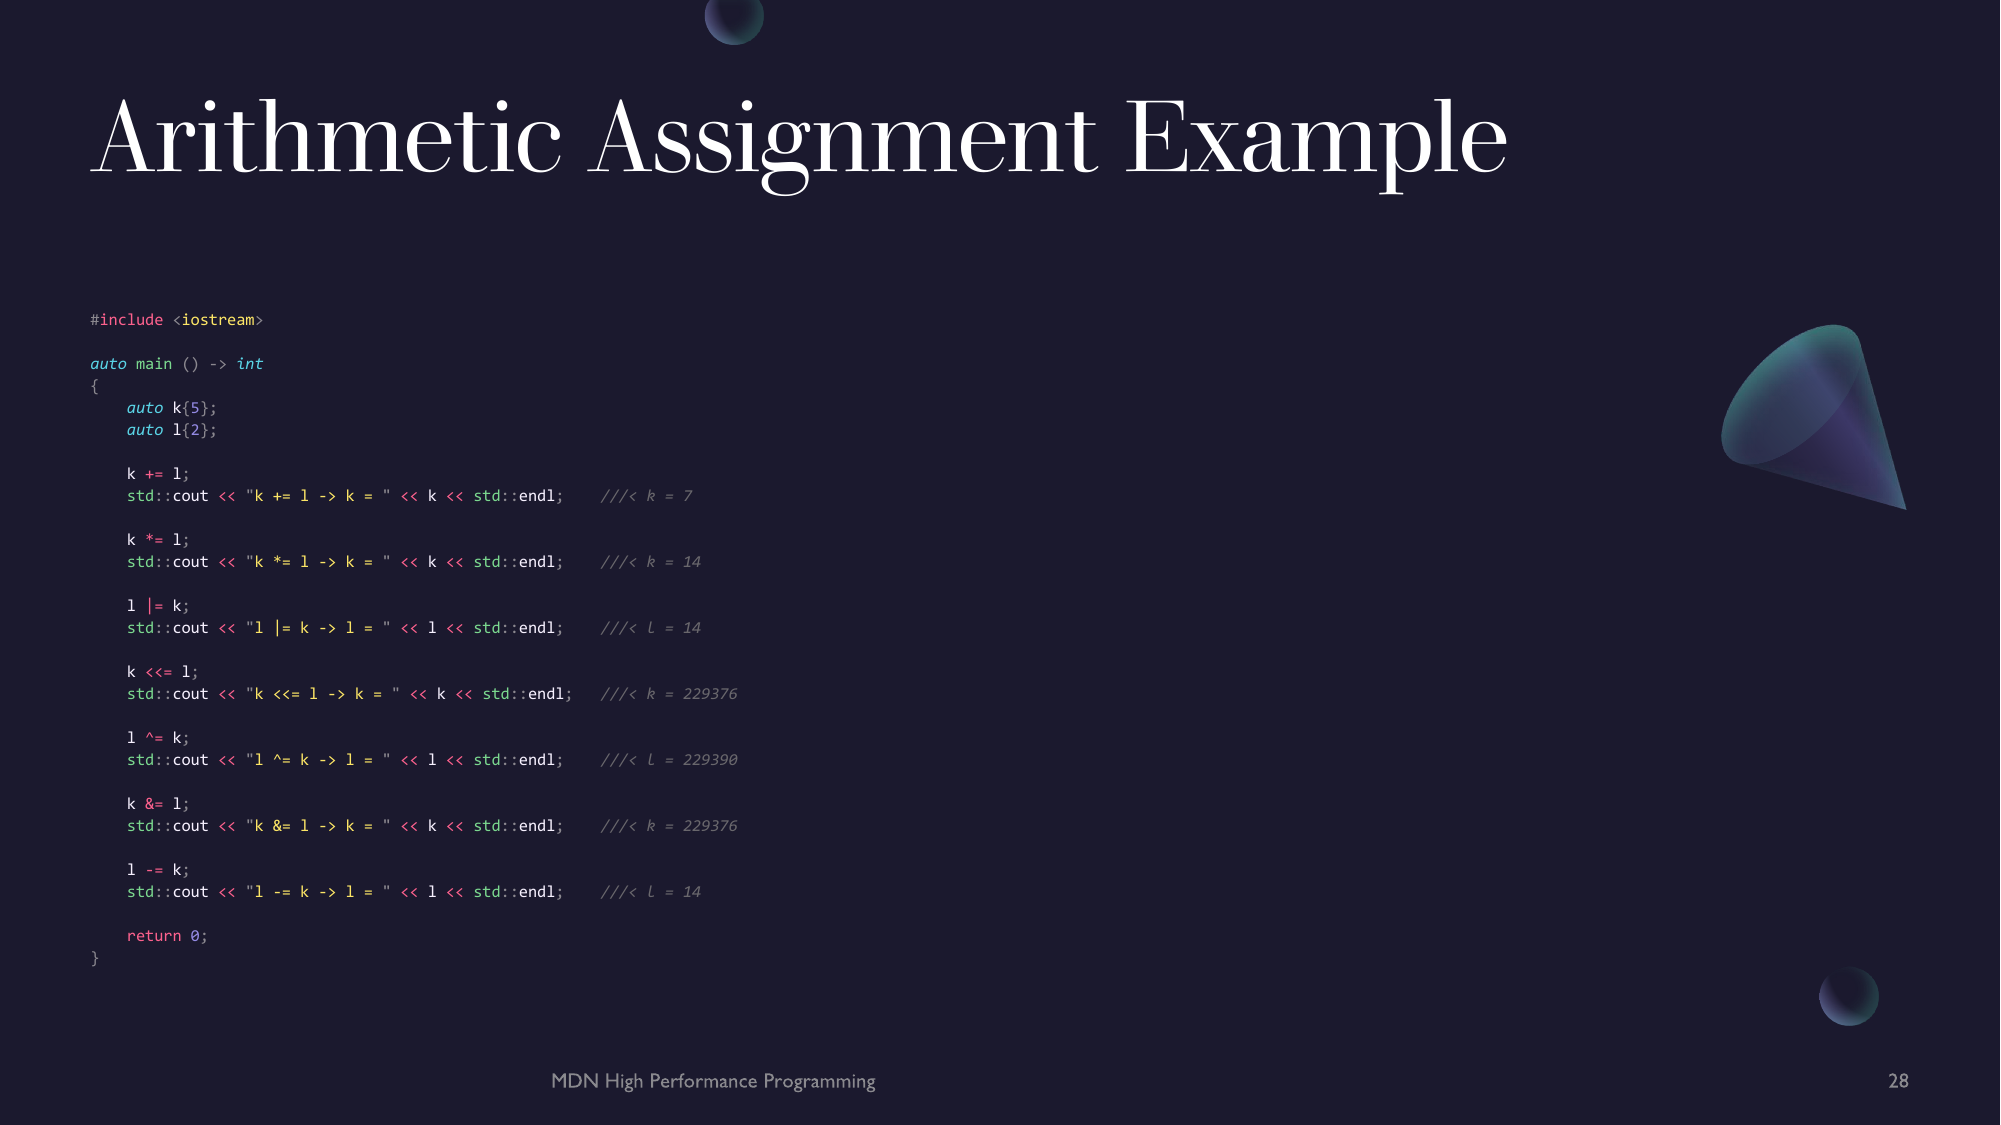
#include <iostream>

auto main () -> int
{
    auto k{5};
    auto l{2};

    k += l;
    std::cout << "k += l -> k = " << k << std::endl;    ///< k = 7

    k *= l;
    std::cout << "k *= l -> k = " << k << std::endl;    ///< k = 14

    l |= k;
    std::cout << "l |= k -> l = " << l << std::endl;    ///< l = 14

    k <<= l;
    std::cout << "k <<= l -> k = " << k << std::endl;   ///< k = 229376

    l ^= k;
    std::cout << "l ^= k -> l = " << l << std::endl;    ///< l = 229390

    k &= l;
    std::cout << "k &= l -> k = " << k << std::endl;    ///< k = 229376

    l -= k;
    std::cout << "l -= k -> l = " << l << std::endl;    ///< l = 14

    return 0;
}
Have a play with these operators and try and perform some computations that you might do in another languages.
Size Operator
Another useful operator is the sizeof and sizeof... operator. It returns the number of bytes if a type parameter pack (more on parameter packs later).
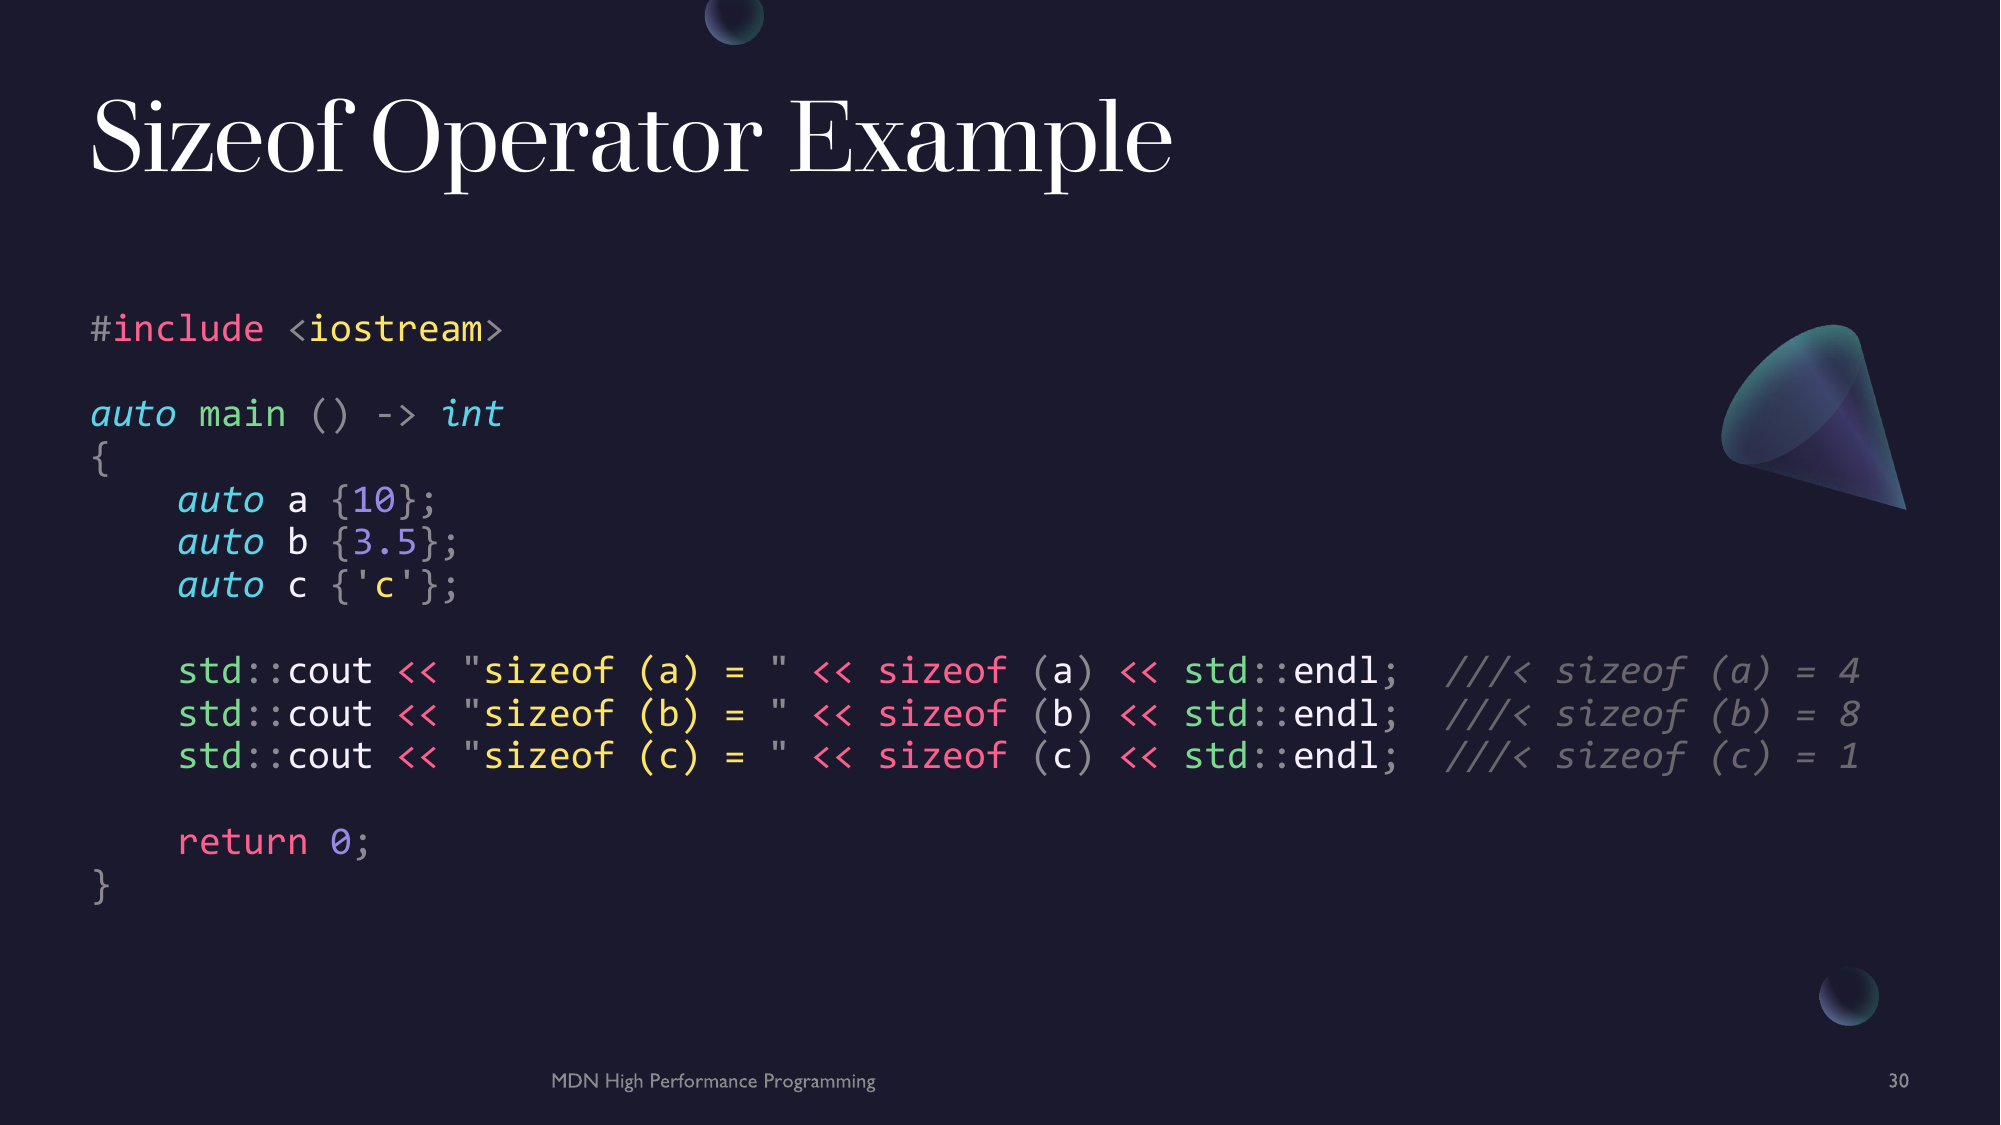
#include <iostream>

auto main () -> int
{
    auto a {10};
    auto b {3.5};
    auto c {'c'};

    std::cout << "sizeof (a) = " << sizeof (a) << std::endl;  ///< sizeof (a) = 4
    std::cout << "sizeof (b) = " << sizeof (b) << std::endl;  ///< sizeof (b) = 8
    std::cout << "sizeof (c) = " << sizeof (c) << std::endl;  ///< sizeof (c) = 1

    return 0;
}
IO
IO means input and output. IO operations are used to consume or emit data at the boundary of a program. This allows for a program to interact with the outside would, including writing or reading from the console, displaying graphics, capturing images etc. In C++, almost all of the IO is performed through streams.
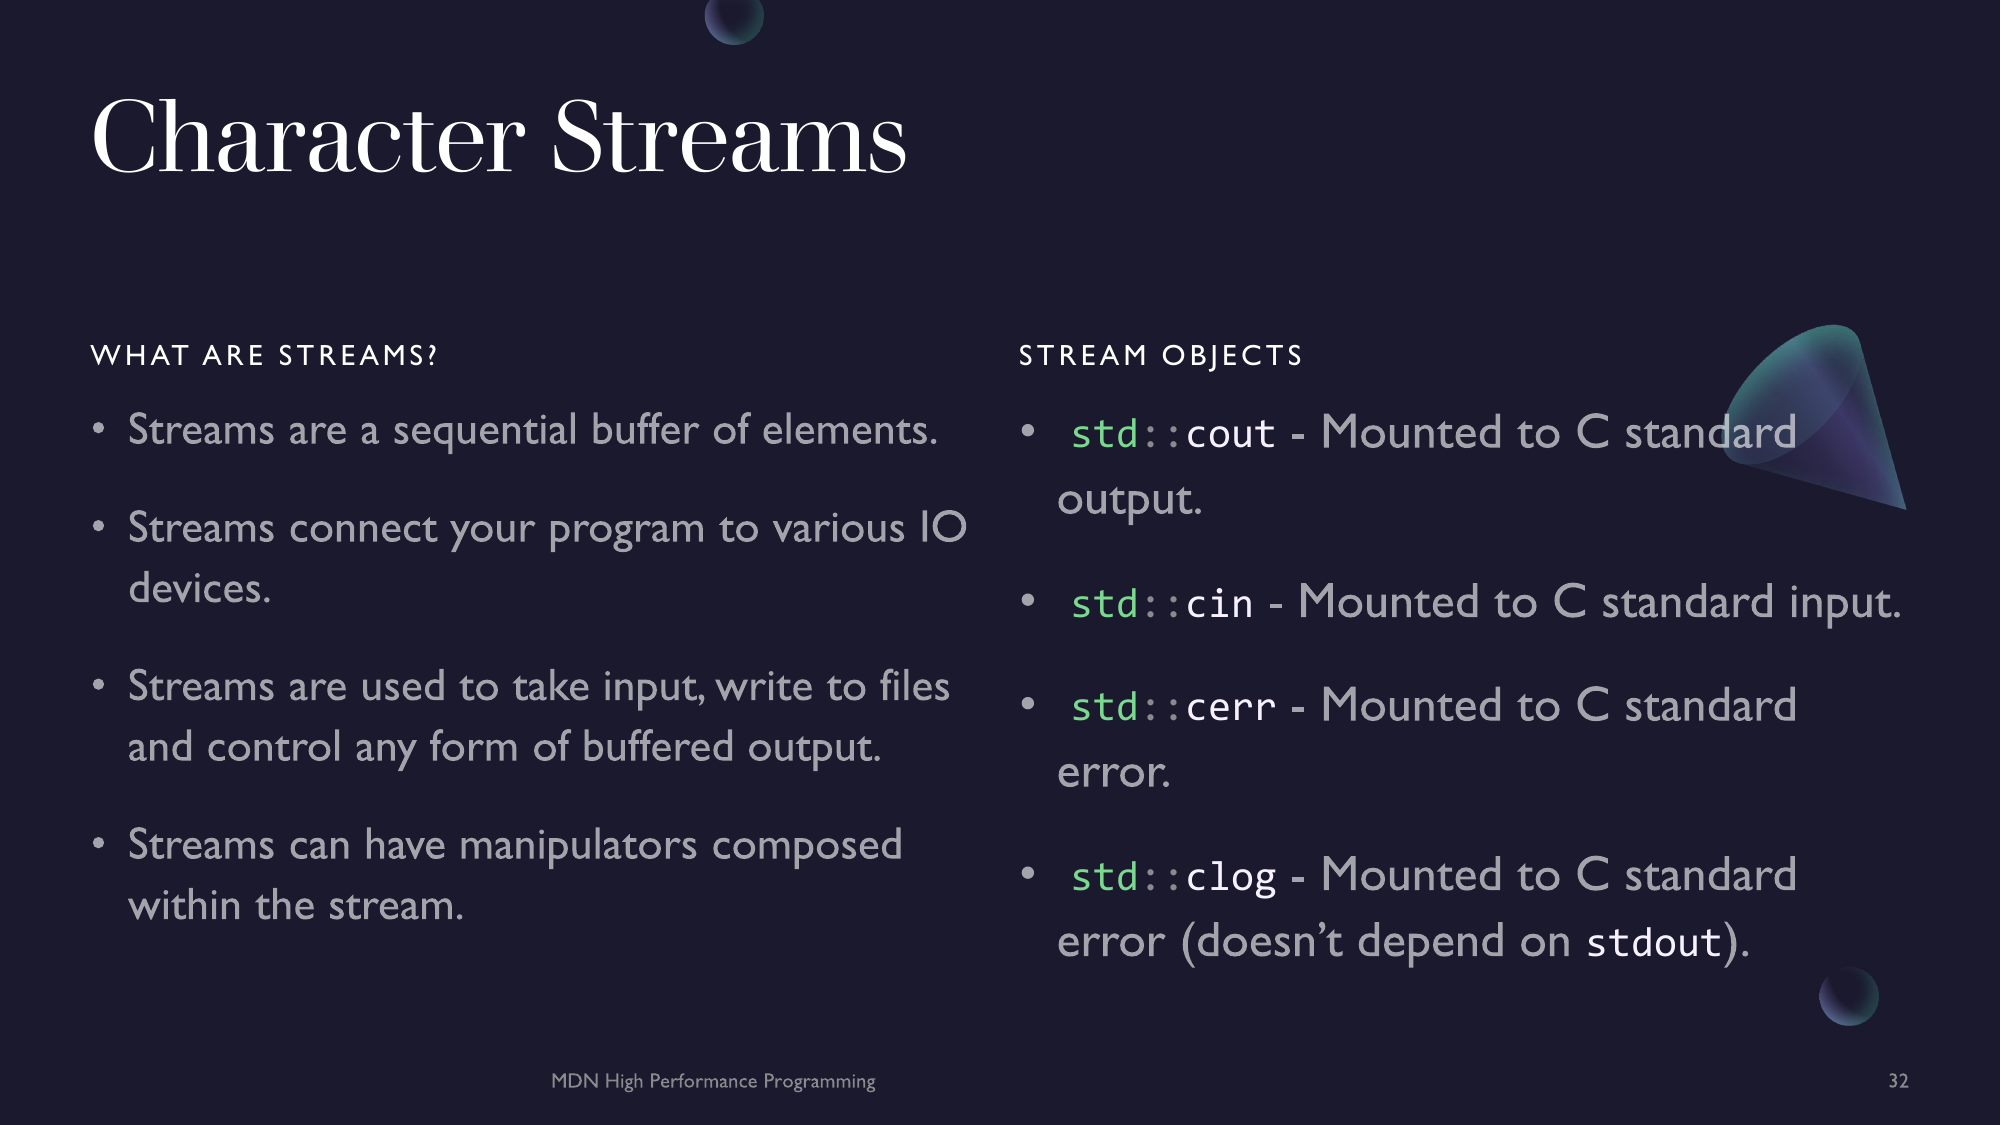
What is a stream?
What is a stream. A stream is a sequence of an indeterminate amount of data connecting a source to a destination. In C++, streams are used to connect a perform a variety of IO operations. You have already used on of these streams in C++, this is of course std::cout.
C Standard Streams
In C++ there are a few pre-defined stream objects. This are mounted to the the C languages stdout, stdin and stderr. These output devices are how C (and these stream objects) connect to the terminal screen and keyboard of your device.
std::cin- Output stream to C'sstdinstd::cout- Output stream to C'sstdoutstd::cerr- Output stream to C'sstderr(dependent onstdout)std::clog- Output stream to C'sstderr(not dependent onstdout)
These are pre-existing objects of the type std::istream and std::ostream respectively. The use of streams allows for C++ developer to have a uniform way of addressing different IO devices. In particular the << operator is available to all streams types allowing for similar usage of streams that may be mounted to alternative IO devices, eg. files, graphics card, cameras etc.
All stream objects and types are found in the <iostream> header.
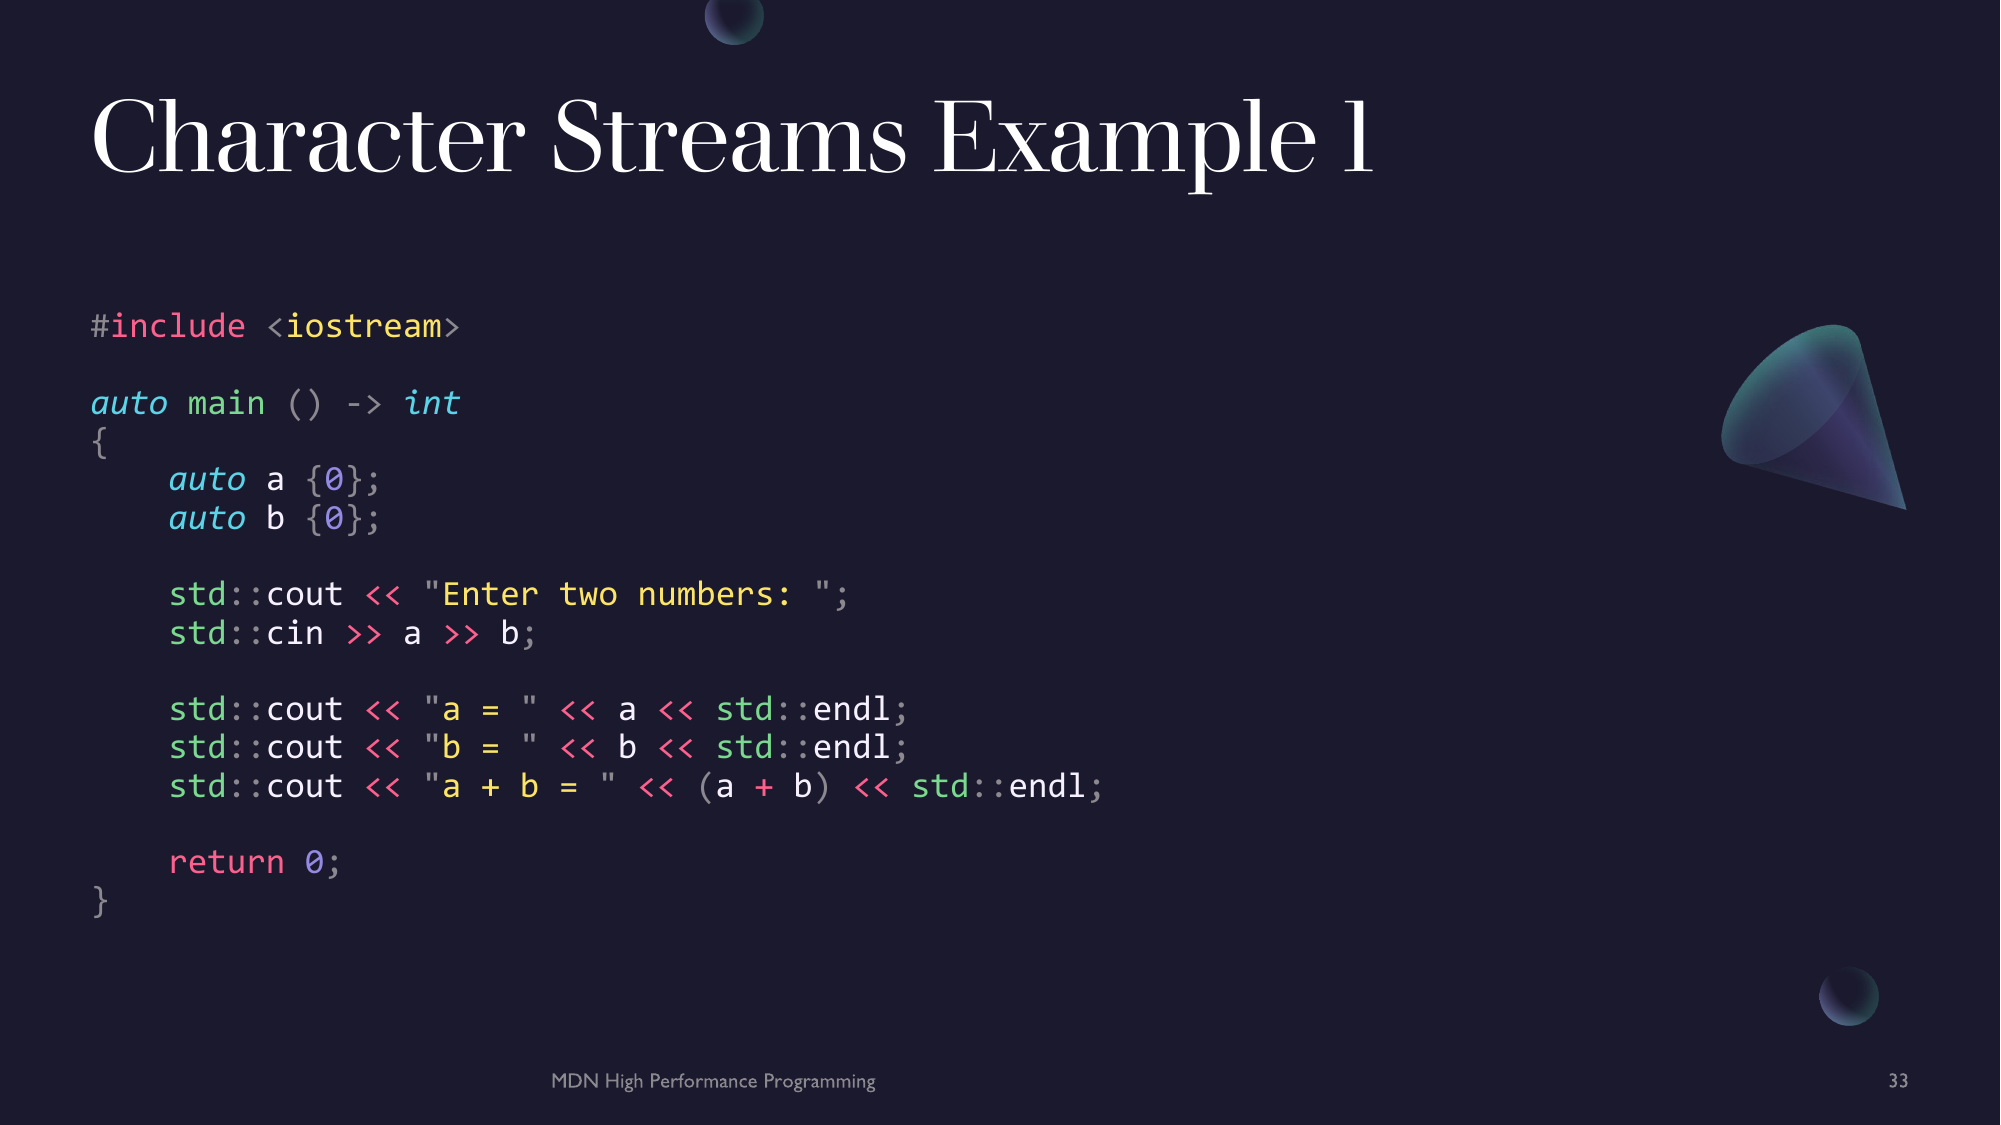
Input
We have seen how to print stuff to the console but how do we get input? There are two ways. One uses the stream directly with the >> operator while the other defers using a function call. We will only look at the direct usage for now.
#include <iostream>

auto main () -> int
{
    auto a {0};
    auto b {0};

    std::cout << "Enter two numbers: ";
    std::cin >> a >> b;

    std::cout << "a = " << a << std::endl;
    std::cout << "b = " << b << std::endl;
    std::cout << "a + b = " << (a + b) << std::endl;

    return 0;
}
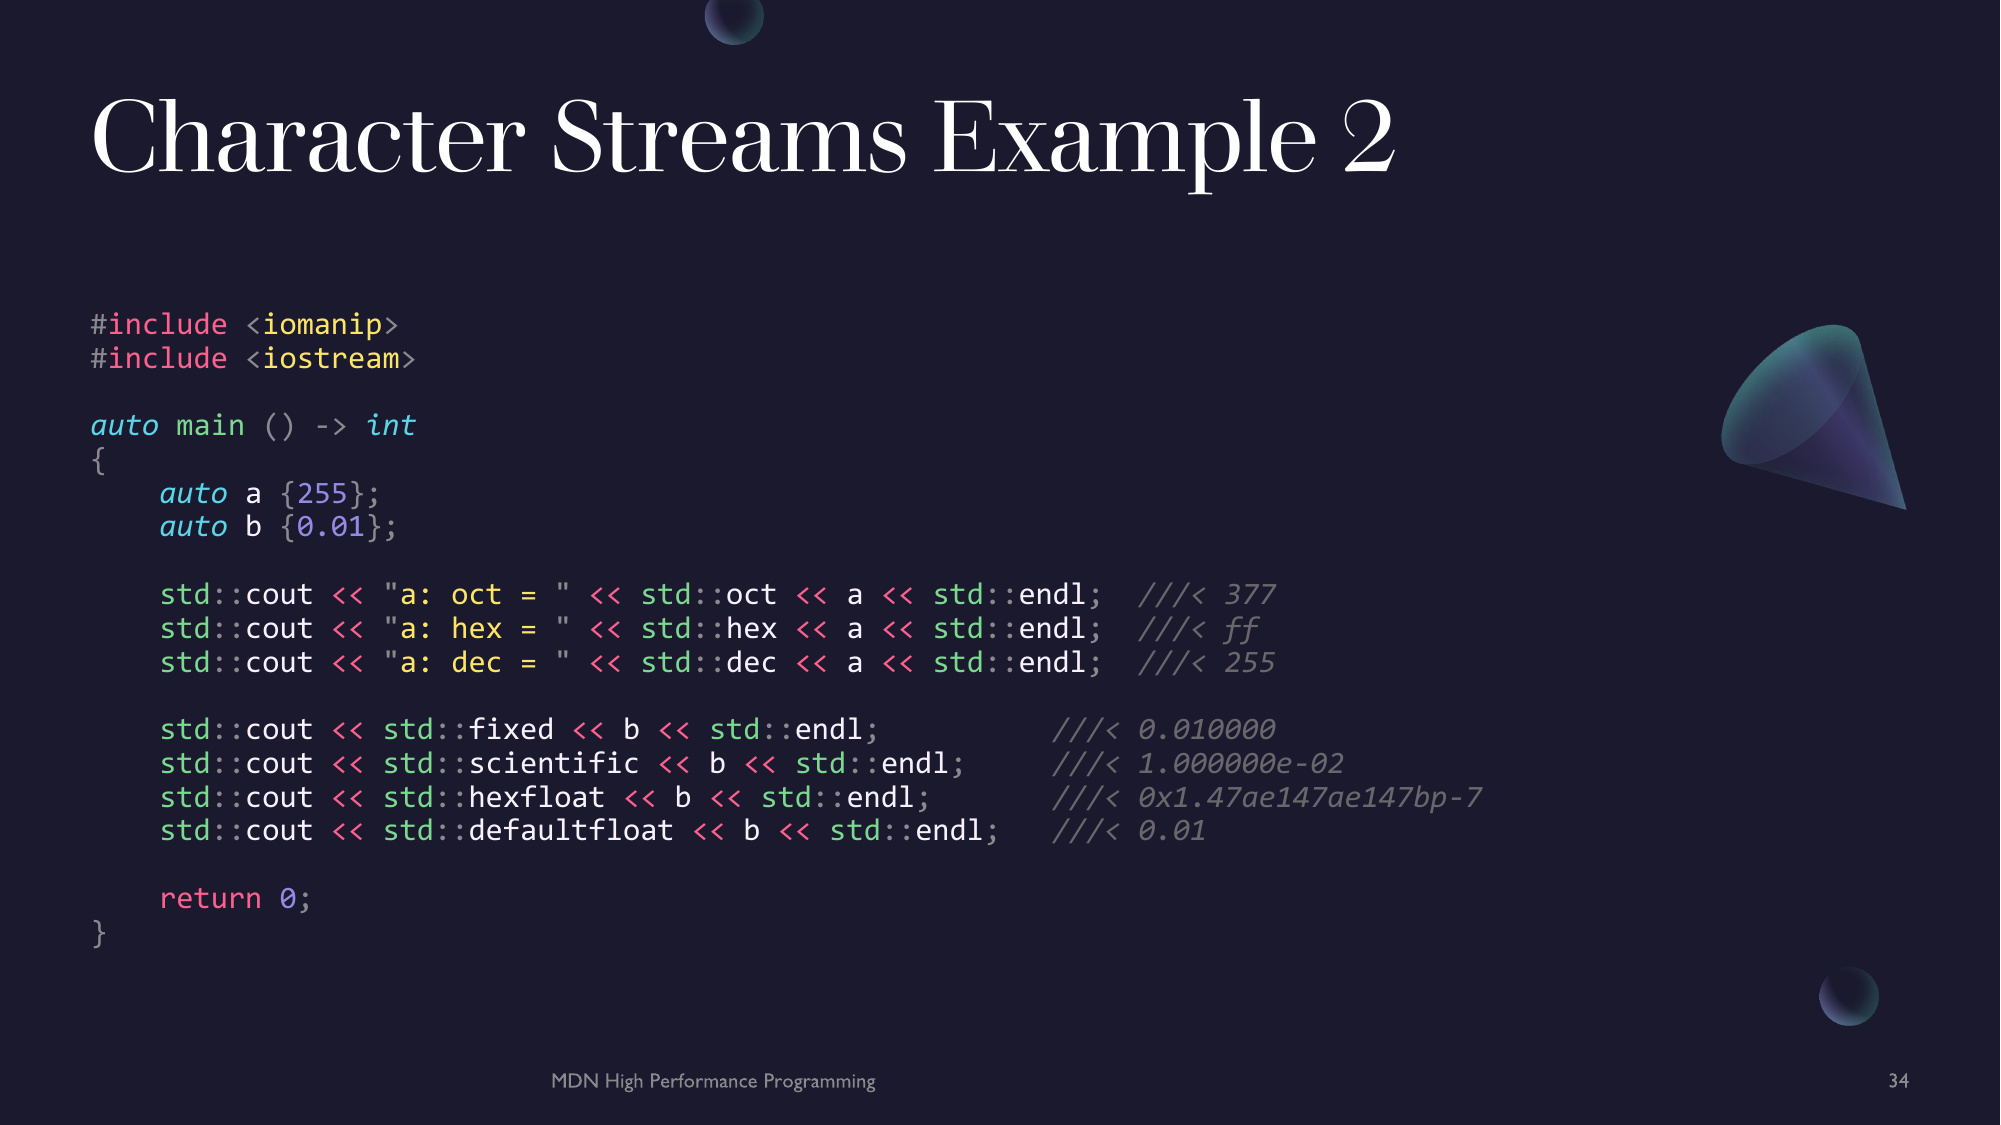
IO Manipulators
Because streams are used for IO operations in C++, they are naturally composable, allowing for the streams manipulation mid-stream. The C++ standard library has a variety of manipulators that allow you to change a streams format. Manipulators are found in the <iomanip> header.
#include <iomanip>
#include <iostream>

auto main () -> int
{
    auto a {255};
    auto b {0.01};

    std::cout << "a: oct = " << std::oct << a << std::endl;  ///< 377
    std::cout << "a: hex = " << std::hex << a << std::endl;  ///< ff
    std::cout << "a: dec = " << std::dec << a << std::endl;  ///< 255

    std::cout << std::fixed << b << std::endl;          ///< 0.010000
    std::cout << std::scientific << b << std::endl;     ///< 1.000000e-02
    std::cout << std::hexfloat << b << std::endl;       ///< 0x1.47ae147ae147bp-7
    std::cout << std::defaultfloat << b << std::endl;   ///< 0.01

    return 0;
}
Equality, Ordering and Logical Operators
The notion of equality and ordering is a common principle in Computer Science. It allows for data to be verified, organised and sorted. This fundamental principles underpin a lot of programming. C++ has many facilities not just for testing equality or ordering of types, value and other entities but also for customizing the behaviour.
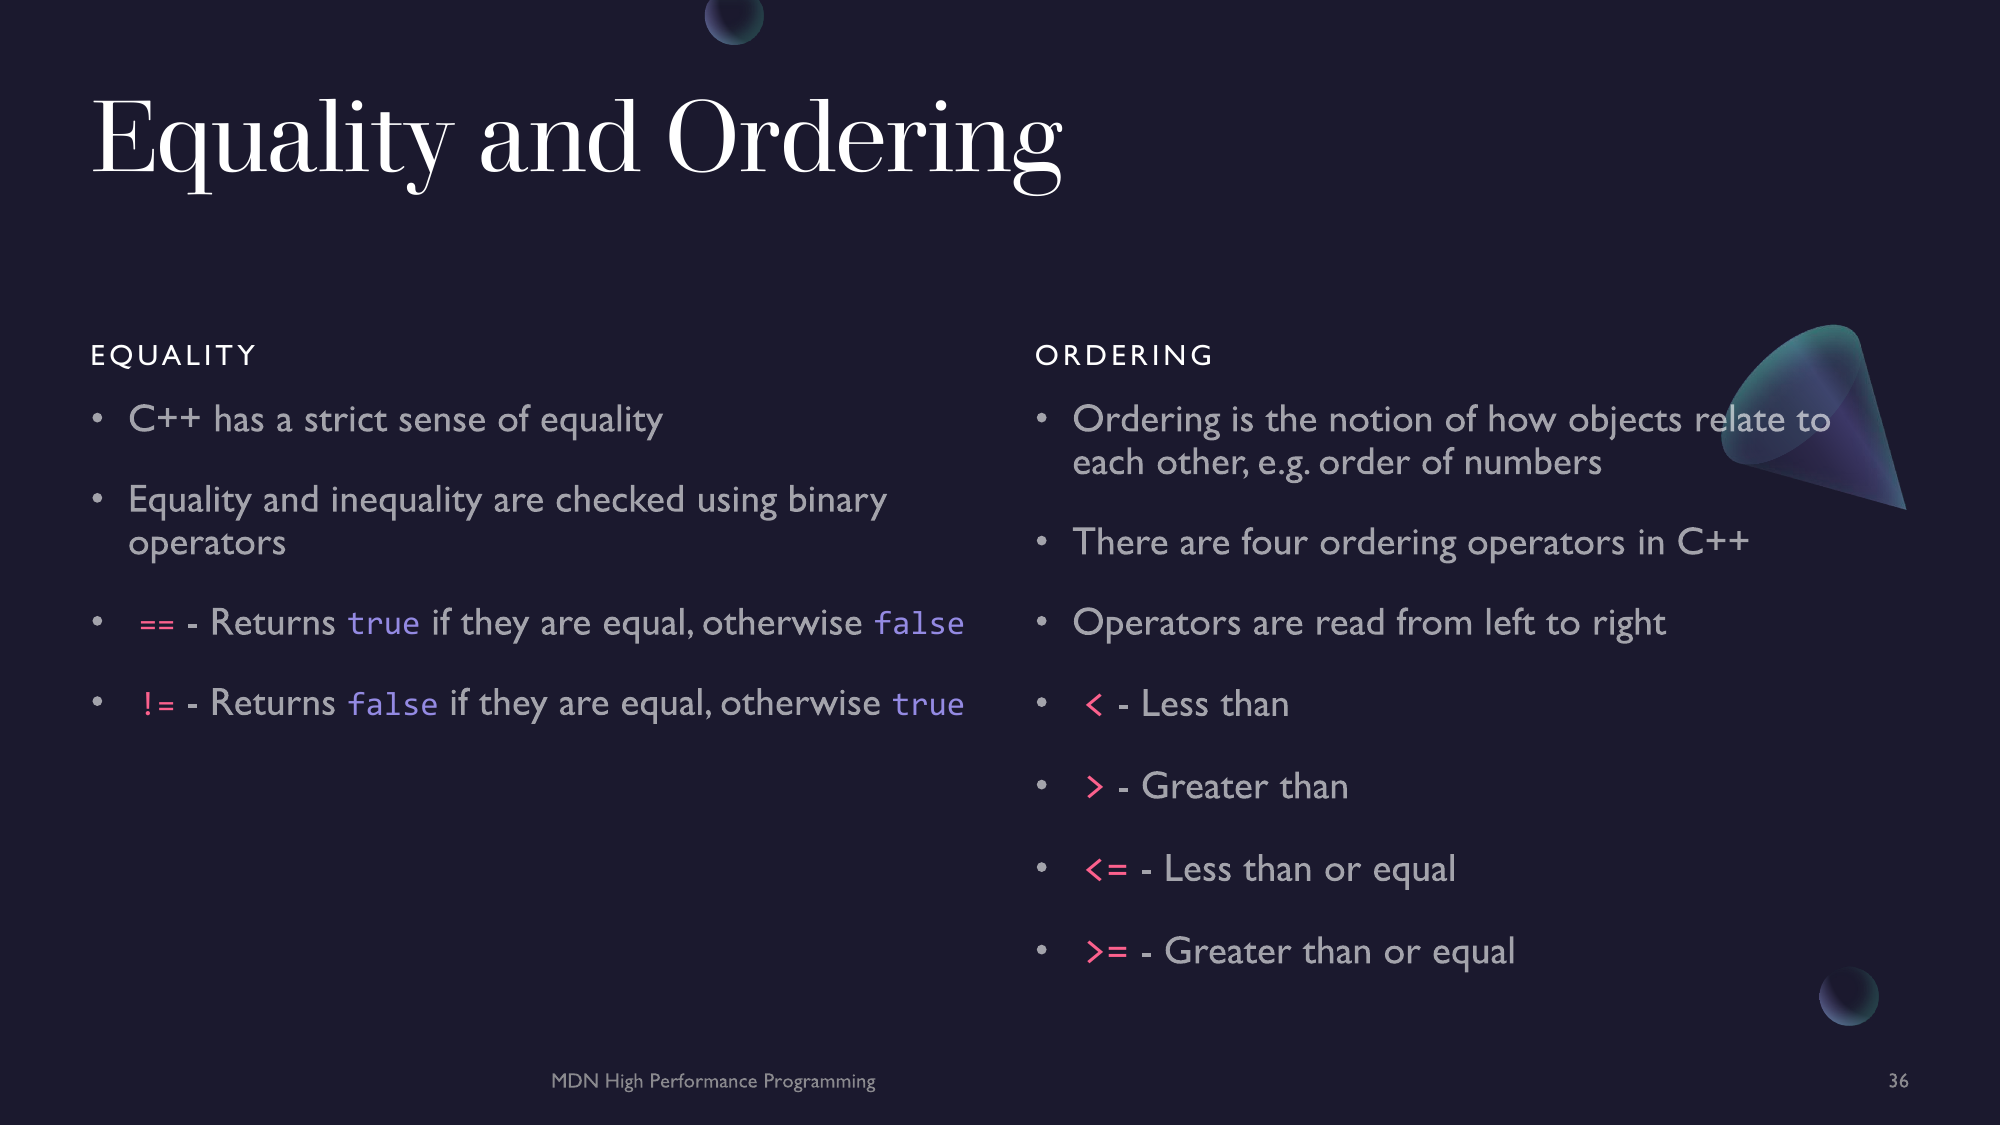
Equality
A common operation in all of programming is to test for equality. In C++ primitive types are compared as arithmetic types, that is the systems ALU (Arithmetic and Logic Unit) will compare the bits of a value and return to the system whether the result is true or false.
Unlike JavaScript, C++ has a sense of strictly equal, that is two values are either equal or are not. To compare for equality or inequality of two values, C++ has the == and != operators respectively.
a == b-trueifaequalsbotherwisefalsea != b-falseifaequalsbotherwisetrue
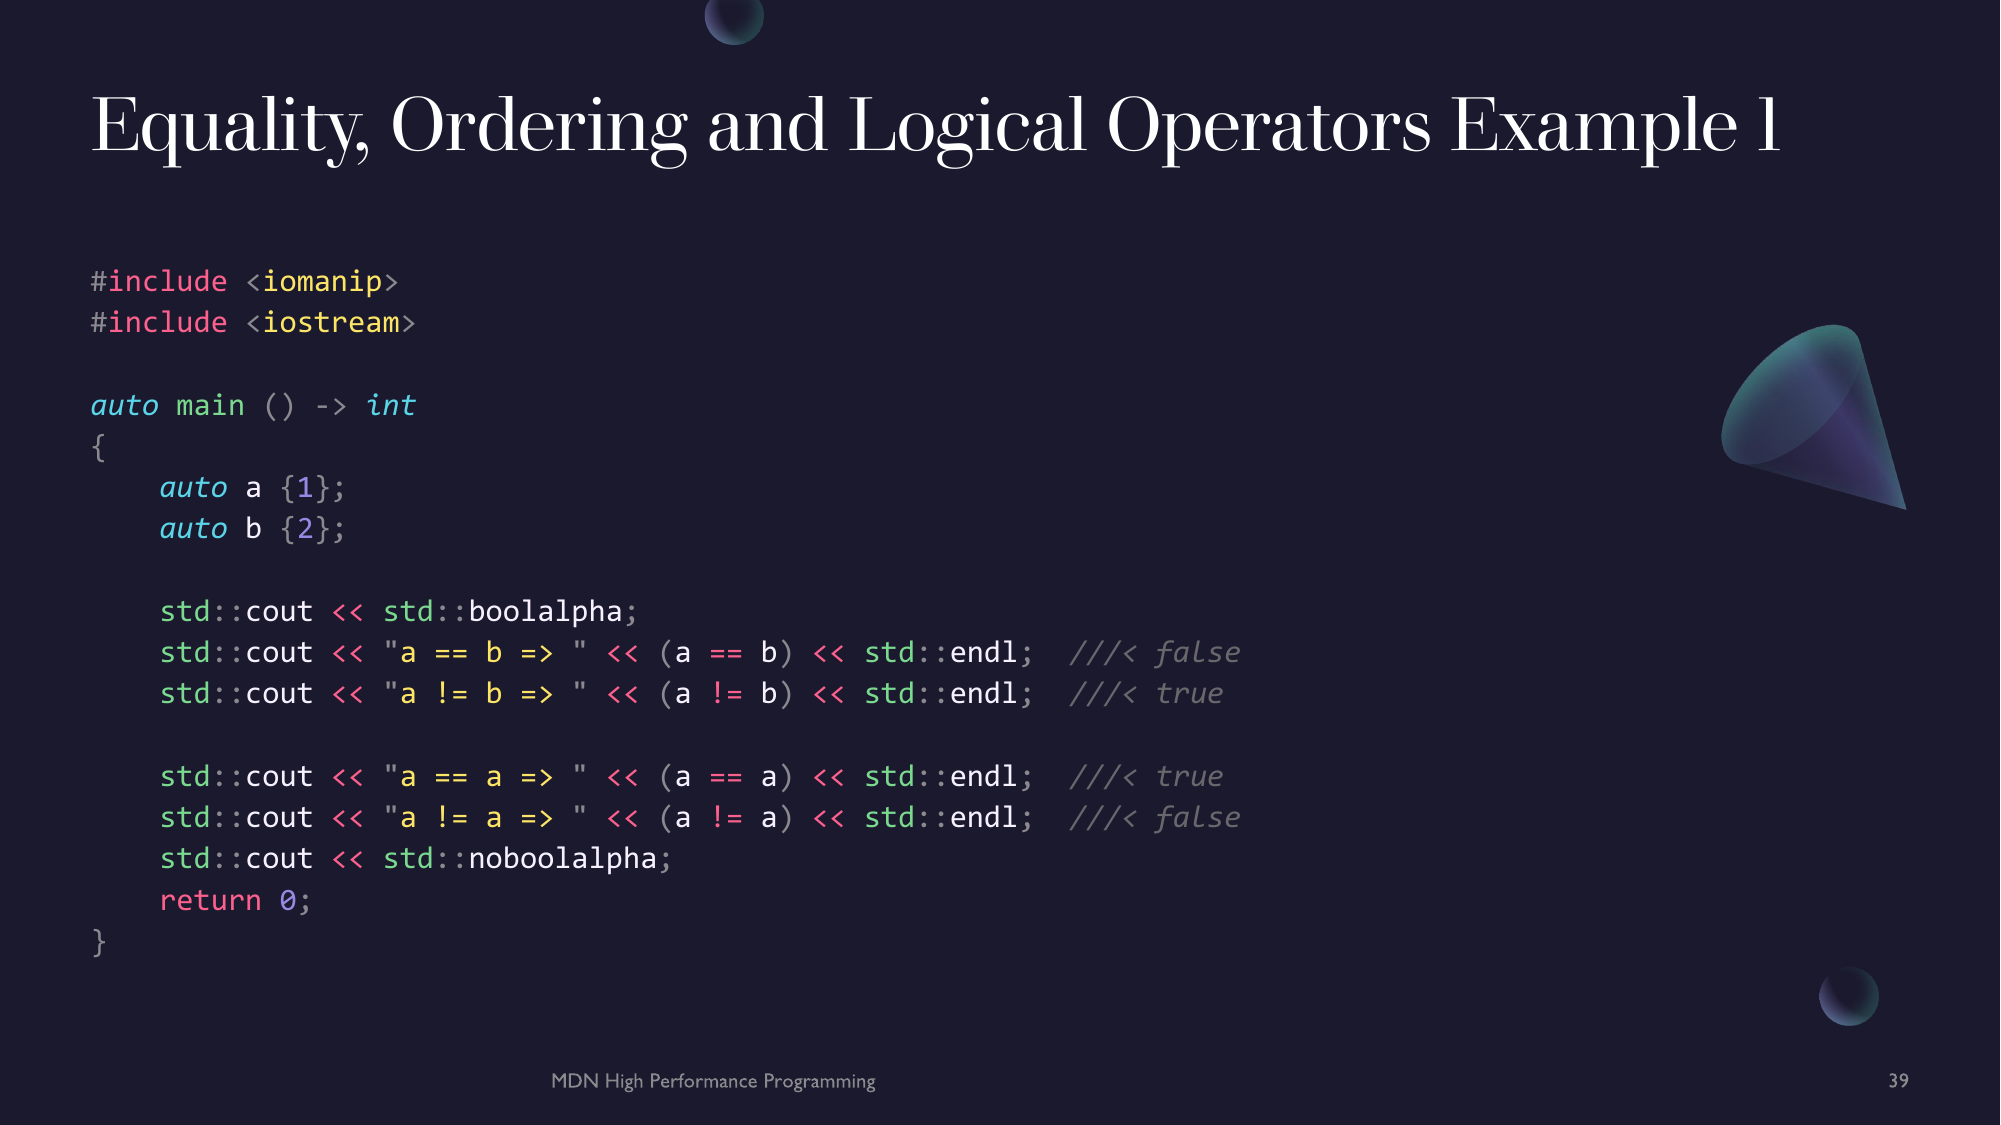
#include <iomanip>
#include <iostream>

auto main () -> int
{
    auto a {1};
    auto b {2};

    std::cout << std::boolalpha;
    std::cout << "a == b => " << (a == b) << std::endl;  ///< false
    std::cout << "a != b => " << (a != b) << std::endl;  ///< true

    std::cout << "a == a => " << (a == a) << std::endl;  ///< true
    std::cout << "a != a => " << (a != a) << std::endl;  ///< false
    std::cout << std::noboolalpha;
    return 0;
}
Ordering
Checking for equality is pretty straight forward. Some more interesting operations are the ordering operators. What is ordering? Ordering is a relationship of different values of the same type. Ordering is what gives numbers their sequence (2 < 3). Ordering operators allow use to check if some ordering condition is met.
<- Less than>- Greater than<=- Less than or Equal>=- Greater than or Equal
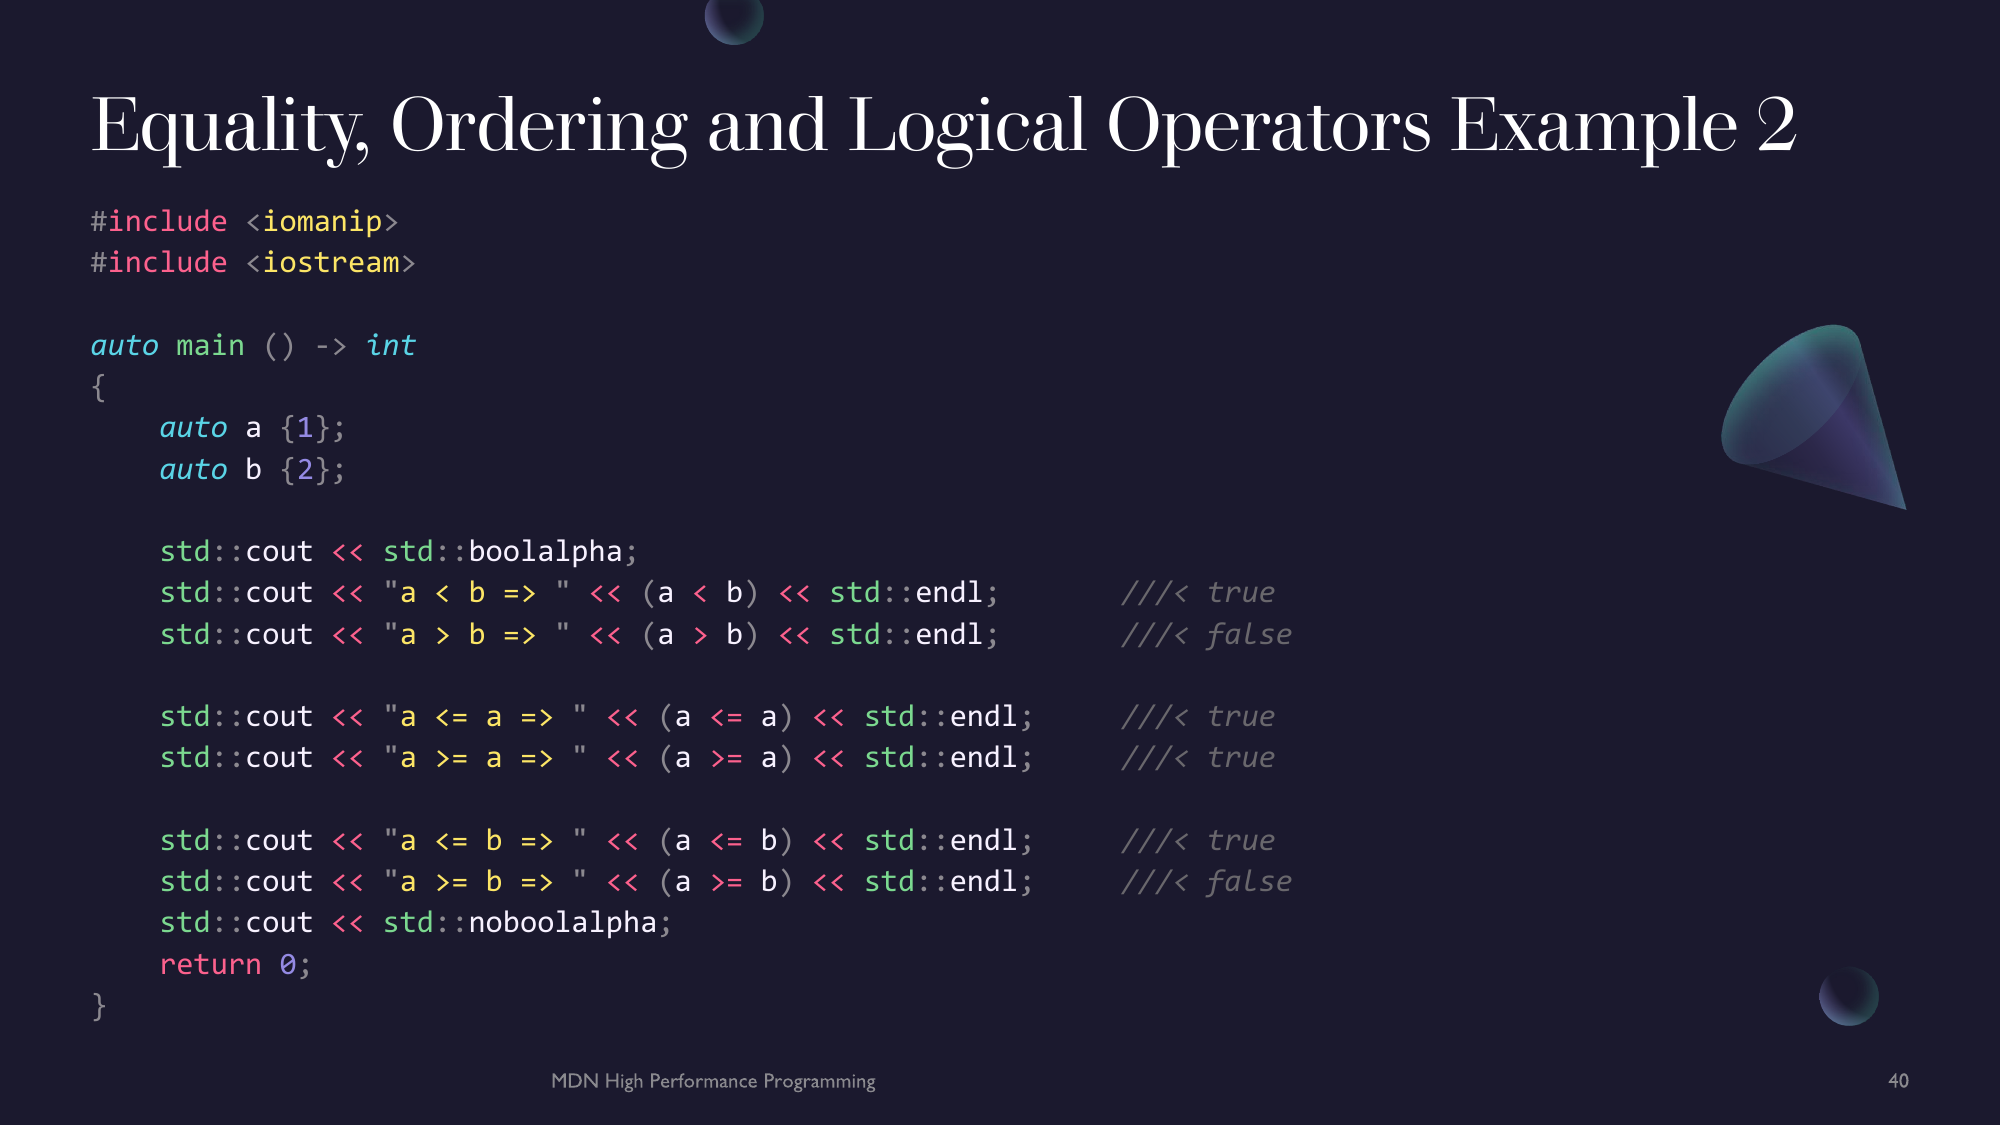
#include <iomanip>
#include <iostream>

auto main () -> int
{
    auto a {1};
    auto b {2};

    std::cout << std::boolalpha;
    std::cout << "a < b => " << (a < b) << std::endl;       ///< true
    std::cout << "a > b => " << (a > b) << std::endl;       ///< false

    std::cout << "a <= a => " << (a <= a) << std::endl;     ///< true
    std::cout << "a >= a => " << (a >= a) << std::endl;     ///< true

    std::cout << "a <= b => " << (a <= b) << std::endl;     ///< true
    std::cout << "a >= b => " << (a >= b) << std::endl;     ///< false
    std::cout << std::noboolalpha;
    return 0;
}
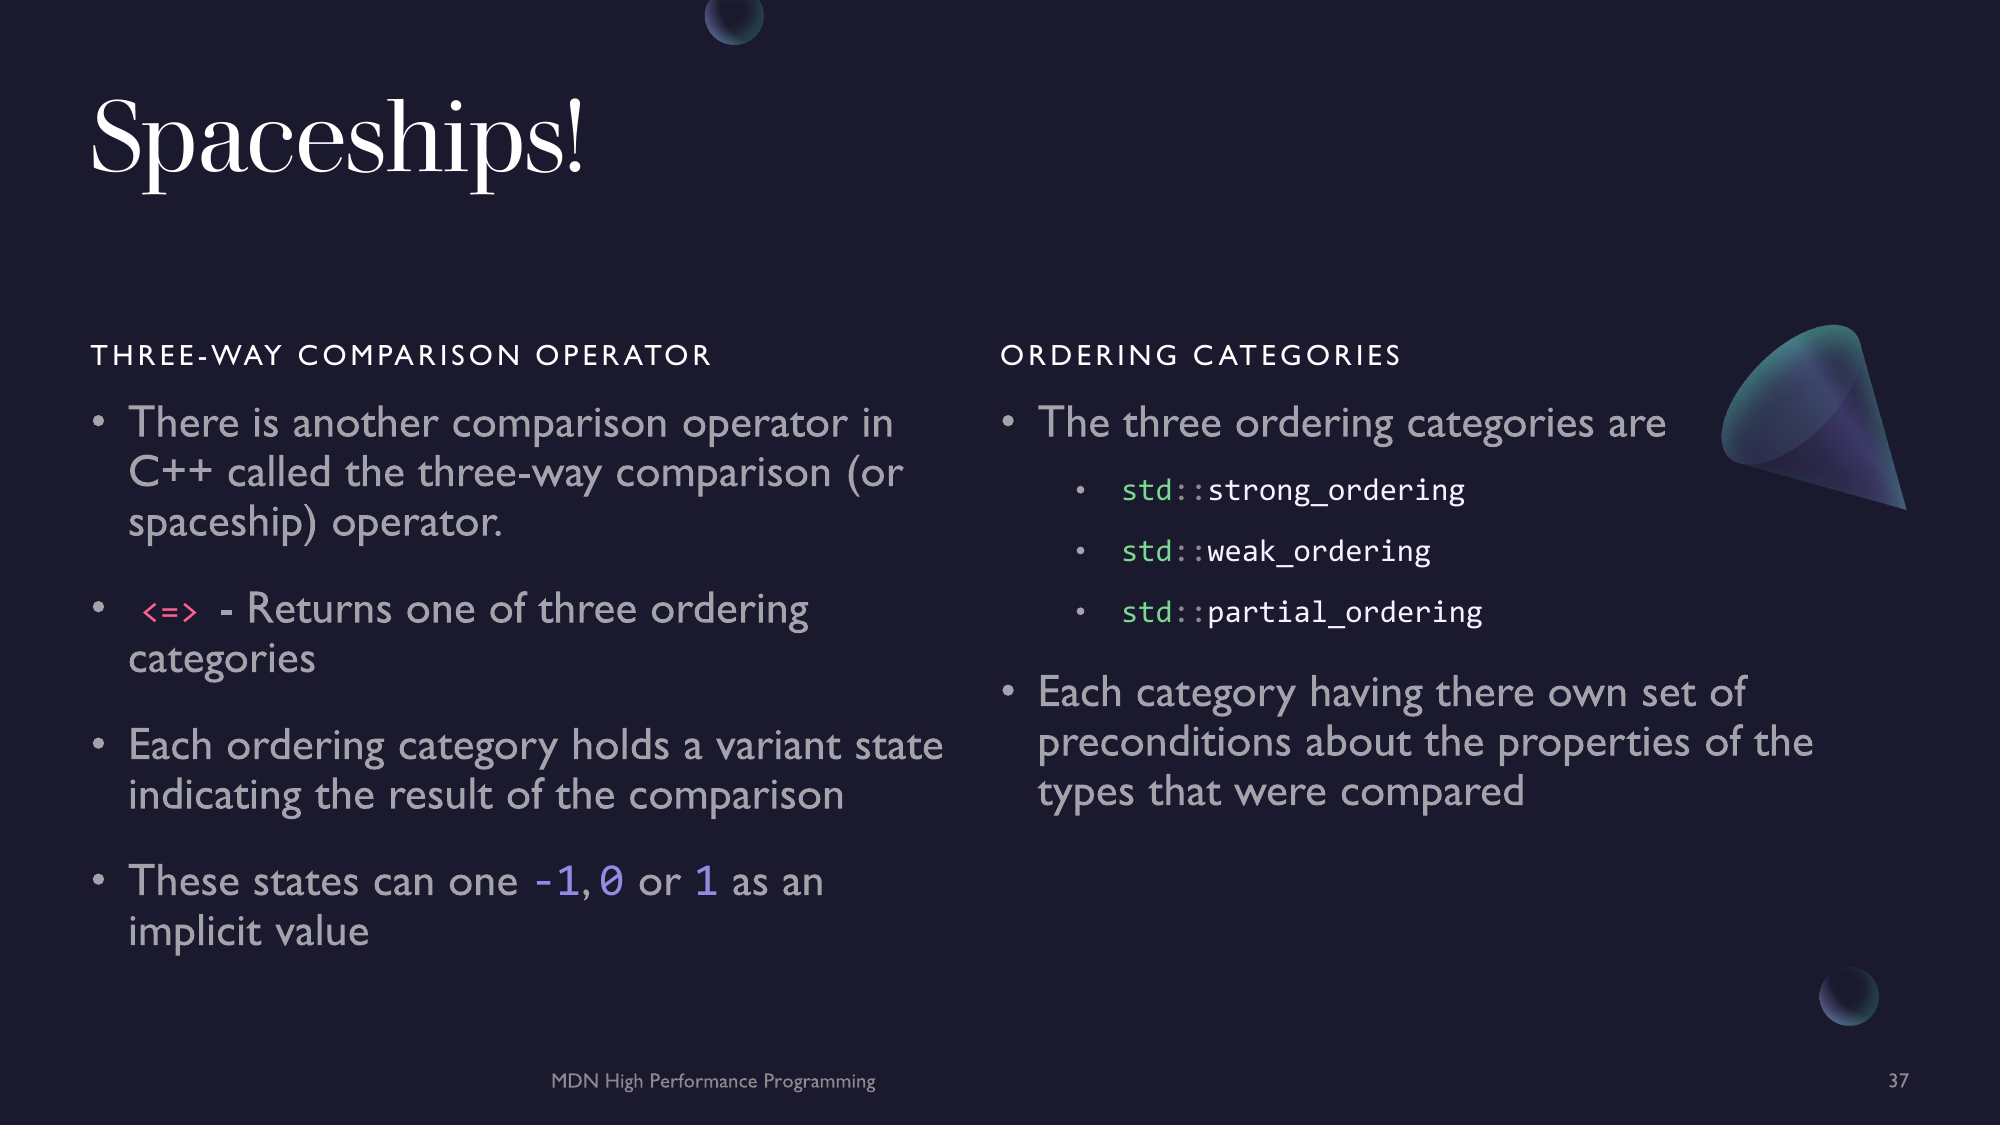
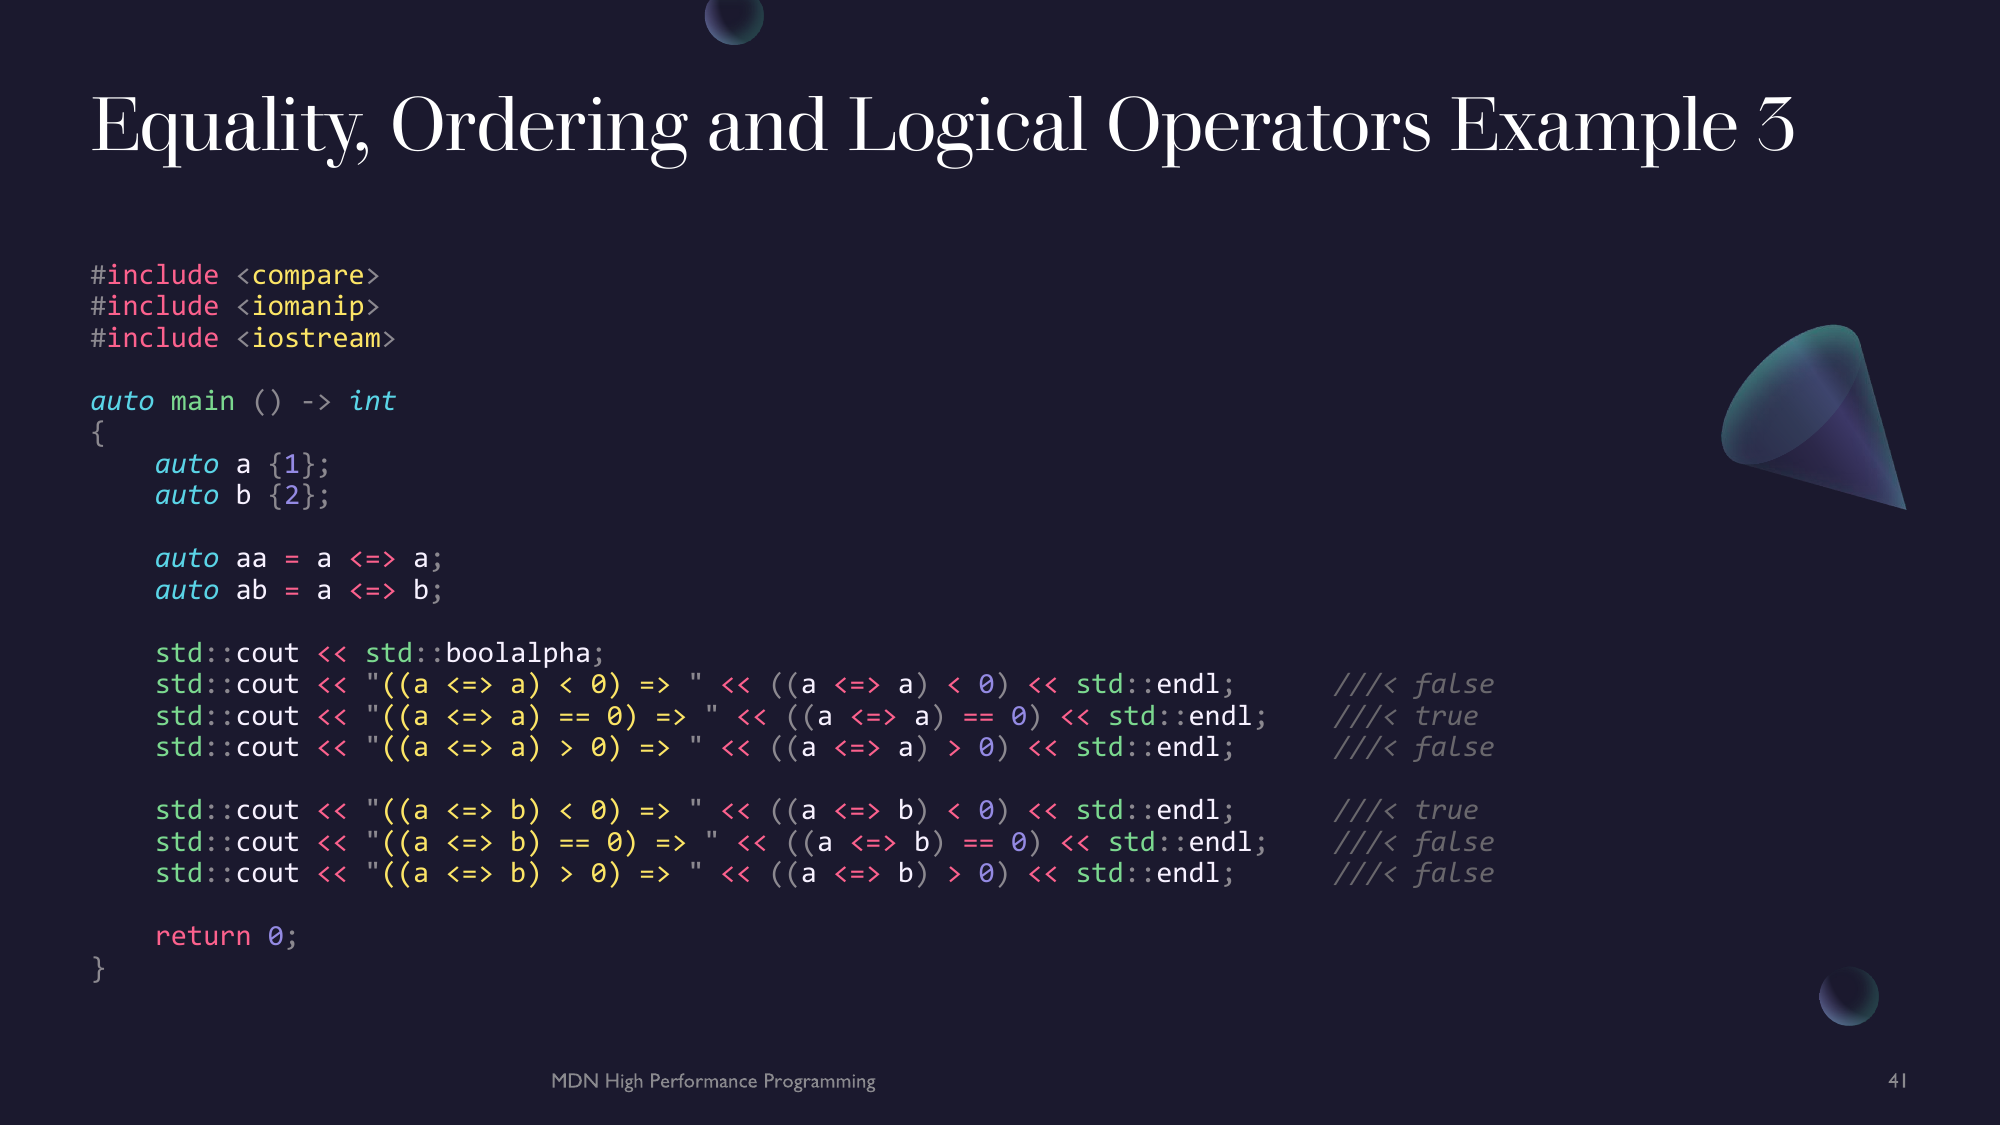
Spaceships and Ordering Types
As of C++20 there as a new ordering operator introduced called the three-way-comparison operator or, the spaceship operator <=>. The spaceship operator different ordering types based on the strictness of the ordering.
(a <=> b) < 0ifa < b(a <=> b) > 0ifa > b(a <=> b) == 0ifa == b
<=> also returns an ordering category. This indicates the level of strictness for the ordered type.
| Category | Equivalent values are.. | Incomparable values are.. |
|---|---|---|
std::strong_ordering | indistinguishable | not allowed |
std::weak_ordering | distinguishable | not allowed |
std::partial_ordering | distinguishable | allowed |
- indistinguishable : if
a == bthenf(a) == f(b) - distinguishable : if
a == bthenf(a) != f(b) std::partial_orderingcan returnstd::partial_ordering::unorderedeg./* anything */ <=> NaN == std::partial_ordering::unordered.
Note: floating point comparisons return
std::partial_ordering
Strong Ordering
std::strong_ordering can have the values:
std::strong_ordering::lessstd::strong_ordering::equivalentstd::strong_ordering::equalstd::strong_ordering::greater
and can be implicitly converted into std::partial_ordering or std::weak_ordering.
Weak Ordering
std::weak_ordering can have the values:
std::weak_ordering::lessstd::weak_ordering::equivalentstd::weak_ordering::greater
and can be implicitly converted into std::partial_ordering.
Partial Ordering
std::partial_ordering can have the values:
std::strong_ordering::lessstd::strong_ordering::equivalentstd::strong_ordering::greaterstd::strong_ordering::unordered
#include <compare>
#include <iomanip>
#include <iostream>

auto main () -> int
{
    auto a {1};
    auto b {2};

    auto aa = a <=> a;
    auto ab = a <=> b;

    std::cout << std::boolalpha;
    std::cout << "((a <=> a) < 0) => " << ((a <=> a) < 0) << std::endl;      ///< false
    std::cout << "((a <=> a) == 0) => " << ((a <=> a) == 0) << std::endl;    ///< true
    std::cout << "((a <=> a) > 0) => " << ((a <=> a) > 0) << std::endl;      ///< false

    std::cout << "((a <=> b) < 0) => " << ((a <=> b) < 0) << std::endl;      ///< true
    std::cout << "((a <=> b) == 0) => " << ((a <=> b) == 0) << std::endl;    ///< false
    std::cout << "((a <=> b) > 0) => " << ((a <=> b) > 0) << std::endl;      ///< false

    return 0;
}
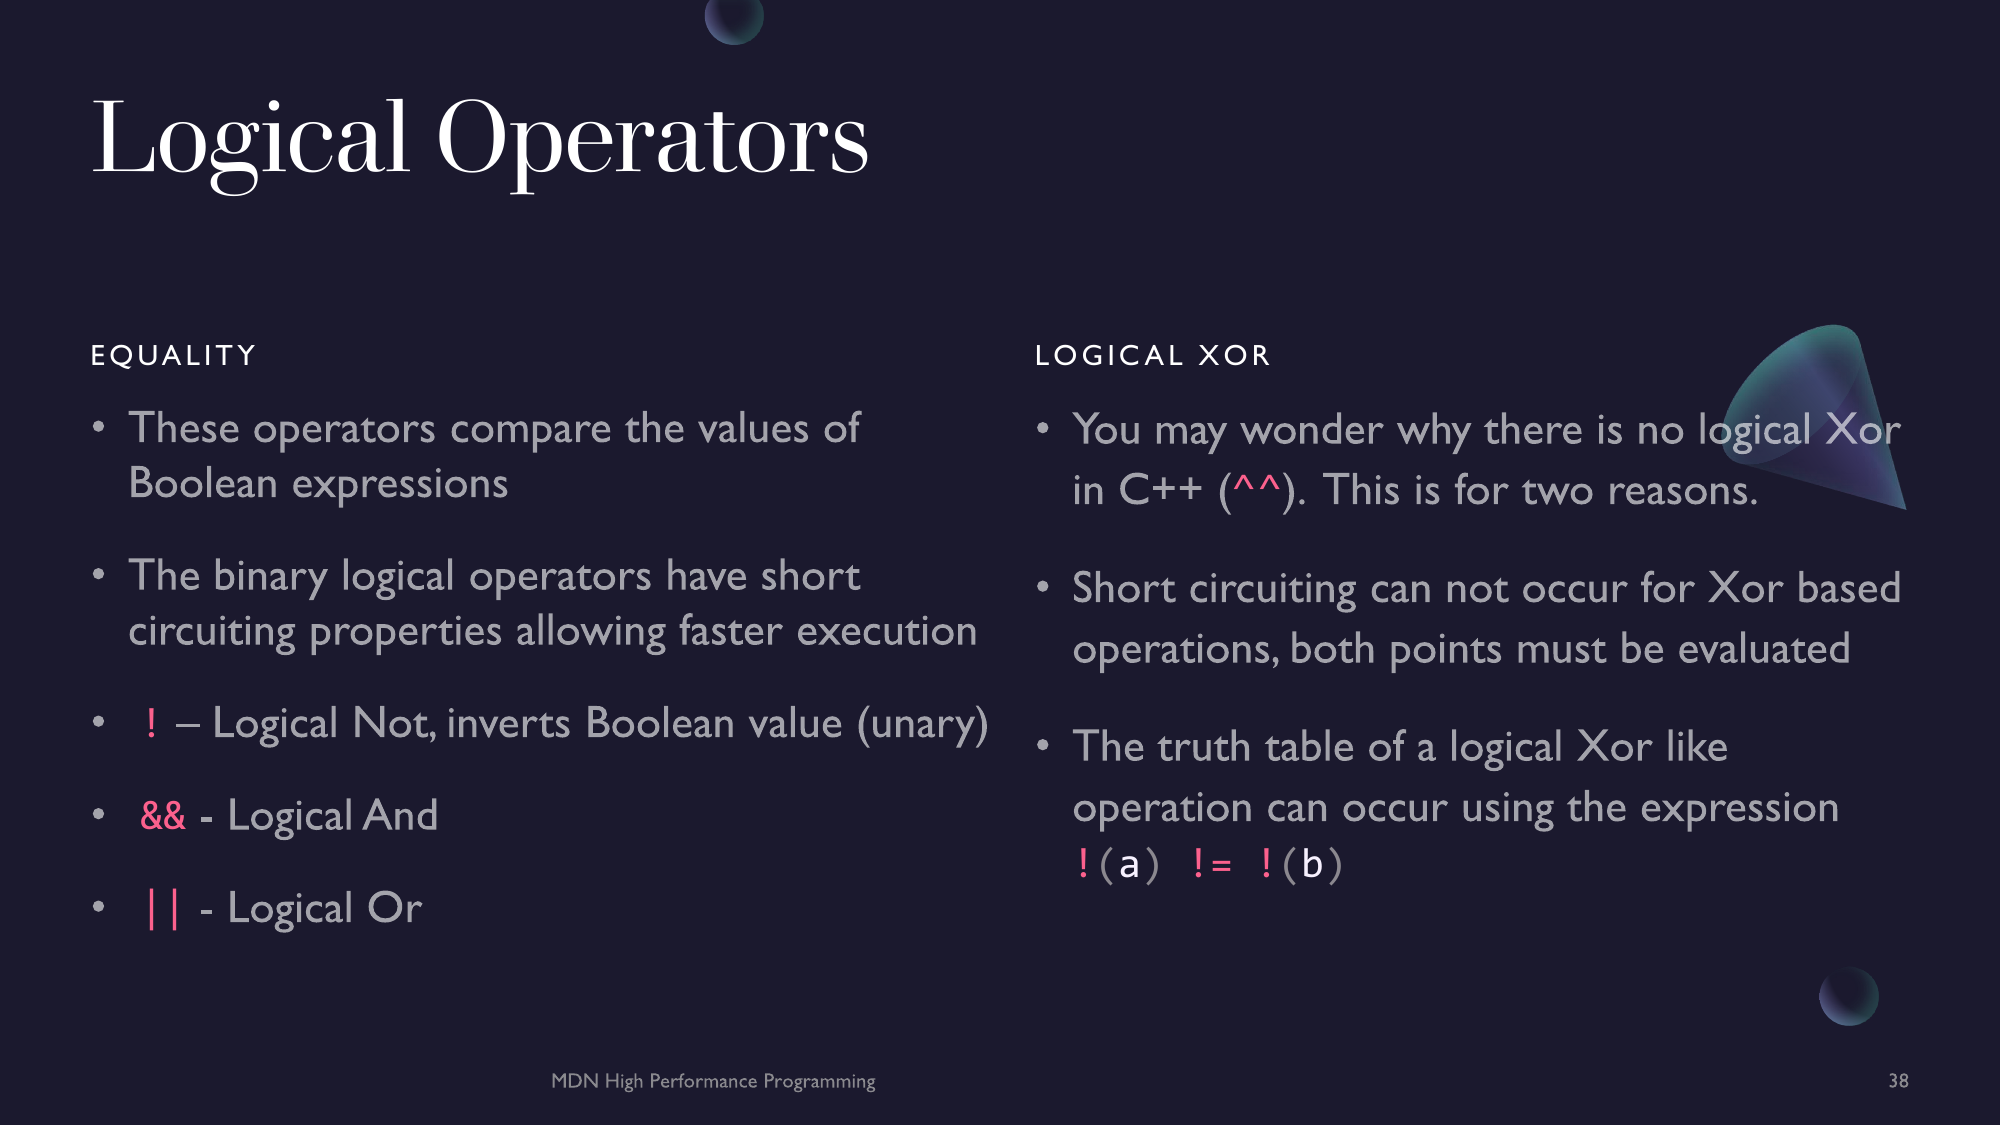
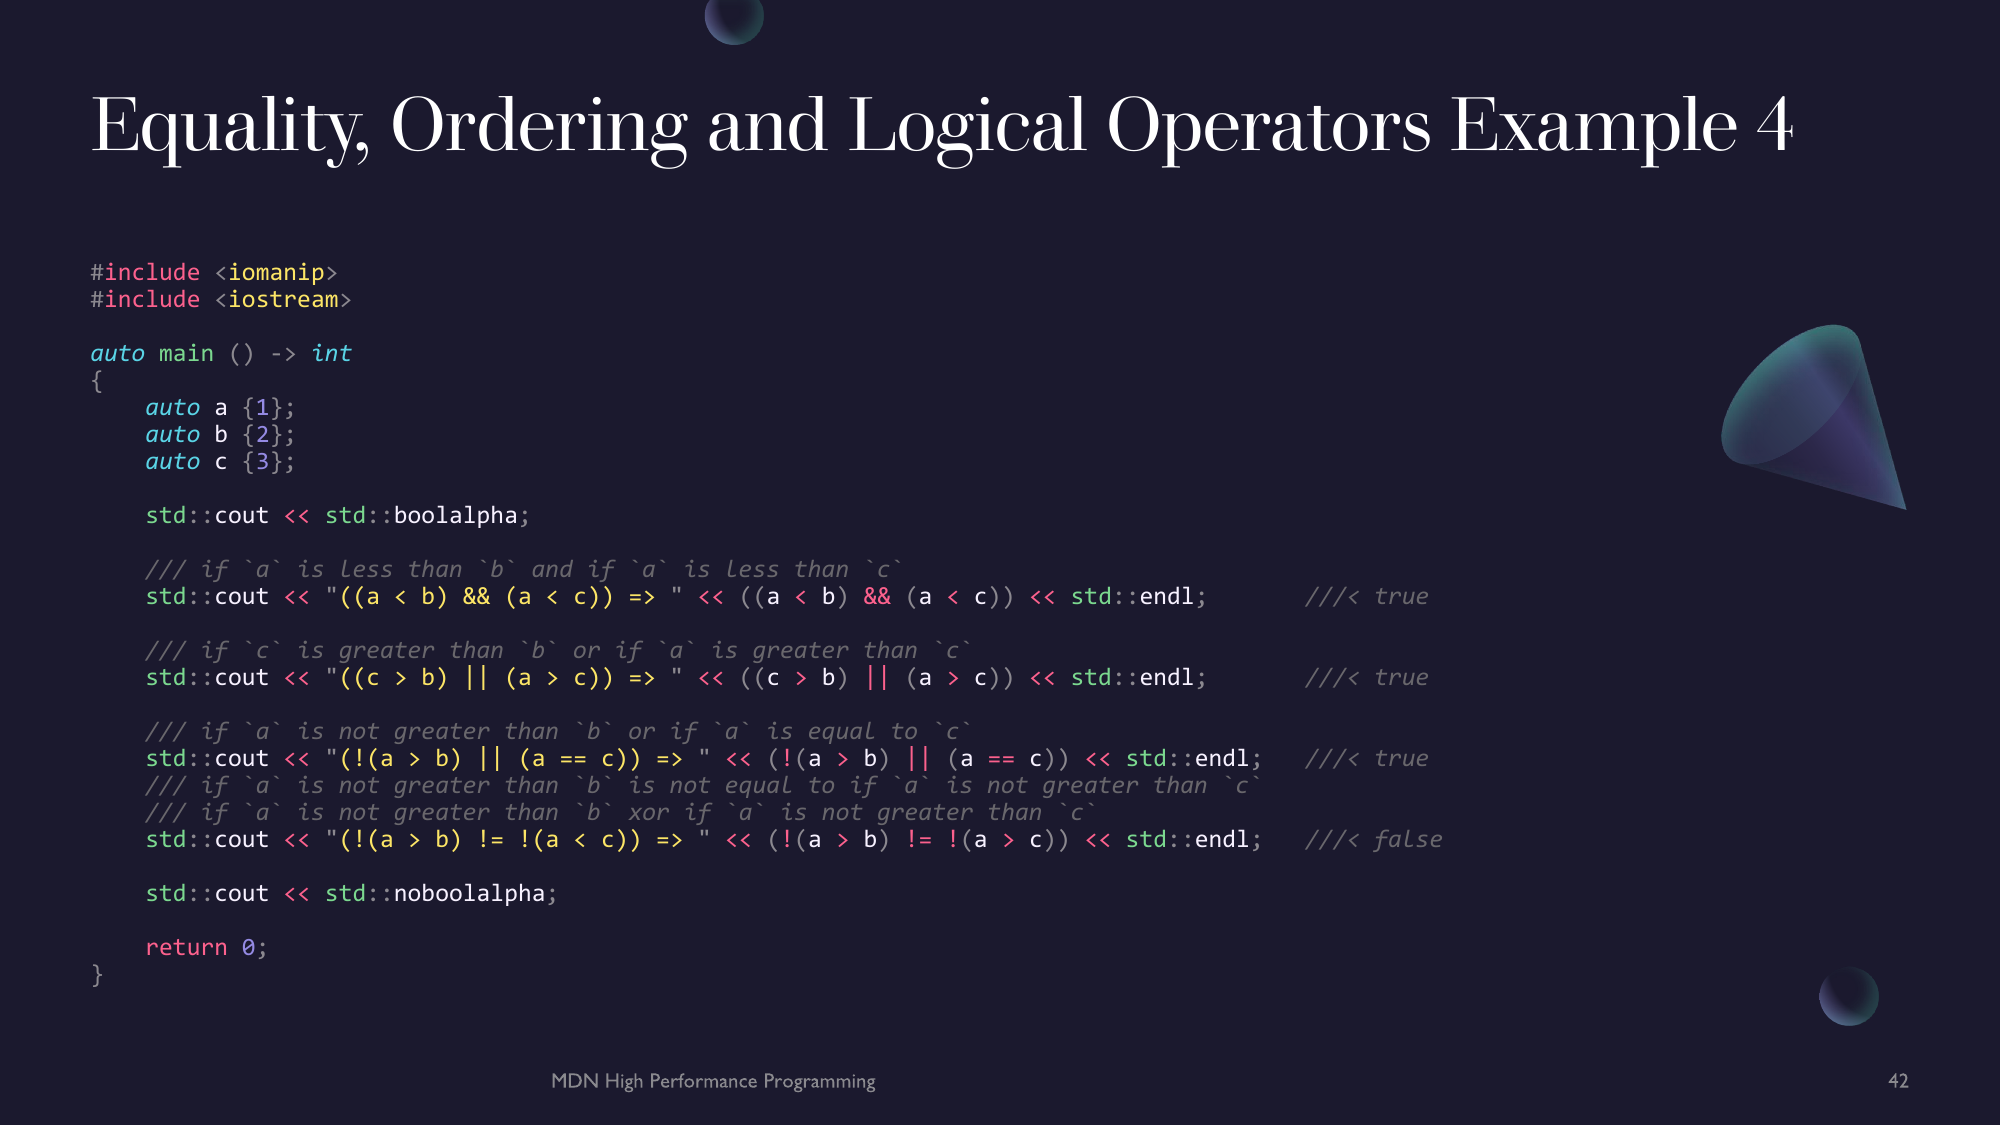
Logical Operators
In programming, it is useful to be able to check a multitude of Boolean expression. This allows programs to have more complex conditional logic structures.
!- Logical Not&&- Logical And||= Logical Or
Logical And and Or have special short circuiting properties. This means that the outcome of a Boolean expressions can be evaluated early. For And, if one Boolean point is false, it doesn't matter what the second point evaluates to as the expression's condition has already failed, thus whole expression would false. Inversely for Or, if one Boolean point is true the whole expression is true
Note: There is no logical Xor. This is because Xor cannot short circuited as the result depends on the result of both points. However, we have already seen the logical Xor, it is the
!=. If the two points of!=are either bothtrueor bothfalse, the inequality condition is not met and thus achieving the exclusivity properties of Xor. In C++ becauseboolcan be implicitly converted to other integral types, it is best that logicalXor is used as:!(a) != !(b).
#include <iomanip>
#include <iostream>

auto main () -> int
{
    auto a {1};
    auto b {2};
    auto c {3};

    std::cout << std::boolalpha;

    /// if `a` is less than `b` and if `a` is less than `c`
    std::cout << "((a < b) && (a < c)) => " << ((a < b) && (a < c)) << std::endl;       ///< true

    /// if `c` is greater than `b` or if `a` is greater than `c`
    std::cout << "((c > b) || (a > c)) => " << ((c > b) || (a > c)) << std::endl;       ///< true

    /// if `a` is not greater than `b` or if `a` is equal to `c`
    std::cout << "(!(a > b) || (a == c)) => " << (!(a > b) || (a == c)) << std::endl;   ///< true
    /// if `a` is not greater than `b` is not equal to if `a` is not greater than `c`
    /// if `a` is not greater than `b` xor if `a` is not greater than `c`
    std::cout << "(!(a > b) != !(a < c)) => " << (!(a > b) != !(a > c)) << std::endl;   ///< false

    std::cout << std::noboolalpha;

    return 0;
}
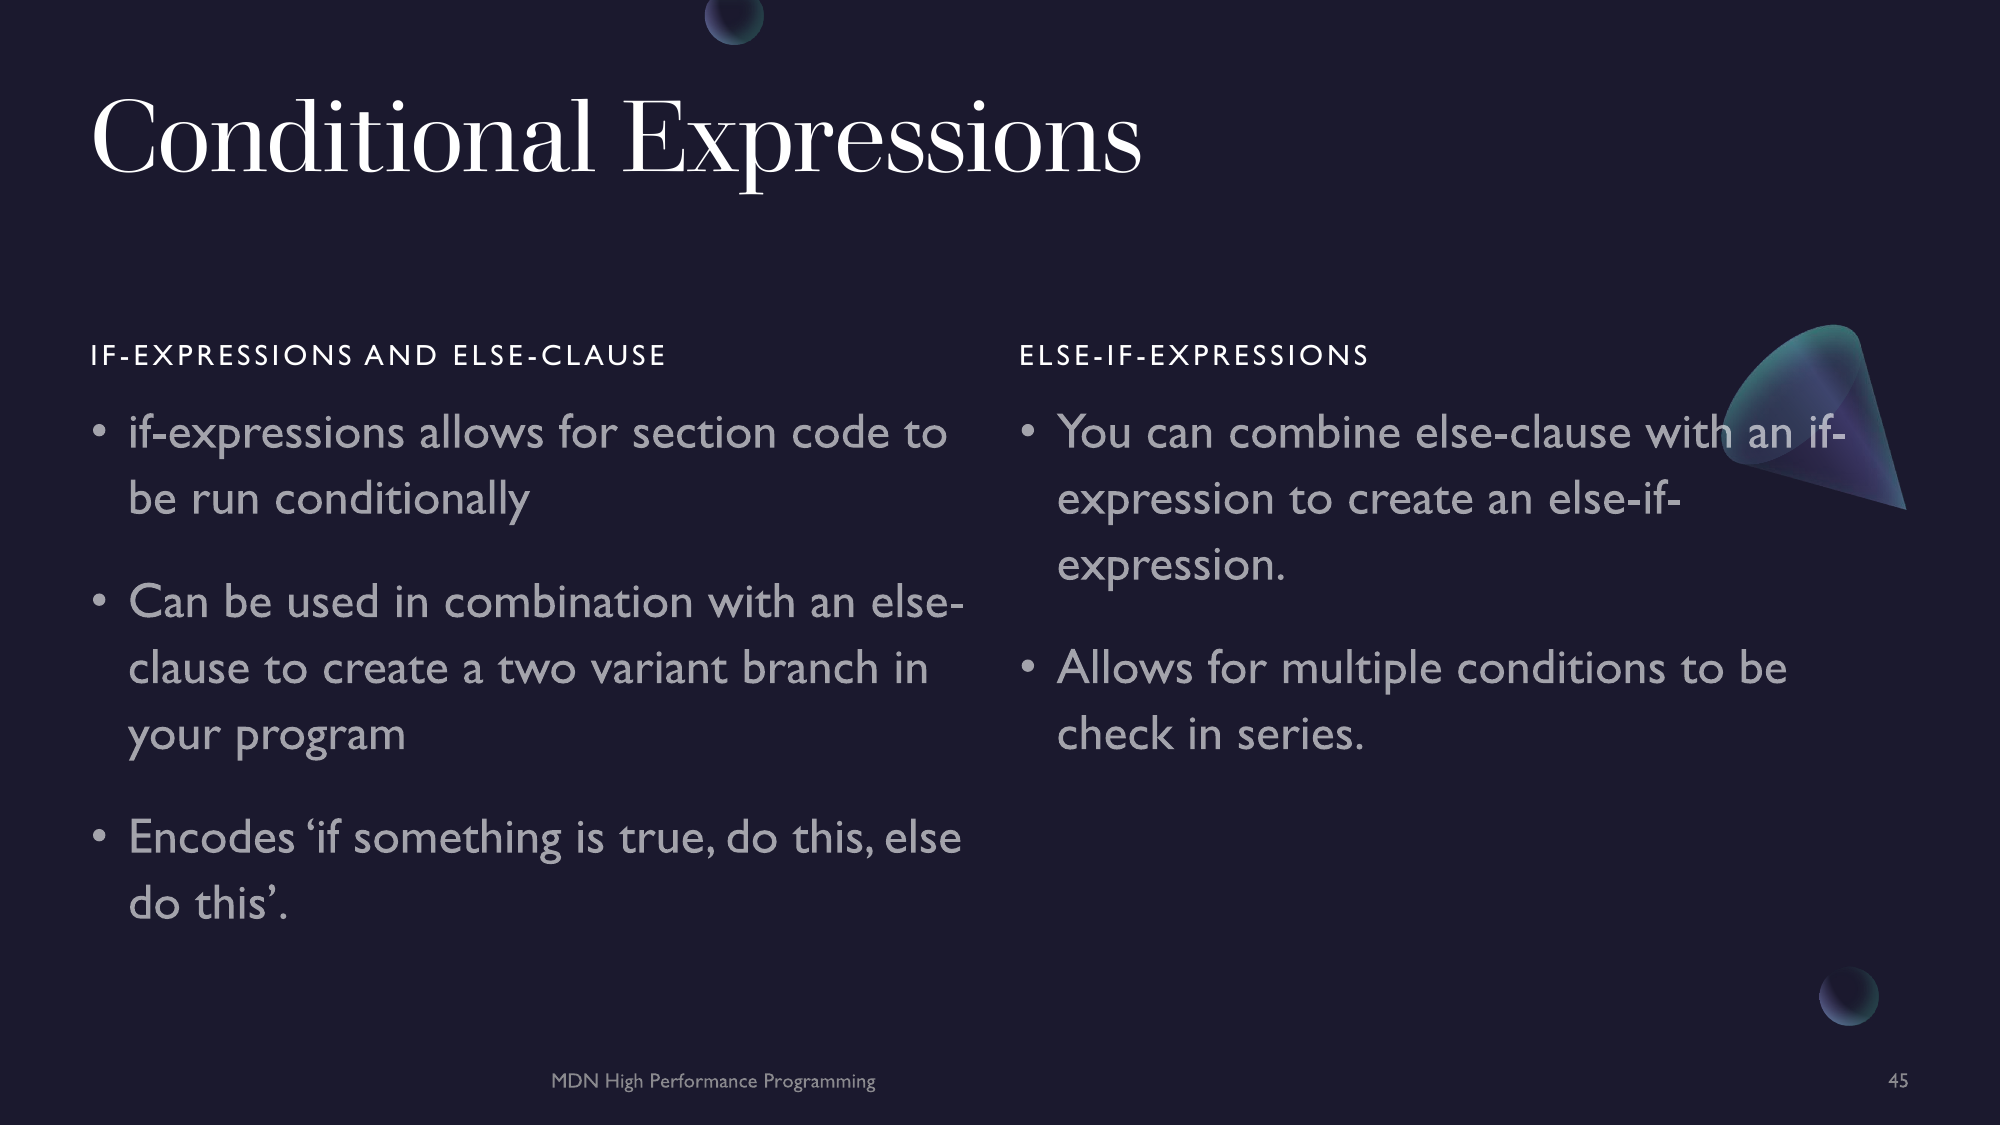
Conditional Expressions
Conditional expressions use the concepts of equality and ordering to allow programs to branch. This means that different parts of a program will execute depending on the current state of a program. This allows for programs to be more adaptive and flexible to create.
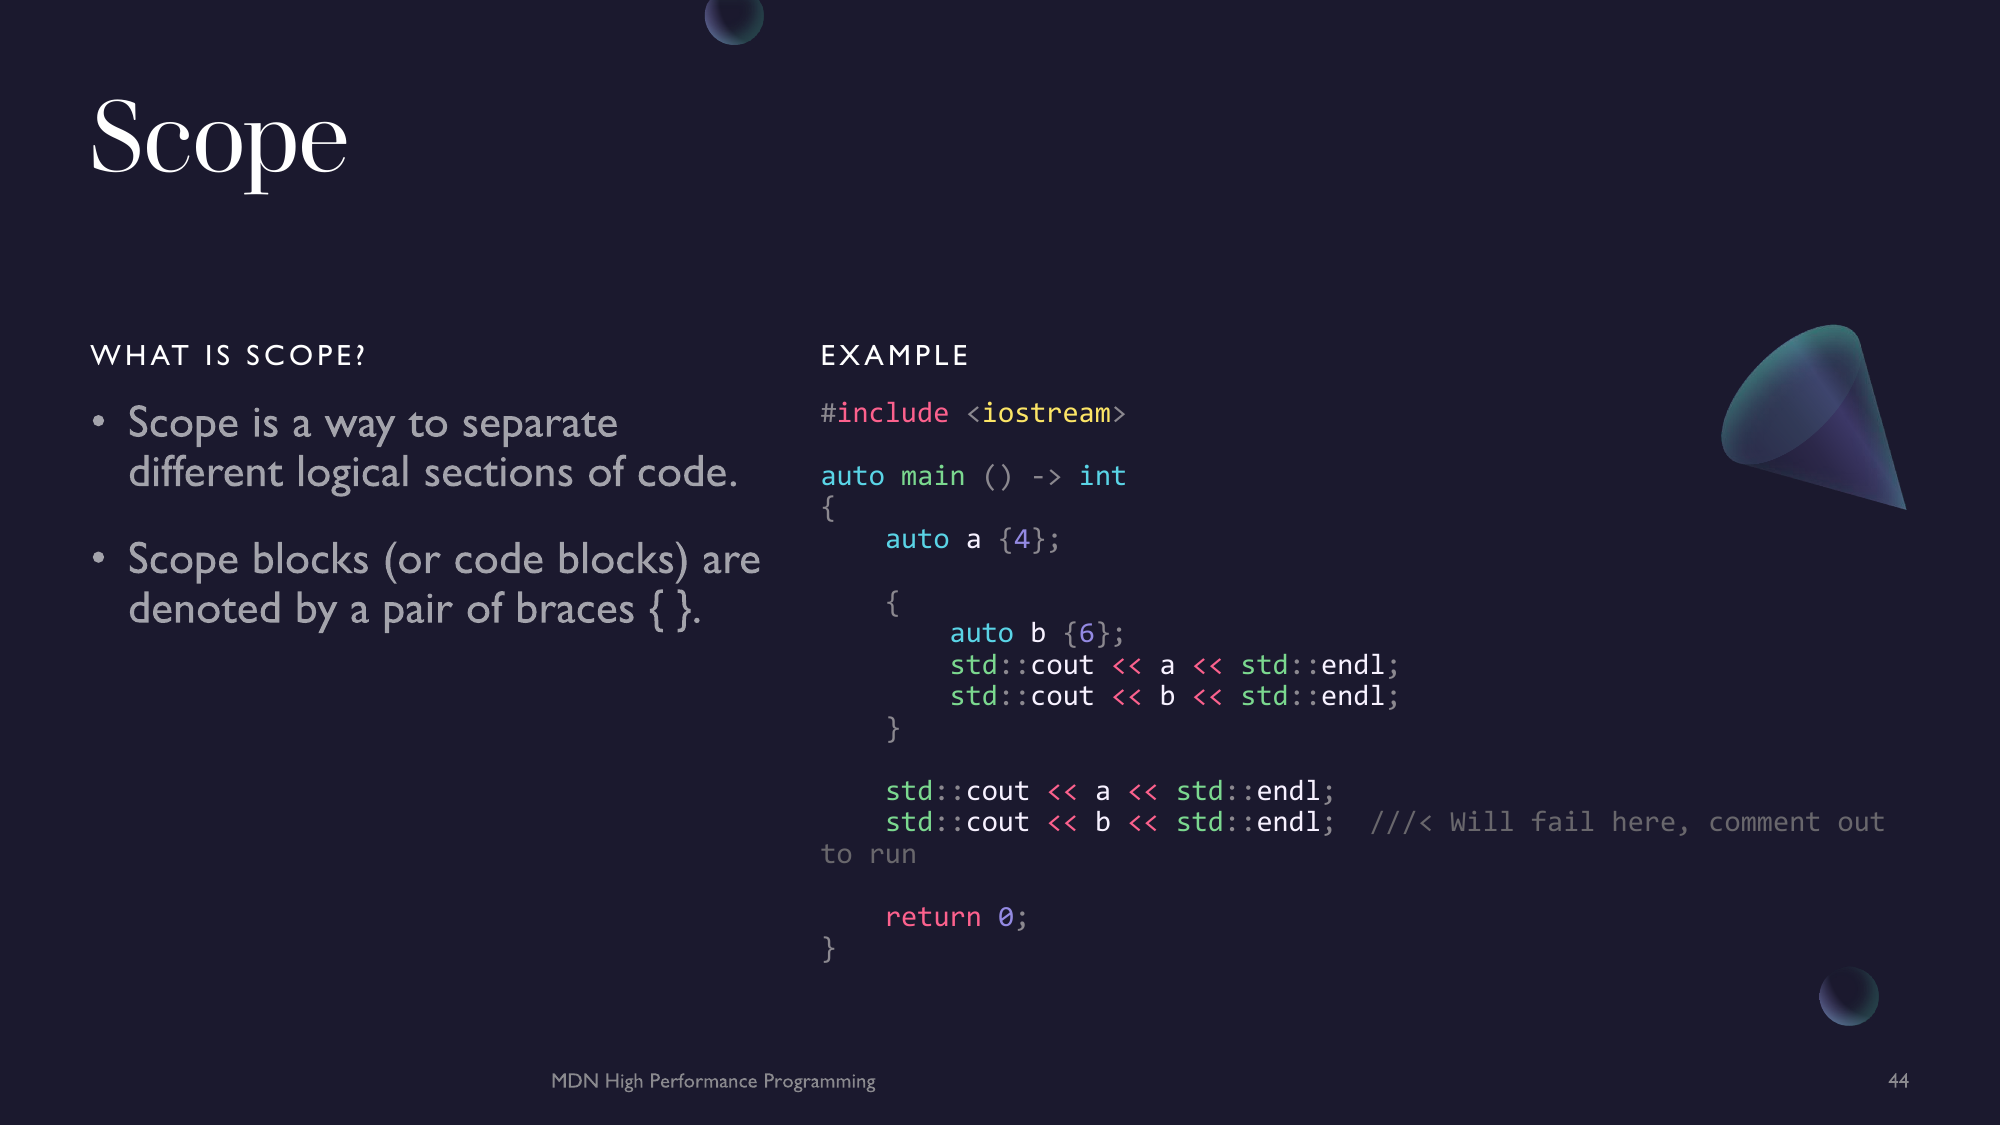
Scope
One important concept in programming is the idea of scope. In C++, scope is very important as it can have an important impact on the design, performance in the safety of a program. Currently we have been running a program purely in the scope of the main() function. What denotes a scope in C++ is a pair of braces {}. Anything introduced within the braces is now in a new scope separate from the outside program. Objects from outside the new scope can be captured but anything created in a new scope is dropped at the end of the scope.
#include <iostream>

auto main () -> int
{
    auto a {4};

    {
        auto b {6};
        std::cout << a << std::endl;
        std::cout << b << std::endl;
    }

    std::cout << a << std::endl;
    std::cout << b << std::endl;  ///< Will fail here, comment out to run

    return 0;
}
Scope blocks (or sometimes code blocks) allow us to encapsulate expressions.
if-expressions
Control flow allows for programs to branch and follow non-linear execution patterns. In C++, this is done through structured conditional expressions. The primary one being an if expression. if expressions are followed by a code block surrounded in {}. If the condition is met, then the code block executes.
if (/* Boolean condition */) { /* code */ }
Note: One-liner execution blocks don't have to be in
{}.
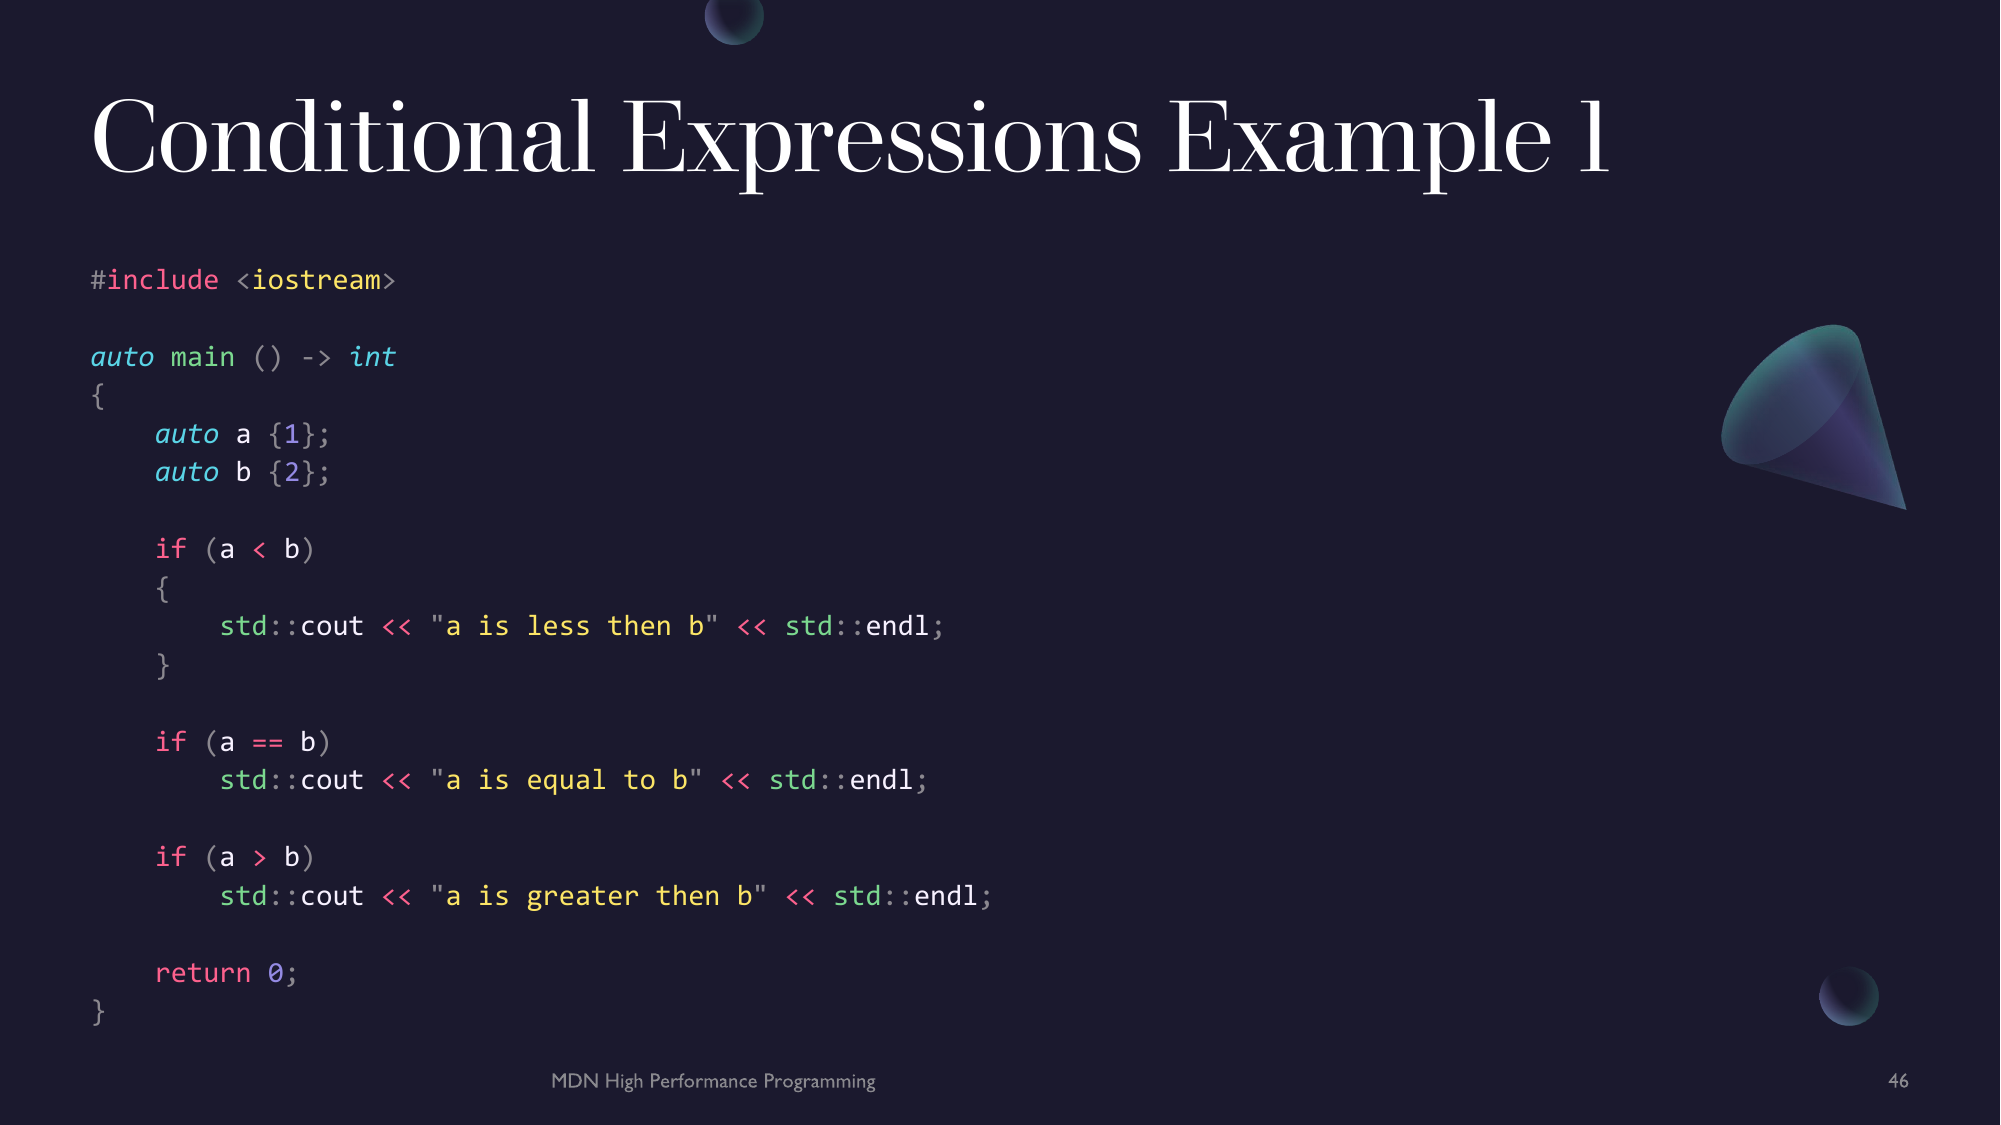
#include <iostream>

auto main () -> int
{
    auto a {1};
    auto b {2};

    if (a < b)
    {
        std::cout << "a is less then b" << std::endl;
    }

    if (a == b)
        std::cout << "a is equal to b" << std::endl;

    if (a > b)
        std::cout << "a is greater then b" << std::endl;

    return 0;
}
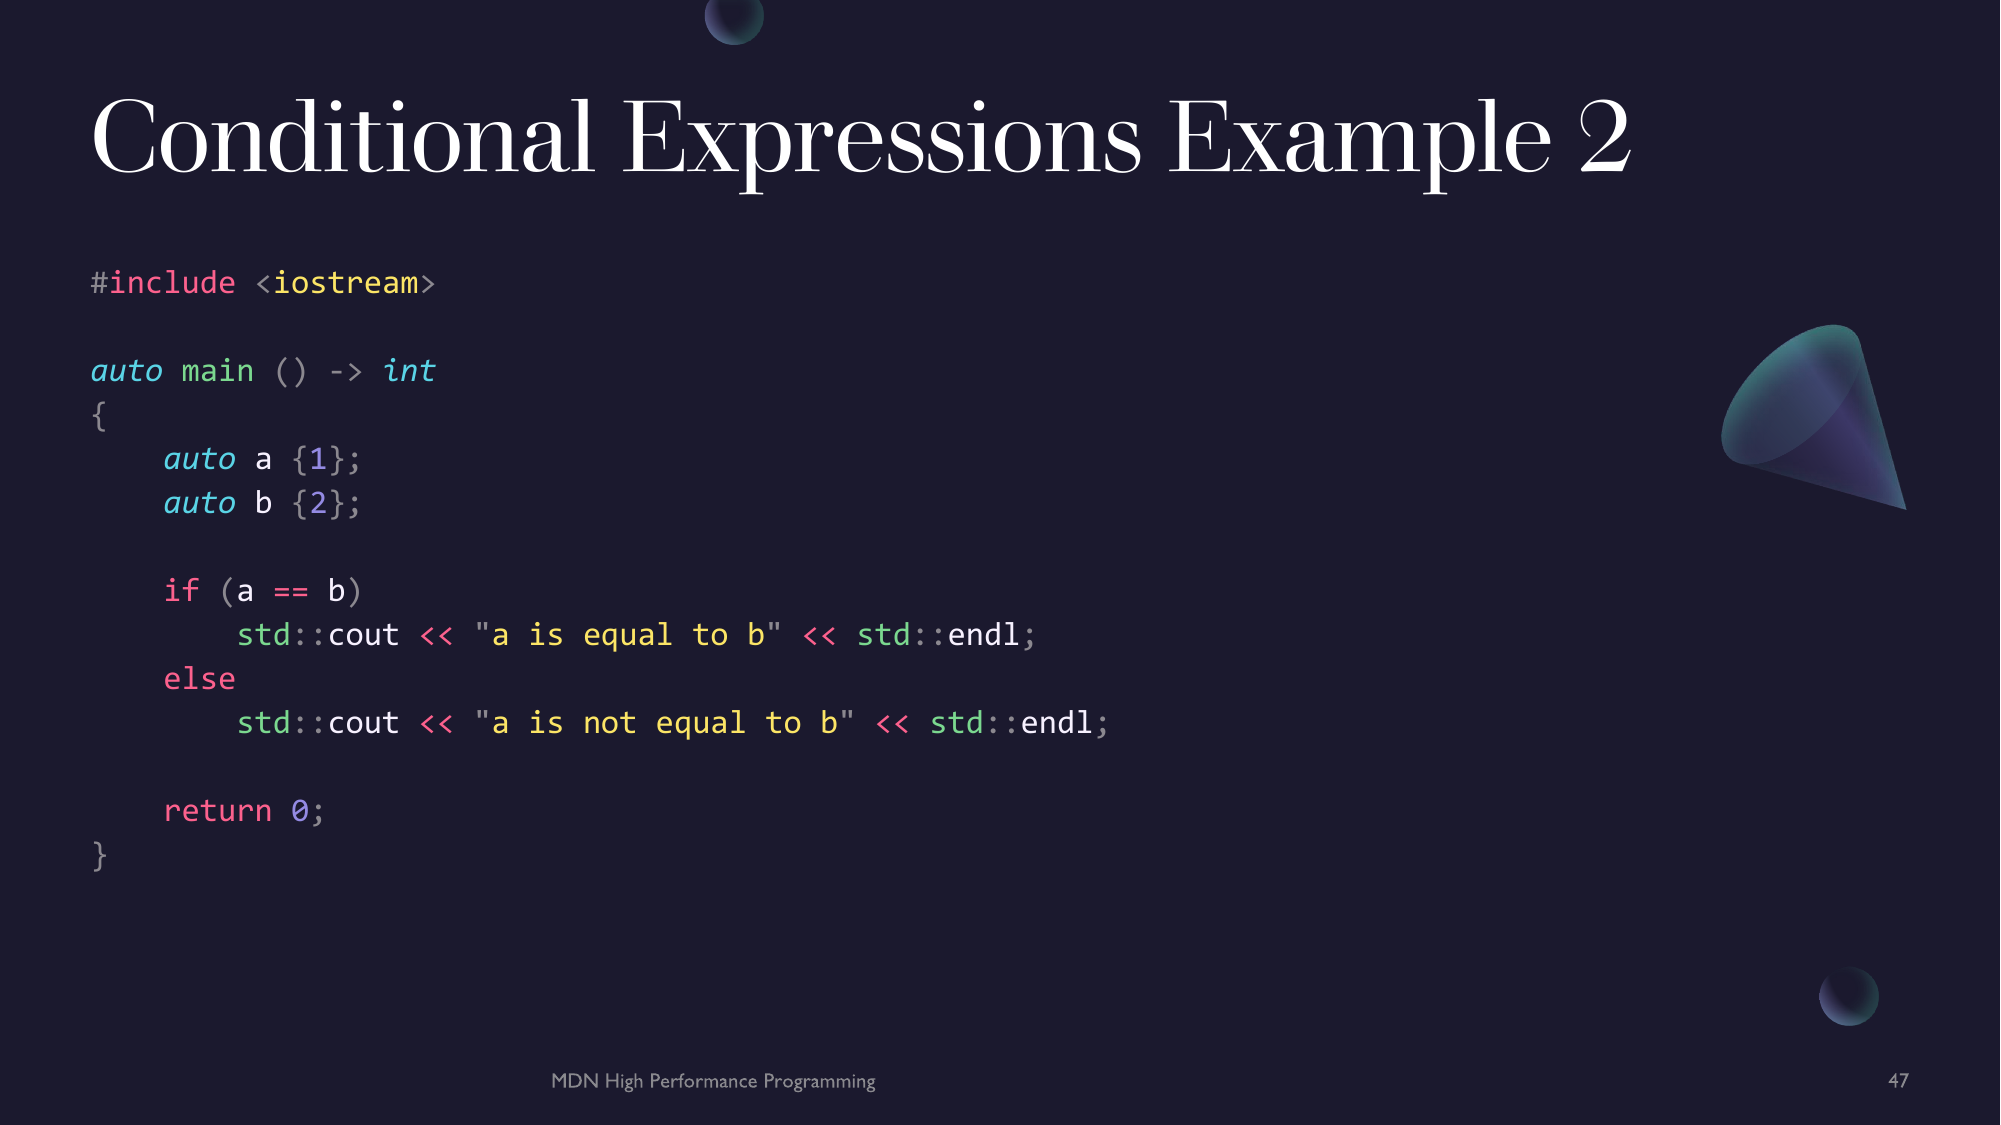
We can also use an else clause at the end. This indicates that if and if expression fails, the else clause will execute instead.
#include <iostream>

auto main () -> int
{
    auto a {1};
    auto b {2};

    if (a == b)
        std::cout << "a is equal to b" << std::endl;
    else
        std::cout << "a is not equal to b" << std::endl;

    return 0;
}
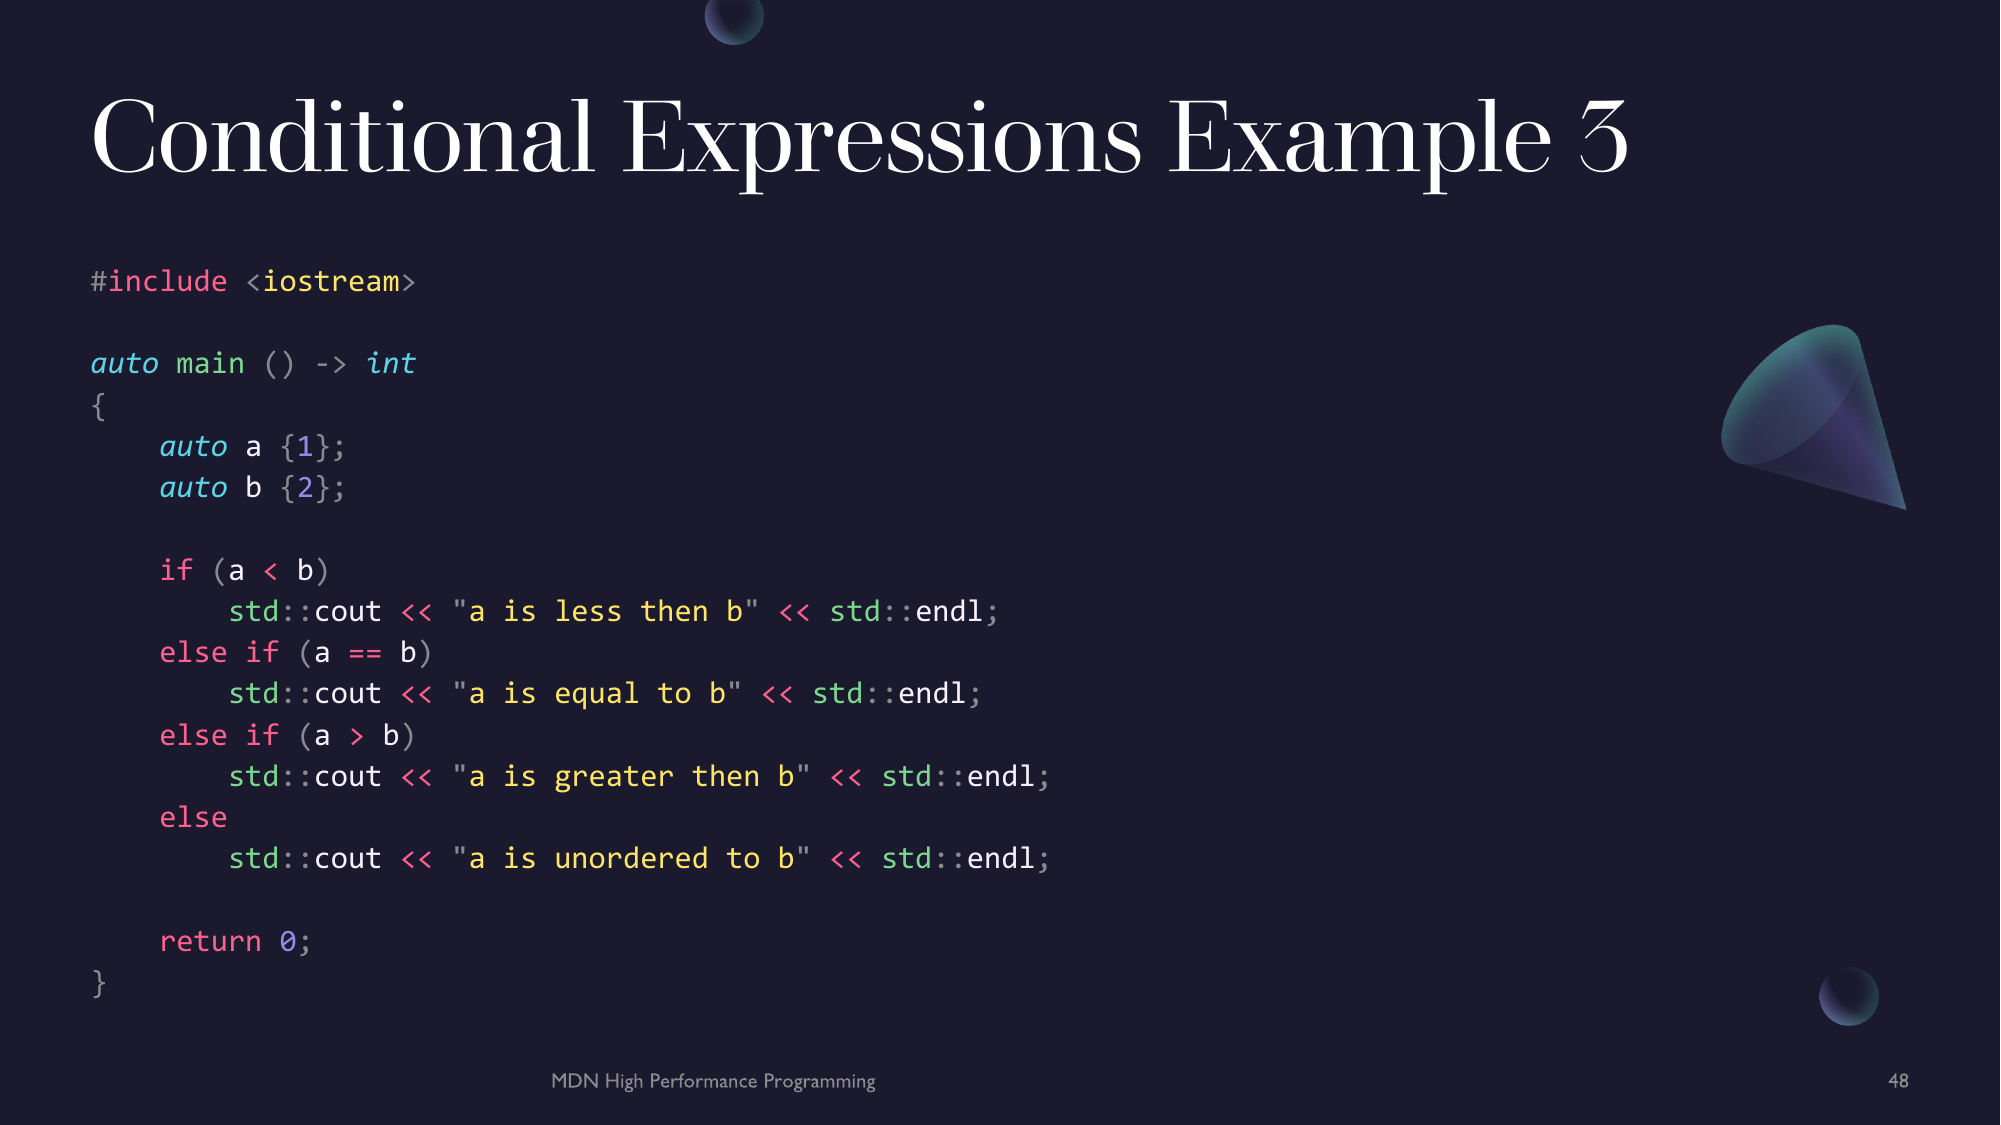
else-expression
We can combine the else clause with an if expression to create and else if expression. This allows for you to create multiple branches in a single if statement.
#include <iostream>

auto main () -> int
{
    auto a {1};
    auto b {2};

    if (a < b)
        std::cout << "a is less then b" << std::endl;
    else if (a == b)
        std::cout << "a is equal to b" << std::endl;
    else if (a > b)
        std::cout << "a is greater then b" << std::endl;
    else
        std::cout << "a is unordered to b" << std::endl;

    return 0;
}
Ternary Operator
if statements are the first step to building much more complex programs however, they are quite bulky in syntax for short conditional expressions. Instead we can use the ternary operator ?: to build short and concise conditional expressions. A ternary expression has the following syntax.
auto /* result */ = /* Boolean expression */ ? /* expression is true */ : /* expression is false */;
#include <iostream>

auto main () -> int
{
    auto a {1};
    auto b {2};

    auto msg = a < b ? "a is less then b" : "b is less then a";

    std::cout << msg << std::endl;

    return 0;
}
Switch Statements
Another useful construct in C++ is a switch statement. switch statements encapsulate the idea of a jump table however, it is limited to integral types, thus the switch condition must be an integral type and have integral case labels.
#include <iostream>

auto main () -> int
{
    auto a {1};

    switch (a)
    {
        case 1:
            std::cout << "a + 1 = " << a + 1 << std::endl;
            break;
        case 2:
            std::cout << "a * 2 = " << a * 2 << std::endl;
            break;
        case 3:
            std::cout << "a - 3 = " << a - 3 << std::endl;
            break;
        default:
            std::cout << "a / 5 = " << a / 5 << std::endl;
            break;
    }

    return 0;
}
Fallthroughs
You will note that at the end of each of the case blocks there are break statements. These are used to exit the switch statement entirely. If this weren't there, each case would run in sequence. This is called fallthrough. most compilers will warn you of this.
#include <iostream>

auto main () -> int
{
    auto a {1};

    switch (a)
    {
        case 1:
            std::cout << "a + 1 = " << a + 1 << std::endl;
        case 2:
            std::cout << "a * 2 = " << a * 2 << std::endl;
        case 3:
            std::cout << "a - 3 = " << a - 3 << std::endl;
        default:
            std::cout << "a / 5 = " << a / 5 << std::endl;
    }

    return 0;
}
Loops
Along with conditional expressions another powerful language facility is loops. Loops allow for programs to run in an iterative manner, that is a block will be executed in series. This is powerful feature that enables us to repeat a set of instructions effectively and efficiently.
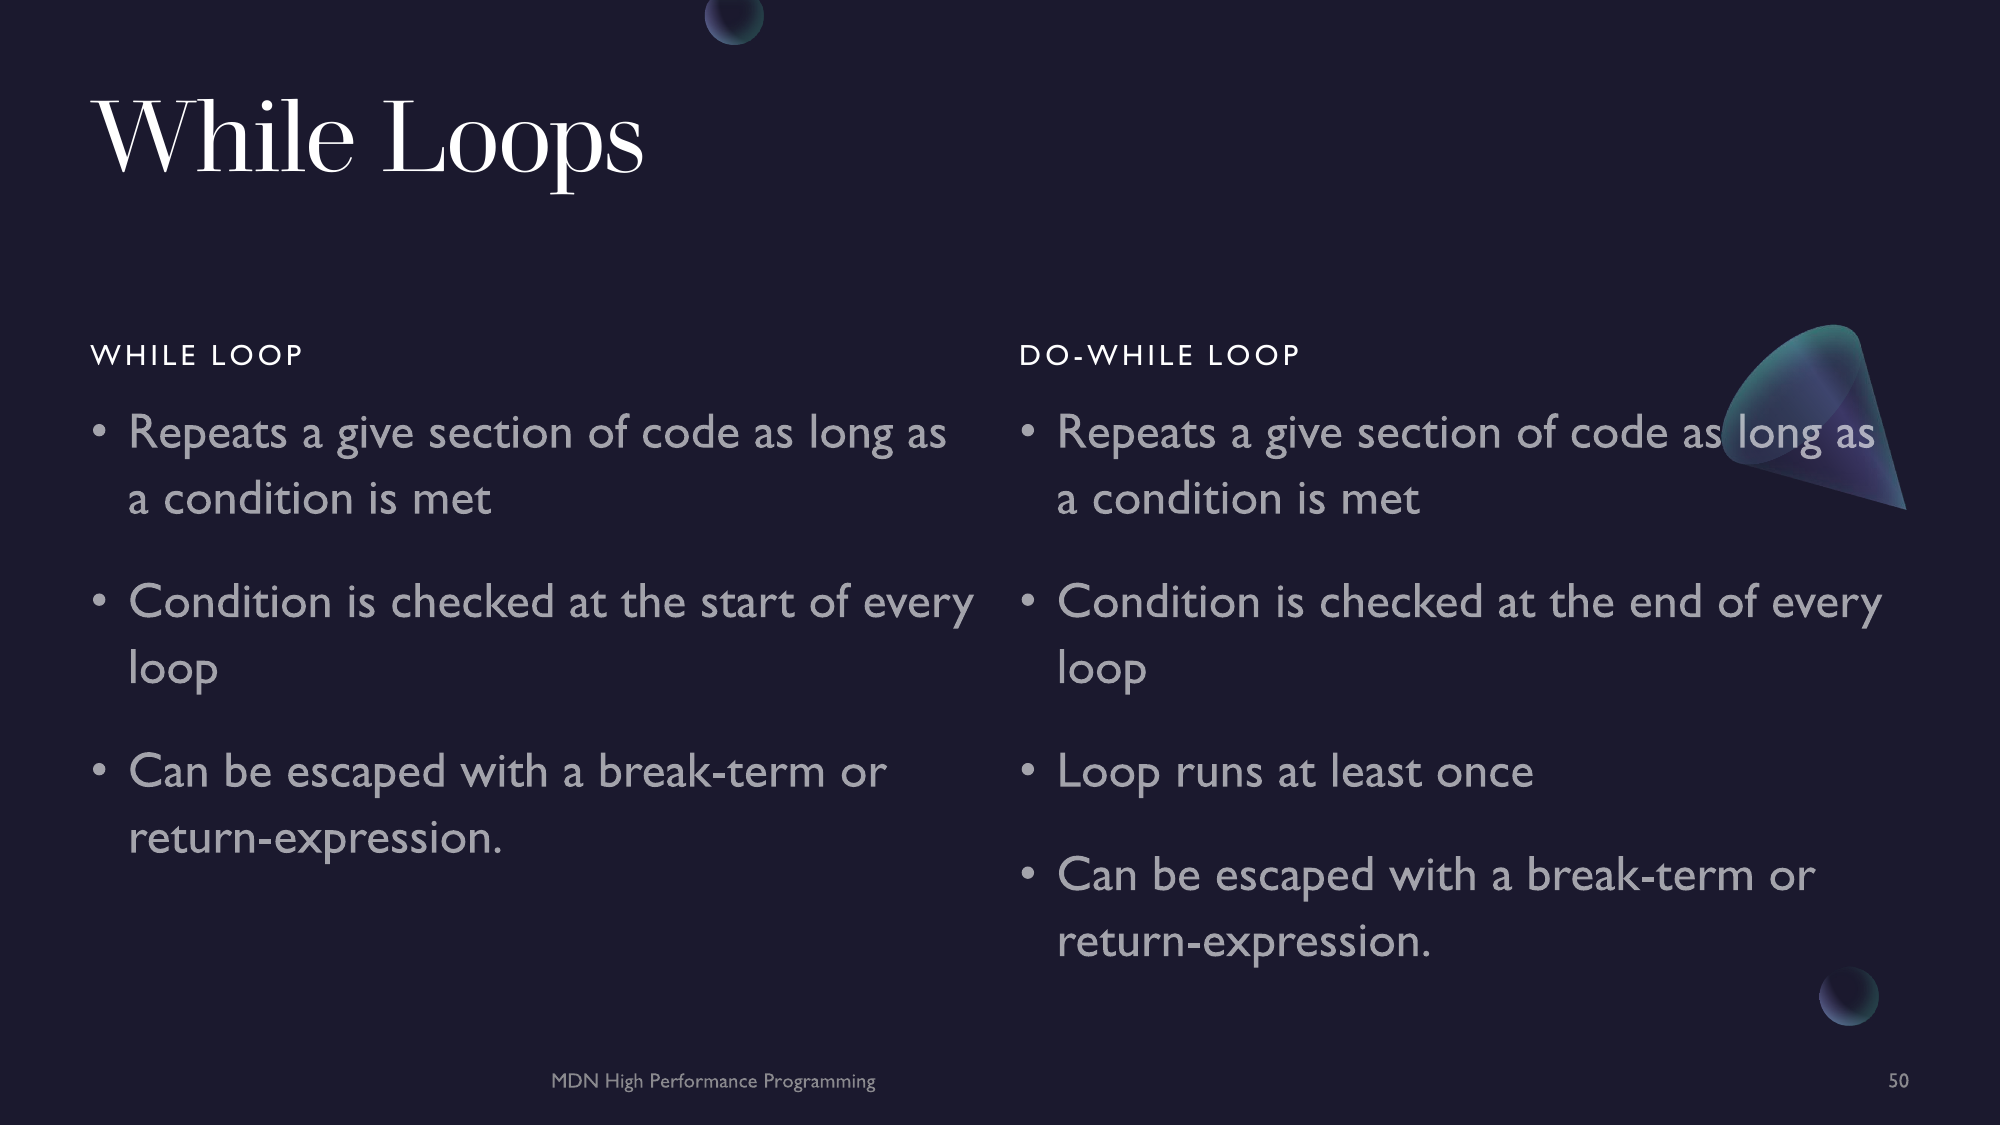
While Loop
A while loop is the most basic kind of loop. while loops will repeat its code block as long as its condition is met.
#include <iostream>

auto main () -> int
{
    auto a {10};

    while (a > 0)
    {
        std::cout << "a = " << a << std::endl;
        --a;
    }

    return 0;
}
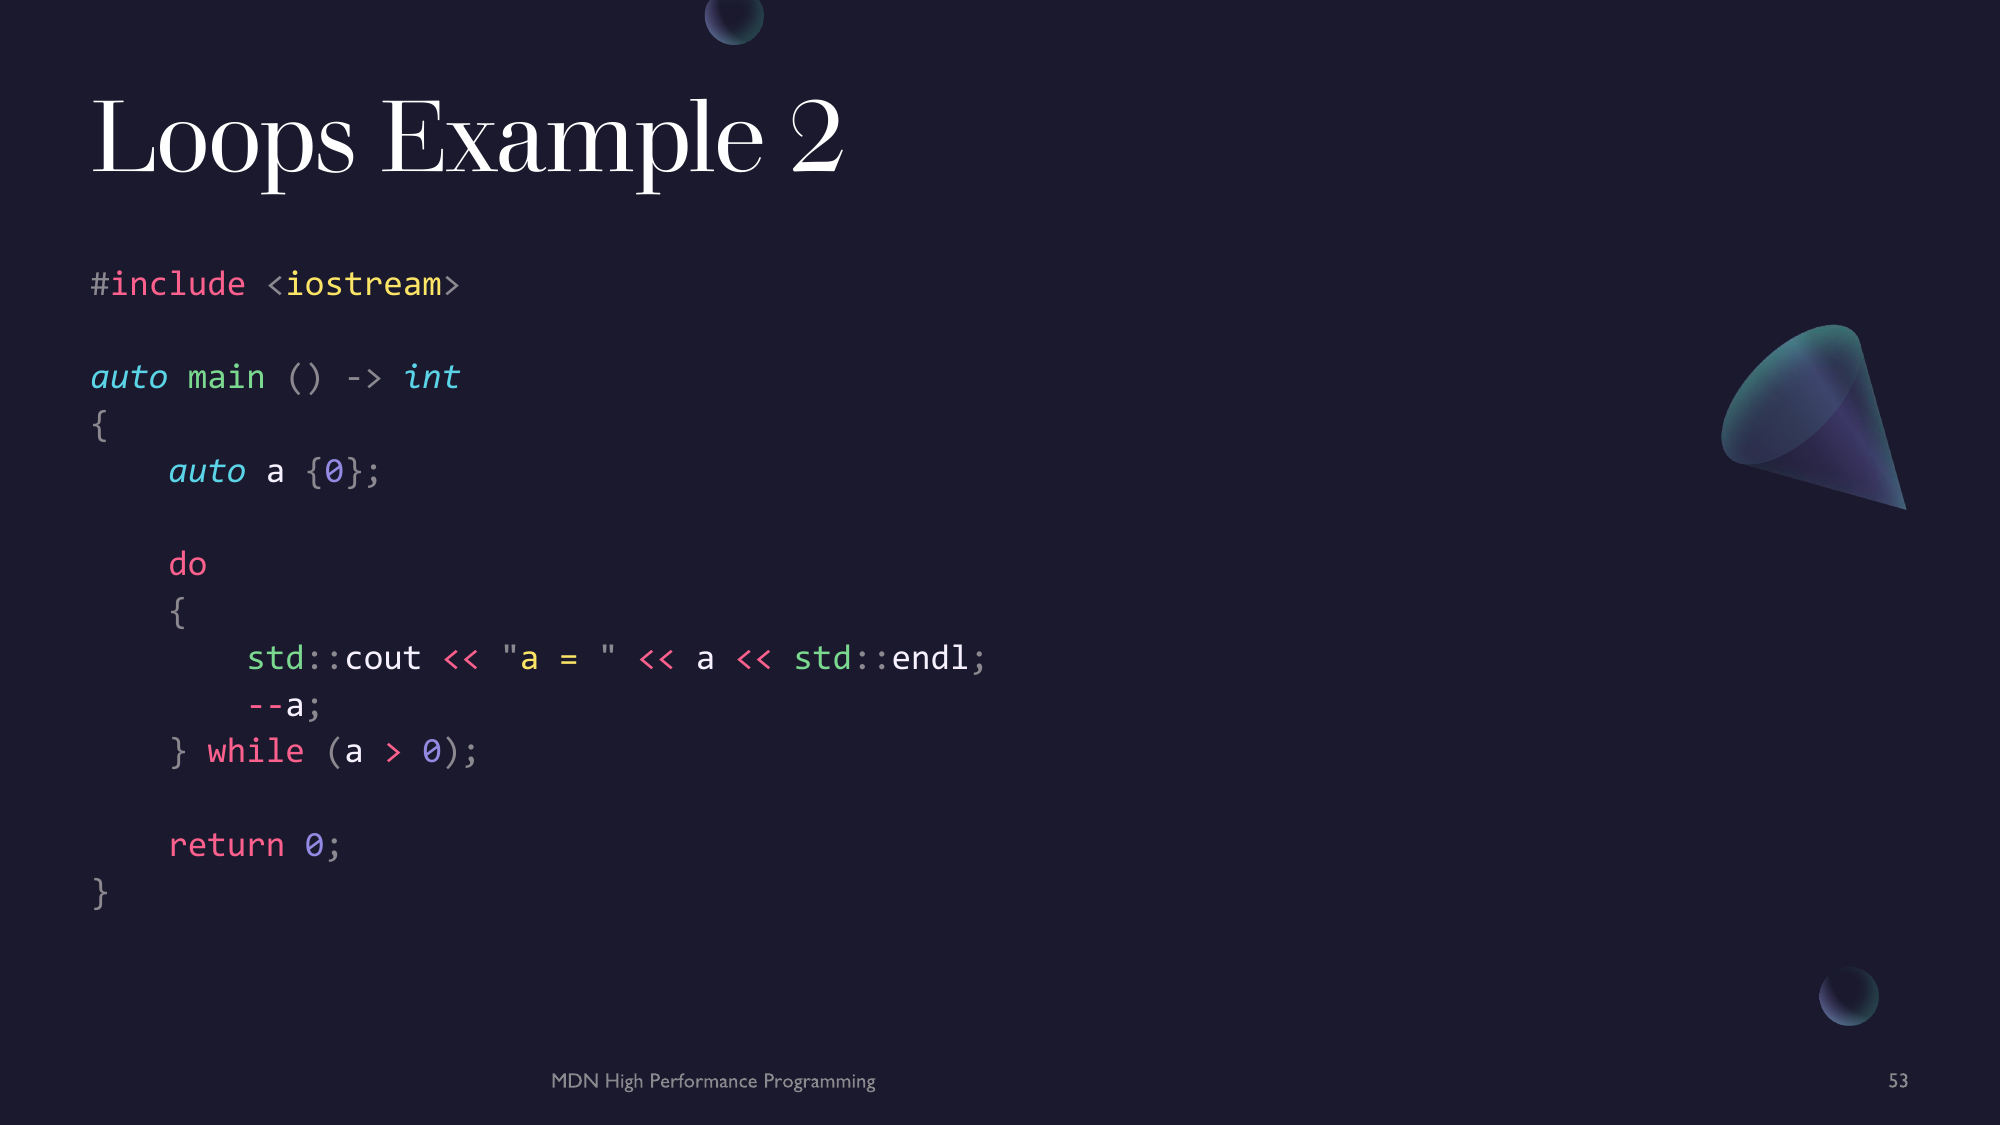
Do-While Loop
There is another kind of while loop in C++ called a do-while loop. This works the exact same way a regular while loop works except that the condition is checked at the end of each loop rather than the start. This means that the code block will be executed at least once.
#include <iostream>

auto main () -> int
{
    auto a {0};

    do
    {
        std::cout << "a = " << a << std::endl;
        --a;
    } while (a > 0);

    return 0;
}
Note: You can break out of a
whileordo-whileloop withbreakor areturn-expression.
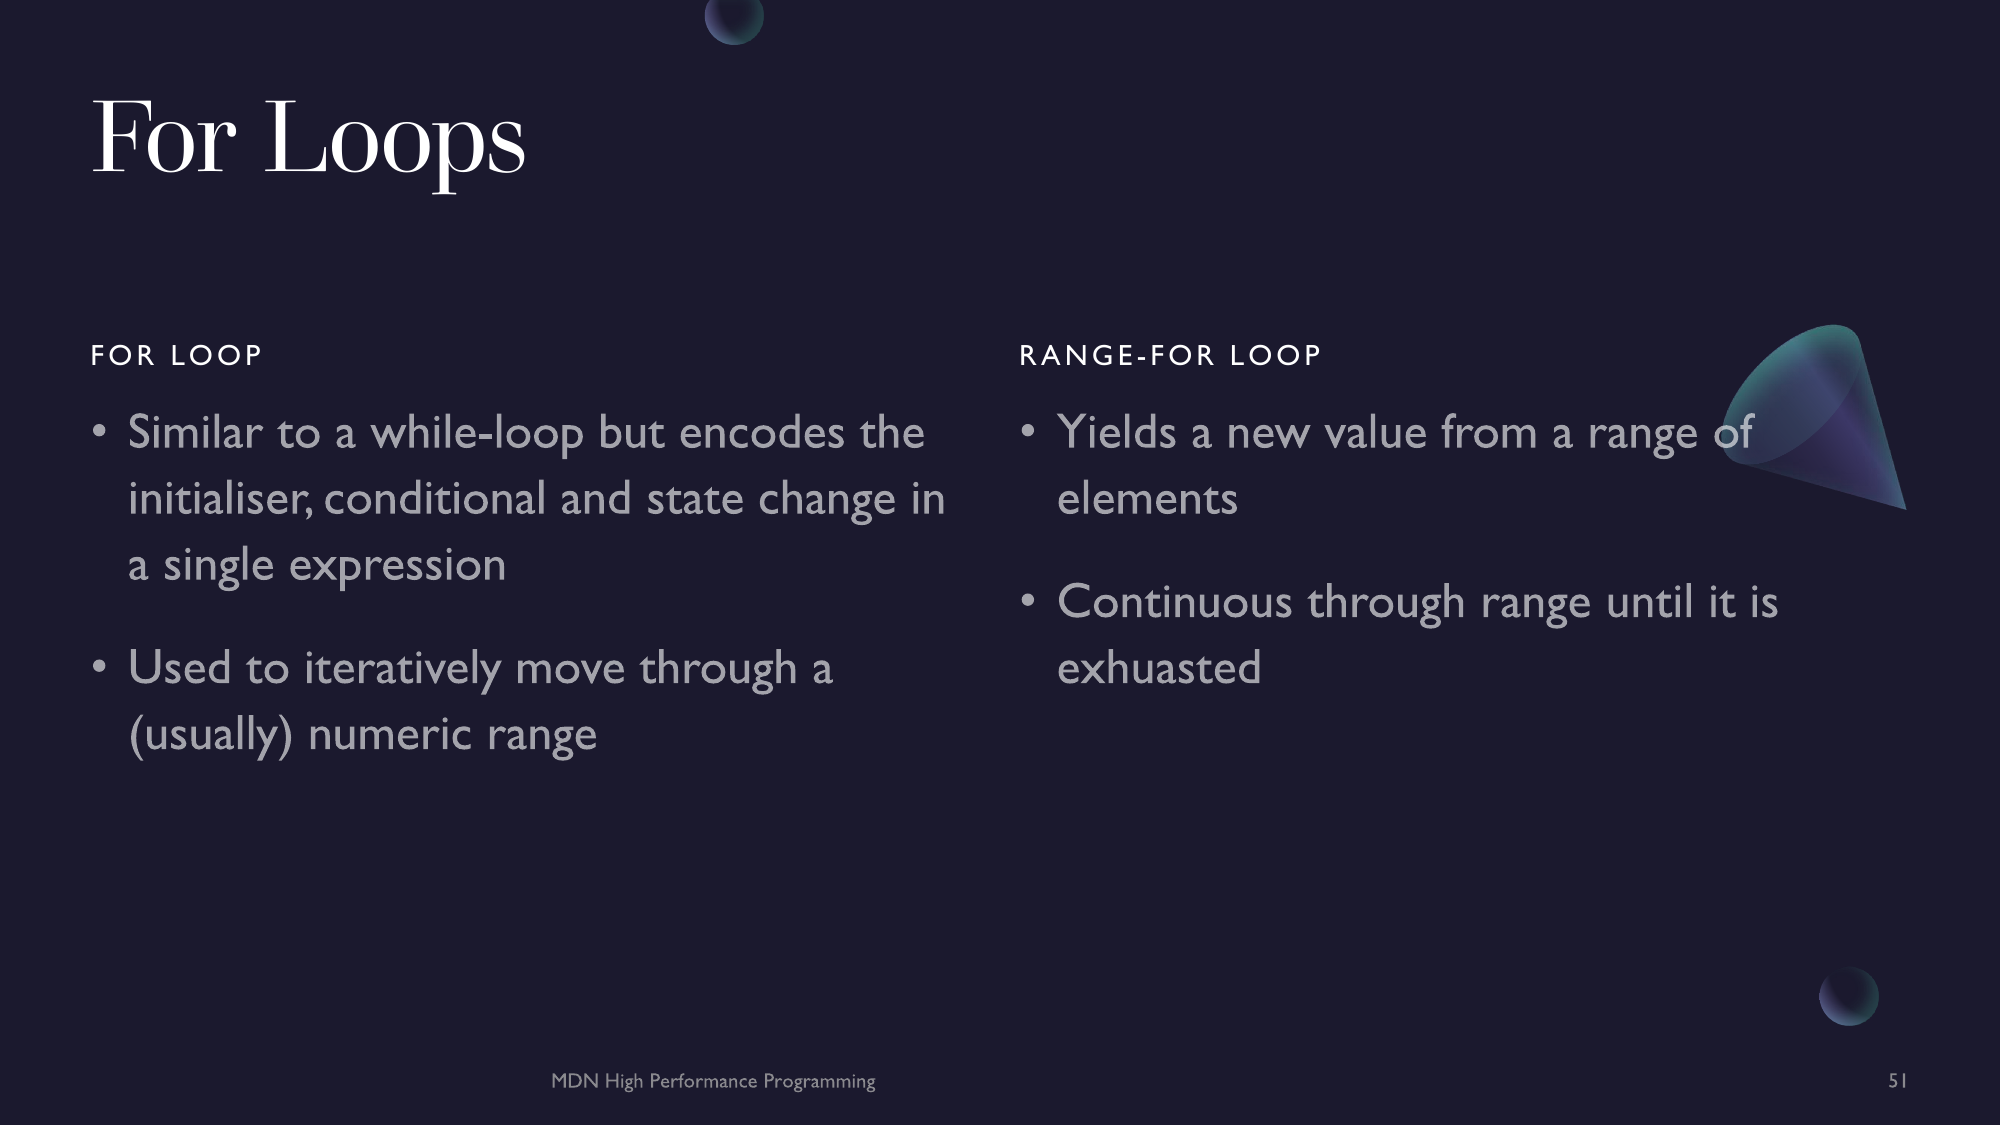
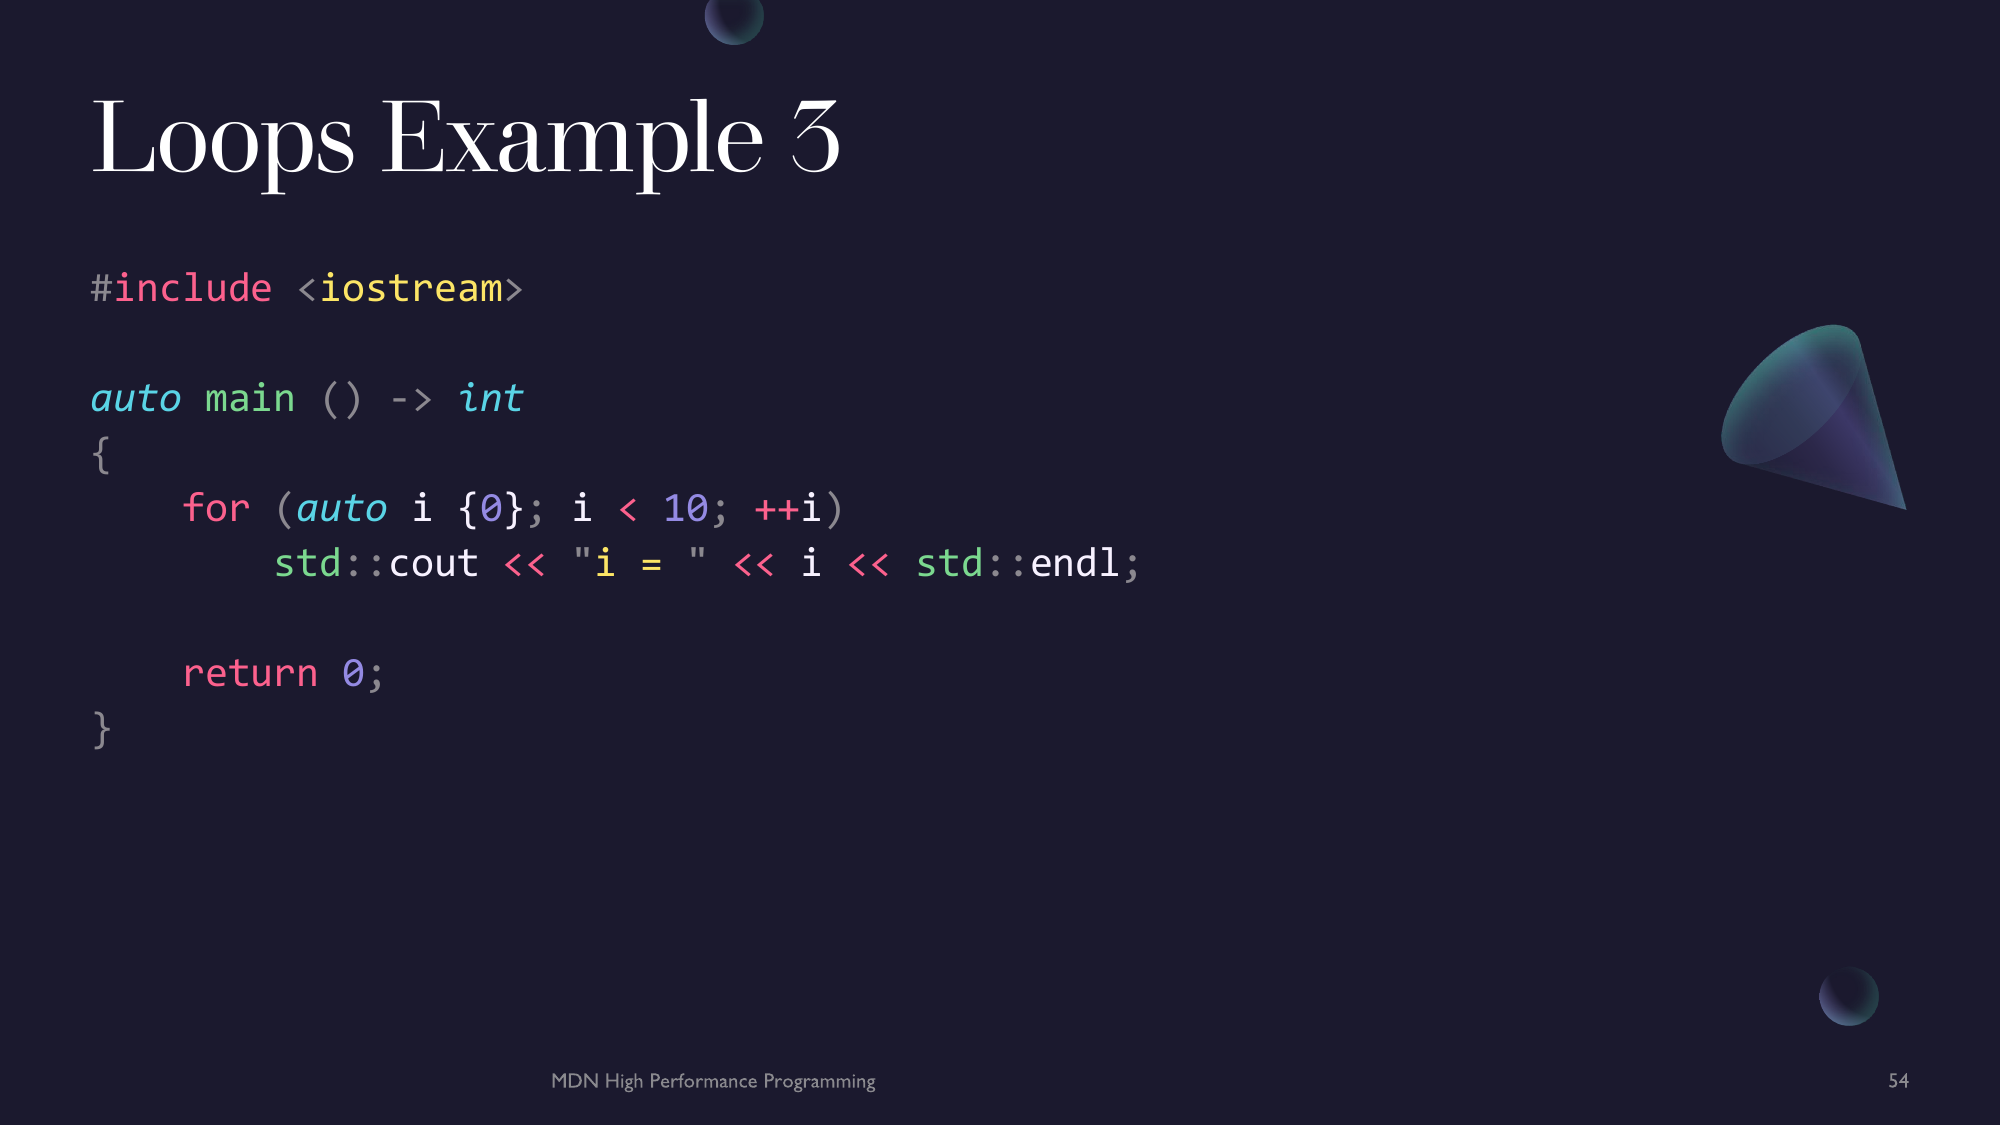
For Loop
Another common loop in C++ is the for loop. for loops will generate an initial value, validate it meets a condition and proceed through the sequences.
#include <iostream>

auto main () -> int
{
    for (auto i {0}; i < 10; ++i)
        std::cout << "i = " << i << std::endl;

    return 0;
}
As we can see, loops through the power of conditional checking make programs much smaller and allow us to abstract repeated actions into a single statement.
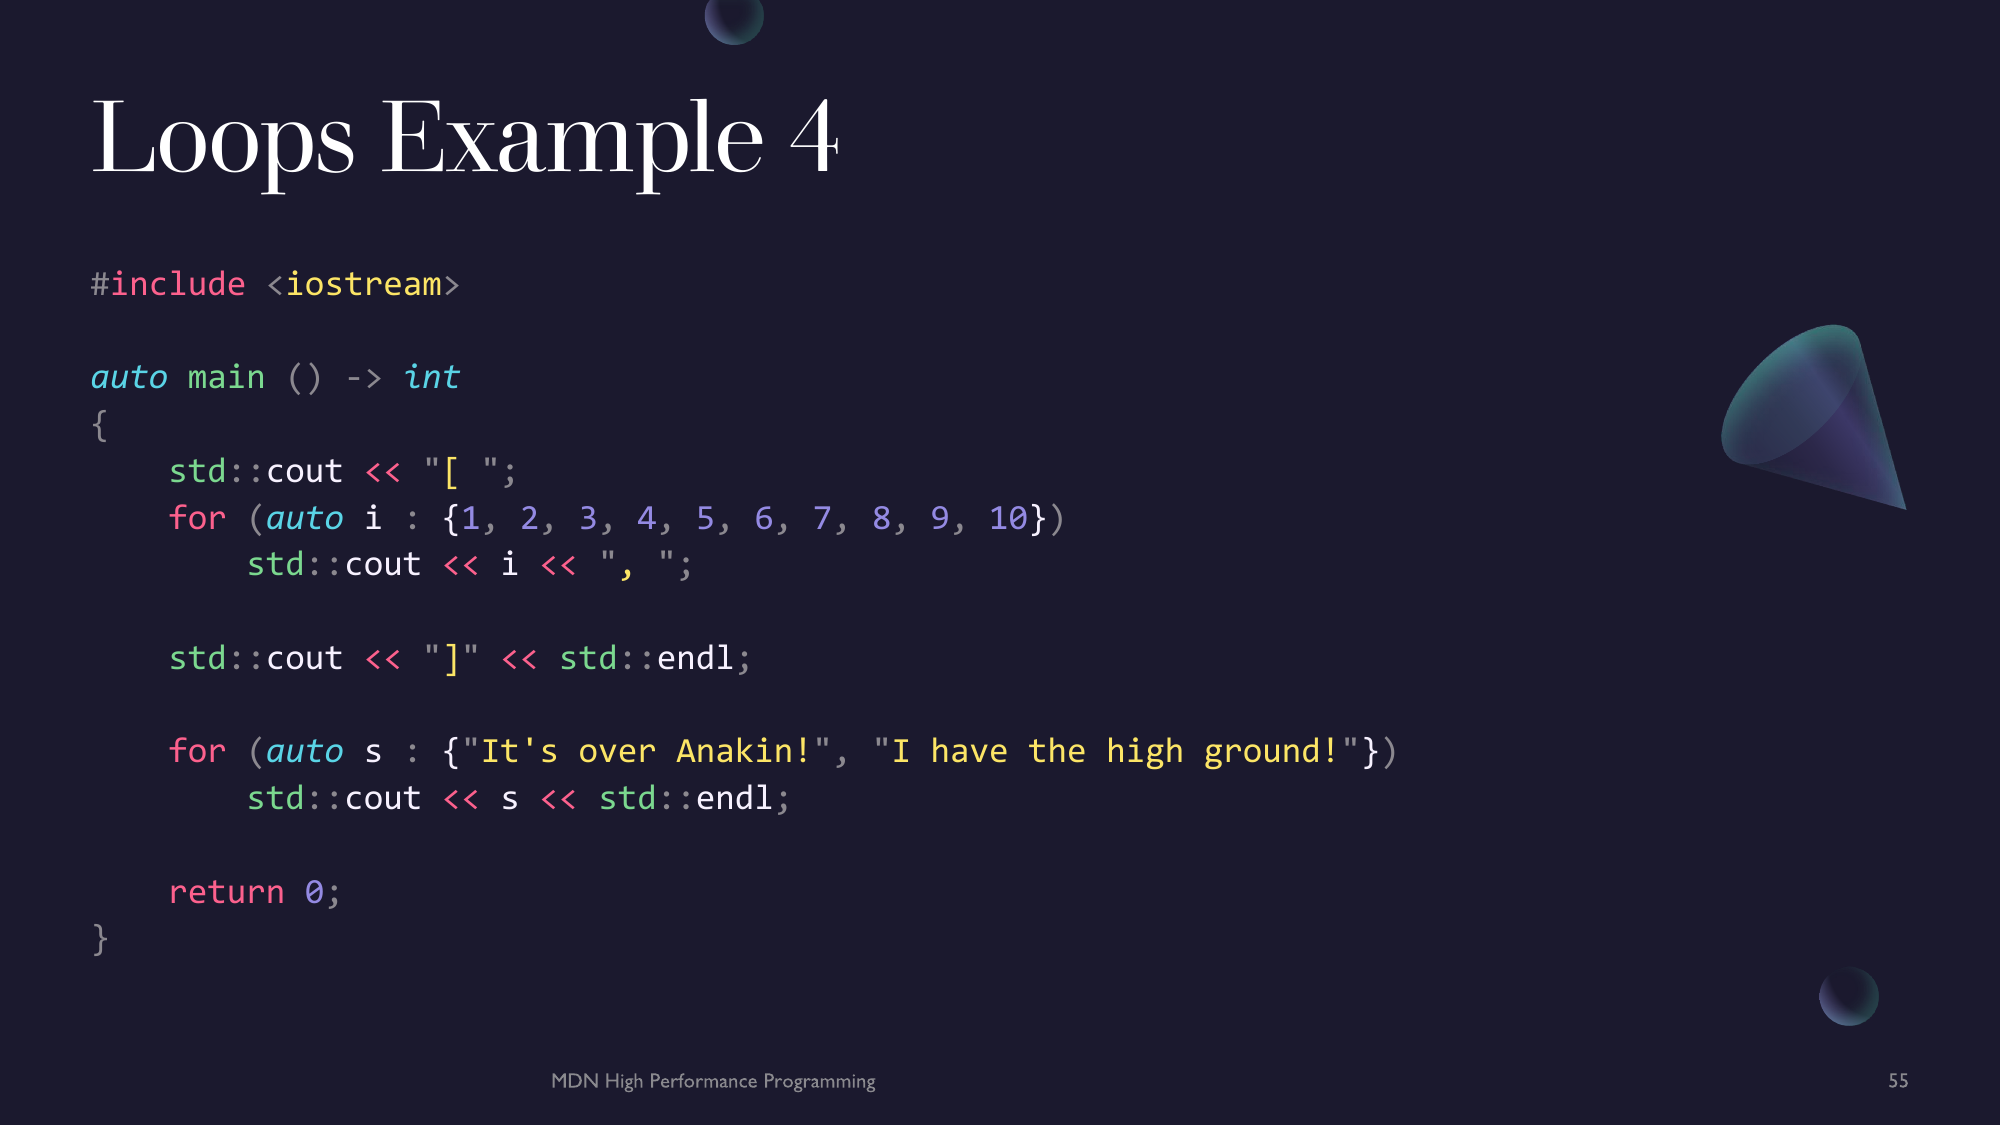
Range For
There is one other loop in C++. This is the range-for. This is a special for loop that is able to iterate through a sequence of values, yielding a single value from the sequence each loop. It automatically knows the size of the sequence and when to stop.
#include <iostream>

auto main () -> int
{
    std::cout << "[ ";
    for (auto i : {1, 2, 3, 4, 5, 6, 7, 8, 9, 10})
        std::cout << i << ", ";

    std::cout << "]" << std::endl;

    for (auto s : {"It's over Anakin!", "I have the high ground!"})
        std::cout << s << std::endl;

    return 0;
}
Functions
What is a functions?
A function is the most basic form of abstraction in programming. They allow software to be broken down into more simple pieces of code and compose and reuse them as we please.
Much like functions in mathematics, functions in C++ (an every programming language) take in some input parameters (aka arguments or points) and return a single output value. This creates a transformation or mapping between input values and types to output values and types.
Function Syntax
Functions in C++ consist of a declaration and definition. A declaration is the functions signature which consists of the functions name, its points and its return type. The definition is a code block with at least on return expression.
T f(A1 a1, A2 a2)
{
    /* code */

    return ...;
}
Tis the return typeA1is the type of argument one stored in parametera1A2is the type of argument one stored in parametera2return ...;is the return expression
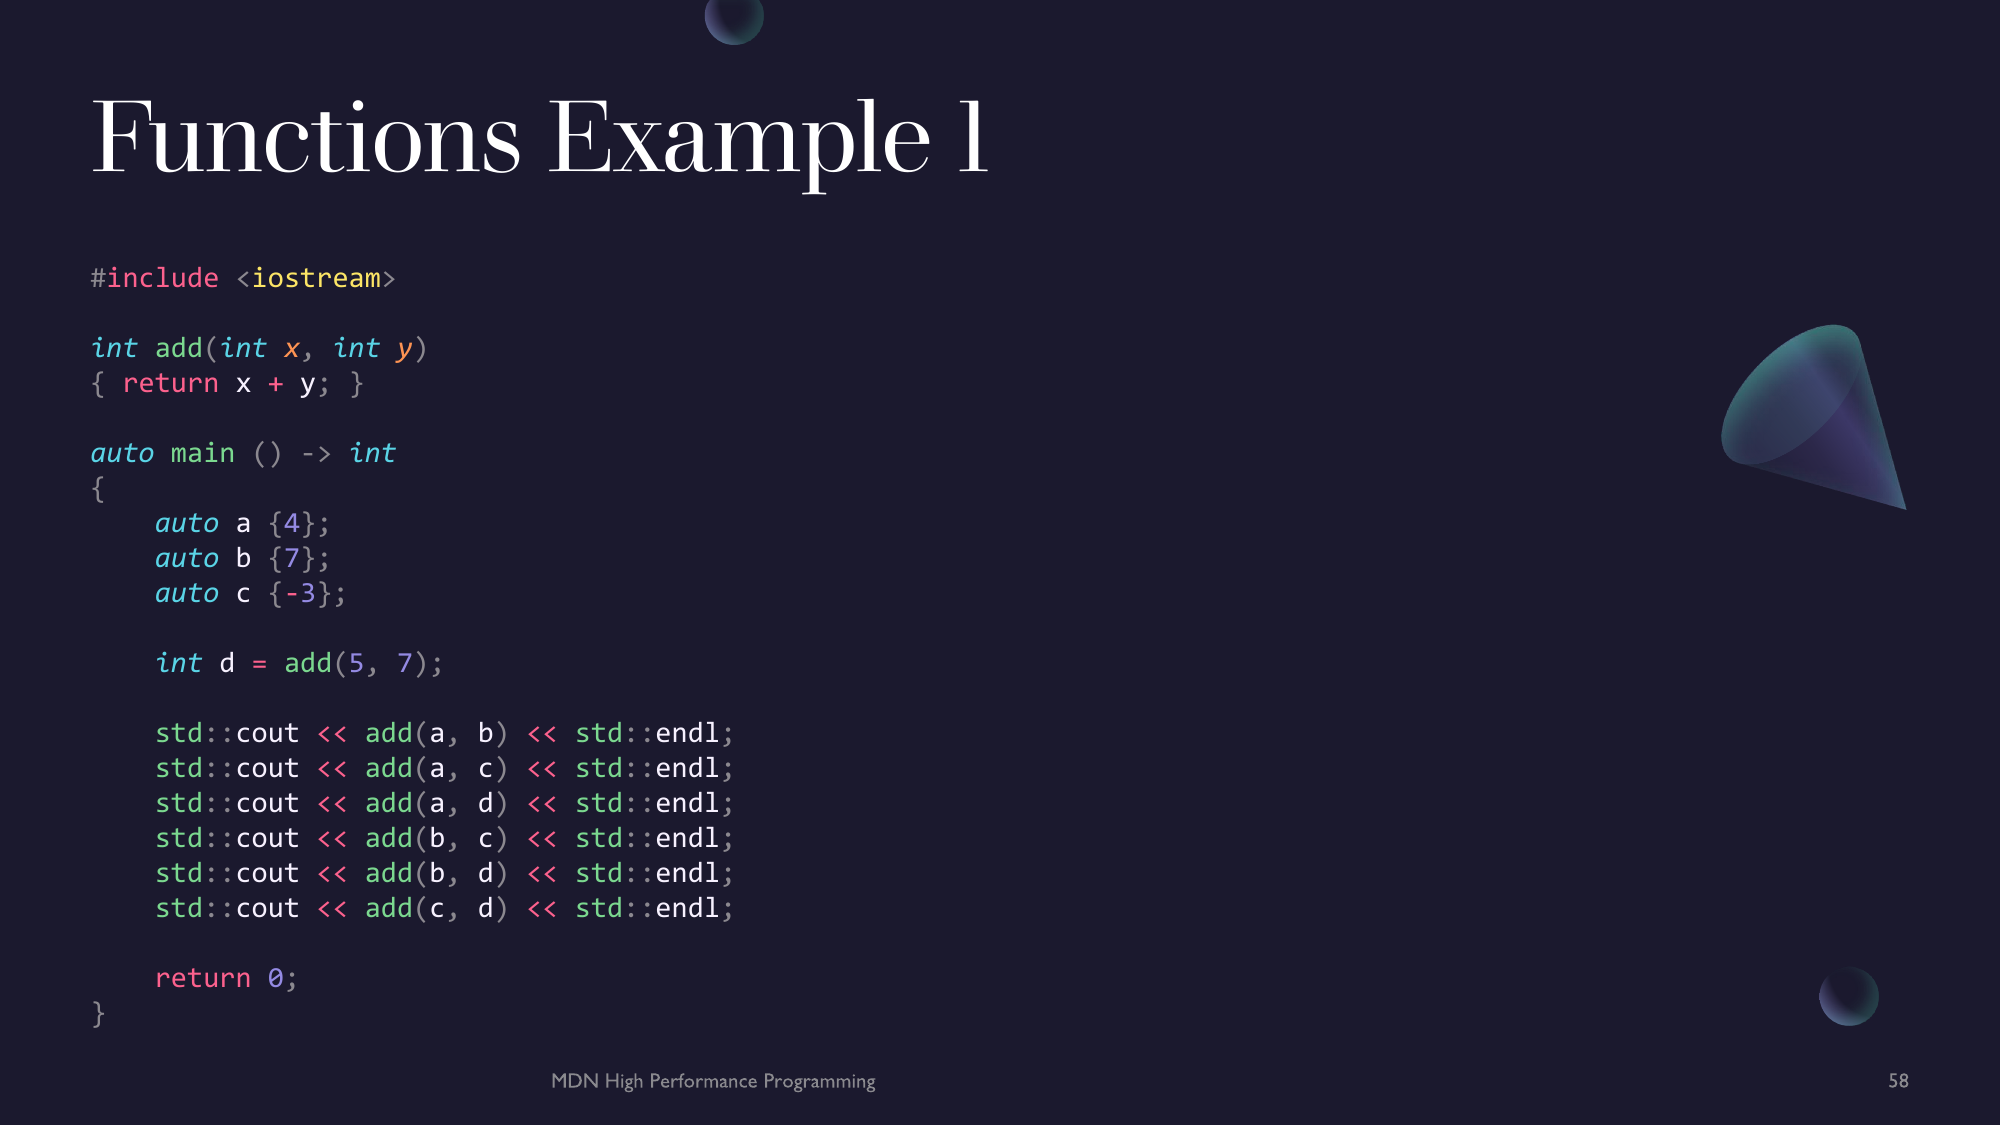
Functions have to be invoked to be used. This involves using the invocation operator () on the functions name. You can pass literals and objects to functions. You can also initialise and assign variables from the return of a function.
#include <iostream>

int add(int x, int y)
{ return x + y; }

auto main () -> int
{
    auto a {4};
    auto b {7};
    auto c {-3};

    int d = add(5, 7);

    std::cout << add(a, b) << std::endl;
    std::cout << add(a, c) << std::endl;
    std::cout << add(a, d) << std::endl;
    std::cout << add(b, c) << std::endl;
    std::cout << add(b, d) << std::endl;
    std::cout << add(c, d) << std::endl;

    return 0;
}
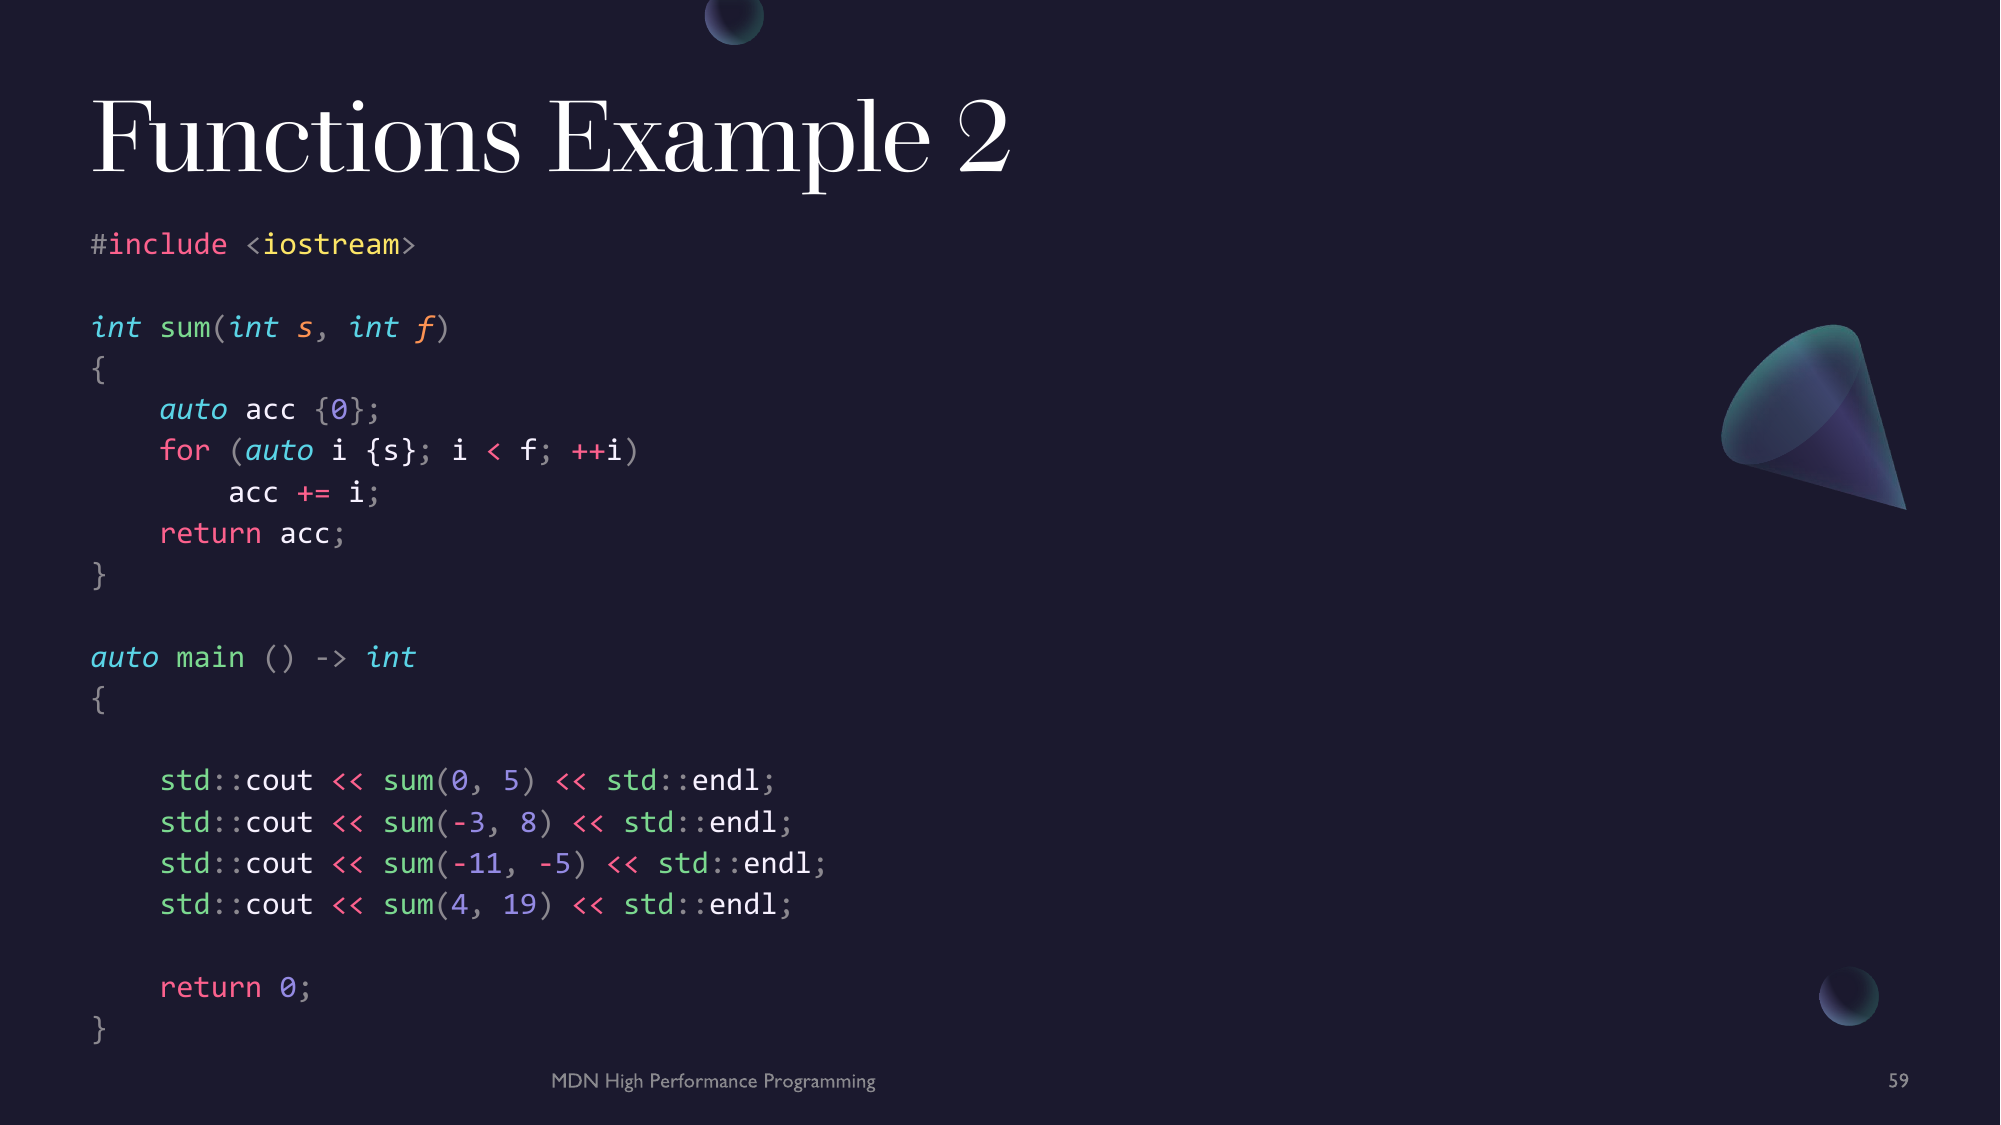
Functions allow us to abstract any common pattern into reusable code.
#include <iostream>

int sum(int s, int f)
{
    auto acc {0};
    for (auto i {s}; i < f; ++i)
        acc += i;
    return acc;
}

auto main () -> int
{

    std::cout << sum(0, 5) << std::endl;
    std::cout << sum(-3, 8) << std::endl;
    std::cout << sum(-11, -5) << std::endl;
    std::cout << sum(4, 19) << std::endl;

    return 0;
}
Void Functions
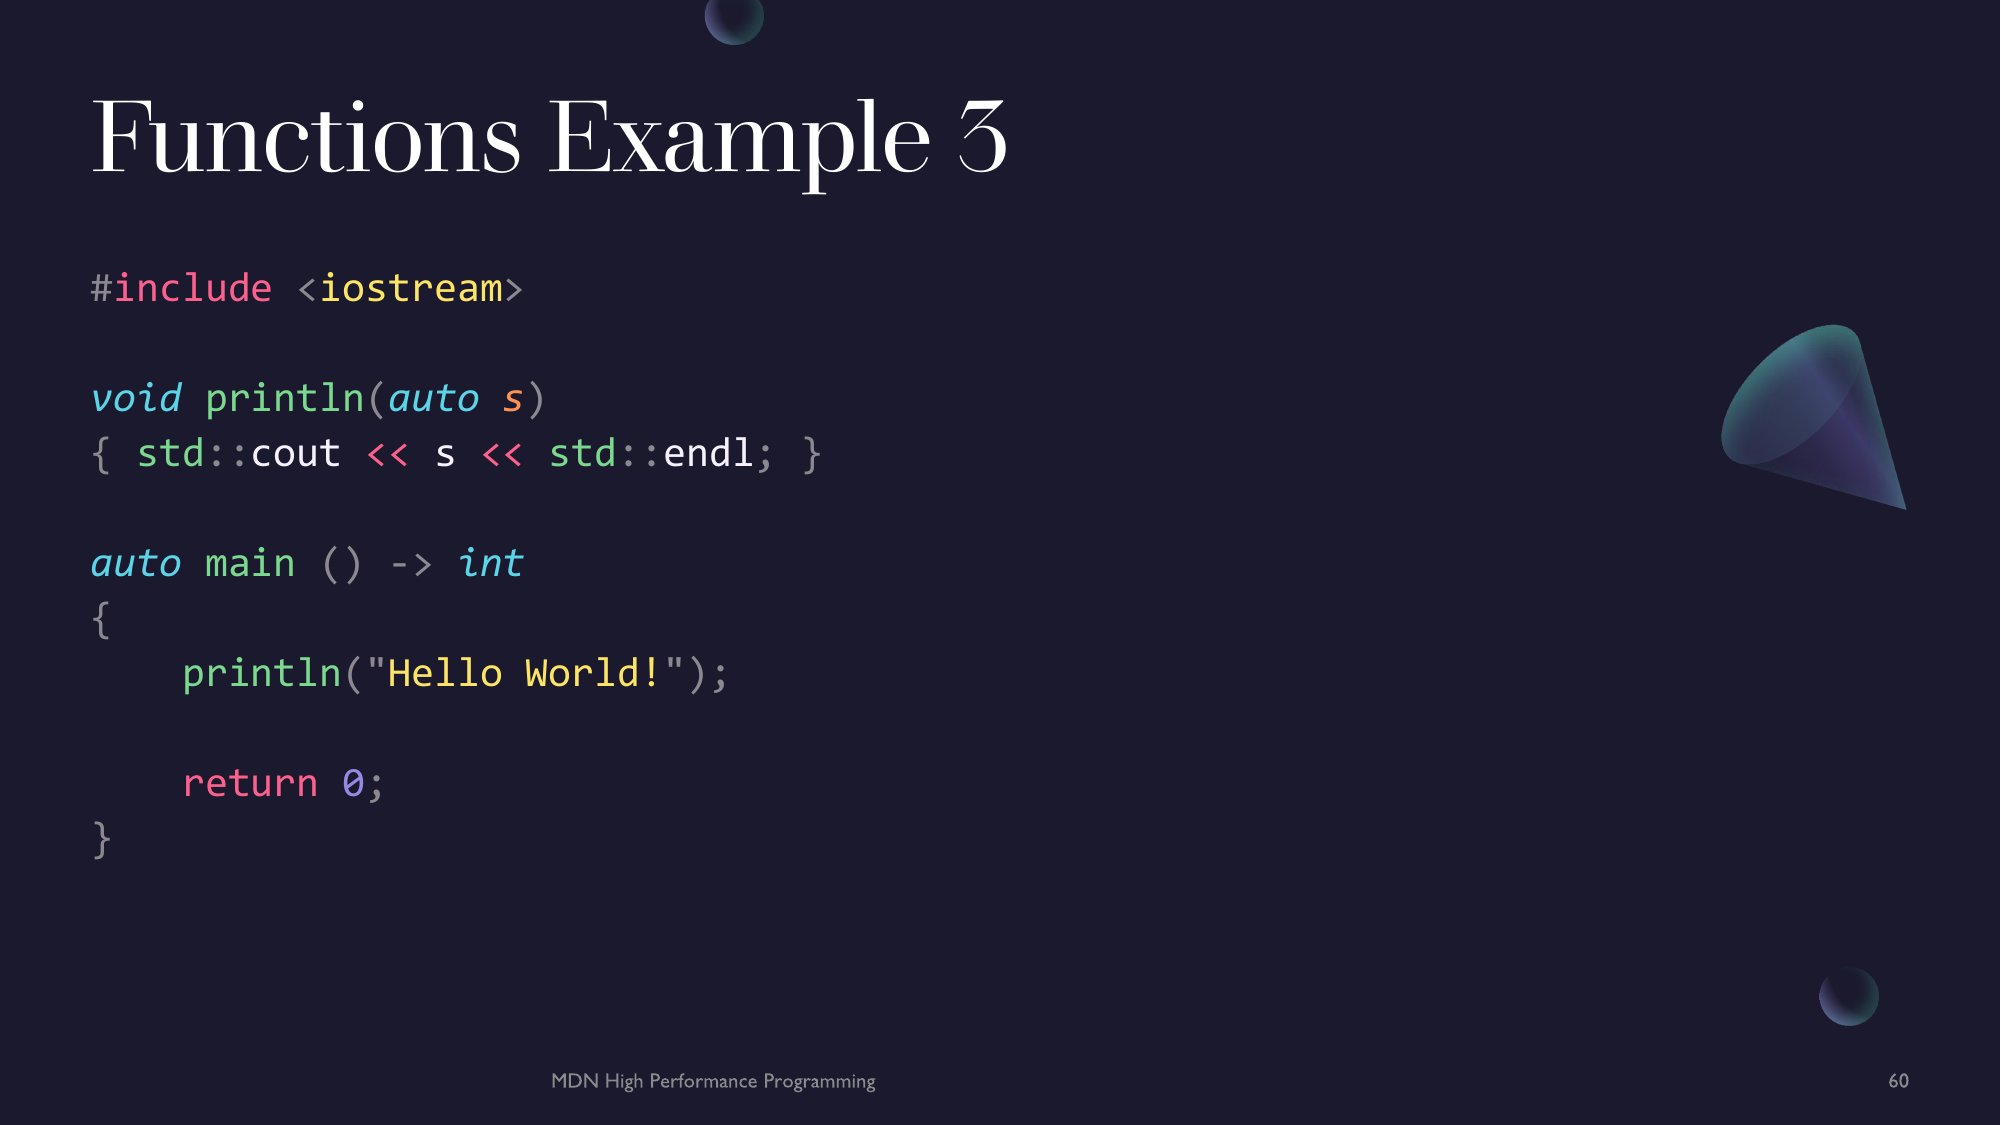
Functions can also return nothing. This is often the case when functions have side effects. Side effects are operations that occur outside the input and outputs domains of a function. Printing with std::cout (or rather the underlying function that `std::cout calls) is an example of a function with side effects. It takes the string literal as input and returns, nothing but the effect of the text printing still occurs.
In C++, the lack of a return type is denoted by the void literal.
#include <iostream>

void println(auto s)
{ std::cout << s << std::endl; }

auto main () -> int
{
    println("Hello World!");

    return 0;
}
Slides


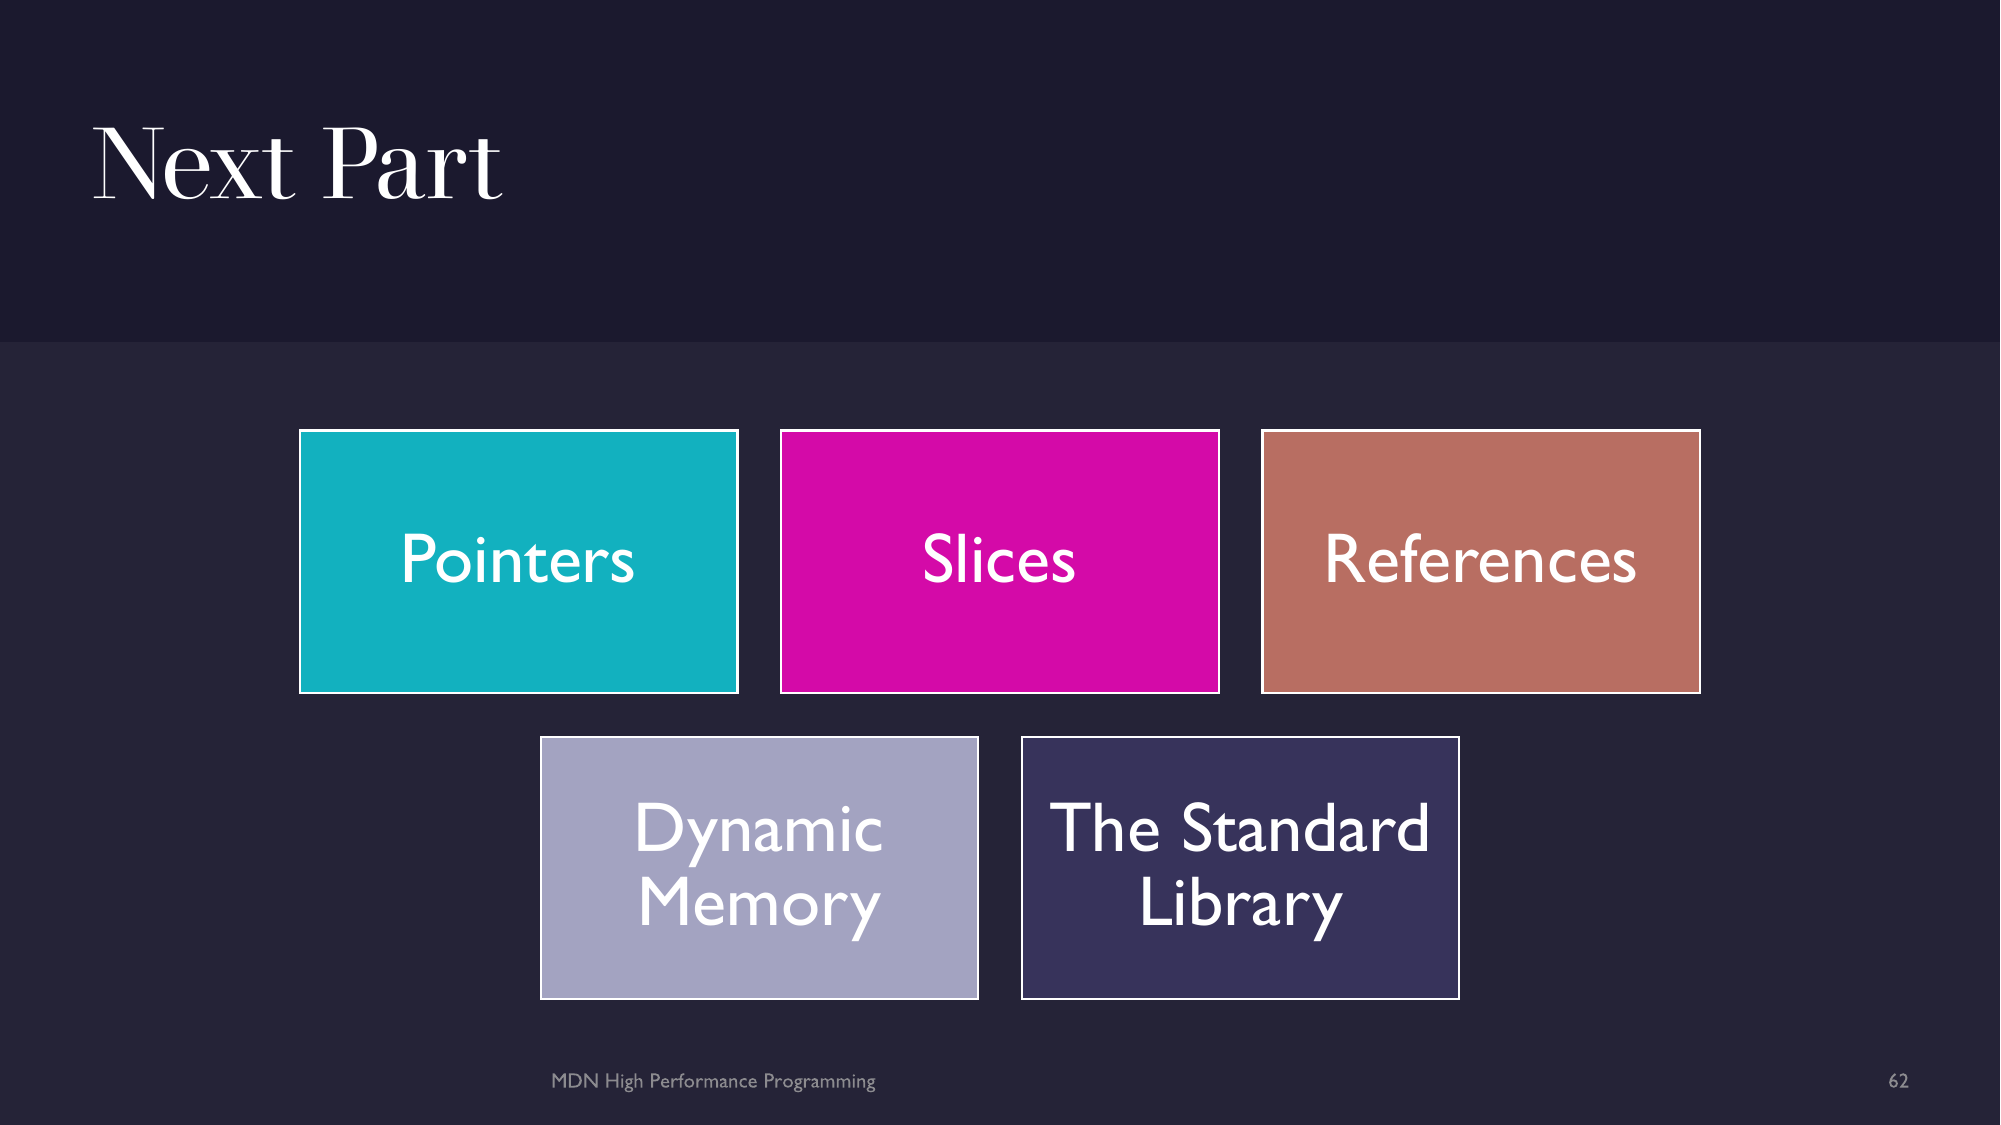


Chapter 3
This week you will be introduced to C++'s memory model and how it allows us to have precise control over memory resources in C++. You will also cover the difference in stack and heap based memory and the facilities for obtaining memory. You will learn about pointers, references and how they allow you to reference data located elsewhere. You will also be introduced to C++'s slice type allowing to store multiple values in a single object. Finally, you get and introduction into a few fundamental types found in C++'s standard library that make working with memory and collections far easier.
Pointers
What is a pointer?
Many people seem to struggle with the concept of a pointer. This is mostly due to either, bad teaching or that someone learning C++ (or C or Rust) do not have a concise understanding of memory. Memory can be thought of as a cell that has some value and lives at some address or location in the physical memory. Cells can be as small as a byte and as large a single machine register, typically 8-bytes.
Note: Registers are the circuit components that hold some value in the CPU that is be operated on. It can be an instruction or some data.
The following data can be mapped to a memory layout below it.
int a {4};
int b {37365};
| Address | Value |
|---|---|
| 0x00007fff59ae6e9d | ... |
| 0x00007fff59ae6e99 | 0x00000004 |
| 0x00007fff59ae6e94 | 0x000091f5 |
| 0x00007fff59ae6e90 | ... |
Notes:
...means garbage values.0x...is just an indicator that the value is a hexadecimal value- We jump backwards because the stack (local memory of your program) starts from the largest address and goes down. This is because the code when stored in memory (as instructions) starts from the lowest value and increases. This prevents overwrites between instructions and data, if managed correctly.
- The memory addresses here are just random, it differs on every computer and every run of the program, usually.
We can see that the value of a is stored at address 0x00007fff59ae6e99 and b is stored at address 0x00007fff59ae6e94. The reason the memory address jumps by four is because each memory address stores a single byte, thus to store a 32-bit value (int) you need for bytes thus the next memory address will be four addresses away, in this case the value for b.
But lets say we wanted to refer to the value already stored in a. We don't want a copy but we wanted some way to point to the value at that address. Well we could store the address of a in another location in memory like so.
| Address | Value |
|---|---|
| 0x00007fff59ae6e9d | ... |
| 0x00007fff59ae6e99 | 0x00000004 |
| 0x00007fff59ae6e94 | 0x000091f5 |
| 0x00007fff59ae6e90 | 0x00007fff59ae6e99 |
| 0x00007fff59ae6e88 | ... |
Notes: We jump 8-bytes in the address space for the stored address as addresses (in the example at least) are 64-bit in size.
As we can see, address 0x00007fff59ae6e90 stores the value 0x00007fff59ae6e94 which happens to be the number indicating the address where a is stored.
This is the premise of a pointer. It is a numerical value that holds some address in memory. This is address of another value in a program.
Syntax
To create a pointer in C++ is super simple. Given some type T the type of a pointer to a value of that type is T*.
We can store the address in an object like any other value in C++. To obtain the address of an object you can use the unary & operator prefixed to an objects name or use the std::addressof() function found in the header <memory>. Using the function is highly recommended as it is more consistent with more complex types.
To obtain the value pointed to by a pointer, we use the unary indirection operator (often called the dereference operator) * prefixed to an object name.
#include <iostream>
#include <memory>

auto main () -> int
{
    int a {4};
    int b {37365};
    int* pa {&a};
    int* pb {std::addressof(b)};

    std::cout << "a = " << a << std::endl;
    std::cout << "pa = " << pa << std::endl;
    std::cout << "*pa = " << *pa << std::endl;

    std::cout << "b = " << b << std::endl;
    std::cout << "pb = " << pb << std::endl;
    std::cout << "*pb = " << *pb << std::endl;

    return 0;
}
const qualifications
Because pointers are an independent type, they are able to have to have const (among other) qualifications however, the ordering of the qualifications can matter.
const T*- Pointer to constant data. The data cannot be changed but the pointer can point to a new location. (T const*is identical)T* const- Constant pointer to data. The data can be modified but the pointer can only point to the original value (address).
#include <iostream>
#include <memory>

auto main () -> int
{
    int a {4};
    int b {37365};
    const int* pa {&a};
    int* const pb {std::addressof(b)};

    std::cout << "*pa = " << *pa << std::endl;
    *pa += 3;  ///< Fails, comment out to run
    pa = std::addressof(b);
    std::cout << "*pa = " << *pa << std::endl;

    std::cout << "*pb = " << *pb << std::endl;
    *pb += 3;
    pb = std::addressof(a);  ///< Fails, comment out to run
    std::cout << "*pb = " << *pb << std::endl;

    return 0;
}
void pointers
Because of C++'s static type system, the type of a pointer must be declared however you can circumvent the type system using void. A pointer can be a void*, meaning that the type it points to is unbound. When you need to use the type you can then use static_cast<>() to create the type that you need. This is actually how C's malloc() function works. It returns a void* and it is up to the user to cast it to the desired type.
#include <iostream>
#include <memory>

auto main () -> int
{
    int a {4};
    void* pa {std::addressof(a)};

    std::cout << "*pa = " << *static_cast<int*>(pa) << std::endl;
    std::cout << "*pa = " << *pa << std::endl;  ///< This will fail, comment out to run

    return 0;
}
Pointer Arithmetic
Because pointers are just numbers (addresses) we can add and subtract from then as if they were integral types. We can use the increment, decrement, addition, subtraction and subscript (index) operators on pointers (+, -, ++, -- and [] respectively).
This can used to create and access a sequence or memory. This is how a string literal ("") works in C++, they are really sequence of char that exist in your program statically. C++ then decays them into the type const char* so functions can refer to them such as std::cout <<.
However, pointer arithmetic is very error prone. and leads to low readability and maintainability, but is useful to understand and for highly controlled manipulation of data.
#include <iostream>

auto main () -> int
{
    auto greeting {"Hello!"};
    const char* response {"Hi!!!"};

    for (auto i {0}; i < 7; ++i)
        std::cout << greeting[i];
    std::cout << std::endl;

    for (auto i {0}; i < 6; ++i)
        std::cout << *(response + i);
    std::cout << std::endl;

    /// These will have the same type
    std::cout << "typeid(greeting).name() = " << typeid(greeting).name() << std::endl;
    std::cout << "typeid(response).name() = " << typeid(response).name() << std::endl;

    for (auto i {0}; i < 6; ++i)
        std::cout << *(response++) << std::endl;

    std::cout << "response = " << response << std::endl;  ///< This now points to whatever is stored after `response`.

    return 0;
}
Dereferencing nullptr
In C++, any assignment and initialisation is is copy by default even when passed to functions. This can be really costly for objects that have a large amount of data stored in them. Pointers make it cheap to pass the data around as you now just have to pass a pointer to it instead of all the data. However, there is a catch to pointers. Pointers can point to nothing, this nothing value is actually the literal nullptr we saw in week 0. And you cannot dereference a pointer to nullptr as nullptr is nothing. This can be really dangerous as this is considered UB which may work, may not compile, may crash the entire program or do something entirely unexpected.
#include <iostream>

auto main () -> int
{
    int* p {nullptr};

    std::cout << "p = " << p << std::endl;      ///< p = 0

    /// Compiles (on Godbolt) but throws a runtime error (see return of program is not zero)
    std::cout << "*p = " << *p << std::endl;

    return 0;
}
Pointers to Pointers
It is also possible in C++ to have a pointer to a pointer. This mostly a feature inherited from C and remains in for C++ to interoperate with C and for completeness. Pointers to pointers may seem daunting but are straight forward if you apply the concept of a pointer again. The pointer-to-pointer object points to the address of the pointer object that holds the address of some other object. Pointer-to-pointers have the type T** and can be dereferenced to the their value, ie. the address the nested pointer points to or again to get the bottom value.
#include <iostream>
#include <memory>

auto main () -> int
{
    int a {6};
    int* p {std::addressof(a)};
    int** pp {std::addressof(p)};

    std::cout << "pp = " << pp << std::endl;
    std::cout << "*pp = " << *pp << std::endl;
    std::cout << "**pp = " << **pp << std::endl;

    return 0;
}
Note:
autois able to deduce the type if the right-hand-side is a rvalue however, theconstqualifications cannot be specified. ie.T* -> autoandT** -> auto.
Slices
What is a slice?
Working with single value objects and variables can be be tedious and doesn't allow for collecting common data efficiently into a single, easy to refer to object. This is were C++ slices come in. Slices are contiguous sequences of values. The length of a slice must be known at compile time and cannot change. Slices can hold any type including primitive types, user-defined types or even pointers.
We have already been using slices in C++ thus far. String literals are actually slices of char.
Note: Technically slices are called 'built-in arrays' in C++ but I'm opting for an alternative naming convention to avoid confusion later and because 'built-in arrays' is annoying to say.
Syntax
The syntax for a slice is strait forward and goes as follows: T v[N] { ... };, where
Tis the type of the slices elementsvis the variable nameNis the size of the array (at compile time){ ... }is the brace-list of literals that will be copied to the array. This list must be of the same size asN
- Note:
Ncan be elided if{ ... }is a fixed size.- Note:
{ ... }is called an aggregate initialiser
Iteration
To access the elements of a slice you use the subscript (index) operator [i] where i is an unsigned integral from 0..N-1, where [0] gets the first element and [1] gets the second element etc.
#include <iostream>

void print(int arr[], std::size_t s)
{
    std::cout << "[ ";
    for (auto i {0}; i < s; ++i)
        std::cout << arr[i] << ", ";
    std::cout << "]" << std::endl;
}

auto main () -> int
{
    int nums[] { 1, 2, 3, 4, 5 };

    print(nums, 5);

    return 0;
}
Slices vs Pointers
In C++, slices can; and often will, decay into a pointer. This is because, under the hood, slices are just pointers to a sequence of elements that are contiguous in memory. This makes it efficient to refer to arrays as you can pass around the pointer to its first element. Using the same example as above, if we change print() to take an integer pointer int* arr instead of int arr[] we get the exact some behavior. This is because C++ efficiently packs data together so the exist next to each other in memory.
#include <iostream>

void print(int* arr, std::size_t s)
{
    std::cout << "[ ";
    for (auto i {0}; i < s; ++i)
        std::cout << arr[i] << ", ";
    std::cout << "]" << std::endl;
}

auto main () -> int
{
    int nums[] { 1, 2, 3, 4, 5 };

    print(nums, 5);

    return 0;
}
String Literals and Character Slices
In C++, the string literal is a char[] or can (usually) decay into a const char*. This make them efficient to create and refer to but can have some unfortunate caveats. The biggest issue is that slices are not very user friendly. This is mostly due to them being inherited from C which is; in contrast to C++, a much simpler language that could not afford; at the time of its creation, the more user friendly abstractions C++ has available to it.
References
What is a reference?
So far we have learnt about pointers and how they are useful in distributing access to a memory resource that is expensive to copy as well as create contiguous sequences of values or slices. We have also seen how to get larger memory resources from the OS using new and delete expressions. However, we have also seen that pointers have caveats. They can lead to memory leaks and other various issues about ownership and lifetime of objects.
In C++ there is another facility that allows for you to refer to objects in different scopes that do not feature the same pitfalls of pointers. These are called references. References are; as the the name suggests a reference to an existing object or in other words an alias for an existing object. Operations done on a reference are truly done on the original object. This helps to avoid the cumbersome and error prone nature of pointers.
Pointers vs References
| Pitfall | Pointers | References | Meaning |
|---|---|---|---|
| Nullable | ✅ | ❌ | Pointers can point to nothing, references cannot |
| Dereferencable | ✅ | ❌ | You cannot dereference a reference |
| Rebindable | ✅ | ❌ | A reference cannot be rebound to a new value. Operations done on the reference affect the underlying value, even assignment. |
| Multiple levels of indirection | ✅ | ❌ | You cannot have a reference of a reference. |
| Pointer arithmetic | ✅ | ❌ | You cannot increment (etc.) a reference like a pointer |
Syntax
References are declared as T&. References must also have an initialiser.
#include <iostream>

auto main () -> int
{
    int i {7};
    int& ir {i};

    std::cout << "i = " << i << std::endl;
    std::cout << "ir = " << ir << std::endl;

    ir += 6;
    std::cout << "i = " << i << std::endl;

    i -= 4;
    std::cout << "ir = " << ir << std::endl;

    return 0;
}
const qualifications
Because references cannot be rebound to reference a new object const qualifications are must simpler than pointers. References themselves are alway constant, that is always point to the same thing however, you can specify that the object itself is constant with const T&. This means that the the object the reference refers to cannot be modified.
#include <iostream>

auto main () -> int
{
    int i {7};
    int& ir {i};
    const int& cir {i};

    std::cout << "i = " << i << std::endl;
    std::cout << "ir = " << ir << std::endl;
    std::cout << "cir = " << cir << std::endl;

    ir += 6;
    std::cout << "i = " << i << std::endl;

    i -= 4;
    std::cout << "ir = " << ir << std::endl;

    cir += 7;   ///< Fails, `cir` is read-only
    std::cout << "i = " << i << std::endl;

    return 0;
}
Note: You can substitute just the type
Tof a reference forautoie.T& -> auto&andconst T& -> const auto&
Move Semantics
References are also used to denote move semantics in functions. So far we have only seen value, pointer and reference semantics. Move semantics allow for a function to take ownership of an objects resources. Move semantics are denoted using the T&& type signature, this is also called a rvalue. This allows us to rip out the guts of an object and use it how we please. To create a rvalue from an existing object we use the std::move() function from the <utility> header.
The difficulty of move semantics is it only applies to objects that can move ie. types with move constructors and move assignments. Without these constructors T&& just becomes a regular reference. This is the case for primitive types in C++. We will cover more on the specifics of moves in chapter 5.
Dynamic Memory
C++ gives us precise control of how memory is used. This allows programs to be highly optimised and control the amount of overhead a program has but means that memory must be managed by manually.
Stack vs Heap
In almost all computers there are two kinds of memory resource pools. The first kind, which we have been using exclusively so far is called the stack. Stack memory is the local memory resources that the computers OS is willing give the program when it runs. However, the stack is limited in size and it is very easy to use up all of the stacks available memory very quickly.
This is where the second memory resource pool comes in called the heap or the free store. The heap is a much larger pool of memory programs can access and utilise but there is a catch to its use. You must go through the operating system each time you want memory from the heap. You are also responsible for returning ownership of that memory to the OS when you are done.
new and delete
So, how do we get memory from the heap. This is done with a new expression. new is a keyword that invokes the OS's memory resource allocator giving you access to memory from the OS. new returns a pointer of the allocated resources type. You can use this pointer however you need to like any other pointer but, after you have finished using the memory resource you must relinquish ownership of it using delete on the pointer holding the resource. Not doing so will cause a memory leak.
#include <iostream>

auto main () -> int
{
    int* ip = new int(7);   ///< Creates an `int` initialised with the value `7` on the heap

    std::cout << "ip = " << ip << std::endl;
    std::cout << "*ip = " << *ip << std::endl;

    delete ip;
    ip = nullptr;

    return 0;
}
Dynamic Slices
You can also allocate slices using new[] expressions and deallocate with delete[].
#include <iostream>

void print(int arr[], std::size_t s)
{
    std::cout << "[ ";
    for (auto i {0}; i < s; ++i)
        std::cout << arr[i] << ", ";
    std::cout << "]" << std::endl;
}

auto main () -> int
{
    int* nums = new int[]{ 1, 2, 3, 4, 5 }; ///< Creates a slice of `int` initialised with brace list

    print(nums, 5);

    delete[] nums;
    nums = nullptr;

    return 0;
}
Forewarning on Dynamic Memory Management
Dynamic memory management is hard to get right and very easy to get wrong. Memory leaks occur and cause dramatic problems for critical systems and slow a program and even an entire computer to a grinding halt. Avoid using raw new and delete expressions in anything beyond trivial programs or unless you know what you are doing. In chapter 5 we will look at various principles that will assists in resource usage; including memory, to ensure C++ program are safe. That being said, have a toy with new and delete now to get an idea of how they work.
Introduction to the Standard Library
What is the Standard Library
The Standard Library is the full set of features in C++ that are available outside the pure language. These include mathematical functions, IO facilities, containers, algorithms and much more. These are tools that abstract a lot of the useful mechanics of C++ into safe, efficient and fast facilities that are easier to use, more consistent and far superior in functionality. The C++ Standard Library is included using headers. These are the files we have been importing using the #include preprocessor directive.
This week you will learn about the most useful and bare-bones features in the Standard Library that will make working with C++ much easier, more idiomatic and faster.
Initializer Lists
Throughout the last few weeks we have been using brace-init-lists to initialise objects. This is super useful for slice-like types to be initialised without using for loops. In C++ these brace-init-lists are converted to std::initializer_list<T> (where T is the element type). This is a useful construct for building user-defined containers that are initialised using a brace-init-list. There is not much use for you in std::initializer_list now but it is useful to know about later. One important thing to know about std::initializer_list is that is is a construction only type. That is it is only used to create object, you cannot return a std::initializer_list from a function.
Arrays
Slices are useful for packing contiguous data into a single object but because of the implicit nature of decaying into pointers they can be error prone. This is where C++'s array type come in.
std::array comes in. This is a complete array type that store both its data and size. Like slices, std::array must know its type and size at compile time and the type must be the same throughout the array. Because std::array is a complete object you can use reference semantics on it in an intuitive way. It is highly recommended to use std::array instead of slices everywhere you can.
#include <iostream>
#include <array>

void print(std::array<int, 6> arr)
{
    std::cout << "[ ";
    for (auto i {0}; i < arr.size(); ++i)
        std::cout << arr[i] << ", ";
    std::cout << "]" << std::endl;
}

auto main () -> int
{
    auto a = std::array<int, 6>{ 1, 2, 3, 4, 5, 6 };
    auto b = std::to_array<int>({ -1, -2, -3, -4, -5, -6});  ///< Size can be deduced

    print(a);
    print(b);

    return 0;
}
Member Access
Because we are know looking at some custom types from C++'s standard library it is important to point out how to access member functions and variables of both objects and pointers. For an object T t(); with a member variable you access it using the . operator like t.foo. If t::foo is a member function you postfix parentheses to call the function like t.foo(). If the object is a pointer say T* tp = &t then the -> operator is used instead of ..
Spans
Another useful slice-like structure is a std::span. Remember the print() function (in slices section of this chapter) that took a slice and a size. This is common place in many old C and C++ libraries that used pointer for all buffers. std::span removes the need for pointers altogether. std::span is a non-owning view of any object that has some contiguous data and a size. This allows libraries to accept a multitude of different intpu types that resemble the shape and work seamlessly with them all.
#include <array>
#include <iostream>
#include <span>

void print(std::span<int> span)
{
    std::cout << "[ ";
    for (auto& e : span)
        std::cout << e << ", ";
    std::cout << "]" << std::endl;
}

auto main () -> int
{
    auto array = std::to_array<int>({ 1, 2, 3, 4, 5, 6 });
    int slice[] = {4, 46, 57};

    print(array);
    print(slice);

    return 0;
}
Strings
Now that we have a much more powerful array type at out disposal it might be tempting to use it as a character array for strings and while this is viable we often want to form a very different set of operations on strings compared to arrays. For this we have std::string. std::string is a specialised type that has a much larger interface of string operations.
#include <iostream>
#include <string>

auto main () -> int
{
    auto str1 {"Hello"};
    auto str2("Goodbye");

    std::cout << str1 << std::endl;
    std::cout << str2 << std::endl;

    return 0;
}
Note: There are also string type for all of C++'s character types eg.
wchar_t.
String Views
There are also span like views for strings. This is called std::string_view. Like span it doesn't own its string but can be used to access its value. This is designed to be a replacement for character slices.
#include <iostream>
#include <string_view>

void print(std::string_view s)
{ std::cout << s << std::endl; }

auto main () -> int
{
    print("Hello");

    return 0;
}
Literal Operators
In C++ the is a cool operator called the literal operator "". This is used to construct literals from string literals. The are string literal operators for std::string and std::string_view which are ""s and ""sv respectively.
#include <iostream>
#include <string>
#include <string_view>

using namespace std::literals;

void print(std::string_view s)
{ std::cout << s << std::endl; }

auto main () -> int
{
    print("Hello"sv);

    std::cout << typeid("Hello").name() << std::endl;
    std::cout << typeid("Hello"s).name() << std::endl;
    std::cout << typeid("Hello"sv).name() << std::endl;

    return 0;
}
Smart Pointers
The final facility we will look at is C++'s smart pointers. Smart pointers allow for automatic lifetime management of heap allocated memory resources. It is highly recommended to only use smart pointers for for any kind of head resource.
All smart pointers are in the <memory> header.
Unique Pointer
std::unique_ptr is a pointer to a uniquely owned resource. It cannot be copied, only moved. When a std::unique_ptr goes out of scope it automatically deletes the allocated resource. Because std::unique_ptr is a complete object you can pass a reference of a std::unique_ptr and modify the underlying value like a pointer. It also offers a safer std::unique_ptr::get() method that returns nullptr if the std::unique_ptr points to nothing.
#include <iostream>
#include <memory>

void print(std::unique_ptr<int>& ptr)
{
    std::cout << ptr << std::endl;
    std::cout << *ptr << std::endl;
}

void add_magic(std::unique_ptr<int>& ptr)
{ *ptr += 42; }

auto main () -> int
{
    std::unique_ptr<int> p1(new int(6));
    auto p2 = std::make_unique<int>(7);
    auto p3 = std::unique_ptr<int>{nullptr};

    print(p1);
    print(p2);

    add_magic(p1);
    // add_magic(p3);  ///< Would fail

    print(p1);
    // print(p3);  ////< Would fails

    return 0;
}
Shared Pointer
Sometimes it useful to have multiple pointers refer to the same dynamic memory resource. However, one issue of this is there is know way to know if the memory resource is still needed but another pointer meaning a memory resource can be released accidently leaving all other pointers to the now deleted resource a dangling pointer. This is where std::shared_ptr comes in handy. This pointer will maintain a count or how many pointers refer to it. Only when this count reaches zero, indicating no more pointers are using the resource will the resource get deleted. This gives the behavior of many garbage collected languages without the massive overhead of a global gabage collecting program.
#include <iostream>
#include <memory>

void print(std::shared_ptr<int> ptr)
{
    std::cout << "ptr = " << ptr << std::endl;
    std::cout << "*ptr = " << *ptr << std::endl;
    std::cout << "ptr.use_count() = " << ptr.use_count() << std::endl;
}

void add_magic(std::shared_ptr<int>& ptr)
{ *ptr += 42; }

auto main () -> int
{
    auto p = std::make_shared<int>(7);

    std::cout << "p.use_count() = " << p.use_count() << std::endl;

    print(p);
    add_magic(p);

    return 0;
}
Weak Pointer
Sometimes it is useful to observe an existing resource that is managed by std::shared_ptr and only assume temporary ownership if the object still exists. This is where std::weak_ptr is used. It is constructed from an existing std::shared_ptr and observes the memory resource and is able to be converted to a std::shared_ptr when it needs to access the resource. This is useful for breaking reference cycles of std::shared_ptr's and extend the lifetime of a memory resource to the scope of a std::weak_ptr. It is also able to check if the resource has been deleted already.
#include <iostream>
#include <memory>

void print(std::weak_ptr<int> ptr)
{
    std::cout << "ptr.use_count() = " << ptr.use_count() << std::endl;

    if (auto sp = ptr.lock())
    {
        std::cout << "sp.use_count() = " << sp.use_count() << std::endl;
        std::cout << "sp = " << sp << std::endl;
        std::cout << "*sp = " << *sp << std::endl;
    }
    else
        std::cout << "ptr is expired" << std::endl;
}

auto main () -> int
{
    auto p = std::make_shared<int>(7);

    std::cout << "p.use_count() = " << p.use_count() << std::endl;

    print(p);

    return 0;
}
Slides


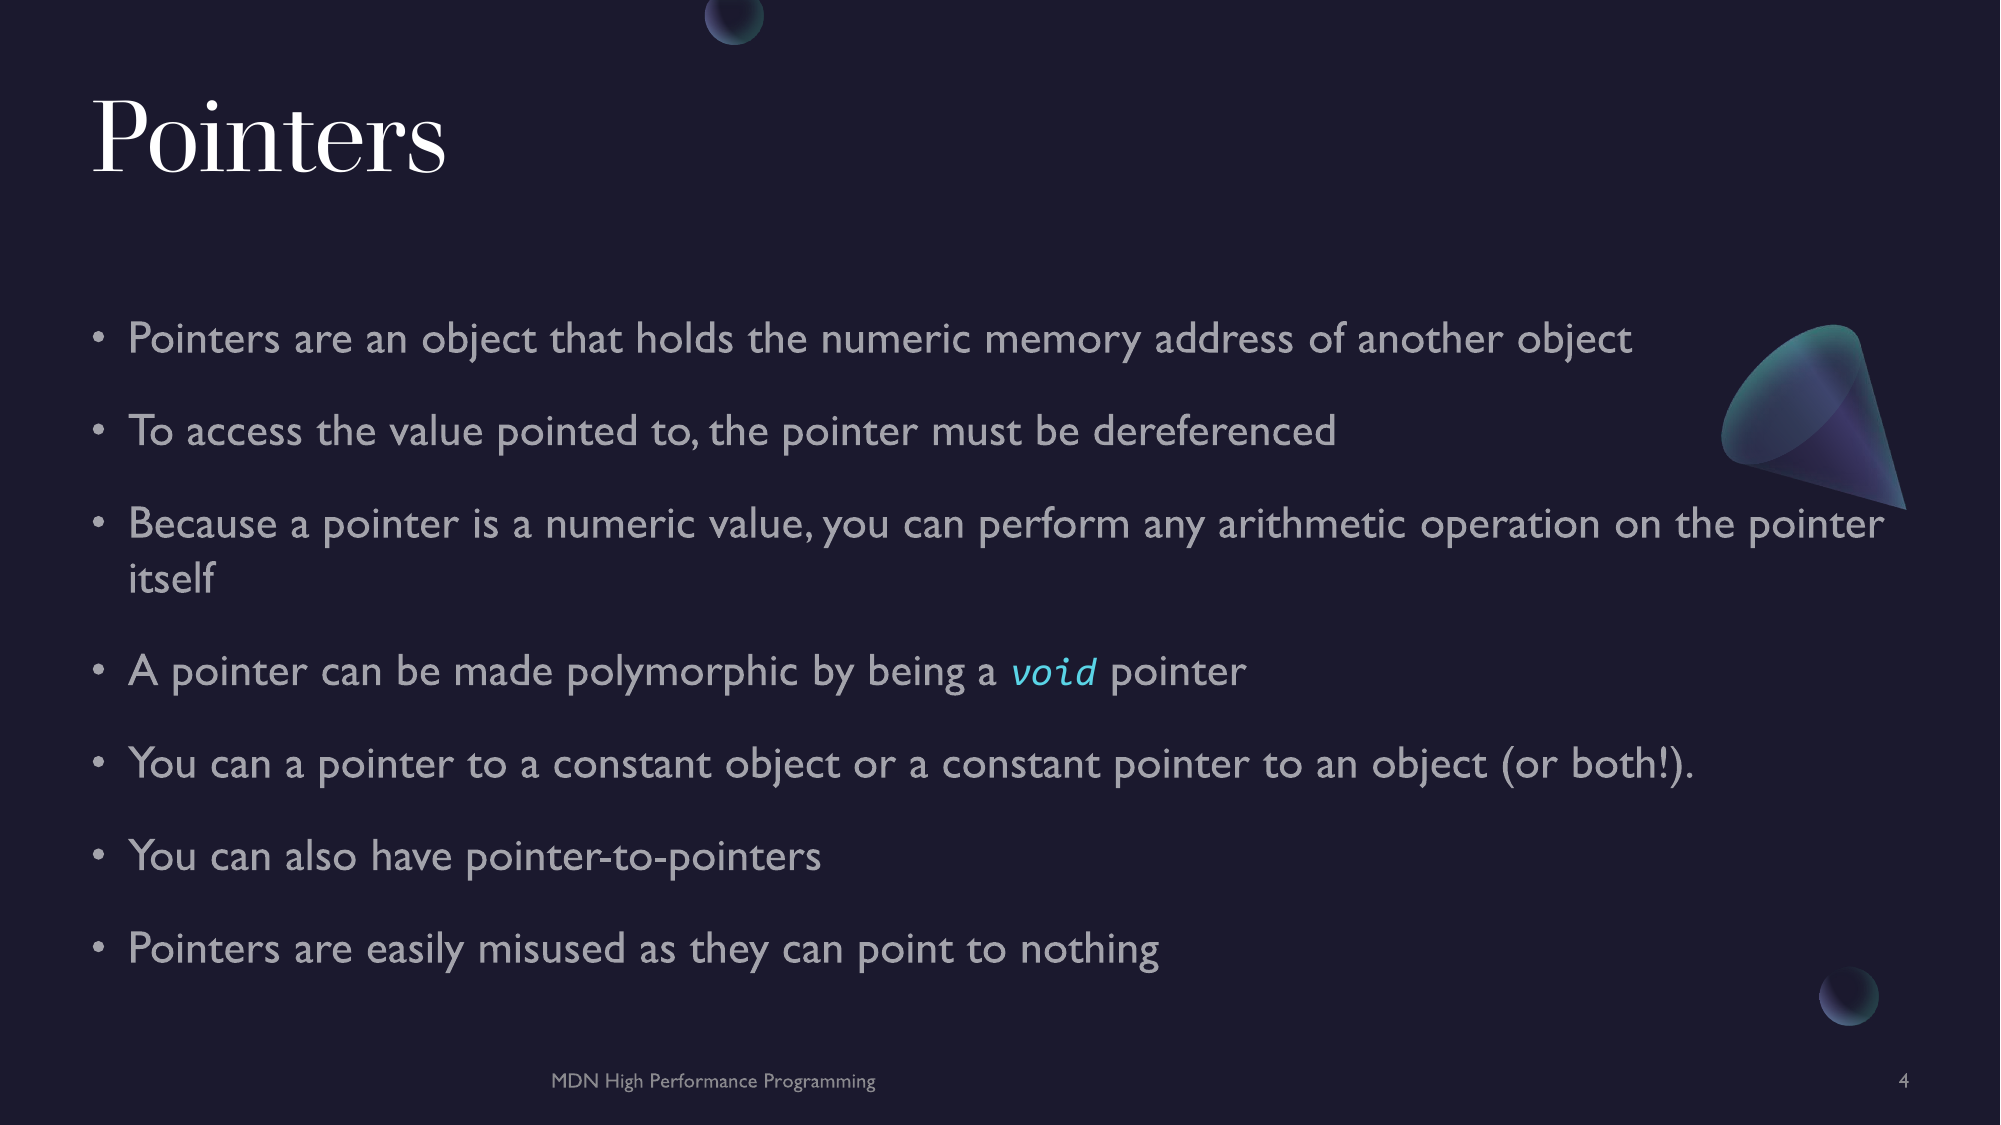
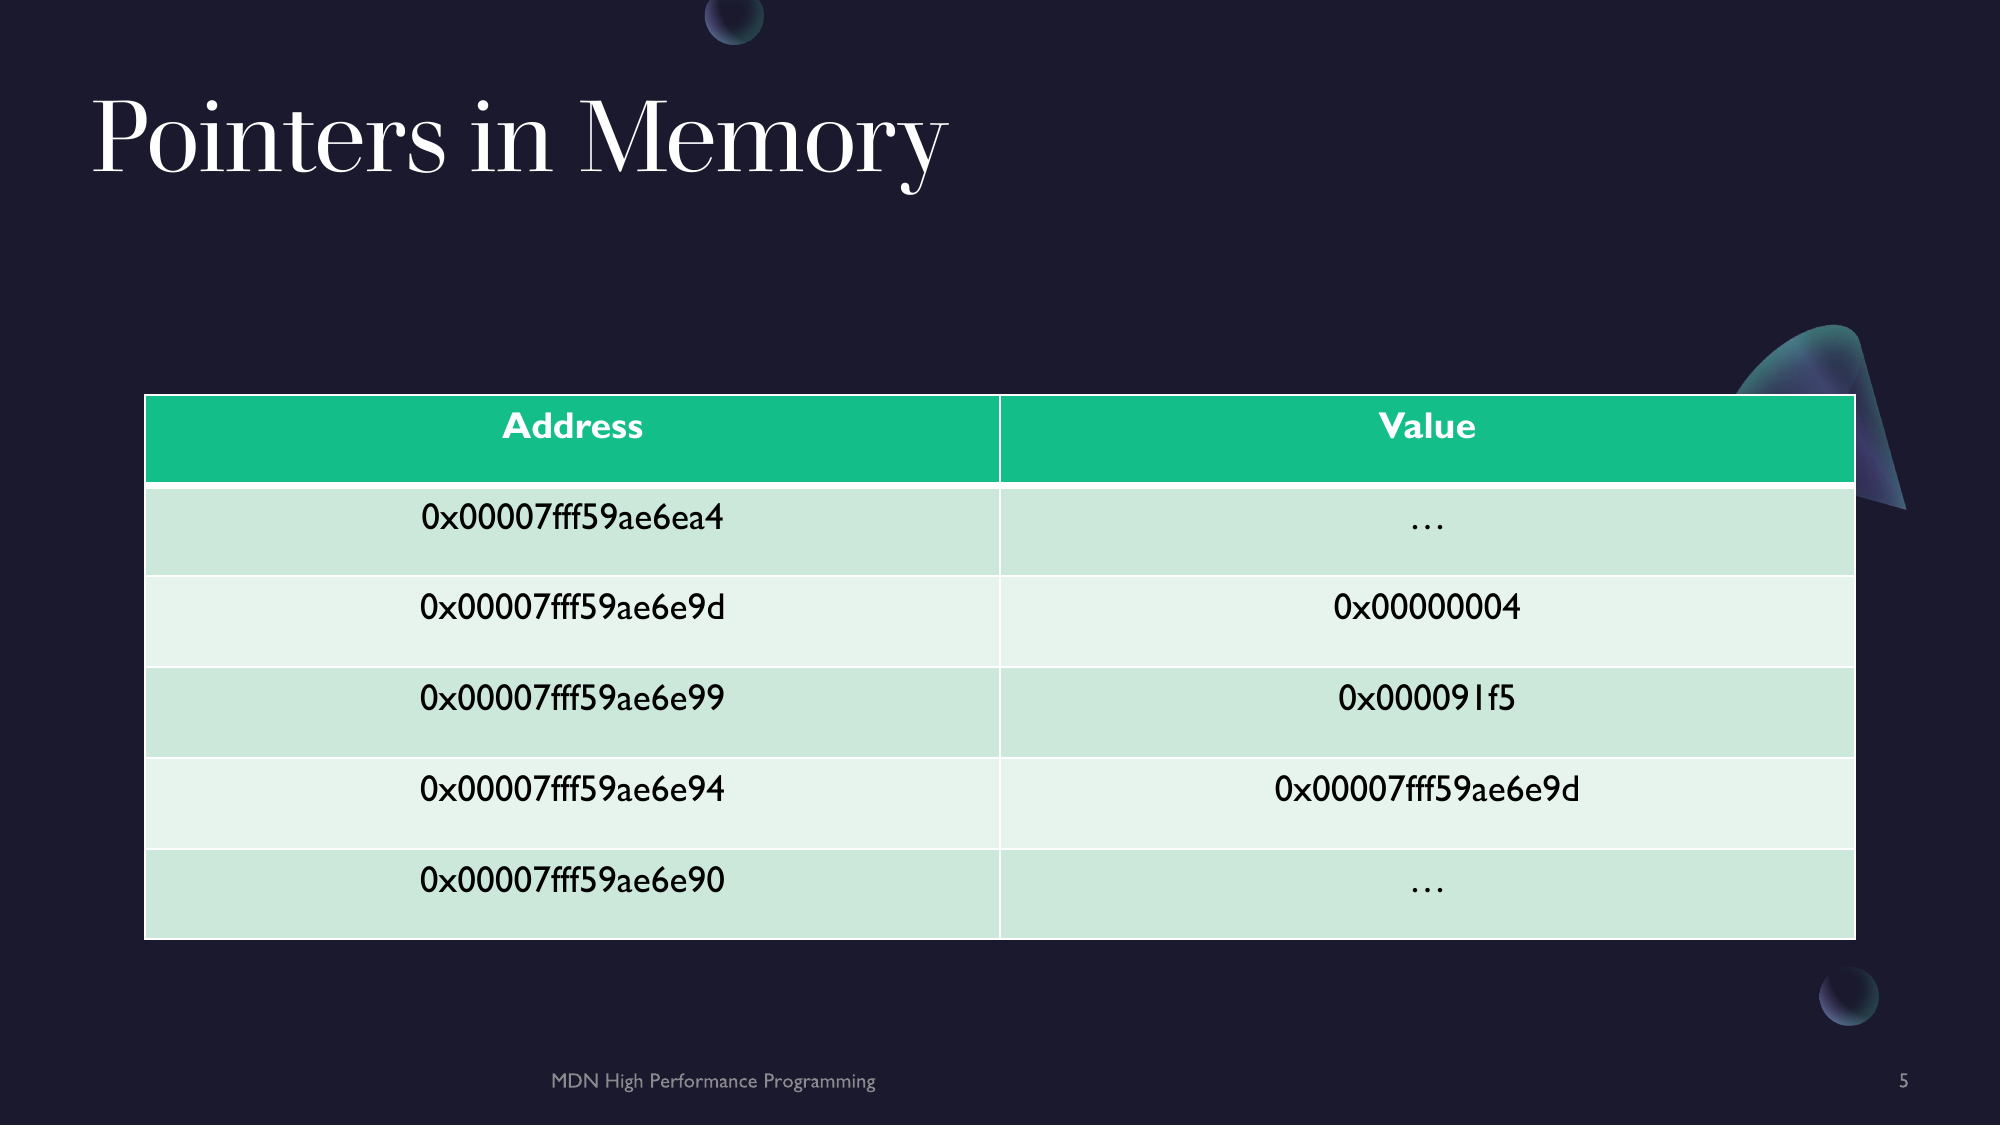
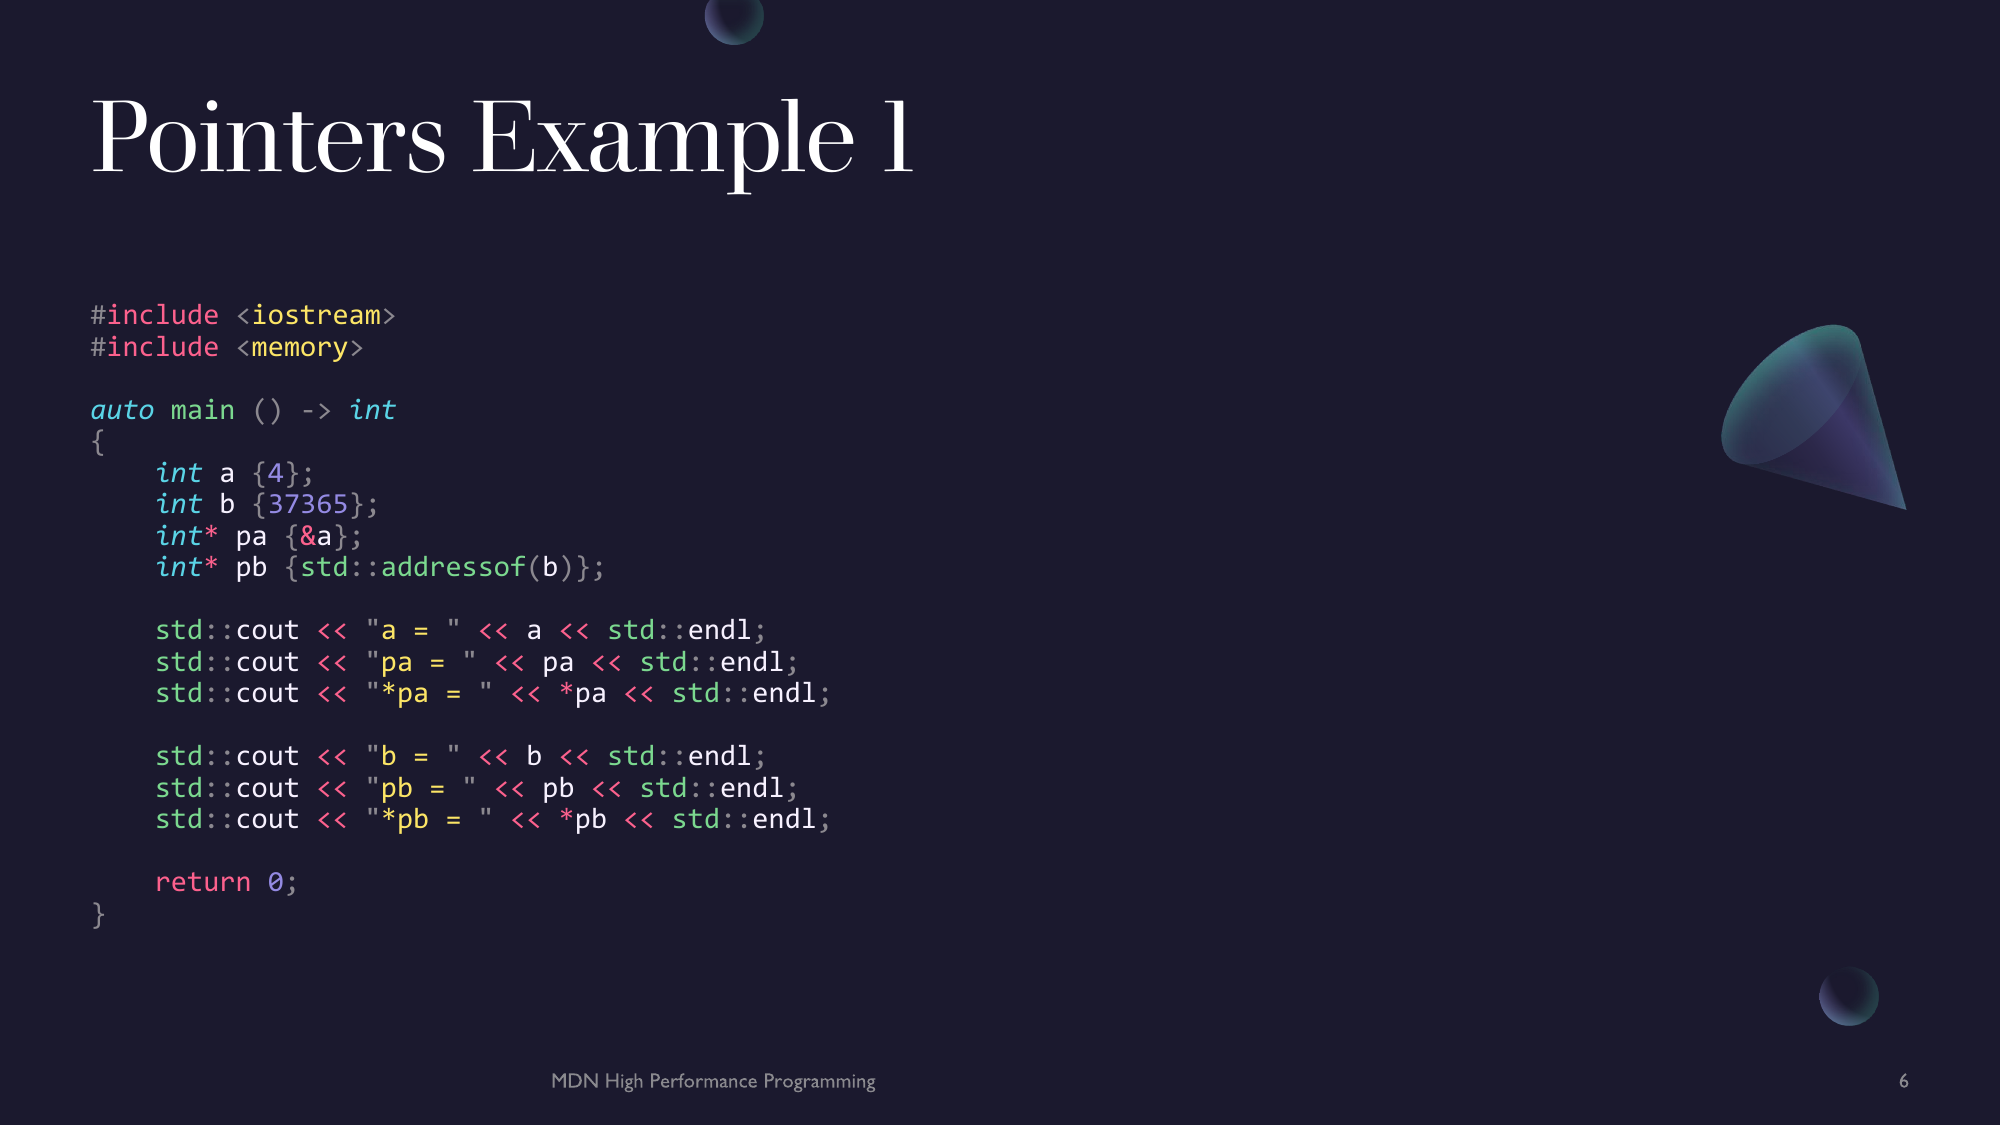
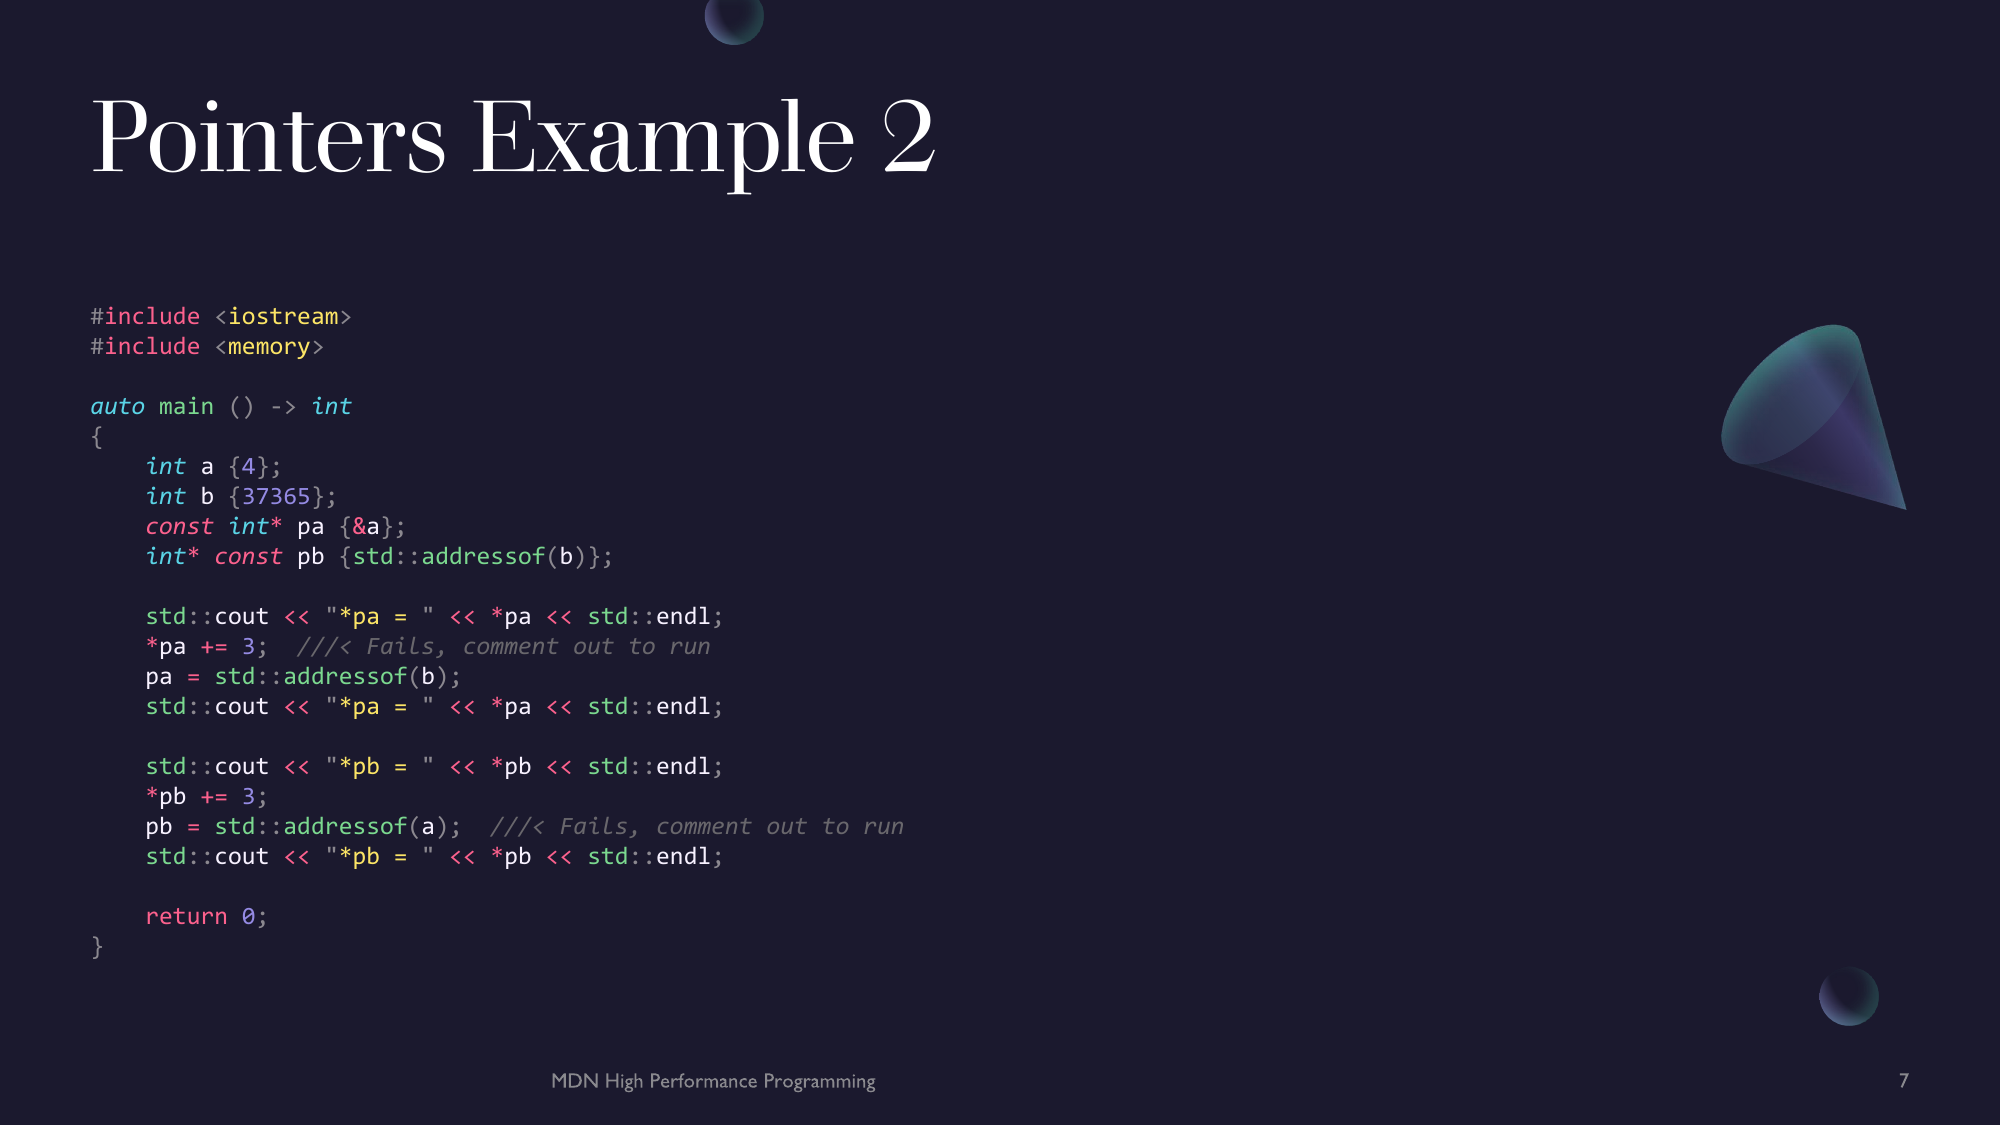
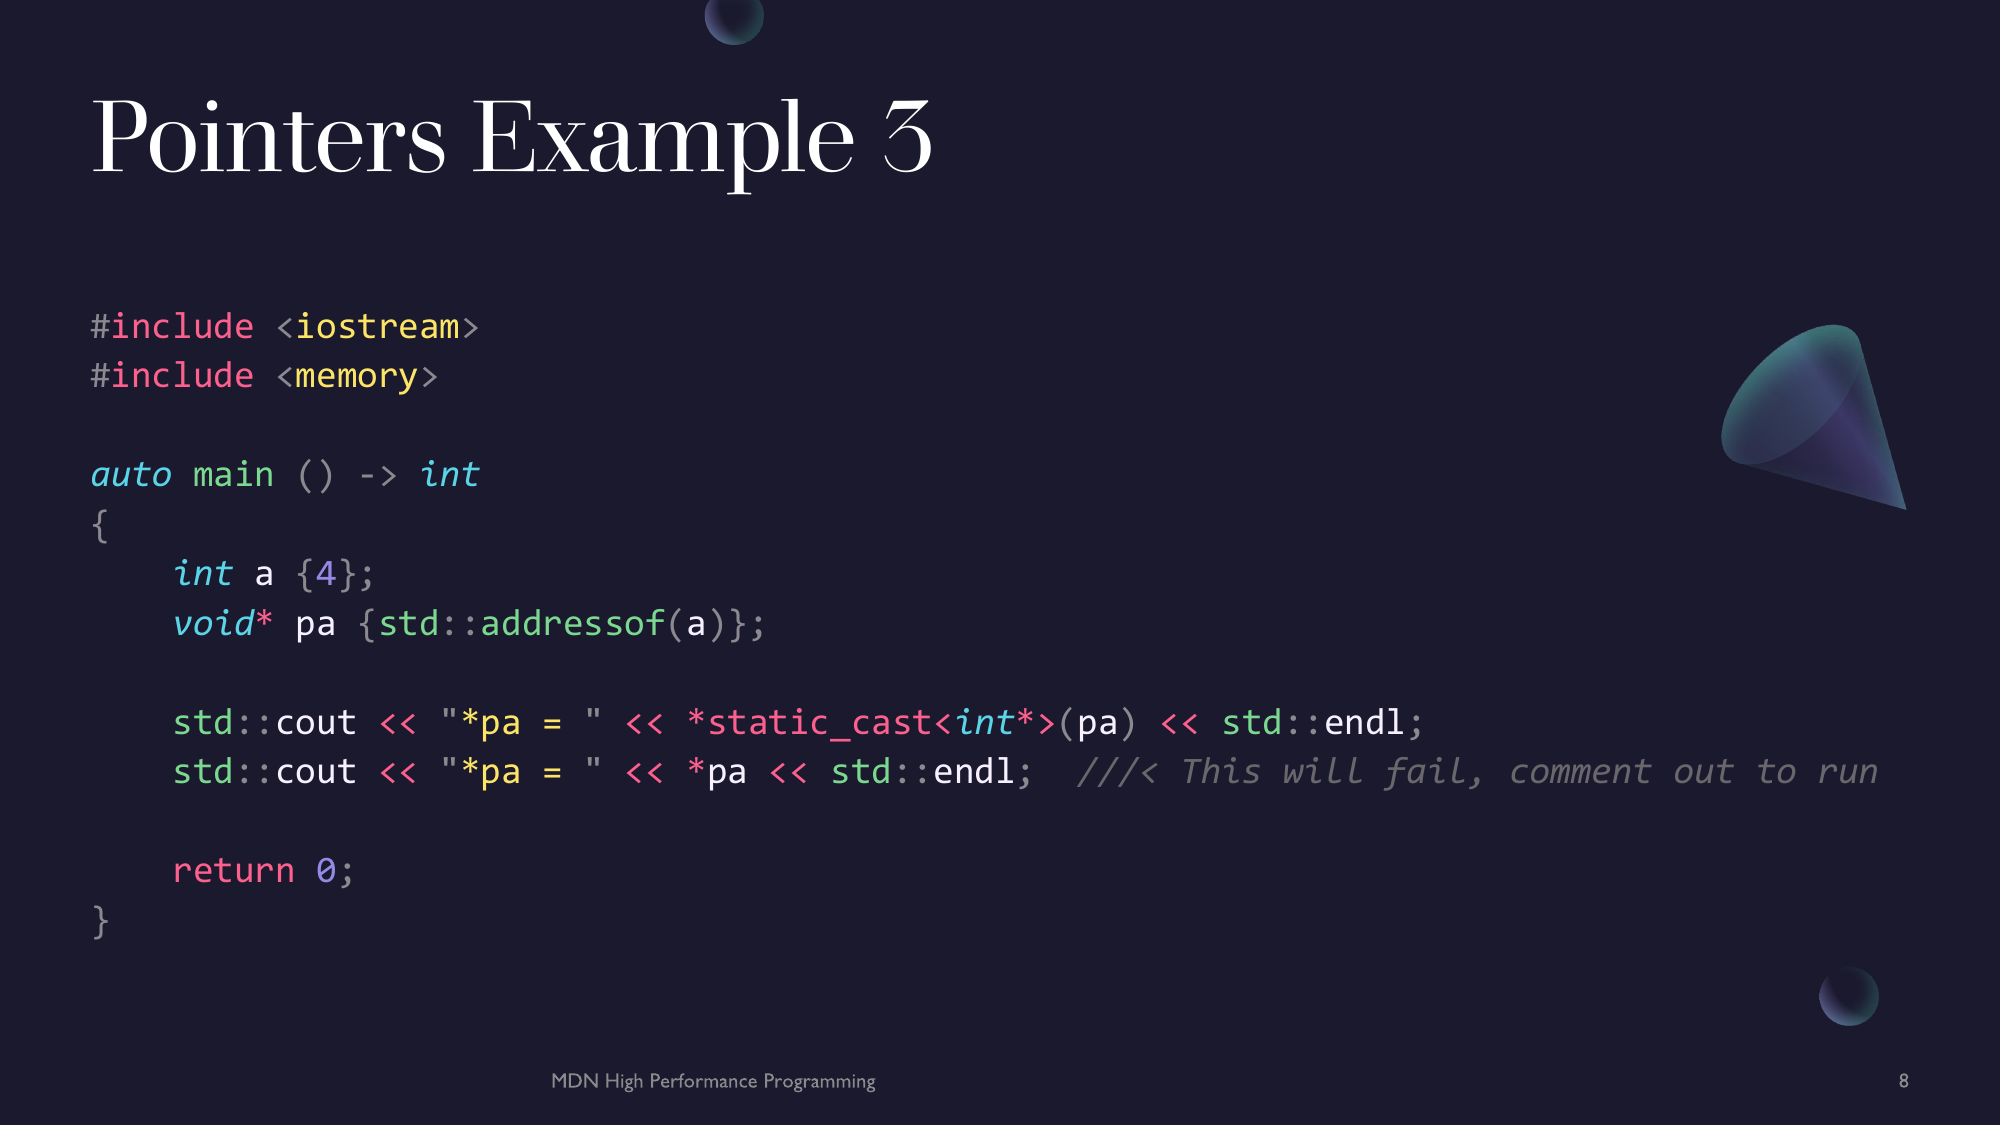
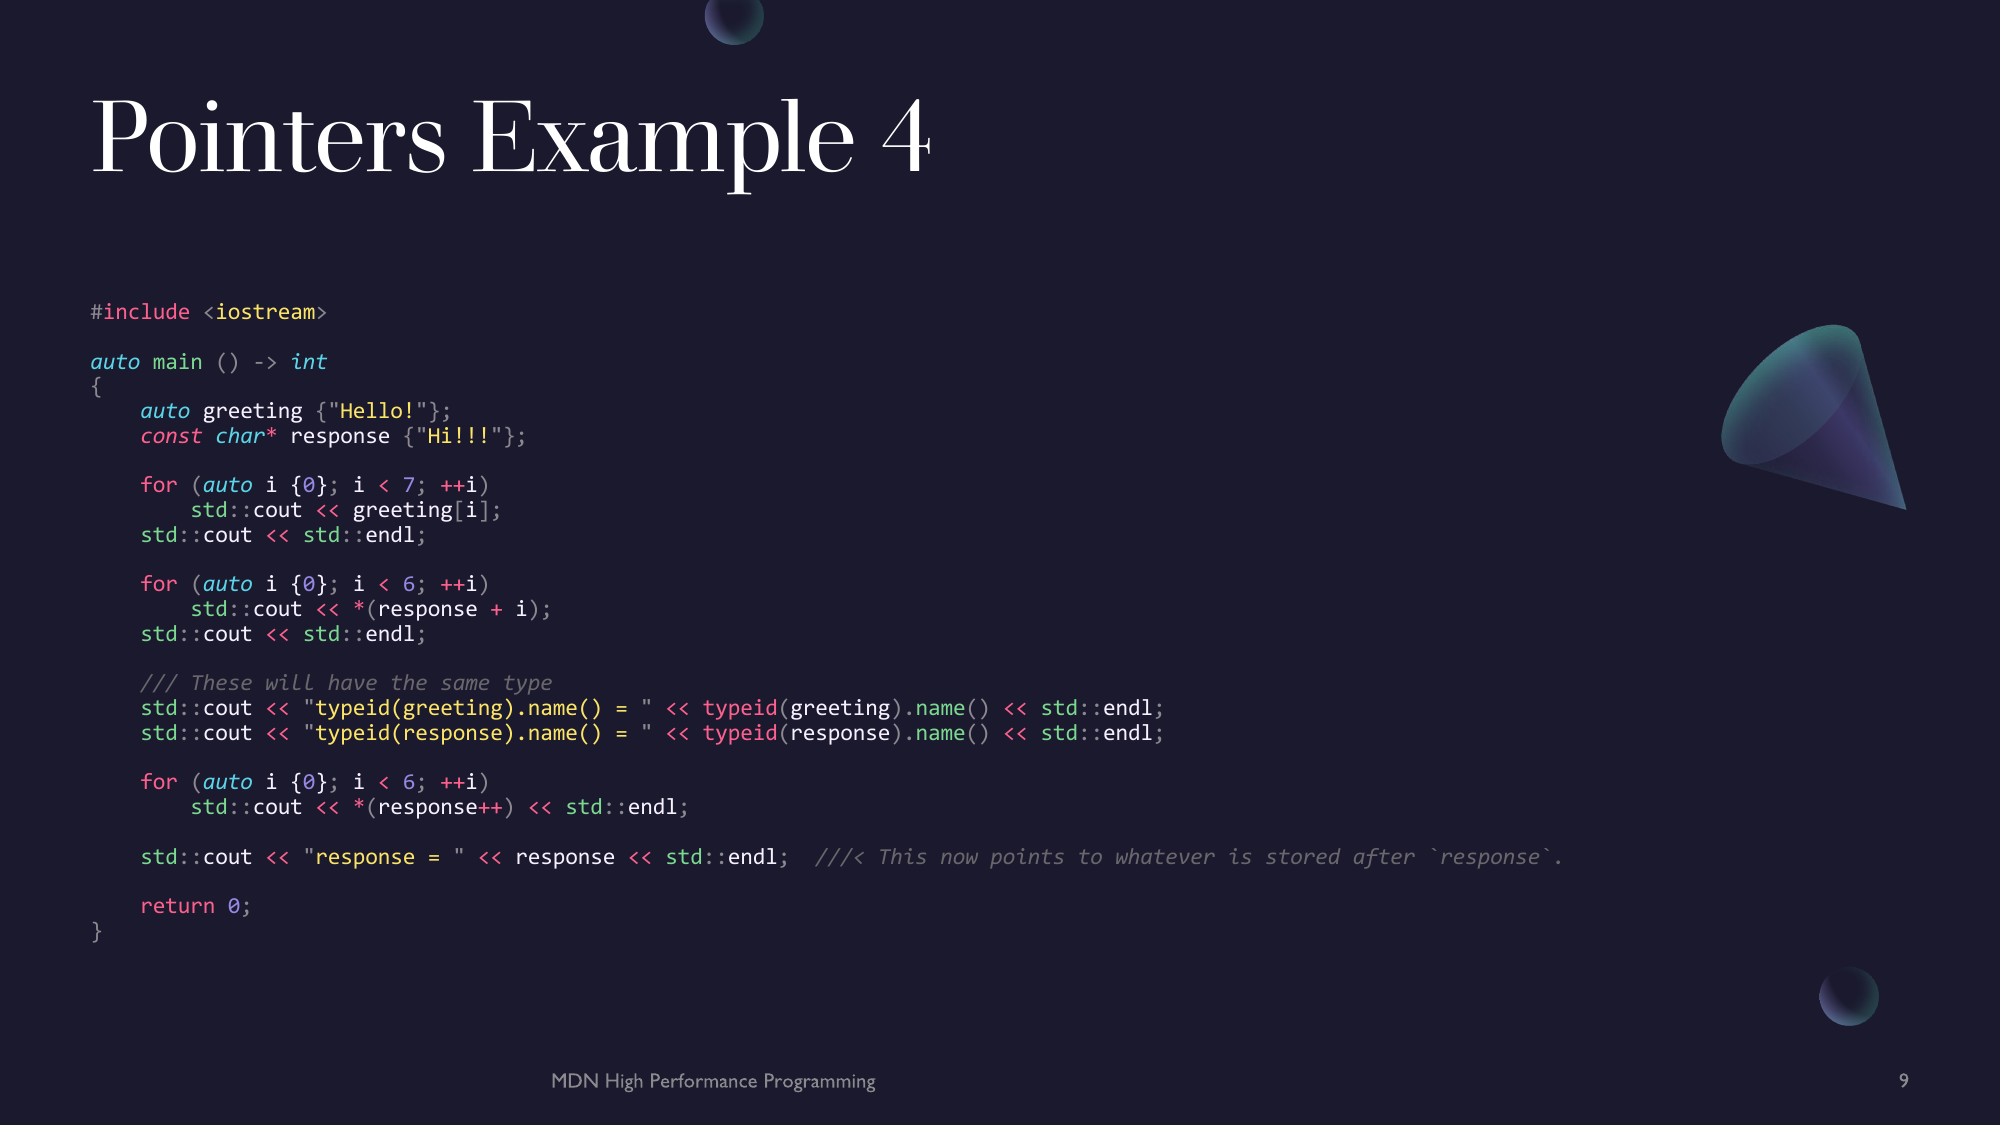
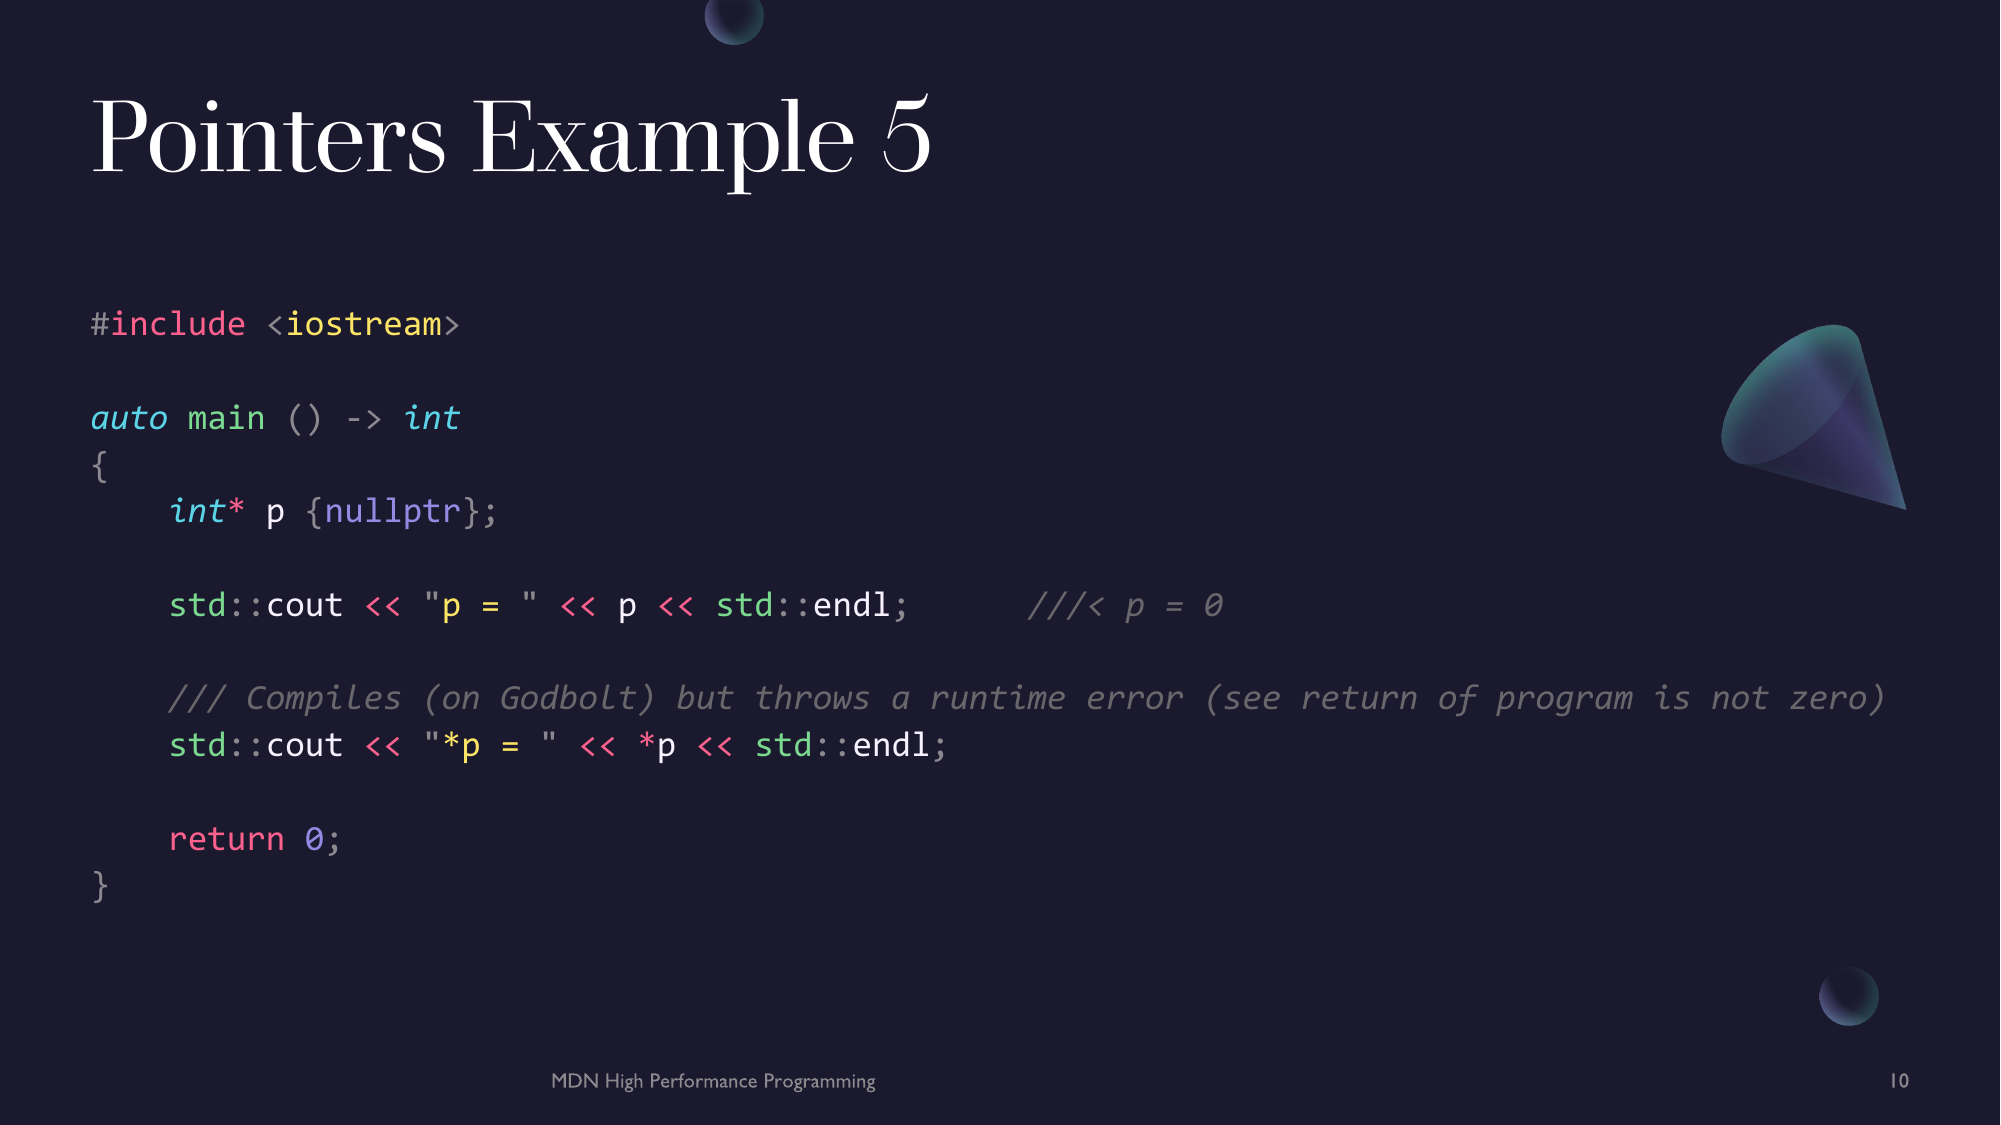


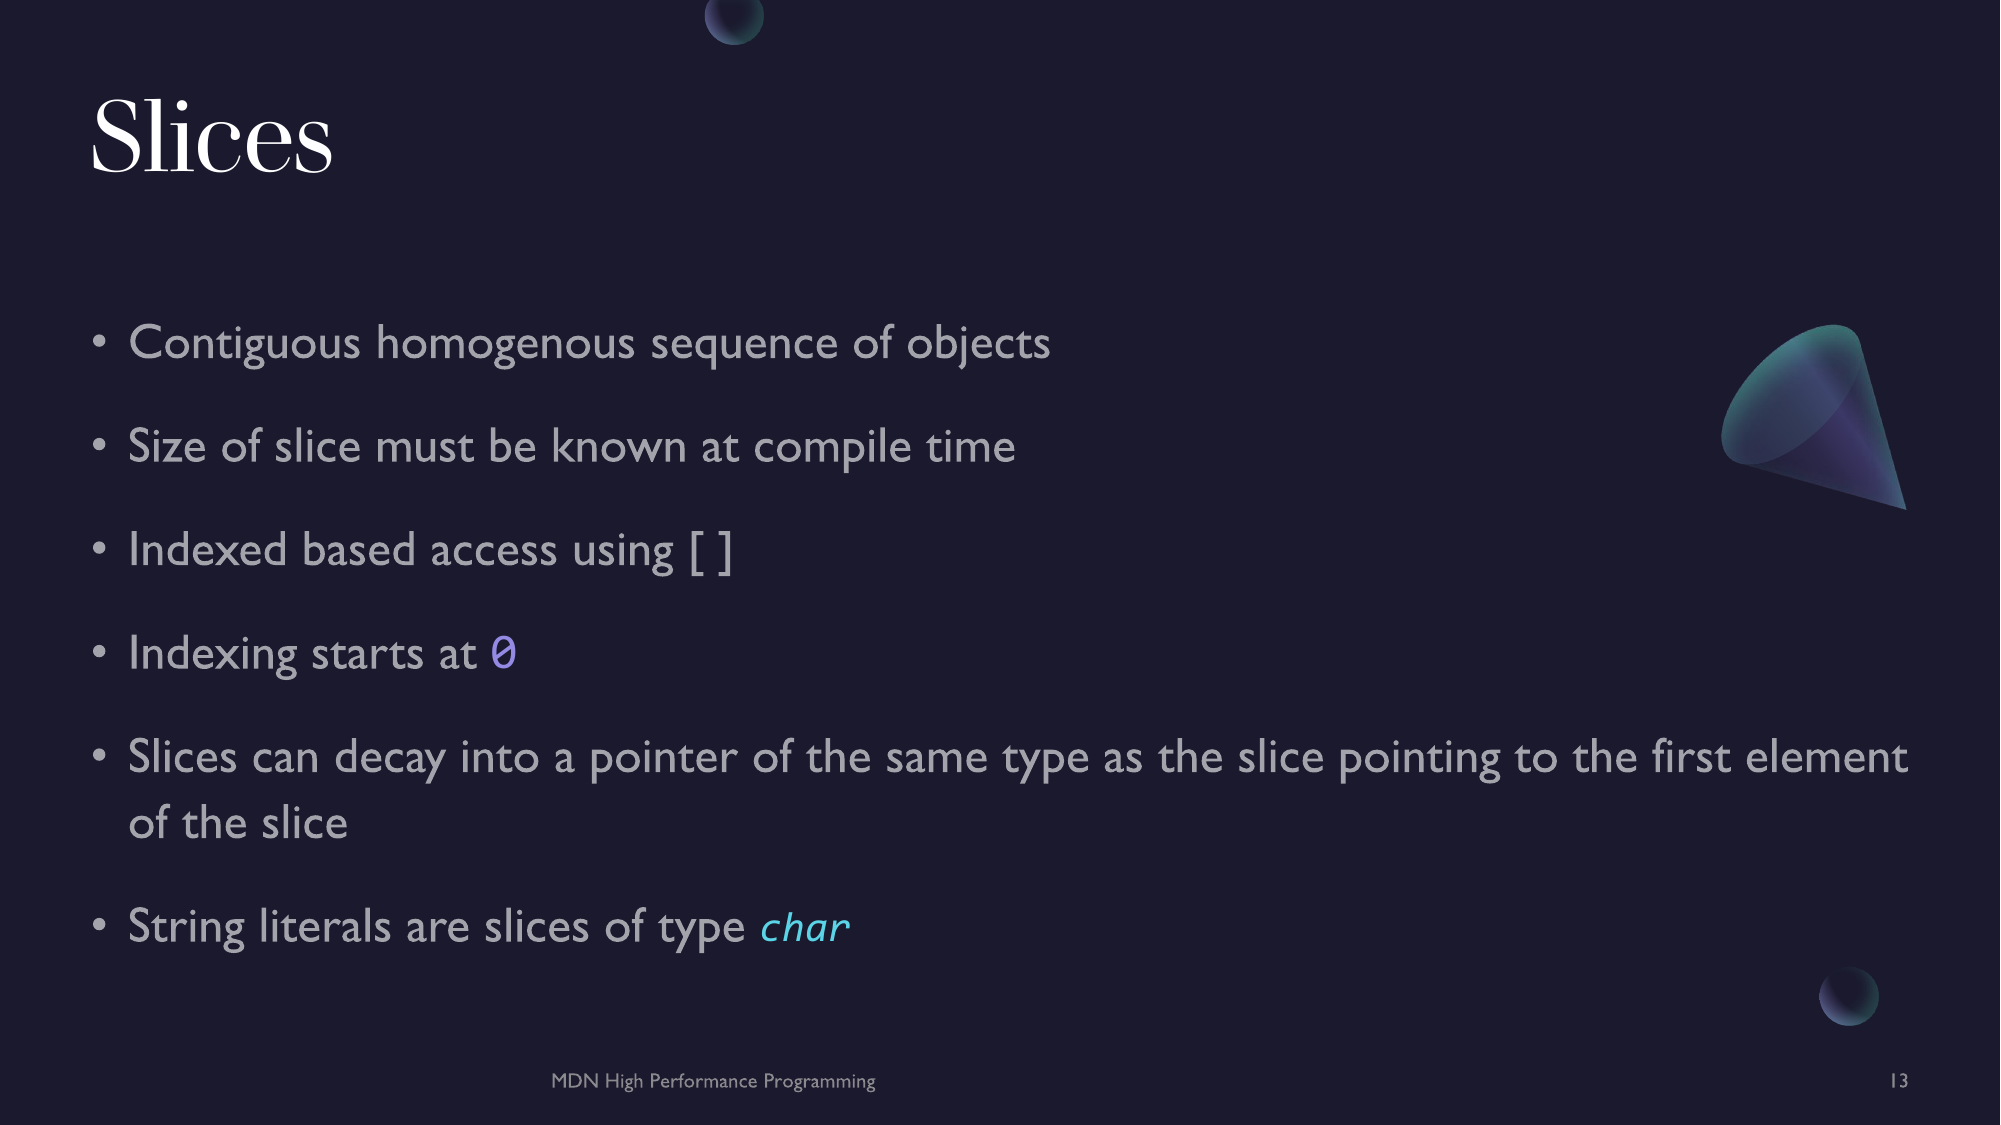

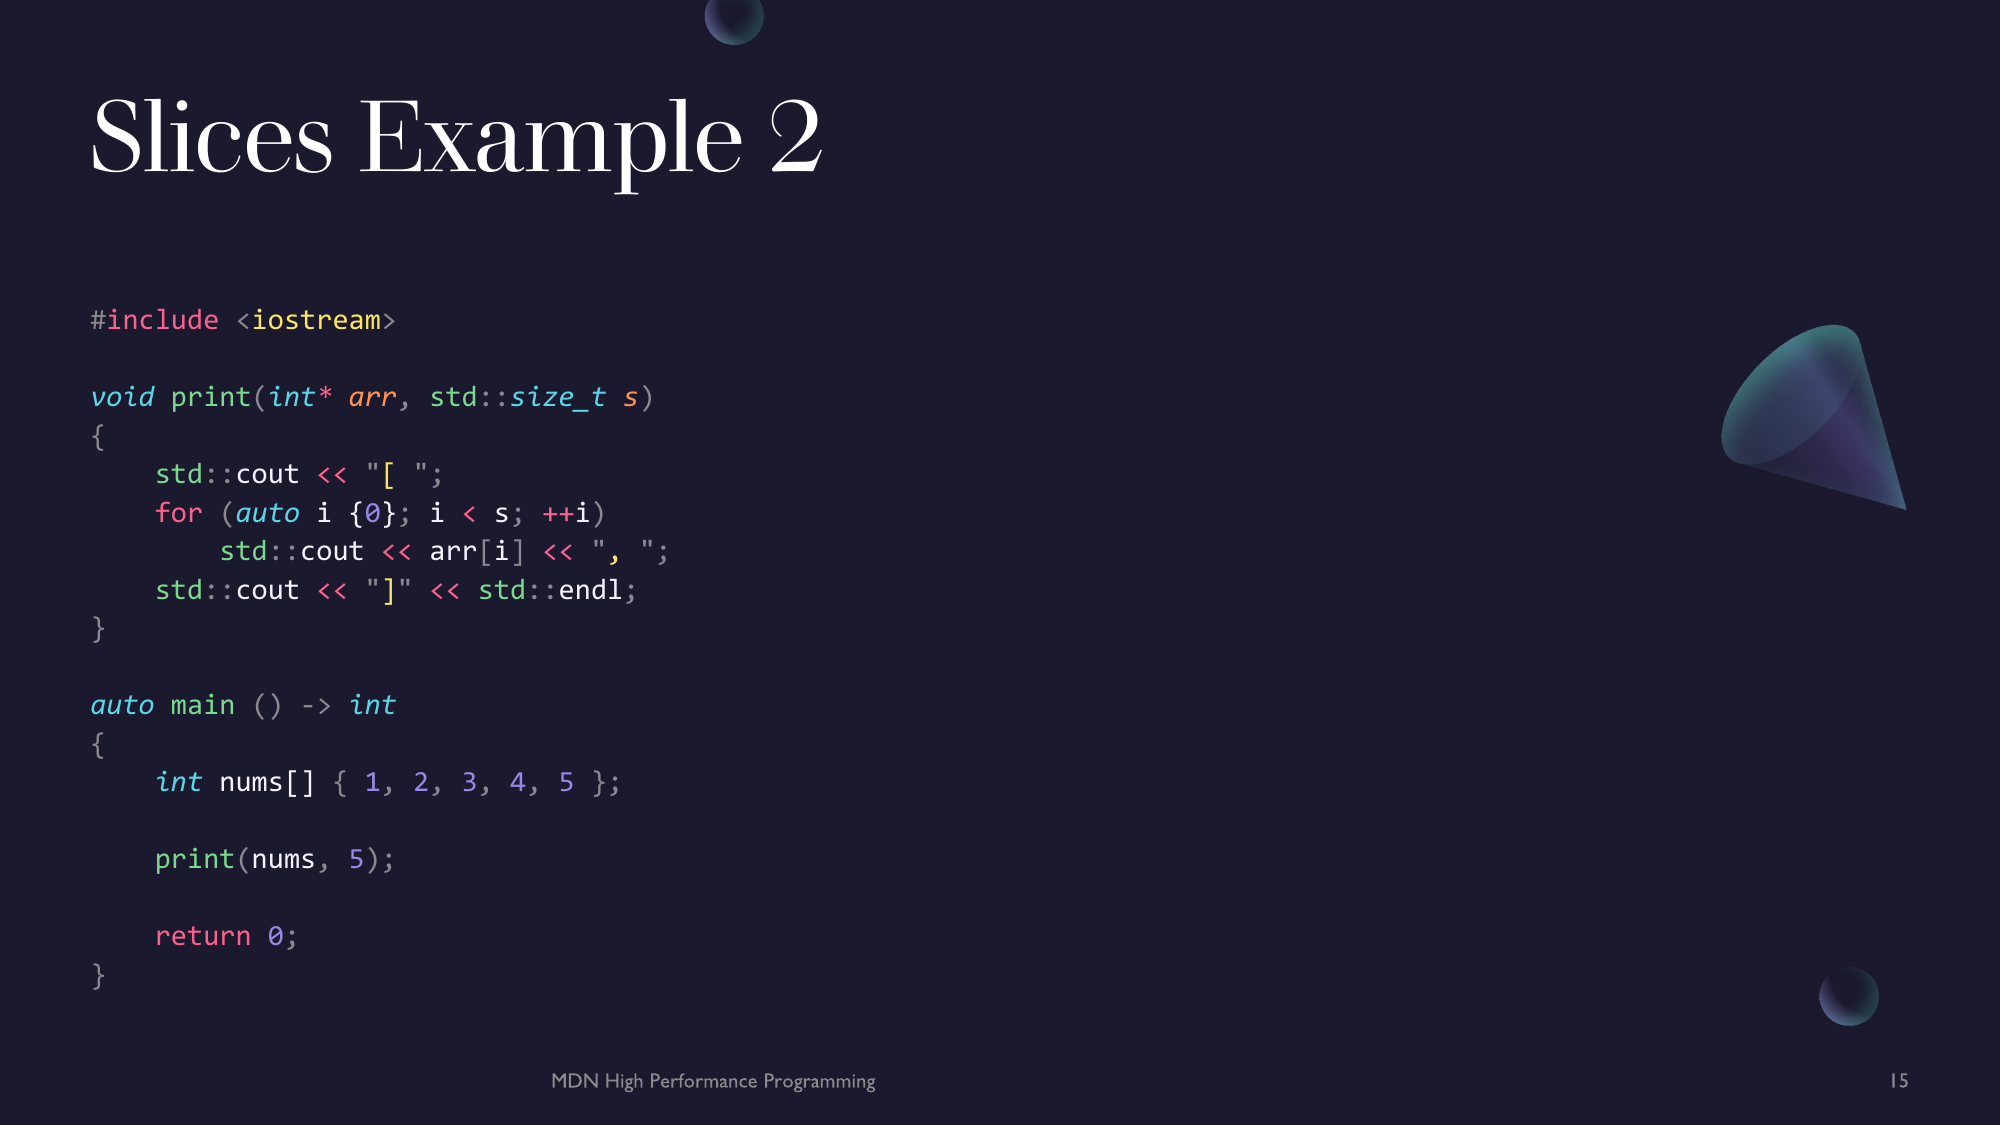

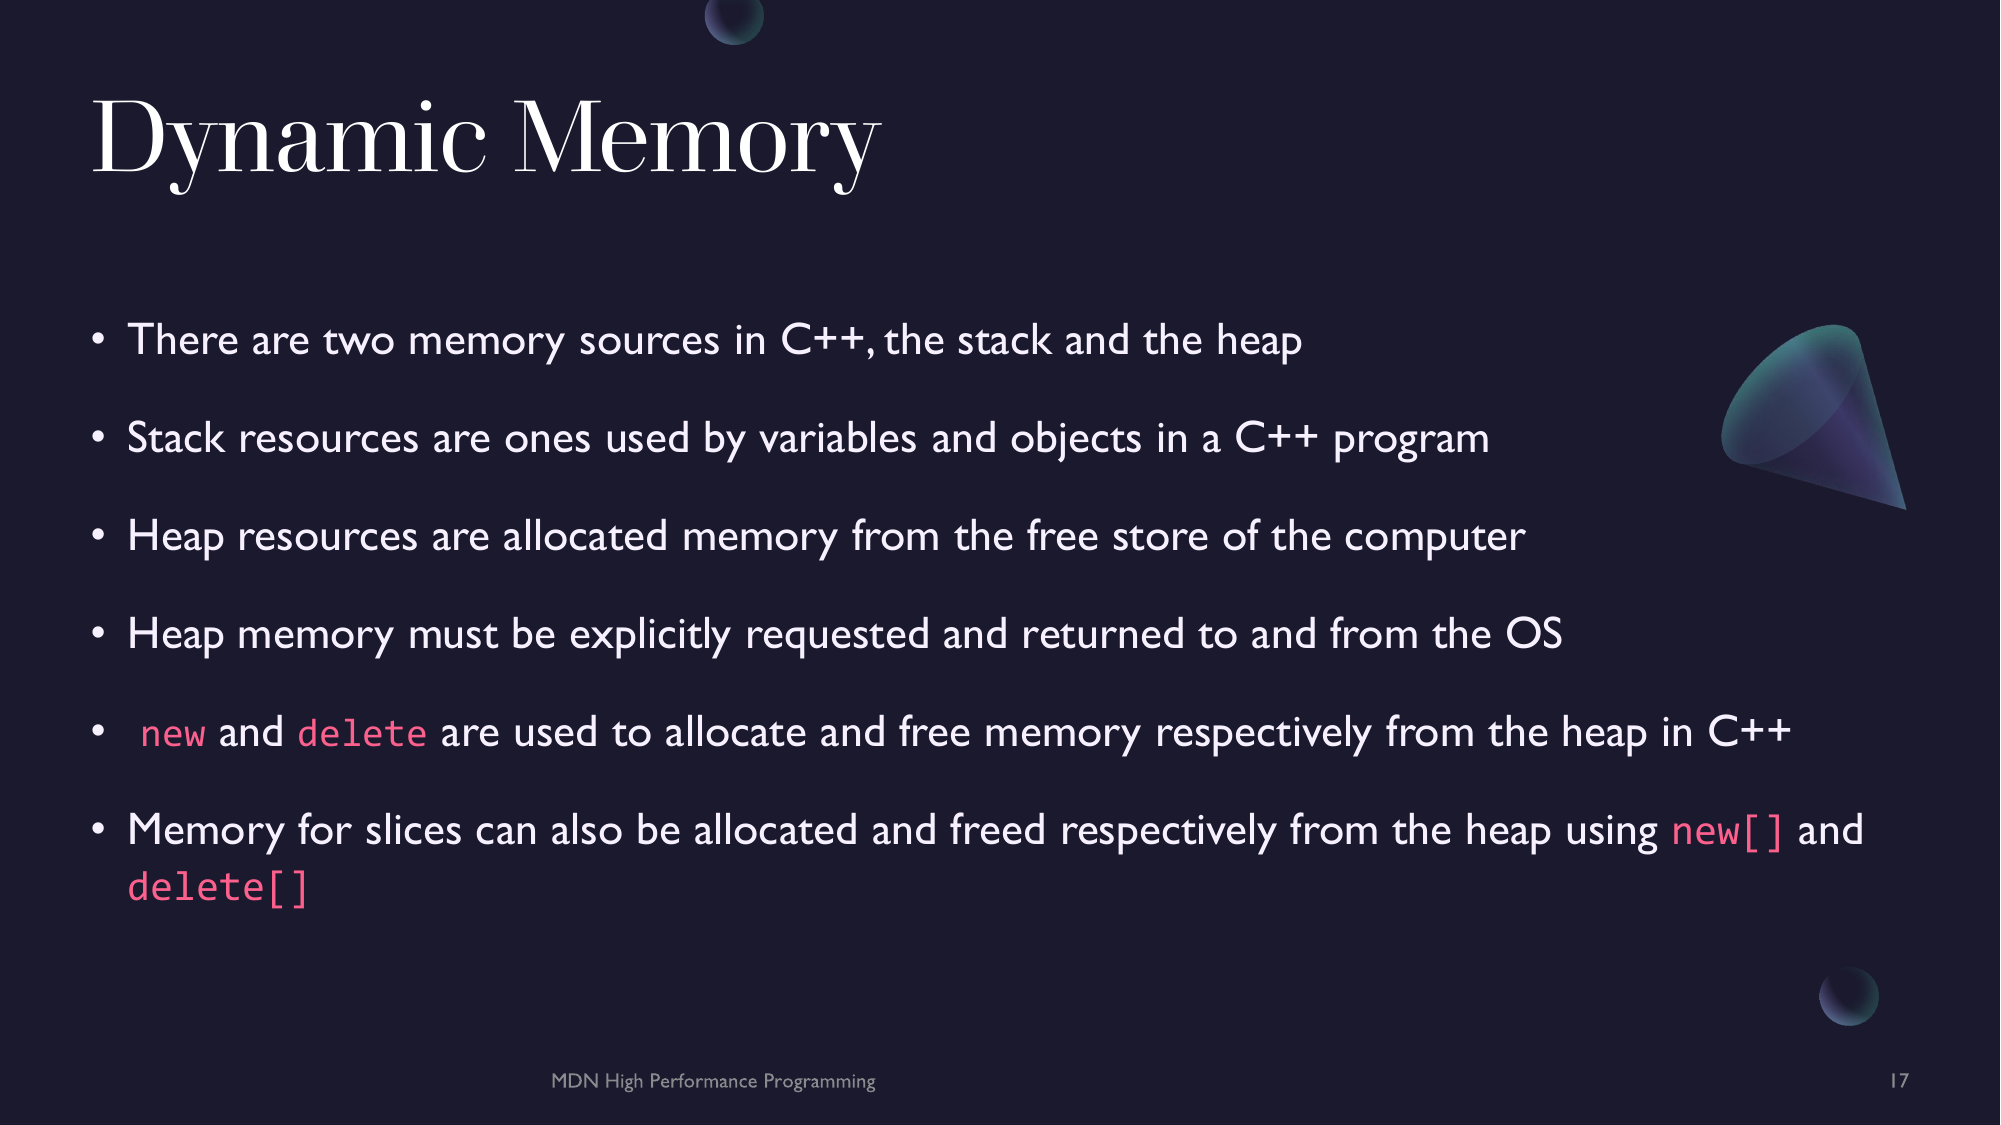
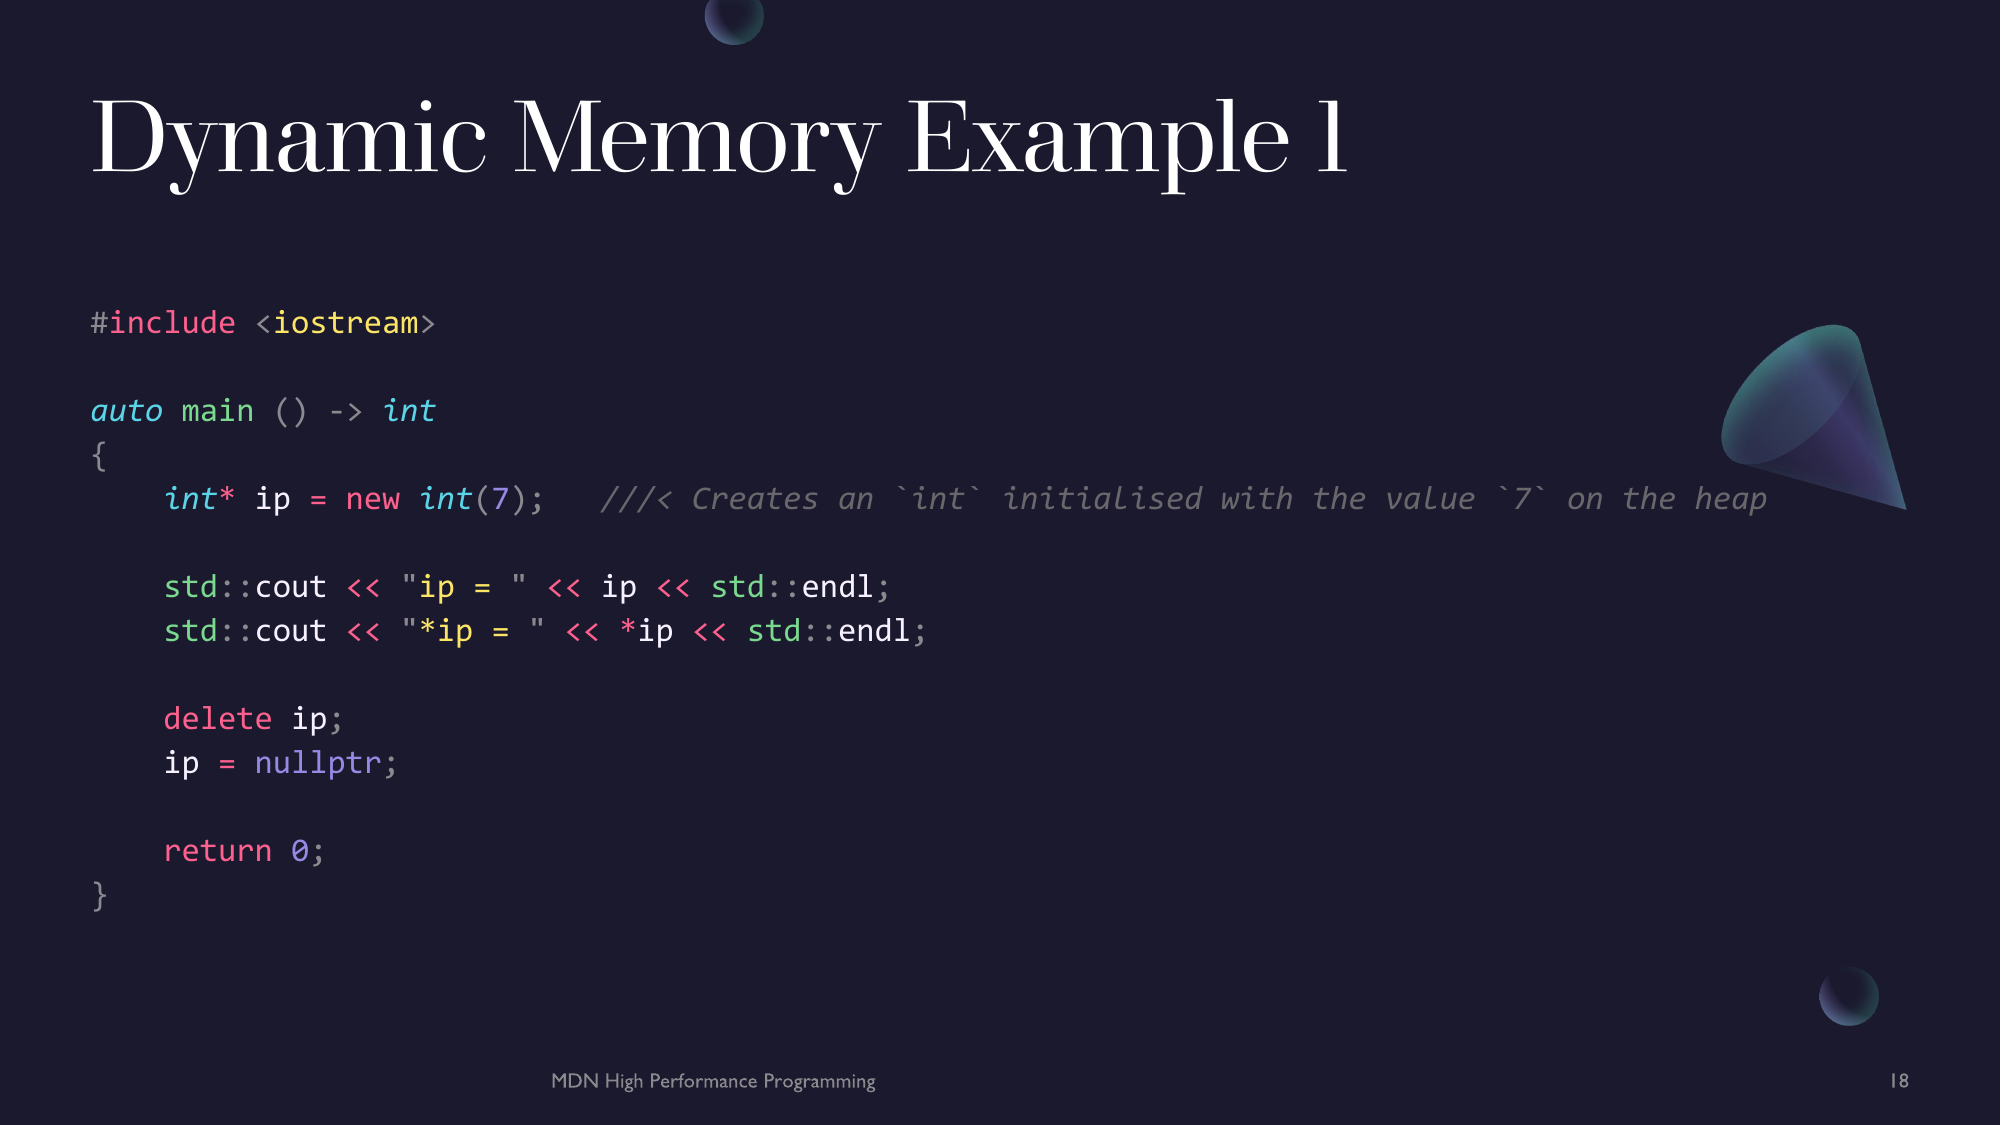
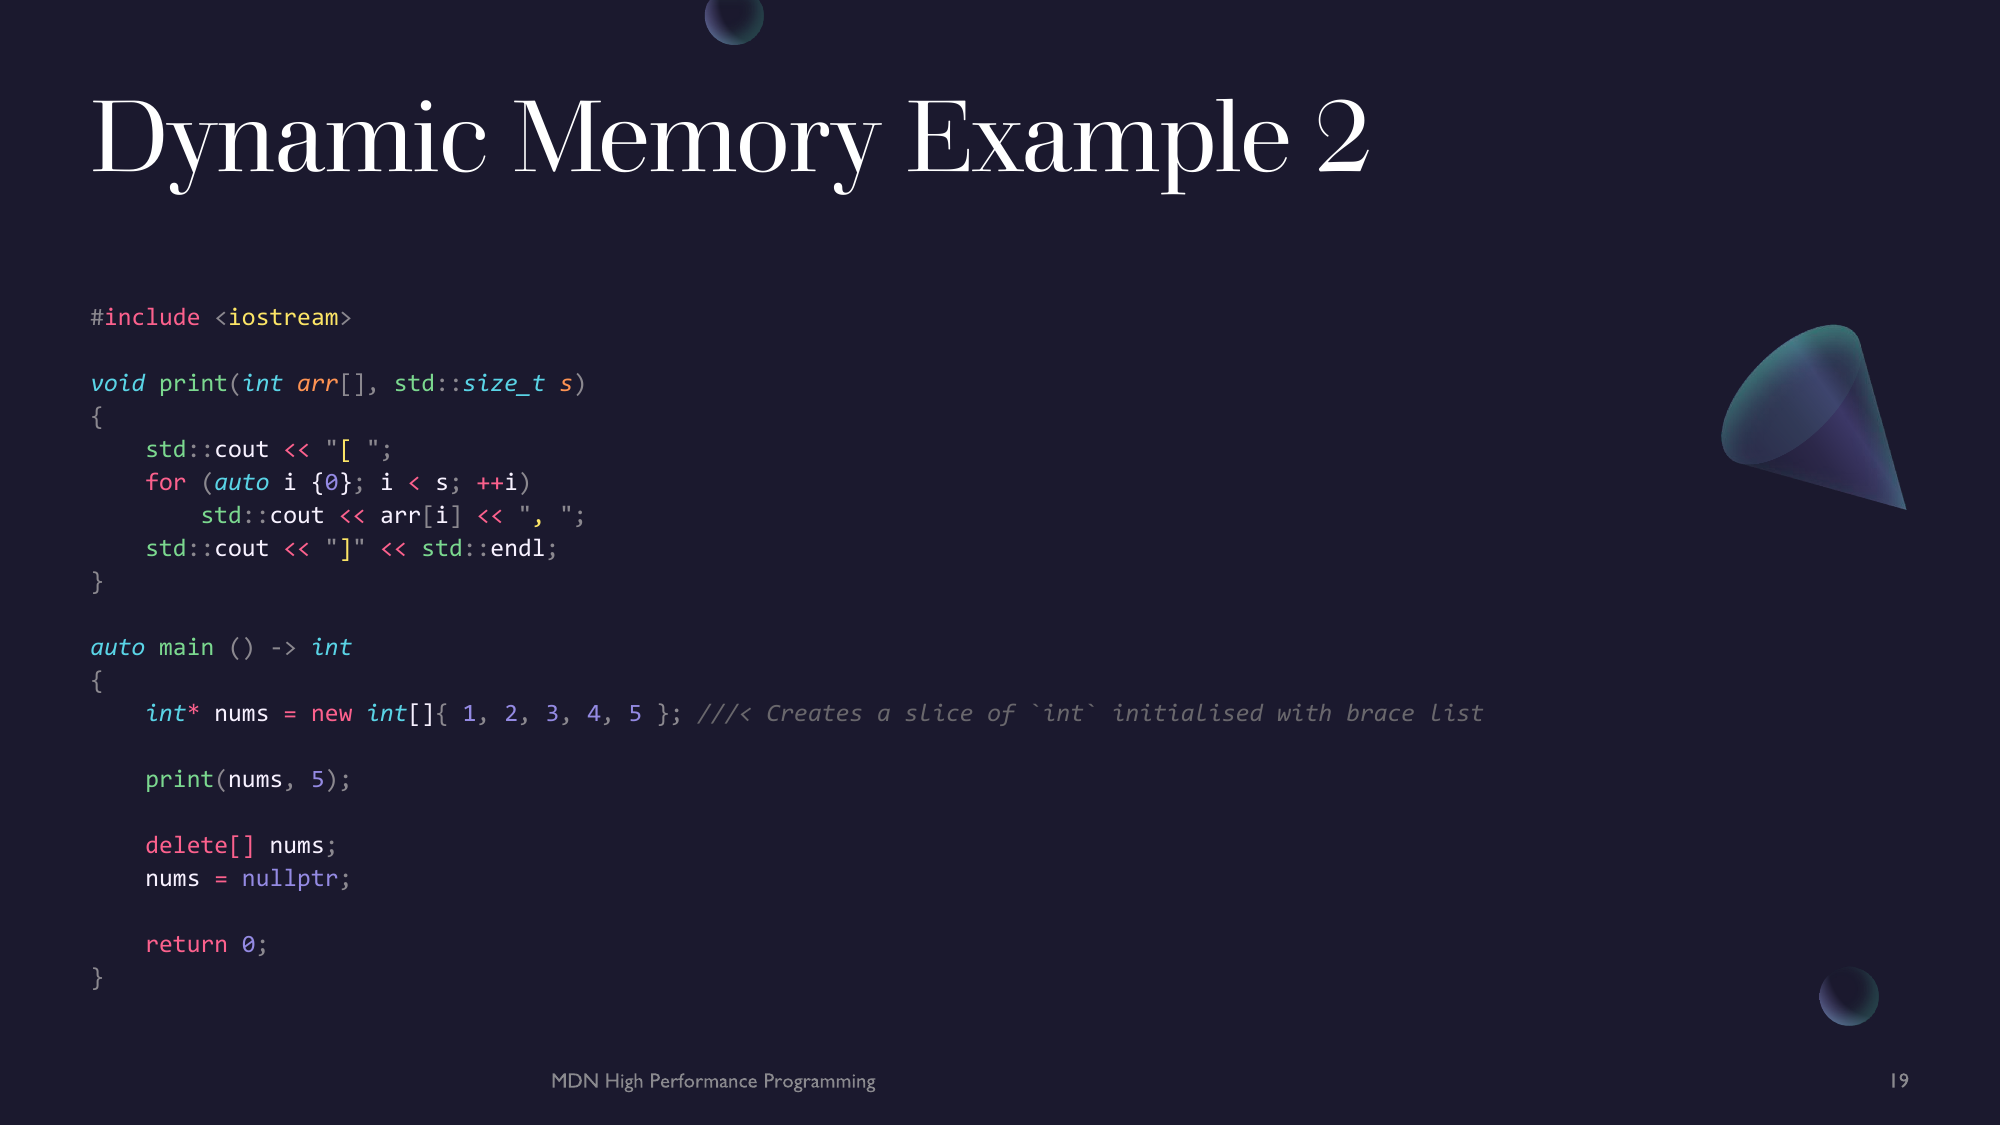

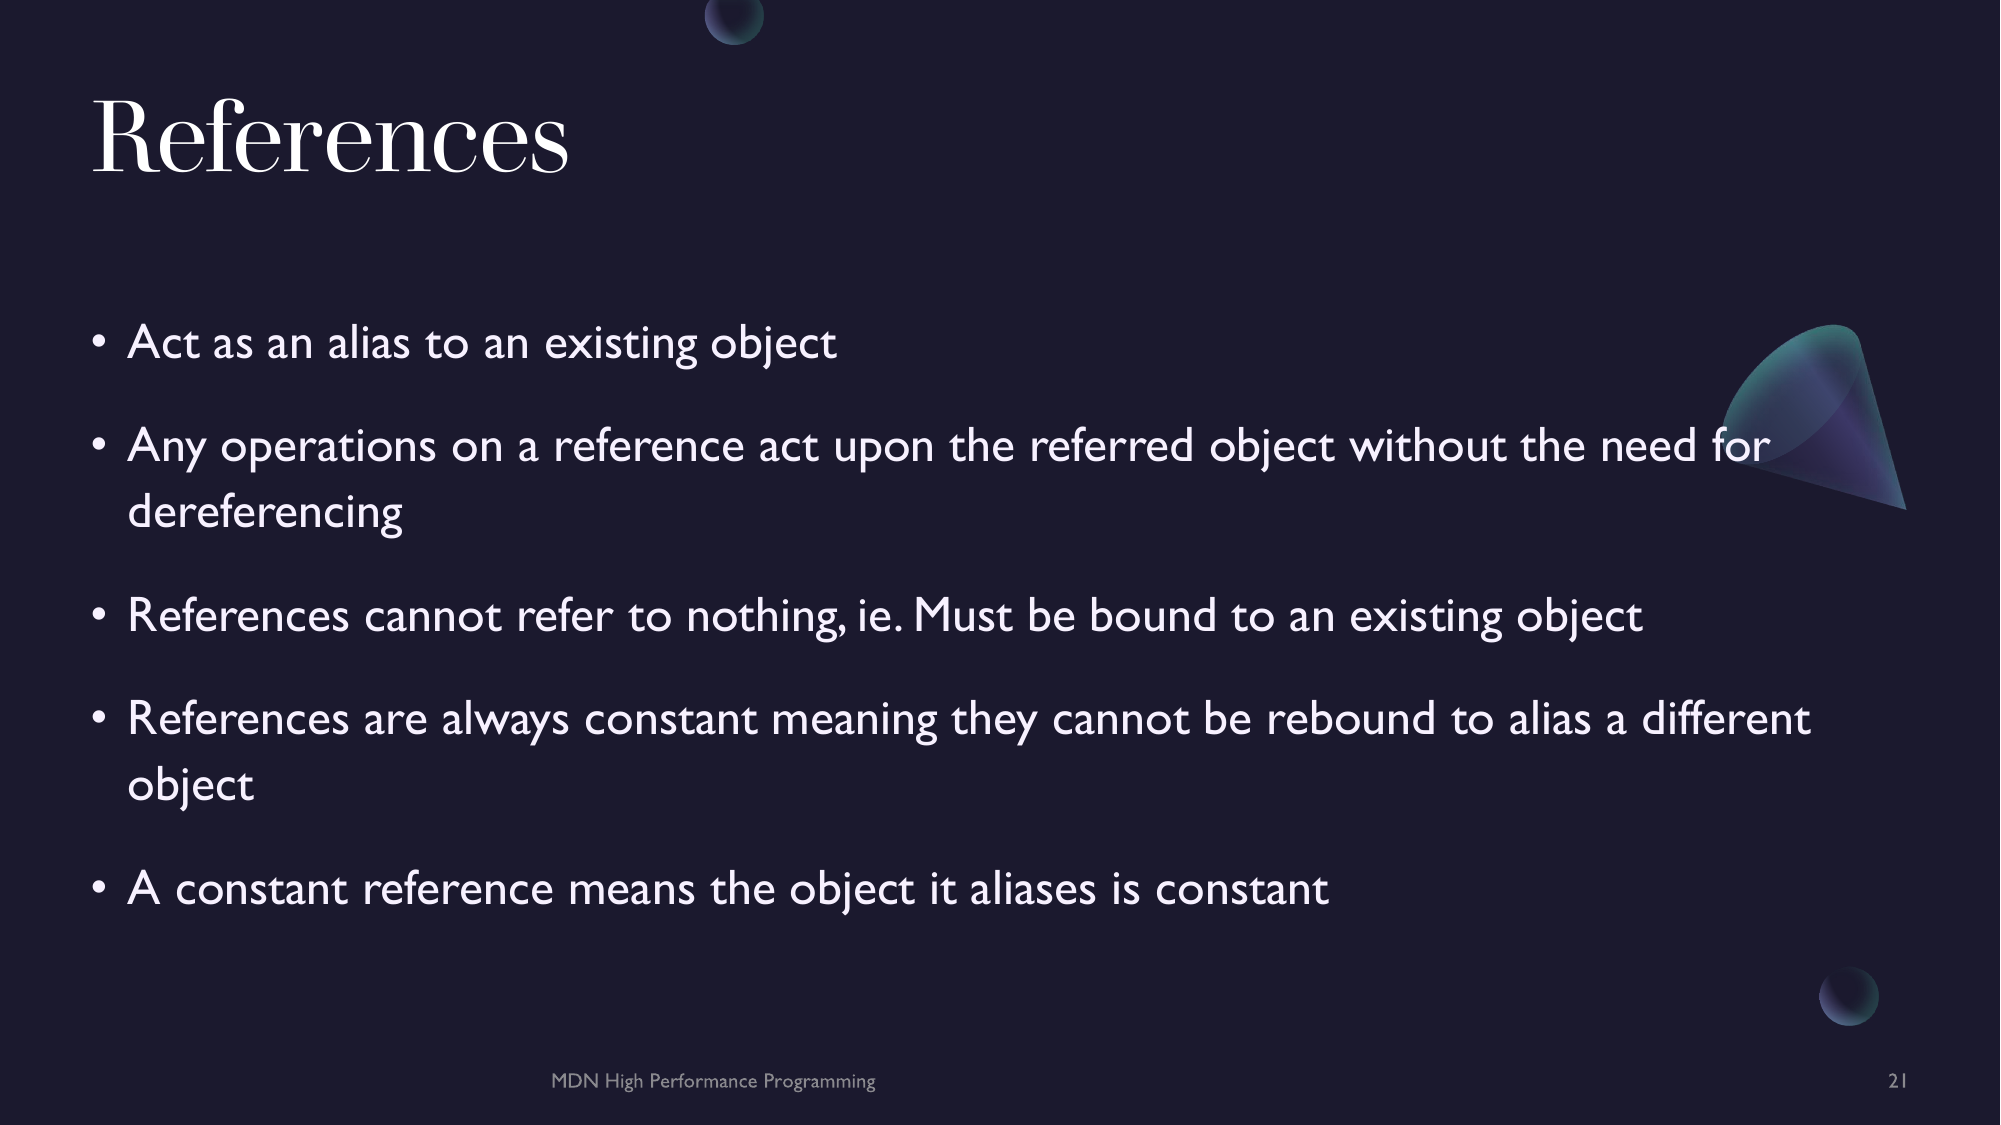
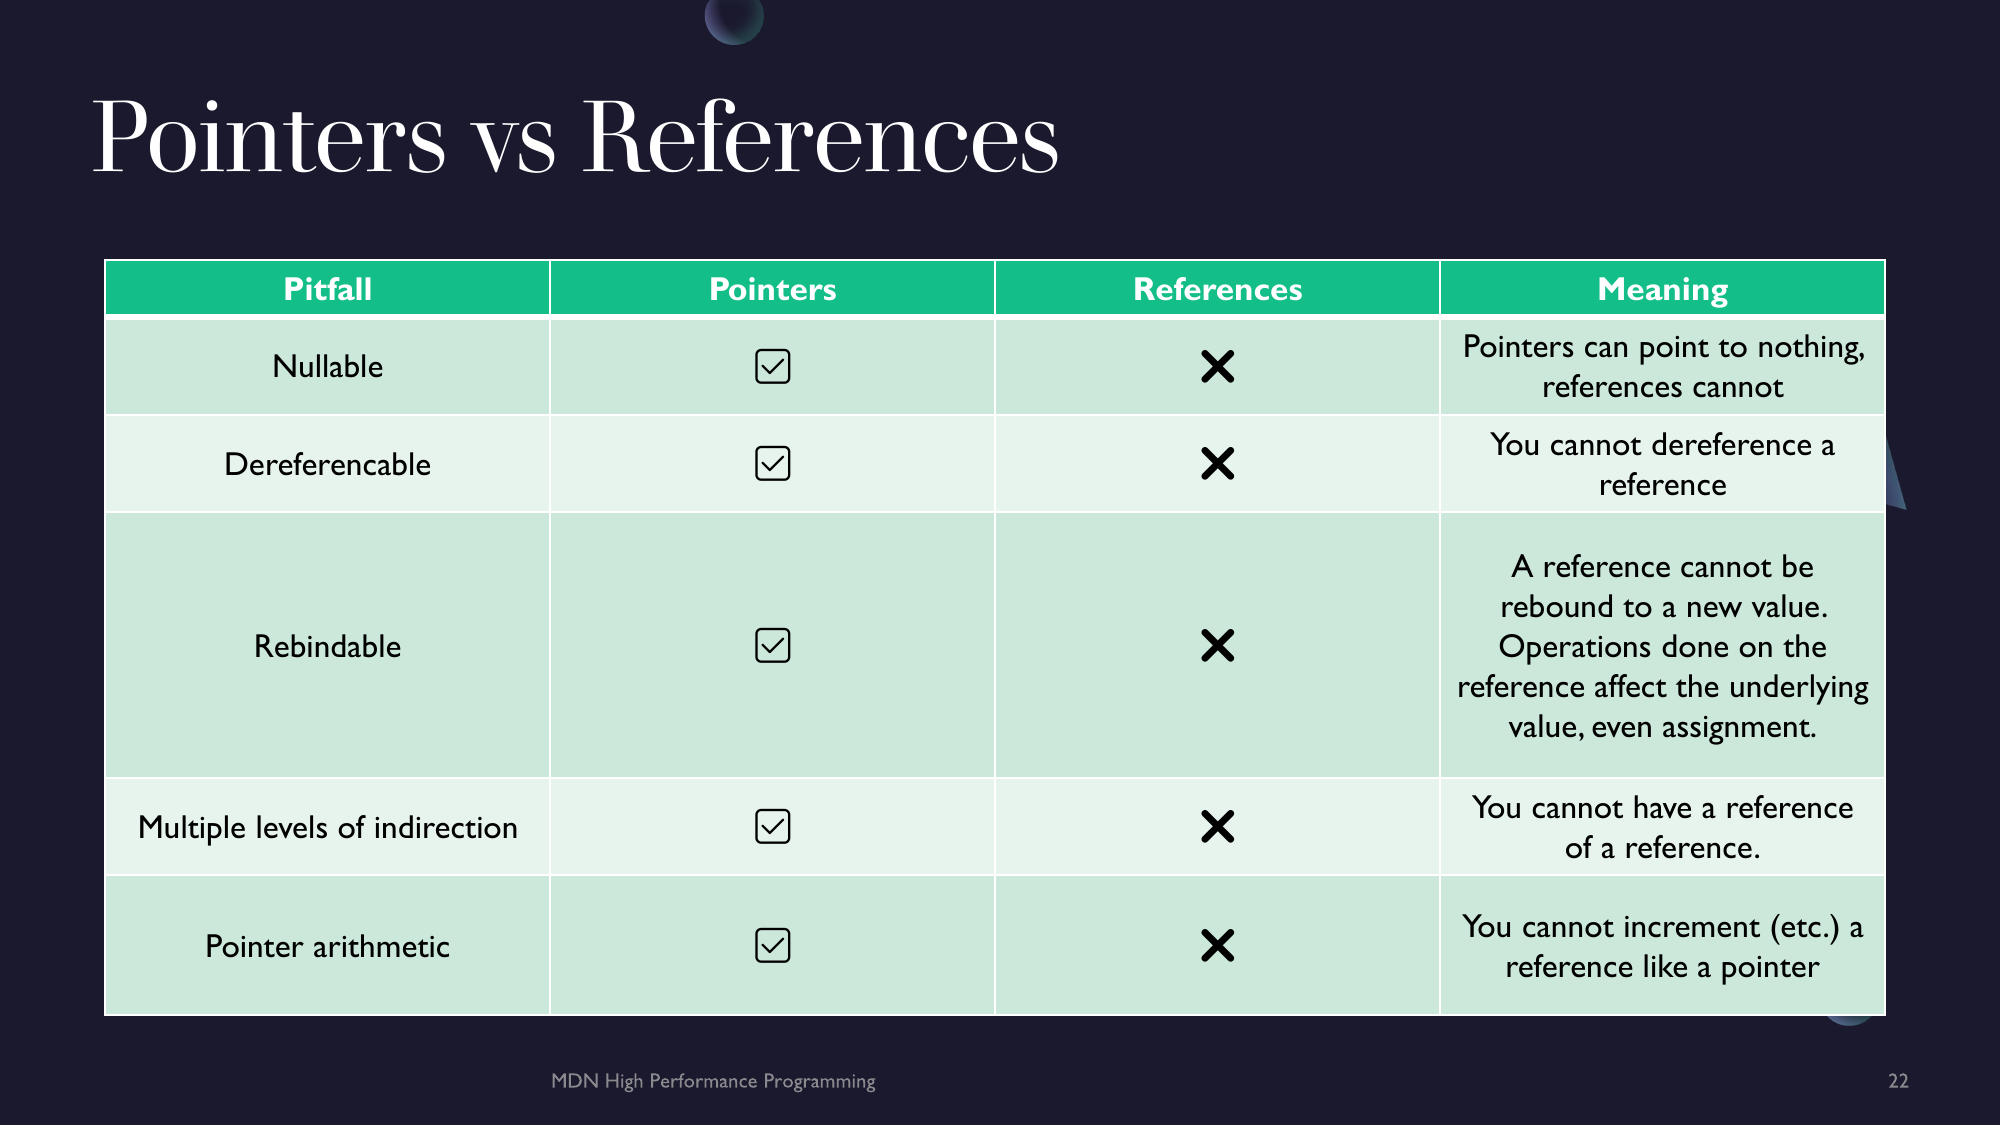
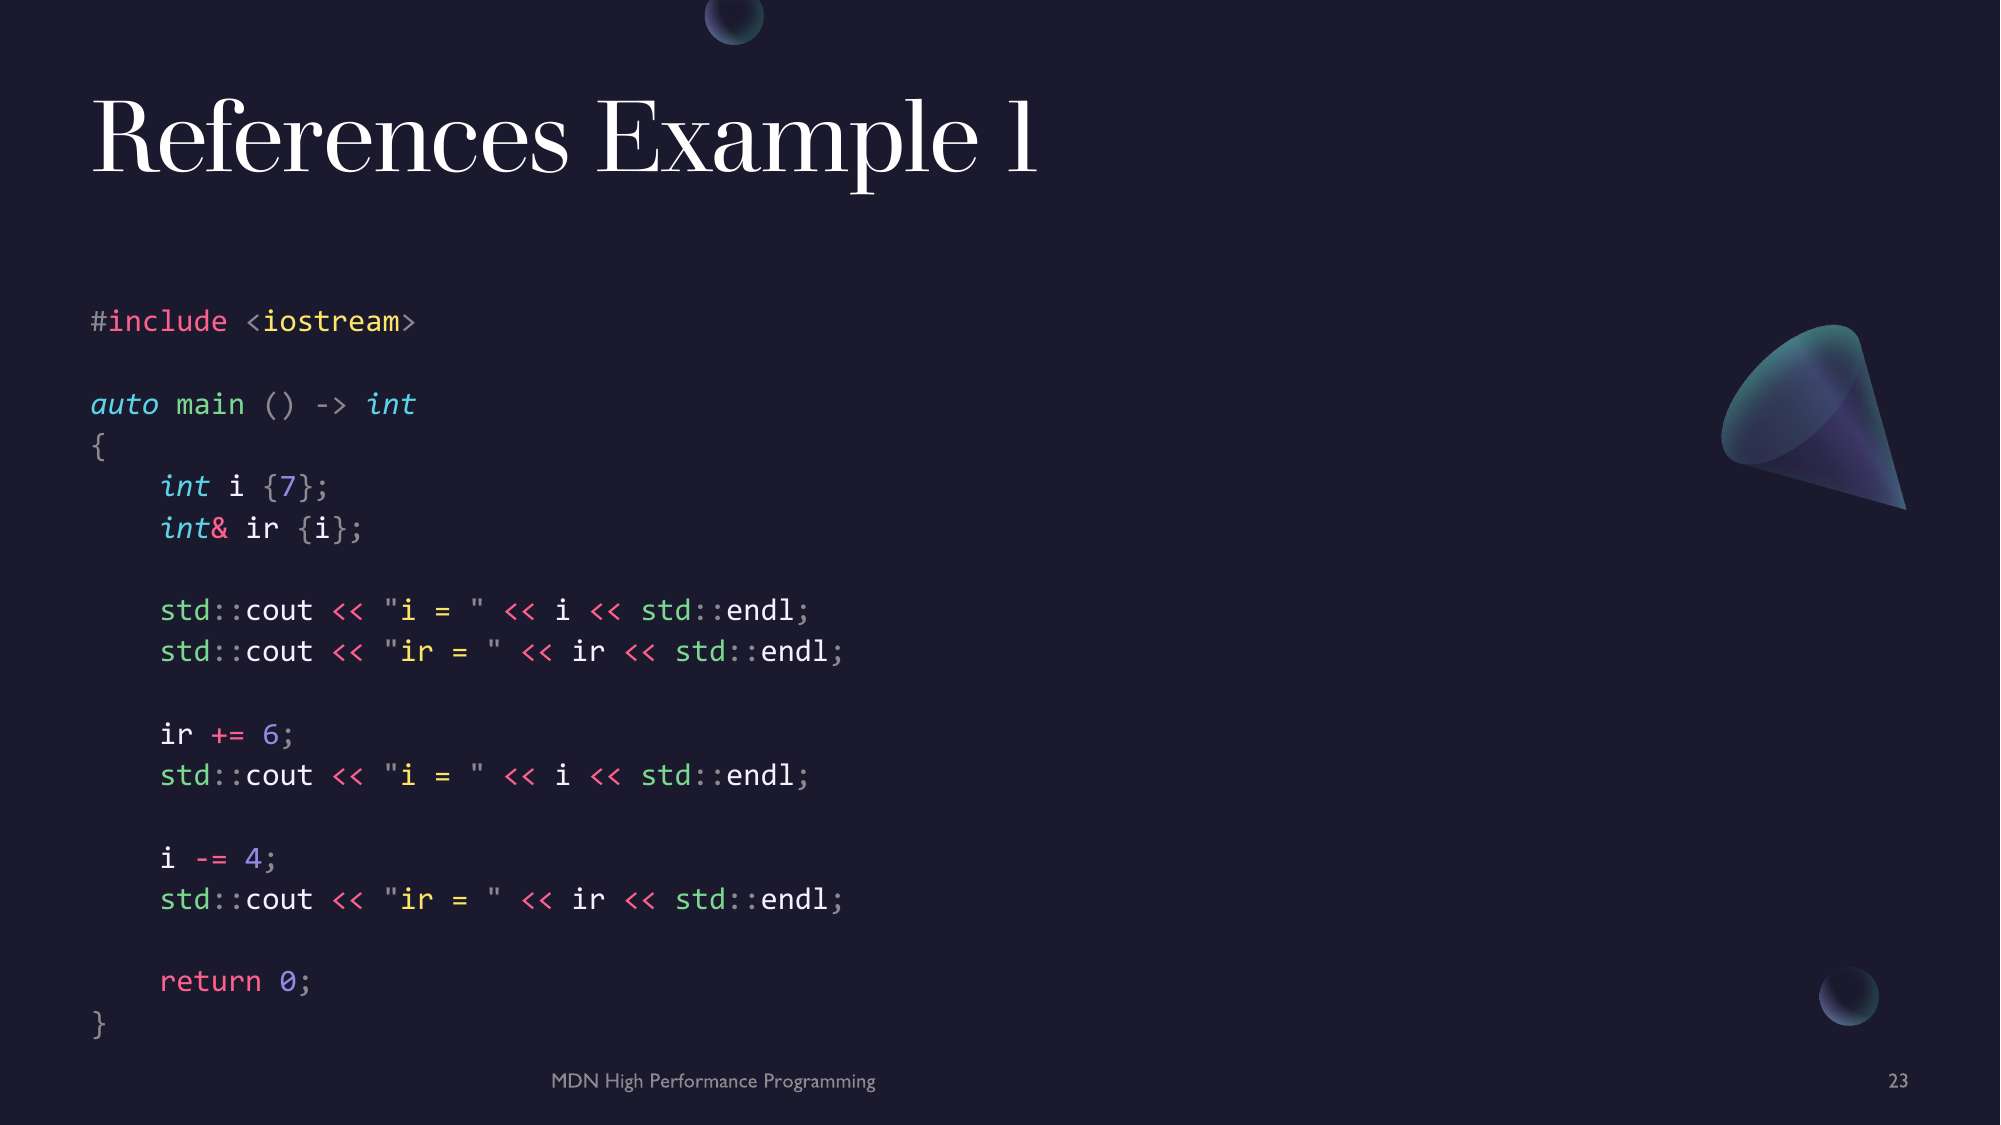
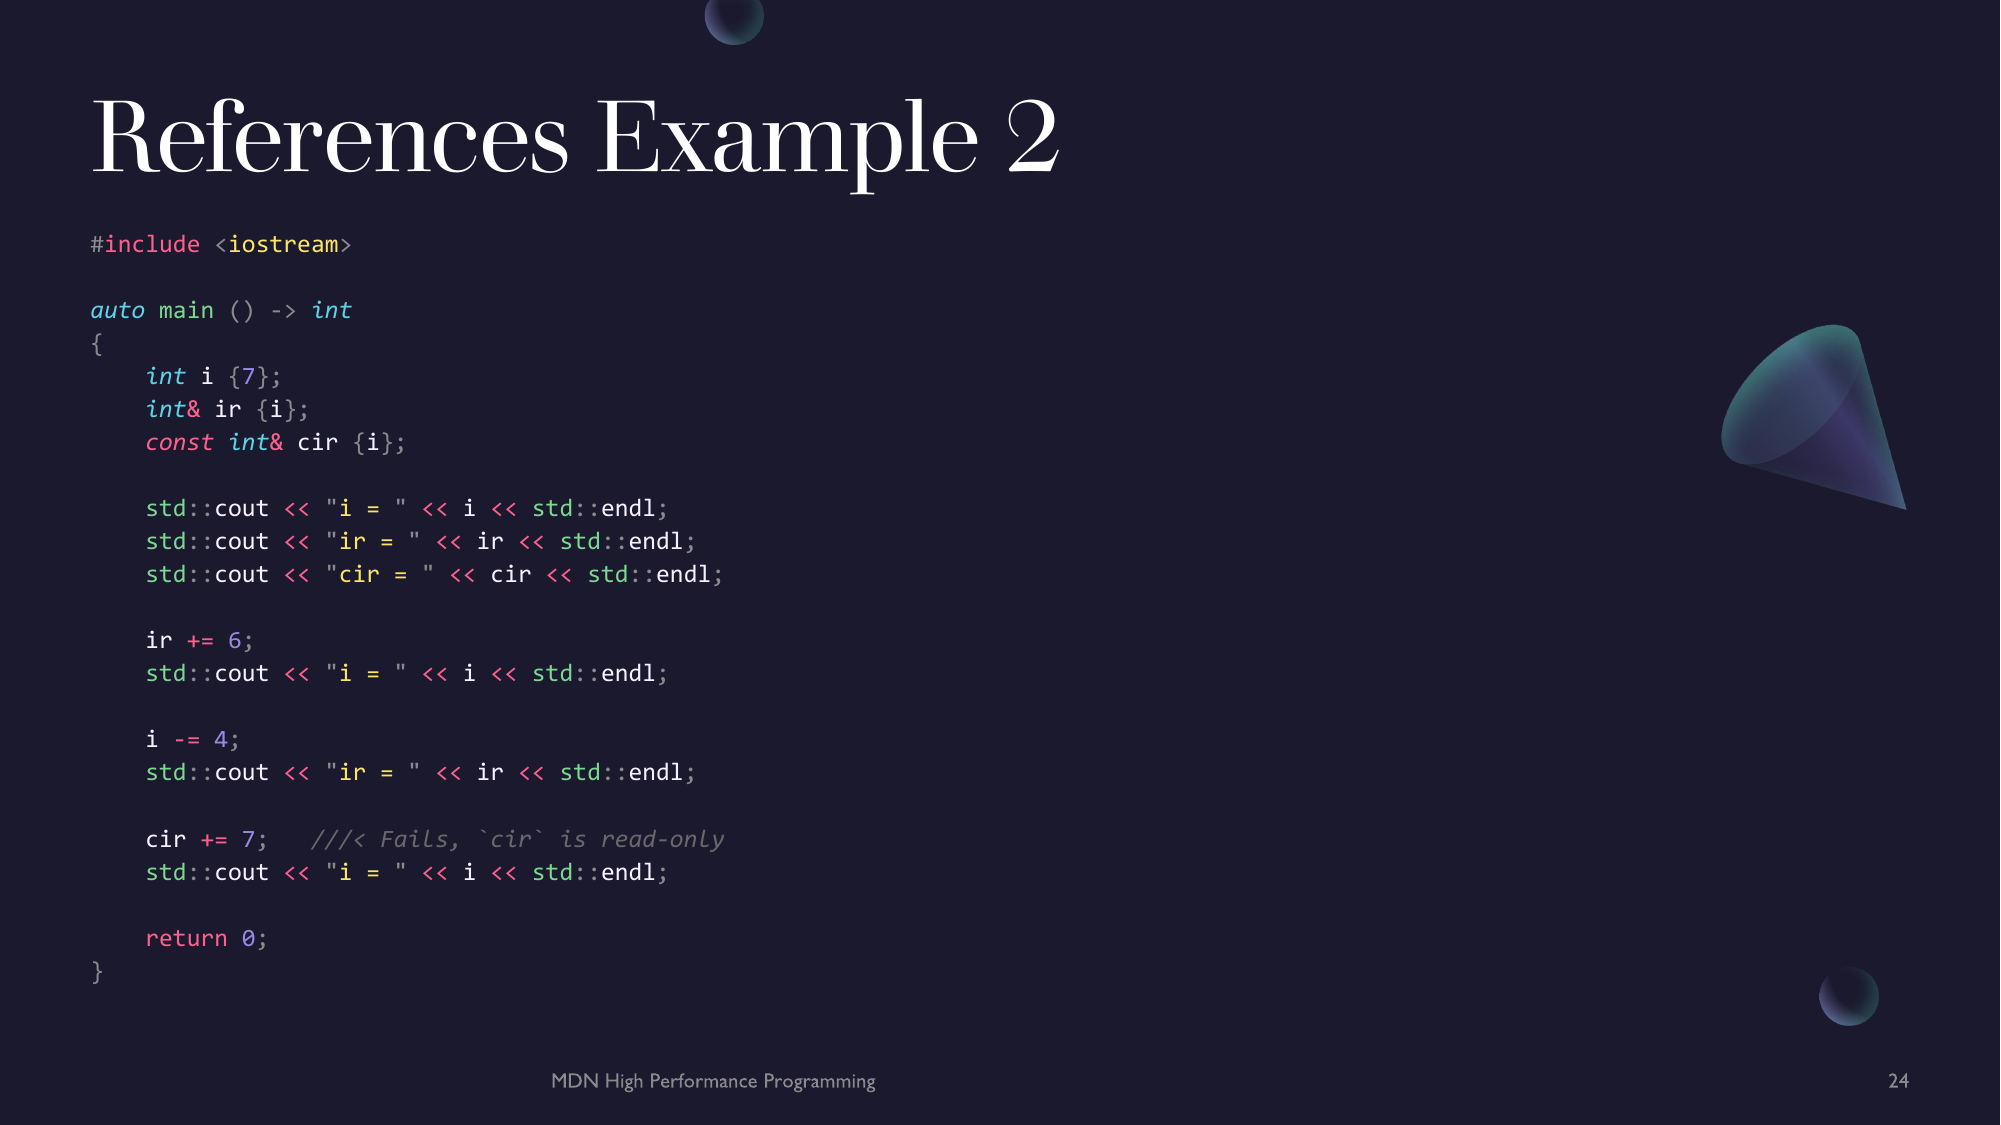

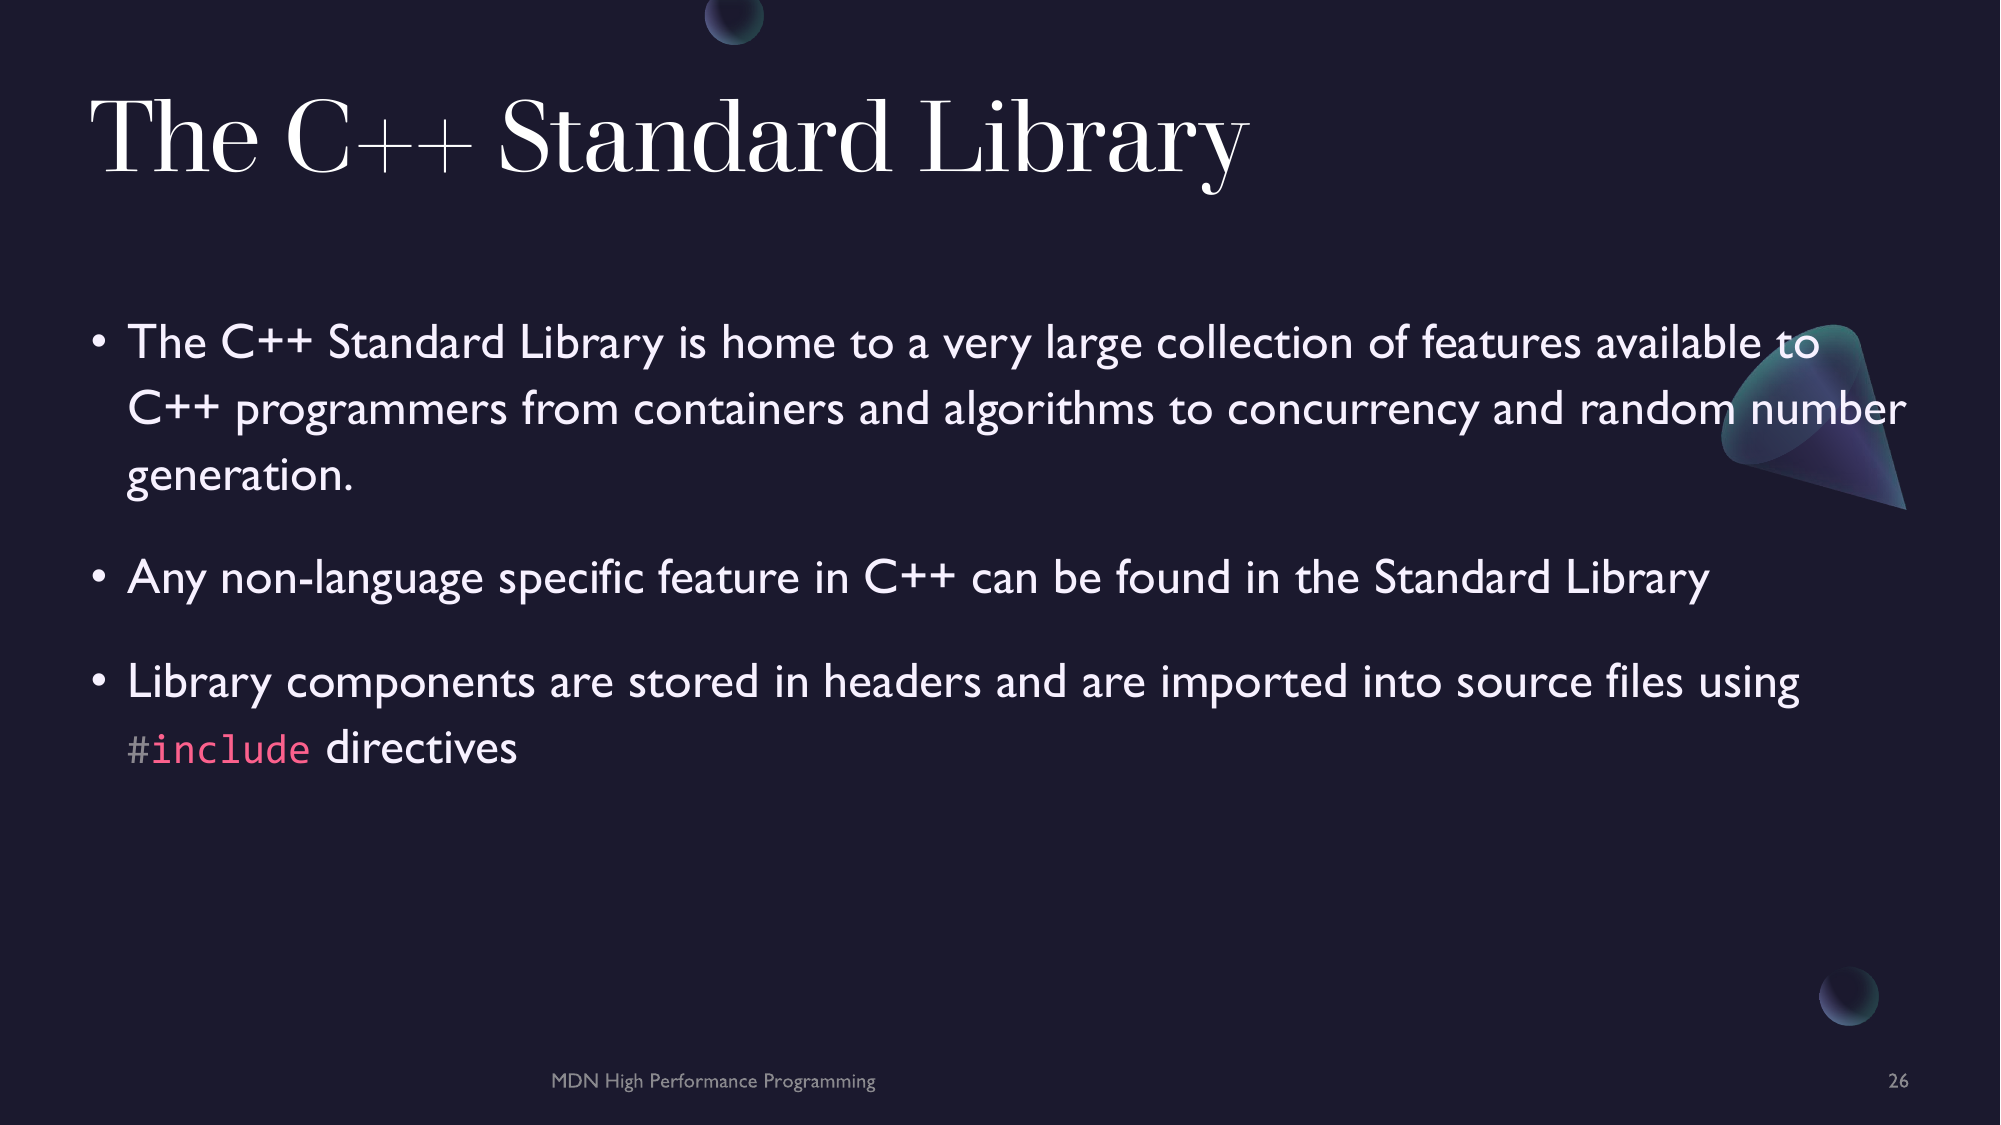
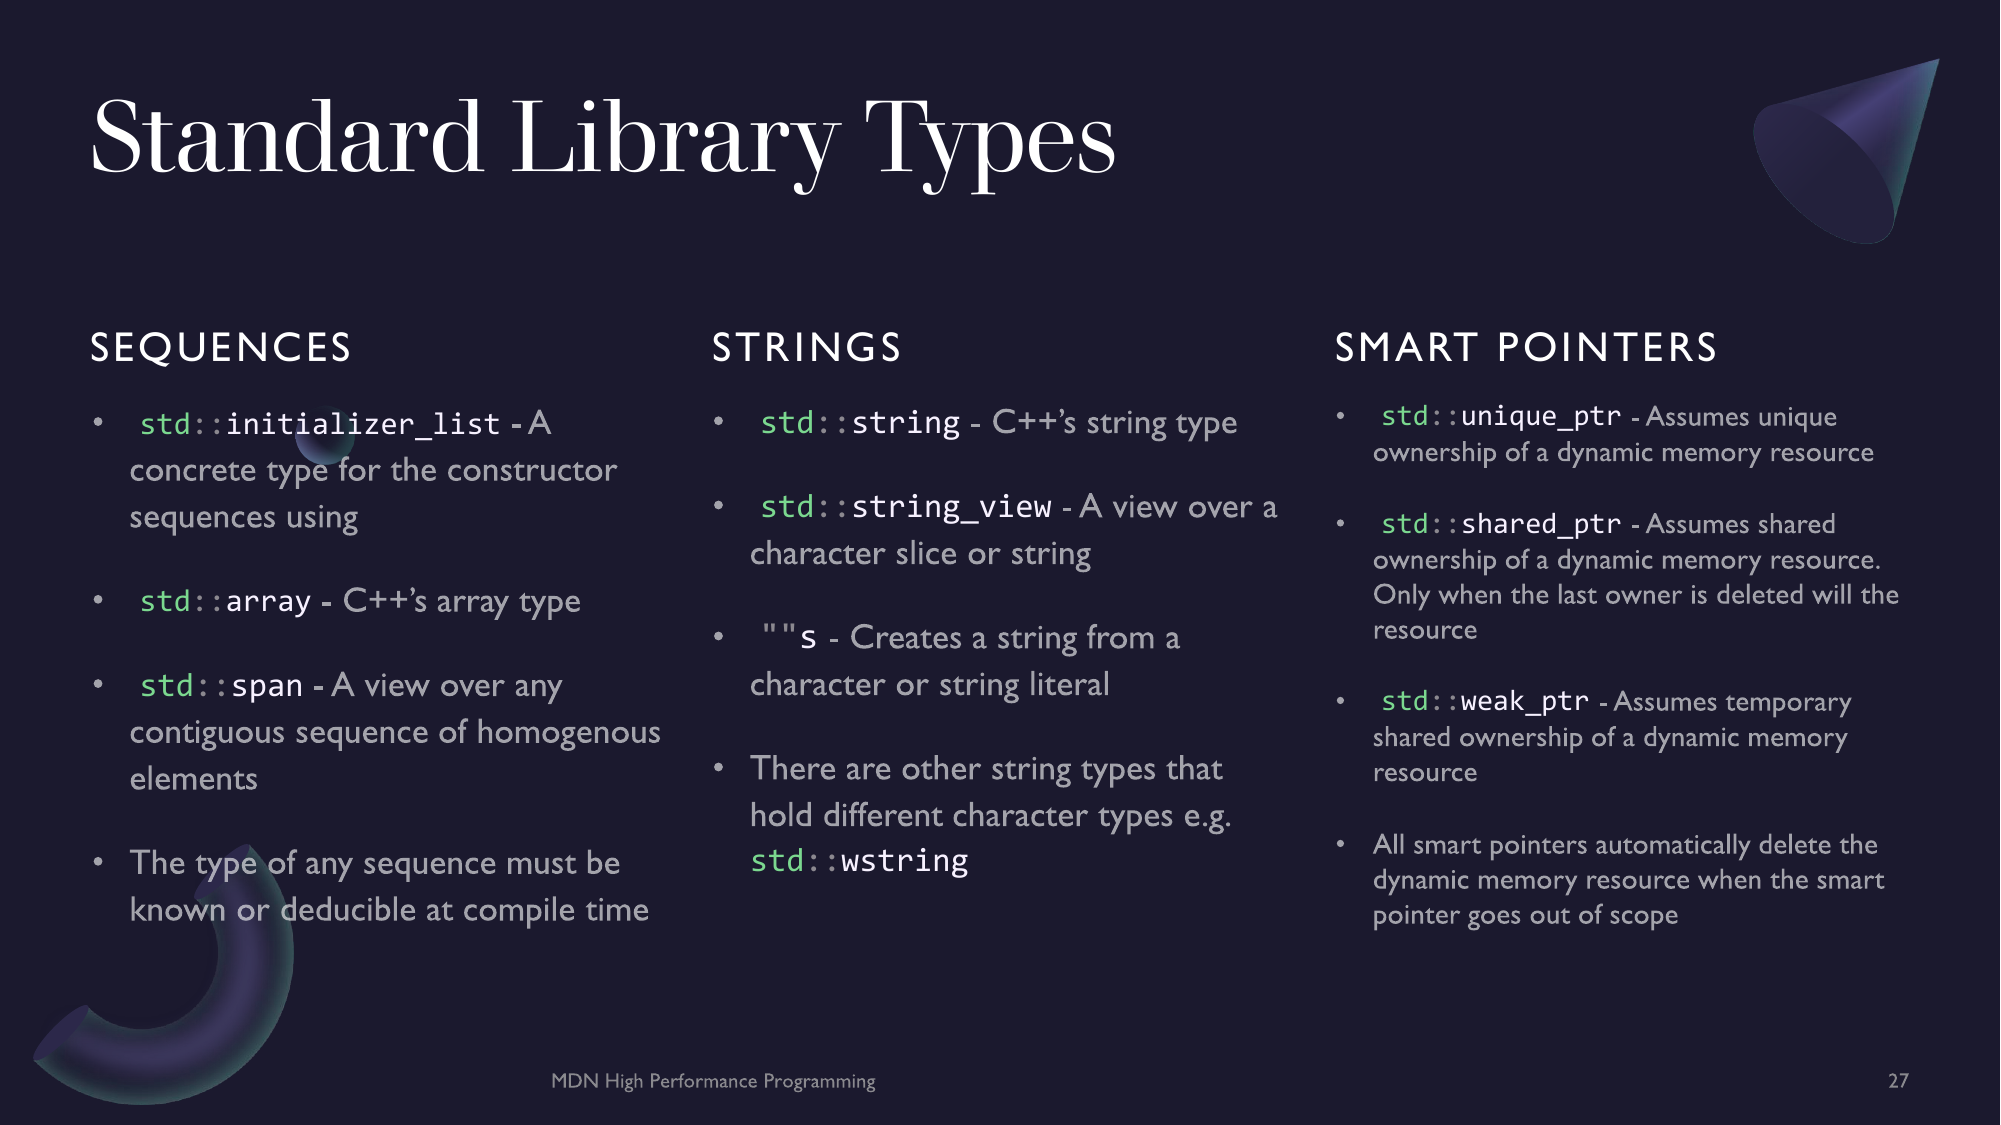
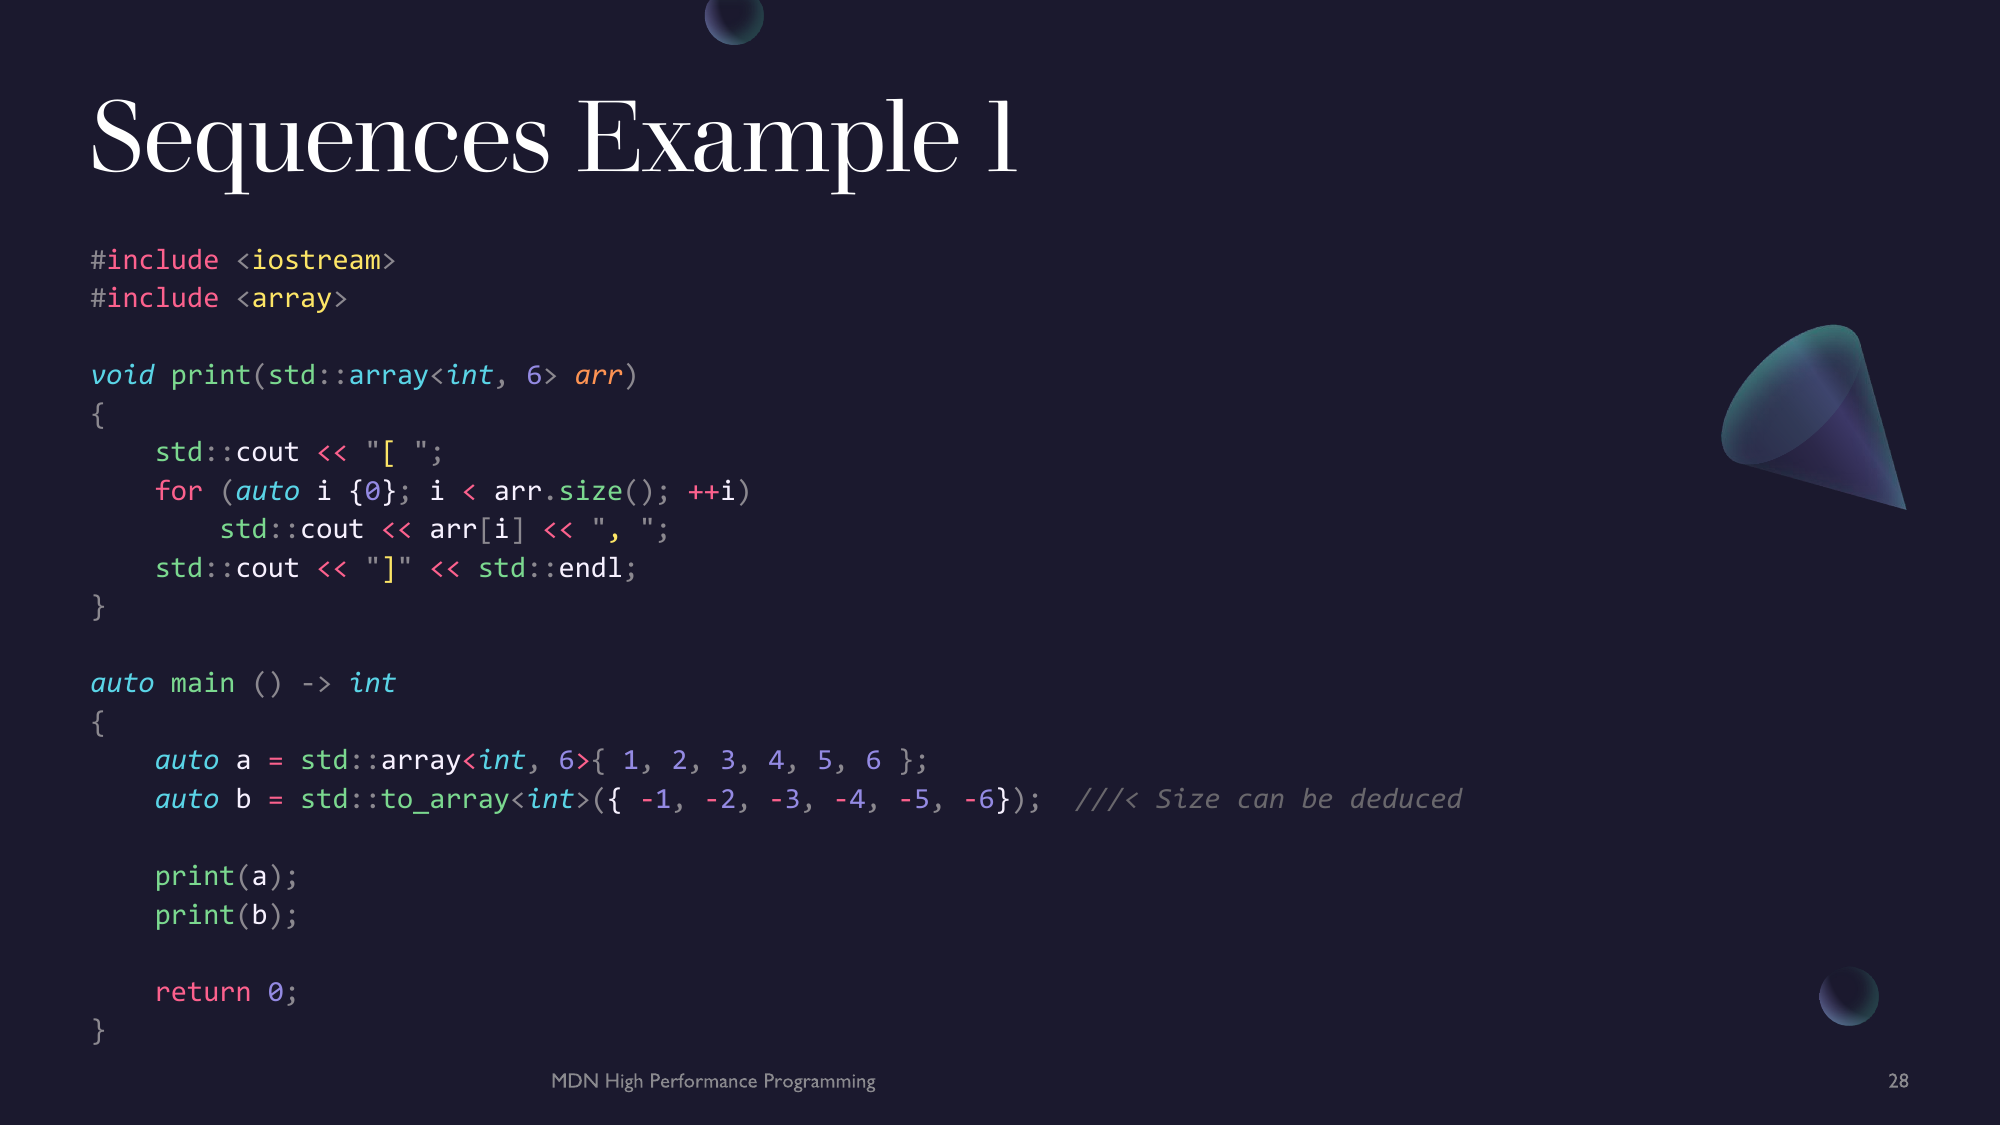
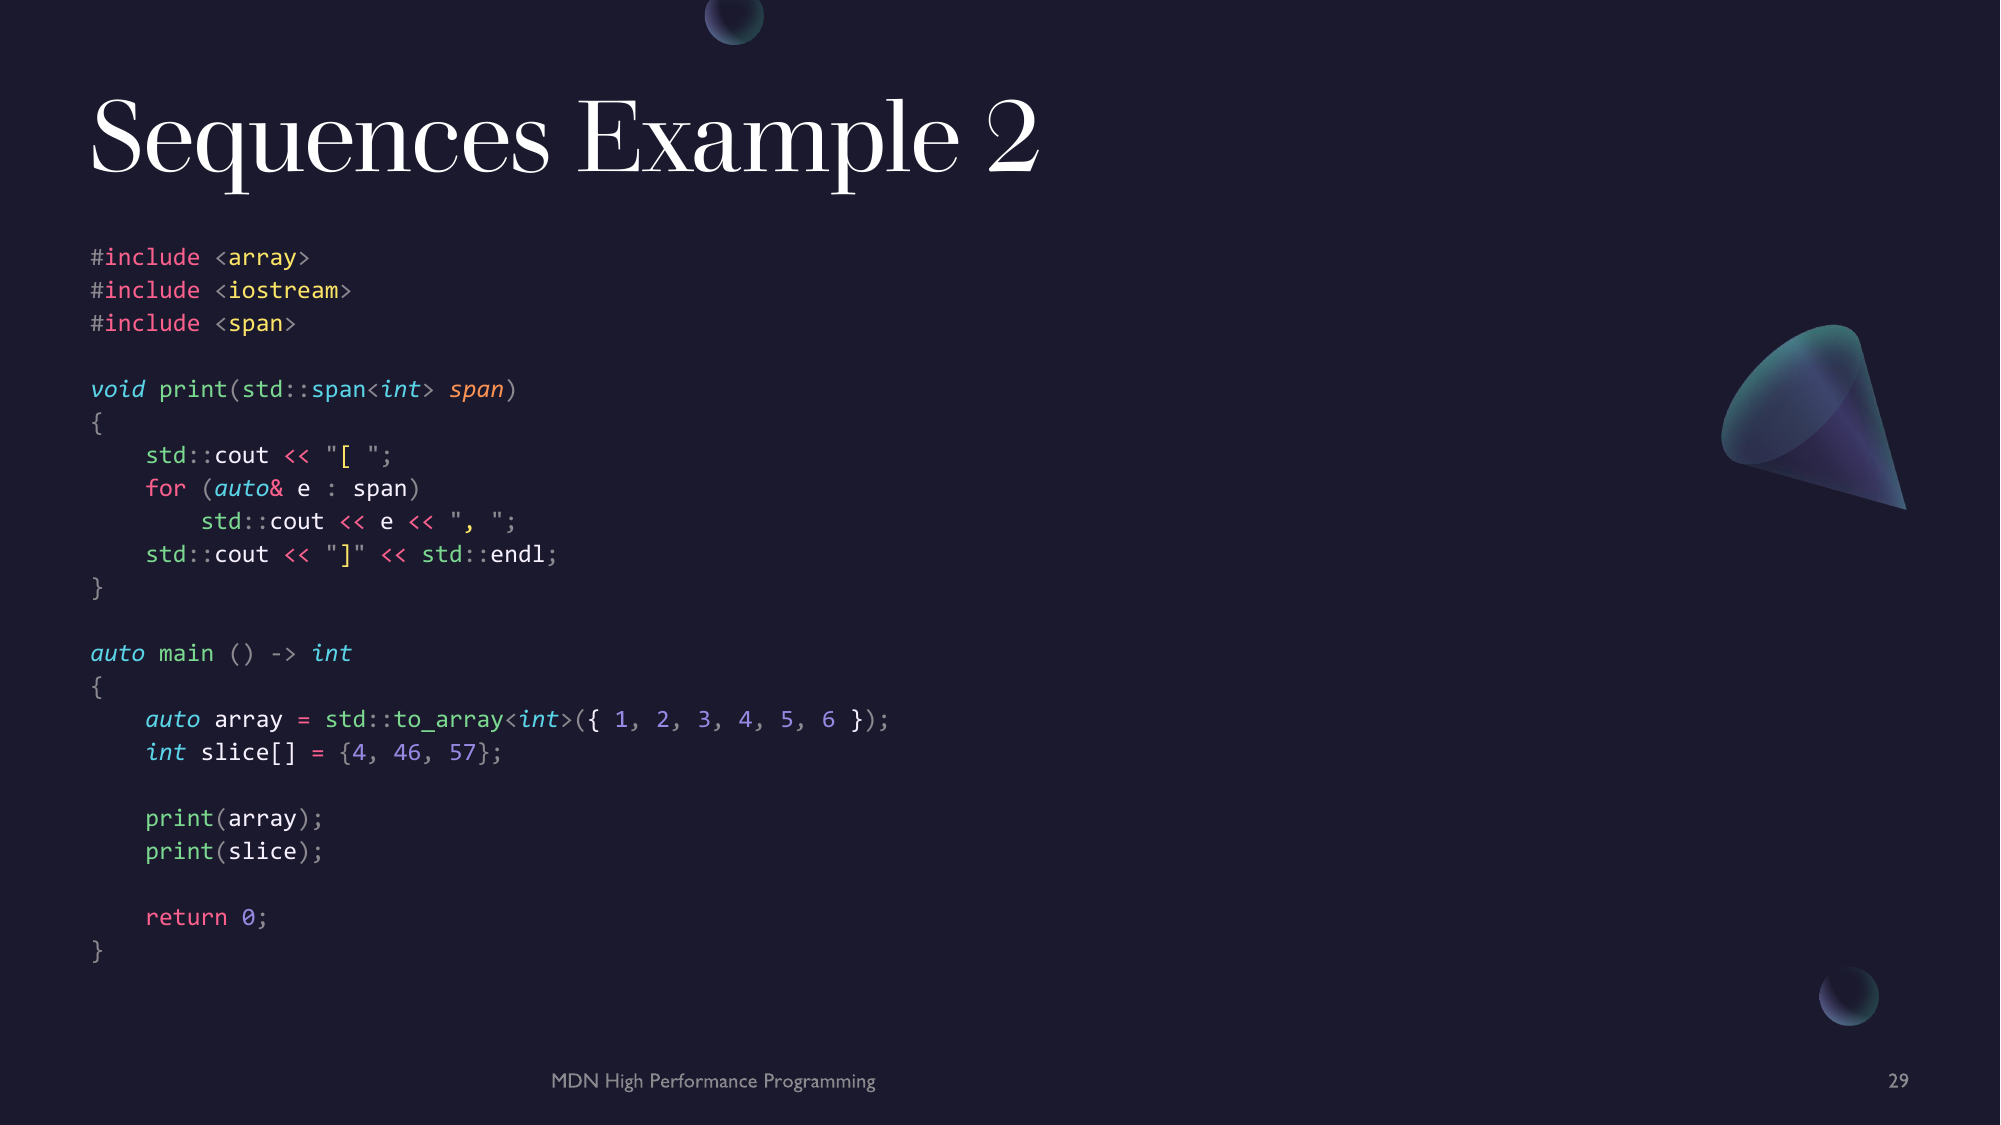
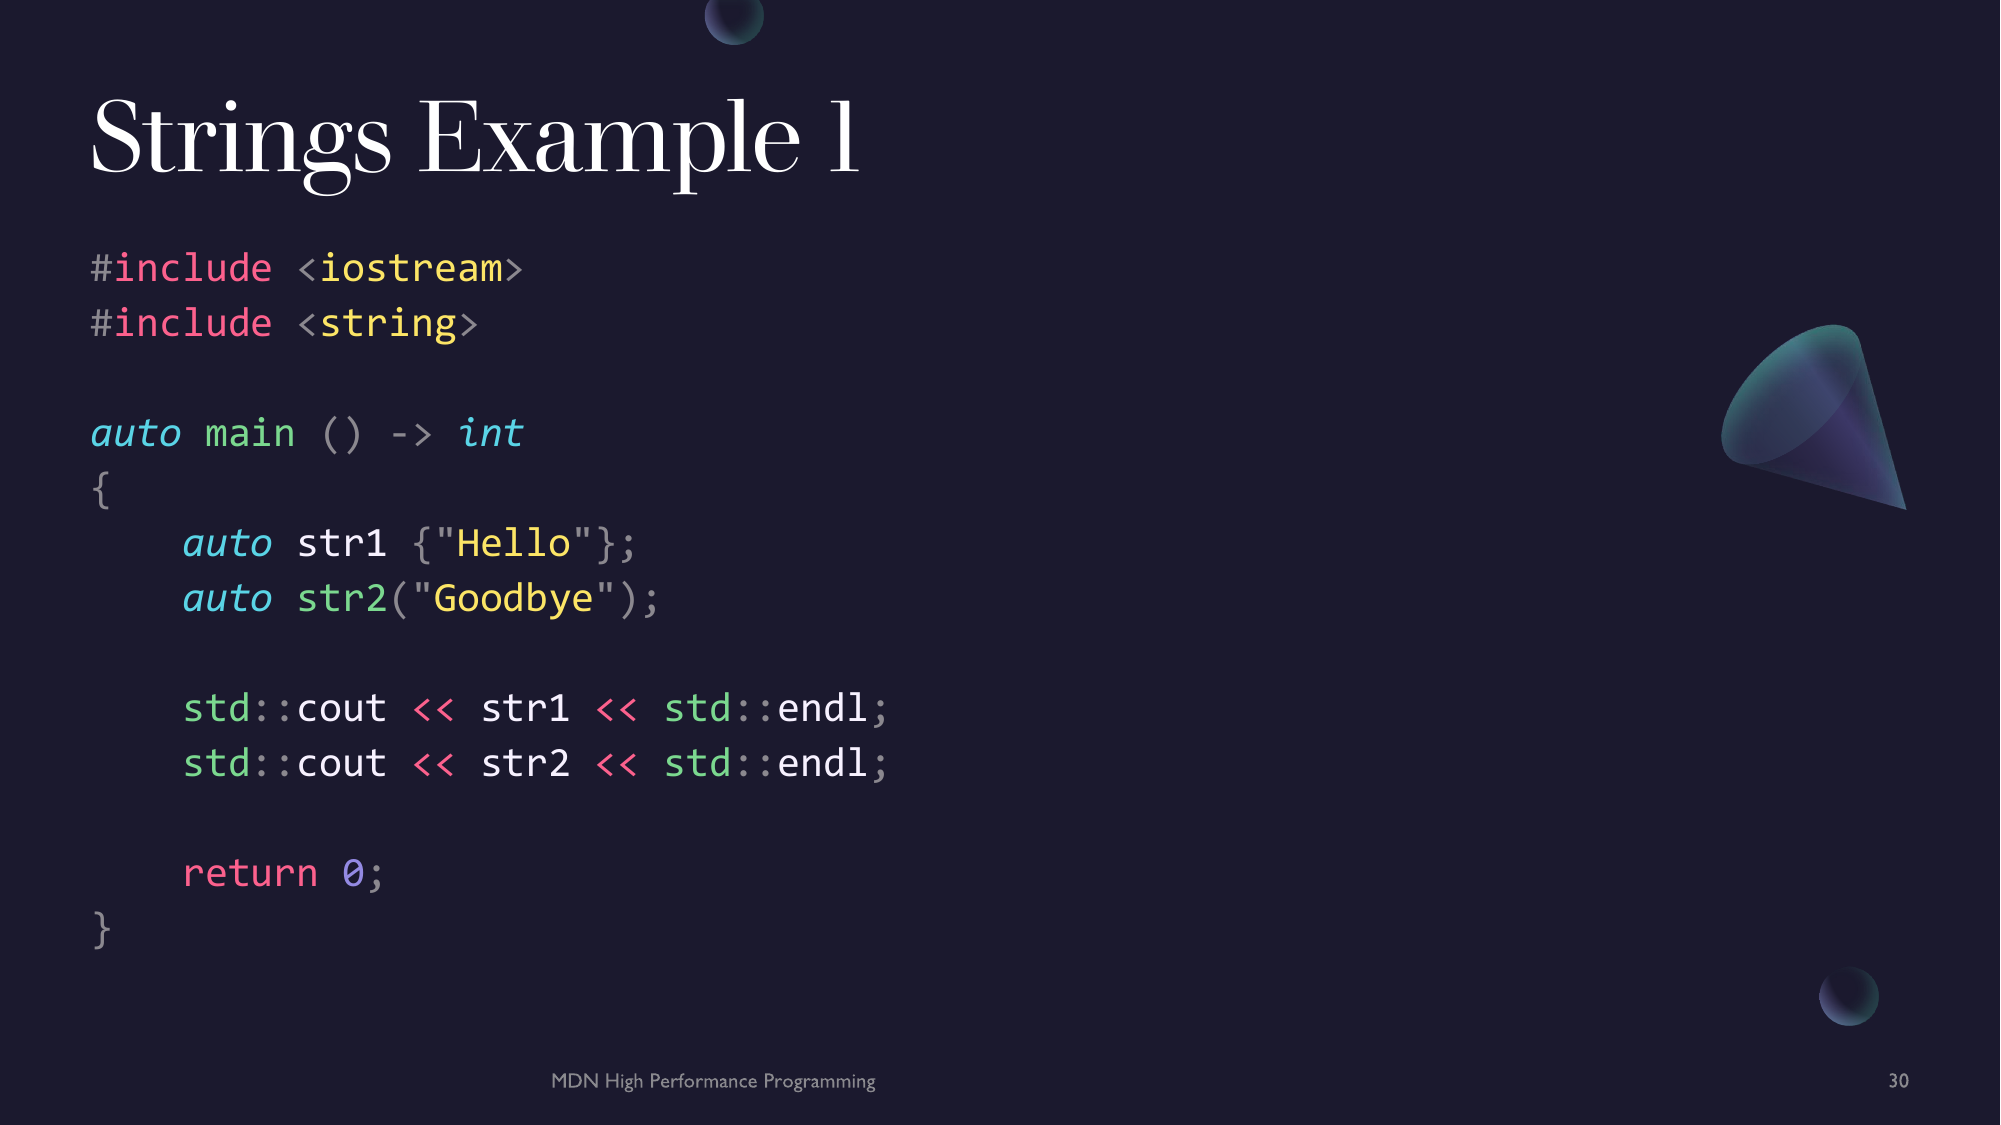
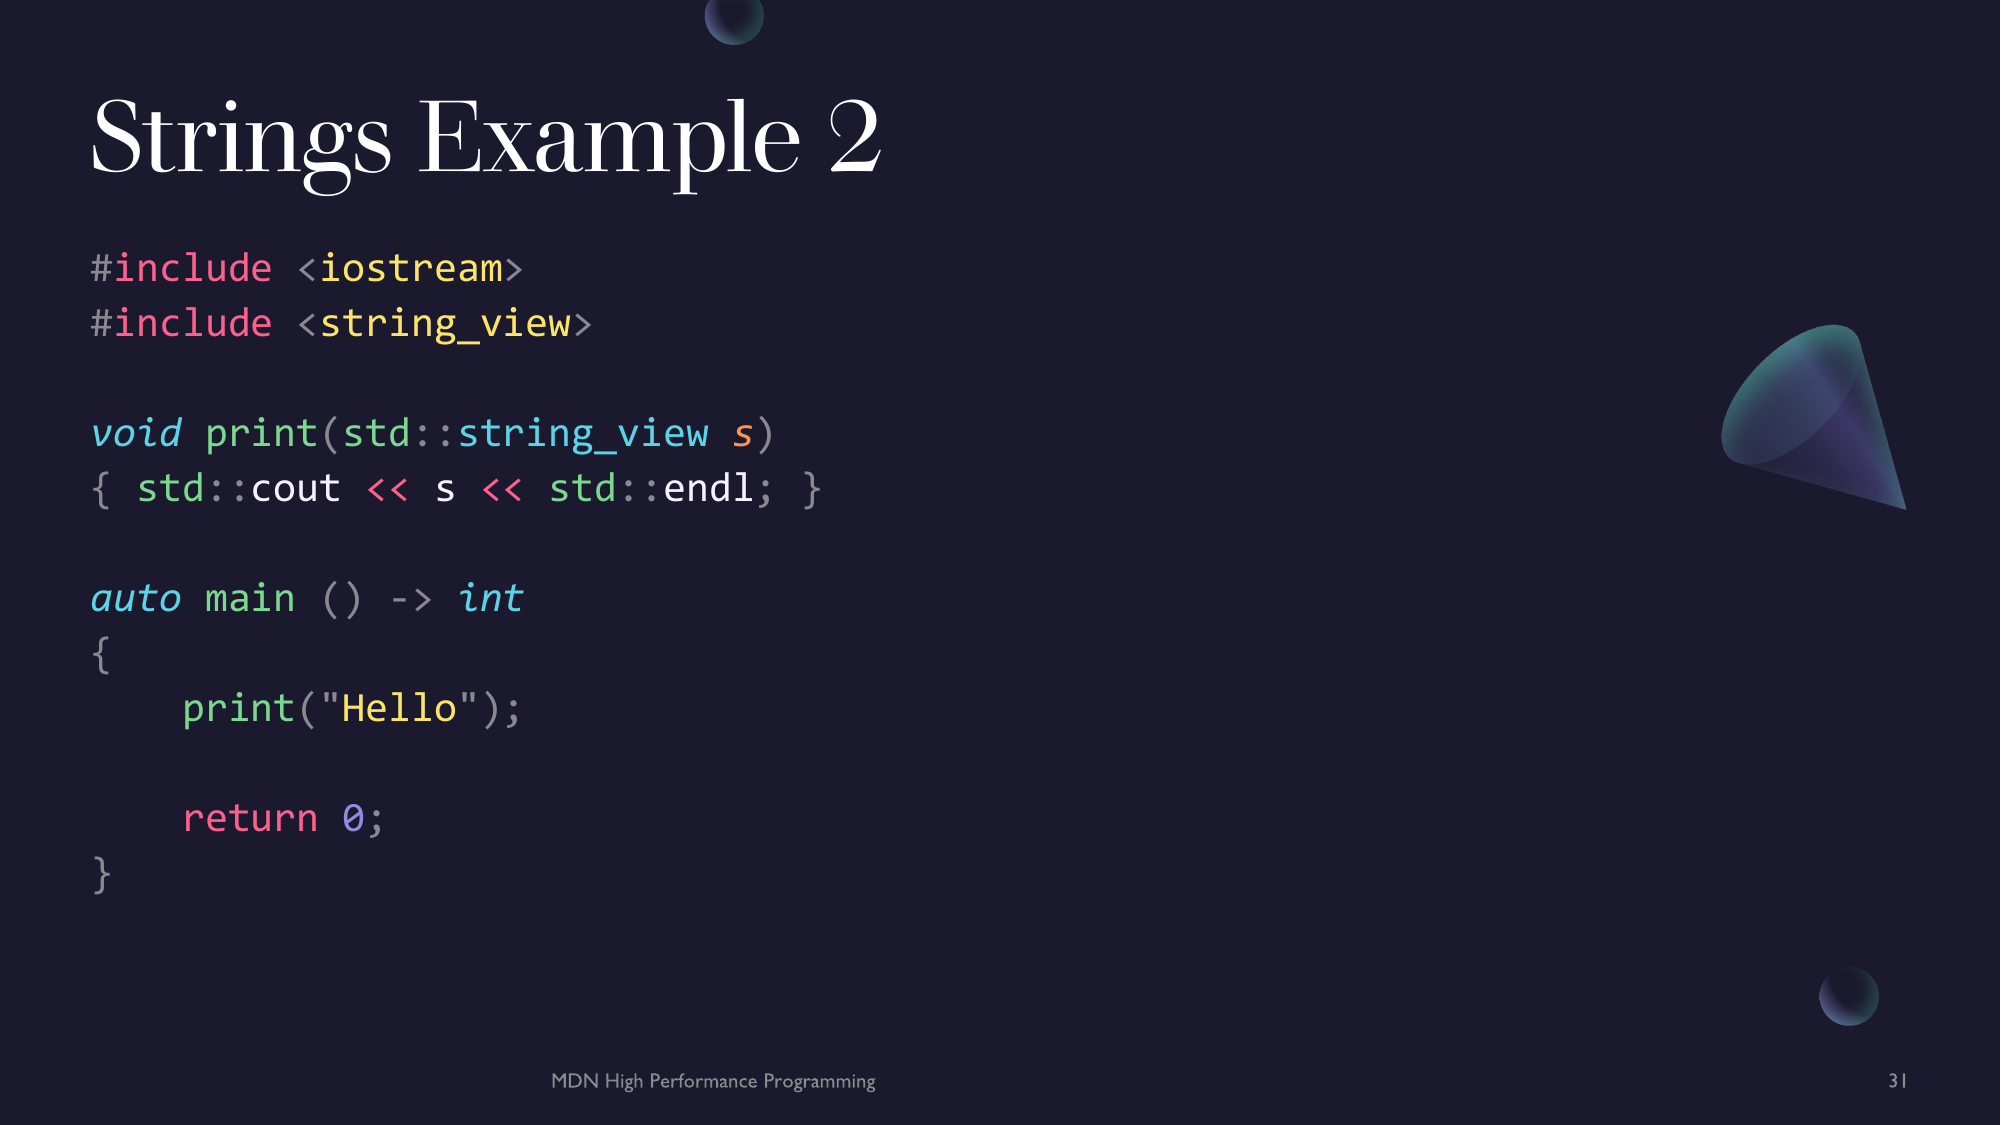
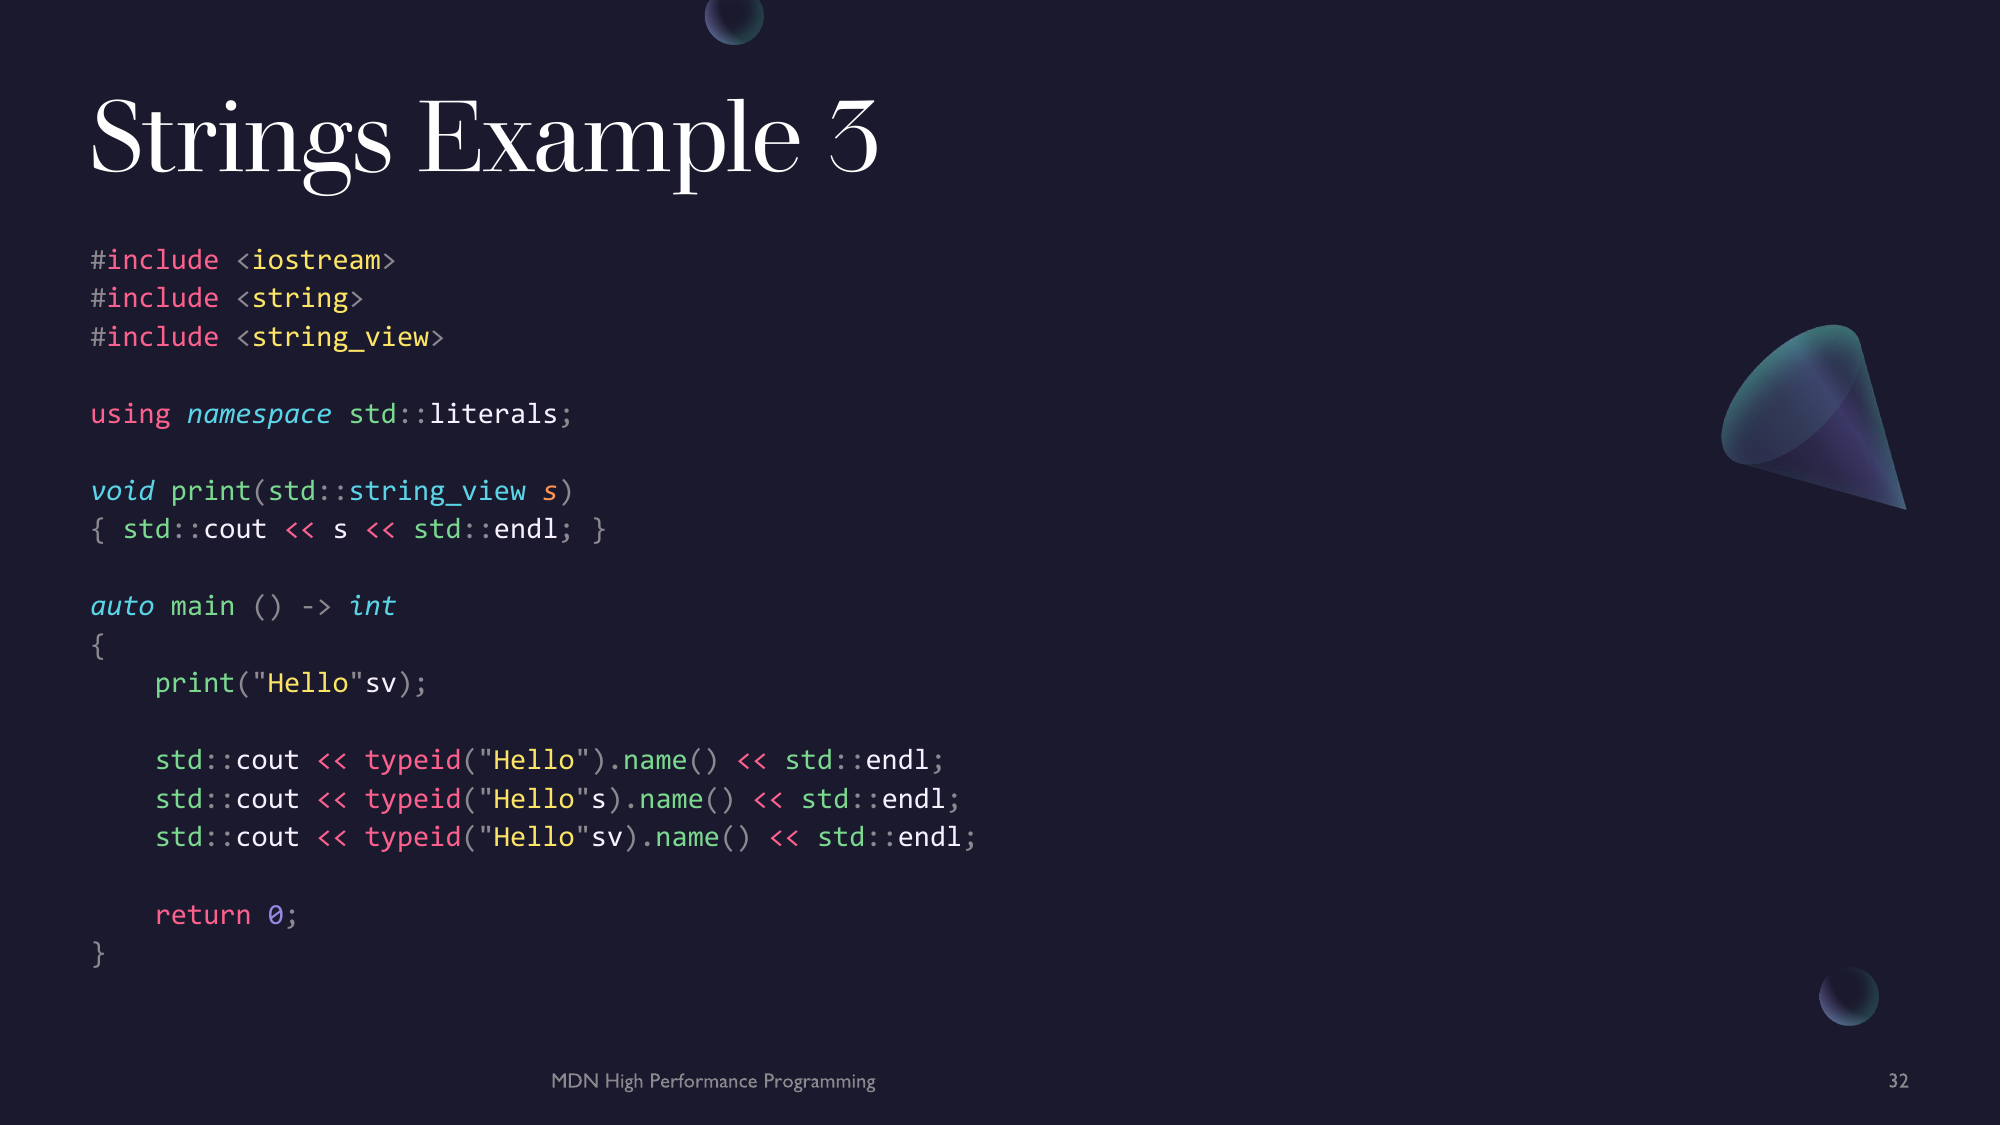
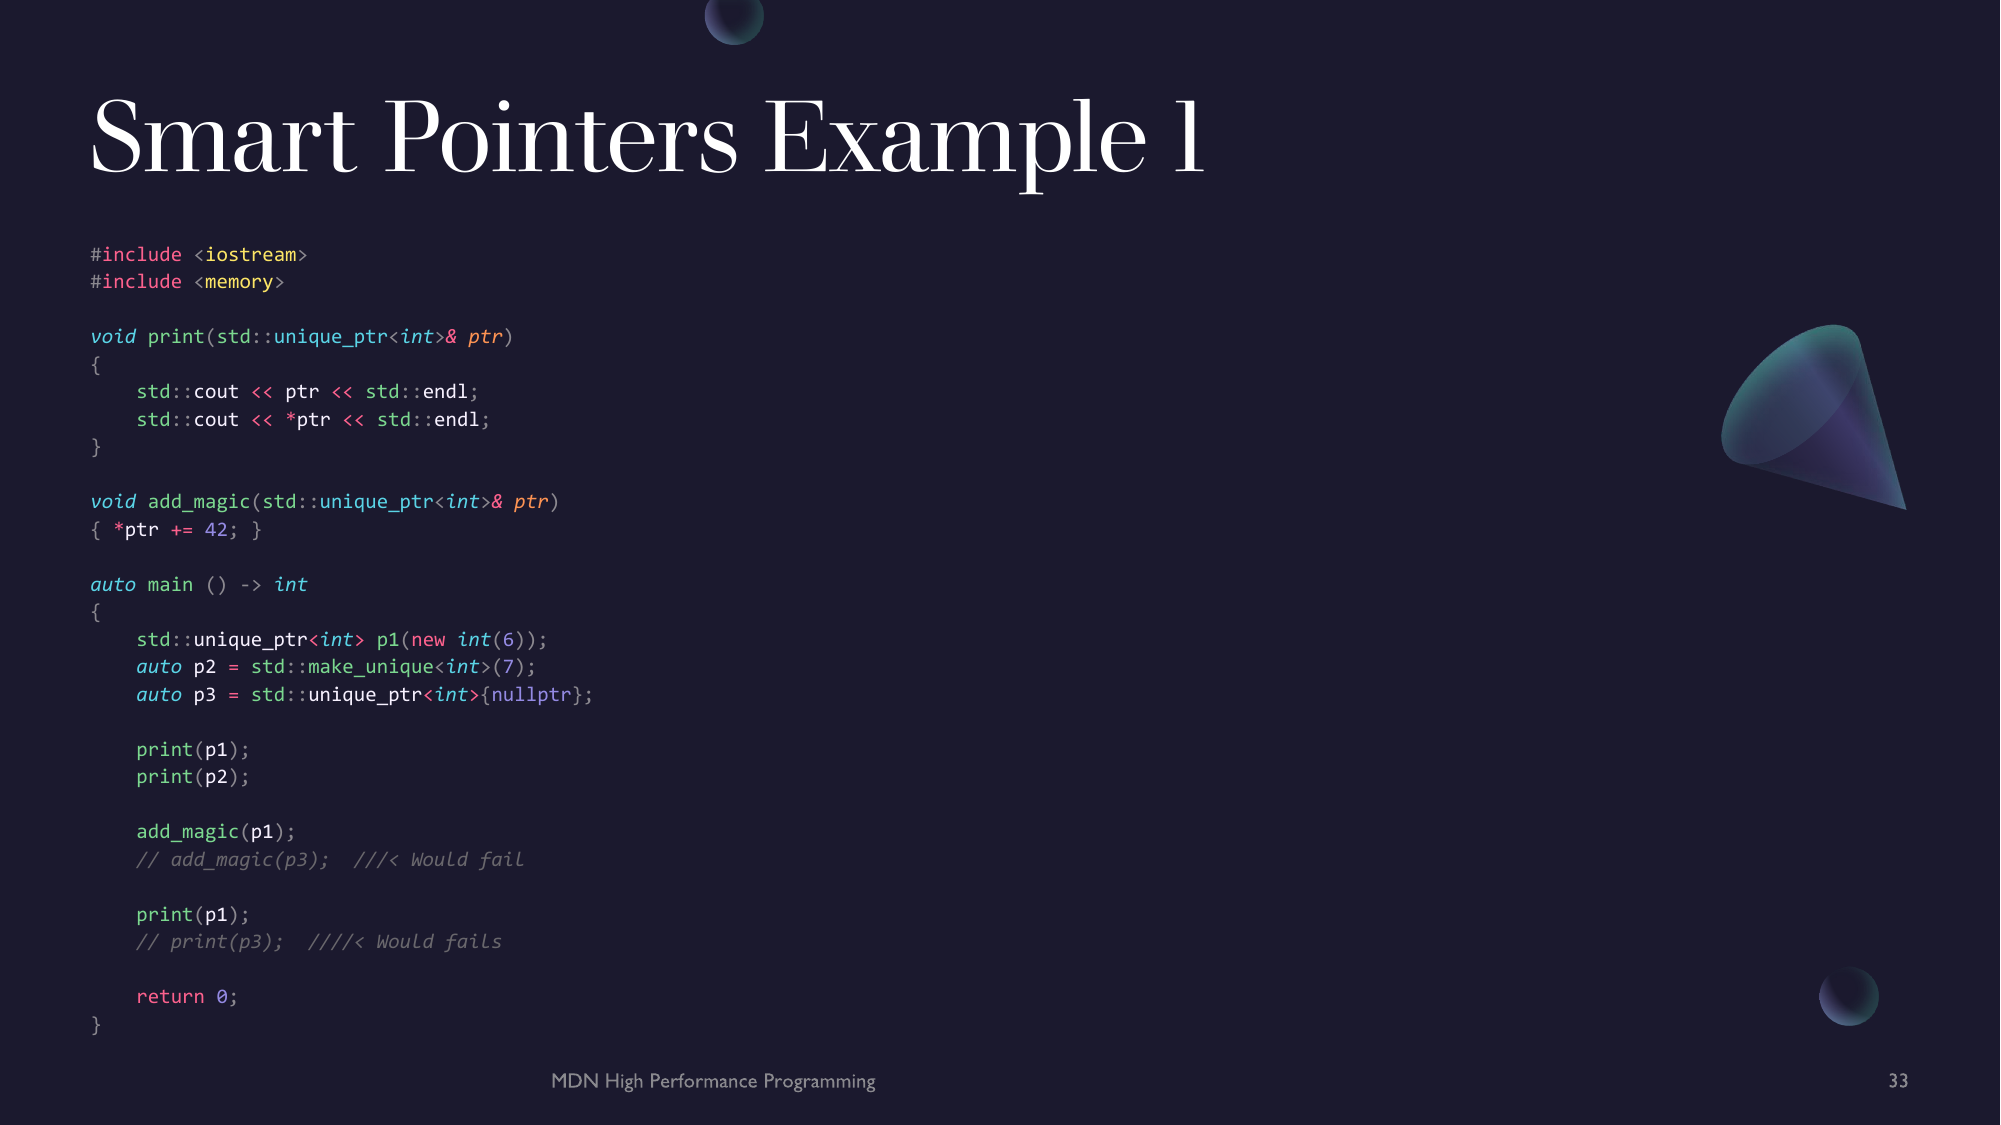
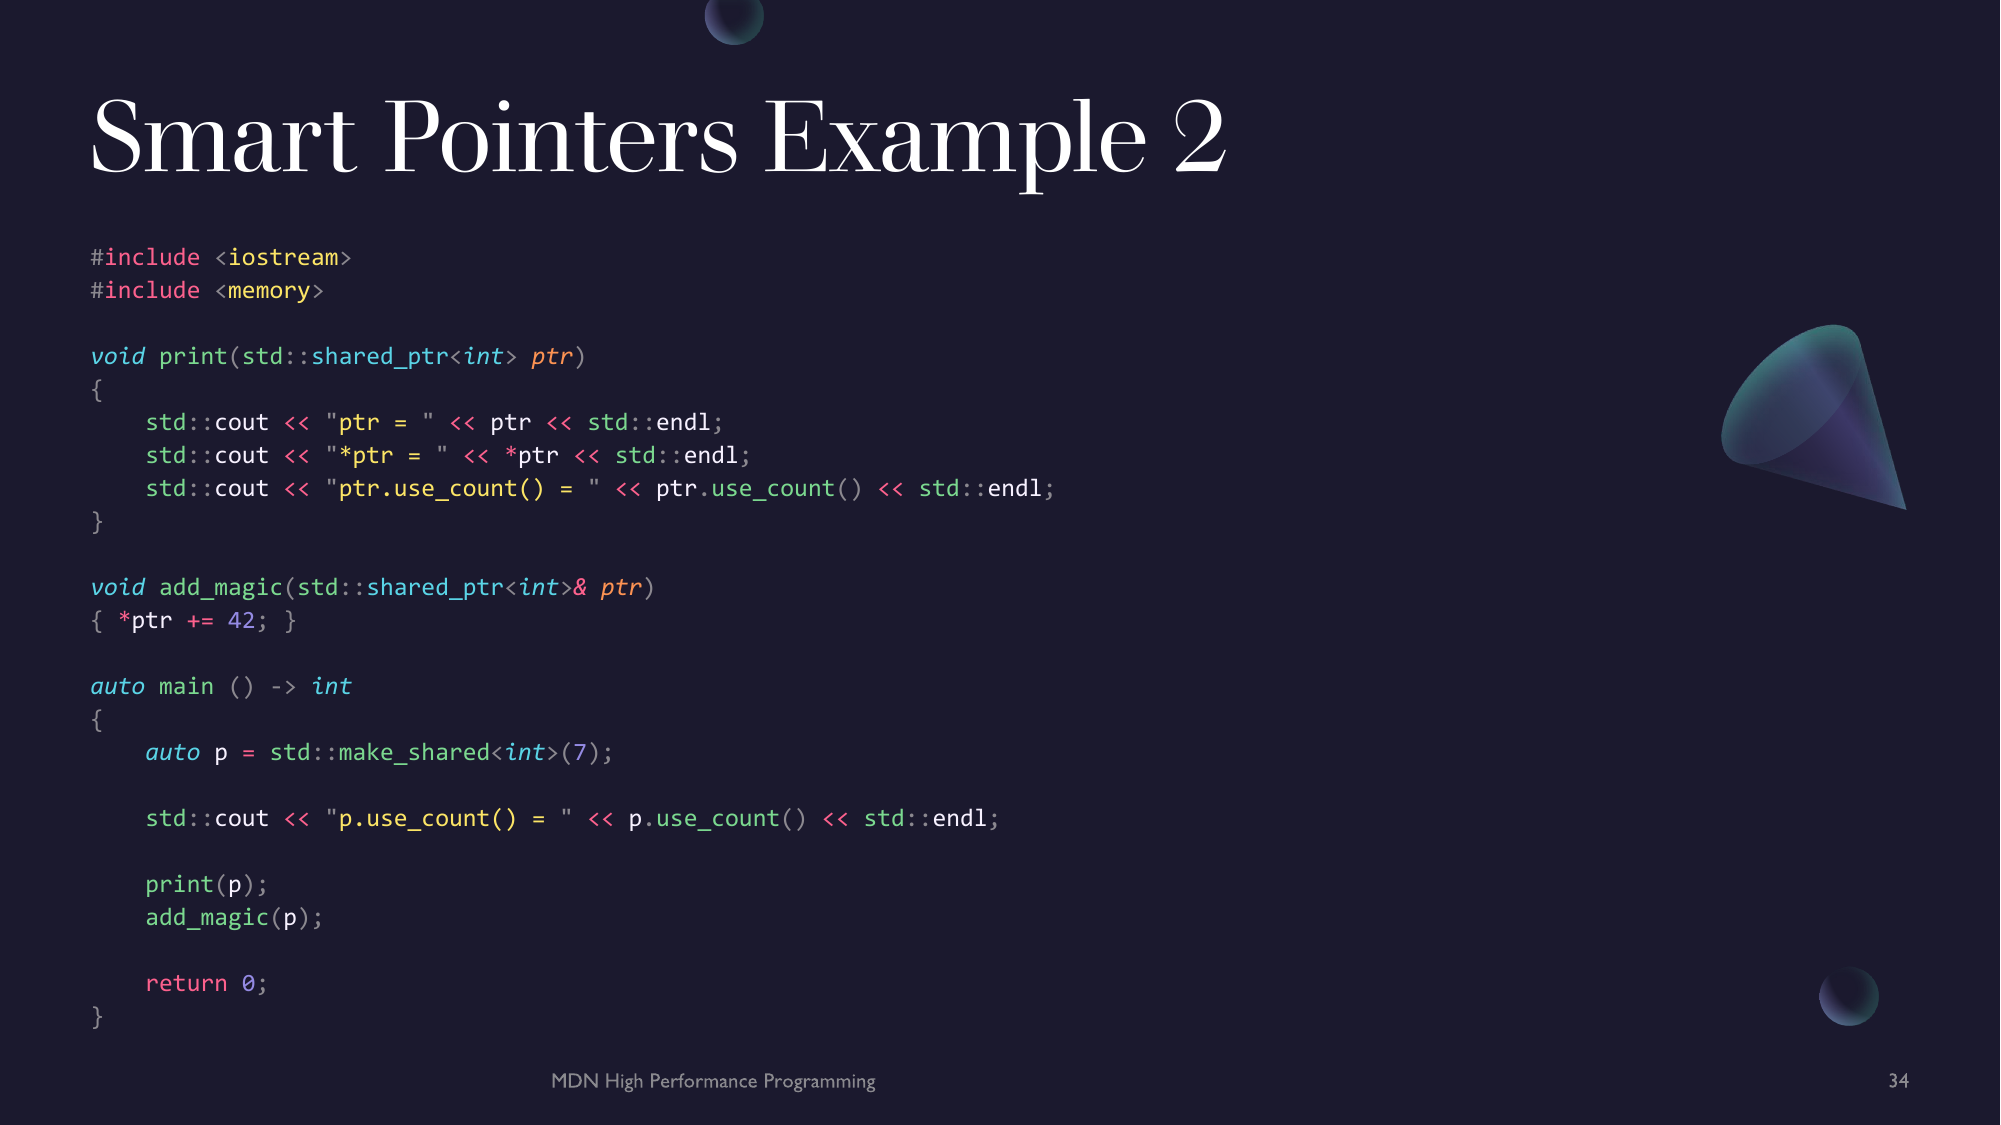
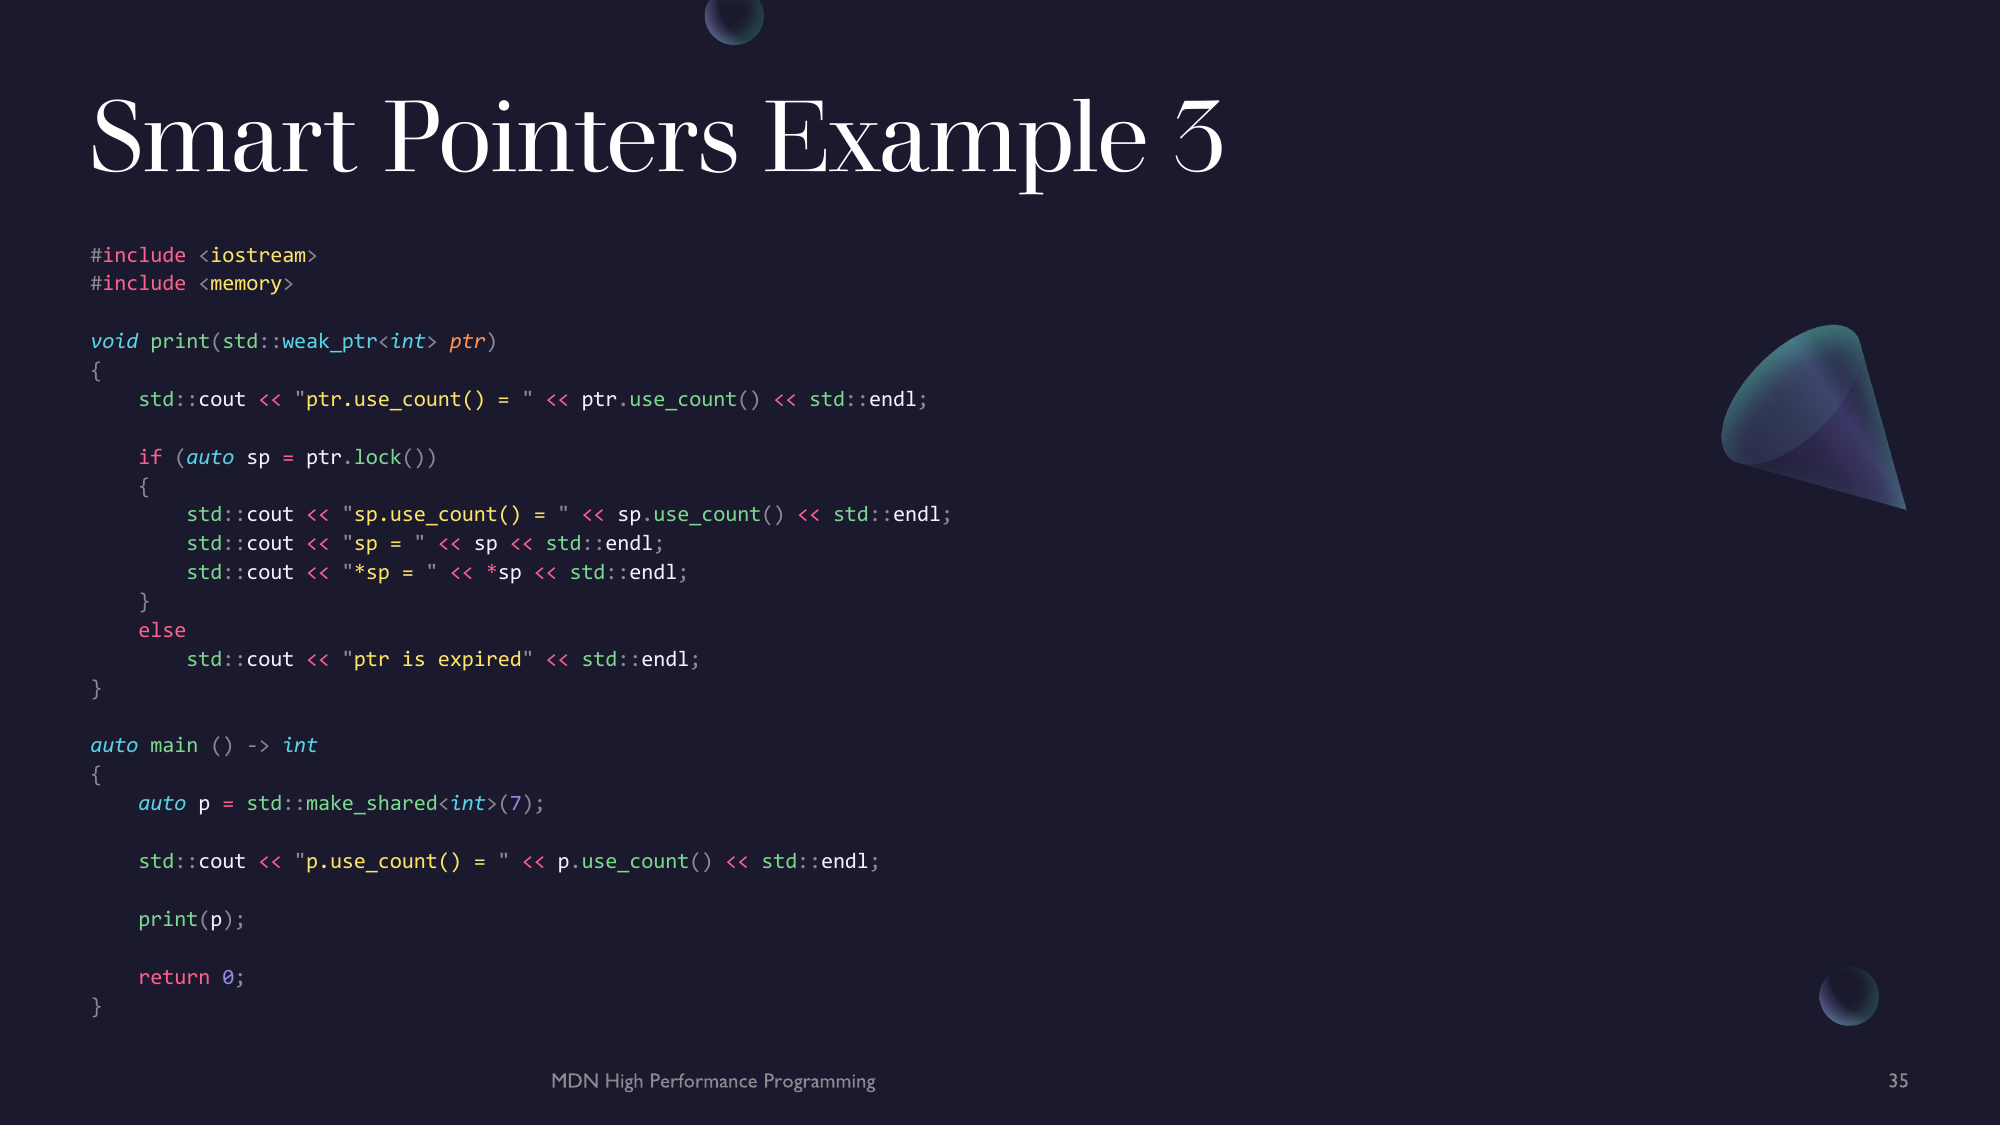


Intermediate C++ Features
Throughout this chapter you will delve deeper into the practical abilities of C++ from advanced function usage and functional programming idioms to logical code separation and modularization. You will also be introduced to a features that allow for the creation of custom types.
Advanced Functions
We saw in chapter 2 how to create functions to abstract usable pieces of code into smaller and more modular components. This is the bare-bones of functions of C++. Functions come in a lot of forms in C++ and have to make different guarantees about how they operate. This is done with various specifiers and labels that indicate to the compiler what a function is expected to do. Some of these we have seen including parameter and return value types along with these types various there CV-qualifications however, there are a few that have not been covered yet. Throughout this page we will build up a function signature from the blueprint below by adding new specifiers to showcase the syntax.
int f(int n)
{ return n; }
No exception optimization
WE won't be covering exceptions in this course as they are quite an advanced topic that is hard to use and costly to get wrong. We may cover exceptions at a later date. In C++ some functions may throw exceptions when ill-formed behavior occurs and but it can be handled so the system can remain operational. However, some functions we can make guarantees at compile time that they will not throw an exception. This allows the compiler to optimise the execution path knowing that it will not need to recover the stack. To do this, we mark a function noexcept keyword. If a noexcept functions does throw, the program calls std::terminate.
int f(int n) noexcept
{ return n; }
Attributes
Attributes are a declarator that indicates a condition of a function. Attributes are prefixed before the return type of the function using the double square-bracket notation [[attribute-name]]. C++ only has a few standard attributes so far but compilers often introduce their own for optimisation of the compiler.
[[noreturn]]- Indicates a function doesn't return[[maybe_unused]]- Indicates an entity maybe unused and suppresses relevant compiler warnings.[[deprecated]]&[[deprecated("reason")]]- Indicated that the use of the marked entity is allowed but discouraged.[[nodiscard]]&[[nodiscard("reason")]]- Indicated that the return value of a function should not be discarded and generates a compiler warning if it is.
[[nodiscard]]
int f(int n) noexcept
{ return n; }
Auto Function
Sometimes the return value of a function is a complicated type or depends on the type of the parameters of the function. This can be solved using an auto declared function with a trailing-return-type.
[[nodiscard]]
auto f(int n) noexcept
    -> int
{ return n; }
Note: The styling used above is my own personal syntax styling. You are free to use your own.
Function Overloading
One difficulty in many programing languages is that you cannot have function symbols with the same name. This creates clashes and ambiguity meaning the compiler doesn't know which function to use. In C++ however, you can have functions with the same symbol (name) as long as there parameters are different. This is called function overloading. This is is achieved due to what is called name mangling. Function names are not simply just the name, say f from above but are mangled to include the type of the parameters the function takes. Thus int f(int n) is a different function to float f(float n). This powerful feature allows us to create multiple functions that perform the same action but for multiple different types and move type resolution to compile time.
Operator Overloading
Function overloading opens the opportunity to create user defined operators. This means you can overload the + or << operators to work for custom types or introduce new functionality. This is how the << and >> works for stream in C++. The << and >> are overloaded to work differently for stream objects.
#include <iostream>
#include <string>

using namespace std::literals;

/// Comment out to see old behaviour
auto operator+ (std::string x, std::string y) -> int
{ return std::stoi(x) + std::stoi(y); }

auto main() -> int
{
    std::cout << "6"s + "5"s << std::endl;

    return 0;
}
Function Utilities
Perfect Forwarding
Often in C++ we want to pass arguments from one function to another without modification. An example of this is passing arguments to a wrapper function that might call some old legacy API. However, there can be issues with value categories, const-ness and reference values of parameters that create undefined behaviour, compiler errors etc. To fix this, C++ introduced perfect forwarding, a way to perfectly pass arguments from on function call to another without losing or changing the value category of the parameters. This is done with std::forward<T>. I am glossing over the details of this but if you are interested, this SO answer gives a great explanation of the problem, attempted solutions and the solution in C++ now.
Value and Type Helpers
Sometimes it is useful to work with the type of an object, not the value. To obtain the type of an object the decltype keyword. This declares the type of the entity or expression passed to the keyword in a function call style. This is useful for deducing the type of an expression once it has been evaluated.
#include <type_traits>

auto add(int x, float y) -> decltype(x + y)
{ return x + y; }

auto main() -> int
{
    static_assert(std::is_same_v<decltype(add(9, 0.345)), float>, "Result is not a float");
    static_assert(std::is_same_v<decltype(add(9, 0.345)), int>, "Result is not a int");

    return 0;
}
Sometimes though, it is impossible to find the return type of objects method calls as it requires constructing an actual value. To overcome this, C++ has a neat function called std::declval. This is able to construct an rvalue (temporary) in order to access object methods.
#include <type_traits>

auto main() -> int
{
    static_assert(std::is_same_v<decltype(std::declval<int>()), int&&>, "Result is rvalue");
    static_assert(std::is_same_v<decltype(std::declval<int>()), int>, "Result is not rvalue");

    return 0;
}
Functional Programming
Function Types
Functions; like variables, have a type. This makes it possible to use functions are variables that can be passed to other functions. But what is the type of a function? In general the type of a function is composed of its return type and the type of its arguments, ie. R(P1, P2, P3, ...). In C functions are passed as function pointers. It is a powerful utility but can be error prone due to the nature of pointers. Instead, C++ has std::function<R(Args...)> which is able to bind to a function to a variable that can be easily passed around to other functions, copied and moved.
#include <functional>
#include <iostream>

auto print_num(double i)
    -> void
{ std::cout << i << '\n'; }

auto add(int x, float y)
    -> double
{ return x + y; }

auto mult_print(int x, float y, std::function<void(double)> f)
    -> void
{ f(x * y); }

auto main() -> int
{
    std::function<void(double)> print_f {print_num};
    std::function<double(int, float)> add_f {add};

    print_f(add_f(4, 6.6));
    mult_print(3, 0.056, print_f);

    return 0;
}
Lambdas and Closures
Sometimes functions need to be able to enclose information about the global environment. This requires the use of closures, a local environment that can access the parent environment in which the closure exists in. In C++ this is accomplished with a lambda. Lambdas are anonymous functions that can capture local variables. Anonymous functions are able to be created and passed to other functions without having to exist as a stored function. Lambdas have a unique syntax consisting of three distinct sets of brackets. [] is used to specified the captured variables, () is the same as regular functions indicating the formal parameters of the lambda that are used when the lambda is invoked, and finally {} holds the body of the lambda.
The capture parameters can either capture by value or by reference. Value captures simply specify the variable names while reference captures prefix an & to the variable name. You can also elide the names of captures and implicitly capture variables by using them in the body of the lambda and indicate whether all (or some) of the implicit captures are by value or reference using the symbols = or & respectively.
#include <functional>
#include <iostream>

auto fmult(int x, float y, std::function<void(double)> f)
    -> void
{ f(x * y); }

auto main() -> int
{
    /// Use `std::function<R(Args...)>` for lambda type
    std::function<double(int, float)> add_f = [](int x, float y) -> double { return x + y; };

    /// Lambda declared with `auto`
    auto print_f = [](double i){ std::cout << i << '\n'; };

    /// Lambda capture `print_f` by value
    auto print_mult = [=](int x, float y){ return fmult(x, y, print_f); };

    int a {7};
    int b {5};

    /// Capture `print_mult` and `a` by value and `b` by reference
    /// Elide names of `mult_print` and `a` with `=`
    auto print_7mult5 = [=, &b](){ return print_mult(a, b); };

    /// Invoke lambdas like functions
    print_f(add_f(4, 6.6));
    fmult(7, 8.9, [](double i){ std::cout << i << '\n'; });     ///< Use lambda as anonymous function,
    print_mult(7, 8.9);                                         ///< or use captured version


    print_7mult5();     ///< 35
    b = 9;              ///< Modify `b`
    print_7mult5();     ///< 63

    return 0;
}
Partial Application
Another useful technique when working with functions is a technique known as partial application. This is similar to how closures with lambda work with a few key differences. Partial application allows you to partially apply the certain parameters of a function while leaving other empty to be passed at a later invocation. This is done with with the std::bind function which takes the function and a variable list of arguments that will be bound to the function in their respective order. The returned function can be invoked like any other function and will be invoked as if the bound variables were passed to it. The power of std::bind comes from its ability to accept placeholder values. These values follow the pattern of _N where N is any number starting at 1. Placeholders are passed to std::bind can can be placed anywhere in the variable argument list. When the resulting function is invoked, any arguments passed to it will be passed to the underlying function. The first passed argument from the partially applied function will be passed to all instances of the _1 placeholder and so on.
Note:
std::bindcannot bind (const) reference arguments functions take. For this, parameters must be wrapped instd::reforstd::crefto bind to references.
#include <functional>
#include <iostream>

auto fn(int n1, int n2, int n3, const int& n4, int n5)
{
    std::cout << n1 << ' '
              << n2 << ' '
              << n3 << ' '
              << n4 << ' '
              << n5 << '\n';
}

/// Import placeholders
using namespace std::placeholders;

auto main() -> int
{
    auto f1 = std::bind(fn, 1, _1, 4, _2, 6);
    auto f2 = std::bind(fn, _1, _1, _1, _1, _1);

    auto a {47676};
    auto f3 = std::bind(fn, _4, _3, _2, std::cref(a), _1);

    f3(4, 3, 2, 1);     ///< 1 2 3 47676 4
    f1(4, a);           ///< 1 4 4 47676 6
    a = 777;
    f3(11, 10, 9, 8);   ///< 8 9 10 777 11
    f1(3, a);           ///< 1 3 4 777 6

    f2(6);              ///< 6 6 6 6 6

    return 0;
}
There is also two new functions that have been added to the standard library. These are std::bind_front (C++20) and std::bind_back (C++23) that allow for efficiently binding parameters to the front or back of a function. These functions do not support the placeholder values like std::bind.
#include <functional>
#include <iostream>

auto fn(int n1, int n2, int n3, const int& n4, int n5)
{
    std::cout << n1 << ' '
              << n2 << ' '
              << n3 << ' '
              << n4 << ' '
              << n5 << '\n';
}

auto main() -> int
{
    auto f = std::bind_front(fn, 1, 2, 3);
    f(4, 5);  ///< 1 2 3 4 5

    return 0;
}
std::bind_front & std::bind_back
Namespaces
Namespaces create separation of symbols and names in C++. This allows for types, functions and variables to have the same name without causing collisions and ambiguity. We have already been using a namespace throughout this series, this being the std namespace. Namespaces a named scopes whose members can be accessed using the scope resolution operator ::. To create a namespace you use the namespace keyword followed by the namespace name and a new scope. To use a namespace without having to go through scope resolution you can declare a namespaces use by using namespace /* name */.
Note: Using
::with no name looks in the global namespace eg.::a.
#include <iostream>

namespace A
{
    auto f(int n)
        -> void
    { std::cout << n << '\n'; }
}

auto f(int n)
    -> void
{ std::cout << "3 + n:(" << n << ") = " << 3 + n << '\n'; }

auto main() -> int
{
    // using namespace A;  ///< Error: overload is ambiguous (redefinition)
    f(8);
    A::f(8);

    return 0;
}
Duplicate Namespaces
Two namespaces with the same name will logically be merged, members and symbols from both can be looked up using the same namespace name given both headers containing the namespace symbols is available to be searched. This is how the std namespace can have all its components across different headers but be looked up using std::.
#include <iostream>

namespace A
{
    auto f(int n)
        -> void
    { std::cout << n << '\n'; }
}

namespace A
{
    auto g(int n)
        -> void
    { std::cout << "3 + n:(" << n << ") = " << 3 + n << '\n'; }
}

auto main() -> int
{
    A::f(8);
    A::g(8);

    return 0;
}
Nested Namespaces
Namespaces can also be declared to be nested. We saw this in the previous set of sections with the std::placeholders namespace. To access a nested namespace you use a double scope resolution operator ::.
#include <iostream>

namespace A
{
    auto f(int n)
        -> void
    { std::cout << n << '\n'; }

    namespace B
    {
        auto f(int n)
            -> void
        { std::cout << "3 + n:(" << n << ") = " << 3 + n << '\n'; }
    }
}

auto main() -> int
{
    A::f(8);
    A::B::f(8);

    return 0;
}
Enumerations
Enumerations (enums) are a distinct types whose value is one of a restricted range of named integral constants called enumerators. Enums allow for specify a type that may have a value of one of many possible named values. Enums have an underlying integral type where each enumerator is of the underlying type. Enums allow for the restriction of the possible values a type can hold. The value of the enumerators of an enum have begin at 0 and increment.
#include <iostream>

enum Colour { Red, Green, Blue};

auto print_colour_name(Colour c)
    -> void
{
    switch (c)
    {
        case Red:
            std::cout << "Red\n";
            break;
        case Green:
            std::cout << "Green\n";
            break;
        case Blue:
            std::cout << "Blue\n";
            break;
        default:
            std::cout << "Not a colour\n";
            break;
    }
}

auto main() -> int
{
    Colour c1 {Red};            ///< Unscoped Initialisation
    Colour c2 {Colour::Green};  ///< Scoped Initialisation
    auto c3 {Colour::Blue};     ///< `auto` type deduction
    auto c4 {4};                ///< Non `Colour`

    print_colour_name(c1);
    print_colour_name(c2);
    print_colour_name(c3);
    print_colour_name(static_cast<Colour>(c4));

    return 0;
}
Underlying Types and Values
In C++ you can specify the underlying type and and value of an enum. To specify the type, the enum's identifier can be followed by a colon with a integral type. To specify the values an enums enumerators are aliasing for, the enumerator name can be followed by a assignment operator and the integral value.
Notes:
- Not all enumerators have to have an explicit value if one or more other enumerators do.
- If an enumerator has an explicit value and the proceeding one is not specified, the proceeding one will assume the next value after the explicit enumerator.
- Enumerators can have the same underlying value.
#include <iostream>

/// Enum `Colour` whose underlying type is `short`
enum Colour : short
{ Red, Green = 57, Blue};

auto print_colour_name(Colour c)
    -> void
{
    switch (c)
    {
        case Red:
            std::cout << "Red = ";
            break;
        case Green:
            std::cout << "Green = ";
            break;
        case Blue:
            std::cout << "Blue = ";
            break;
        default:
            std::cout << "Not a colour\n";
            return;
    }

    std::cout << static_cast<short>(c) << std::endl;
}

auto main() -> int
{
    Colour c1 {Red};            ///< Unscoped Initialisation
    Colour c2 {Colour::Green};  ///< Scoped Initialisation
    auto c3 {Colour::Blue};     ///< `auto` type deduction
    auto c4 {4};                ///< Non `Colour`

    print_colour_name(c1);
    print_colour_name(c2);
    print_colour_name(c3);
    print_colour_name(static_cast<Colour>(c4));

    return 0;
}
Enum Class
Unscoped enums, which is all we have seen thus far can be implicitly converted into there underlying type. This can cause unwanted conversions. To accommodate for this C++ has scoped enums which are declared as enum class (or struct). They cannot be implicitly converted there underlying type, they have int as there underlying type by default and can only be accessed using the names scope resolution operator (::) with the name being the name of the enum class.
#include <iostream>

/// Enum class `Colour` whose underlying type is `short`
enum class Colour : short
{ Red, Green = 57, Blue};

auto print_colour_name(Colour c)
    -> void
{
    switch (c)
    {
        case Colour::Red:
            std::cout << "Red = ";
            break;
        case Colour::Green:
            std::cout << "Green = ";
            break;
        case Colour::Blue:
            std::cout << "Blue = ";
            break;
        default:
            std::cout << "Not a colour\n";
            return;
    }

    std::cout << static_cast<short>(c) << std::endl;
}

auto main() -> int
{
    // Colour c1 {Red};         ///< Unscoped Initialisation (error for `enum class`)
    Colour c2 {Colour::Green};  ///< Scoped Initialisation
    auto c3 {Colour::Blue};     ///< `auto` type deduction
    auto c4 {4};                ///< Non `Colour`

    // print_colour_name(c1);
    print_colour_name(c2);
    print_colour_name(c3);
    print_colour_name(static_cast<Colour>(c4));

    return 0;
}
Unions
Unions are a special kind of type known as an algebraic data type. This means the type of a union object can vary between a small list of possible types. This allows for a single type to be one of many possible types that can change throughout the lifetime of the program. The members of a union occupy the same memory space, thus the size of a union is the size of the largest possible member. Constructing a union object will always need to construct the first variant. Accessing the non-activate member is UB.
#include <iostream>

union Sym
{
    int num;
    float float32;
    const char* str;
};

auto main() -> int
{
    Sym sym {8};
    std::cout << sym.num << std::endl;

    sym.float32 = 5.6f;
    std::cout << sym.float32 << std::endl;

    sym.str = "Hello";
    std::cout << sym.str << std::endl;

    return 0;
}
Limitations
Unions are quite powerful but have a few limitations.
- There is no default mechanism for inspecting the current variant of a union.
- They can have member functions including constructors and destructors but cannot have virtual functions (more on this in chapter 5).
- They cannot have base classes nor can be used as a base class.
- They cannot have non-static members of reference types.
- If any variant types have a non-trivial special member function it is deleted for the union and must be declared explicitly for the union type.
#include <iostream>
#include <string>
#include <array>

union S
{
    std::string str;
    std::array<int, 5> arr;
    ~S() {}                 ///< Variant `str` has non-trivial destructor
};

int main()
{
    S s = {"Hello, world"};

    std::cout << "s.str = " << s.str << '\n';
    s.str.~basic_string();                      ///< Explicity destroy string

    s.arr = std::array<int, 5>{1, 2, 3, 4, 5};  ///< Explicity create array
    s.arr[1] = 5675;                            ///< Assign 2nd element to 3

    for (auto& v : s.arr)
        std::cout << v << ' ';
    std::cout << std::endl;

}
Type Safe Algebraic Data Types
While unions are powerful, they are very error prone and can lead to hard to diagnose bugs. Instead, in C++17 type-safe algebraic types that more intuitive to use and far safer.
Options
One of the most common uses of algebraic data types is std::optional which can represent a type that may optionally contain some value or non at all. std::optional is often used as the return type if a function that might expectedly fail. std::optional can contain any type or has the type of std::nullopt.
#include <cmath>
#include <limits>
#include <iostream>
#include <optional>
#include <string>

auto divide(int x, int y)
    -> std::optional<float>
{
    if (y == 0)
        return std::nullopt;

    return std::optional<float>{x / static_cast<float>(y)};
}

auto main() -> int
{

    auto opt1 = divide(4, 5);
    std::cout << opt1.value() << std::endl;

    /// Given `opt2` and `opt3` have the value `std::nullopt`
    /// the value passed to `.value_or()` is returned
    auto opt2 = divide(2, 0);
    std::cout << opt2.value_or(std::numeric_limits<float>::quiet_NaN()) << std::endl;

    auto opt3 = divide(4656, 0);
    std::cout << opt3.value_or(0.1f) << std::endl;

    return 0;
}
Variants
The is also a more generic algebraic data type in C++ called std::variant which is implemented as a tagged union; that is, you are able to inspect which type is currently active, validate the state of the variant and perform a simply form of pattern matching. Empty variants can be simulated by using the std::monospace type variant.
#include <iostream>
#include <string>
#include <variant>
#include <vector>

/// Used to perform pattern matching
template<class... Ts> struct match : Ts... { using Ts::operator()...; };

using Sym = std::variant<int, float, std::string, long>;

auto main() -> int
{
    std::vector<Sym> syms = {8, "Hello", 6.8f, 4, "Bye", 857565L};
    for (auto& var : syms)
    {
        std::visit(match{
            [](int i){ std::cout << "Sym: <Integer> = " << i << std::endl; },
            [](float f){ std::cout << "Sym: <Float> = " << f << std::endl; },
            [](std::string s){ std::cout << "Sym: <String> = " << s << std::endl; },
            [](auto&& o){ std::cout << "Sym: <Other> = " << o << std::endl; }
        }, var);
    }

    return 0;
}
Structures
Structures (structs) are fundamental to developing with C++. They allow for creating custom types that can have member variables, and member functions (methods). They allow for packing any amalgamation of data into a single type. Structures are created using the struct keyword. To access the members and methods of a struct the member access operator . is used. For pointers to struct types, the pointer member access operator -> is used.
Note: The definition of a structure must have an
;after the last brace.
#include <iostream>
#include <memory>

struct PairInt
{
    int first;
    int second;

    /// Adds members of two `PairInt`
    constexpr auto
    add(const PairInt& o)
        const noexcept
        -> PairInt
    { return PairInt{first + o.first, second + o.second}; }

    /// Overload `+~ cleaner `PairInt::add` call
    friend constexpr auto
    operator+ (const PairInt& x, const PairInt& y)
        noexcept
        -> PairInt
    { return x.add(y); }

    /// Overload `<<` for printing
    friend auto
    operator<< (std::ostream& os, const PairInt& v)
        -> std::ostream&
    {
        os << "(.first: " << v.first << ", .second: " << v.second << ")";
        return os;
    }
};

auto main() -> int
{
    auto a = PairInt{5, 7};
    auto b = PairInt{.first = 2, .second = 9};  ///< Named aggregate initialisation
    auto p = std::addressof(b);                 ///< Pointer to struct type

    std::cout << "a = " << a << std::endl;      ///< `PairInt` works with `std::cout`
    std::cout << "b = " << b << std::endl;

    std::cout << "a + b = " << a + b << std::endl;      ///< Call to overloaded `+`
    std::cout << "a + c = " << a + *p << std::endl;     ///< Pointer to structs works like regular pointers

    std::cout << "a.add(b) = " << a.add(b) << std::endl;    ///< Method access
    std::cout << "p->add(a) = " << p->add(a) << std::endl;  ///< Pointer member access

    return 0;
}
Note: Ignore the
friendkeyword for now.
Task 1
Having learnt a massive chunk of C++ now I want you to try and right some code for yourself. Your section is to create a triple struct, ie. like a 3D point but semantically more general. You must demonstrate and run all of the properties of the struct. The program should be called triple.cxx (or triple.main.cxx if using bpt)
Requirements
- Must have three members of the same type (either
int,floatordouble) - A way to add two points
- A way to subtract two points
- A way to multiply a point by a scalar (of the same underlying type)
- A way to divide a point by a scalar (of the same underlying type)
- A way to be print a formatted output using
std::cout
Bonus
- A way to be created using input from
std::cin - Create a 'triple' structure for the other underlying types.
Submitting
You can use Godbolt or bpt to build and test your struct. Once you have created your implementation:
- Clone this repo using
git clone https://github.com/MonashDeepNeuron/HPP.git. - Create a new branch using
git checkout -b triple/<your-name>. - Create a folder in the
/submissionsdirectory with your name. - Create a folder with the name of this task.
- Copy your mini project into this directory (bpt setup, cmake scripts etc.) with a
README.mdor comment in the code on how to run the program (verify it still works). There is a sample header file in/templatesthat you can use. - Go to https://github.com/MonashDeepNeuron/HPP/pulls and click 'New pull request'.
- Change the branches in the drop down so that your branch is going into
mainand `Create new pull request. - Give the pull request a title and briefly describe what you were able to implement and any struggles you had.
- On the right side-panel, under the 'Assignees' section, click the cog and assign me.
- Click 'Create pull request' and I'll take it from there.
Note: If you created a GodBolt instance, put the link in a comment at the top of the file (under your copy comments). This is generated by clicking the
sharebutton in the top-right-most corner of the webpage and clicking the 'short link' option.
Slides


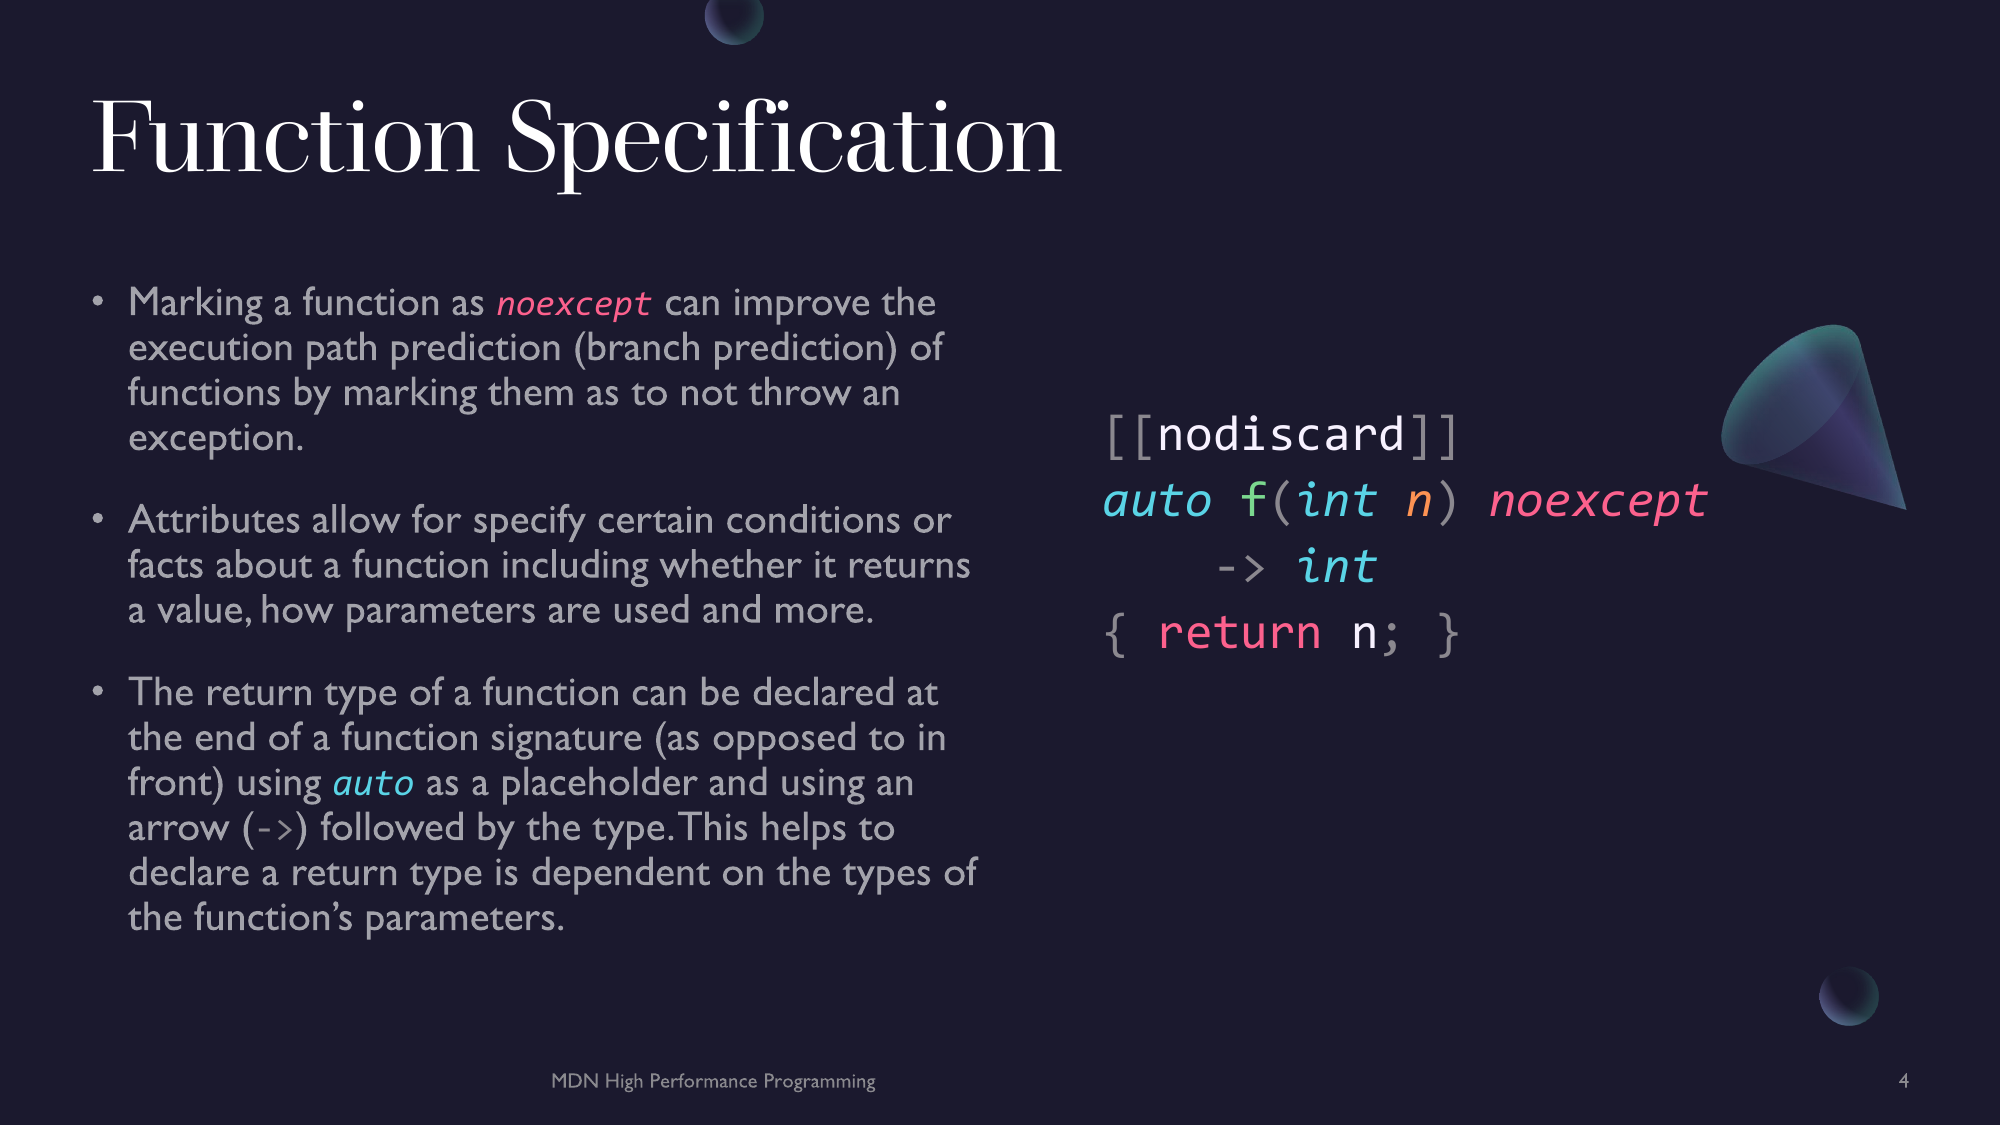
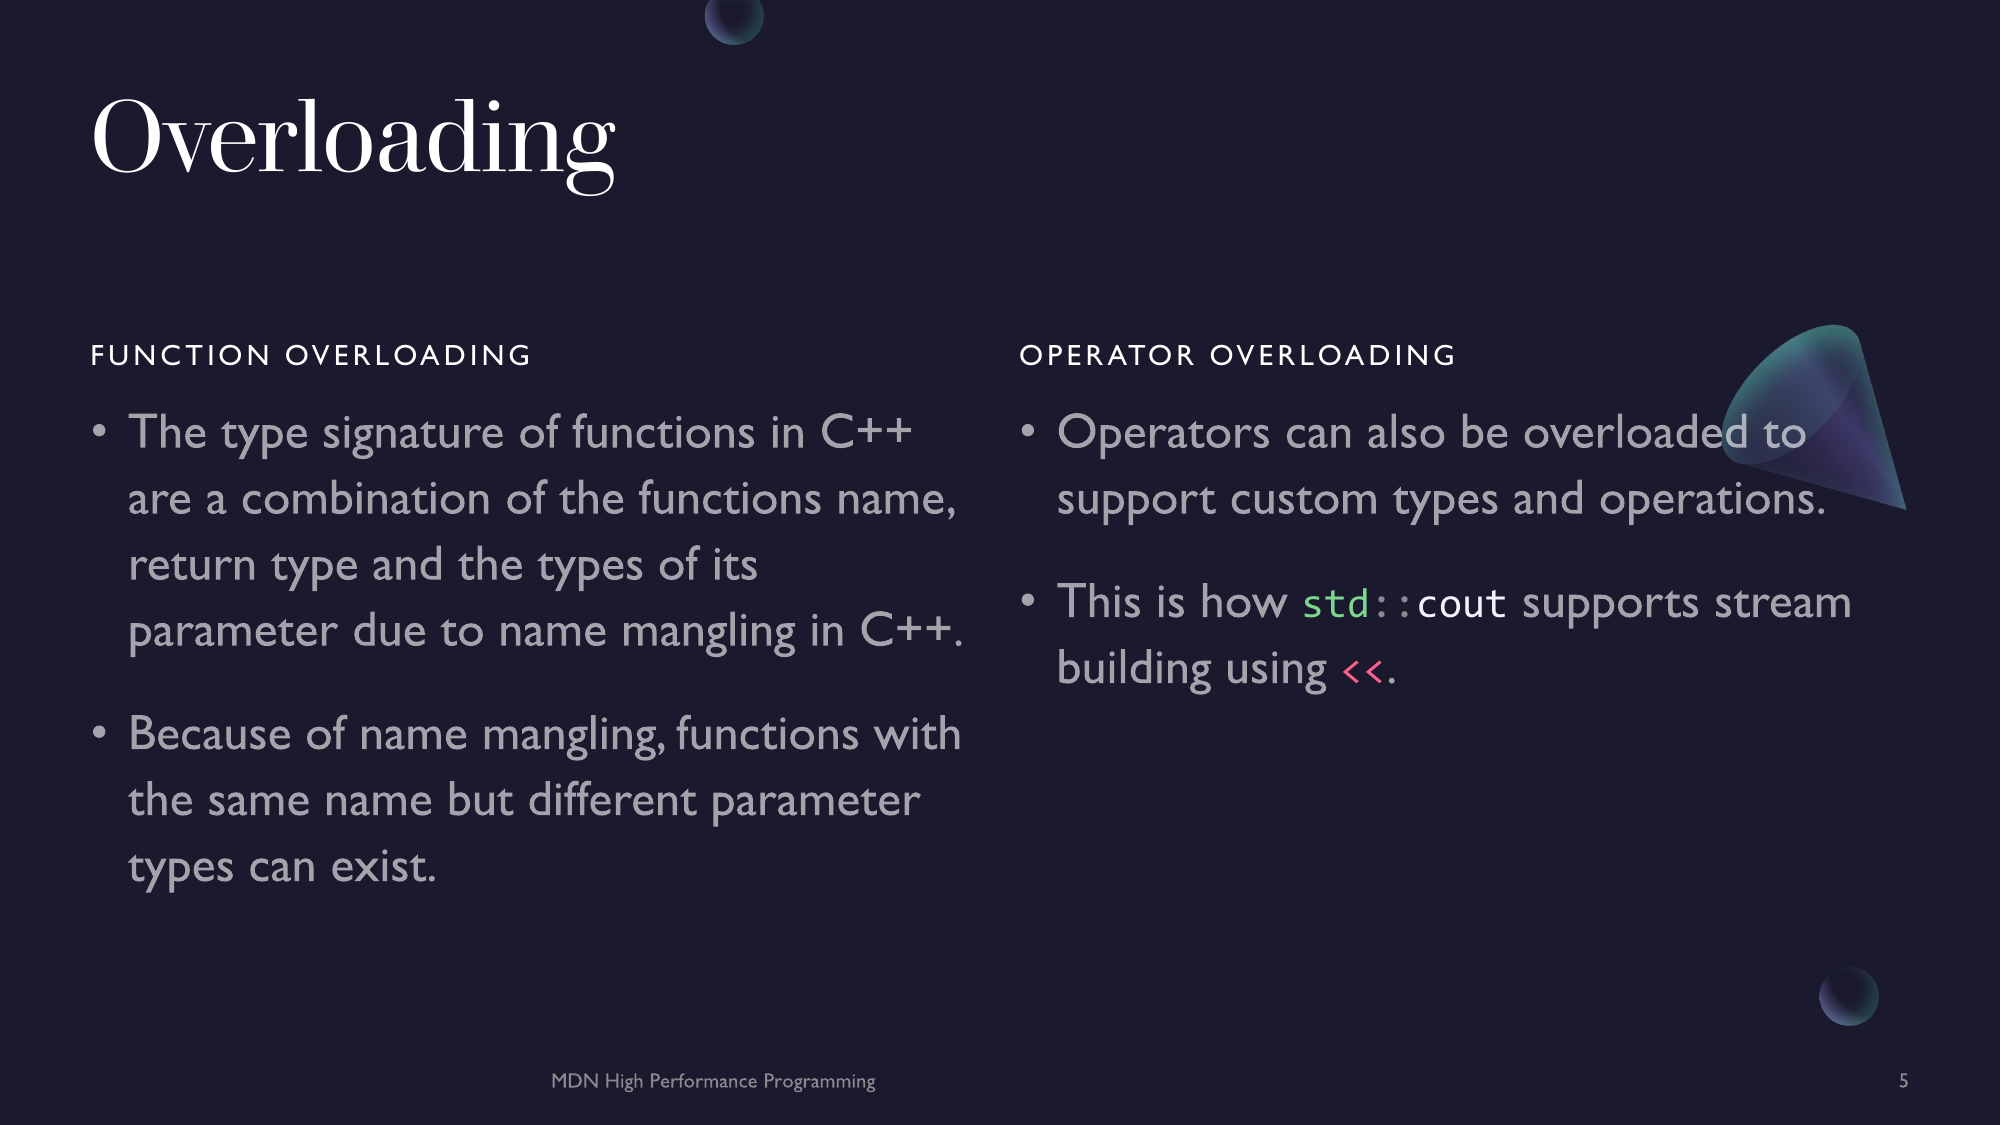
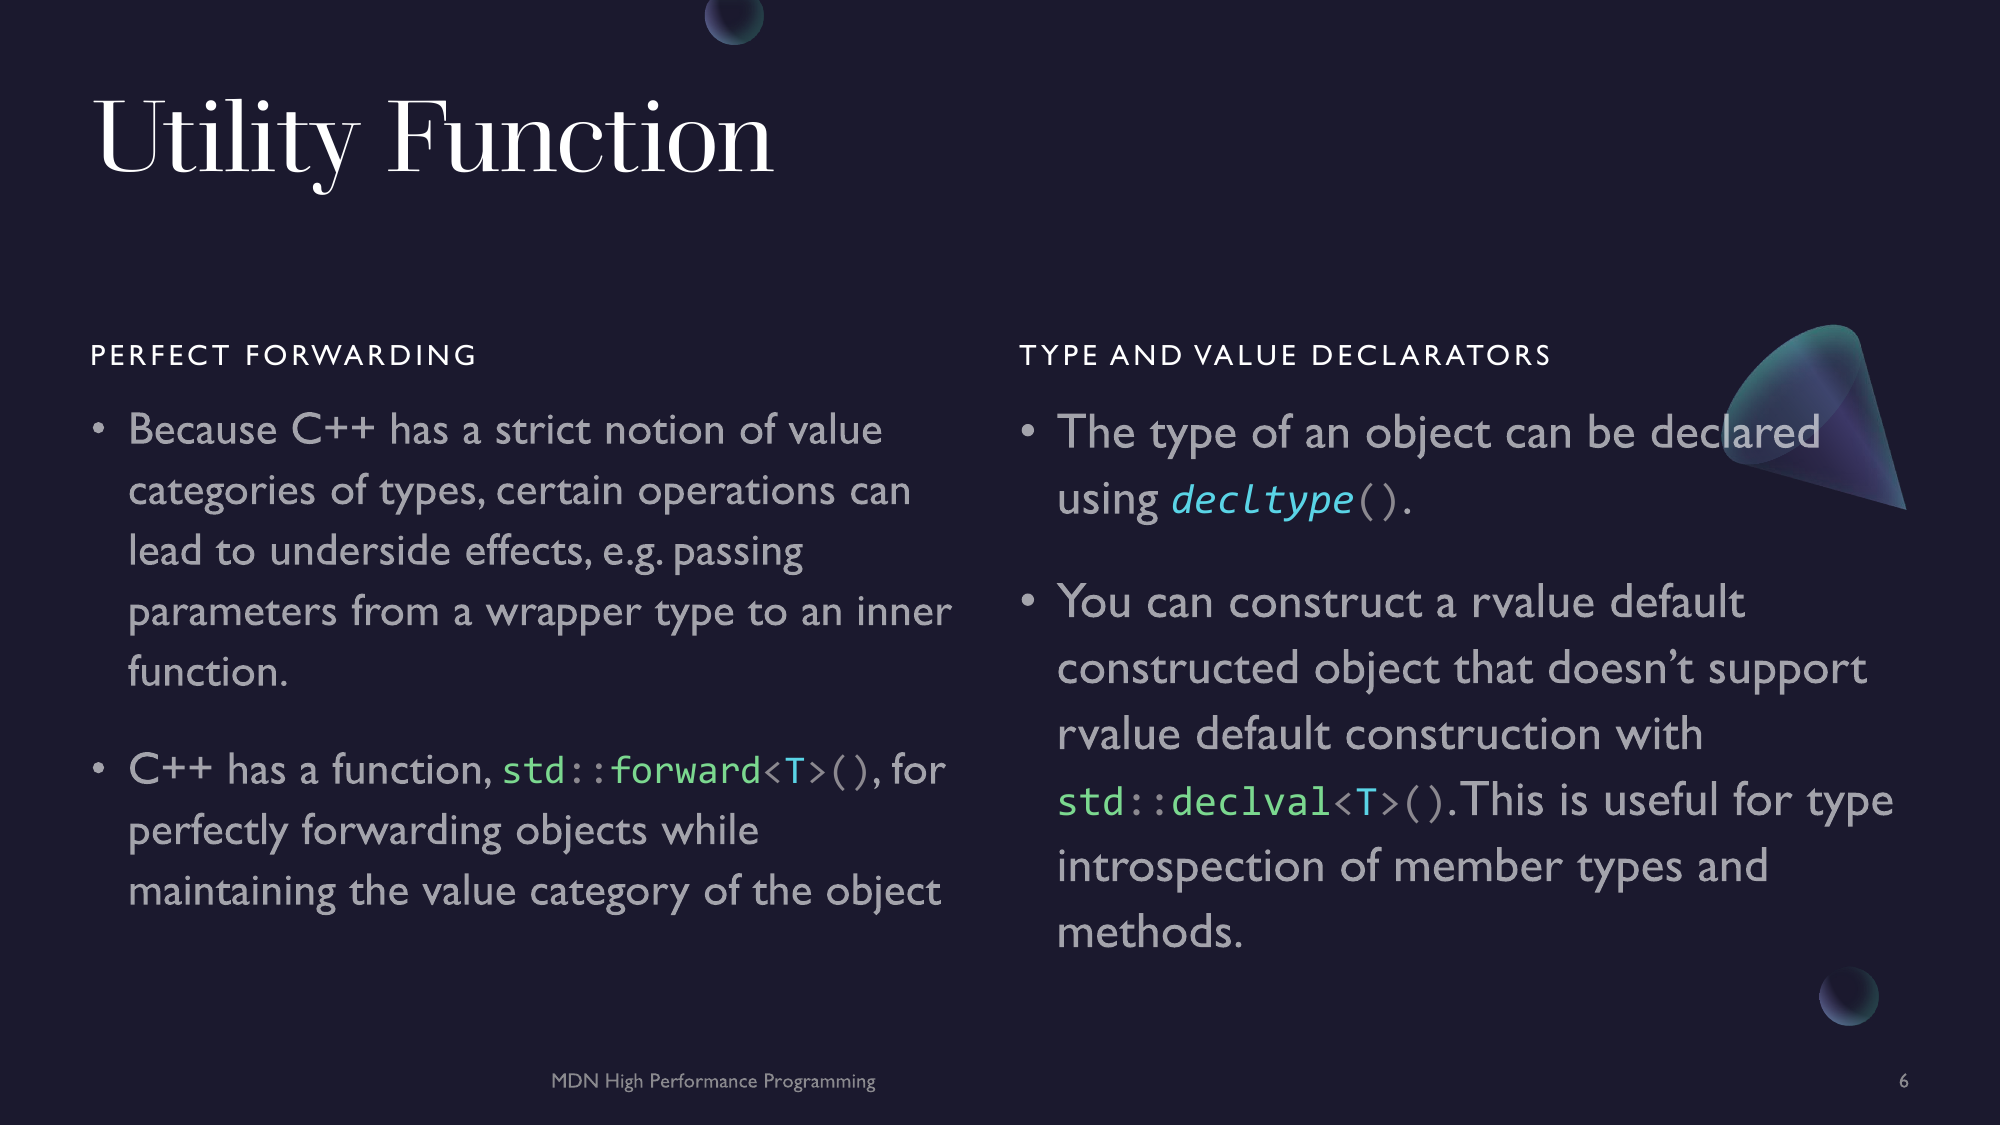
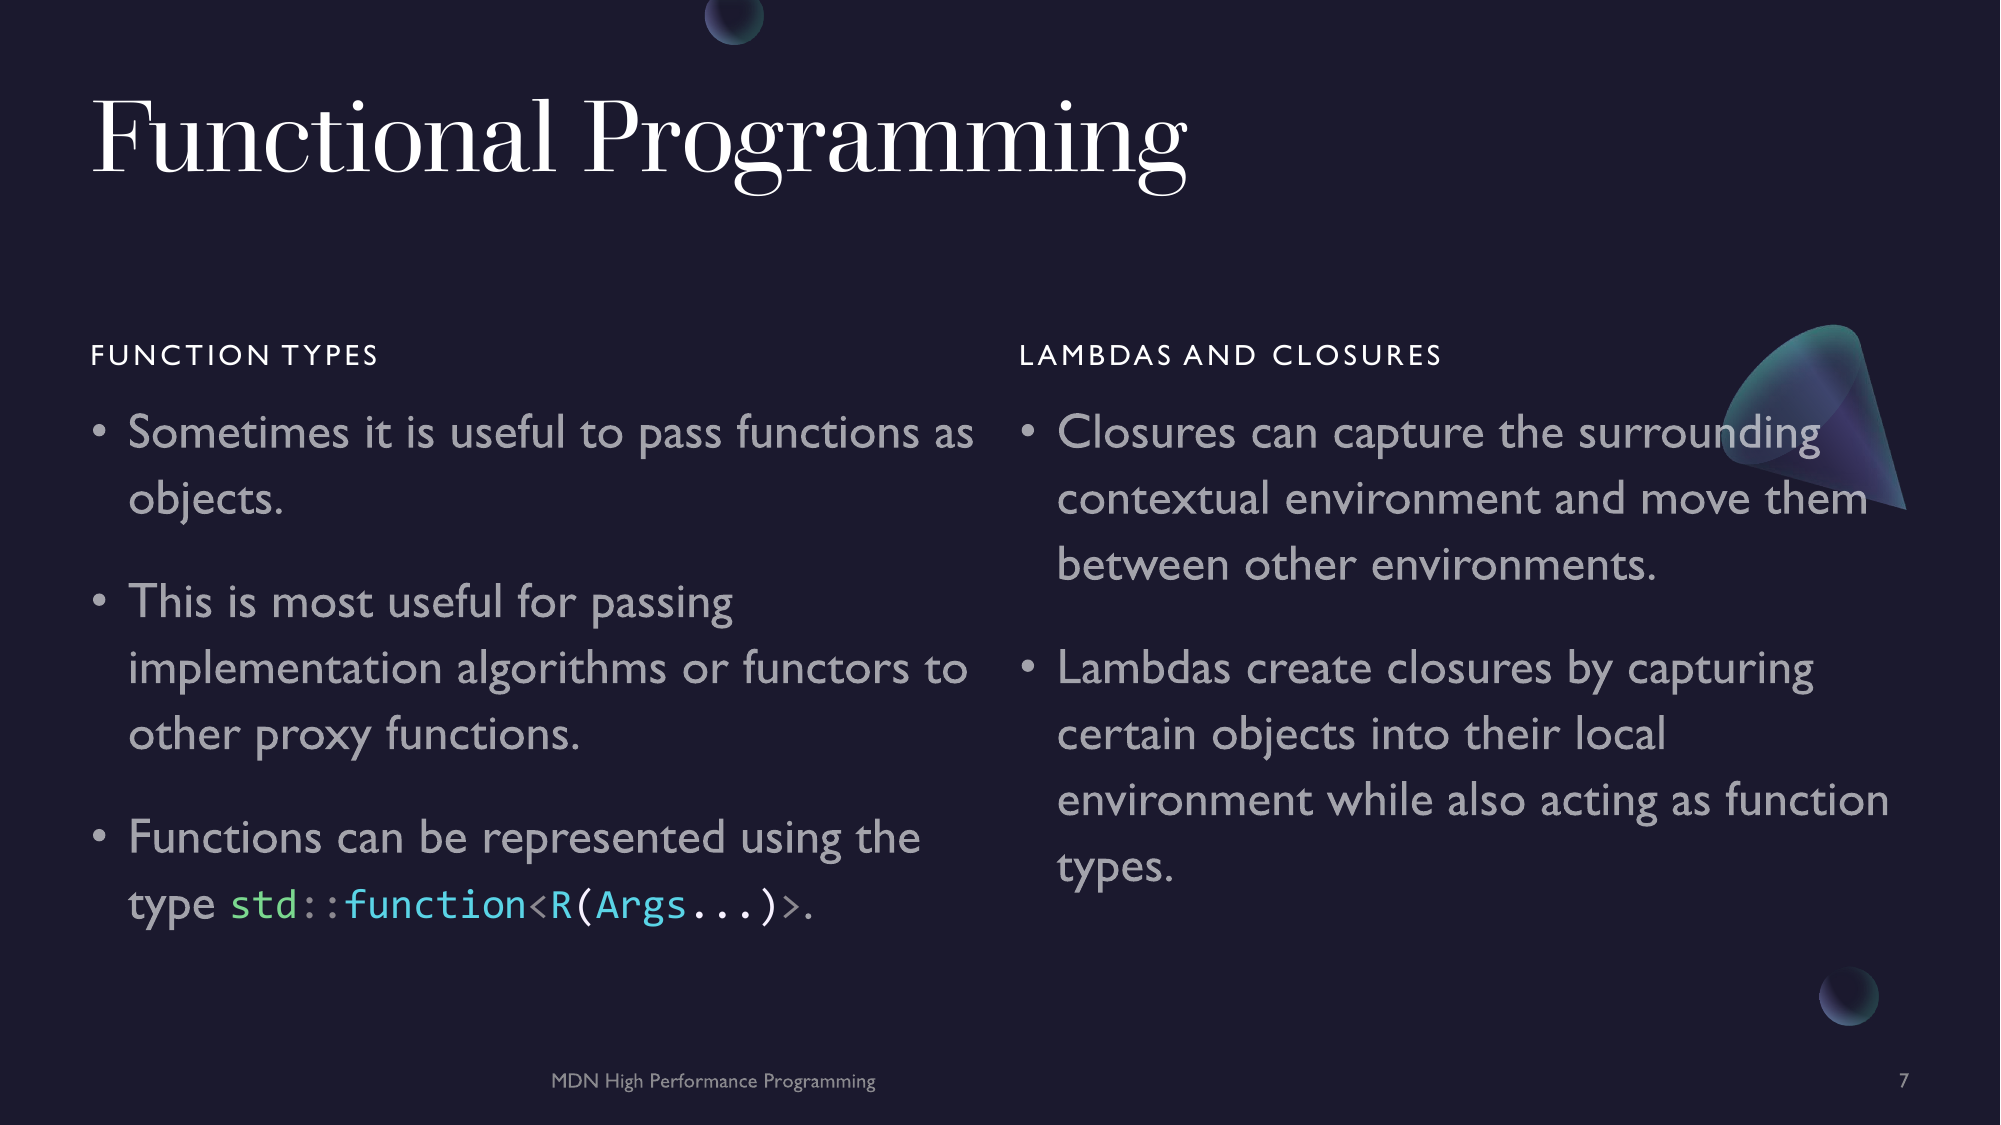
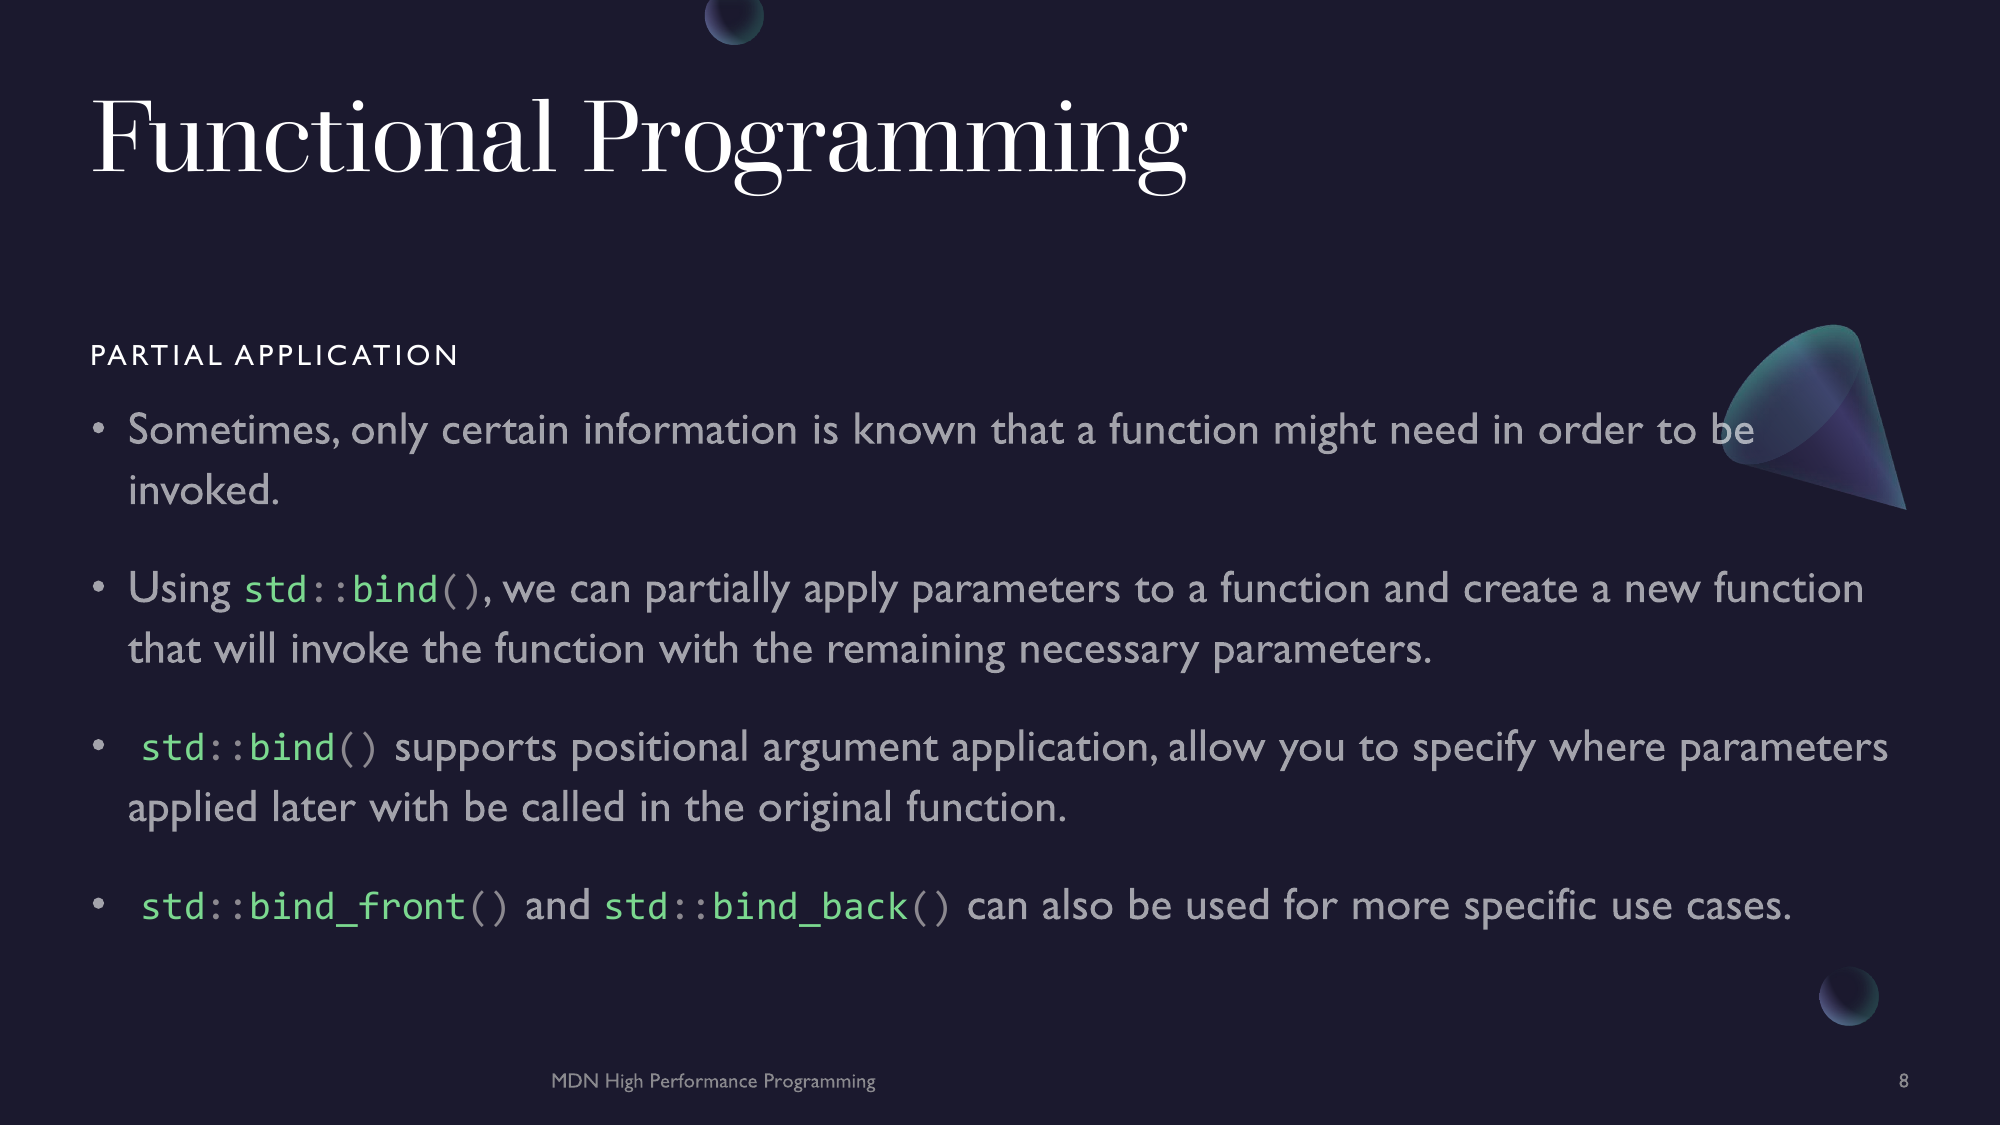
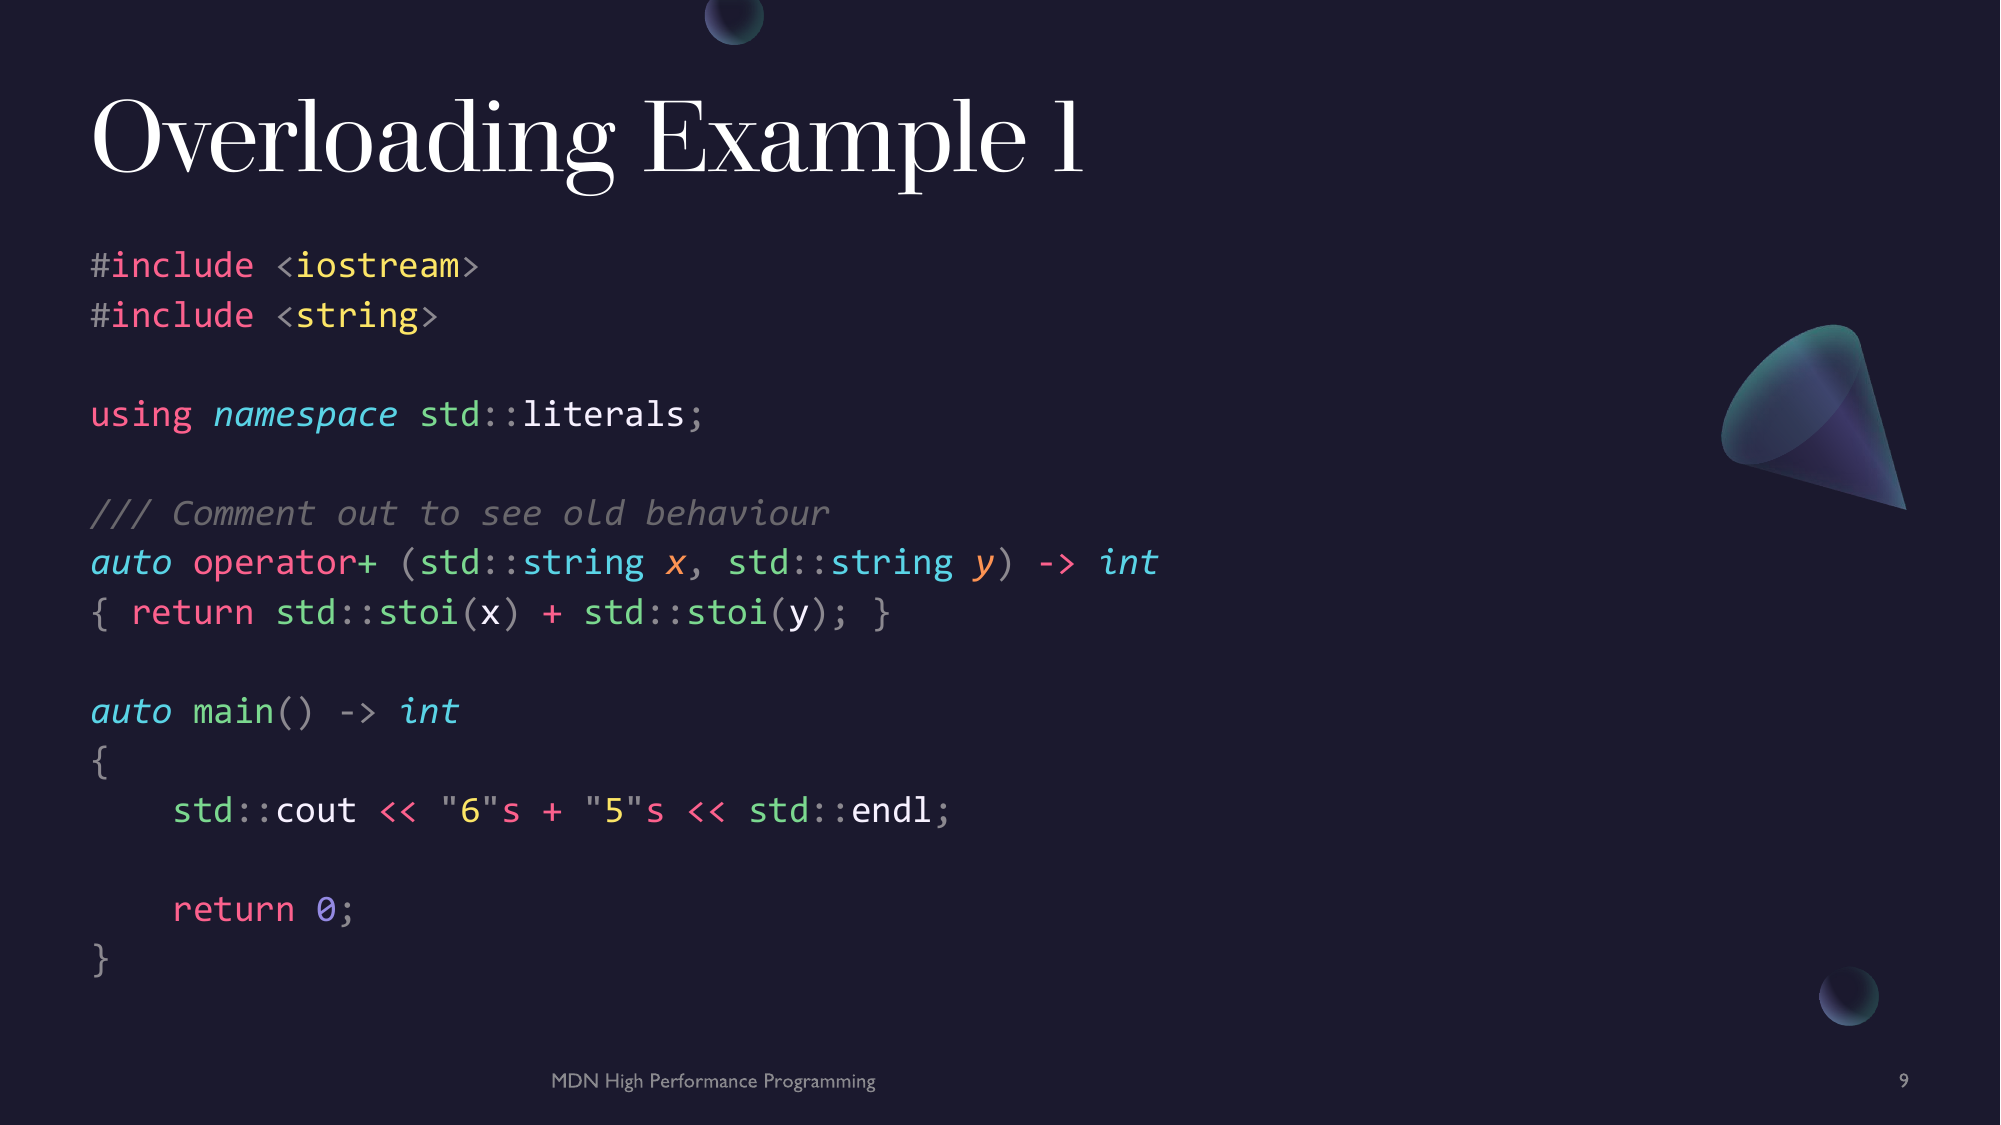


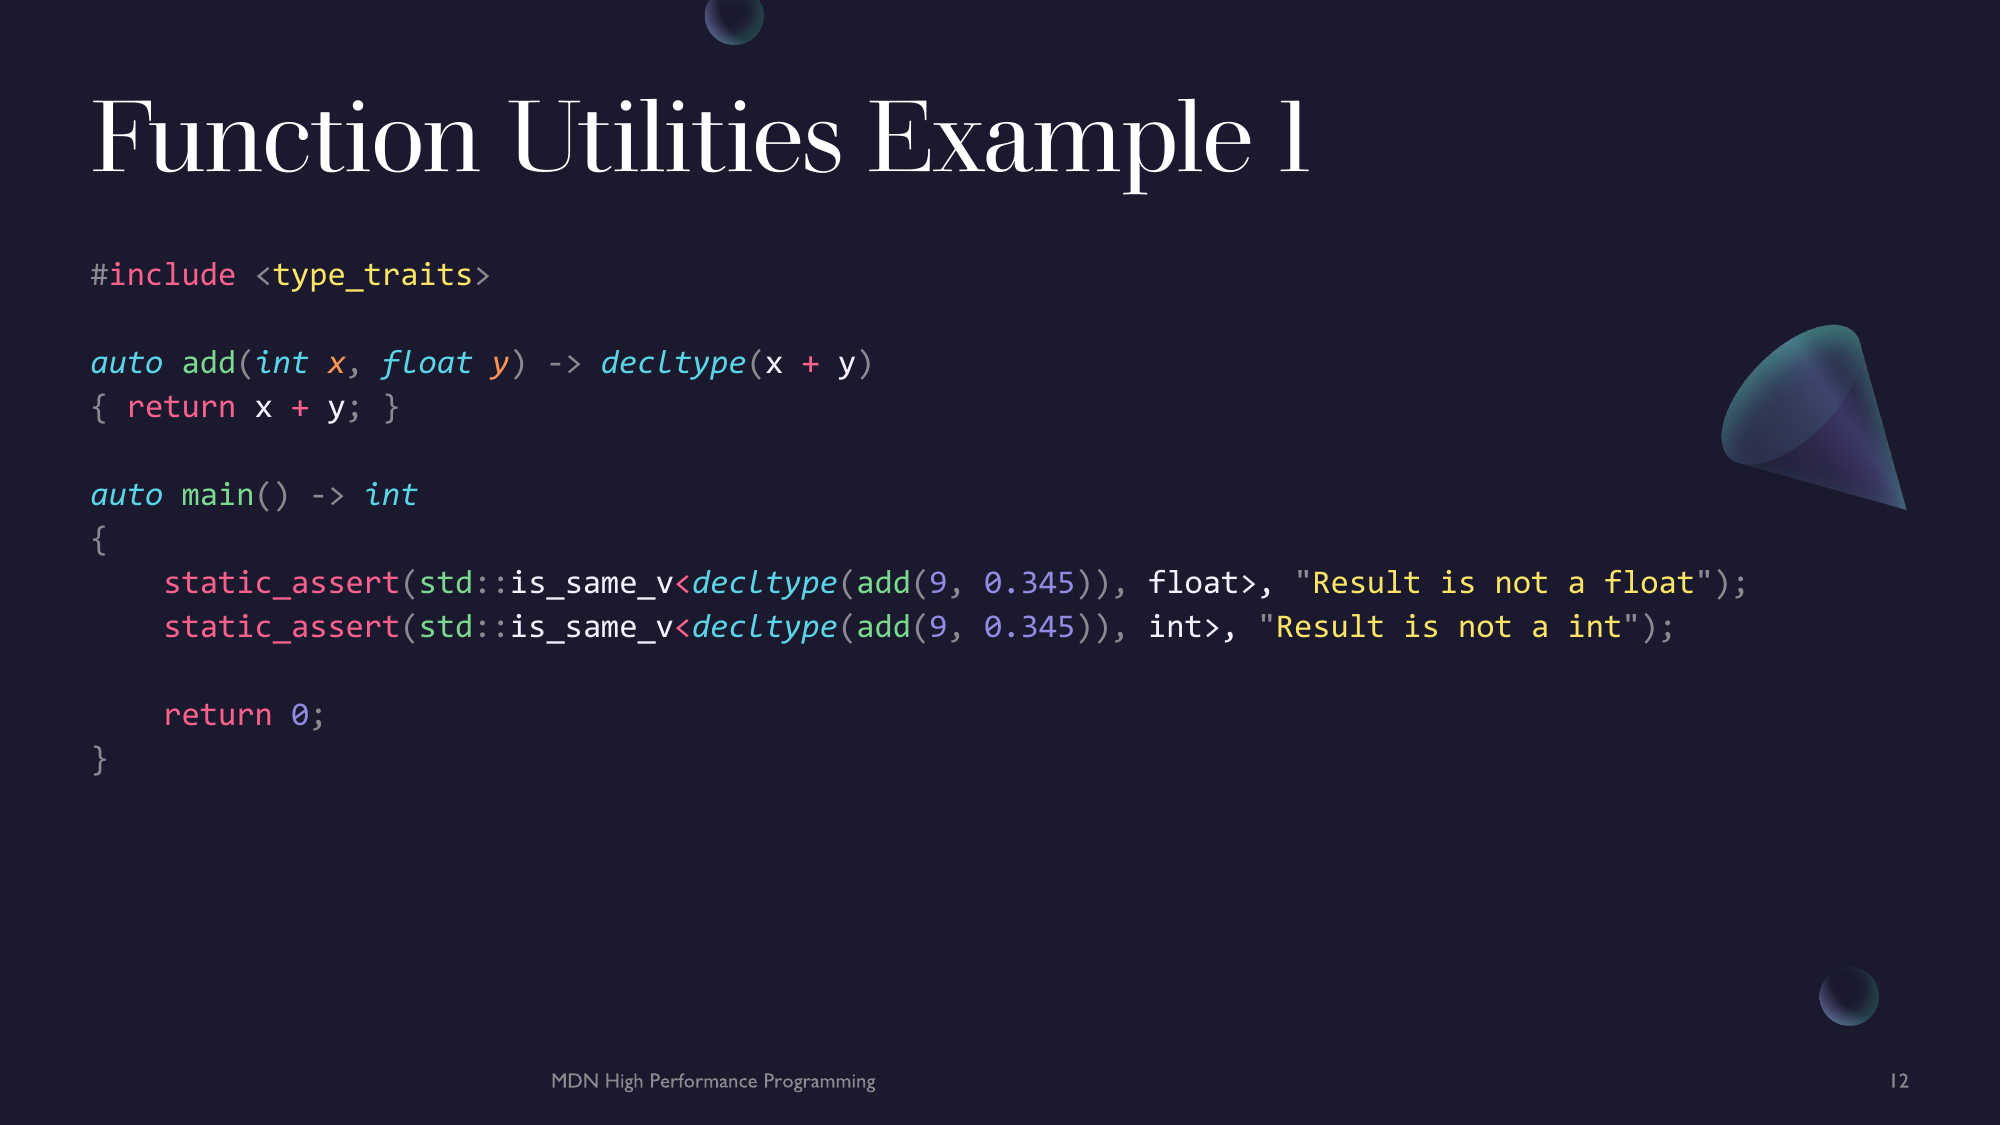
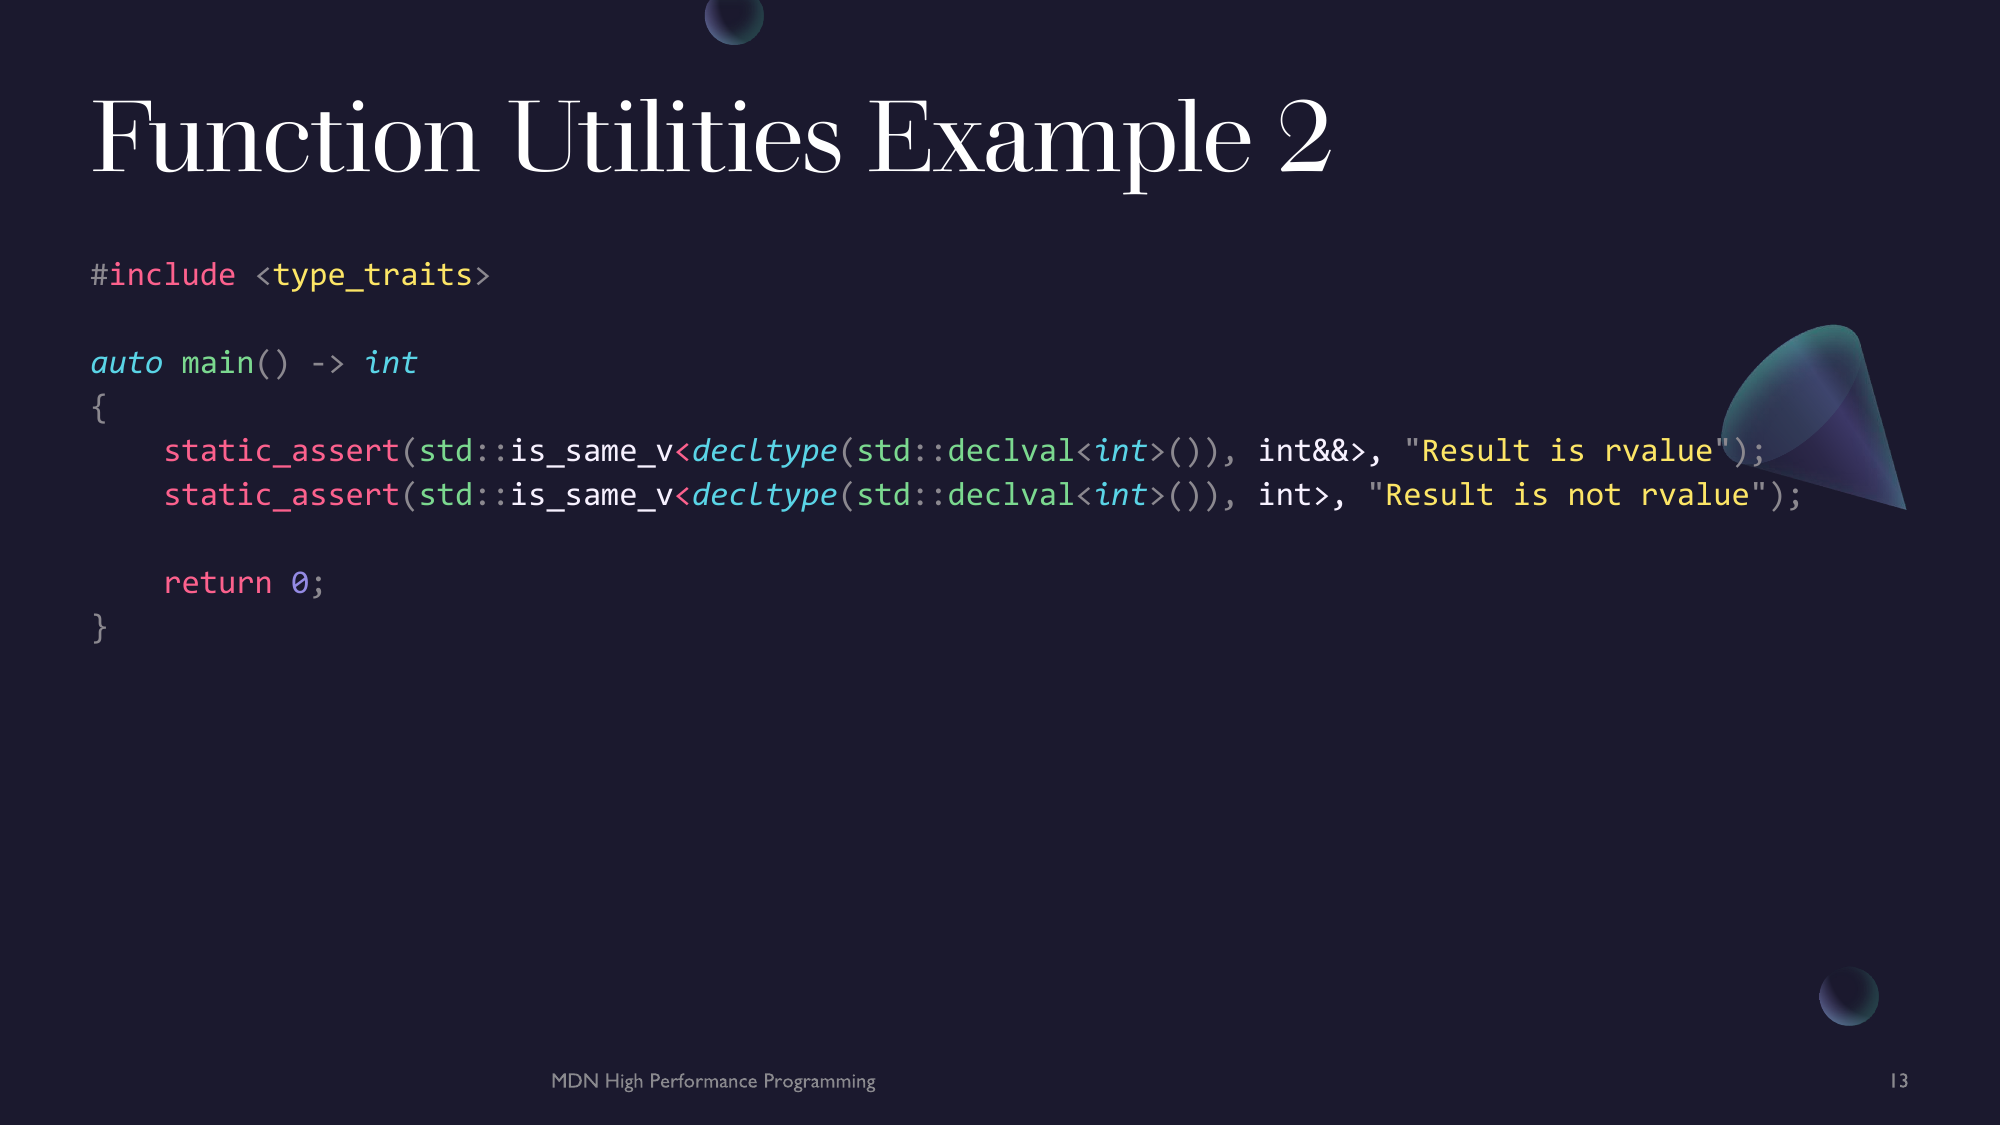
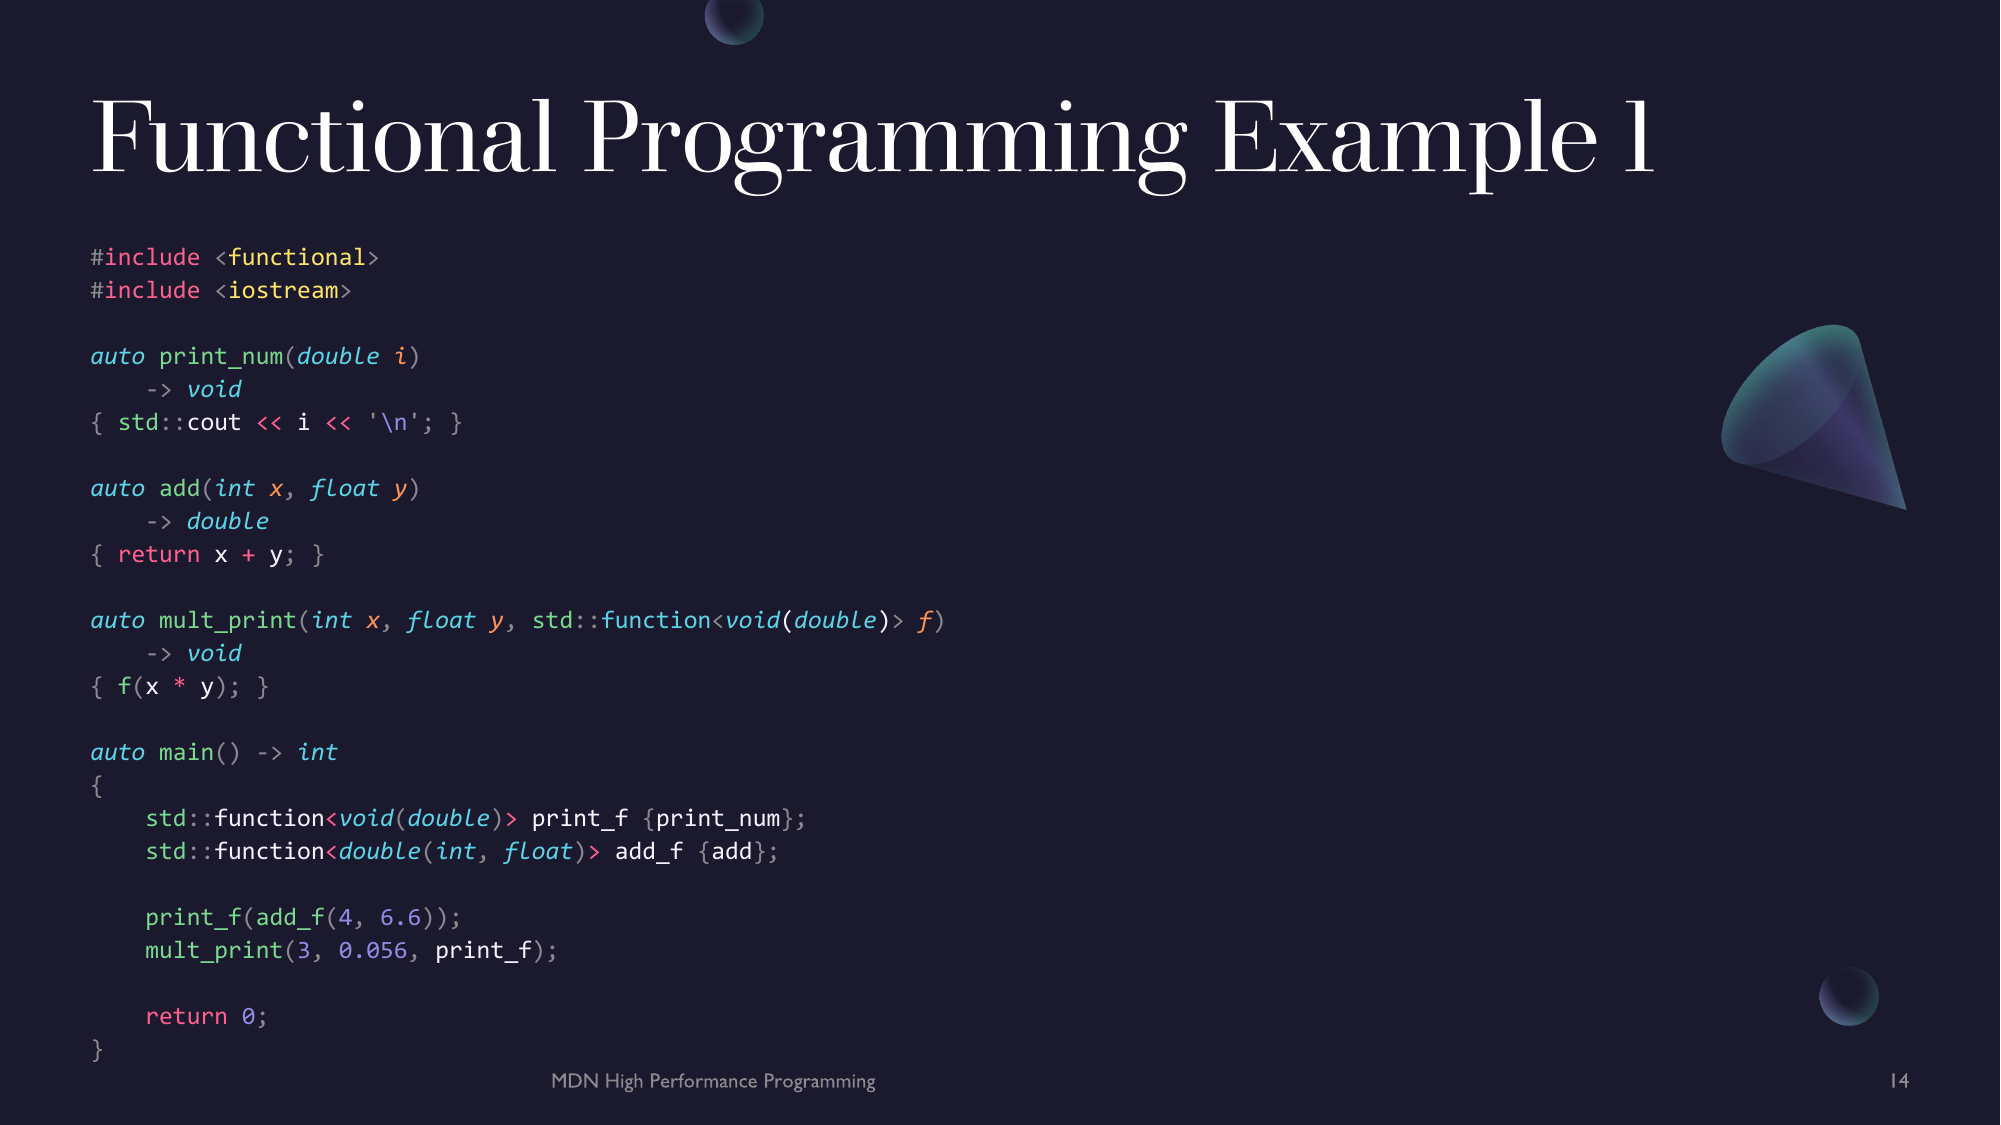
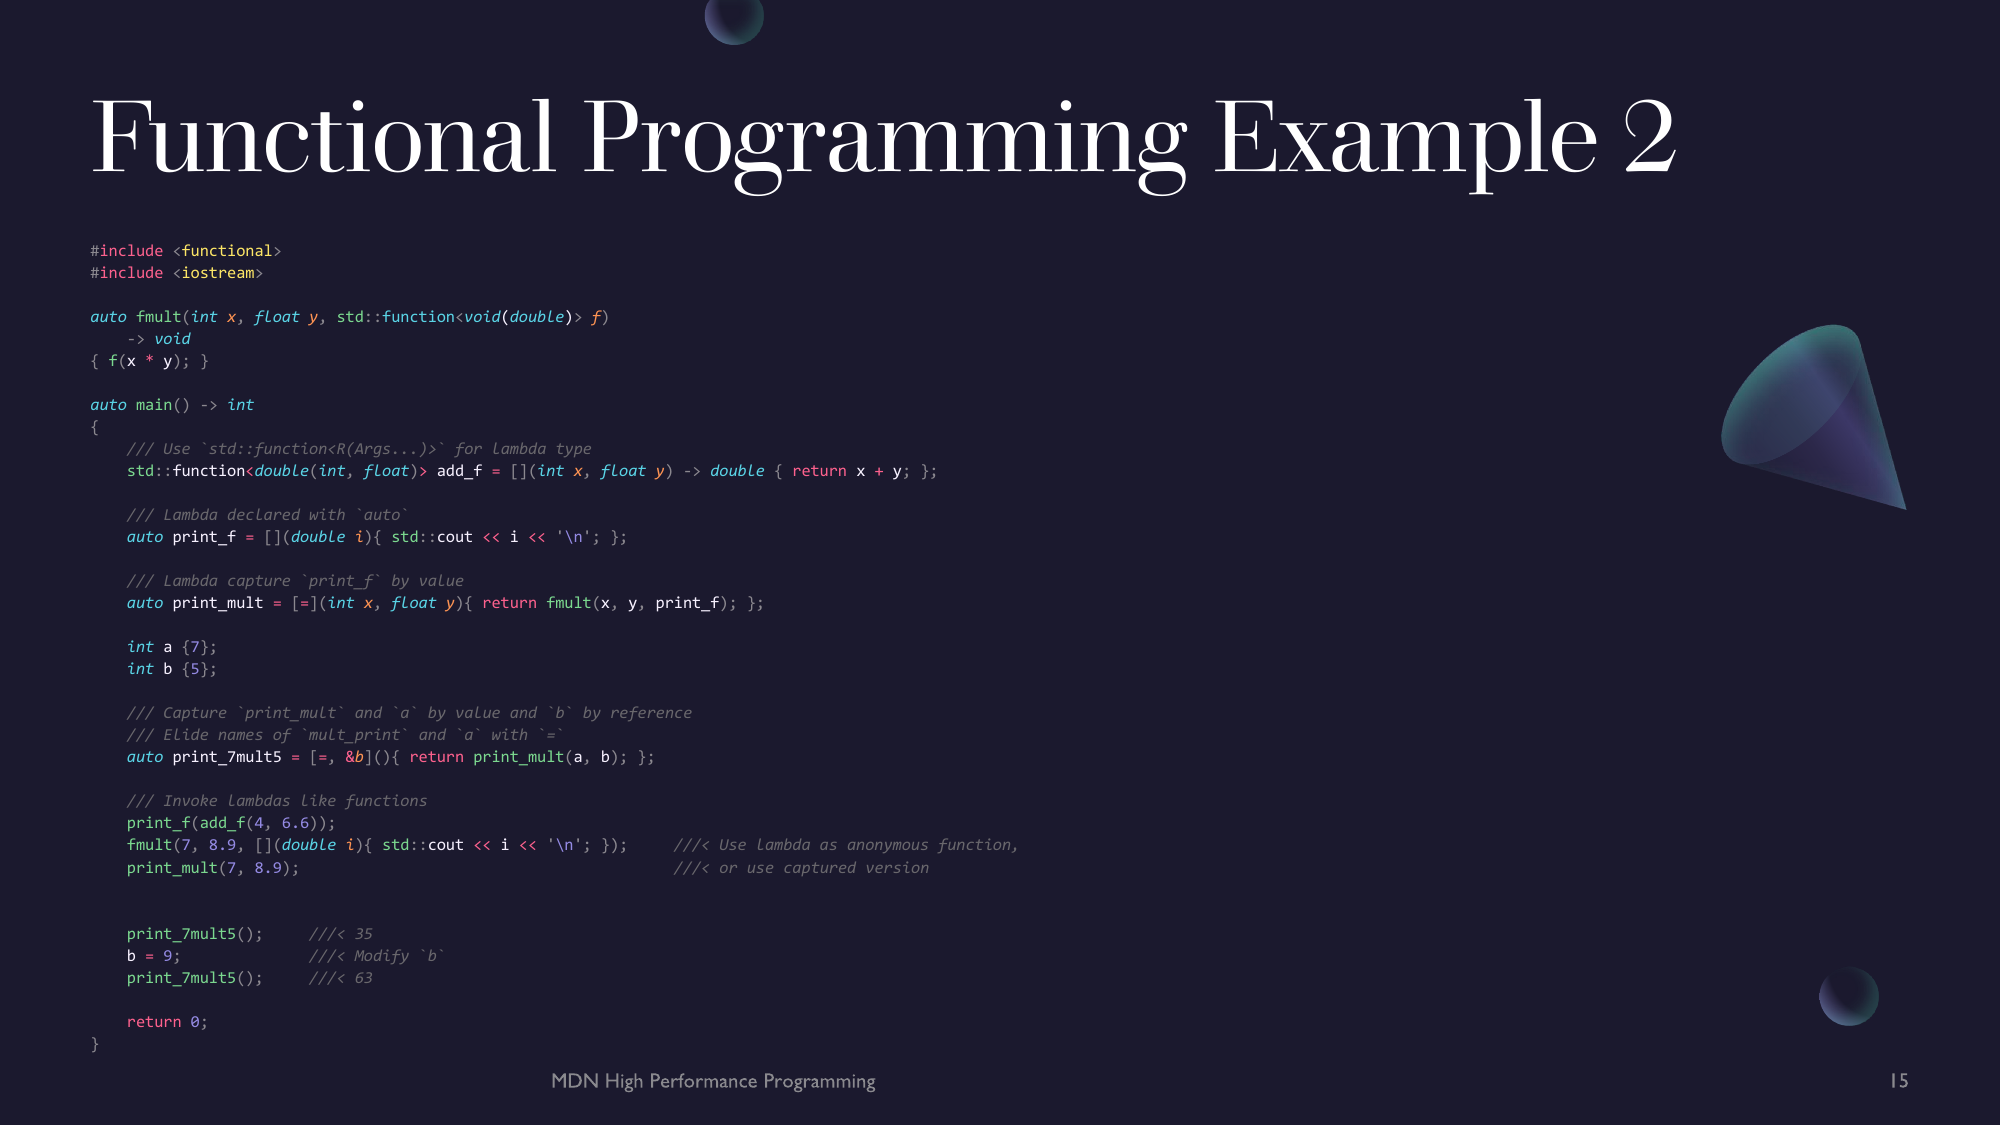
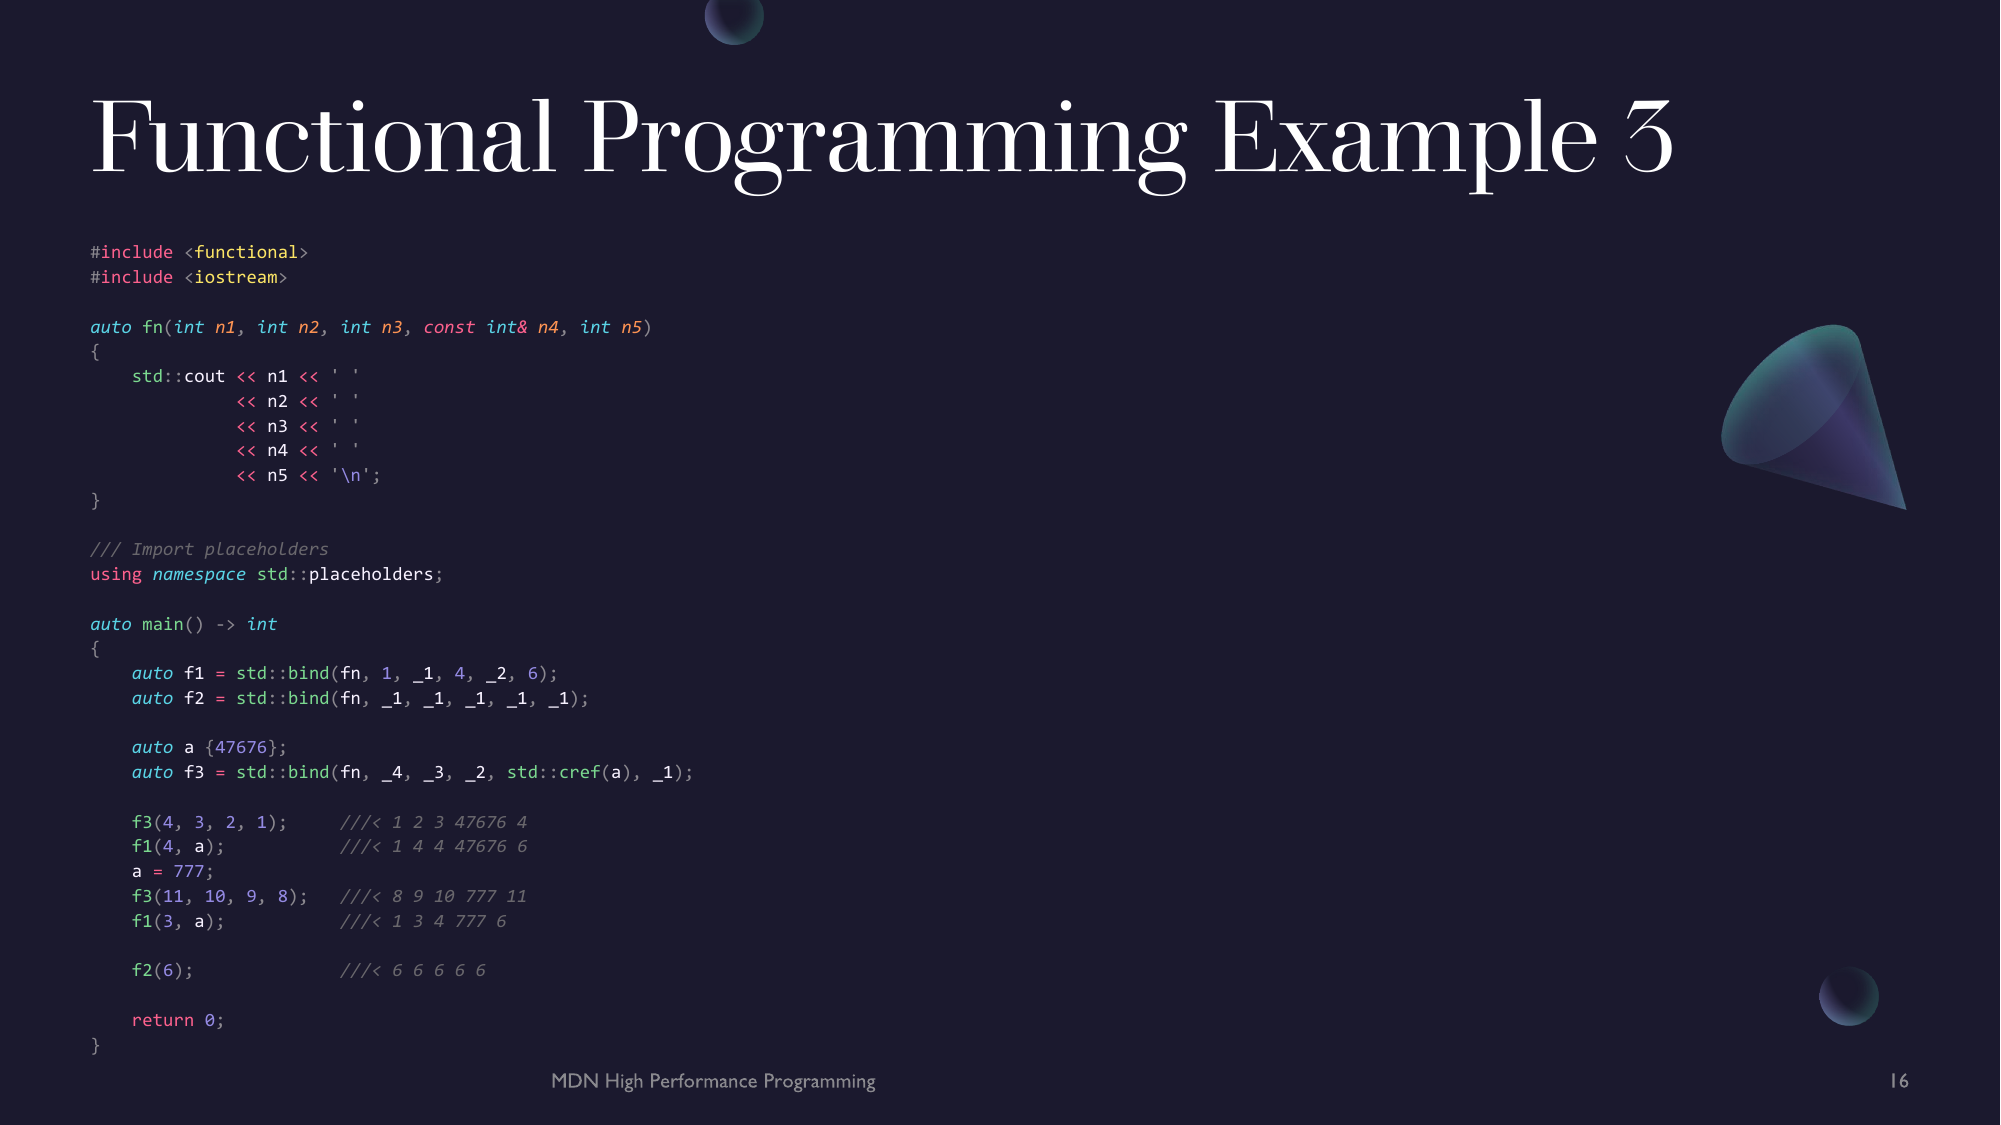
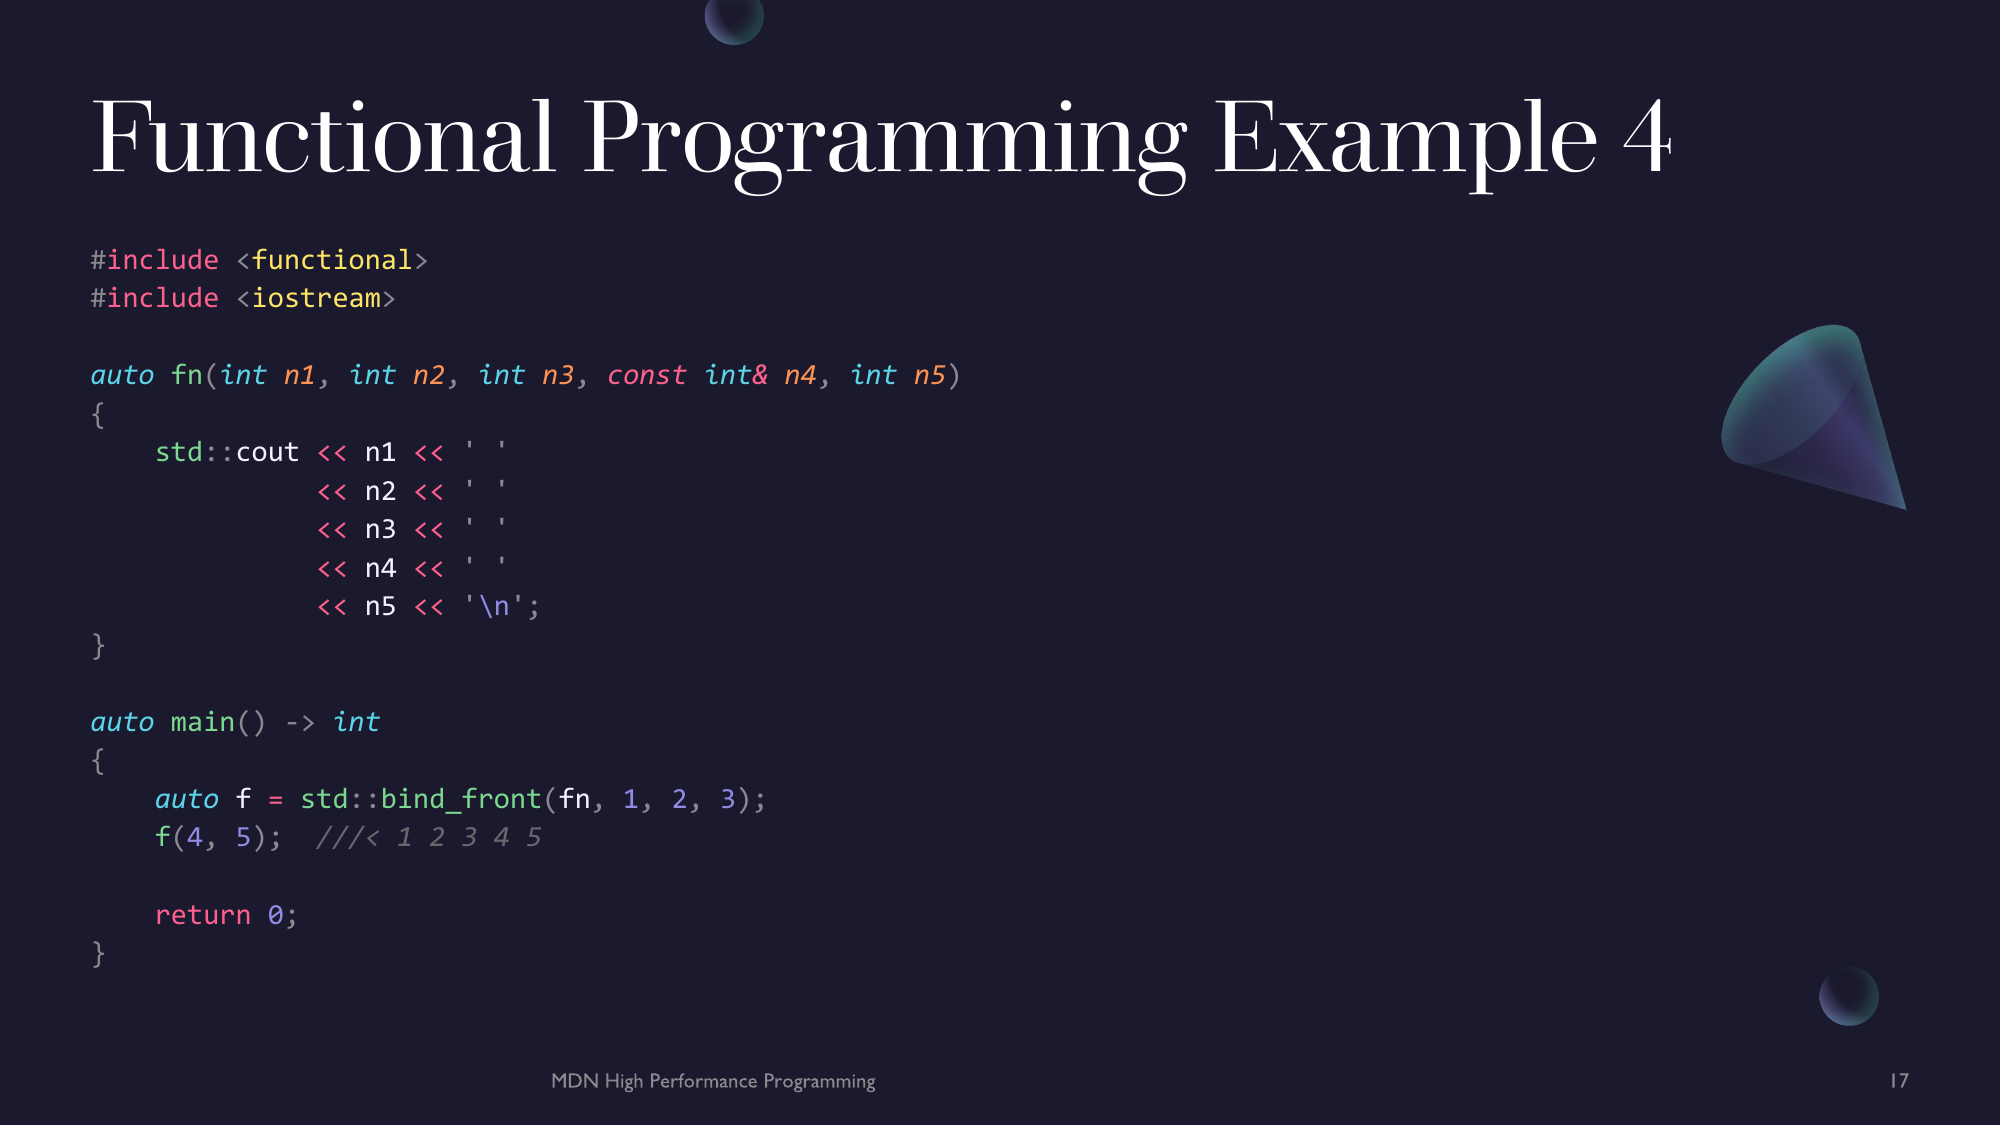

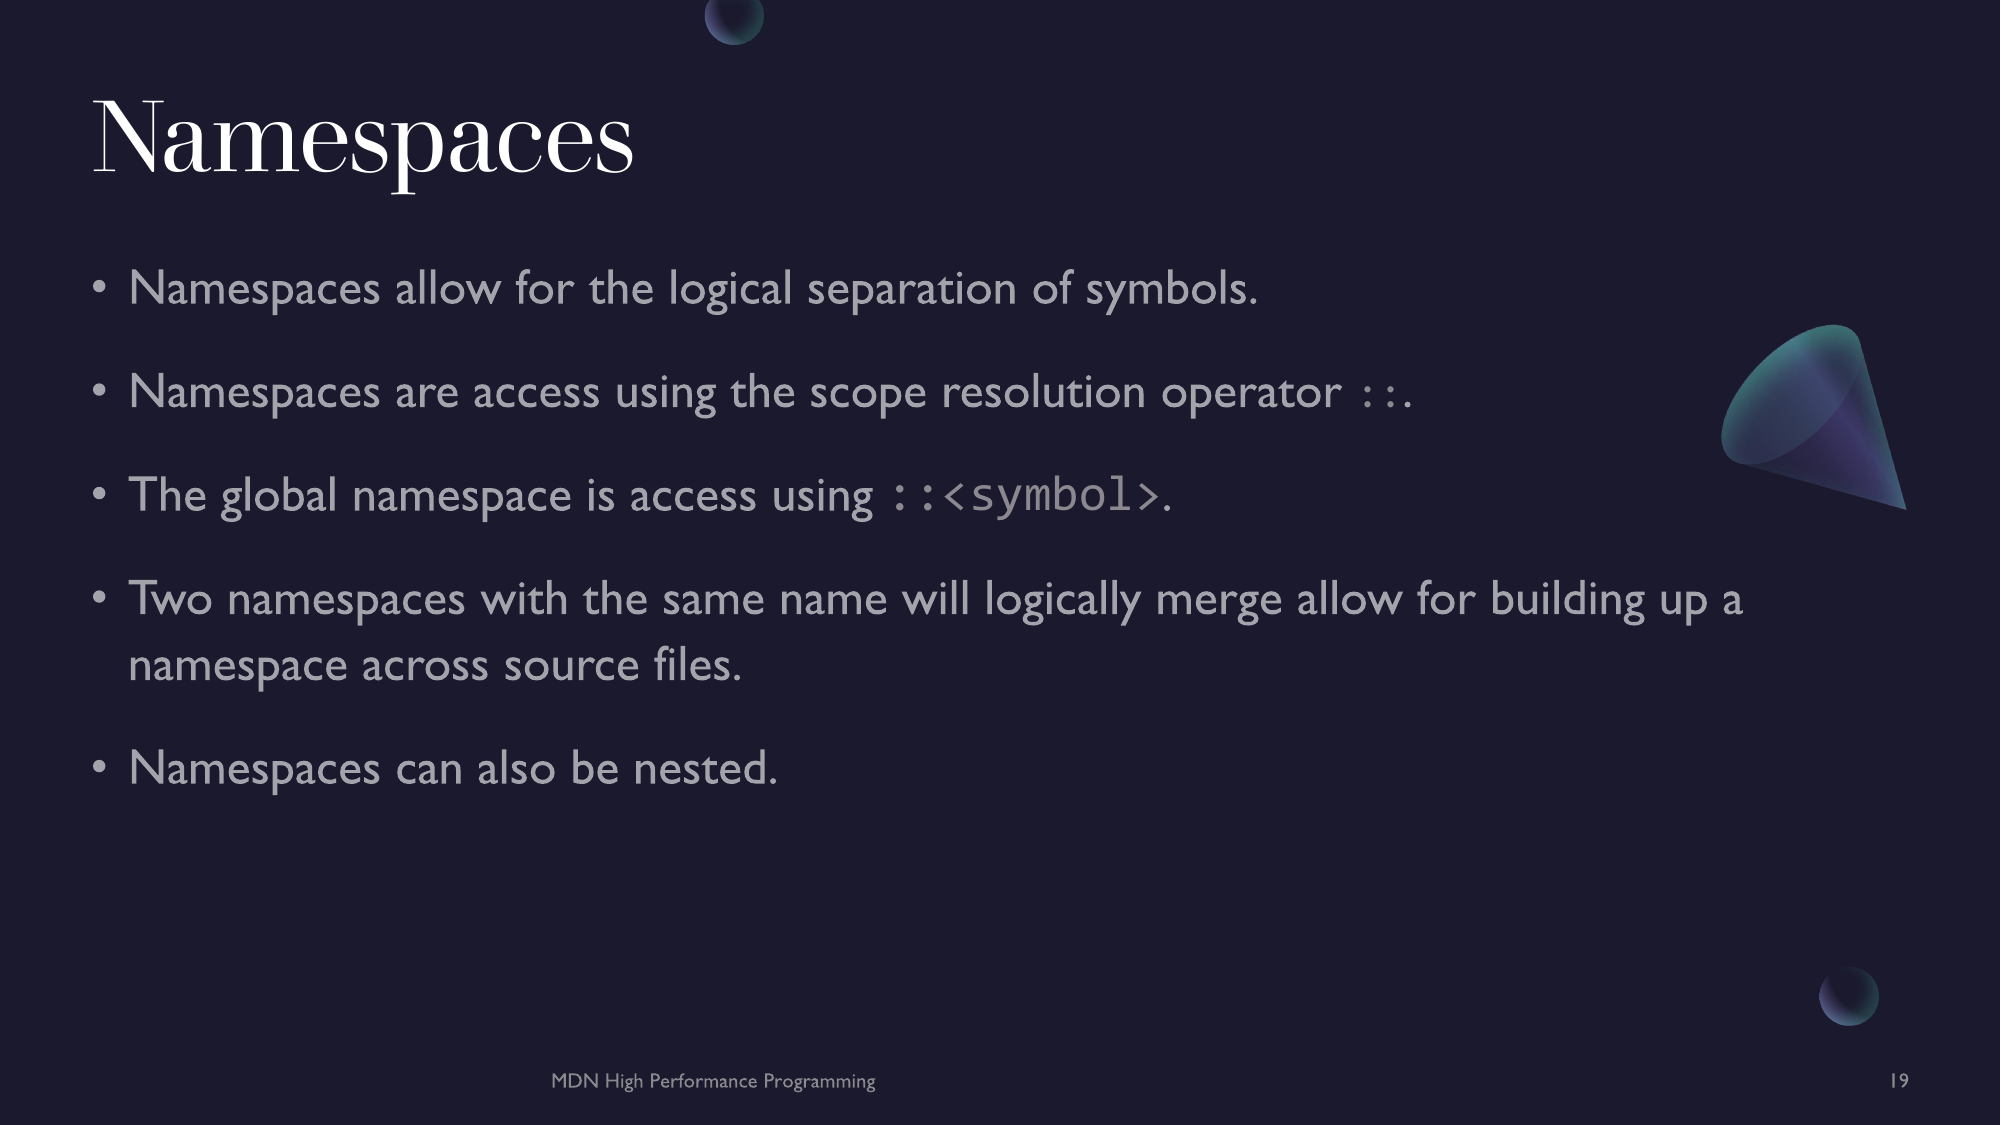
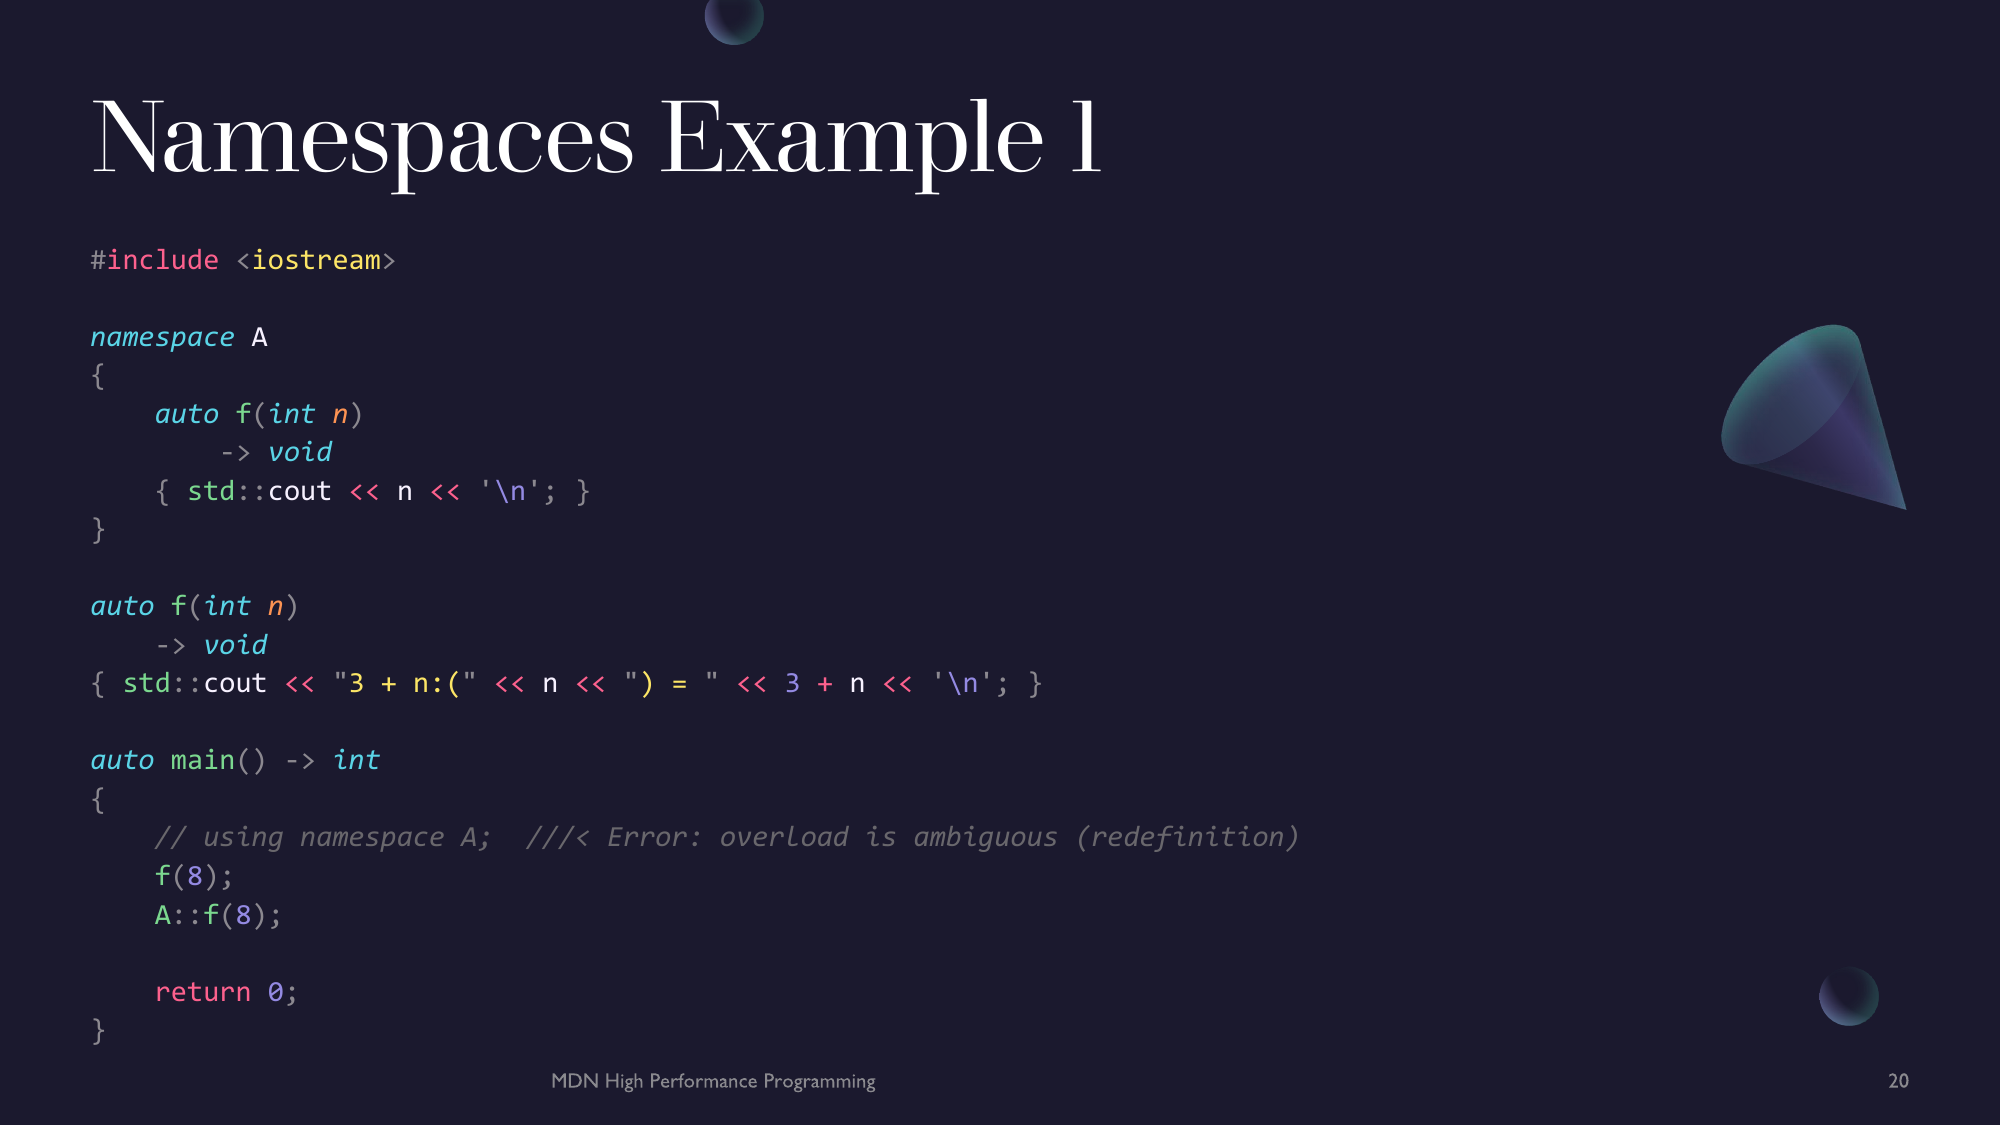
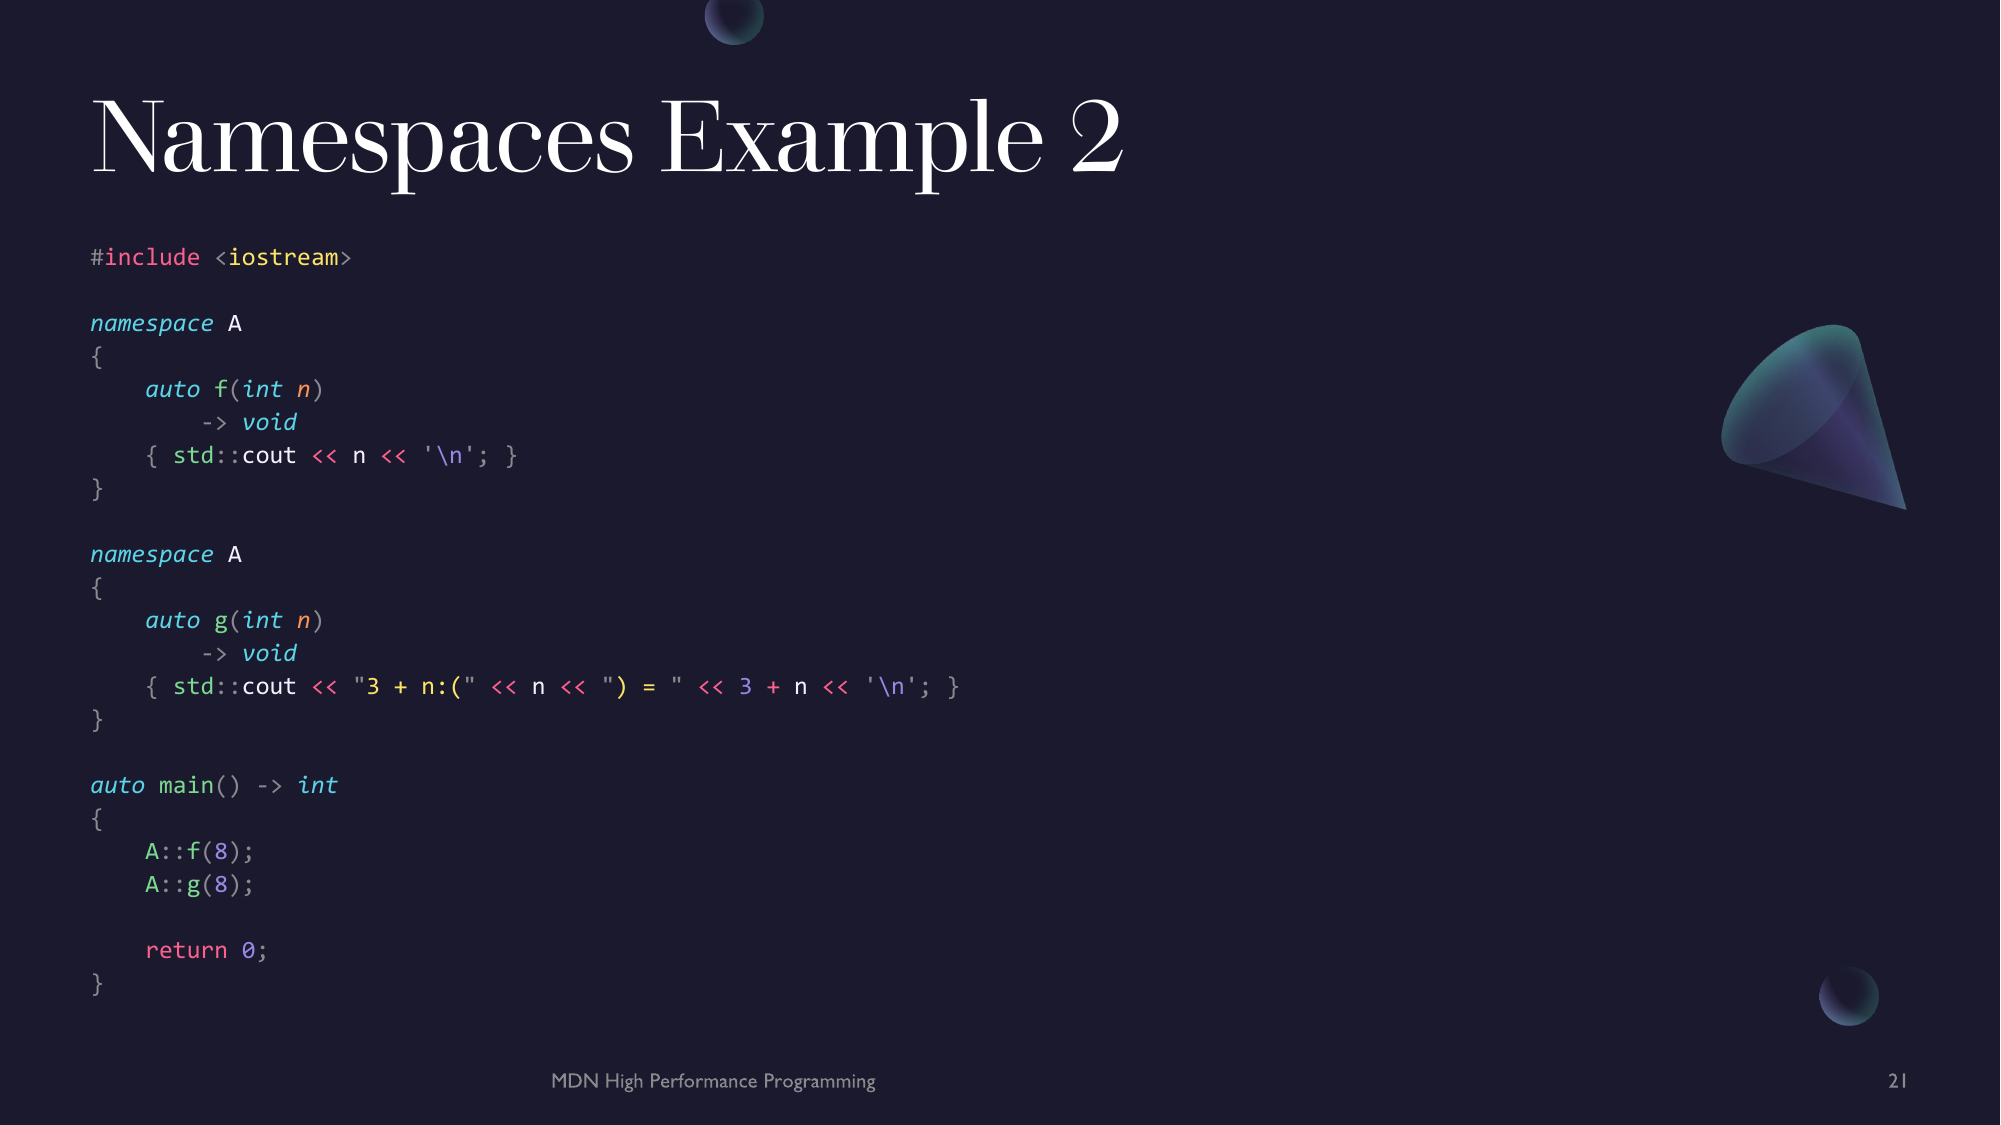
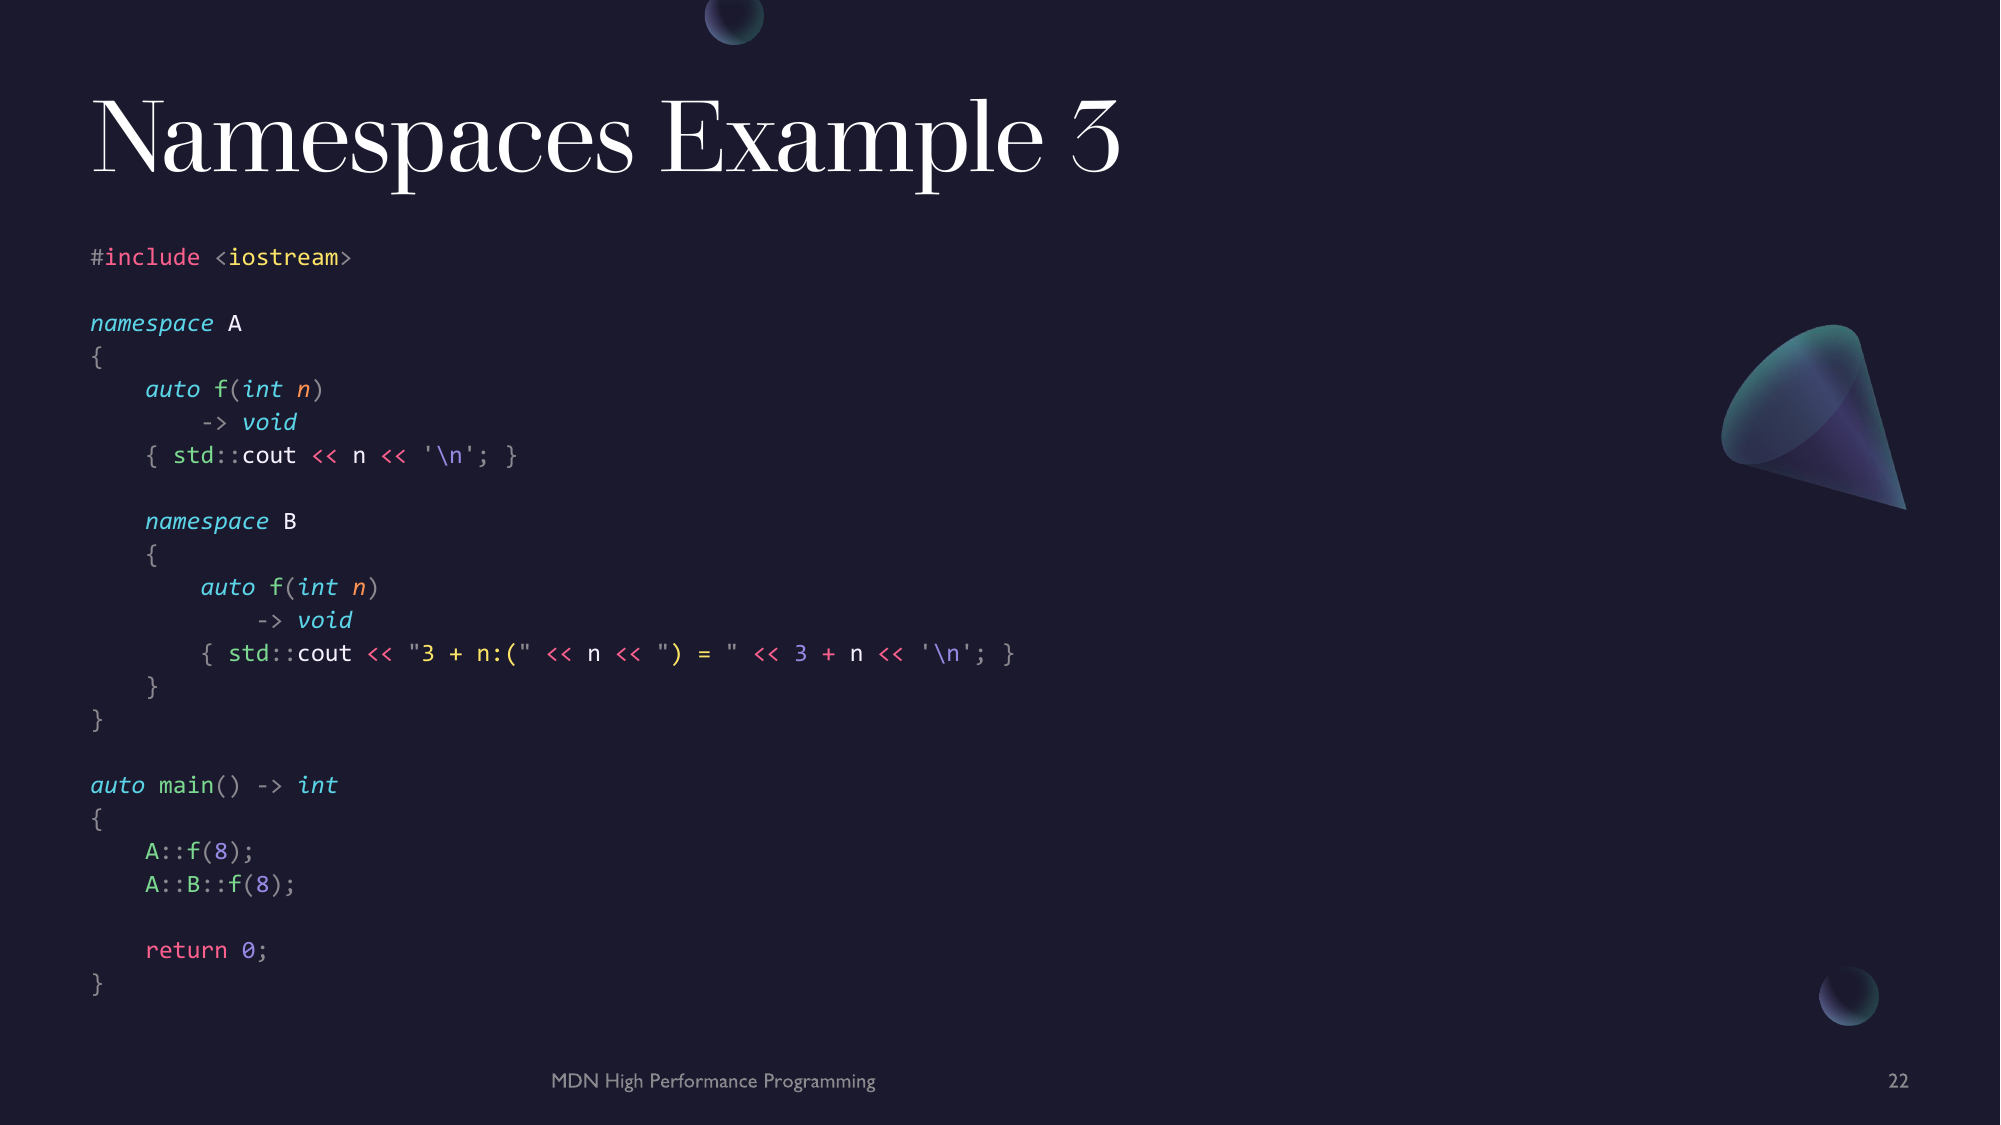

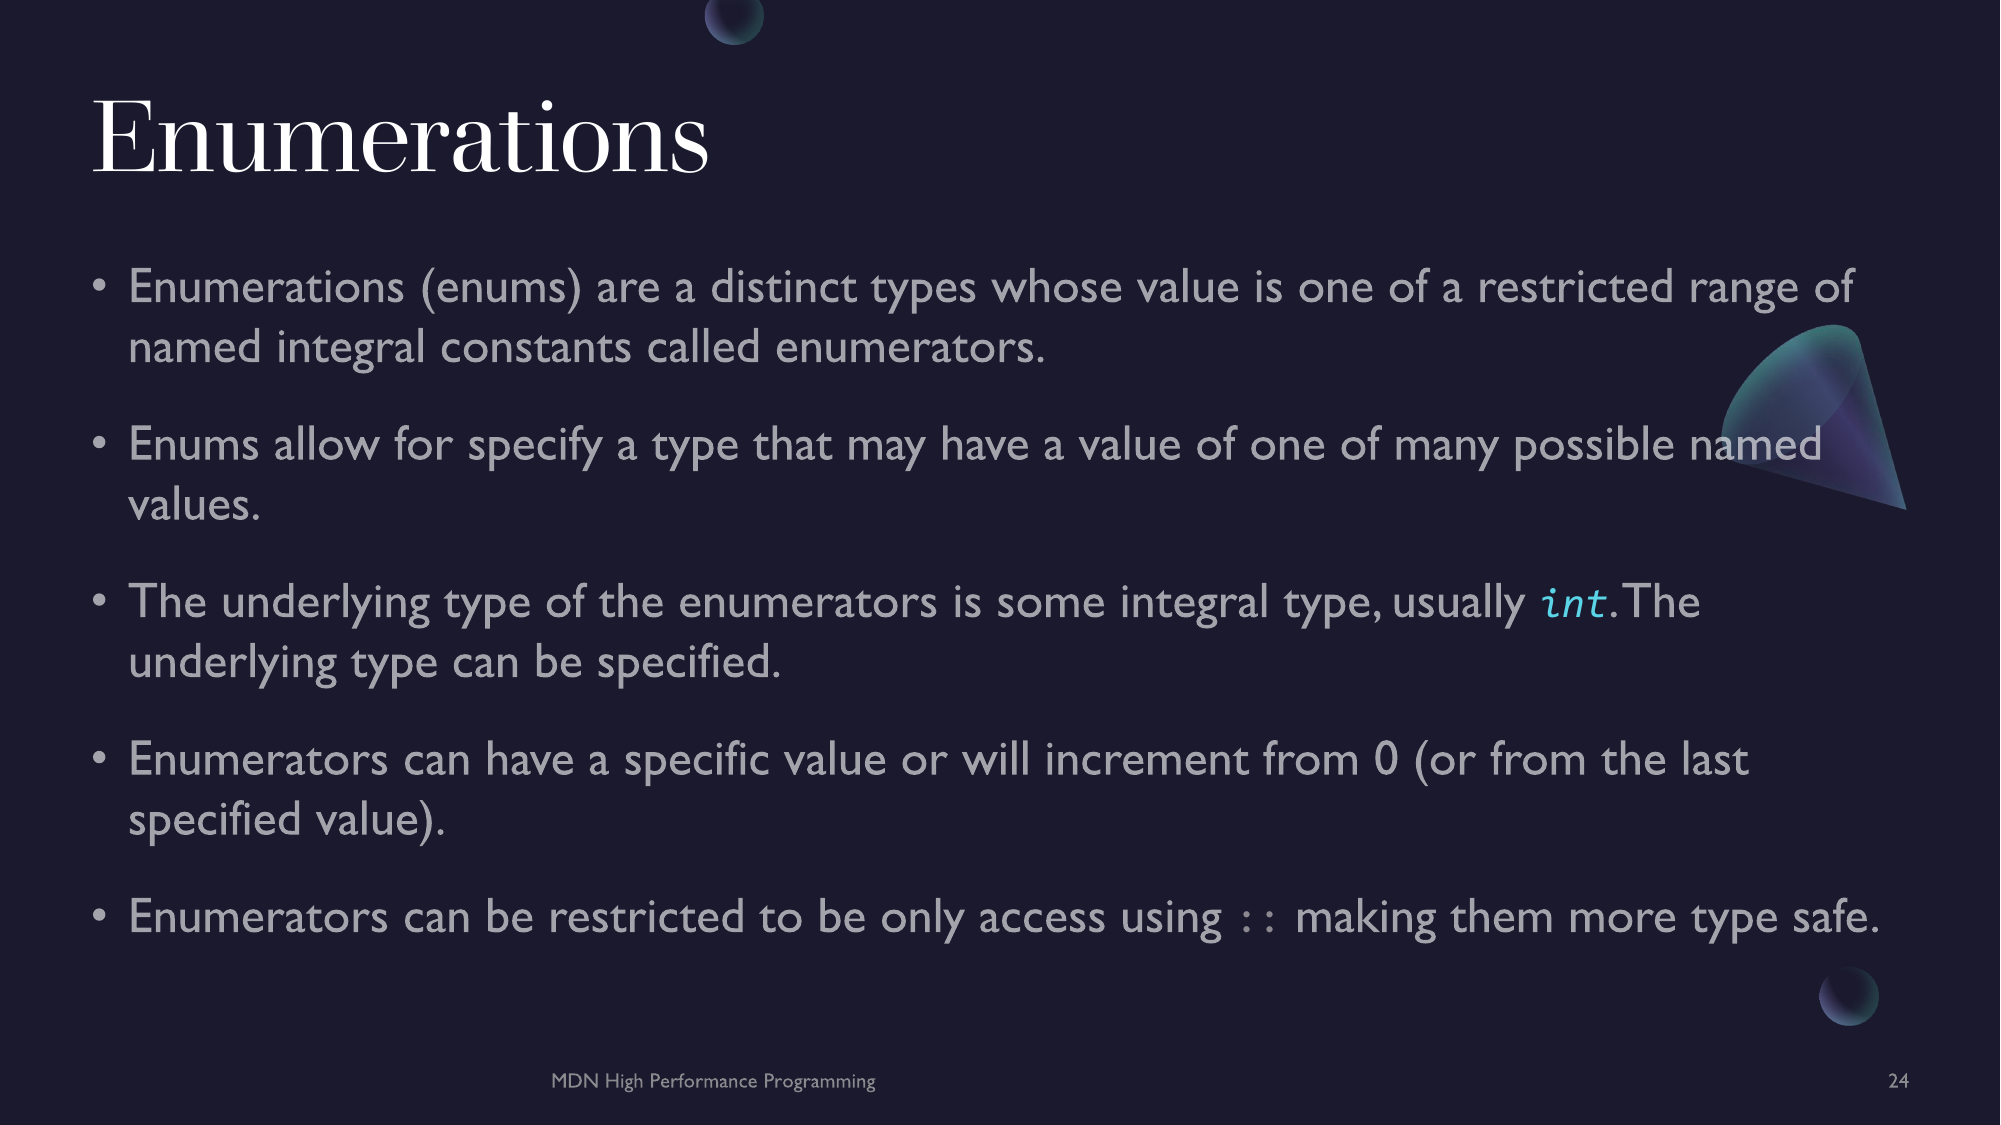
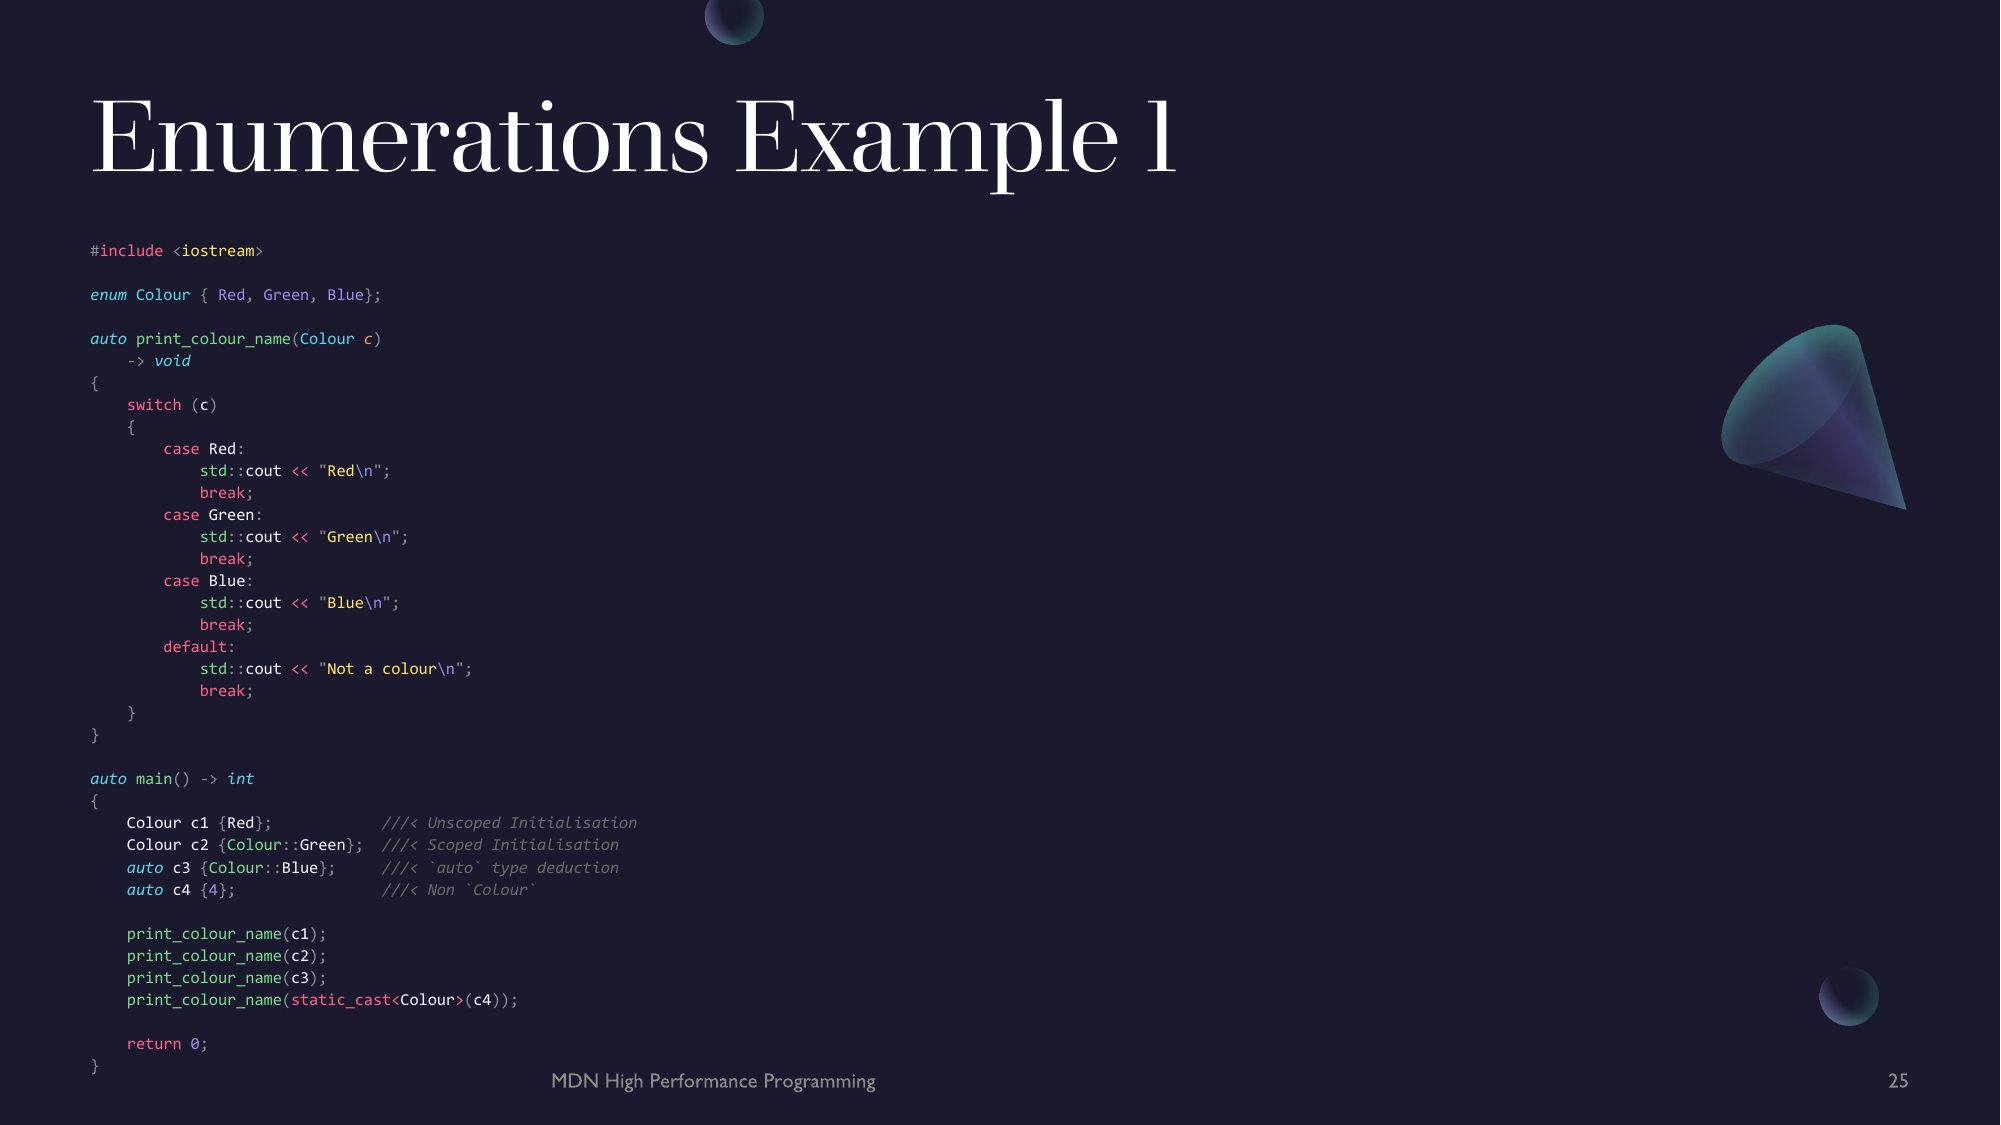
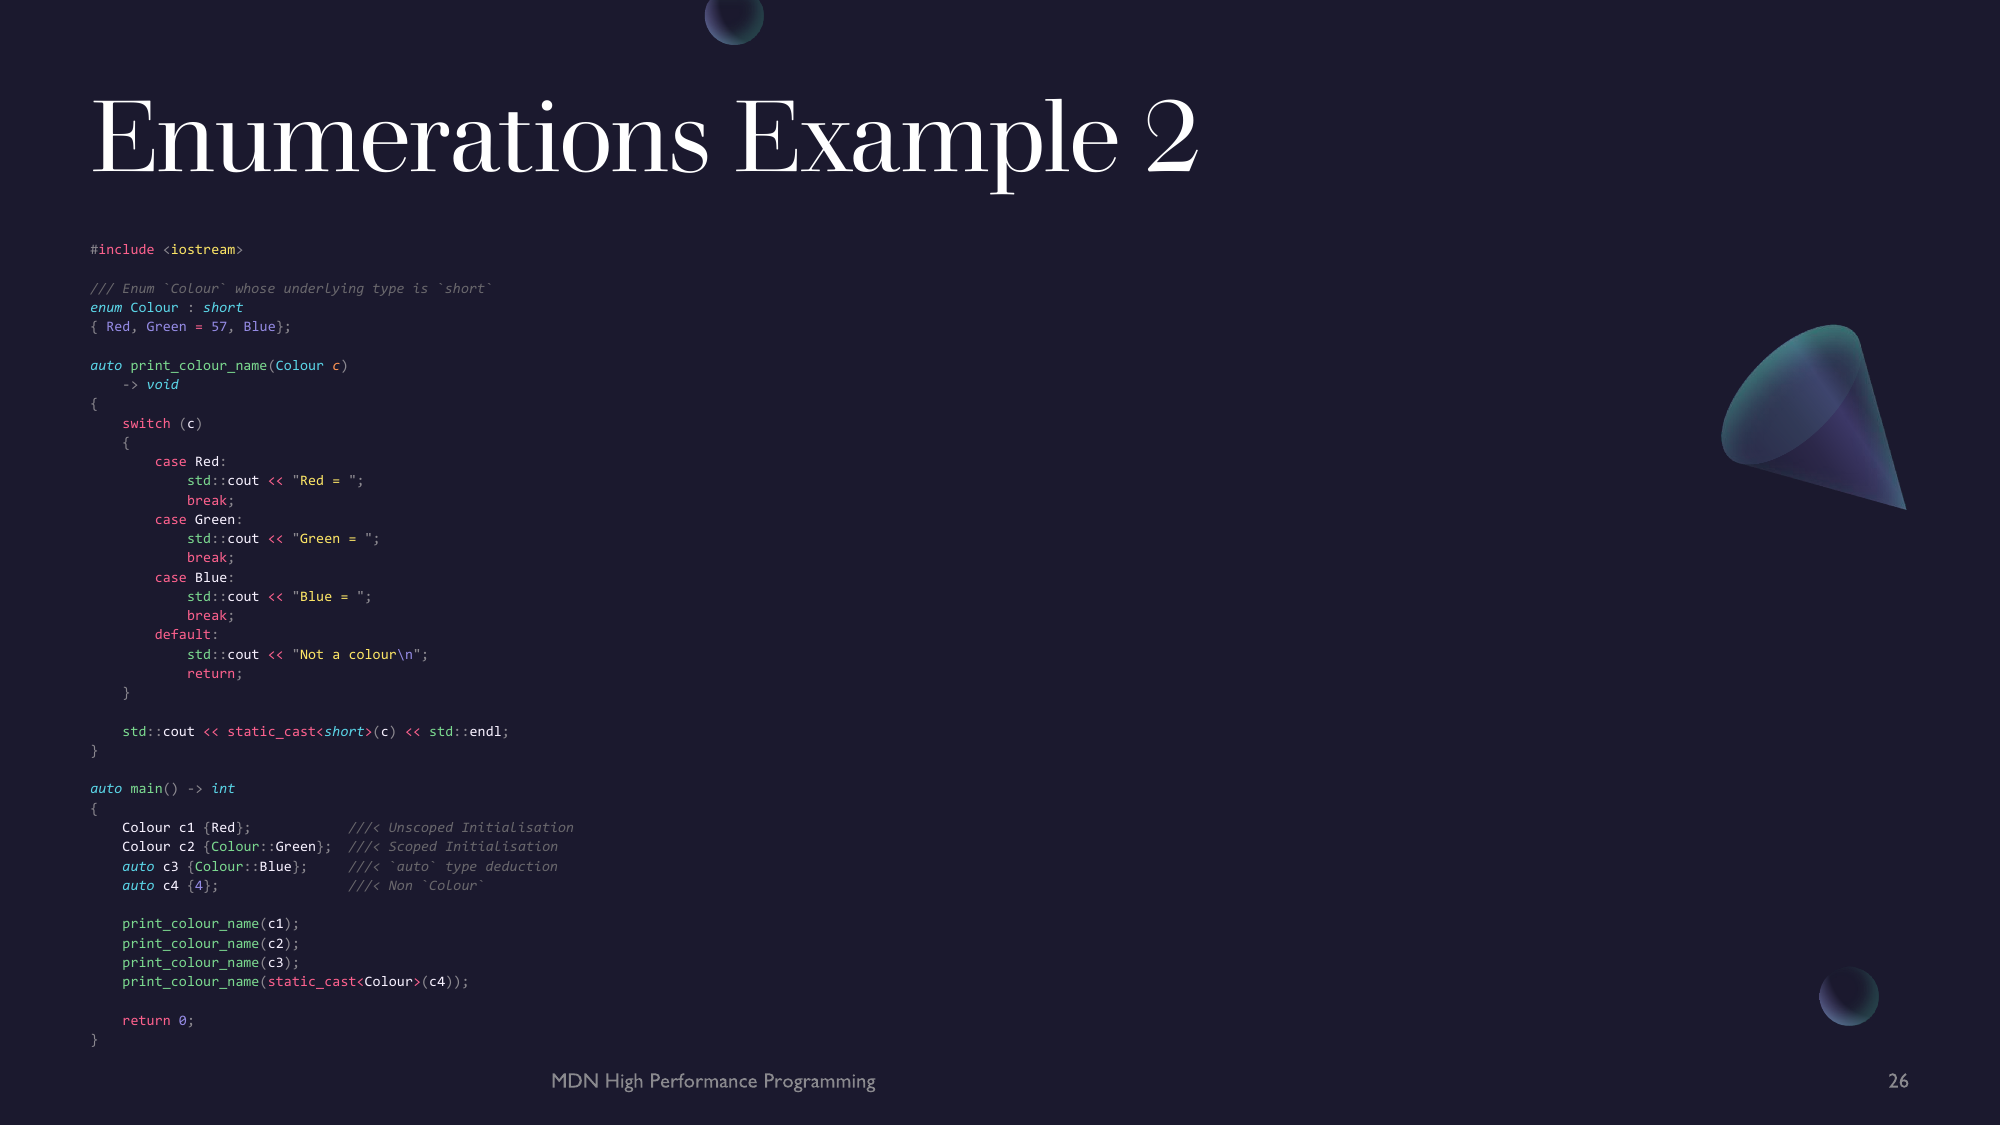


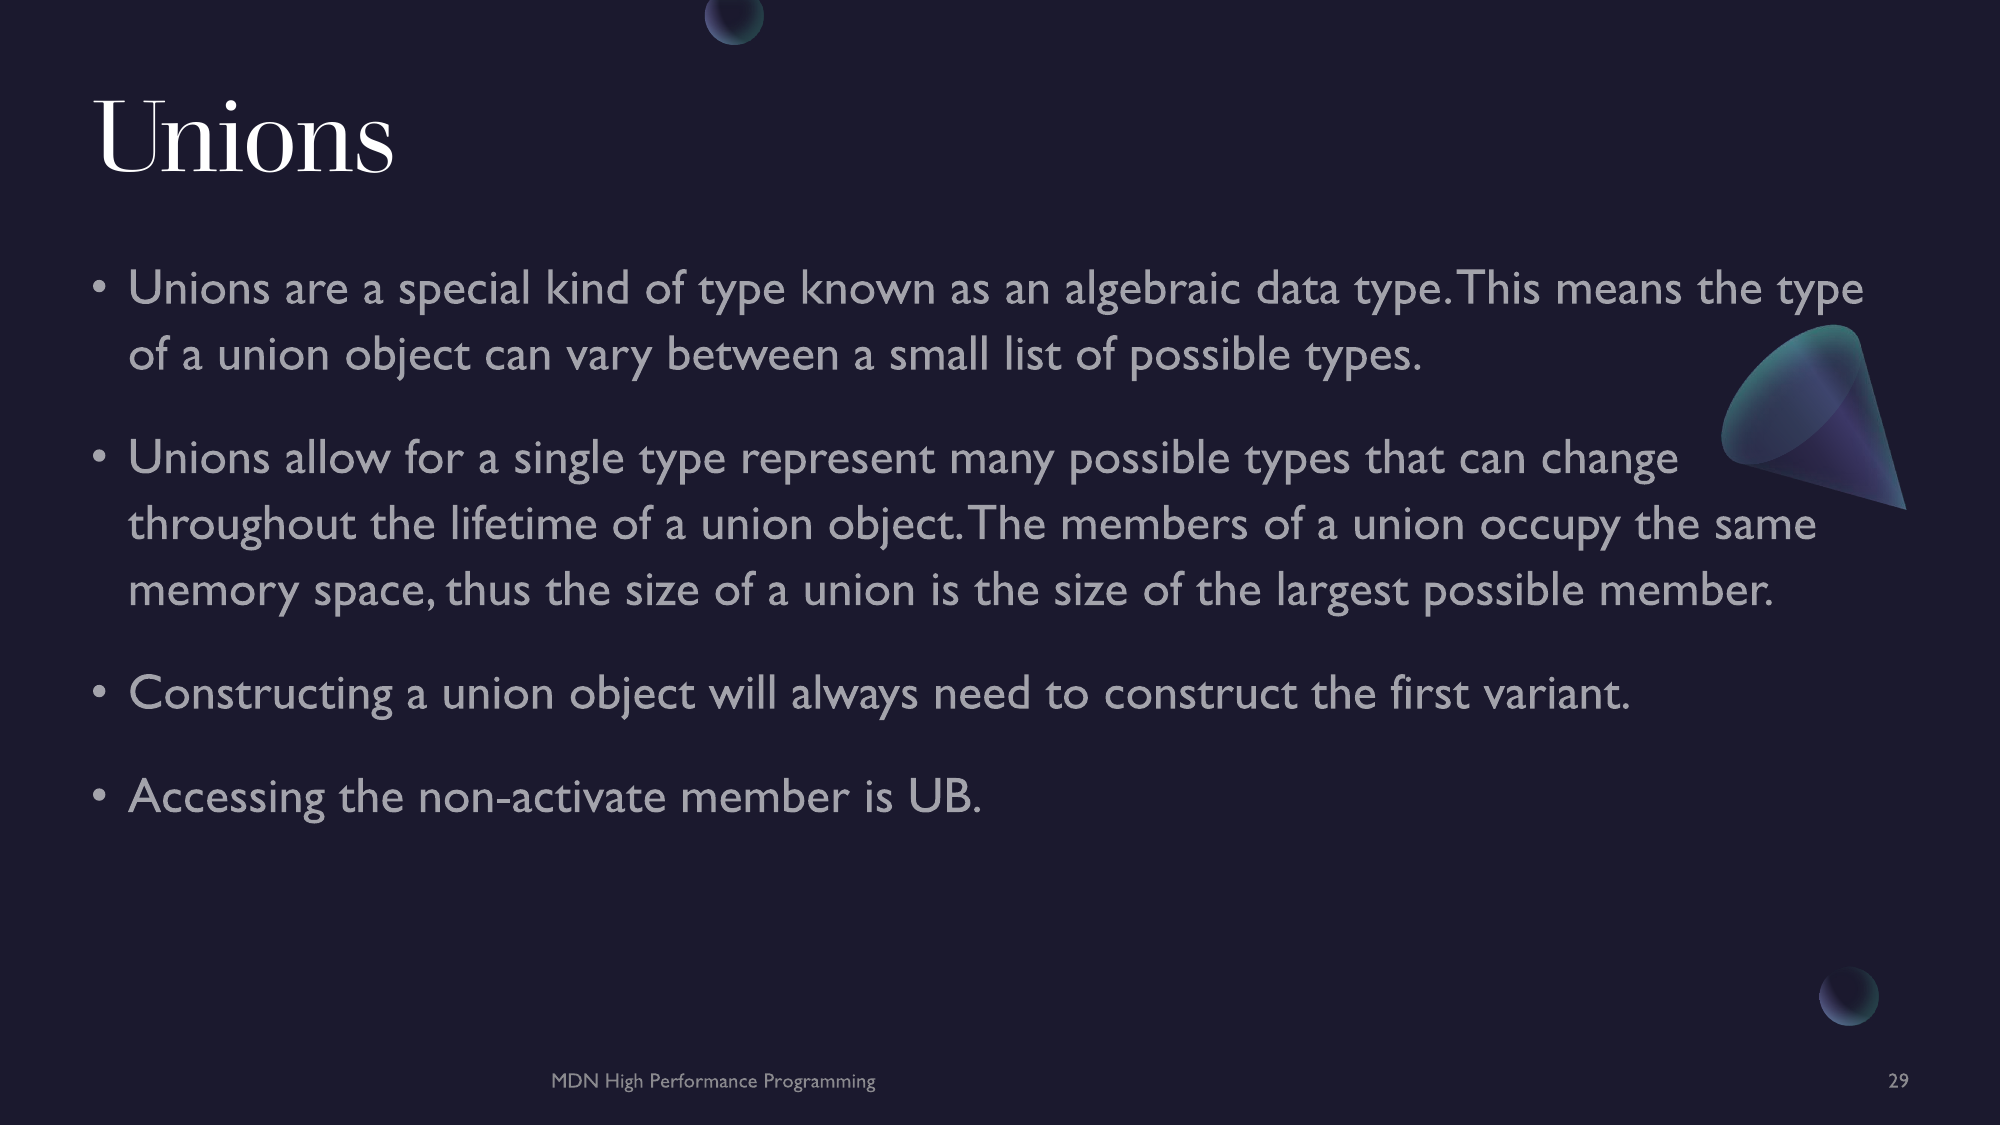
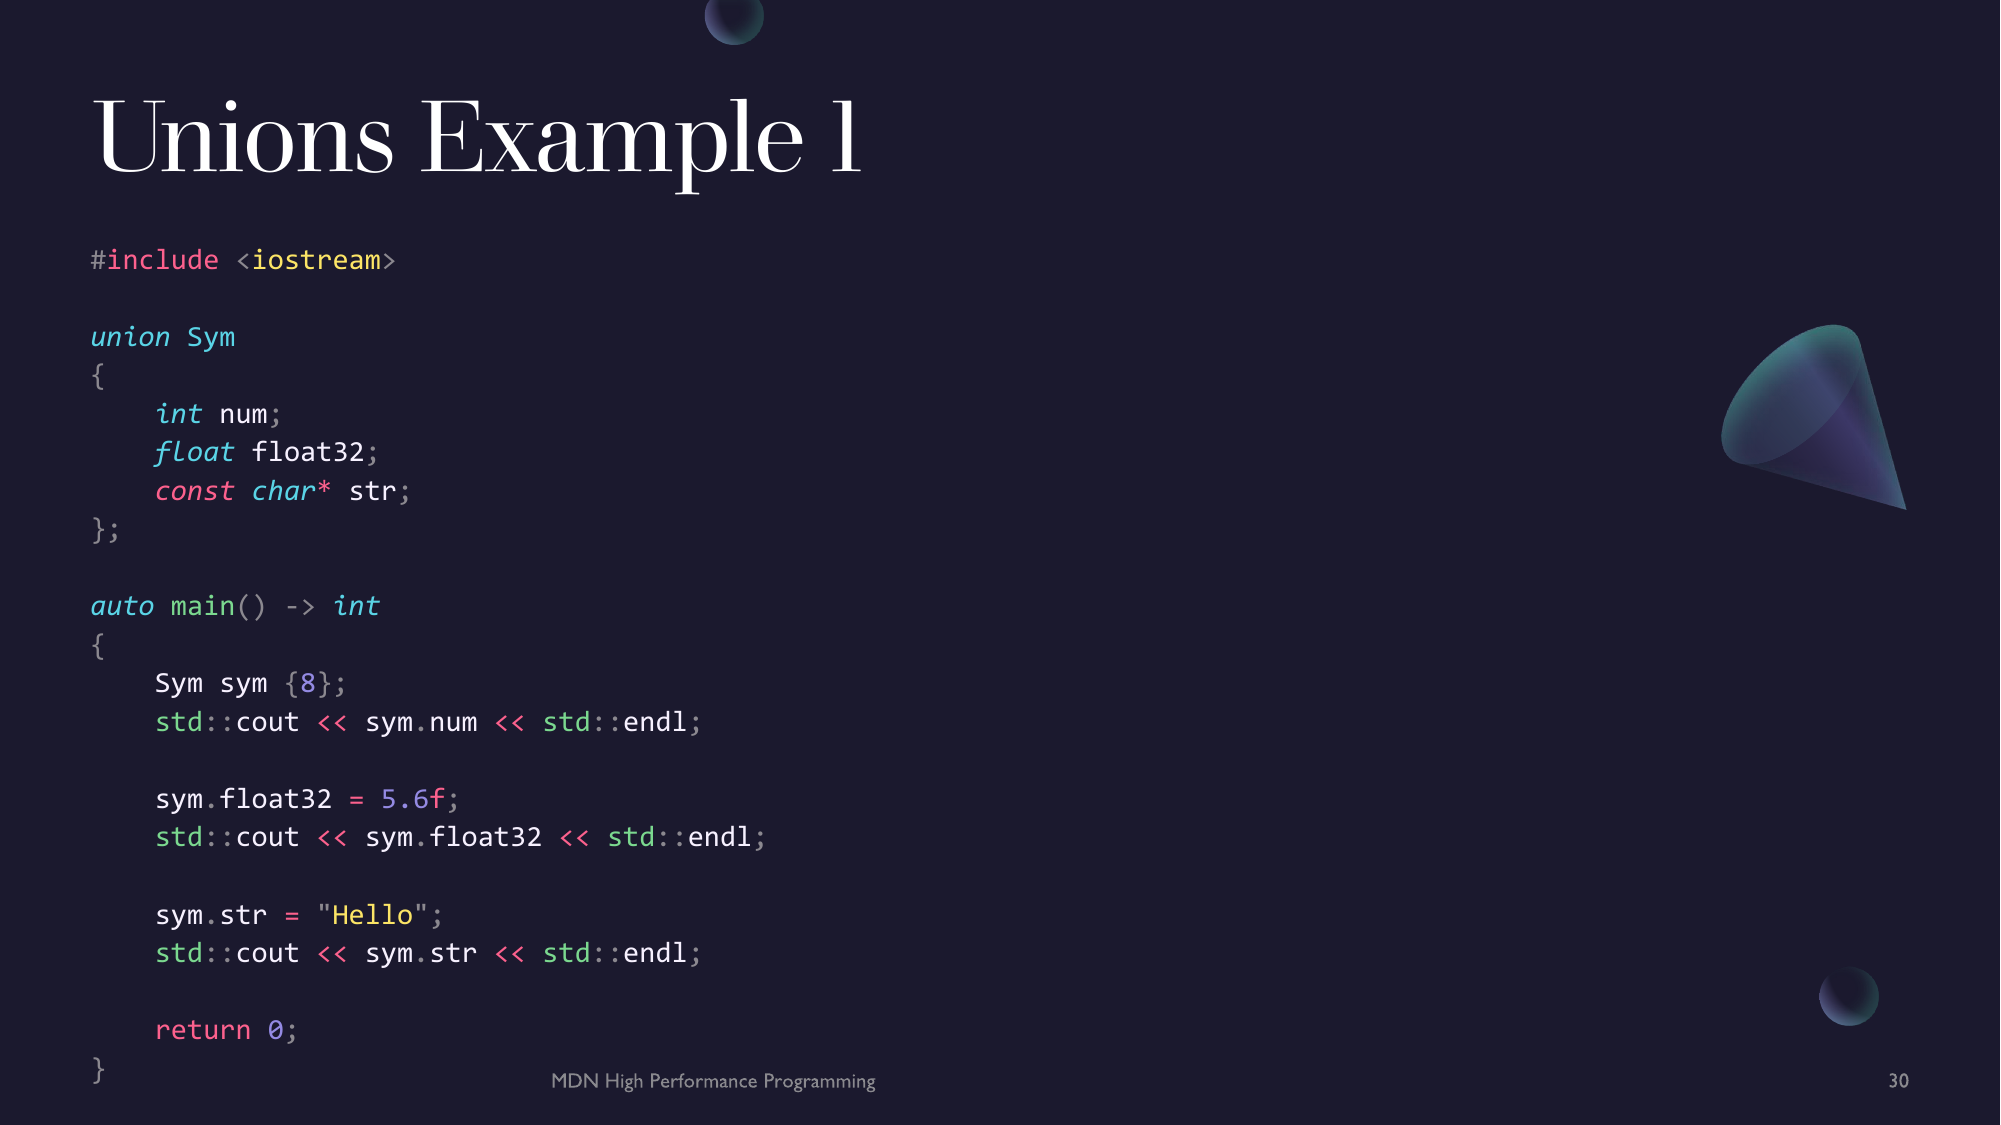


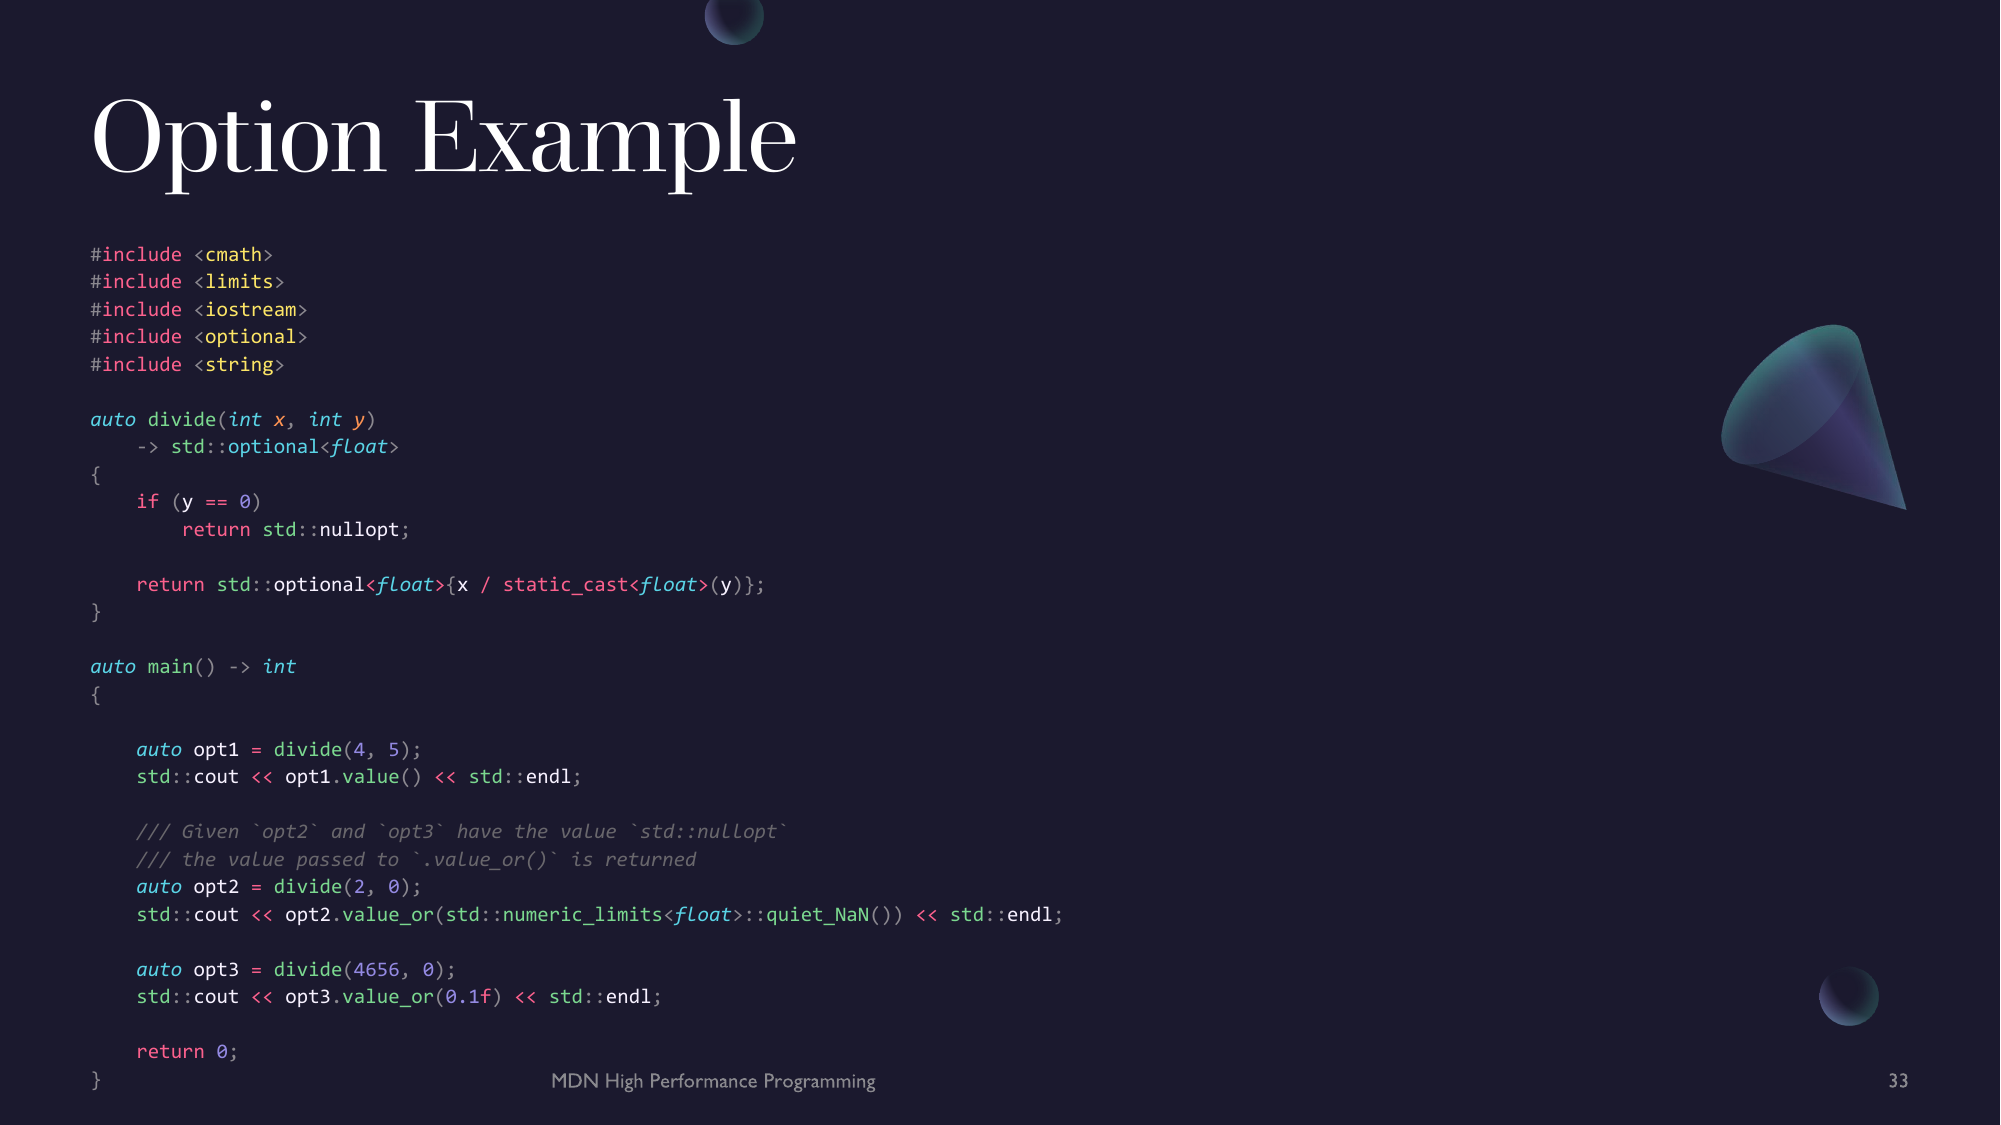
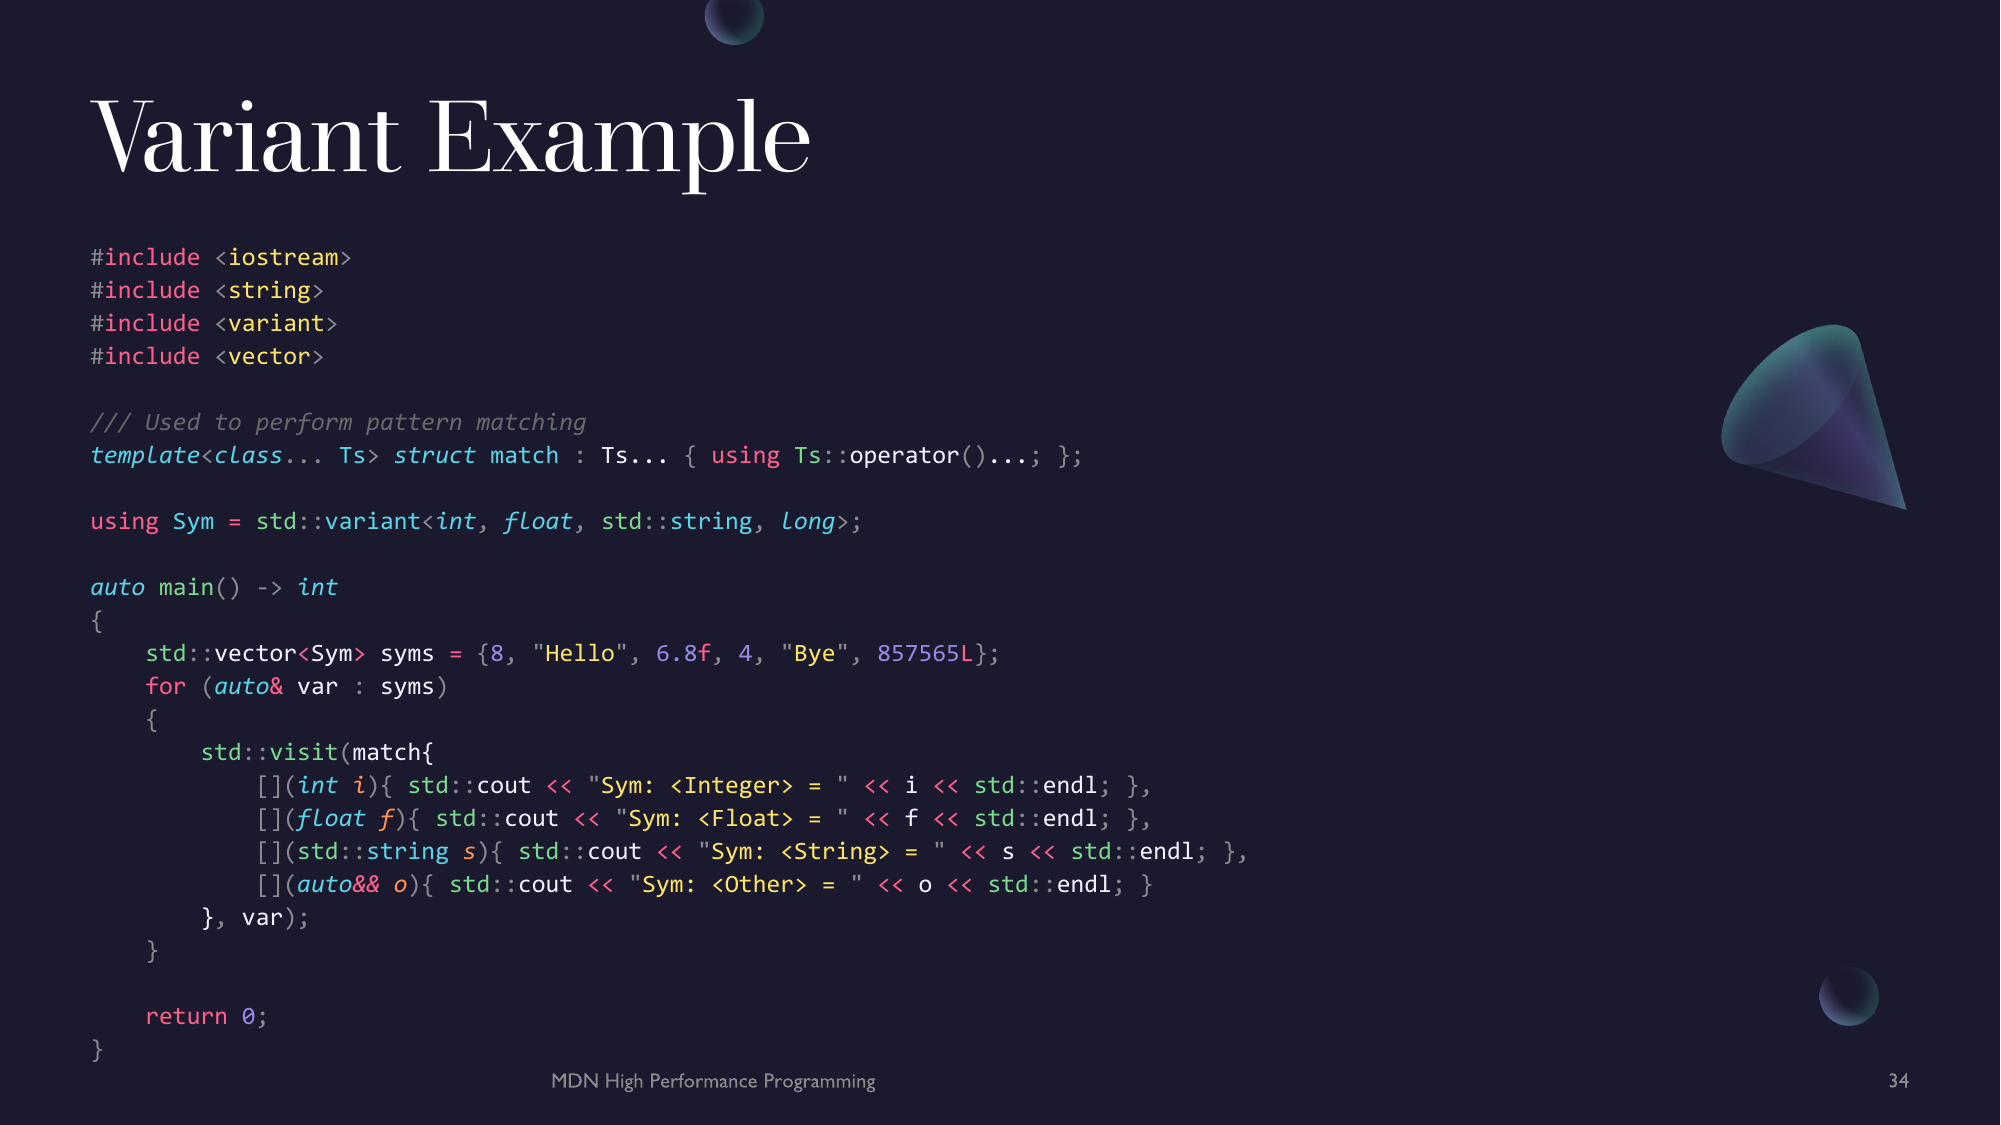

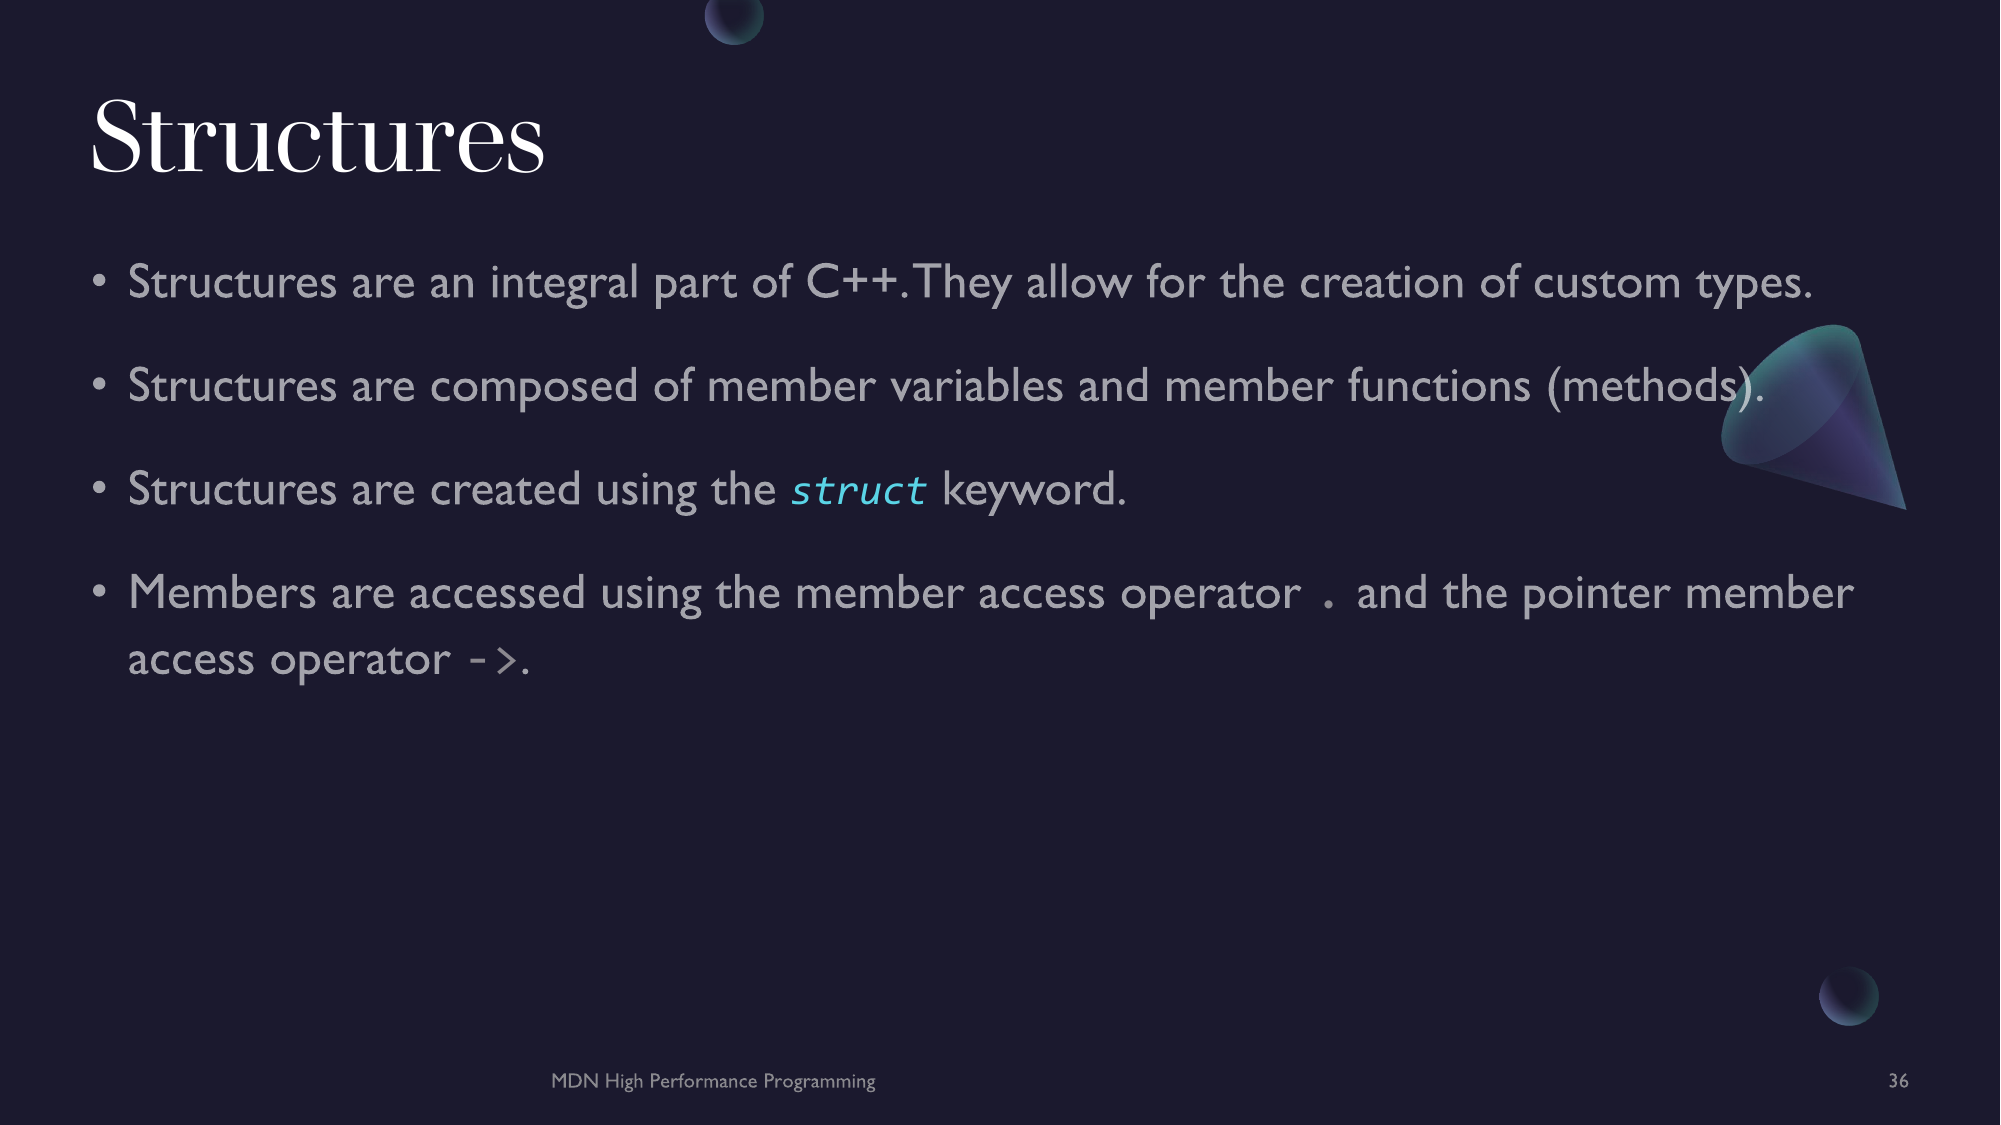
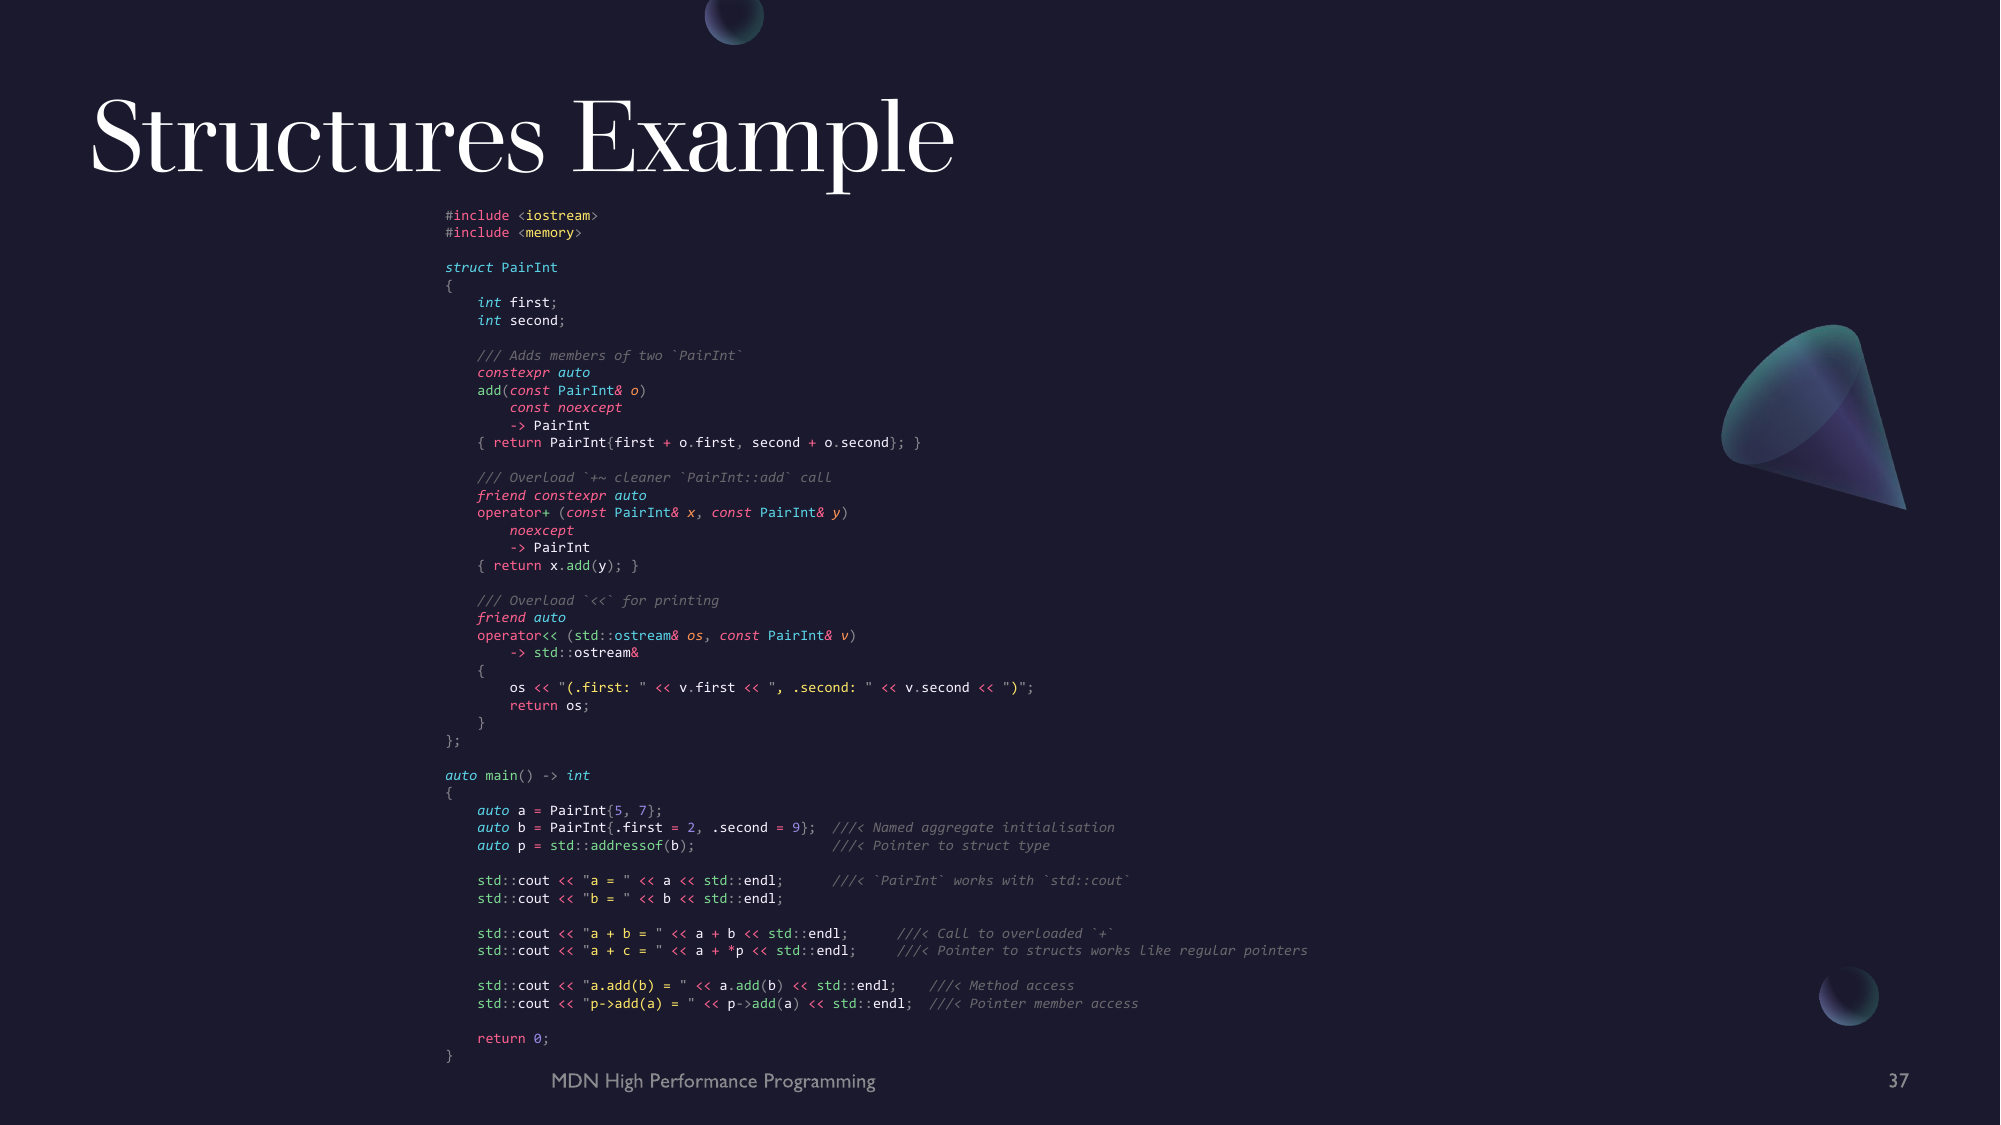


Generic Programming
Throughout this chapter you will discover C++ immensely customizable type system. How you can utilise structures and classes to create your own types from abstract base classes, data structures. You will also learn briefly about C++ Object Orientated facilities and how to utilise dynamic and static inheritance. You will also be introduced to generic programming through templates and metaprogramming. Finally you will learn about constraining your programs and enforcing requirements using C++ new concept faculties.
Classes
What Is a Class?
What is a class? Classes are the same as types. They allow for defining a set of valid operations on a particular configuration or amalgamation of data. In C++ there are two category of types, primitives and classes. Primitives are the basic types your were first introduced to in Chapter 2. Many other programming languages do not primitives because the language undergoes many more transformations before becoming machine code. As an example, int in Python is an object. It meets all the basic requirements of an object same as any other object in Python. This is not the case in C++. int in C++ is directly lowered (translated) into a assembly or machine type. You can a can access the bits that represent the int, even mutate them. They have a fixed width in memory (although varying from platform-to-platform) and cannot have their interfaces changes or adapted. Classes are different, they are much like object from Python (although, due to C++'s zero overhead principle, you only pay for what you ask for). Class are custom types that anyone can define and even modify through hierarchy structures and inheritance.
Defining a Class
A class is defined identically to a structure. In fact, to C++ they are identical. You can use either keyword to create a class type. Typically however, struct is reserved for simple structures while class are use for more complex types by convention. There is one distinction between the two declarations, class will make all class members (methods and variables) private by default while struct will make them public by default.
Note: From now on I'll refer to structures and classes as classes or types.
#include <iostream>

class Point
{
    int x;
    int y;
};

auto main() -> int
{
    auto p = Point{ 2, 5 };

    std::cout << "( " << p.x << ", " << p.y << " )" << std::endl;  ///< Fails as `x` and `y` are private

    return 0;
}
Member Access
Classes allow for you to specify the access rights of its members. There are three member access categories. Each allows for a different level of access permissions from both direct users of the class and the children (derived) of the class.
Note: The term 'Member' means any method (function) or variable owned by a class, structure or type.
General Access
When defining a class, you can specify chapters of its definition to be either private, protected or public. This is done by putting an accessor label (with the keyword being one of the previously mentioned accessor categories with a : suffix) in a region of the classes body. All declared members following the label will adopt the accessor policy. You can reuse access specifiers as much as you want.
Here are the rules for the different accessor policies.
| Accessor Category | Meaning |
|---|---|
private | Member can only be used by member functions of the same class or friends (functions or classes). |
protected | Member can only be used by member functions of the same class, friends (functions or classes) or derived classes. |
public | Can be accessed by anyone. |
#include <iostream>

class Point
{
public:             ///< Declare members `x` and `y` as public
    int x;
    int y;
};

auto main() -> int
{
    Point p{ 2, 5 };  ///< Now succeeds

    std::cout << "( " << p.x << ", " << p.y << " )" << std::endl;  ///< Now succeeds

    return 0;
}
Access in Derived Classes
When deriving from another classes (more on inheritance here), you can specify the access rights of the parent classes members through the base class.
| Base Classes Access Policy | private | protected | public |
|---|---|---|---|
| Always inaccessible with any derivation access | private in derived class if you use private derivation | private in derived class if you use private derivation | |
protected in derived class if you use protected derivation | protected in derived class if you use protected derivation | ||
protected in derived class if you use public derivation | public in derived class if you use public derivation |
#include <iostream>

class Point
{
public:
    int x;
    int y;
};

class Point3D
    : protected Point       ///< Points members are `protected`
{
public:
    int z;
};

auto main() -> int
{
    Point p{ 2, 5 };
    Point3D p3d{};

    std::cout << "( " << p.x << ", " << p.y << " )" << std::endl;
    std::cout << "p3d.z = " << p3d.z << std::endl;
    std::cout << "( " << p3d.x << ", " << p3d.y << ", " << p3d.z << " )" << std::endl;  ///< Fails, `x` and `y` are inaccessible

    return 0;
}
Note: Classes can access their own members regardless of the access policy even if it is a different instance.
Constructors and Destructors
So far we haven't seen much difference from classes than just using them as aggregate structures. One of the unique benefits of classes in C++ is the ability to explicitly define and control how structures are created and destroyed. This gives you powerful control over the lifetime of a type and how its resources are managed at the definition stage removing the need for manual management at runtime. This is done through constructors and destructors. These are special members (functions) with the same name as the class. A class can have any number of constructors (following the normal function overloading rules) but can only have one destructor.
Note: Creation or construction of a type refers to the explicit instantiation of an object with a particular class type.
Explicit Constructors
The most useful kind of constructors for defining custom creation of a class are explicit constructors. These constructors take explicitly specified arguments, usually used to initialise member variables with a particular value. Explicit constructors are often marked with the explicit keyword in their function signature. Means the constructor must be explicitly called, ie. passed the correct types.
Throughout this chapter we are going to build up the Point class. Lets start by making it possible to define the point from two int. I've defined the explicit constructor for initialising the members Point::x and Point::y as well as temporary getters/setters.
#include <iostream>

class Point
{
public:

    /// Explicit Constructor for initialising `x` and `y`
    explicit constexpr
    Point(int x, int y) noexcept
    : x{ x }, y{ y }
    { }

    constexpr auto
    X() noexcept -> int&
    { return x; }

    constexpr auto
    Y() noexcept -> int&
    { return y; }

private:
    int x;
    int y;

};  /// class Point

auto main() -> int
{
    Point p{ 2, 5 };

    std::cout << "( " << p.X() << ", " << p.Y() << " )" << std::endl;


    return 0;
}
Note: Even though it is taught often in; OOP centric or even OOP enabled languages, to define 'getters' and 'setters' for member variables. This is bad practice as it often leads to users of types and classes manually mutating the data themselves instead of defining access patterns and stateful transitions through methods or algorithms. If you must use 'getter' or 'setter' access patterns then you member variables should be publicly accessible.
Member Initialisers Lists
You may notice the comma separated 'list' under the constructors declaration. This is called an member initialiser list. It is used to initialise the members of a class from the arguments of the called constructor or from other members of the class. Member initialiser lists are specified between a constructors declaration and its body. Members are initialised in the following order regardless of the order specified by the member initialiser list.
- If the constructor is for the most-derived class, virtual bases are initialized in the order in which they appear in depth-first left-to-right traversal of the base class declarations (left-to-right refers to the appearance in base-specifier lists)
- Then, direct bases are initialized in left-to-right order as they appear in this class's base-specifier list
- Then, non-static data member are initialized in order of declaration in the class definition.
- Finally, the body of the constructor is executed
Constructors and member initializer lists
Default Constructor
Sometimes, you don't know the state a type should by in when it is being initialised. In these cases it is useful to have a fallback state. To achieve this we use a default constructor. This will usually take no parameters.
#include <iostream>

class Point
{
public:

    /// Default Constructor
    constexpr
    Point() noexcept
        : x{ 0 }, y{ 0 }
    { }

    /// Explicit Constructor for initialising `x` and `y`
    explicit constexpr
    Point(int x, int y) noexcept
        : x{ x }, y{ y }
    { }

    constexpr auto
    X() noexcept -> int&
    { return x; }

    constexpr auto
    Y() noexcept -> int&
    { return y; }

private:
    int x;
    int y;

};  /// class Point

auto main() -> int
{
    Point p1{ 2, 5 };
    Point p2{};

    std::cout << "( " << p1.X() << ", " << p1.Y() << " )" << std::endl;
    std::cout << "( " << p2.X() << ", " << p2.Y() << " )" << std::endl;


    return 0;
}
Copy Constructors
Constructors allow for defining custom semantics for common meta-like operations. For example, if you define a constructor that takes a constant reference to another Point, the only thing to can do is copy the data from the other class. This constructor pattern is called Copy Semantics. We can also overload the = operator so we can perform copy assignments.
Let's define a copy constructor for Point.
#include <iostream>

class Point
{
public:

    /// Default Constructor
    constexpr
    Point() noexcept
        : x{ 0 }, y{ 0 }
    { }

    /// Explicit Constructor for initialising `x` and `y`
    explicit constexpr
    Point(int x, int y) noexcept
        : x{ x }, y{ y }
    { }

    /// Copy Constructor
    constexpr Point(const Point& p) noexcept
        : x{ p.x }, y{ p.y }
    { }

    constexpr auto
    X() noexcept -> int&
    { return x; }

    constexpr auto
    Y() noexcept -> int&
    { return y; }

private:
    int x;
    int y;

};  /// class Point

auto main() -> int
{
    Point p1{ 2, 5 };
    Point p2{ p1 };   ///< Copy Constructor Called

    std::cout << "( " << p1.X() << ", " << p1.Y() << " )" << std::endl;
    std::cout << "( " << p2.X() << ", " << p2.Y() << " )" << std::endl;

    p2.X() = 8;
    p2.Y() = 9;

    std::cout << "( " << p1.X() << ", " << p1.Y() << " )" << std::endl;
    std::cout << "( " << p2.X() << ", " << p2.Y() << " )" << std::endl;

    return 0;
}
Move Constructors
While our Point class has gotten pretty sophisticated there is one file base constructor we need in order to complete its baseline functionality. In C++, all data has an owner. We can get pointers and references to data so that other can borrow the data. We can even copy data so that a new owner can have the same values as another however, there is one missing piece. The transfer of ownership, what if we want to give ownership of some data to a new owner. We see this principle with rvalue references. When we initialise an int with a literal; say 1, we are transferring ownership of the data associated with the literal 1 to the named variable. In C++ this is called a move. Moves occur when a constructor (or assignment) of a type is called on a rvalue reference which invokes the class's move constructor. Moves will rip the data of a type out of it and transfer the ownership of the data and resource to the new object, leaving the old owner in a default initialised state (usually). Moves can be induced using the std::move() function from the <utility> header.
Note: Moves of literal types will often invoke a copy over a move because they are primitive types and this cheap to copy. Moves are mostly relevant to more complex types.
#include <iostream>
#include <utility>

class Point
{
public:

    /// Default Constructor
    constexpr
    Point() noexcept
        : x{ 0 }, y{ 0 }
    { }

    /// Explicit Constructor for initialising `x` and `y`
    explicit constexpr
    Point(int x, int y) noexcept
        : x{ x }, y{ y }
    { }

    /// Copy Constructor
    constexpr Point(const Point& p) noexcept
        : x{ p.x }, y{ p.y }
    { }

    /// Move Constructor
    constexpr Point(Point&& p) noexcept
        : x{ std::move(p.x) }, y{ std::move(p.y) }
    {
        p.x = int();
        p.y = int();
    }

    constexpr auto
    X() noexcept -> int&
    { return x; }

    constexpr auto
    Y() noexcept -> int&
    { return y; }

private:
    int x;
    int y;

};  /// class Point

auto main() -> int
{
    Point p1{ 2, 5 };

    std::cout << "( " << p1.X() << ", " << p1.Y() << " )" << std::endl;

    Point p2{ std::move(p1) };   ///< Move Constructor Called

    std::cout << "( " << p1.X() << ", " << p1.Y() << " )" << std::endl;
    std::cout << "( " << p2.X() << ", " << p2.Y() << " )" << std::endl;

    return 0;
}
Destructors
So far we have built a pretty sophisticated type of our own with many ways to construct it however, what happens when it gets destroyed. This will invoke the classes destructor. The destructor is declared the same as the default constructor however, it is prefixed with a tilde ('~') in the constructors name. Destructors are used to properly free resources from the type. Resources include things such as dynamic memory, device handles, web sockets etc. For our Point class our destructor is really a no-op as all of its members are trivial to destruct and will automatically occur. A trivial constructor will look like this.
/// ... Rest of `Point` class's constructors

constexpr ~Point() noexcept {}

/// ... Members variables
RAII
So why have all these means of specifying creation and deletion of objects? One of the core faults of many programs in C is the requirement to explicitly create and destroy resources, even of structures. One of the first things introduced to C++ where constructors and destructors so that the creation of object of a type and its subsequent destruction were tied to the type itself anf could be implicitly handled by the compiler. It also allowed for classes to acquire all resources they needed at the time of construction. This principle is known as 'Resource Acquisition Is Initialisation' or RAII. This means that the lifetime of any resource owned by a class is tied to the lifetime of an instance of that class.
How this works is that a constructor acquires all the required resources at construction meaning that after construction the object must be initialised. Similarly, the destructor releases resources in reverse-acquisition-order to prevent resource leaks. This also means that if a constructor should fail (by throwing an exception), any already acquired resources are released in reverse acquisition order and destructors must never throw.
Classes with member functions named open()/close(), lock()/unlock(), or init()/copyFrom()/destroy()
(or similar, carrying the same semantics meaning) are typical examples of non-RAII classes.
Letting the compiler do the work for you
Because our Point class is superficial and almost trivial, it can be annoying to define all the constructors and when the resources being initialised are trivial. It would be nice to not have to specify every constructor. What if we could make the compiler generate the constructors for us? Well, we can. By just declaring the constructors signature with no member initialiser list or body, we can use the = default suffix specifier indicating for the compiler to generate the constructor for us. We will do this for the default constructor.
/// ... Point details

constexpr Point() noexcept = default;

/// ... Point details
Note: It should be noted that you should only do this if the operation of performed by a particular constructor is trivial and predictable and doesn't require specific set of operations to occur.
You can also disallow the use of a particular constructor entirely by deleting it.
/// ... Point details

constexpr Point(const Point& p) noexcept = delete;  ///< Point objects cannot be copied.

/// ... Point details
Members & Methods
While constructors and destructors ensure resource and lifetime safety for classes they are only half the story. Member functions or methods allow us to define operations that we want to on or using the data help by a class. They allow for stateful modification of data while ensuring type safety. To define a methods for a class you simply define a function within the classes body. Normal rules for naming and overloading apply however methods are able to access all members (function and variable) of the immediate class and any protected and public members of parent classes. In our Point class we already have to members; Point::X() and Point::Y() which return int& of the members Point::x and Point::y respectively.
/// ... Point details

constexpr auto
X() noexcept -> int&
{ return x; }

constexpr auto
Y() noexcept -> int&
{ return y; }

/// ... Point details
Const and Reference Qualifiers
Members can restrict and customize their usage on particular instances of its class through the class objects value category and cv-qualifiers. By postfixing the symbols const, & and && to a member function we can restrict the usage of that member function to instances of the class object to being a constant object and/or having either value category of lvalue or rvalue respectively.
Note: A combination of cv- and ref- qualifiers can be used ie
const&orconst&&but not both
#include <iostream>
#include <utility>

auto print(auto n) -> void
{ std::cout << n << std::endl; }

class A
{
public:

    auto f() & -> int&
    {
        print("lvalue");
        return n;
    }

    auto f() const& -> int
    {
        print("const lvalue");
        return n;
    }

    auto f() && -> int
    {
        print("rvalue");
        return std::move(n);
    }

    auto f() const&& -> int
    {
        print("const rvalue");
        return std::move(n);
    }

private:

    int n = 0;
};

auto main() -> int
{
    A a;
    const A ca;

    a.f();
    std::move(a).f();
    A().f();

    ca.f();
    std::move(ca).f();

    return 0;
}
This
It is useful for a class to be self aware and have some means of referring to itself, for example when working with another instance of the same class in a method it can be ambiguous when you are using members from your instance and from the other objects instance. Classes in C++ implicitly have a member called this. this is a pointer to the current instance of a class in memory. Using this allows for qualified lookup of names for the current object. Like any other pointer it can be dereferenced so that it can be used as a reference or have its members accessed using this->. this can only be used in methods and has the type of the class type the method was called with including cv-qualifications.
/// ... Point details

constexpr auto
X() noexcept -> int&
{ return this->x; }

constexpr auto
Y() noexcept -> int&
{ return this->y; }

/// ... Point details
Operator Overloading
Much like how you can overload operators as free functions, classes can define there own overloads for operators. operator overloads for classes are defined just like regular methods for classes however, the first argument is implicitly this object.
/// ... Point details

constexpr auto
operator+ (const Point& p) noexcept -> Point
{ return Point{ x + p.x, y + p.y }; }

constexpr auto
operator- (const Point& p) noexcept -> Point
{ return Point{ x - p.x, y - p.y }; }

constexpr auto
operator== (const Point& p)
    noexcept -> bool
{ return (x == p.x) && (y == p.y); }

constexpr auto
operator!= (const Point& p)
noexcept -> bool
{ return !(*this == p); }

/// ... Point details
Assignment Overloads
One of the most useful operator overloads we can define for a class is an overload for =; two in fact, one for each of copy semantics and move semantics. This methods work identical to their constructor counterparts except they must have an explicit return type and value, cannot have a member initializer list and must only be defined for a single argument.
/// ... Point details

constexpr auto
operator= (const Point& p) noexcept -> Point&
{
    if (p != *this)
    {
        x = p.x;
        y = p.y;
    }

    return *this;
}

constexpr auto
operator= (Point&& p) noexcept -> Point&
{
    if (p != *this)
    {
        x = std::move(p.x);
        y = std::move(p.y);
    }

    return *this;
}

/// ... Point details
Note: The
if (p != *this)check ensures self assignment does not occur.
Friend Methods
Sometimes it is useful to access the internal private and protected data of a class without having to make it exposed to everyone. This is were friends come in handy. The friend keyword can be attached to nested class forward specifications and functions. This makes free functions able to access and modify the internal data of a class. Friendship is most useful for creating relationships between hierarchal unrelated classes interoperate with each other such as in certain operator overloads.
Notes:
- Friendship is not transitive - A friend of your friend is not your friend
- Friendship is not inherited - Your friends children are not your friends
Here I've defined an overload for << as a friend function. This is because std::ostream is an unrelated type to Point but we want to be able to access the non-public members of a Point object. With this, we can delete the Point::X() and Point::Y() methods.
/// ... Point details

friend auto
operator<< (std::ostream& os, const Point& p)
    noexcept -> std::ostream&
{
    os << "( " << p.x << ", " << p.y << " )";
    return os;
}

/// ... Point details
Dynamic Inheritance
You are able to inherit the members of another class into your own class. This allows for many OOP concepts to be applied such as inheritance and polymorphism. Base classes are specified after the derived classes name specification. All classes can be inherited from (unless declared as final).
Note: OOP principles are not the focus of this series and is only covered lightly. C++ is by no means a Object Oriented language (despite similar naming). Rather C++ supports OOP principles in order to benefit from these principles however, many chapters of the language (Standard Library) will utilise these features and principles in a far more general sense.
#include <iostream>

struct A
{
    int n;
};

struct B : public A
{
    float f;
};

auto main() -> int
{
    A a();
    std::cout << a.n << std::endl;
    a.n = 7;
    std::cout << a.n << std::endl;

    B b();
    std::cout << b.n << std::endl;
    std::cout << b.f << std::endl;
    b.n = 4;
    std::cout << b.n << std::endl;
    std::cout << a.n << std::endl;

    b.f = 8.53464f;
    std::cout << b.f << std::endl;

    return 0;
}
Virtual Methods
A method can be marked as virtual with the virtual specifier. This means that classes that derive this method can override them by specifying them as overridden with the override keyword in the derived class.
#include <iostream>

struct A
{
    virtual void foo();
};

void A::foo() { std::cout << "A::foo()" << std::endl; }

struct B : public A
{
    void foo() override;
};

void B::foo() { std::cout << "B::foo()" << std::endl; }

auto main() -> int
{
    A a;
    a.foo();

    B b;
    b.foo();

    return 0;
}
-
Note:
virtualandoverridemethods cannot have deduced return types -
Note: The definition of virtual functions must be defined separate from the declaration.
Virtual Inheritance
Classes can also inherit base classes virtually. For each base class that is specified as virtual, the most derived object will contain only one sub-object of that virtual base class, even if the class appears many times in the inheritance hierarchy (as long as it is inherited virtual every time)*.
#include <iostream>

struct B
{ int n; };

class X : public virtual B {};
class Y : virtual public B {};
class Z : public B {};

// every object of type AA has one X, one Y, one Z, and two B's:
// one that is the base of Z and one that is shared by X and Y
struct AA : X, Y, Z
{
    AA()
    {
        X::n = 1; // modifies the virtual B sub-object's member
        Y::n = 2; // modifies the same virtual B sub-object's member
        Z::n = 3; // modifies the non-virtual B sub-object's member

        std::cout << X::n << Y::n << Z::n << '\n';
    }
};

auto main() -> int
{
    AA aa;

    return 0;
}
*Note: This is an adaptation (paraphrase) from cppreference
Abstract Classes
Abstract classes are classes which define or inherit at least one 'pure' virtual methods. Pure virtual methods are virtual methods whose declaration are suffixed by the = 0; pure-specifier expression. Abstract classes cannot be instantiated but can be pointer to or referred to.
#include <iostream>

struct Base
{
    virtual void g() = 0;
    virtual ~Base() {}
};

void Base::g() { std::cout << "Base::g()" << std::endl; }

struct A : Base
{
    virtual void g() override;
};

void A::g()
{
    Base::g();
    std::cout << "A::g()" << std::endl;
}

auto main() -> int
{
    // Base b;  ///< Fails `cannot declare variable 'b' to be of abstract type 'Base'`

    A a;
    a.g();

    return 0;
}
Templates
Why templates?
Everything we have learnt about C++ relies on the fact the type of any object must be known at compile time. This can be quite constricting on the kinds of programs we are able to right. Just think back to Assignment 1 where you were sectioned with creating a class called Triple with a single underlying type (either int, float or double). Imagine you create TripleInt but now had to create a class with the same interface but for the other underlying types (float and double in this case) that you did not implement (well some of you may have). This can dramatically increase code duplication. One might think to solve this through class inheritance. Somehow define a common abstract interface that derived classes could inherit from and then override the methods in order to implement the interface for each underlying type. However, this requires more work still as anyone that wants to implement Triple would have to inherit from it and implement the same interface and logic for there own underlying type. Another caveat is this requires every Triple object to have a vtable to there underlying methods resulting in dynamic dispatch of method calling which, is something that has a lot of runtime overhead. The real solution is to have a single interface that can working for any desired type. This is where templates come in.
What are templates?
Templates can be thought of as blueprints for function, variable or class. They allow for defining interfaces in terms of template parameters which can be types or compile-time variables. Templates can then be instantiated for a given set of valid template parameters which results in the function, variable or class being fully defined meaning they can now be instantiated themselves. Templates are created by using a template<> declaration above the definition of a function, variable or class with the template parameters being specified within the angle brackets (<>).
Template Parameters
There are three categories of template parameters; type, non-type and template-template. We wont cover template-template parameters as they are used for advanced specialisation. Type template parameters are template parameters that accept a type as an argument. These are used to create generic functions, variables and classes that can be defined in terms of many different types. These are the most common use of templates. Type arguments are declared as template<typename T> with T being the name of the type argument and will be an alias to the type we later instantiate the template with. Non-type arguments are used to pass values at compile time to a function, variable or class. The type of a non-type template argument must be explicitly declared eg. template<int N>, Non-type template arguments are constant and thus cannot be mutated. Here is an example of a template declaration that takes type and non-type template arguments.
template<typename T, std::size_t N>
/// ... template entity details
This is the template signature of std::array.
Template Functions
To begin, we will look at defining template functions. Template functions are defined identically to regular functions except that before the functions signature we use a template declaration. As we can see below, regardless of the type of the array or the its size we can call print<>(). Also, thanks to C++17 we don't have to call it with specific template arguments as the can be deduced from the array itself.
#include <array>
#include <iostream>
#include <string>

template<typename T, std::size_t N>
auto print(const std::array<T, N>& arr) -> void
{
    std::cout << "[ ";

    for (auto n { N }; const auto& e : arr)
        if (--n > 0)
            std::cout << e << ", ";
        else
            std::cout << e;

    std::cout << " ]" << std::endl;
}

auto main() -> int
{
    auto a1 = std::to_array<int>({ 1, 2, 3, 4, 5 });
    auto a2 = std::to_array<double>({ 1.576, 0.0002, 3756348.34646, 5e-14, 465.7657, 358.0, 237437.456756 });
    auto a3 = std::to_array<std::string>({ "John", "Anna", "Grace", "Bob" });

    print<int, 5>(a1);  ///< Explicit template argument instantiation
    print(a2);          ///< template argument deduction (same below)
    print(a3);

    return 0;
}
Template Classes
Template classes allow us to define generic types. Almost all of C++ standard library types are template classes, even std::cout which is a static instance of the class std::basic_ostream<char>. Template classes allow us to create a blueprint of a class and then instantiate the class definition which a particular type. We can see this with out Point class from the previous section section. Now we define Point in terms of a template type T which we will specify later. This allows us to create Point objects of float and double as well while still only defining a single interface.
Note: For copy and move constructors, the template type parameters can be elided as copy and move semantics must preserve the type. Converting constructors (a type of explicit constructor) are used to convert between template types.
#include <iostream>
#include <utility>

template<typename T>
class Point
{
public:
    /// Default Constructor (Compiler Created)
    constexpr Point() = default;

    explicit constexpr
    Point(T x, T y) noexcept
        : x{ x }, y{ y }
    { }

    constexpr Point(const Point& p) noexcept
    : x{ p.x }, y{ p.y }
    { }

    constexpr Point(Point&& p) noexcept
        : x{ std::move(p.x) }
        , y{ std::move(p.y) }
    { p = Point(); }

    constexpr auto
    operator= (const Point& p) noexcept -> Point&
    {
        if (p != *this)
        {
            x = p.x;
            y = p.y;
        }

        return *this;
    }

    constexpr auto
    operator= (Point&& p) noexcept -> Point&
    {
        if (p != *this)
        {
            x = std::move(p.x);
            y = std::move(p.y);
        }

        return *this;
    }

    ~Point() noexcept = default;

    constexpr auto
    operator+ (const Point& p) noexcept -> Point
    { return Point{ x + p.x, y + p.y }; }

    constexpr auto
    operator- (const Point& p) noexcept -> Point
    { return Point{ x - p.x, y - p.y }; }

    constexpr auto
    operator== (const Point& p)
        noexcept -> bool
    { return (x == p.x) && (y == p.y); }

    constexpr auto
    operator!= (const Point& p)
    noexcept -> bool
    { return !(*this == p); }

    friend auto
    operator<< (std::ostream& os, const Point& p)
        noexcept -> std::ostream&
    {
        os << "( "
        << p.x
        << ", "
        << p.y
        << " )";

        return os;
    }

private:
    T x;
    T y;
};


auto main() -> int
{
    auto p1 = Point<int>{ 2, 5 };
    auto p2 = Point{ 6, 7 };
    auto p3 = p1 + p2;
    auto p4 = Point<double>{ 5.6 , -0.007 };
    auto p5 = Point{ 4.576 , 24.012 };
    auto p6 = p4 - p5;

    std::cout << p1 << std::endl;
    std::cout << p2 << std::endl;
    std::cout << p3 << std::endl;
    std::cout << p4 << std::endl;
    std::cout << p5 << std::endl;
    std::cout << p6 << std::endl;

    return 0;
}
Note: We could define
Point::xandPoint::yto be different types but this is unnecessary for now.
Class Template Methods
Just like how free functions can be templated, we can also specify methods of classes to be templated. This allows use to customize classes methods not just in terms of its template types and parameters but also in terms of templates of objects that we may need to pass to the method of a class. This useful for creating overloaded methods that are not just customized by type but also the template signature pattern they have.
You may have noticed that I did not add or subtract two Point of different type in the previous example. This is because + and - are only defined for Point of the same template. We can fix this with a templated method. There are a few other details we have to add in order for this to work. First we add the template specification for the other Point<U> argument (we can do the same for == and !=). We then us std::common_type<T...> to help deduce the arithmetic (an other) promotions between types. This is for promotions of say int to double. Finally, because the class Point<U> is a different instantiation of Point to this (ie. Point<T>), we have to specify all Point<U> of any U type as a friend class to Point<T>.
/// ... Point details

template<typename U>
constexpr auto
operator+ (const Point<U>& p)
    noexcept -> Point<typename std::common_type<T, U>::type>
{ return Point<typename std::common_type<T, U>::type>{ x + p.x, y + p.y }; }

template<typename U>
constexpr auto
operator- (const Point<U>& p)
    noexcept -> Point<typename std::common_type<T, U>::type>
{ return Point<typename std::common_type<T, U>::type>{ x - p.x, y - p.y }; }

template<typename U>
constexpr auto
operator== (const Point<U>& p)
    noexcept -> bool
{ return (x == p.x) && (y == p.y); }

template<typename U>
constexpr auto
operator!= (const Point<U>& p)
noexcept -> bool
{ return !(*this == p); }

/// ... Point details

private:

    T x;
    T y;

    template<typename U>
    friend class Point;
Note: The template argument names must be different then the outer template classes template argument names as this name (symbol) is still very much in scope.
Section 2.6: Template Variables
Is is also possible to define variables as templates. This allows for variables to take on different forms depending on the underlying type. Template variables are typically static or constexpr free variables or static members of a class. A common use of template variables is mathematical constants that have different underlying types. We can see this in use with e<T> and std::numeric_limits<T> members.
#include <iomanip>
#include <iostream>
#include <numeric>

template<typename T>
constexpr T e = T(2.7182818284590452353602874713527);

auto main() -> int
{
    std::cout << std::setprecision(std::numeric_limits<long double>::max_digits10);
    std::cout << "True e            = 2.7182818284590452353602874713527" << std::endl;
    std::cout << "e<long double>    = " << e<long double> << std::endl;
    std::cout << "e<double>         = " << e<double> << std::endl;
    std::cout << "e<float>          = " << e<float> << std::endl;
    std::cout << "e<int>            = " << e<int> << std::endl;
    std::cout << "e<char>           = " << e<char> << std::endl;

    return 0;
}
Note: Consequently, this is a good showcase of how quickly
floatanddoubleloose precision.
Template Metaprogramming Basics
We've seen a bit of metaprogramming in C++ already. Metaprogramming is the ability to influence the structure of your code at compile time using the language itself. Templates are a simple form of metaprogramming and allow us to change the behaviour of our code based on the types and values we instantiate our templates with. Using templates, the C++ standard library has many metaprogramming objects that allow us to customize our code even more. Most of the standard libraries metaprogramming objects are in the form of type analysis from the <type_traits> header. These allow us to inspect the properties of any type (template or known) and customize based on the results. There is much more to metaprogramming that is beyond the scope of this course.
Generics Programming
Generic programming is a style of programming that involves defining algorithms and data structures in terms of generic types. This allows the behaviour of the program to be adapted according to the types, which can be resolved at compile or pre-process time as opposed to through runtime resolution. It also allows for programs to work in a more adaptive way so that, regardless of the type that used at instantiation time, the program will adapt and work accordingly.
Parameter Packs
Chapter of C++ generic programming facilities that go hand-in-hand with templates is template parameter packs. These are heterogenous objects that can contain an arbitrary number of elements that gets instantiated at compile time. Parameter packs allows for C++ to generalize the idea passing an around an arbitrary number of different typed arguments. This can be utilised by template functions and classes alike. Parameter packs can also have a single type which indicates an arbitrary number of values with the same type. Parameter packs are denoted by an ellipsis Ts... where Ts is either a parameter pack template type parameter from the template declaration of the form template<typename... Ts>, or the single type of a value parameter pack with the function signature of the form f(int... ints). We can combine these two notations to create functions of variadic type arguments f(Ts... ts) where Ts is a template type parameter pack and ts is a template value parameter pack.
#include <iostream>

auto tprintf(const char* format) -> void  ///< Base function
{ std::cout << format; }

template<typename T, typename... Args>
auto tprintf(const char* format, T value, Args&&... args) -> void  ///< recursive variadic function
{
    for (; *format != '\0'; format++)
    {
        if (*format == '%')
        {
            std::cout << value;
            tprintf(format + 1, std::forward<Args>(args)...);  ///< recursive call, `std::forward` is called on the expanded pack
            return;
        }
        std::cout << *format;
    }
}

auto main() -> int
{
    tprintf("% world% % - %\n", "Hello", '!', 123, -0.3575);

    return 0;
}
Parameter pack size
The size of a pack can be obtained by using the sizeof... operator. This will return a std::size_t with the number of either types or values in the parameter pack.
#include <iostream>

template<typename... Args>
auto print_size(Args&&... args) -> void
{ std::cout << sizeof...(args) << std::endl; }

auto main() -> int
{
    print_size(2, 0.6, 0.5313f, "Hello");

    return 0;
}
Fold Expressions
Fold expressions allow for unary and binary operations to be performed on packs of elements. This allows us to 'loop' through a pack and perform compile type computation such as sums, printing and more. Fold expressions can operate just on the pack ot can have an initialiser that is separate from the pack.
#include <iostream>

template<typename... Args>
auto sum(Args&&... args) -> std::common_type<Args...>::type
{ return (... + args); }

template<typename T, typename... Args>
auto product(T init, Args&&... args) -> std::common_type<T, Args...>::type
{ return (init * ... * args); }

auto main() -> int
{
    std::cout << sum(2, 0.6, 0.5313f) << std::endl;
    std::cout << product(0, 6, 1.356, 90.5313f) << std::endl;
    std::cout << product(6, 1.356, 90.5313f) << std::endl;

    return 0;
}
Tuples
Because of the introduction of parameter packs in C++11, C++ was finally able to have a tuple data structure called std::tuple. Tuples are a formalisation of parameter packs, tieing a heterogeneous pack of types to a heterogeneously types pack of values. Tuples are incredibly powerful in programming as they formalise the idea of being able to cluster together elements of any type where the types might not be immediately be known at definition. This is; normally, incredibly difficult to do in a typed language like C++ with the solution before being to create aggregate classes to store the required data together. Tuples make this far easier and can be used anywhere. ANother benefit is any tuple has a common interface allowing anyone to manipulate them as they need. std::tuple structure is immutable however, its elements can be modified in place making them extremely versatile. std::tuple comes with a host of powerful helper functions and classes that allow for compile time inspection of a tuples size, element type and value access, creation of std::tuple and destructuring.
#include <iostream>
#include <tuple>
#include <utility>

template<typename Tup, std::size_t... I>
auto print(const Tup& t, std::index_sequence<I...>) -> void
{
    std::cout << "( ";

    (..., (std::cout << (I == 0 ? "" : ", ") << std::get<I>(t)) );

    std::cout << " )" << std::endl;
}


template<typename... Ts, std::size_t... I>
auto print(const std::tuple<Ts...>& t) -> void
{ print(t, std::make_index_sequence<sizeof...(Ts)>()); }


auto main() -> int
{
    auto t1 = std::tuple<int, double>{ 2, 0.6 };        ///< Types explicitly declared
    auto t2 = std::tuple{ 15.2f, "Hello" };             ///< With type deduction
    auto t3 = std::make_tuple("Bye", 15, 78, 343.546);  ///< With type deducing maker

    print(t1);
    print(t2);
    print(t3);

    return 0;
}
Pairs
It is often common place to just need to return a two values of possibly different types and not have to go through the hassle of uses std::tuple generic (yet admittedly cumbersome) access methods. This is where std::pair comes in. std::pair is a specific use case of a std::tuple. Accessing the elements of a pair can be done directly using class dot access of the members name.
#include <iostream>
#include <utility>

template<typename F, typename S>
auto print(const std::pair<F, S>& p) -> void
{
    std::cout << "( " << p.first << ", " << p.second << " )" << std::endl;
}

auto main() -> int
{
    auto p1 = std::pair<int, double>{ 2, 0.6 };     ///< Types explicitly declared
    auto p2 = std::pair{ 15.2f, "Hello" };          ///< With type deduction
    auto p3 = std::make_pair(78, 343.546);          ///< With type deducing maker

    print(p1);
    print(p2);
    print(p3);

    return 0;
}
Destructuring
Since C++17, std::pair and std::tuple can be accessed using structured bindings. This can make it easier to manipulate the data of a pair, tuple, arrays, slices and even aggregate classes. Structured bindings are declared by an auto specifier (which can have reference, storage and cv qualifiers) followed by square brackets containing comma separated variable names that will bind to the sequence of values ie. /*cv-qual (optional) */auto/*& or && (optional)*/ [/* names */] = /* tuple-like */.
#include <iostream>
#include <tuple>

auto main() -> int
{

    auto t = std::make_tuple(78, 343.546, "Hello");
    auto& [i1, f1, s1] = t;

    std::cout << "( " << i1 << ", " << f1 << ", " << s1 << " )" << std::endl;

    i1 = 576876;

    const auto& [i2, f2, s2] = t;
    std::cout << "( " << i2 << ", " << f2 << ", " << s2 << " )" << std::endl;

    return 0;
}
Concepts
Limitations to templates
Templates are extremely powerful allow us to create reusable and extendible code however there is a caveat to this. Take for example our Point class from Sections 1-2. Point just takes a single type T. This can be absolutely any type. This can become a problem though later for the user. Say we have a Point<std::string>. This will cause an error for the user of our Point class if they try to take two Point<std::string> because - is not supported by std::string. This can be a major problem as the error produced can be ambiguous to the user and require looking at the source code in depth to diagnose.
/// ... Point implementation

using namespace std::literals;

auto main() -> int
{
   auto p1 = Point{ "Hello"s, "Hi"s };
   auto p2 = Point{ "Goobye"s, "Bye"s };

   auto p3 = p1 - p2;

   std::cout << p3 << std::endl;

    return 0;
}
The error output (by GCC). As we can see it is verbose and delves into many of the attempts to make it work, and this is for a simple class.
<source>: In instantiation of 'constexpr Point<typename std::common_type<T, U>::type> Point<T>::operator-(const Point<U>&) [with U = std::__cxx11::basic_string<char>; T = std::__cxx11::basic_string<char>; typename std::common_type<T, U>::type = std::__cxx11::basic_string<char>]':
<source>:96:19:   required from here
<source>:61:62: error: no match for 'operator-' (operand types are 'std::__cxx11::basic_string<char>' and 'const std::__cxx11::basic_string<char>')
   61 |     { return Point<typename std::common_type<T, U>::type>{ x - p.x, y - p.y }; }
      |                                                            ~~^~~~~
In file included from /opt/compiler-explorer/gcc-12.2.0/include/c++/12.2.0/string:47,
                 from /opt/compiler-explorer/gcc-12.2.0/include/c++/12.2.0/bits/locale_classes.h:40,
                 from /opt/compiler-explorer/gcc-12.2.0/include/c++/12.2.0/bits/ios_base.h:41,
                 from /opt/compiler-explorer/gcc-12.2.0/include/c++/12.2.0/ios:42,
                 from /opt/compiler-explorer/gcc-12.2.0/include/c++/12.2.0/ostream:38,
                 from /opt/compiler-explorer/gcc-12.2.0/include/c++/12.2.0/iostream:39,
                 from <source>:1:
/opt/compiler-explorer/gcc-12.2.0/include/c++/12.2.0/bits/stl_iterator.h:621:5: note: candidate: 'template<class _IteratorL, class _IteratorR> constexpr decltype ((__y.base() - __x.base())) std::operator-(const reverse_iterator<_IteratorL>&, const reverse_iterator<_IteratorR>&)'
  621 |     operator-(const reverse_iterator<_IteratorL>& __x,
      |     ^~~~~~~~
/opt/compiler-explorer/gcc-12.2.0/include/c++/12.2.0/bits/stl_iterator.h:621:5: note:   template argument deduction/substitution failed:
<source>:61:62: note:   'std::__cxx11::basic_string<char>' is not derived from 'const std::reverse_iterator<_IteratorL>'
   61 |     { return Point<typename std::common_type<T, U>::type>{ x - p.x, y - p.y }; }
      |                                                            ~~^~~~~
/opt/compiler-explorer/gcc-12.2.0/include/c++/12.2.0/bits/stl_iterator.h:1778:5: note: candidate: 'template<class _IteratorL, class _IteratorR> constexpr decltype ((__x.base() - __y.base())) std::operator-(const move_iterator<_IteratorL>&, const move_iterator<_IteratorR>&)'
 1778 |     operator-(const move_iterator<_IteratorL>& __x,
      |     ^~~~~~~~
/opt/compiler-explorer/gcc-12.2.0/include/c++/12.2.0/bits/stl_iterator.h:1778:5: note:   template argument deduction/substitution failed:
<source>:61:62: note:   'std::__cxx11::basic_string<char>' is not derived from 'const std::move_iterator<_IteratorL>'
   61 |     { return Point<typename std::common_type<T, U>::type>{ x - p.x, y - p.y }; }
      |                                                            ~~^~~~~
<source>:61:71: error: no match for 'operator-' (operand types are 'std::__cxx11::basic_string<char>' and 'const std::__cxx11::basic_string<char>')
   61 |     { return Point<typename std::common_type<T, U>::type>{ x - p.x, y - p.y }; }
      |                                                                     ~~^~~~~
/opt/compiler-explorer/gcc-12.2.0/include/c++/12.2.0/bits/stl_iterator.h:621:5: note: candidate: 'template<class _IteratorL, class _IteratorR> constexpr decltype ((__y.base() - __x.base())) std::operator-(const reverse_iterator<_IteratorL>&, const reverse_iterator<_IteratorR>&)'
  621 |     operator-(const reverse_iterator<_IteratorL>& __x,
      |     ^~~~~~~~
/opt/compiler-explorer/gcc-12.2.0/include/c++/12.2.0/bits/stl_iterator.h:621:5: note:   template argument deduction/substitution failed:
<source>:61:71: note:   'std::__cxx11::basic_string<char>' is not derived from 'const std::reverse_iterator<_IteratorL>'
   61 |     { return Point<typename std::common_type<T, U>::type>{ x - p.x, y - p.y }; }
      |                                                                     ~~^~~~~
/opt/compiler-explorer/gcc-12.2.0/include/c++/12.2.0/bits/stl_iterator.h:1778:5: note: candidate: 'template<class _IteratorL, class _IteratorR> constexpr decltype ((__x.base() - __y.base())) std::operator-(const move_iterator<_IteratorL>&, const move_iterator<_IteratorR>&)'
 1778 |     operator-(const move_iterator<_IteratorL>& __x,
      |     ^~~~~~~~
/opt/compiler-explorer/gcc-12.2.0/include/c++/12.2.0/bits/stl_iterator.h:1778:5: note:   template argument deduction/substitution failed:
<source>:61:71: note:   'std::__cxx11::basic_string<char>' is not derived from 'const std::move_iterator<_IteratorL>'
   61 |     { return Point<typename std::common_type<T, U>::type>{ x - p.x, y - p.y }; }
      |                                                                     ~~^~~~~
<source>:61:77: error: no matching function for call to 'Point<std::__cxx11::basic_string<char> >::Point(<brace-enclosed initializer list>)'
   61 |     { return Point<typename std::common_type<T, U>::type>{ x - p.x, y - p.y }; }
      |                                                                             ^
<source>:20:15: note: candidate: 'constexpr Point<T>::Point(Point<T>&&) [with T = std::__cxx11::basic_string<char>]'
   20 |     constexpr Point(Point&& p) noexcept
      |               ^~~~~
<source>:20:15: note:   candidate expects 1 argument, 2 provided
<source>:16:15: note: candidate: 'constexpr Point<T>::Point(const Point<T>&) [with T = std::__cxx11::basic_string<char>]'
   16 |     constexpr Point(const Point& p) noexcept
      |               ^~~~~
<source>:16:15: note:   candidate expects 1 argument, 2 provided
<source>:12:5: note: candidate: 'constexpr Point<T>::Point(T, T) [with T = std::__cxx11::basic_string<char>]'
   12 |     Point(T x, T y) noexcept
      |     ^~~~~
<source>:12:5: note:   conversion of argument 1 would be ill-formed:
<source>:9:15: note: candidate: 'constexpr Point<T>::Point() [with T = std::__cxx11::basic_string<char>]'
    9 |     constexpr Point() = default;
      |               ^~~~~
<source>:9:15: note:   candidate expects 0 arguments, 2 provided
ASM generation compiler returned: 1
<source>: In instantiation of 'constexpr Point<typename std::common_type<T, U>::type> Point<T>::operator-(const Point<U>&) [with U = std::__cxx11::basic_string<char>; T = std::__cxx11::basic_string<char>; typename std::common_type<T, U>::type = std::__cxx11::basic_string<char>]':
<source>:96:19:   required from here
<source>:61:62: error: no match for 'operator-' (operand types are 'std::__cxx11::basic_string<char>' and 'const std::__cxx11::basic_string<char>')
   61 |     { return Point<typename std::common_type<T, U>::type>{ x - p.x, y - p.y }; }
      |                                                            ~~^~~~~
In file included from /opt/compiler-explorer/gcc-12.2.0/include/c++/12.2.0/string:47,
                 from /opt/compiler-explorer/gcc-12.2.0/include/c++/12.2.0/bits/locale_classes.h:40,
                 from /opt/compiler-explorer/gcc-12.2.0/include/c++/12.2.0/bits/ios_base.h:41,
                 from /opt/compiler-explorer/gcc-12.2.0/include/c++/12.2.0/ios:42,
                 from /opt/compiler-explorer/gcc-12.2.0/include/c++/12.2.0/ostream:38,
                 from /opt/compiler-explorer/gcc-12.2.0/include/c++/12.2.0/iostream:39,
                 from <source>:1:
/opt/compiler-explorer/gcc-12.2.0/include/c++/12.2.0/bits/stl_iterator.h:621:5: note: candidate: 'template<class _IteratorL, class _IteratorR> constexpr decltype ((__y.base() - __x.base())) std::operator-(const reverse_iterator<_IteratorL>&, const reverse_iterator<_IteratorR>&)'
  621 |     operator-(const reverse_iterator<_IteratorL>& __x,
      |     ^~~~~~~~
/opt/compiler-explorer/gcc-12.2.0/include/c++/12.2.0/bits/stl_iterator.h:621:5: note:   template argument deduction/substitution failed:
<source>:61:62: note:   'std::__cxx11::basic_string<char>' is not derived from 'const std::reverse_iterator<_IteratorL>'
   61 |     { return Point<typename std::common_type<T, U>::type>{ x - p.x, y - p.y }; }
      |                                                            ~~^~~~~
/opt/compiler-explorer/gcc-12.2.0/include/c++/12.2.0/bits/stl_iterator.h:1778:5: note: candidate: 'template<class _IteratorL, class _IteratorR> constexpr decltype ((__x.base() - __y.base())) std::operator-(const move_iterator<_IteratorL>&, const move_iterator<_IteratorR>&)'
 1778 |     operator-(const move_iterator<_IteratorL>& __x,
      |     ^~~~~~~~
/opt/compiler-explorer/gcc-12.2.0/include/c++/12.2.0/bits/stl_iterator.h:1778:5: note:   template argument deduction/substitution failed:
<source>:61:62: note:   'std::__cxx11::basic_string<char>' is not derived from 'const std::move_iterator<_IteratorL>'
   61 |     { return Point<typename std::common_type<T, U>::type>{ x - p.x, y - p.y }; }
      |                                                            ~~^~~~~
<source>:61:71: error: no match for 'operator-' (operand types are 'std::__cxx11::basic_string<char>' and 'const std::__cxx11::basic_string<char>')
   61 |     { return Point<typename std::common_type<T, U>::type>{ x - p.x, y - p.y }; }
      |                                                                     ~~^~~~~
/opt/compiler-explorer/gcc-12.2.0/include/c++/12.2.0/bits/stl_iterator.h:621:5: note: candidate: 'template<class _IteratorL, class _IteratorR> constexpr decltype ((__y.base() - __x.base())) std::operator-(const reverse_iterator<_IteratorL>&, const reverse_iterator<_IteratorR>&)'
  621 |     operator-(const reverse_iterator<_IteratorL>& __x,
      |     ^~~~~~~~
/opt/compiler-explorer/gcc-12.2.0/include/c++/12.2.0/bits/stl_iterator.h:621:5: note:   template argument deduction/substitution failed:
<source>:61:71: note:   'std::__cxx11::basic_string<char>' is not derived from 'const std::reverse_iterator<_IteratorL>'
   61 |     { return Point<typename std::common_type<T, U>::type>{ x - p.x, y - p.y }; }
      |                                                                     ~~^~~~~
/opt/compiler-explorer/gcc-12.2.0/include/c++/12.2.0/bits/stl_iterator.h:1778:5: note: candidate: 'template<class _IteratorL, class _IteratorR> constexpr decltype ((__x.base() - __y.base())) std::operator-(const move_iterator<_IteratorL>&, const move_iterator<_IteratorR>&)'
 1778 |     operator-(const move_iterator<_IteratorL>& __x,
      |     ^~~~~~~~
/opt/compiler-explorer/gcc-12.2.0/include/c++/12.2.0/bits/stl_iterator.h:1778:5: note:   template argument deduction/substitution failed:
<source>:61:71: note:   'std::__cxx11::basic_string<char>' is not derived from 'const std::move_iterator<_IteratorL>'
   61 |     { return Point<typename std::common_type<T, U>::type>{ x - p.x, y - p.y }; }
      |                                                                     ~~^~~~~
<source>:61:77: error: no matching function for call to 'Point<std::__cxx11::basic_string<char> >::Point(<brace-enclosed initializer list>)'
   61 |     { return Point<typename std::common_type<T, U>::type>{ x - p.x, y - p.y }; }
      |                                                                             ^
<source>:20:15: note: candidate: 'constexpr Point<T>::Point(Point<T>&&) [with T = std::__cxx11::basic_string<char>]'
   20 |     constexpr Point(Point&& p) noexcept
      |               ^~~~~
<source>:20:15: note:   candidate expects 1 argument, 2 provided
<source>:16:15: note: candidate: 'constexpr Point<T>::Point(const Point<T>&) [with T = std::__cxx11::basic_string<char>]'
   16 |     constexpr Point(const Point& p) noexcept
      |               ^~~~~
<source>:16:15: note:   candidate expects 1 argument, 2 provided
<source>:12:5: note: candidate: 'constexpr Point<T>::Point(T, T) [with T = std::__cxx11::basic_string<char>]'
   12 |     Point(T x, T y) noexcept
      |     ^~~~~
<source>:12:5: note:   conversion of argument 1 would be ill-formed:
<source>:9:15: note: candidate: 'constexpr Point<T>::Point() [with T = std::__cxx11::basic_string<char>]'
    9 |     constexpr Point() = default;
      |               ^~~~~
<source>:9:15: note:   candidate expects 0 arguments, 2 provided
Execution build compiler returned: 1
To address this C++20 introduced concepts. A mechanism for imposing constraints on types.
What is a Concept?
A concepts is a set of conditions and requirements imposed on a type that is checked at compile time and evaluates as a Boolean. Before C++20, template metaprogramming and SFINAE where used to statically impose constraints on types but they had limitations and were highly verbose. Concepts allow us to define syntactic constraints on a template type and then impose those constraints on other types. Concepts are introduced using a template declaration followed by a concept declaration (similar to a class declaration but replace the keyword class with concept). Concepts can be composed of other concepts using || and && (holding similar semantics to there Boolean equivalents). It is difficult to create meaningful concepts as one, they are very new to both C++ but also programming in general, instead try and use the concepts defined by the standard library; from the <concepts> header, first and impose them on a case by case basis using the techniques we are going to learn below.
#include <concepts>
#include <iomanip>
#include <iostream>
#include <string>
#include <utility>

/// Concept defining a type that can be hashed using `std::hash`
template<typename H>
concept Hashable = requires (H a)
{
    { std::hash<H>{}(a) } -> std::convertible_to<std::size_t>;
};

struct NotHashable {};

using namespace std::literals;

auto main() -> int
{
   std::cout << std::boolalpha;
   std::cout << "Is Hashable<int>:          " << Hashable<int> << "  : std::hash<int>{}(69)               = " << std::hash<int>{}(69) << std::endl;
   std::cout << "Is Hashable<float>:        " << Hashable<float> << "  : std::hash<float>{}(4.5756f)        = " << std::hash<float>{}(4.5756f) << std::endl;
   std::cout << "Is Hashable<double>:       " << Hashable<double> << "  : std::hash<double>{}(-0.0036565764) = " << std::hash<double>{}(-0.0036565764) << std::endl;
   std::cout << "Is Hashable<std::string>:  " << Hashable<std::string> << "  : std::hash<std::string>{}()         = " << std::hash<std::string>{}(""s) << std::endl;
   std::cout << "Is Hashable<NotHashable>:  " << Hashable<NotHashable> << std::endl;

    return 0;
}
Constrained templates
Concepts are easiest to use when constraining templates type parameters. Instead of the using the keyword typename when can instead use a concept. This will impose the rules on the template type at the point of instantiation. We can see this best with our Point class. Being that a 'point' is a numerical value in a field; say coordinates on a cartesian plane we might want to restrict the type parameter T of Point to a number type. C++'s concepts library already has a concept for this called std::integral. Lets impose this new template type parameter constraint on T.
template<std::integral T>
class Point
{
    /// ... implementation
};

using namespace std::literals;

auto main() -> int
{
   auto p1 = Point{ "Hello"s, "Hi"s };

    return 0;
}
While C++ error messages aren't the most readable as the compiler tries many different things, amongst the errors is one stating 'template constraint failed ...'. This indicates to use that std::string is not an appropriate type for Point without needed to try and subtract two Point<std::string> or any other operation on it. The instantiation failed at construction.
# ... other error info

<source>: In substitution of 'template<class T> Point(T, T)-> Point<T> [with T = std::__cxx11::basic_string<char>]':
<source>:94:37:   required from here
<source>:13:5: error: template constraint failure for 'template<class T>  requires  integral<T> class Point'
<source>:13:5: note: constraints not satisfied
In file included from <source>:1:
/opt/compiler-explorer/gcc-12.2.0/include/c++/12.2.0/concepts: In substitution of 'template<class T>  requires  integral<T> class Point [with T = std::__cxx11::basic_string<char>]':
<source>:13:5:   required by substitution of 'template<class T> Point(T, T)-> Point<T> [with T = std::__cxx11::basic_string<char>]'
<source>:94:37:   required from here
/opt/compiler-explorer/gcc-12.2.0/include/c++/12.2.0/concepts:100:13:   required for the satisfaction of 'integral<T>' [with T = std::__cxx11::basic_string<char, std::char_traits<char>, std::allocator<char> >]
/opt/compiler-explorer/gcc-12.2.0/include/c++/12.2.0/concepts:100:24: note: the expression 'is_integral_v<_Tp> [with _Tp = std::__cxx11::basic_string<char, std::char_traits<char>, std::allocator<char> >]' evaluated to 'false'
  100 |     concept integral = is_integral_v<_Tp>;

# ... Other error info
Requires expressions
The is a slight problem with our reformed Point class. It no longer can accept floating point types as they are not considered integrals in C++. Instead we need to constraint Point to a type T by creating a conjunction (&&) or disjunction (||) of multiple concepts. To do this we use a requires clause. Requires clause are introduced just after (often syntactically below) a template declaration and consist of a list of requirements in the form of a Boolean concept expression. We can create a disjunction of the std::integral and std::floating_point allowing floating point types and integral types to be valid T for Point.
template<typename T>
    requires std::integral<T> || std::floating_point<T>
class Point
{
    /// ... implementation
};

auto main() -> int
{
   auto p1 = Point{ 0.567, 45.657 };
   auto p2 = Point{ 1, 9 };

   std::cout << p1 + p2 << std::endl;
   std::cout << p1 - p2 << std::endl;

    return 0;
}
Note: We could specify a more desirable constraint using the
std::is_arithmetic_vtype trait as a concept combines the two ideas better semantically but fine tuningPointcan be an exercise for you.
Requires expression
Sometimes more complicated requirements need to be specified in order to fine the allowed behaviour of the program. Require expressions allow for mock values of template types to bne created and specify patterns that a value of the type parameter must provide. In the case of our Point class, we may want to also allow other types that support + and - binary operator overloads. Because this check depends on the type parameter of another Point we can't declare it at the requires clause at the template declaration of Point. Instead we need to create a requires clause at the operator overloads template declaration. We then declare our requires expression, enforcing the semantic and syntactic rules on the type. We can declare as many of these rules in a requires expression as we like. For Point we will ensure that for a value of type T called a and for a value of type U of name b, a + b and a - b is valid.
/// ... Point details

template<typename U>
    requires requires (T a, U b)
    {
        a + b;
    }
constexpr auto
operator+ (const Point<U>& p)
    noexcept -> Point<typename std::common_type<T, U>::type>
{ return Point<typename std::common_type<T, U>::type>{ x + p.x, y + p.y }; }

template<typename U>
    requires requires (T a, U b)
    {
        a - b;
    }
constexpr auto
operator- (const Point<U>& p)
    noexcept -> Point<typename std::common_type<T, U>::type>
{ return Point<typename std::common_type<T, U>::type>{ x - p.x, y - p.y }; }

/// ... Point details
Note: The double
requires requiresnotation is called an ad-hoc constraint. The firstrequiresintroduces a requires clause which can have concepts, conjunctions, disjunctions or requires expressions. The secondrequireintroduces a requires expression which takes a similar syntactic form to functions.
Compound requirements
We can also apply constraints on the expressions within a requires expression, ensuring the types or properties these expressions will have. These are called compound expressions, which we create by wrapping our individual rules from a requires expression in braces and use a -> followed by a constraint on the return type of the expression.
/// ... Point details

template<typename U>
    requires requires (T a, U b)
    {
        { a + b } -> std::same_as<typename std::common_type<T, U>::type>;
    }
constexpr auto
operator+ (const Point<U>& p)
    noexcept -> Point<typename std::common_type<T, U>::type>
{ return Point<typename std::common_type<T, U>::type>{ x + p.x, y + p.y }; }

template<typename U>
    requires requires (T a, U b)
    {
        { a - b } -> std::same_as<typename std::common_type<T, U>::type>;
    }
constexpr auto
operator- (const Point<U>& p)
    noexcept -> Point<typename std::common_type<T, U>::type>
{ return Point<typename std::common_type<T, U>::type>{ x - p.x, y - p.y }; }

/// ... Point details
Constrained variables
We can also use concepts to constrain variables declared with the auto specifier. Gives a more robust option for constraining function and method parameters without the need for template declarations or requires clauses.
#include <concepts>
#include <iostream>

auto println(const std::integral auto& v) -> void
{ std::cout << v << std::endl; }

auto main() -> int
{
    println(9);
    // println(46.567);  ///< fails

    return 0;
}
Note: We've applied concepts at the user definition level for classes. These concepts [ideas] can be applied to template functions as well. They are also the basic for defining your own concepts.
Task 2 : Templated Triple
Having learnt about classes, templates and concepts I want you to reimplement your Triple class so that it behaves more like a standard type and has a more sophisticated implementation and interface. Similar to Assignment 1, you will submit using a pull request on GitHub to this repo.
Requirements
- Must be templated for a single type
T - A way to add two points of different
T - A way to subtract two points of different
T - A way to multiply a point by a scalar of different
T - A way to divide a point by a scalar of different
T - A way to be print a formatted output using
std::cout - Using concepts ensure that
Tsatisfies only:std::integral
- or
std::floating_point
- or
TandUsupportT + UT - UU * TT / U
- and doesn't support
is_pointeris_referenceis_enumetc.
- and
Tsupports<<to anstd::ostream
Note: Let me know if the concept requirements are confusing
Bonus
- A way to be created using input from
std::cin - Allow three different type parameter; say
T,UandVfor the member variables while still maintaining the base requirements [hard]
Submitting
You can use Godbolt or bpt to build and test your struct. Once you have created your implementation:
- Clone this repo using
git clone https://github.com/MonashDeepNeuron/HPP.git. - Create a new branch using
git checkout -b triple/<your-name>. - Create a folder in the
/submissionsdirectory with your name. - Create a folder with the name of this task.
- Copy your mini project into this directory (bpt setup, cmake scripts etc.) with a
README.mdor comment in the code on how to run the program (verify it still works). There is a sample header file in/templatesthat you can use. - Go to https://github.com/MonashDeepNeuron/HPP/pulls and click 'New pull request'.
- Change the branches in the drop down so that your branch is going into
mainand `Create new pull request. - Give the pull request a title and briefly describe what you were able to implement and any struggles you had.
- On the right side-panel, under the 'Assignees' section, click the cog and assign me.
- Click 'Create pull request' and I'll take it from there.
Note: If you created a GodBolt instance, put the link in a comment at the top of the file (under your copy comments). This is generated by clicking the
sharebutton in the top-right-most corner of the webpage and clicking the 'short link' option.
Slides


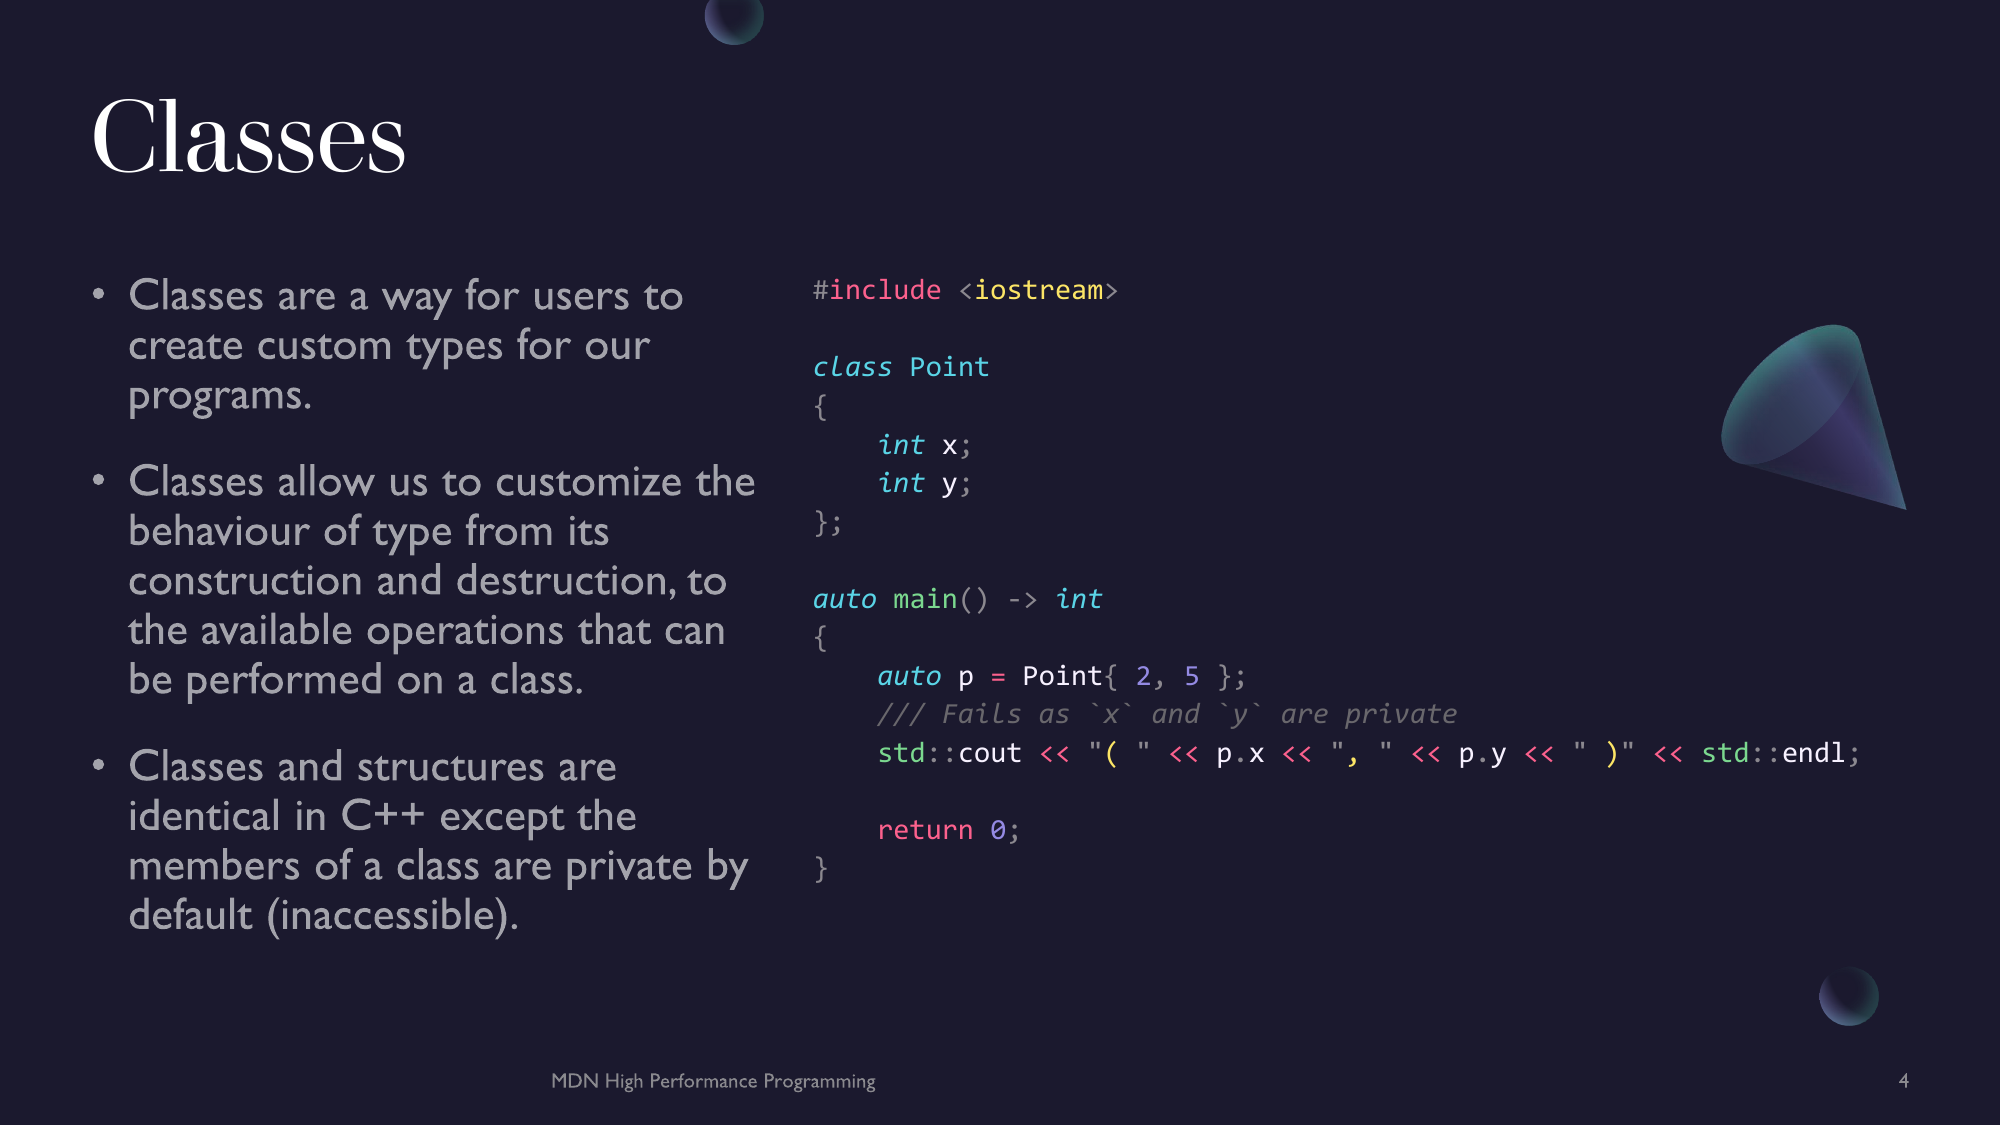
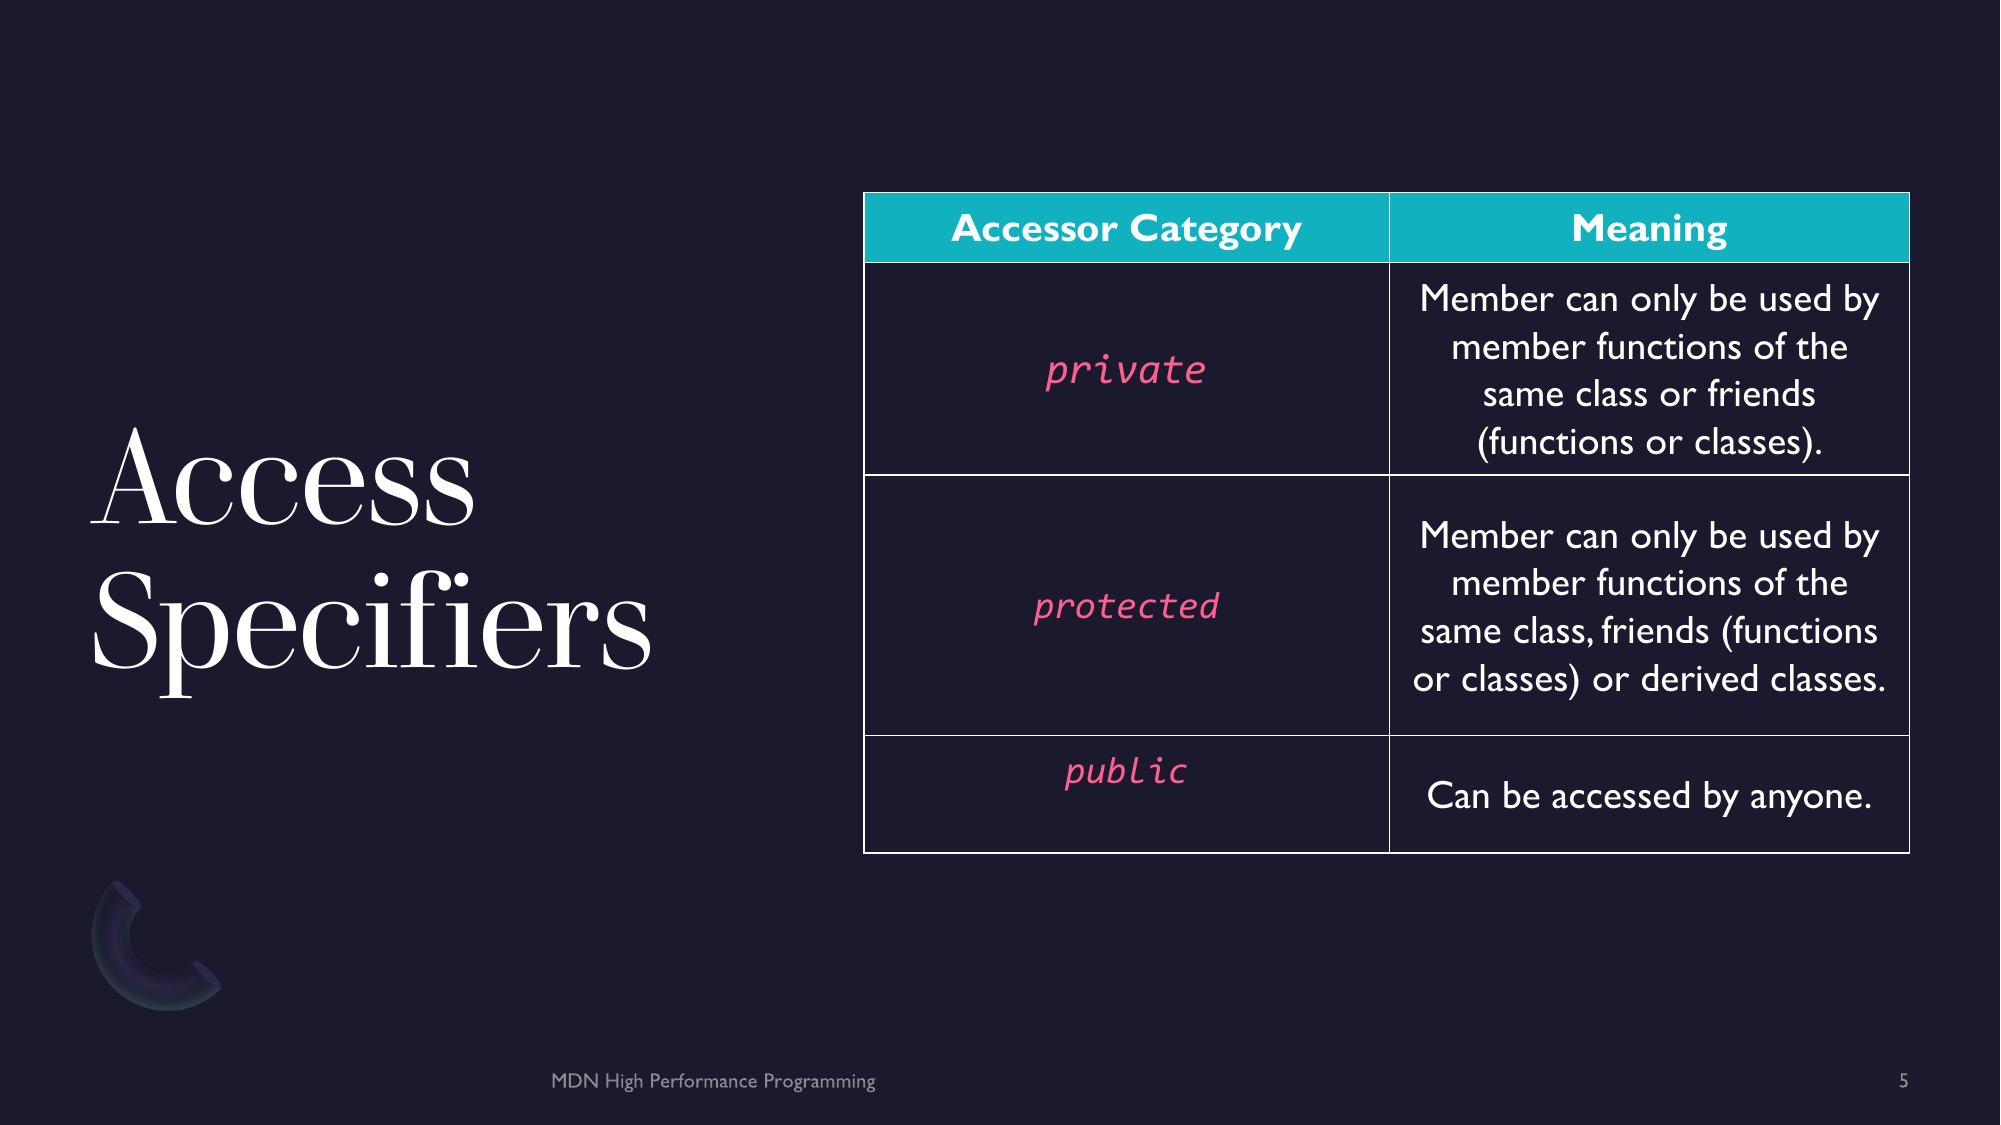
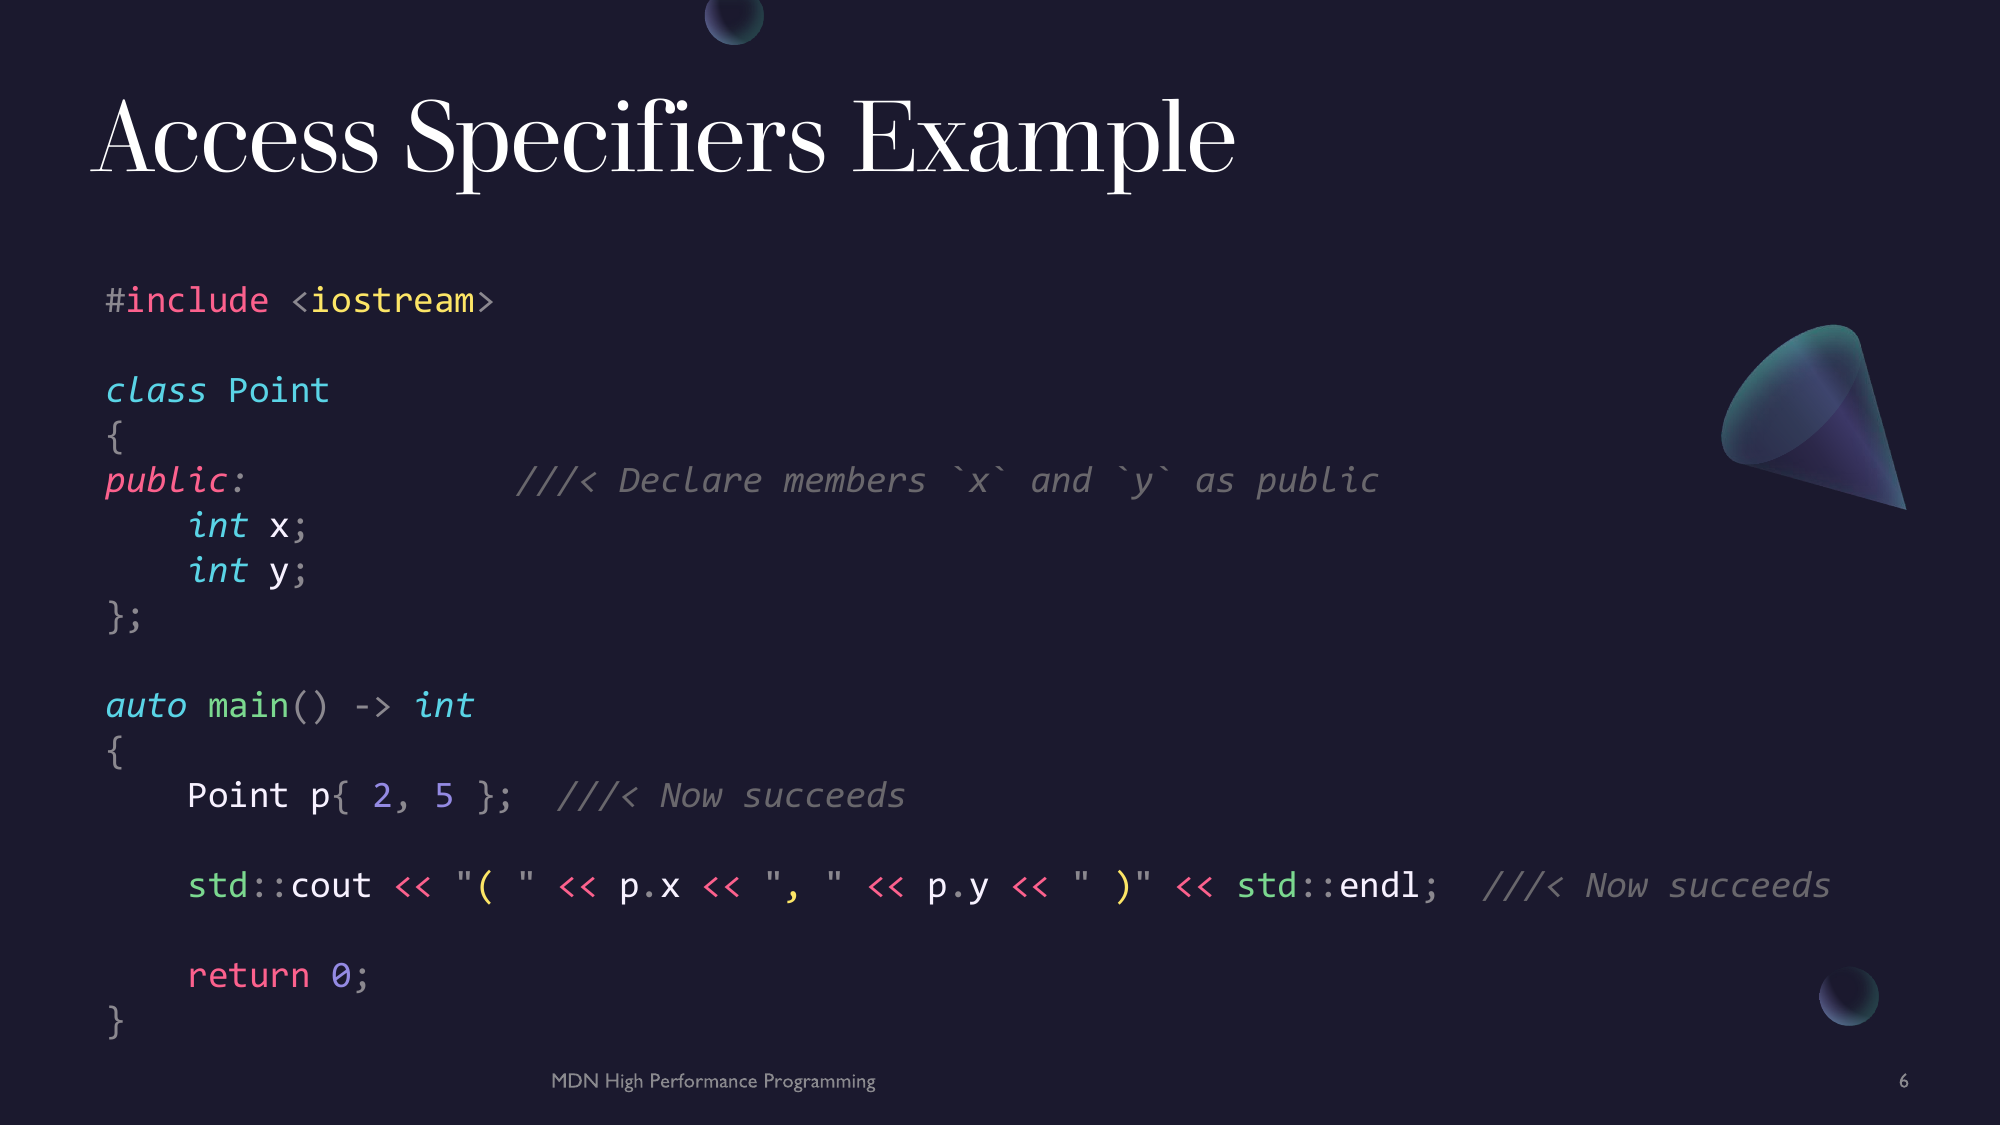

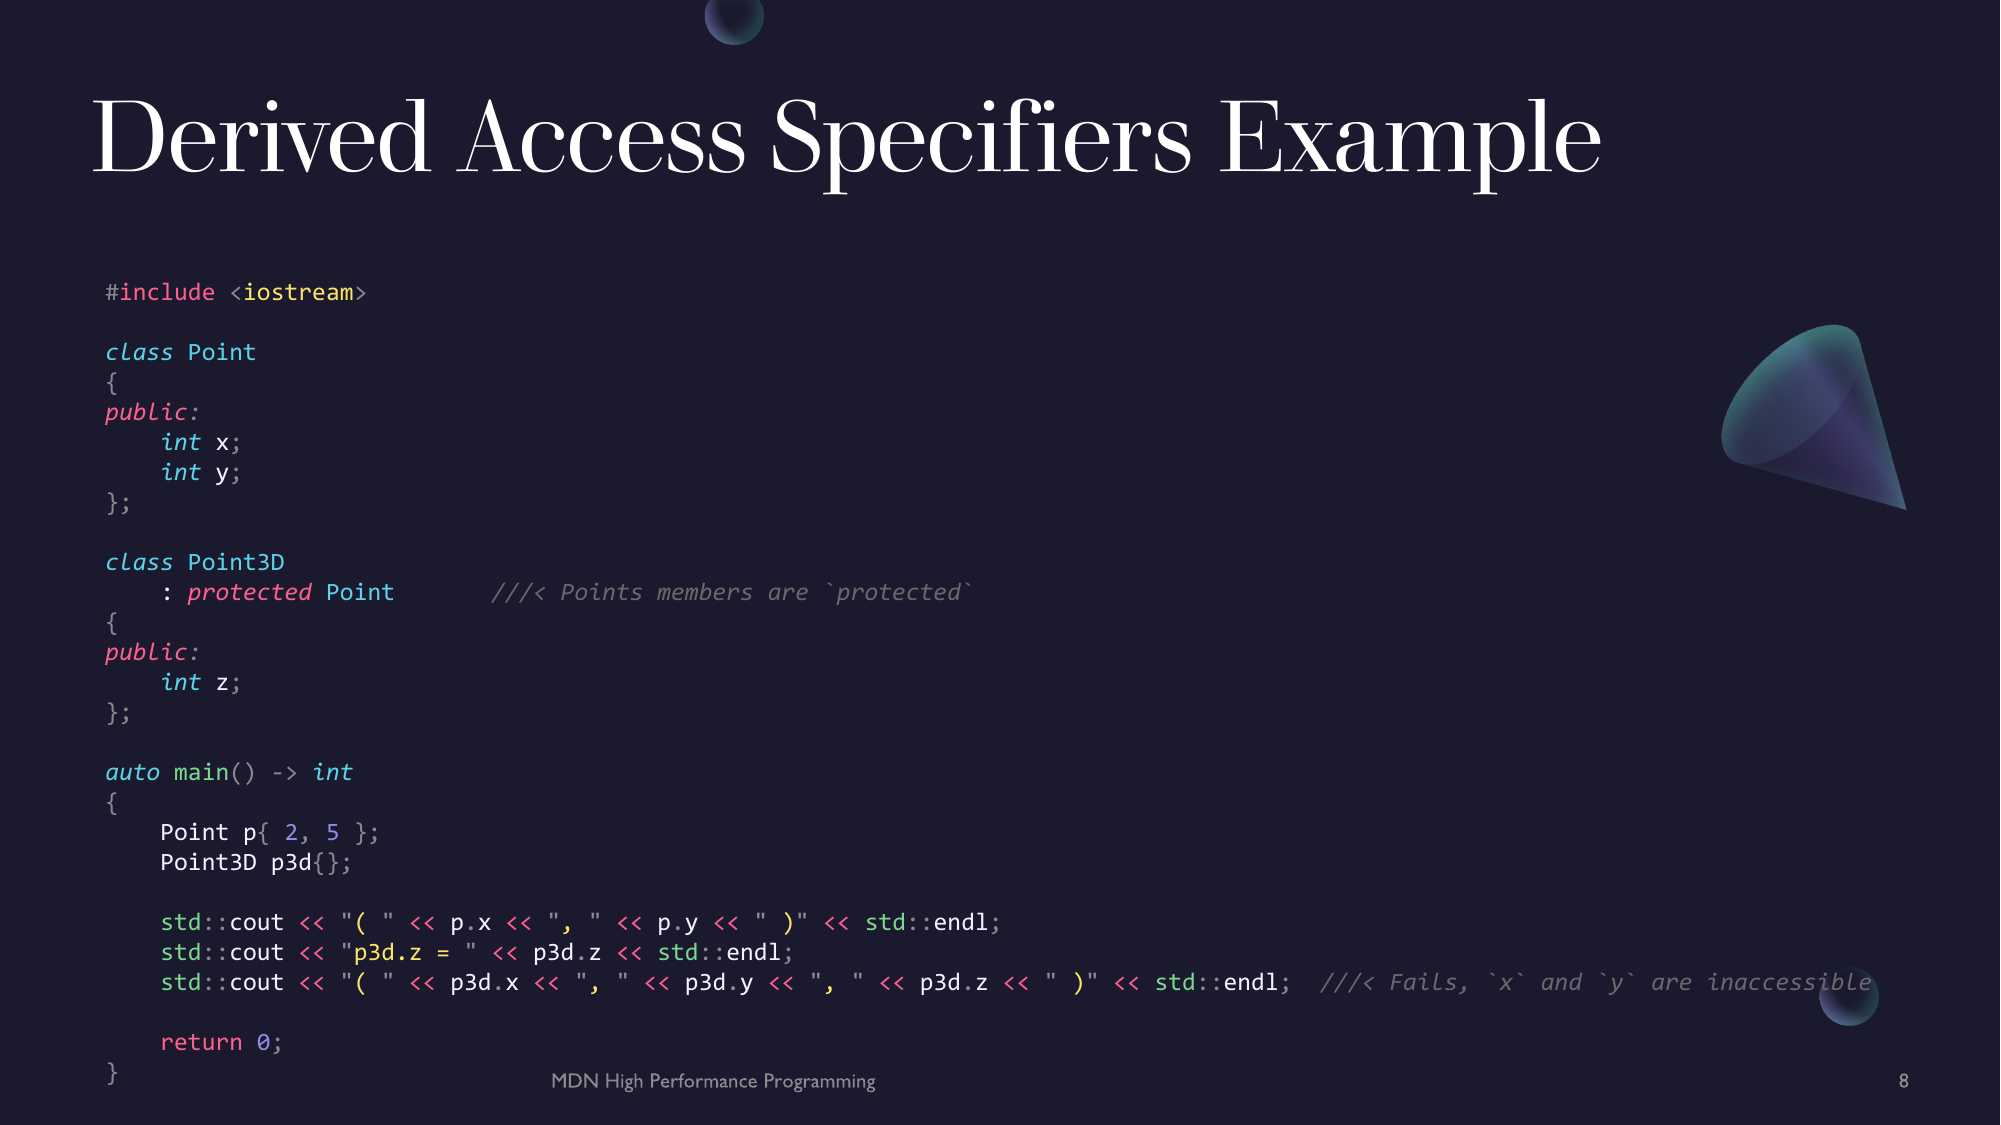
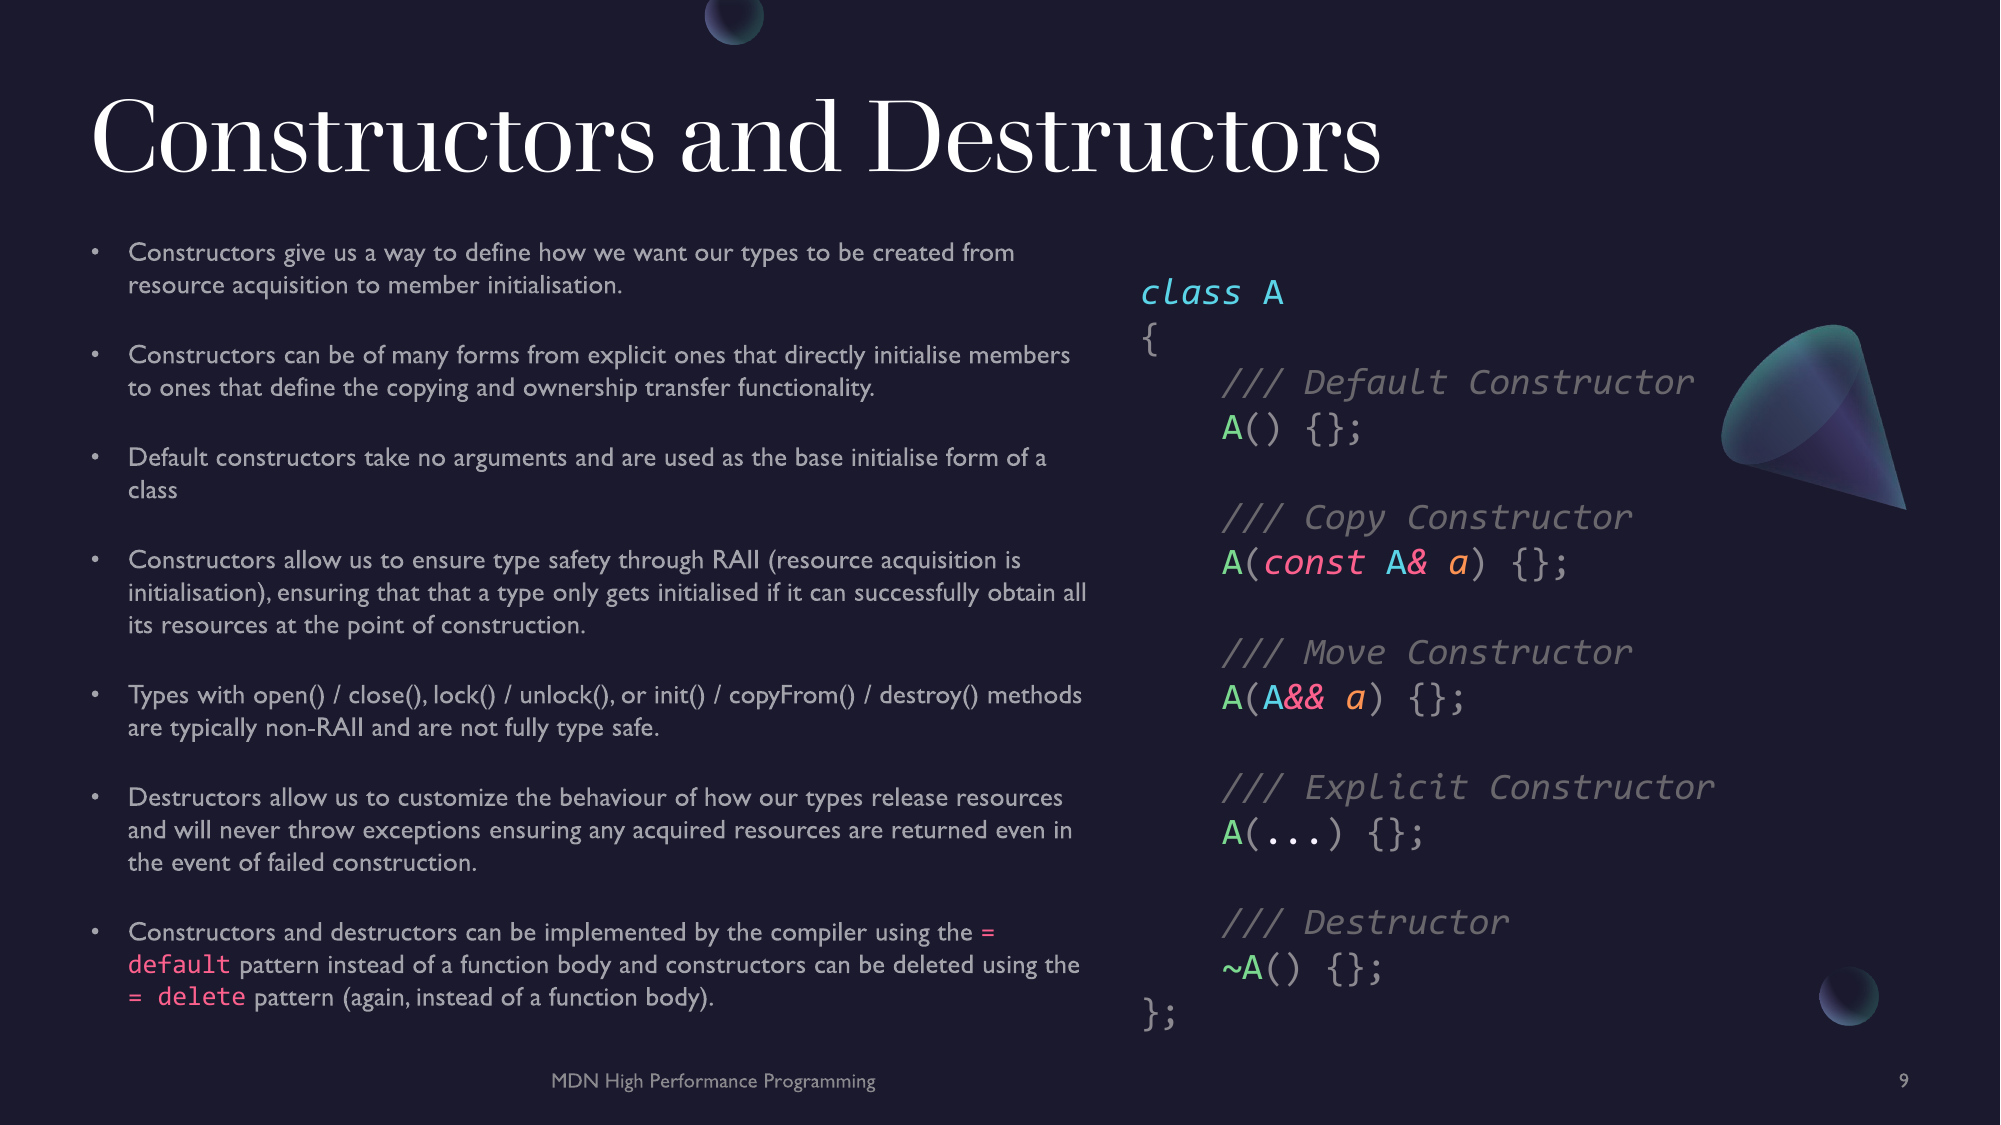
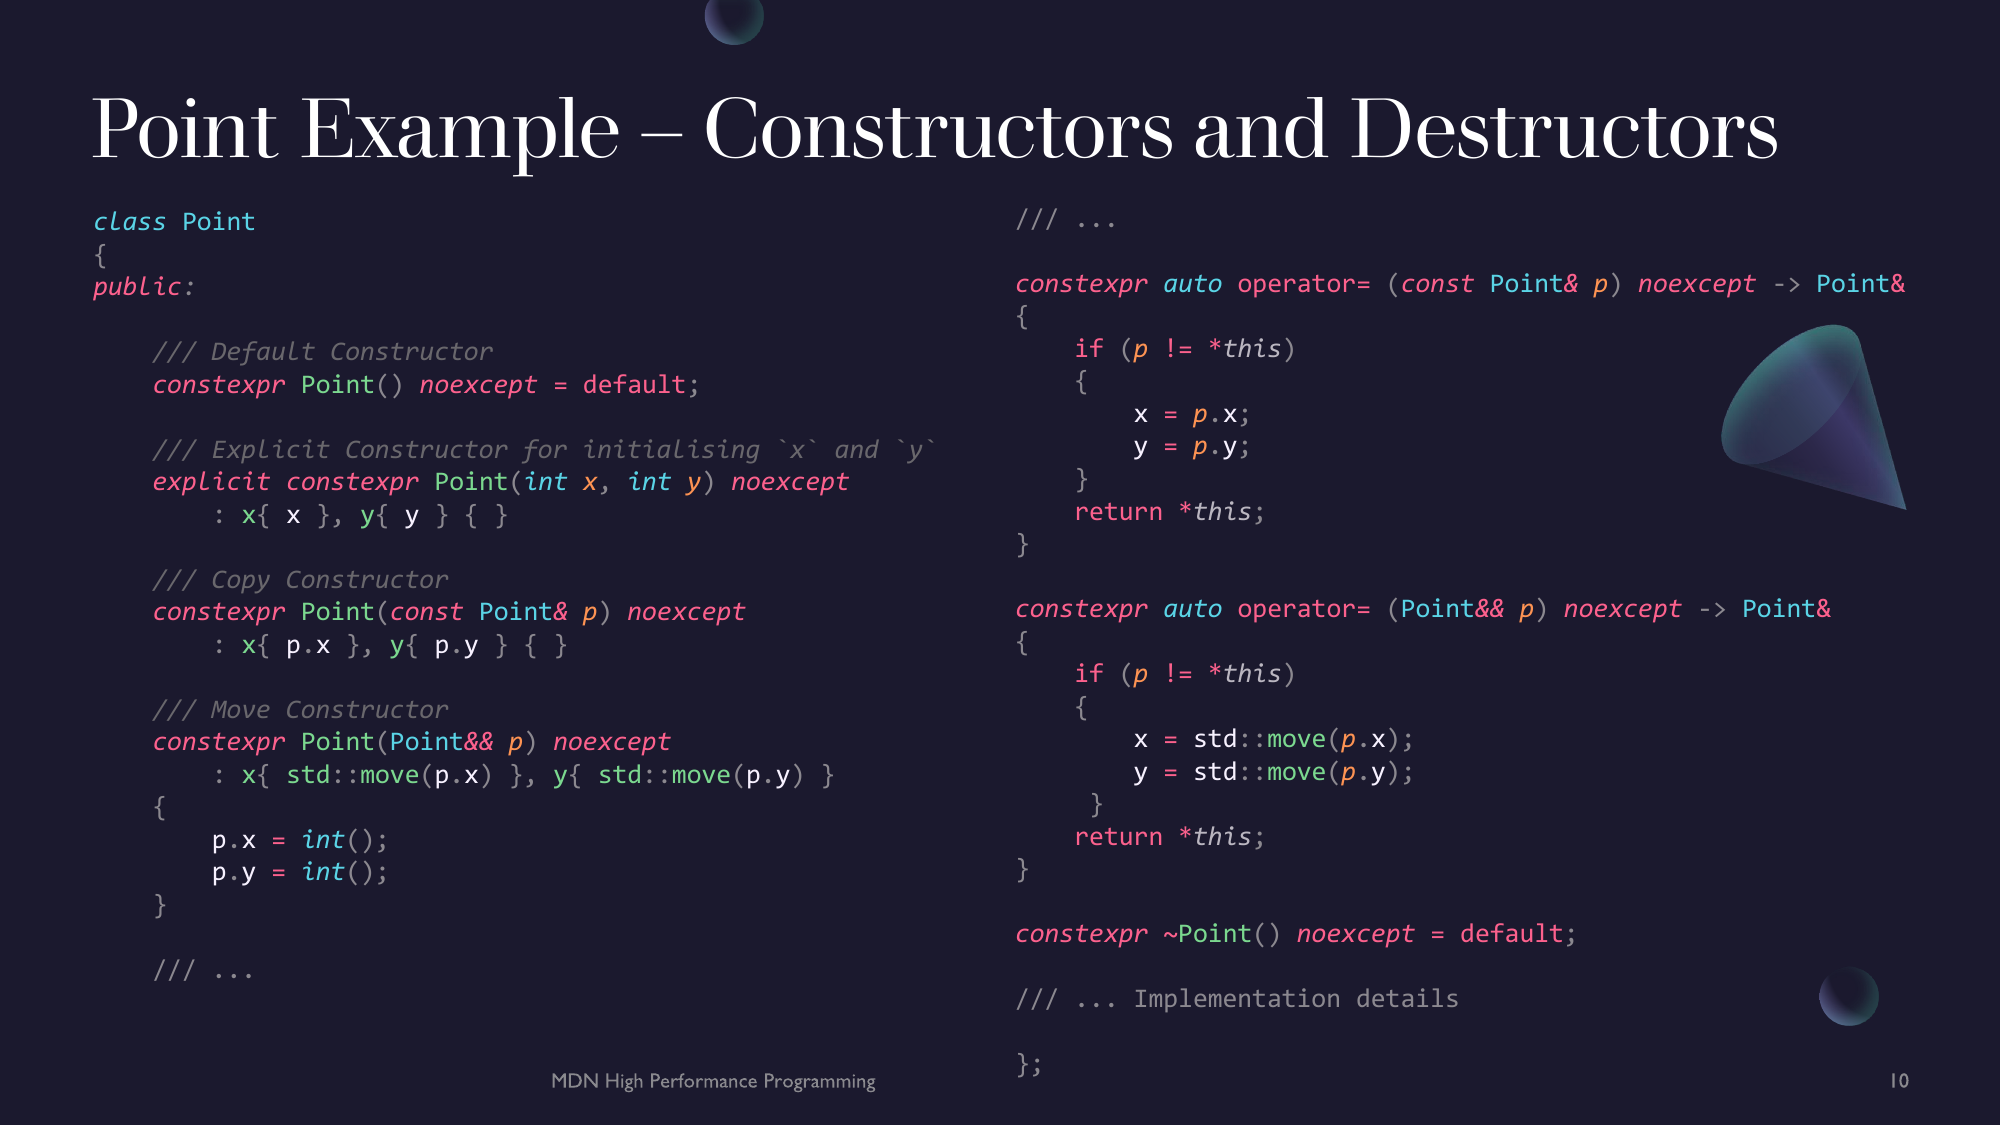
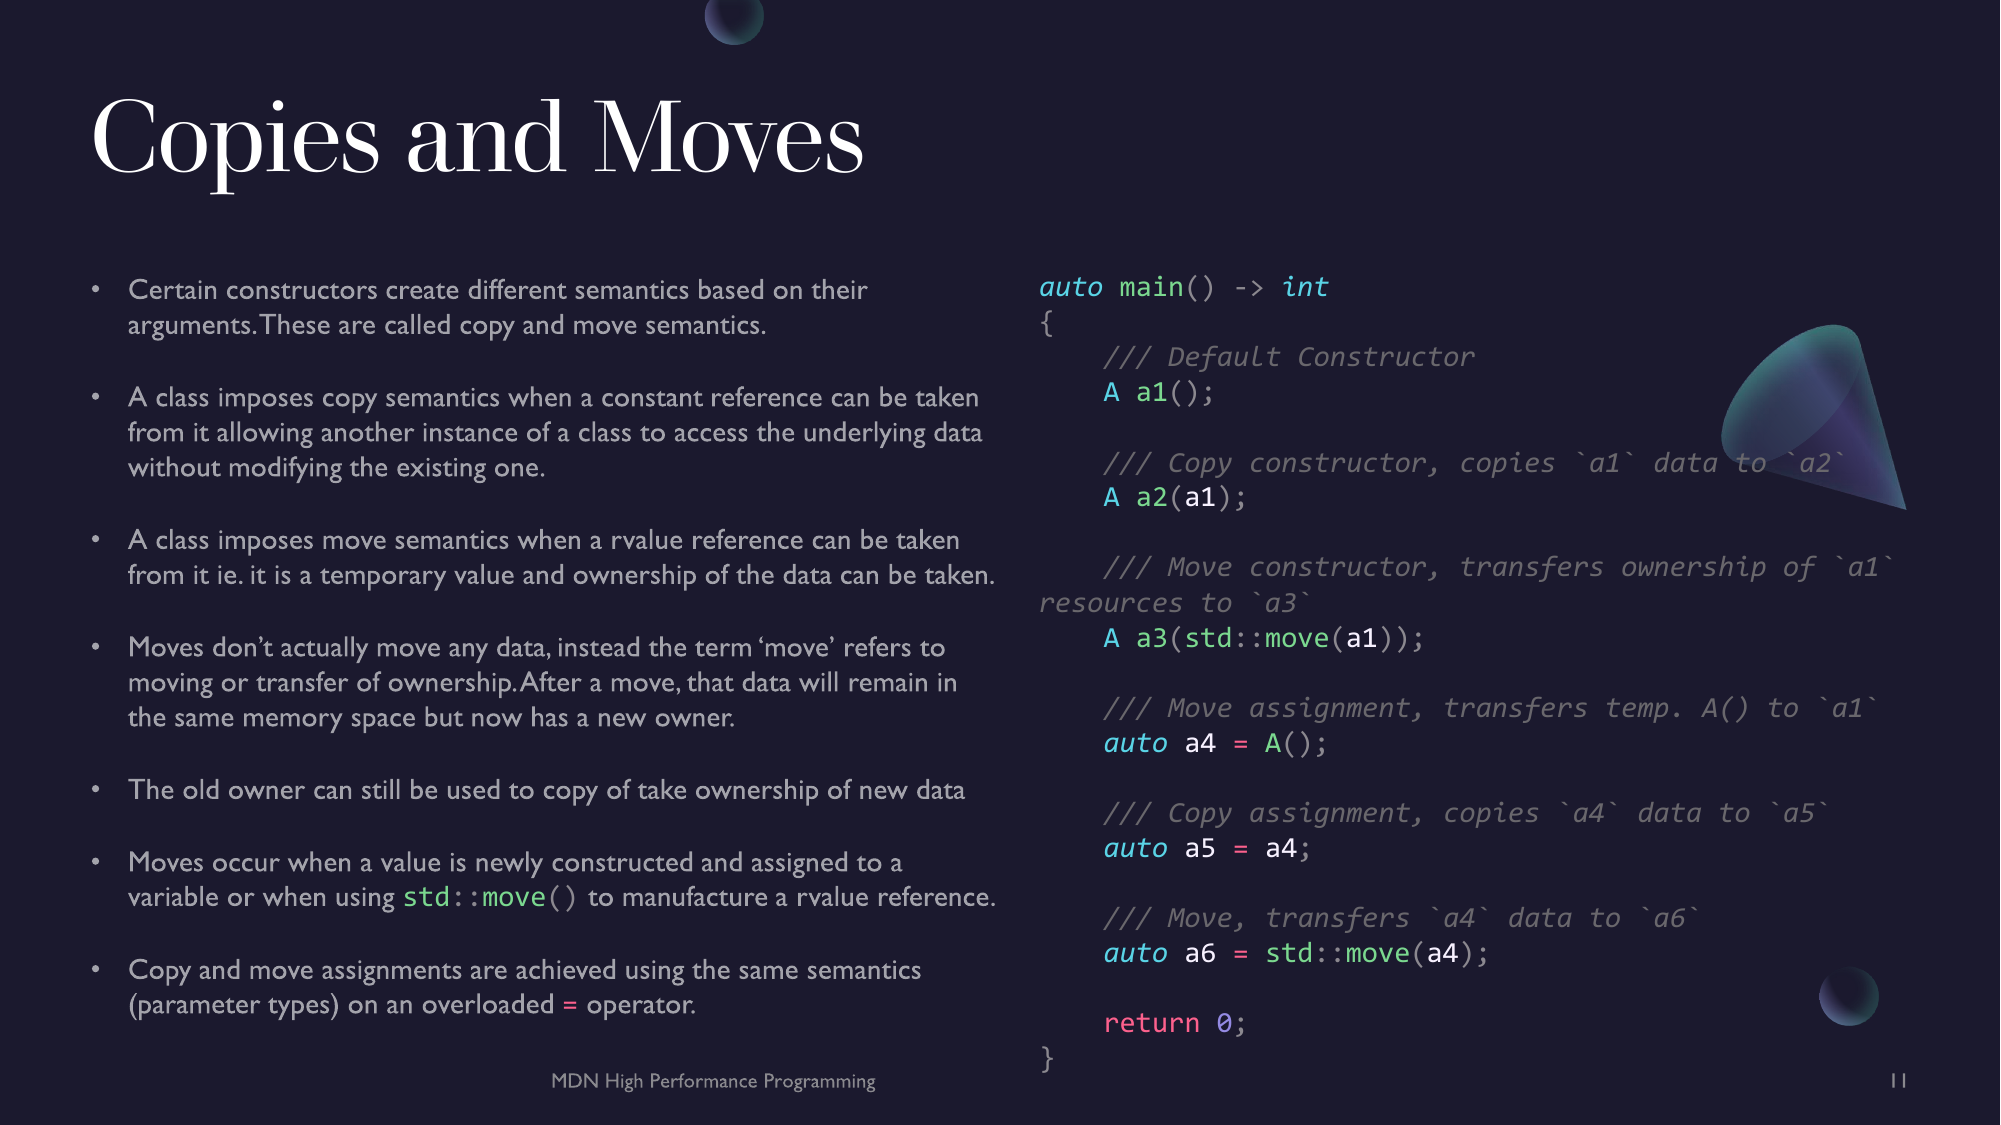
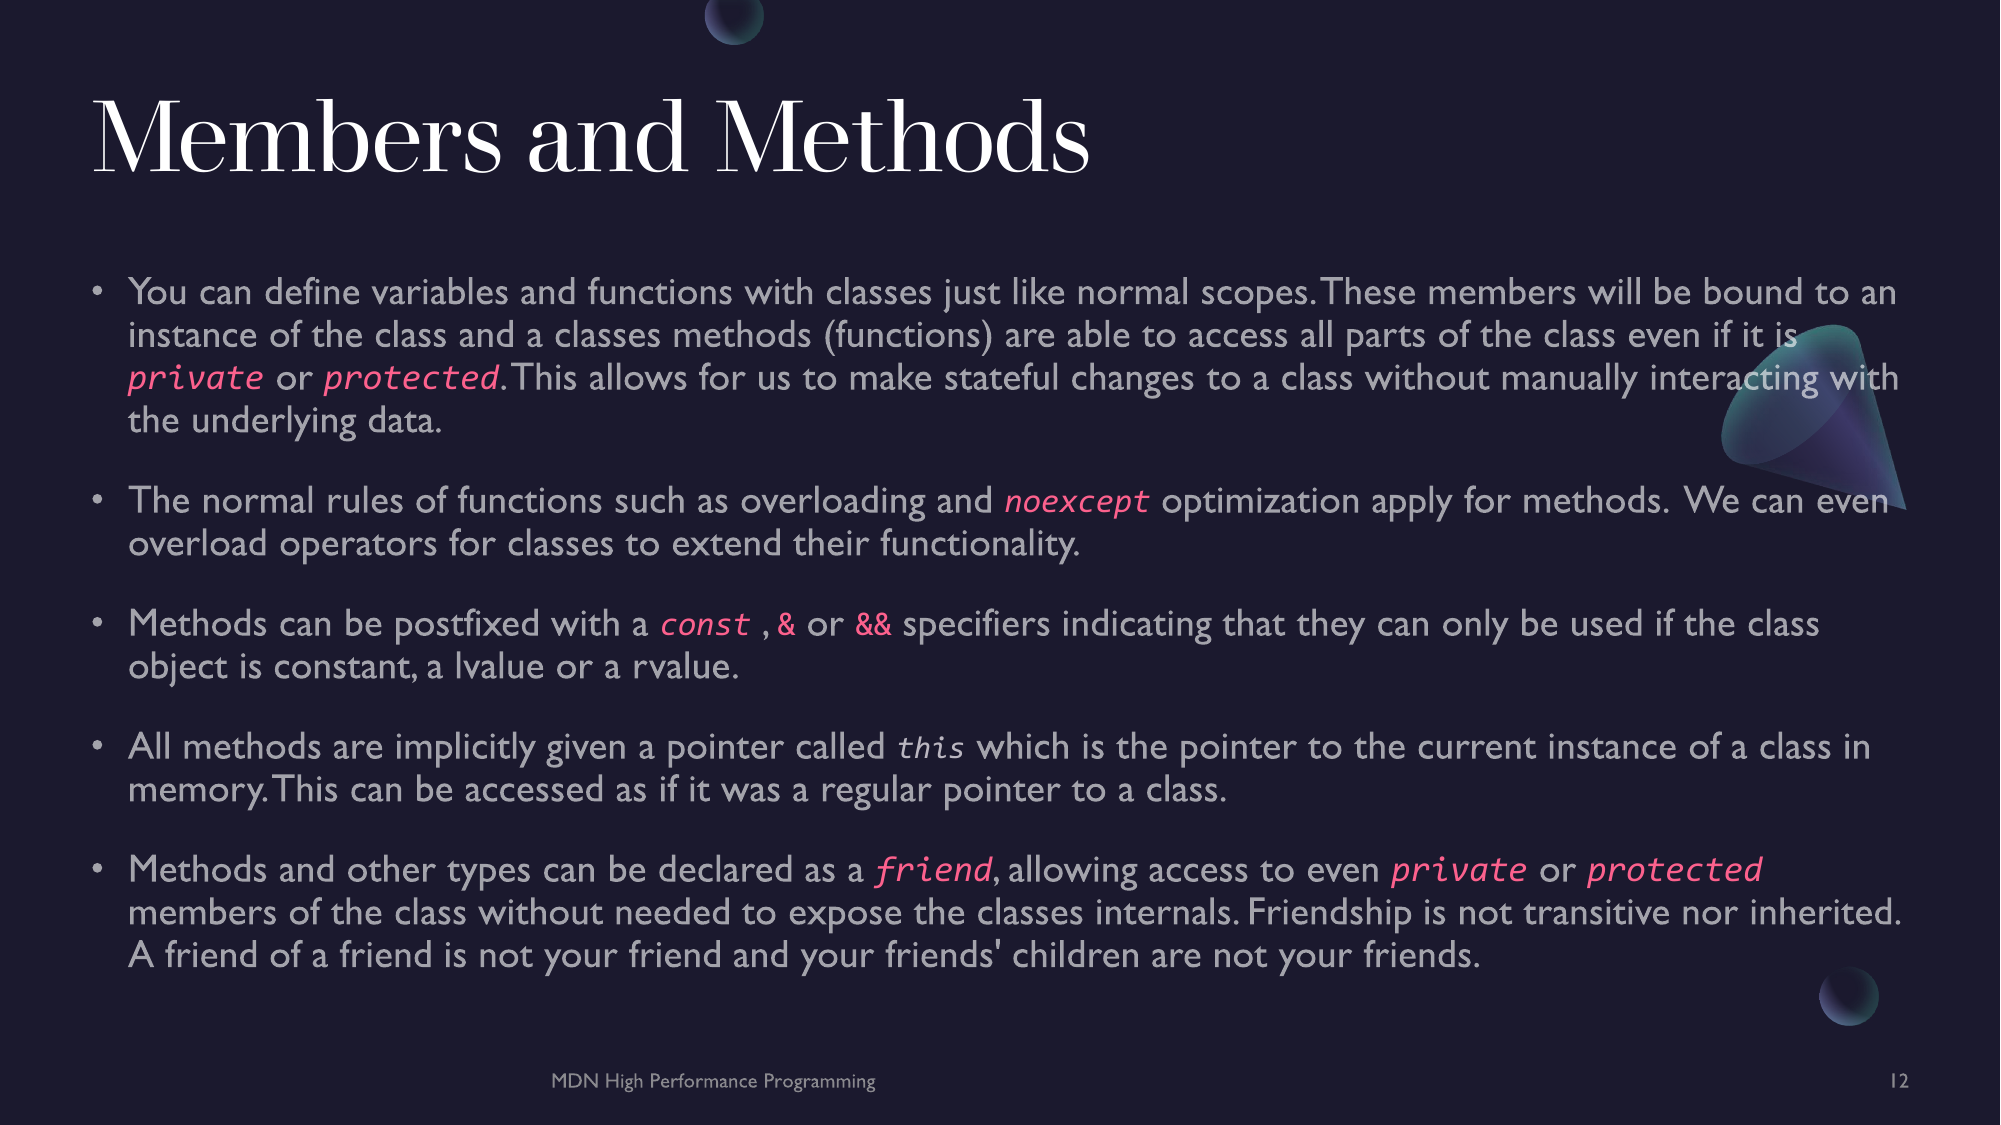
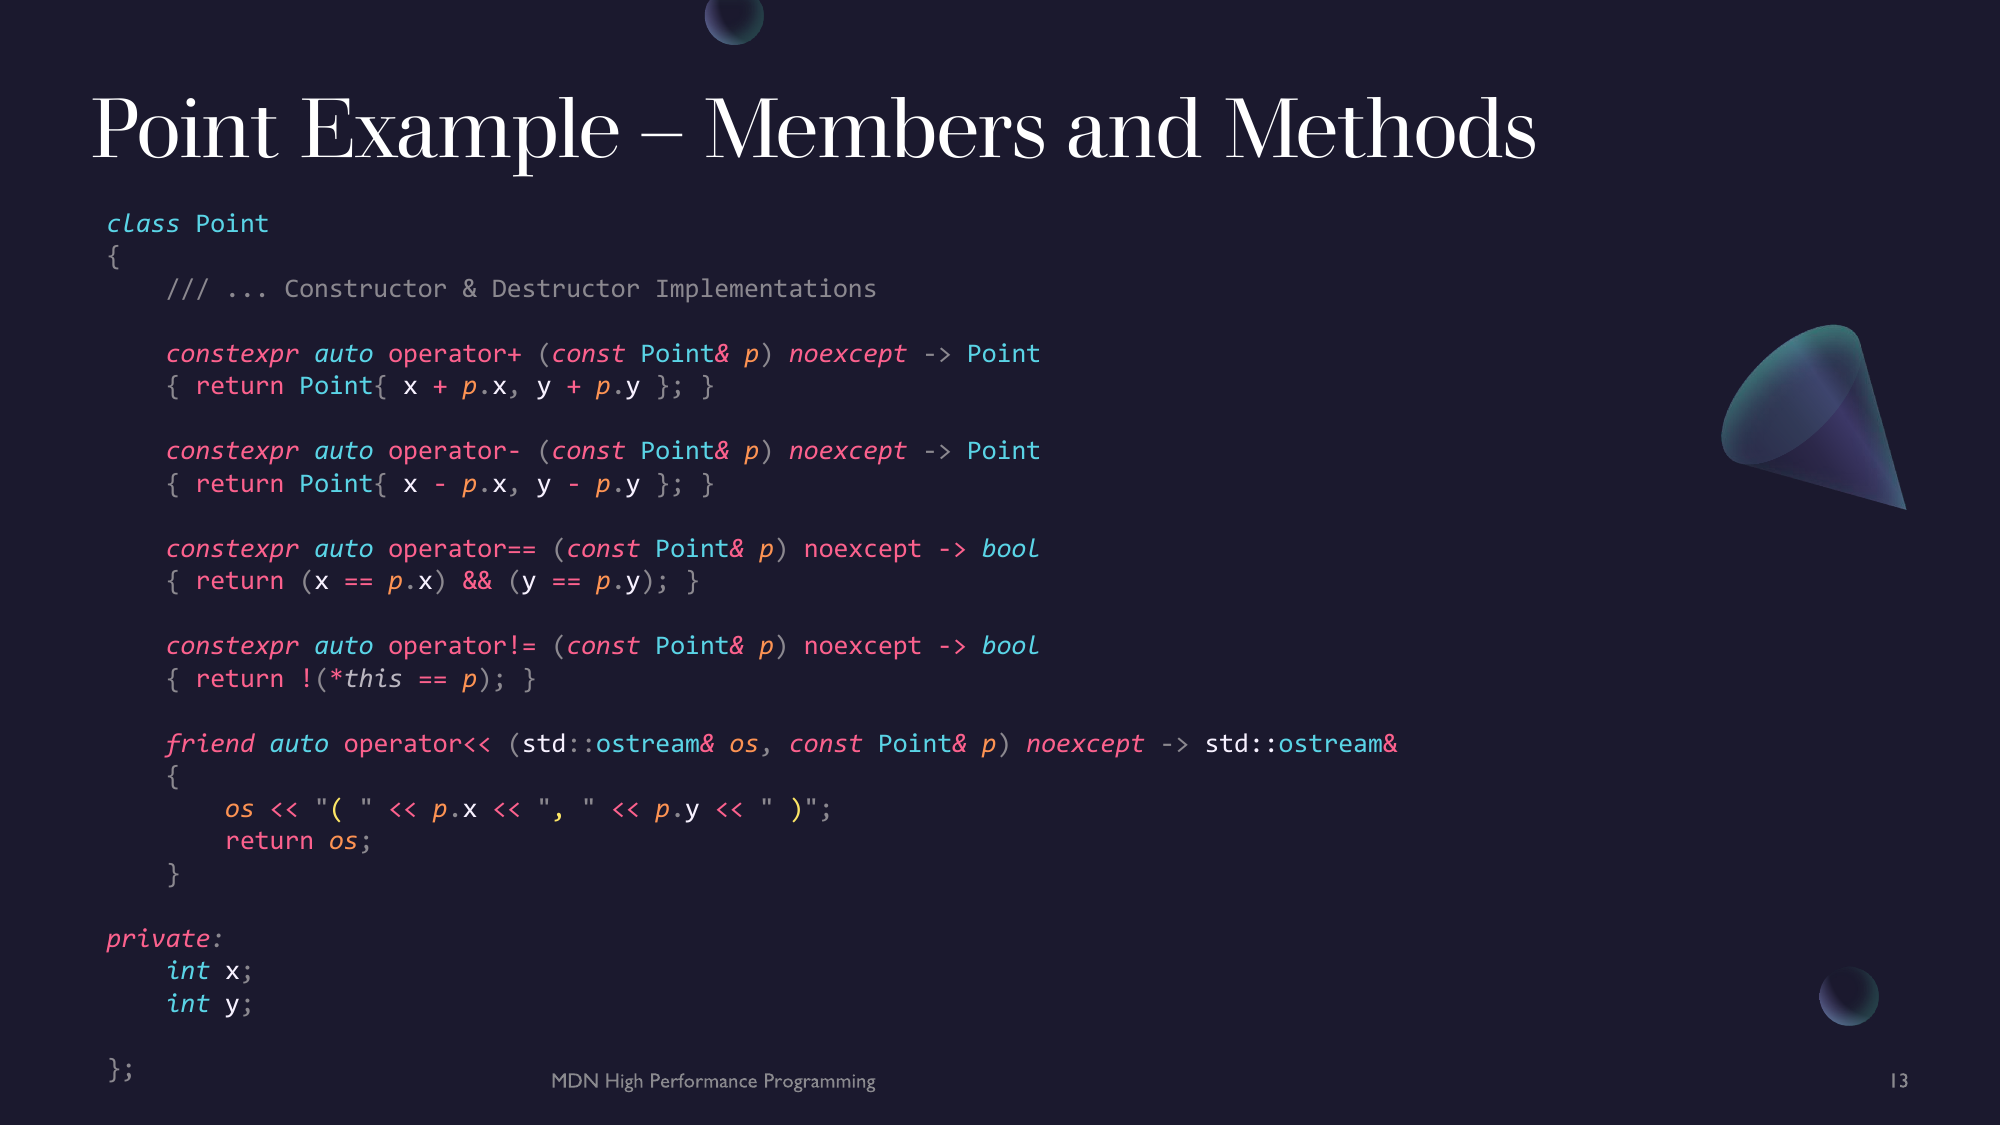
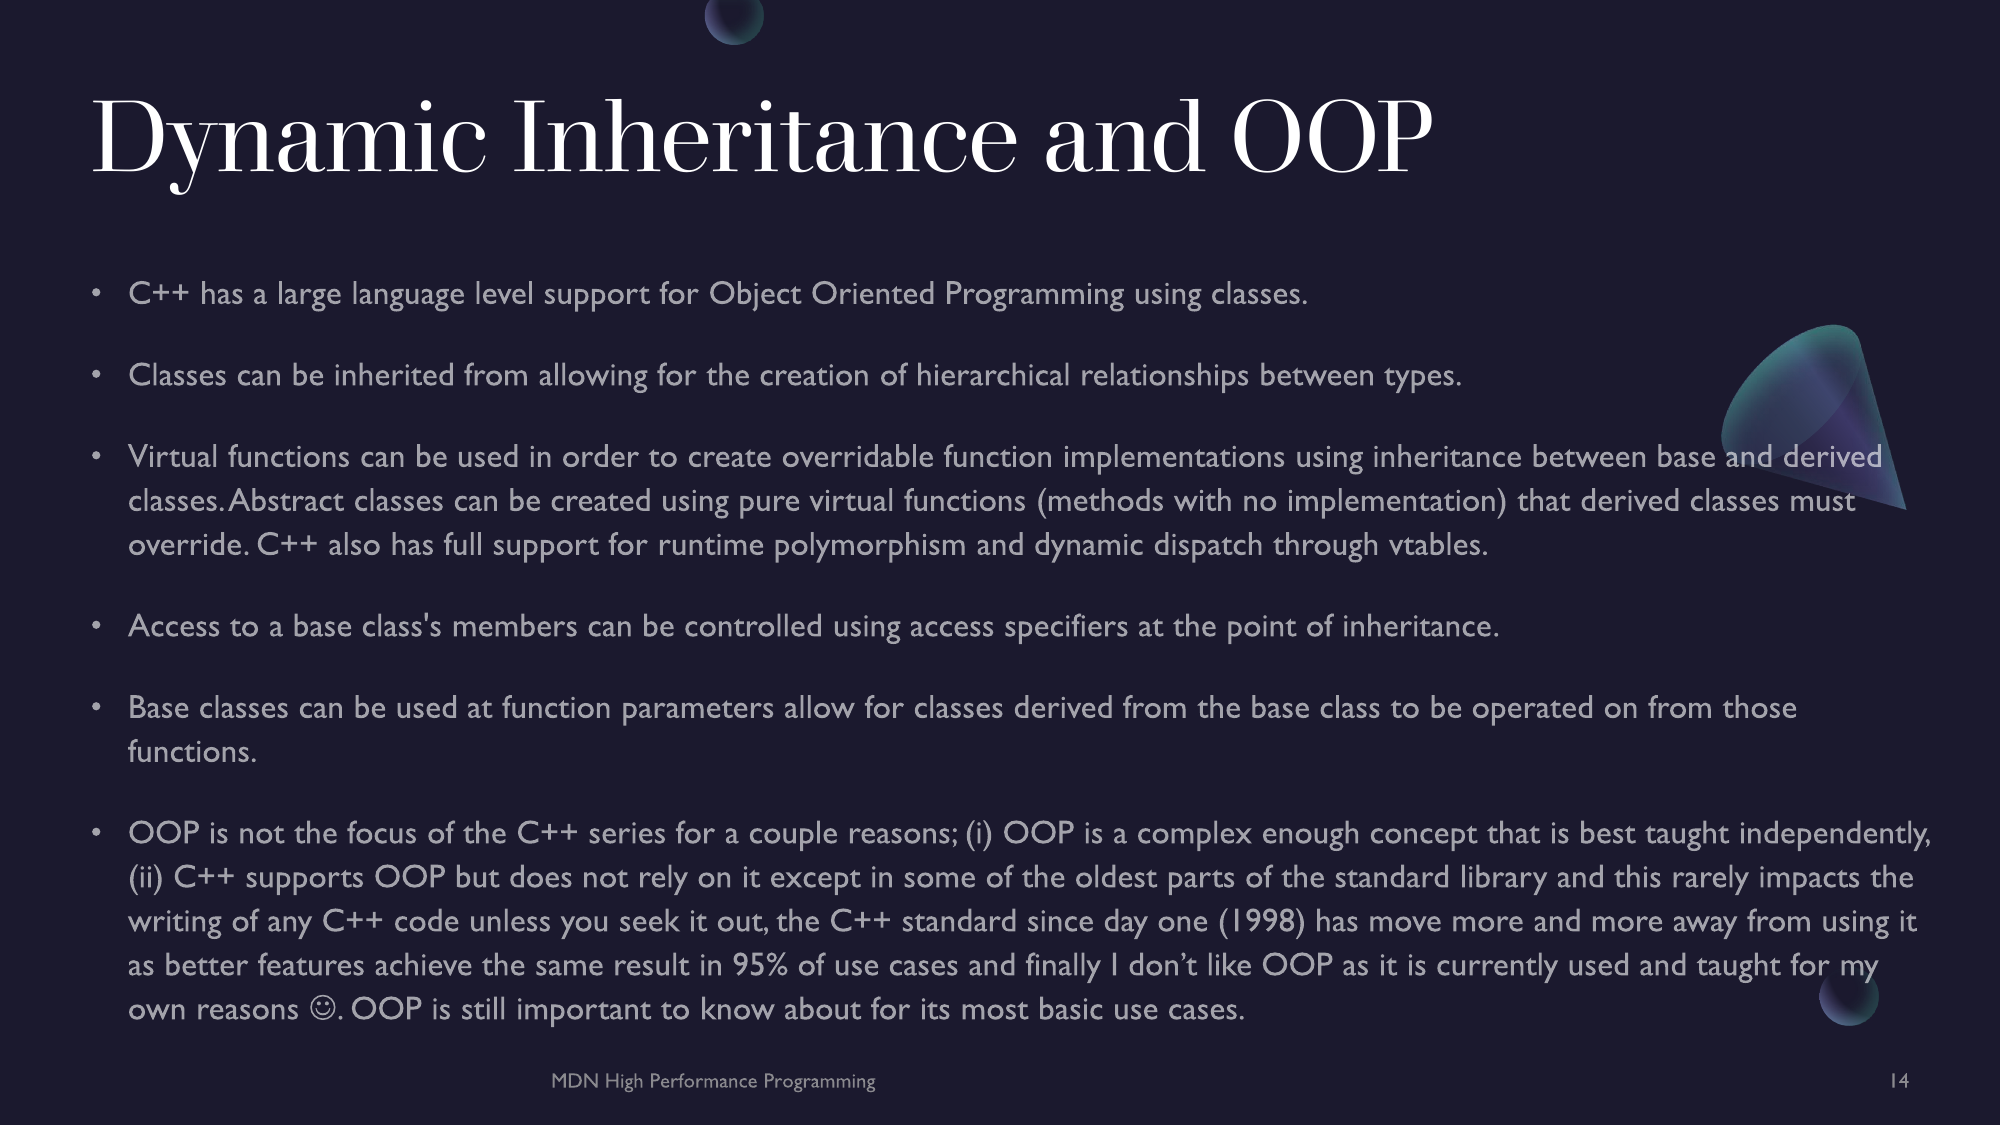
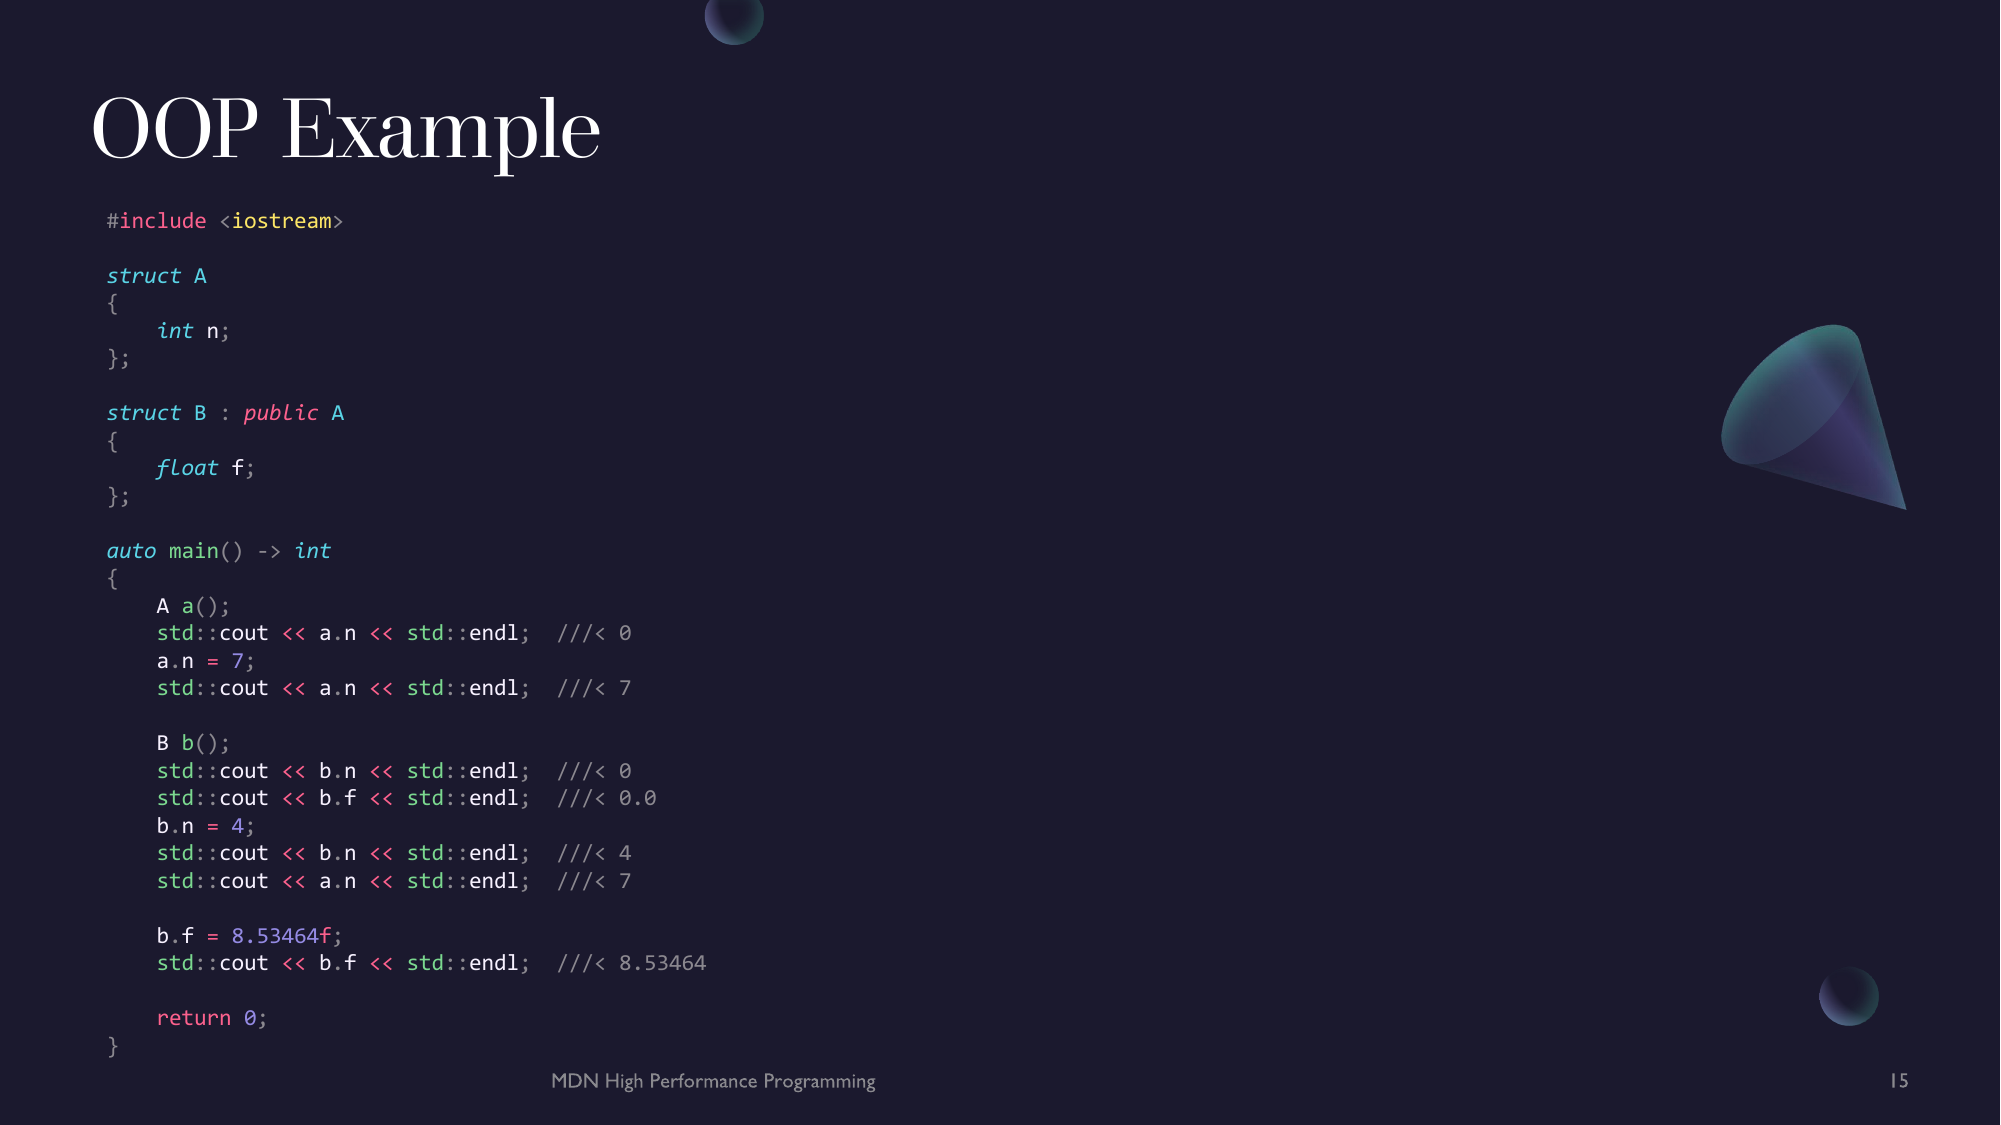

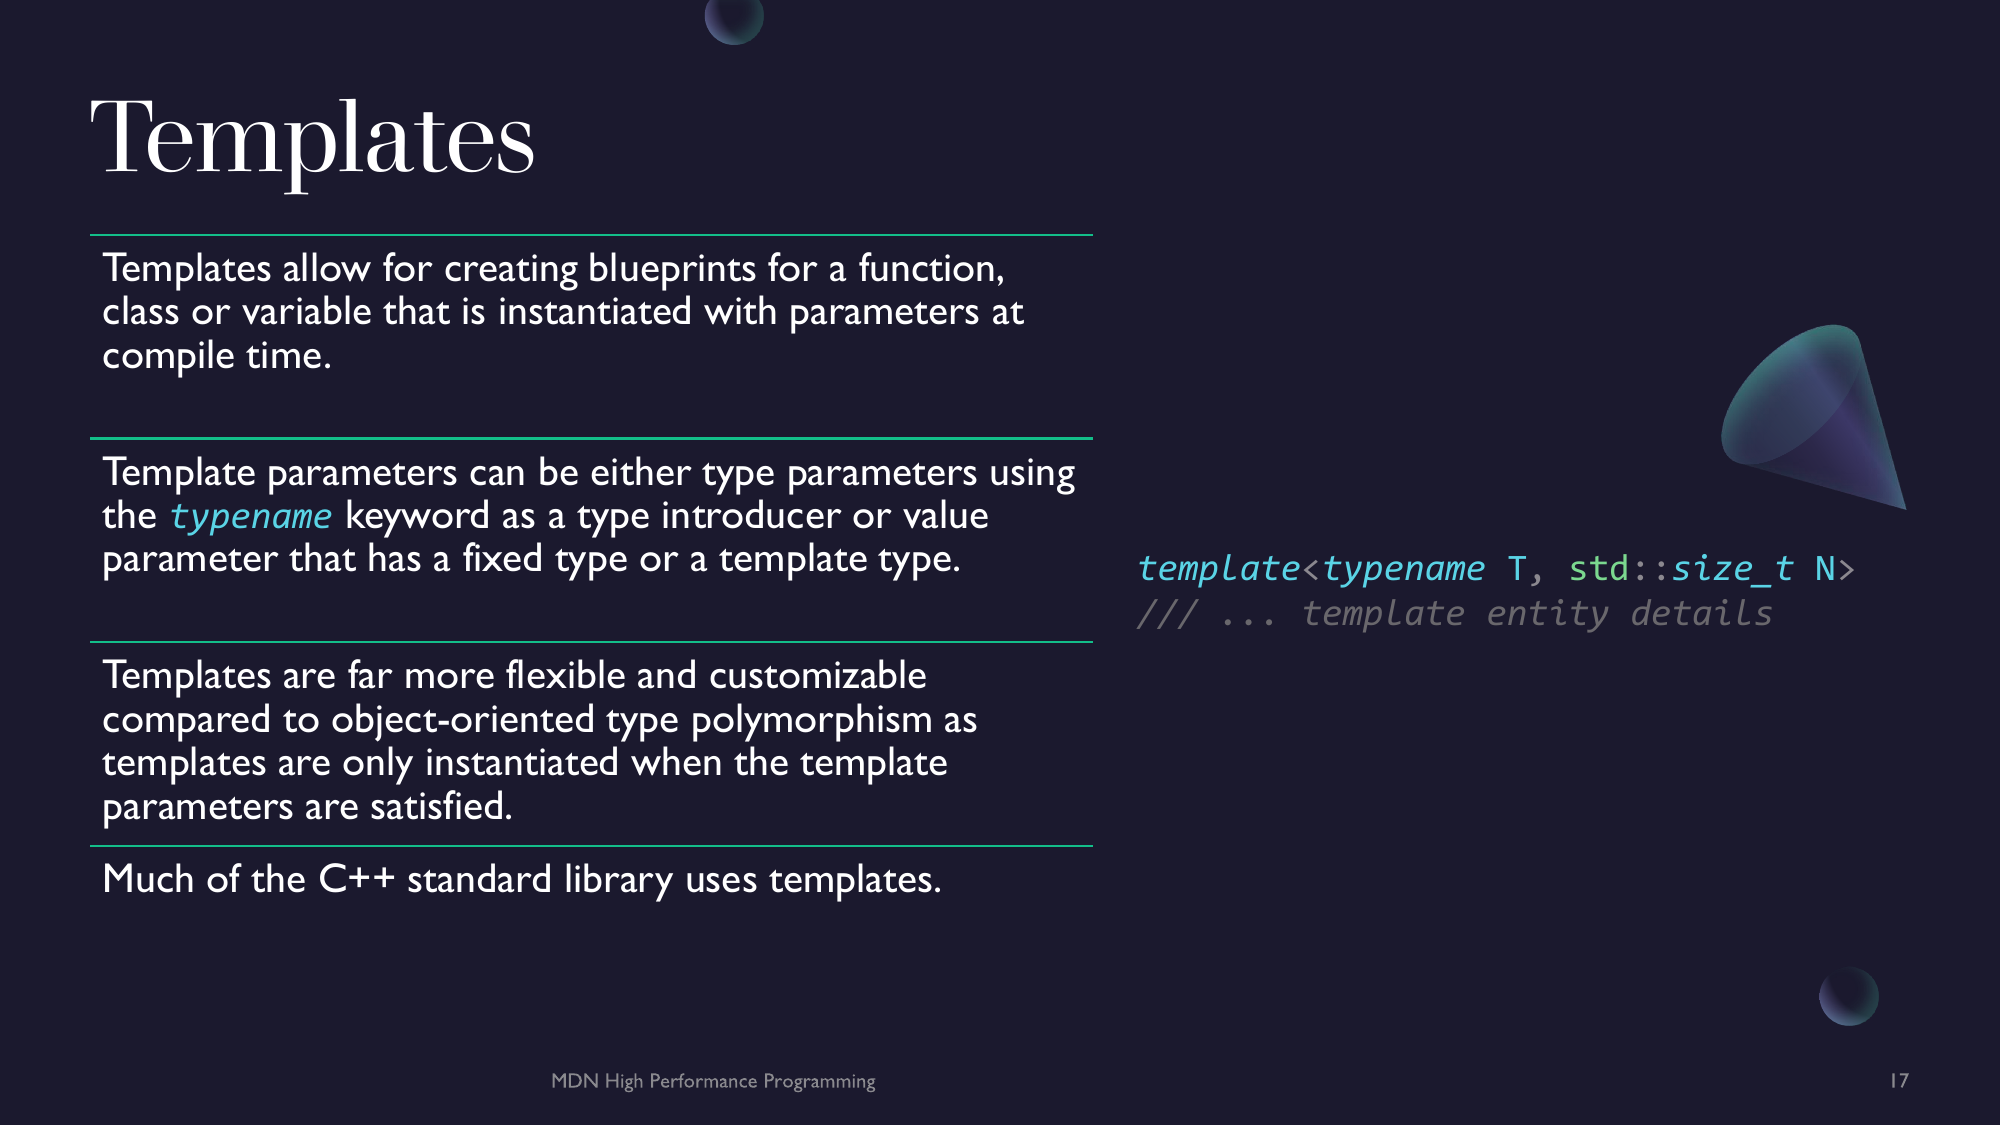
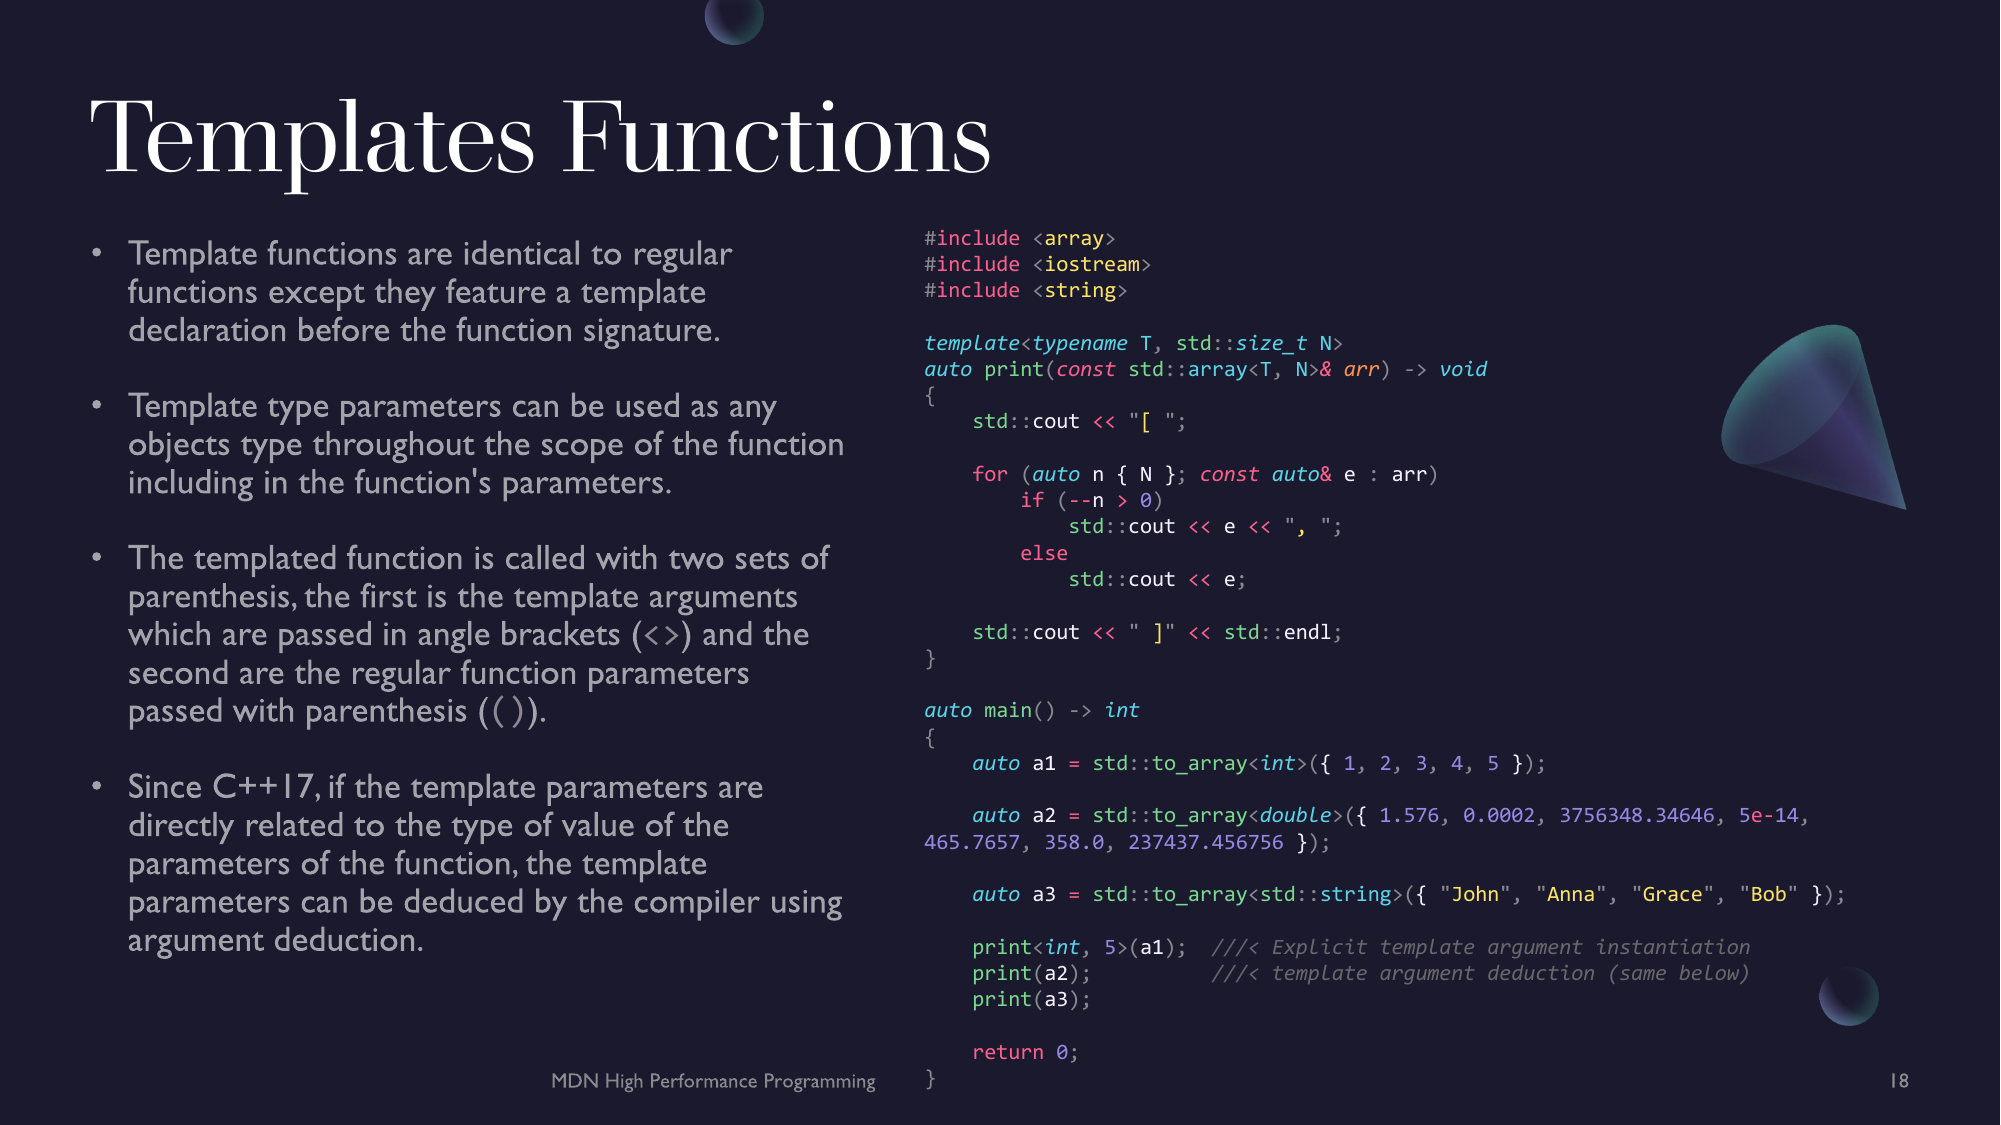
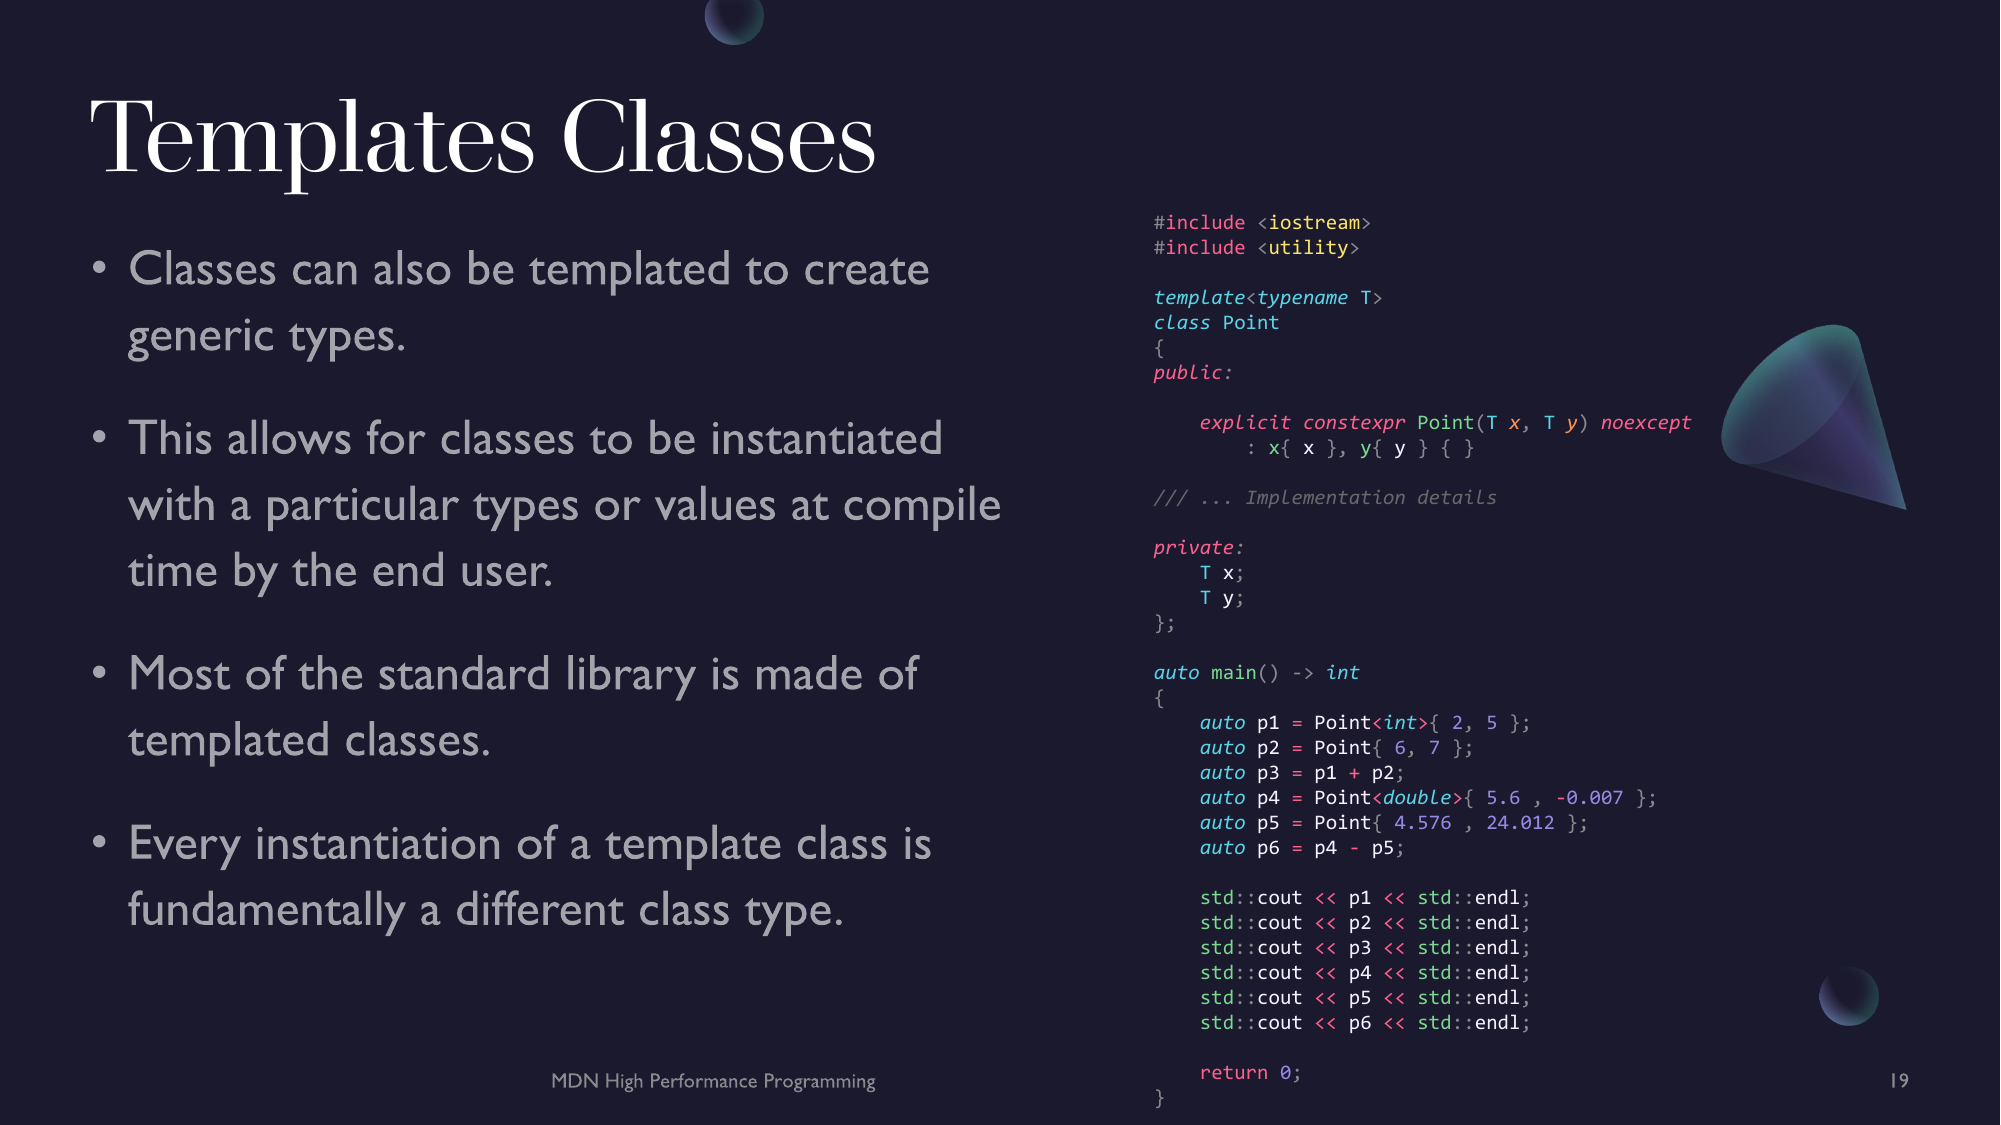
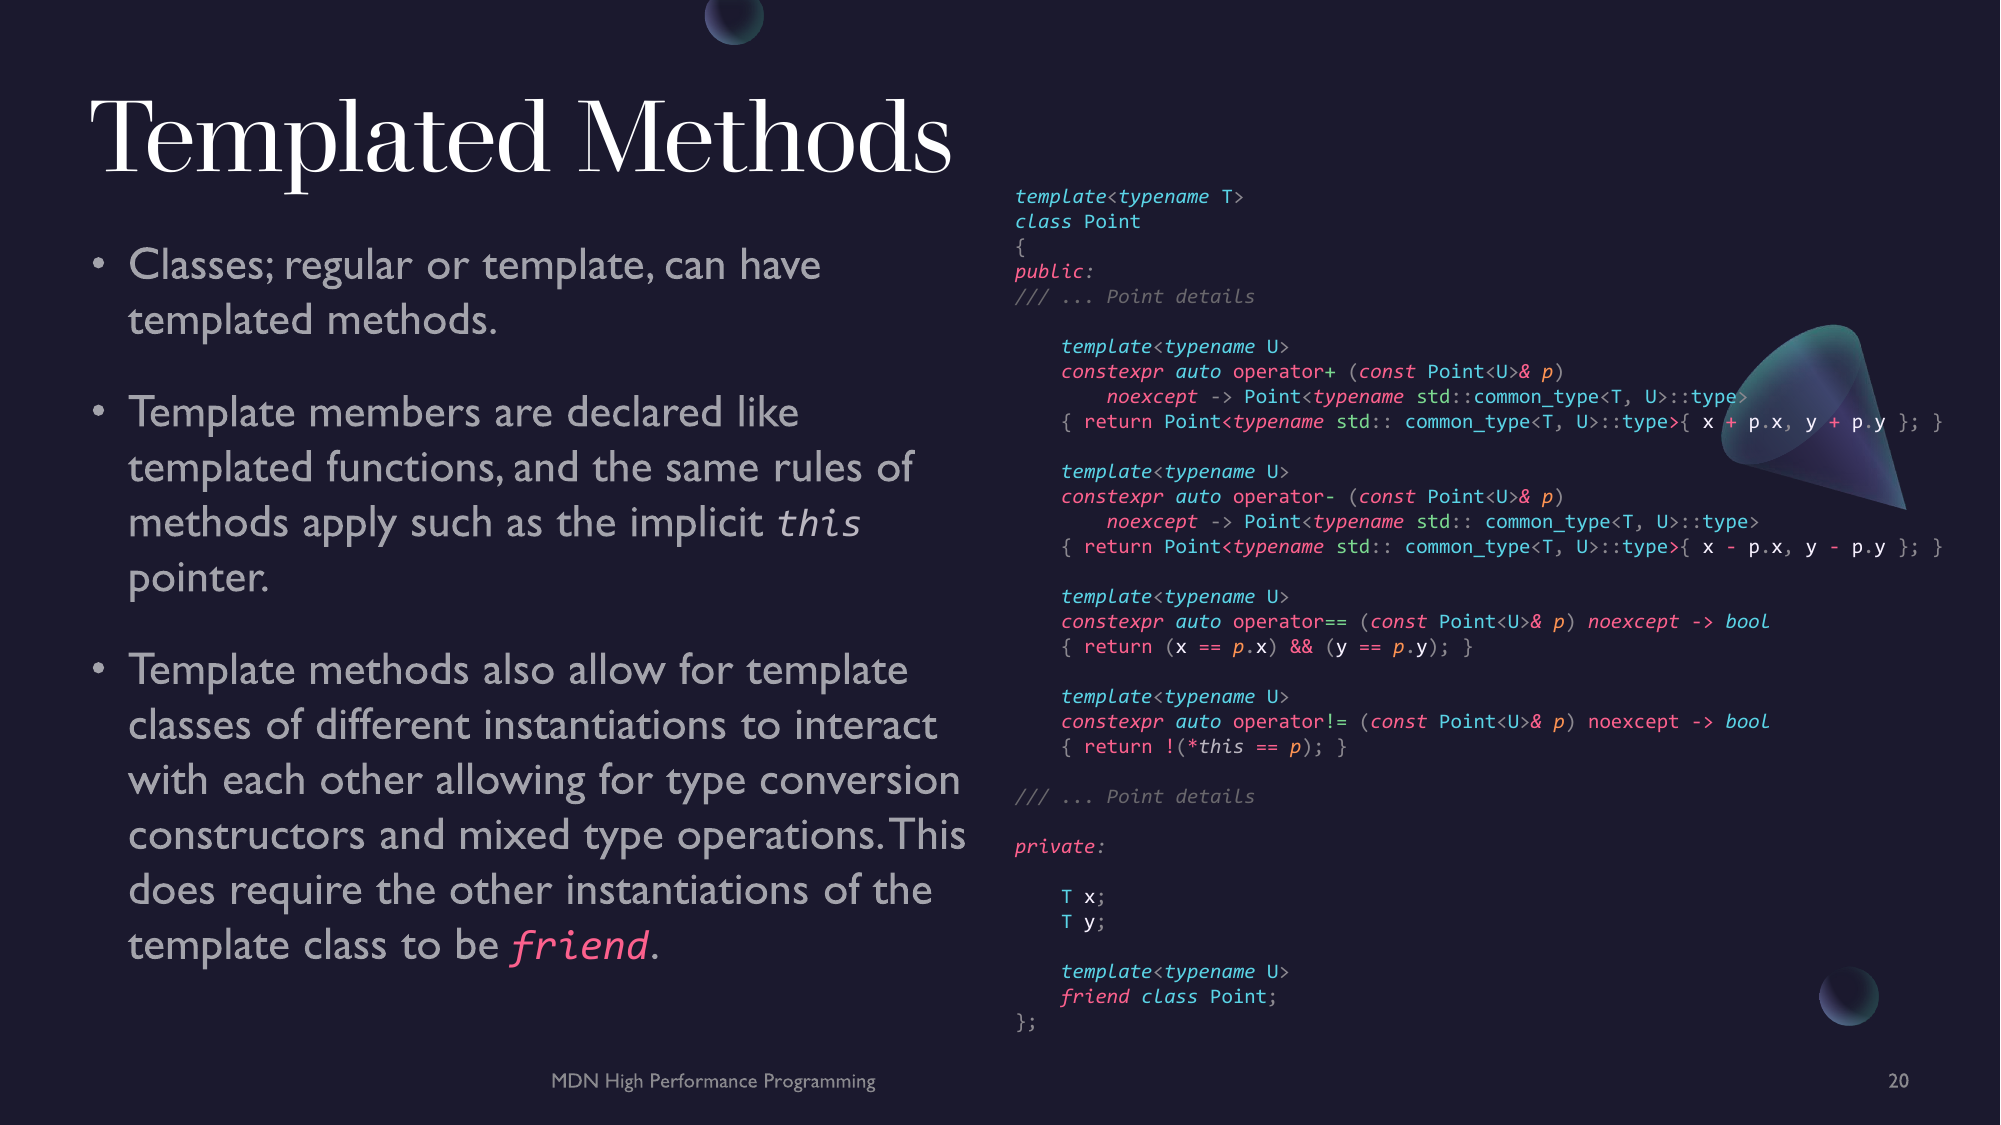
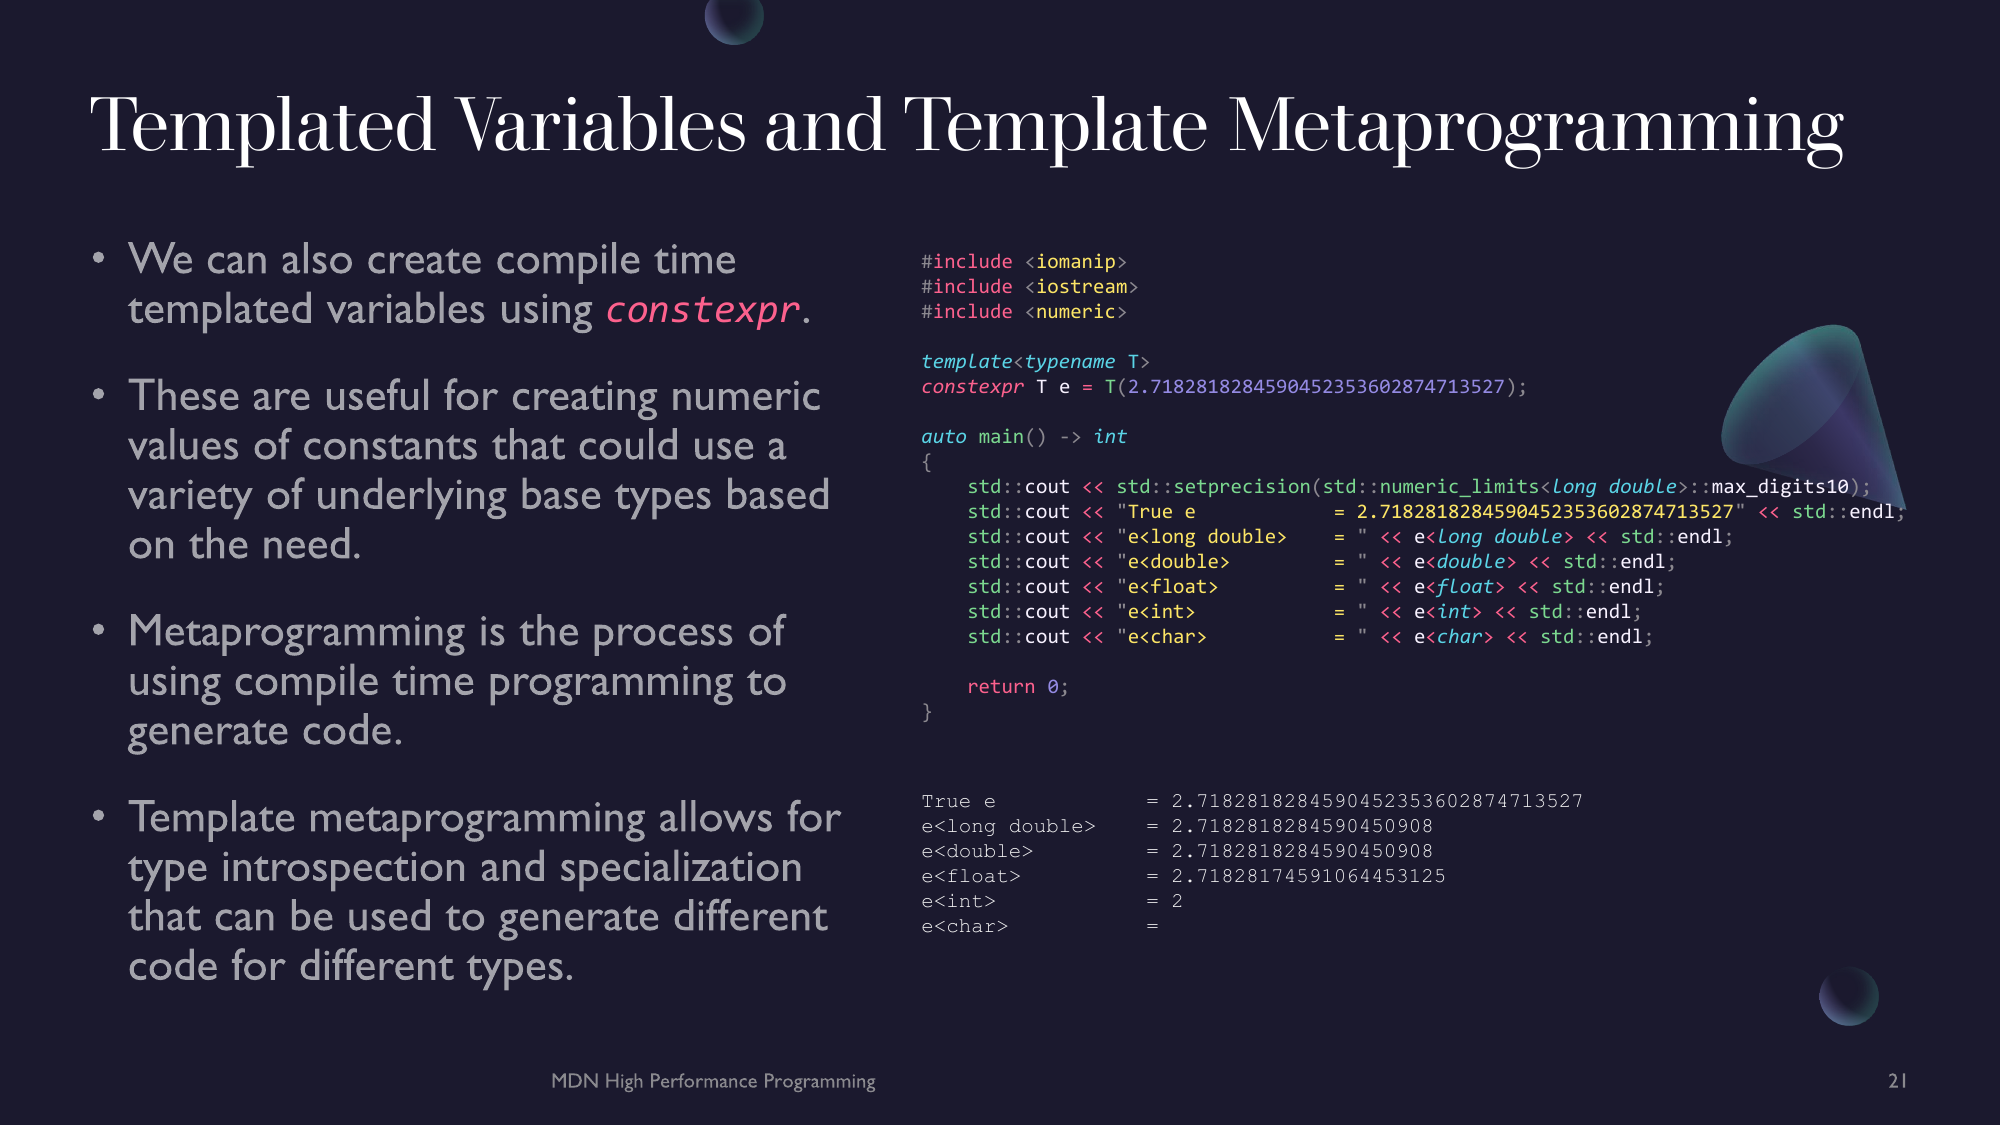

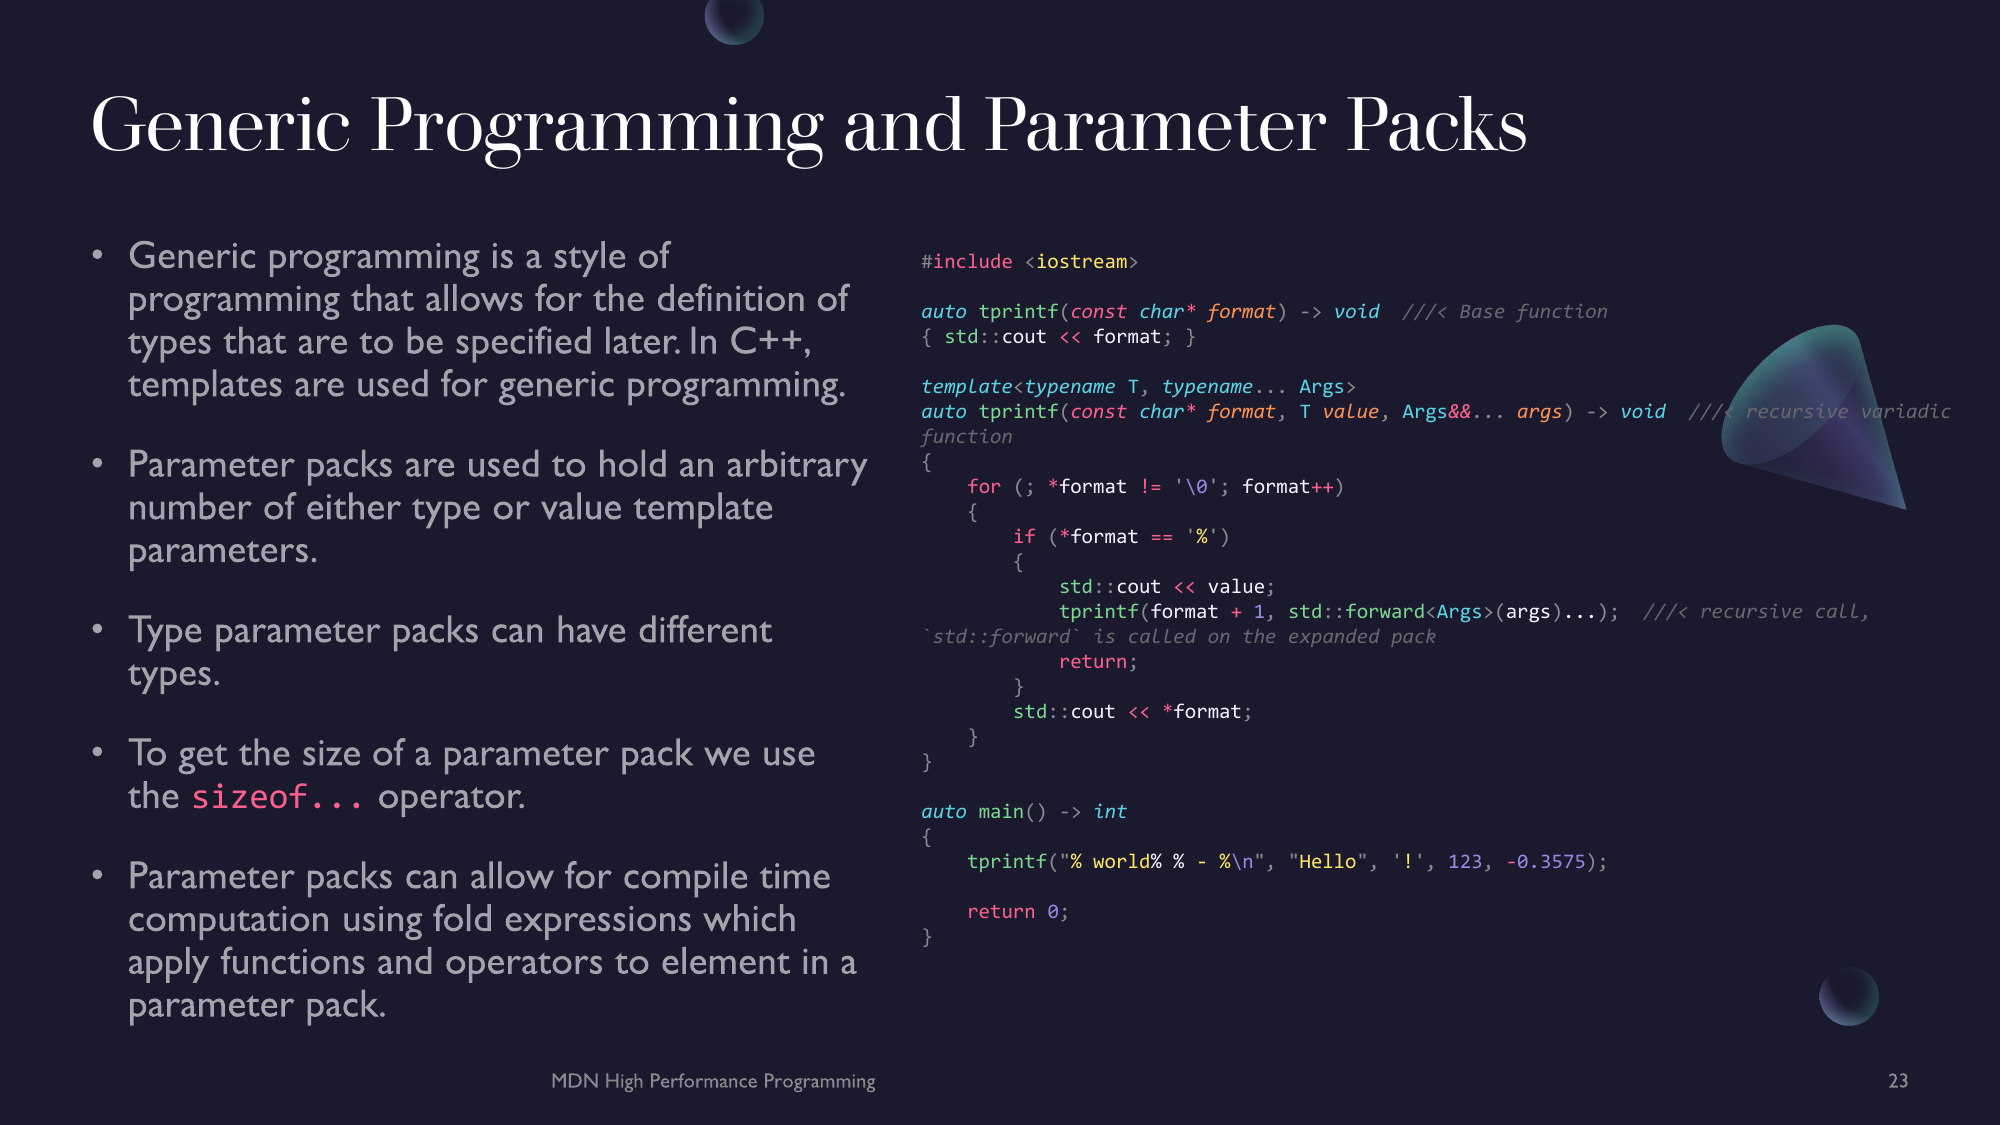
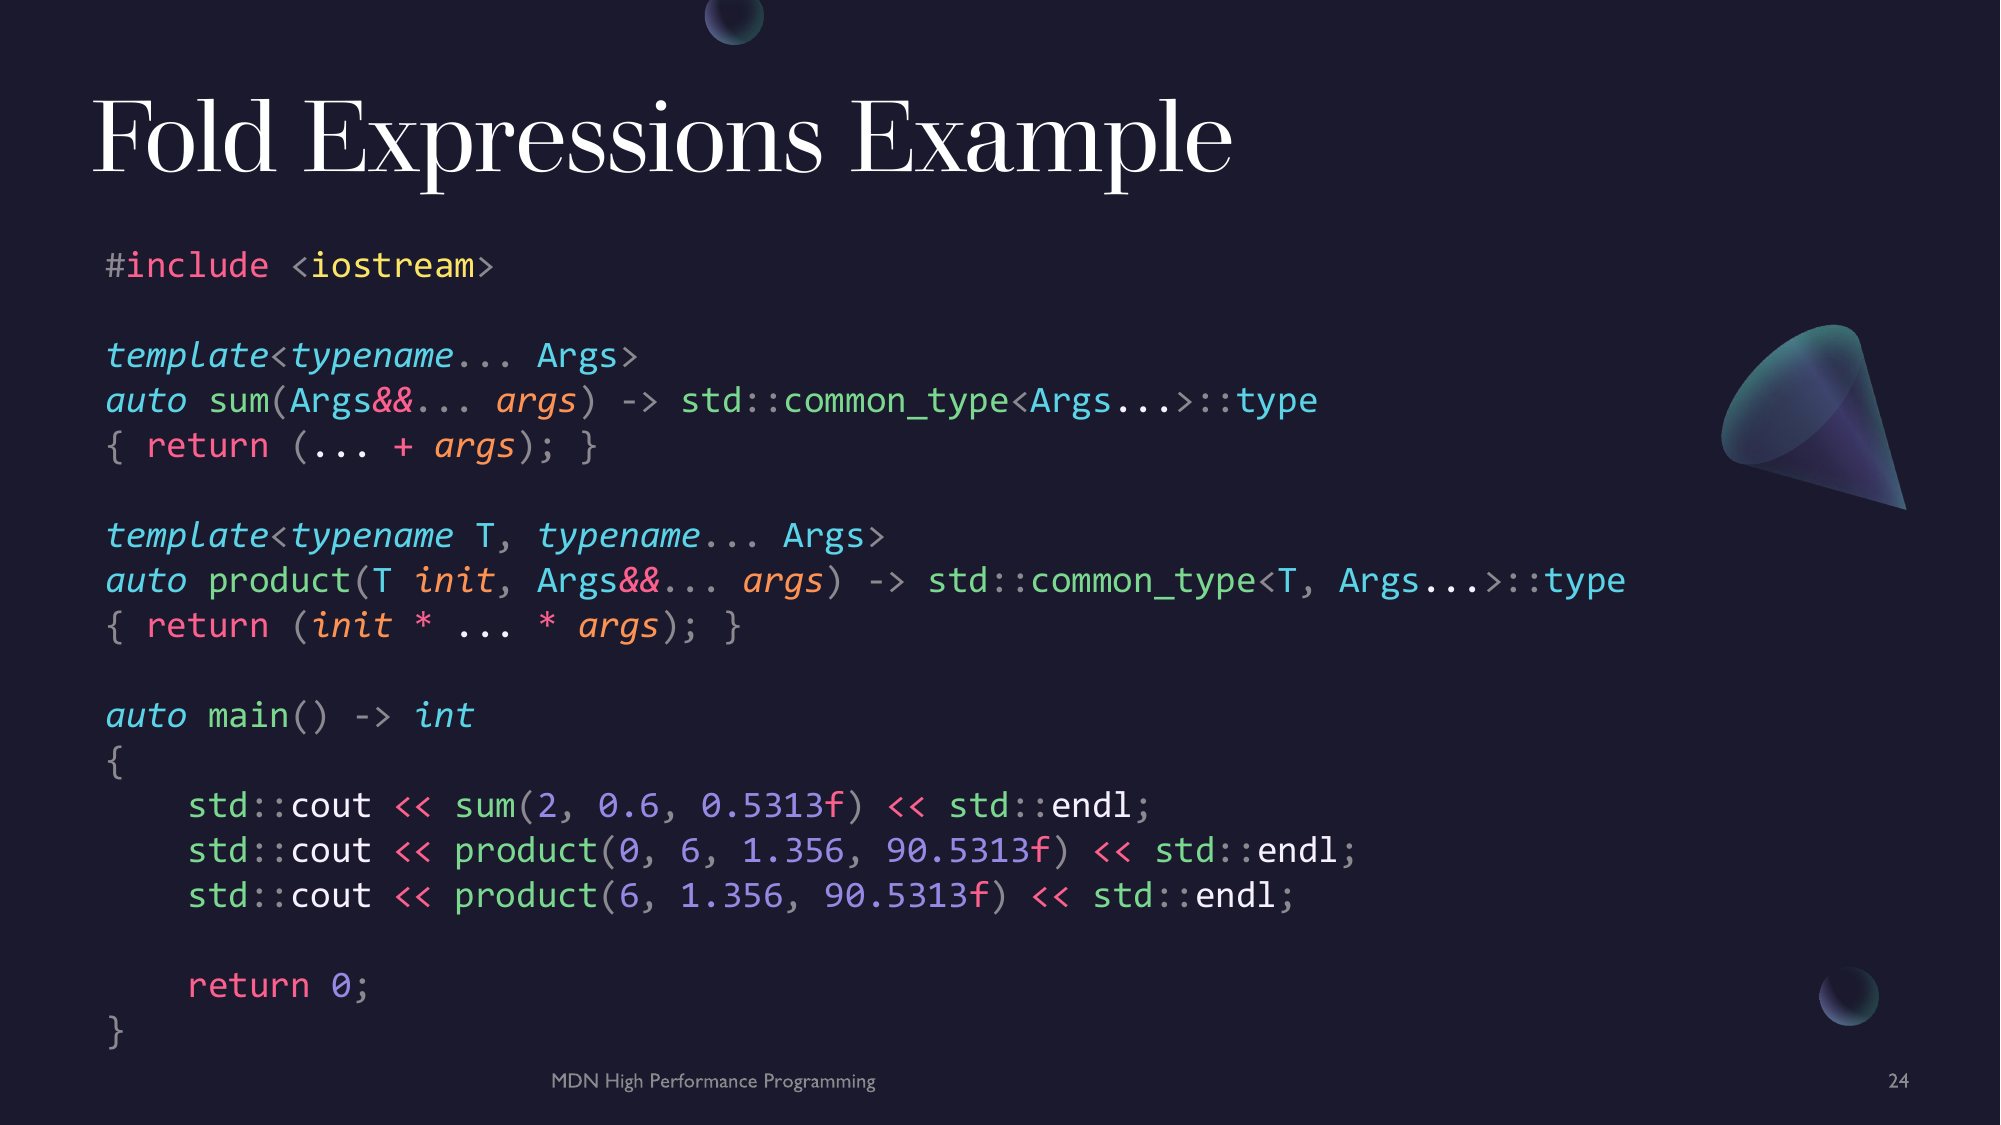
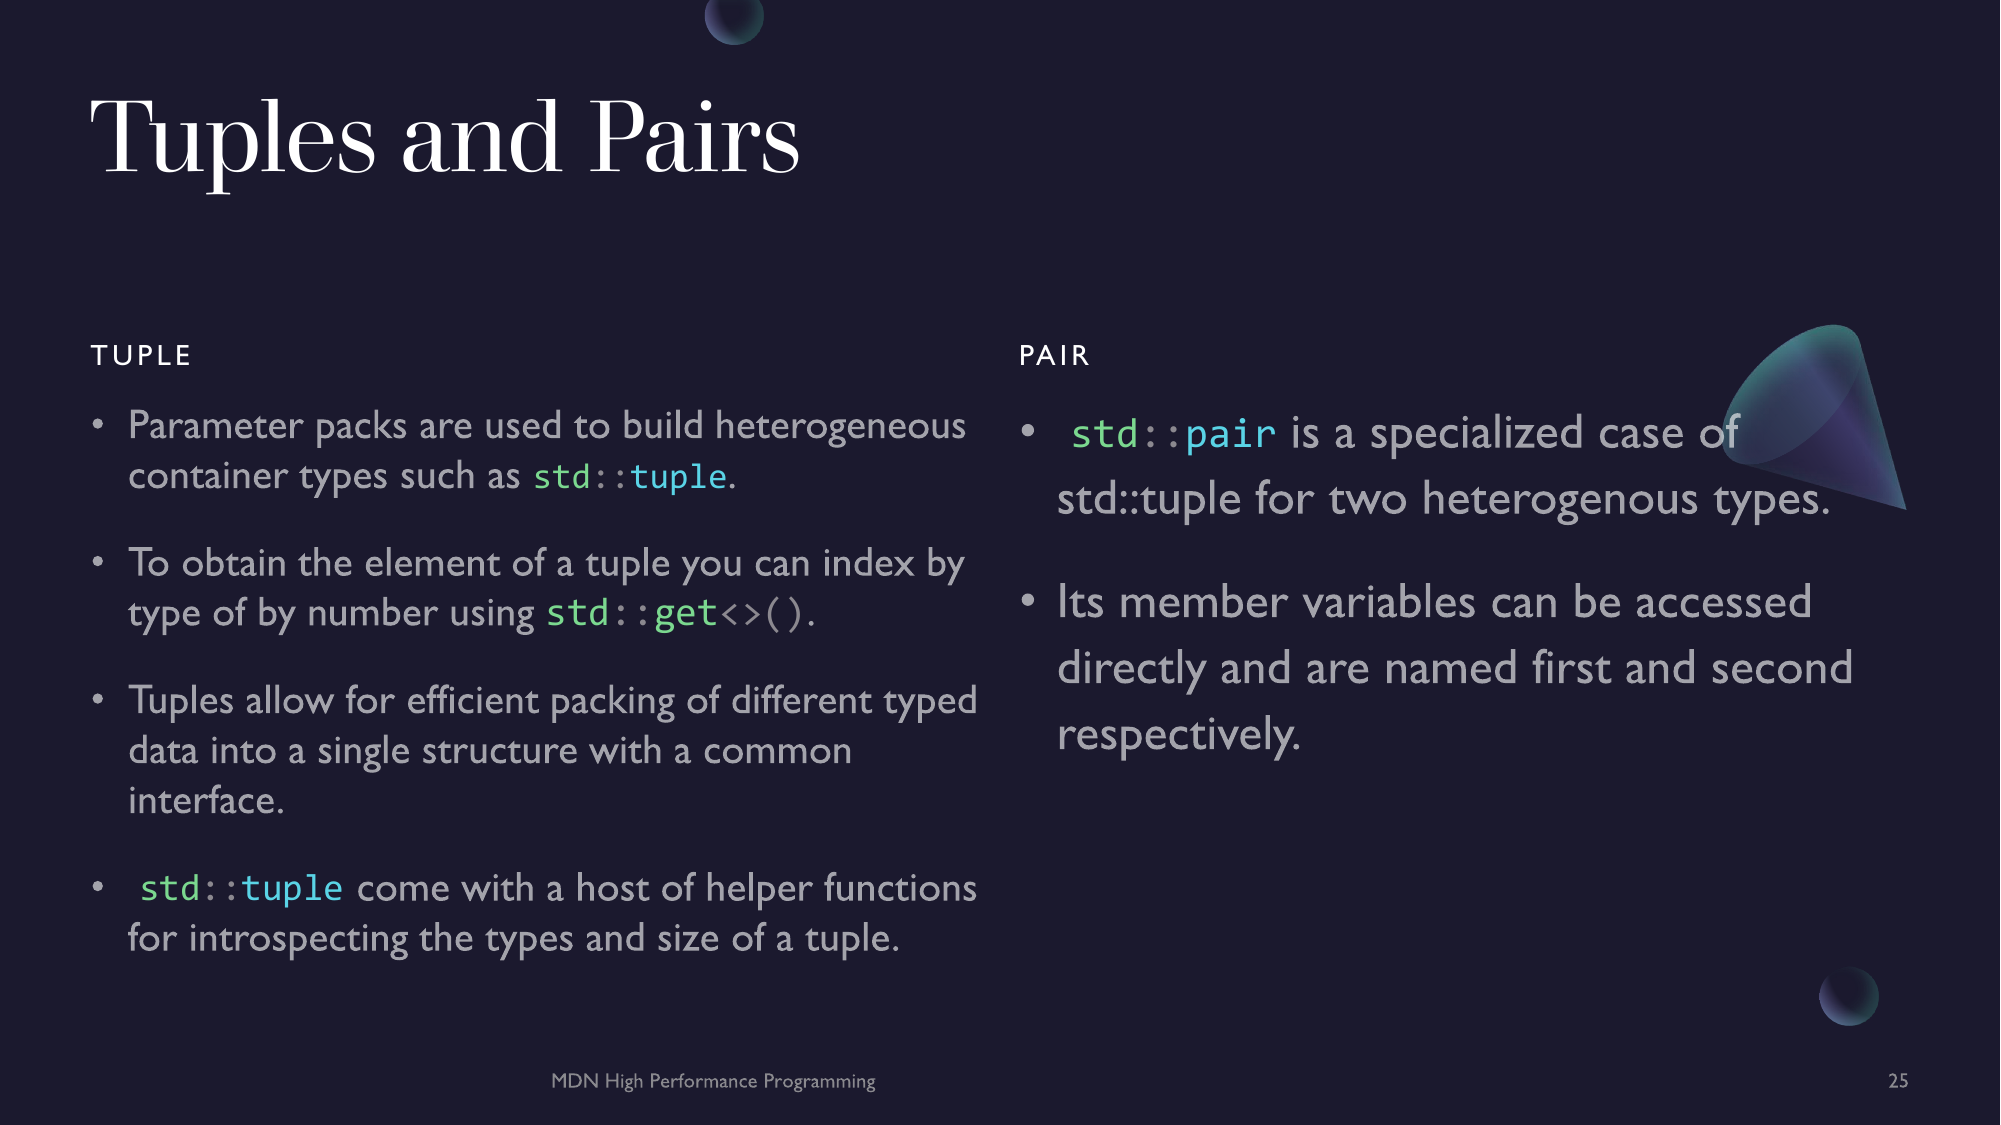
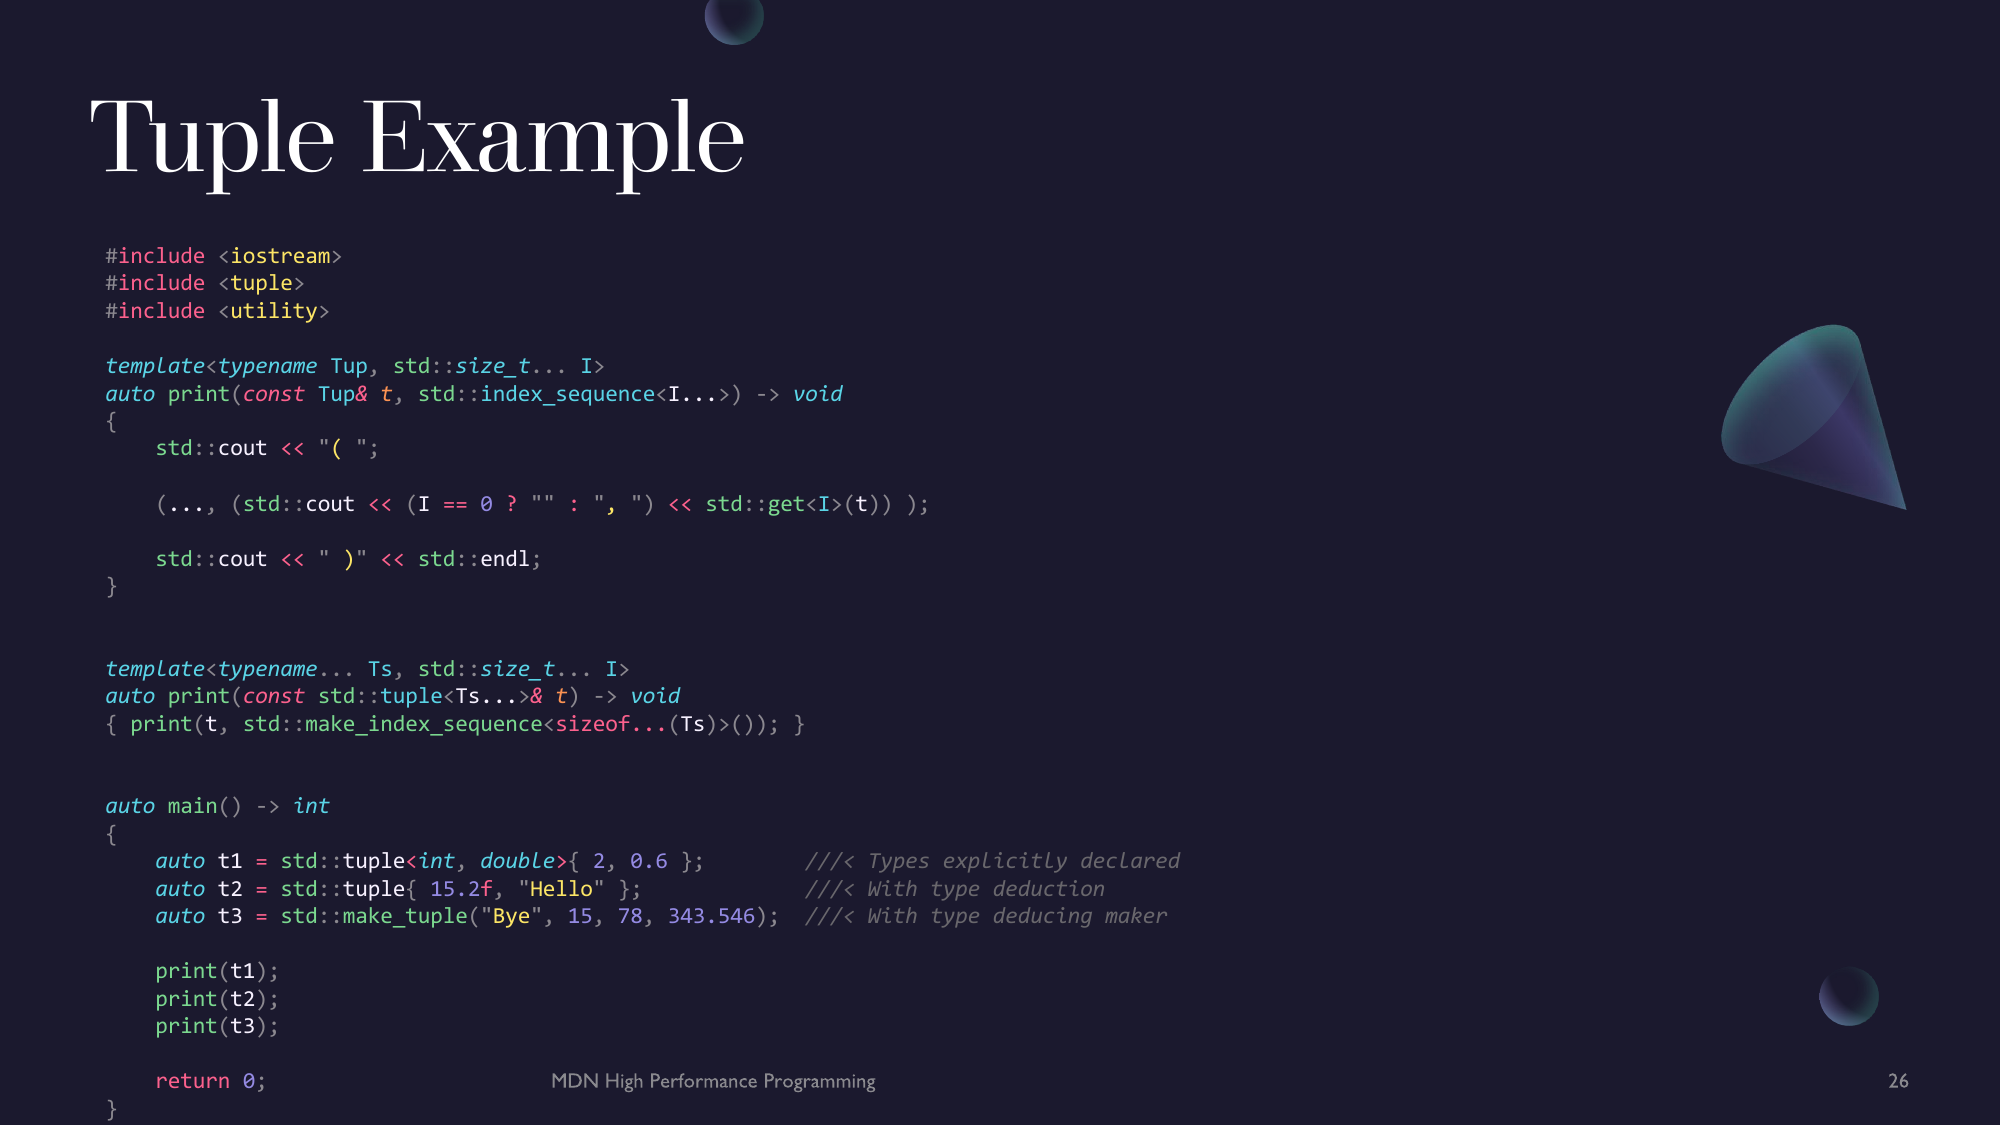
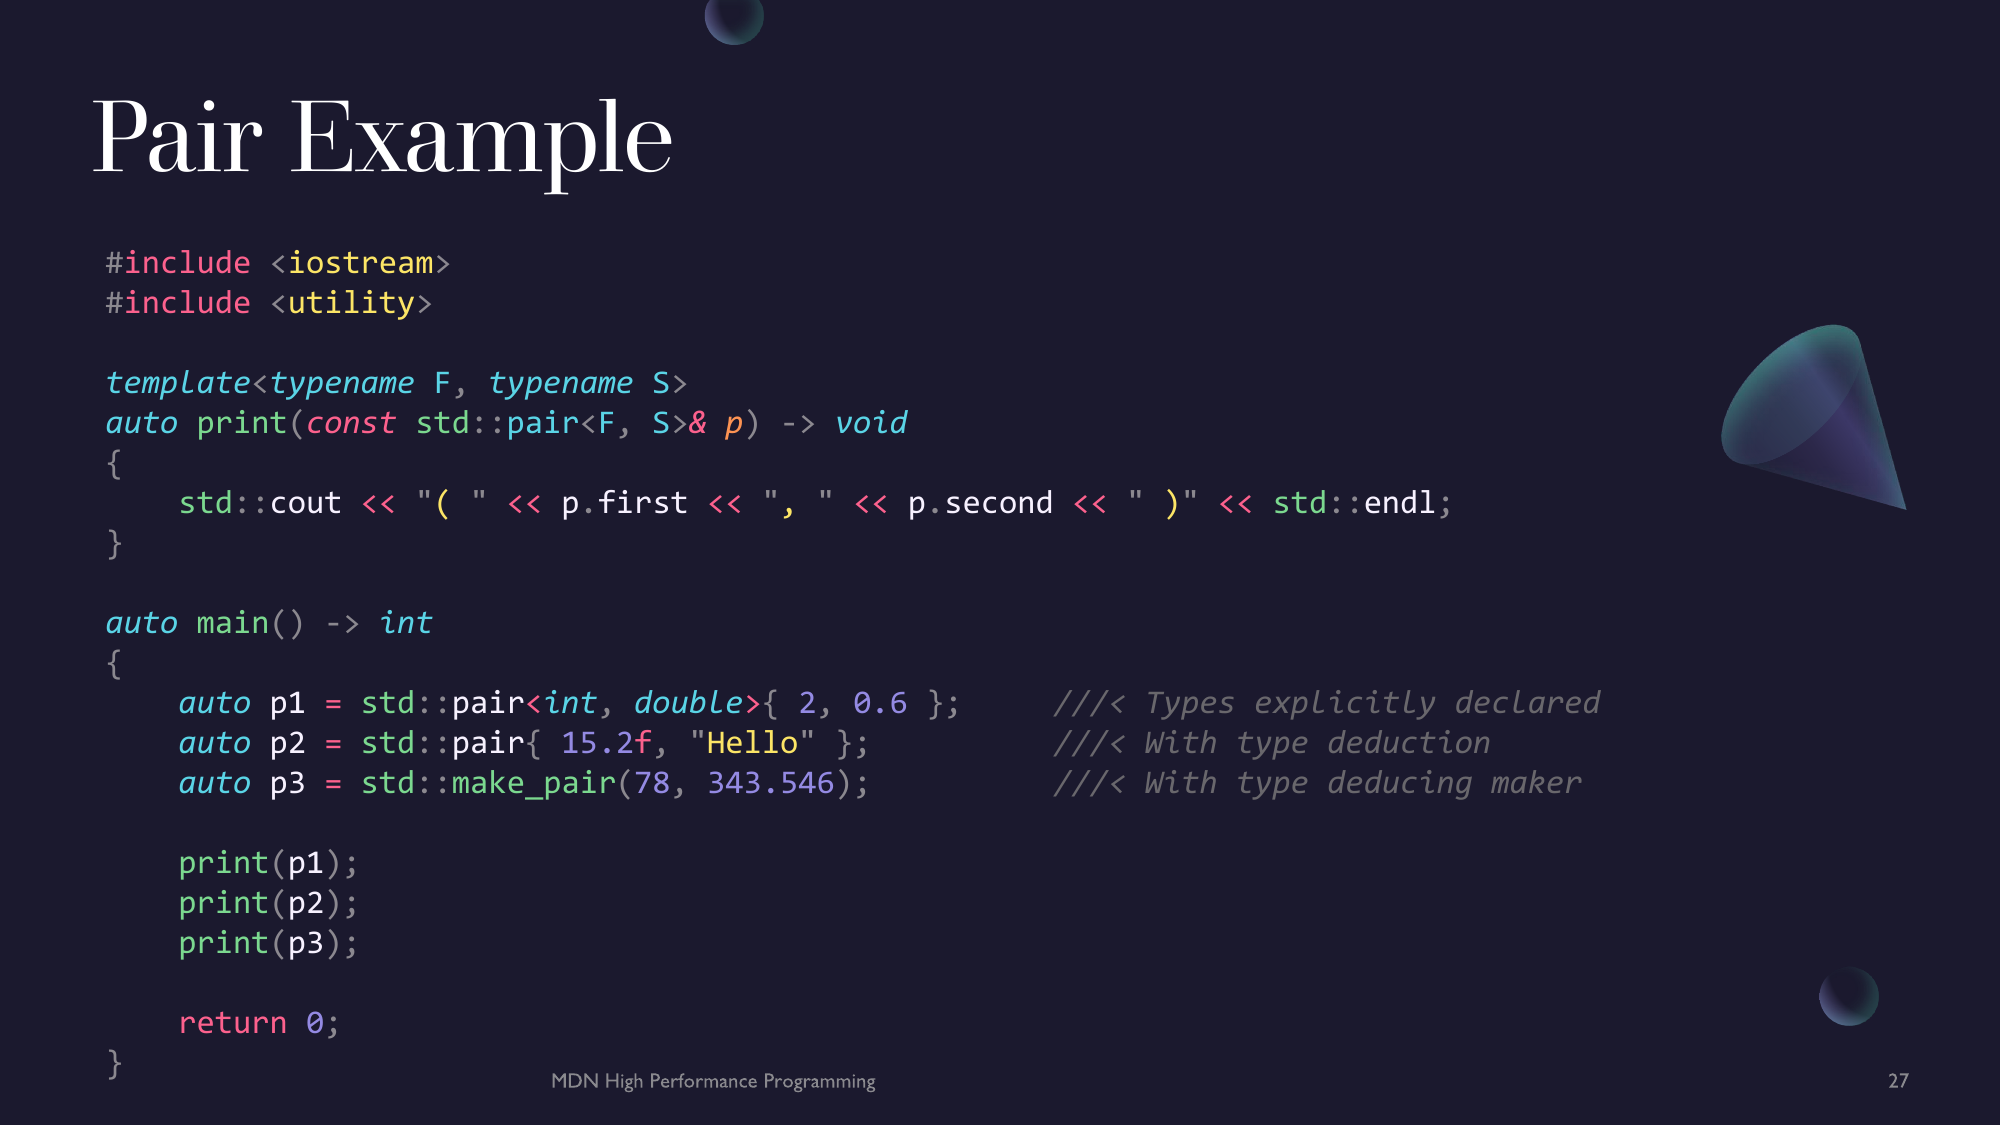
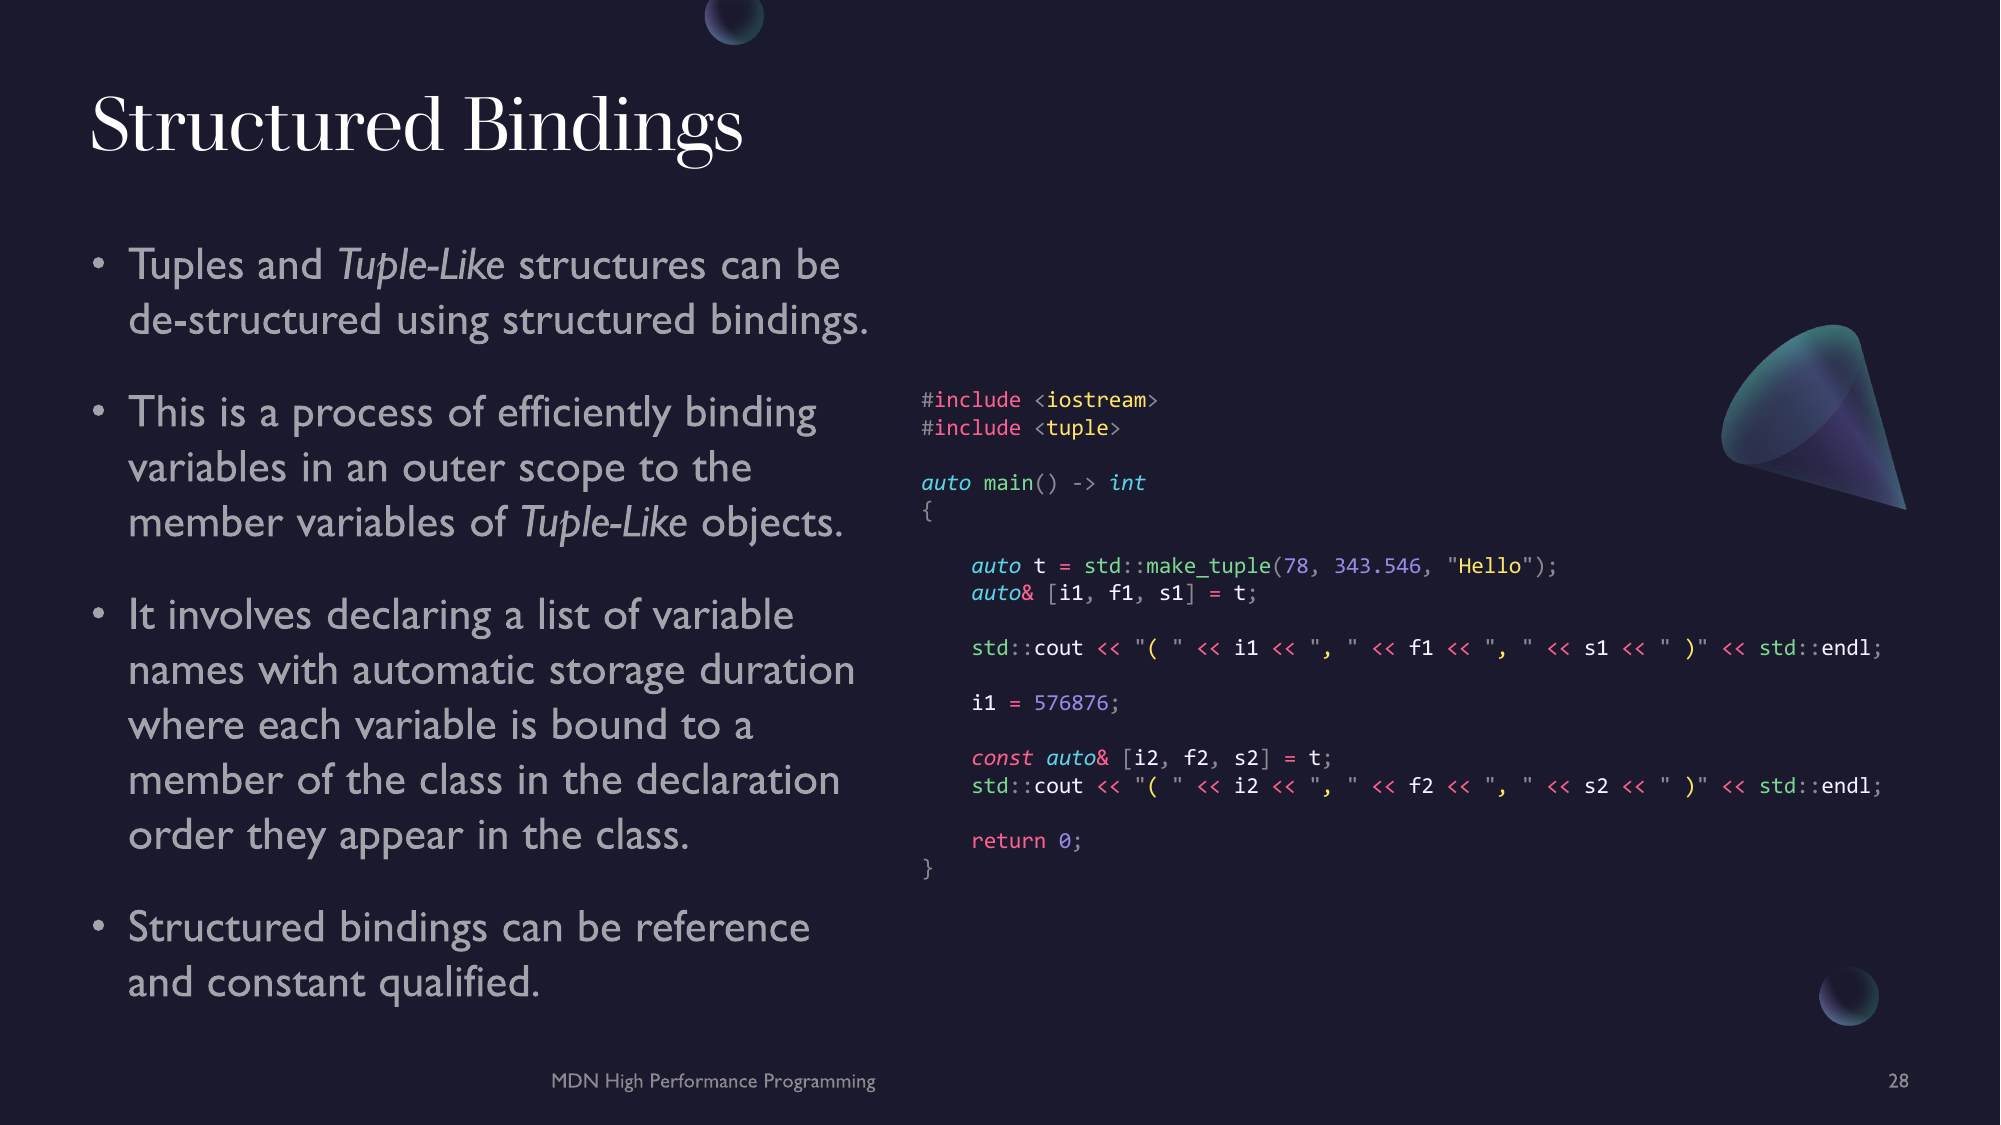

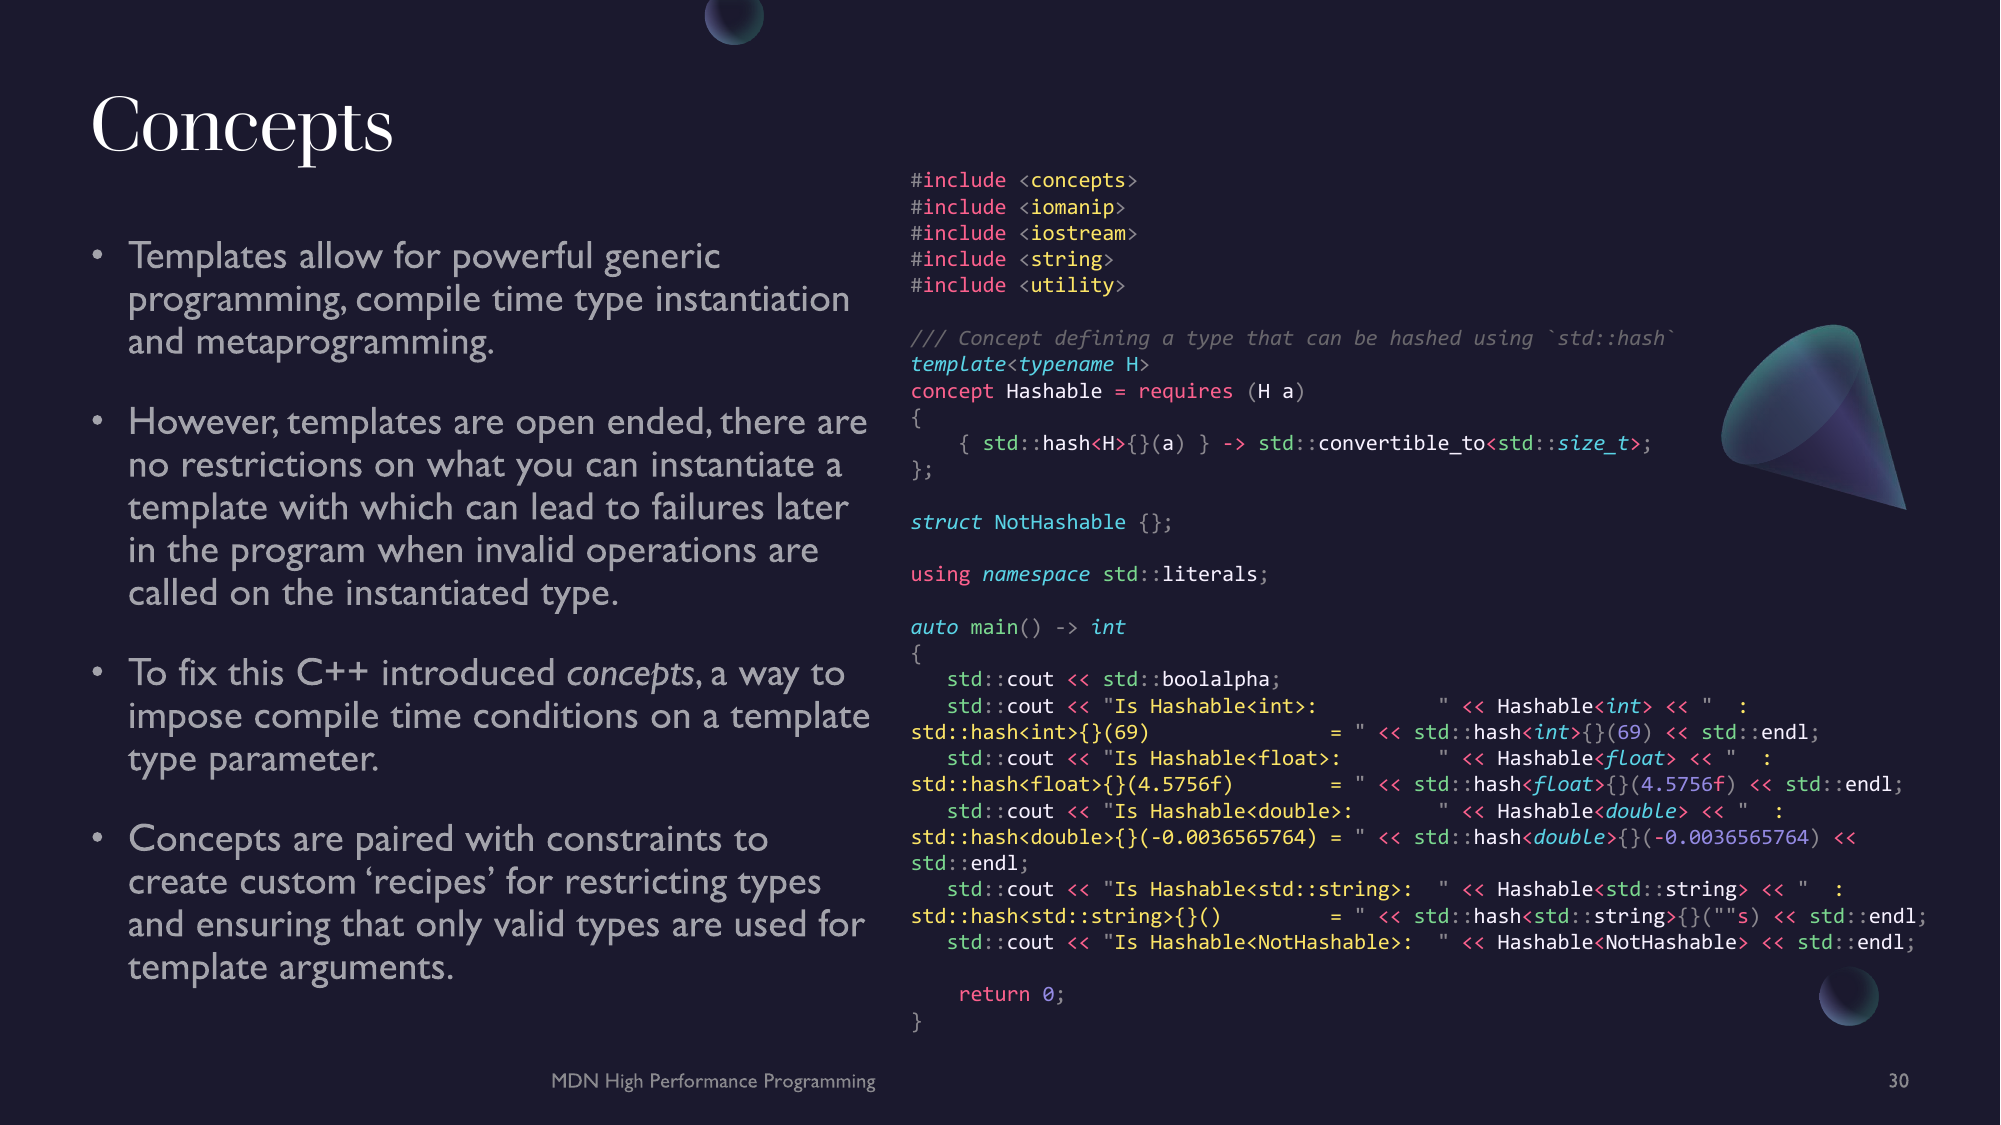
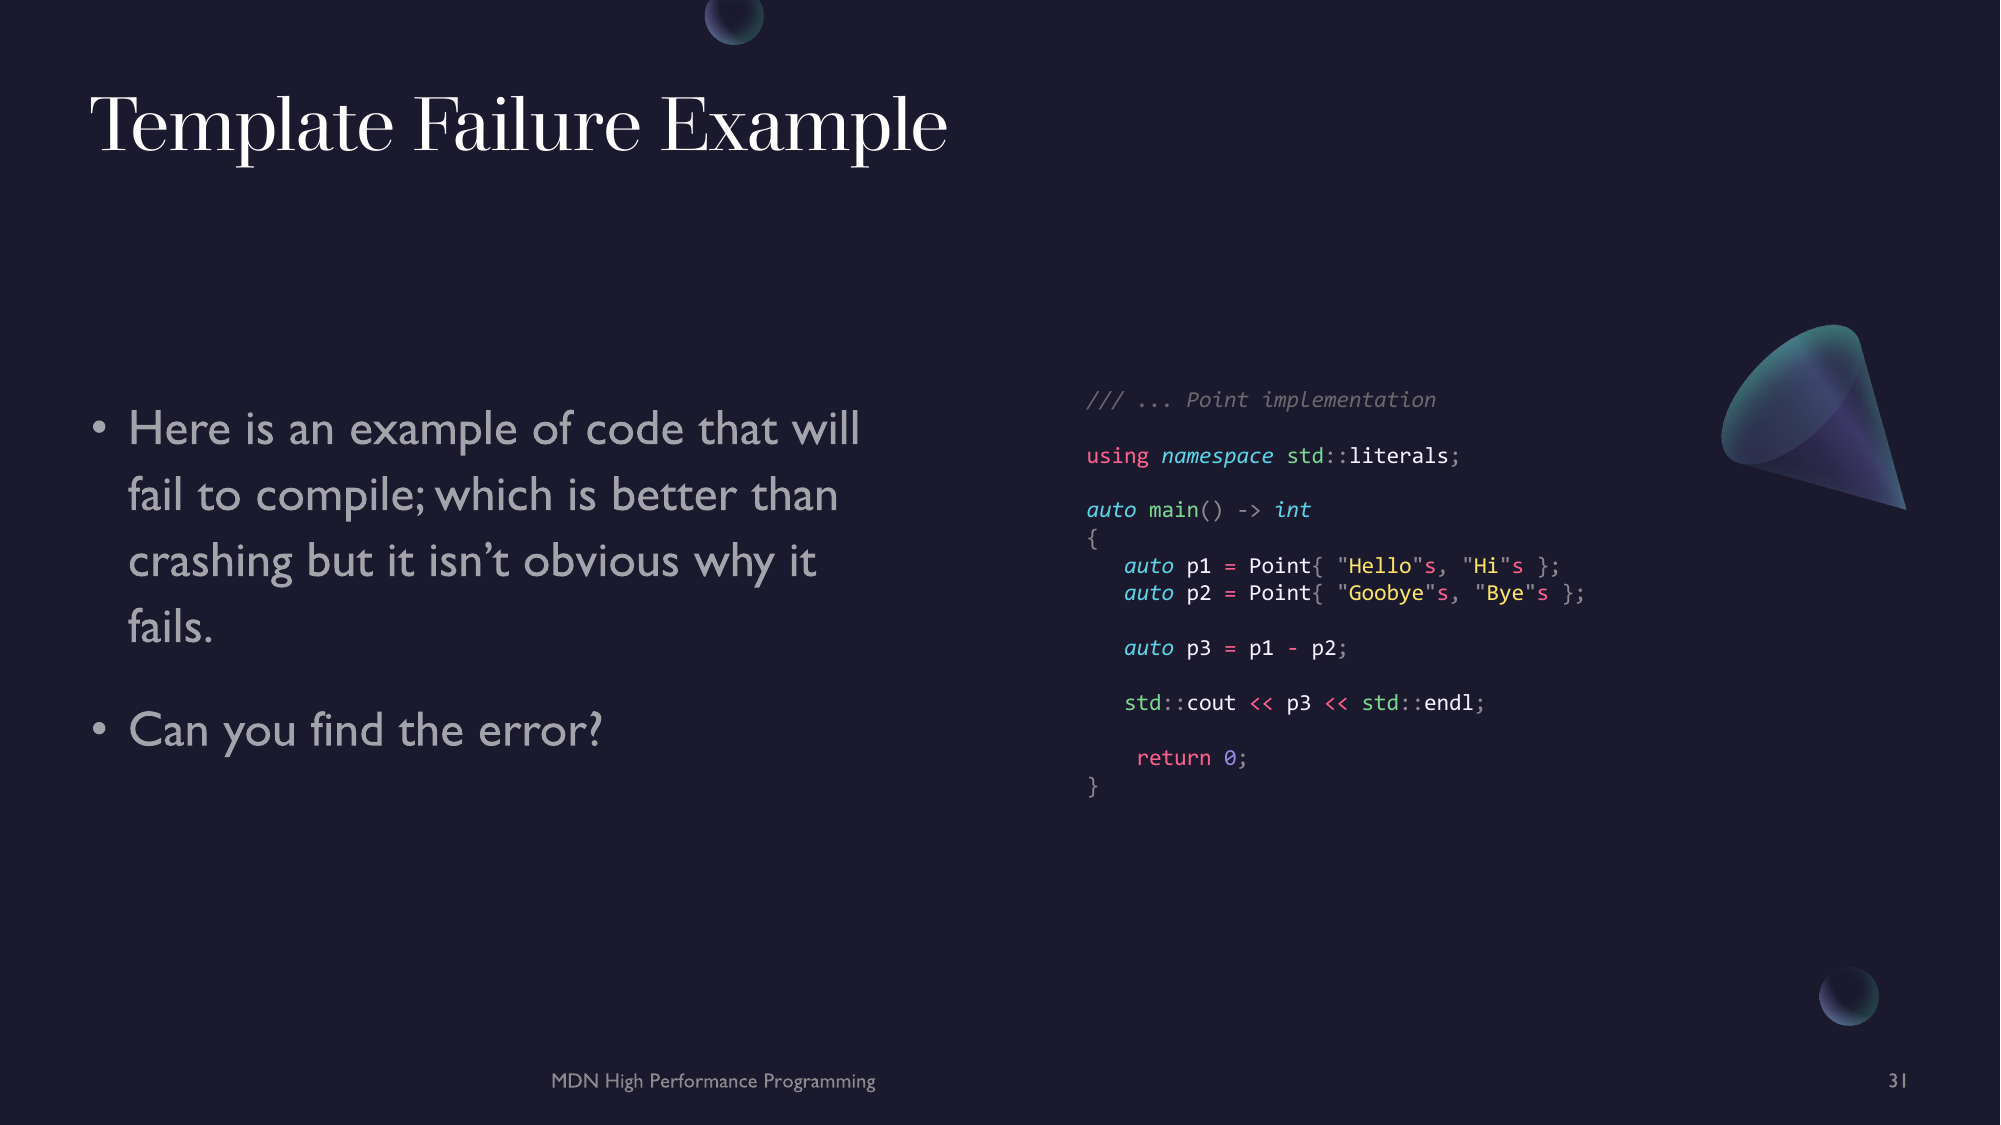
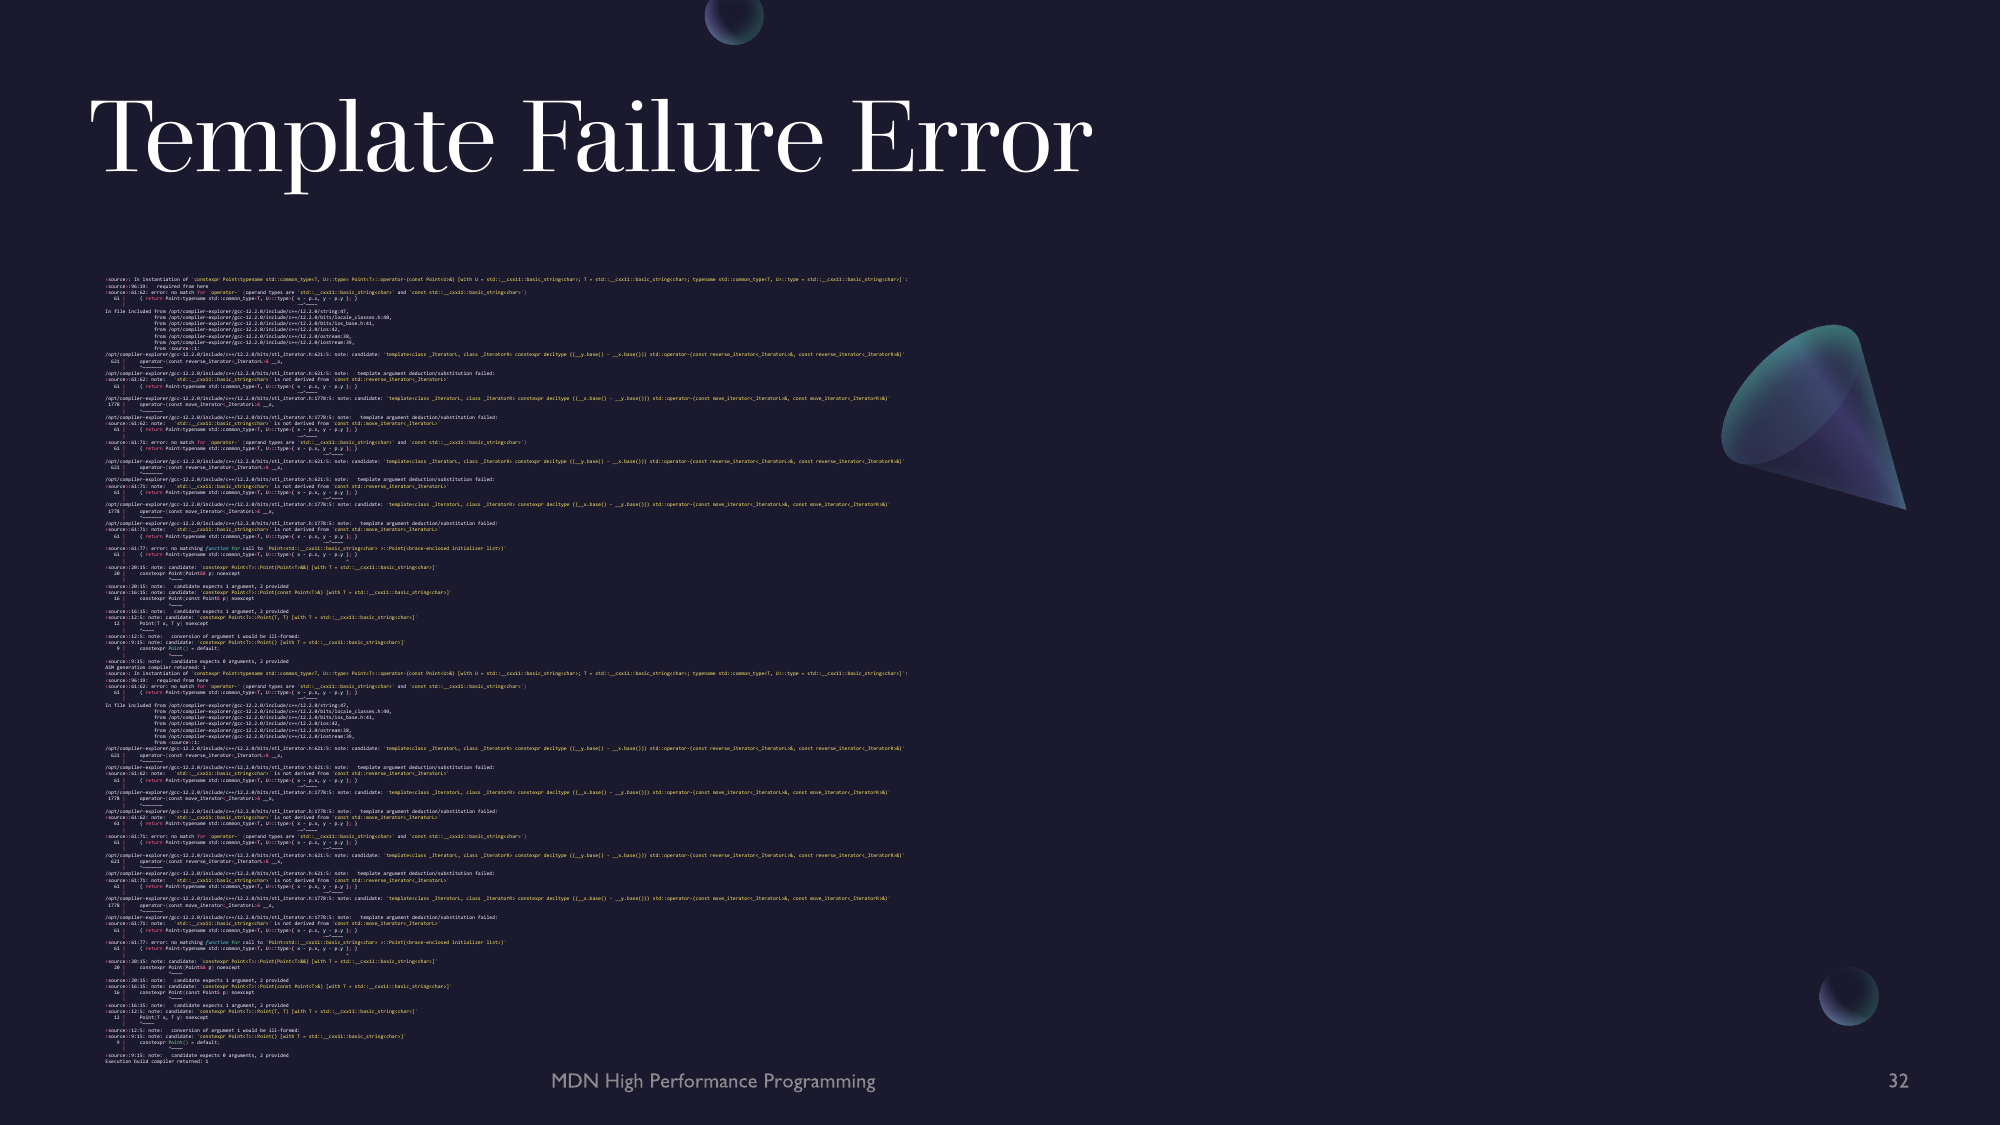
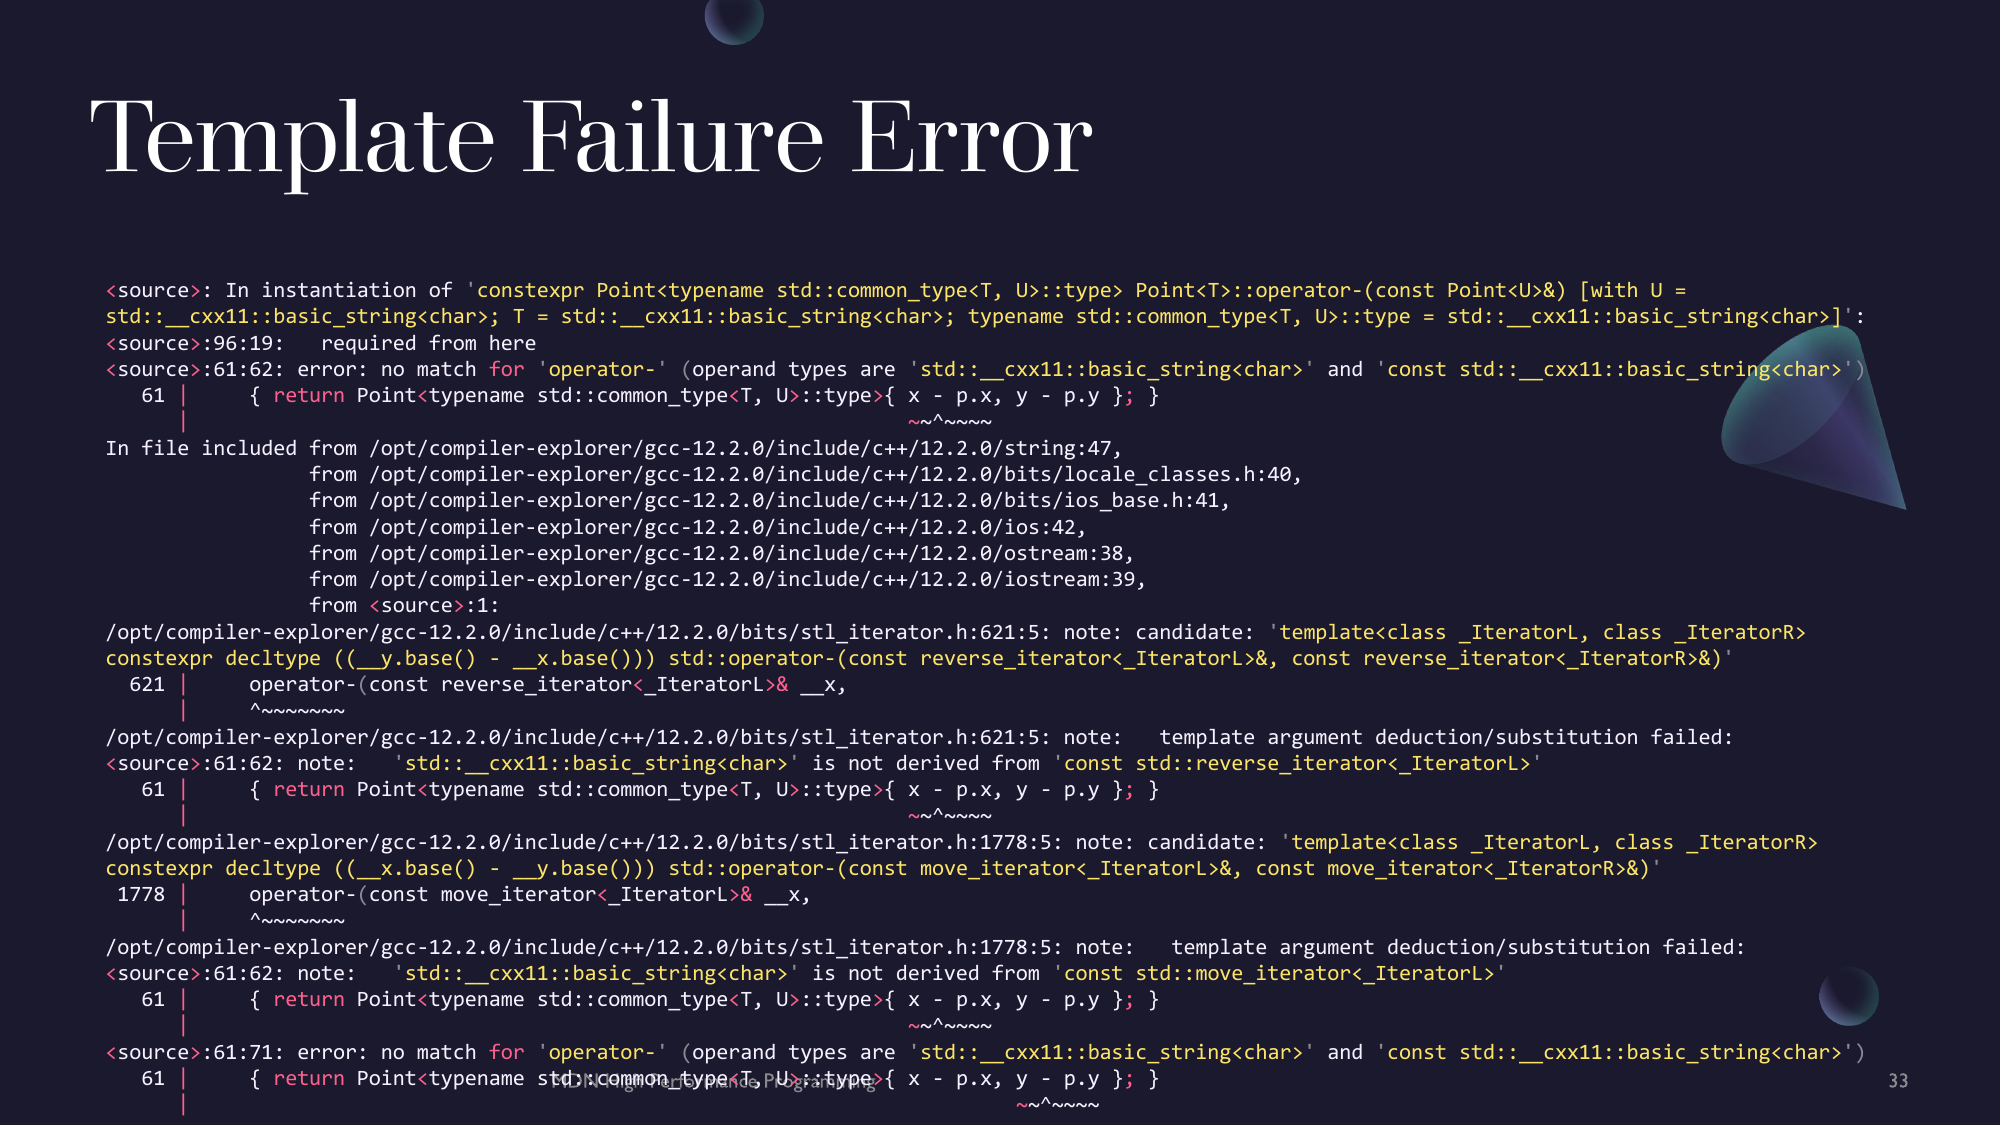
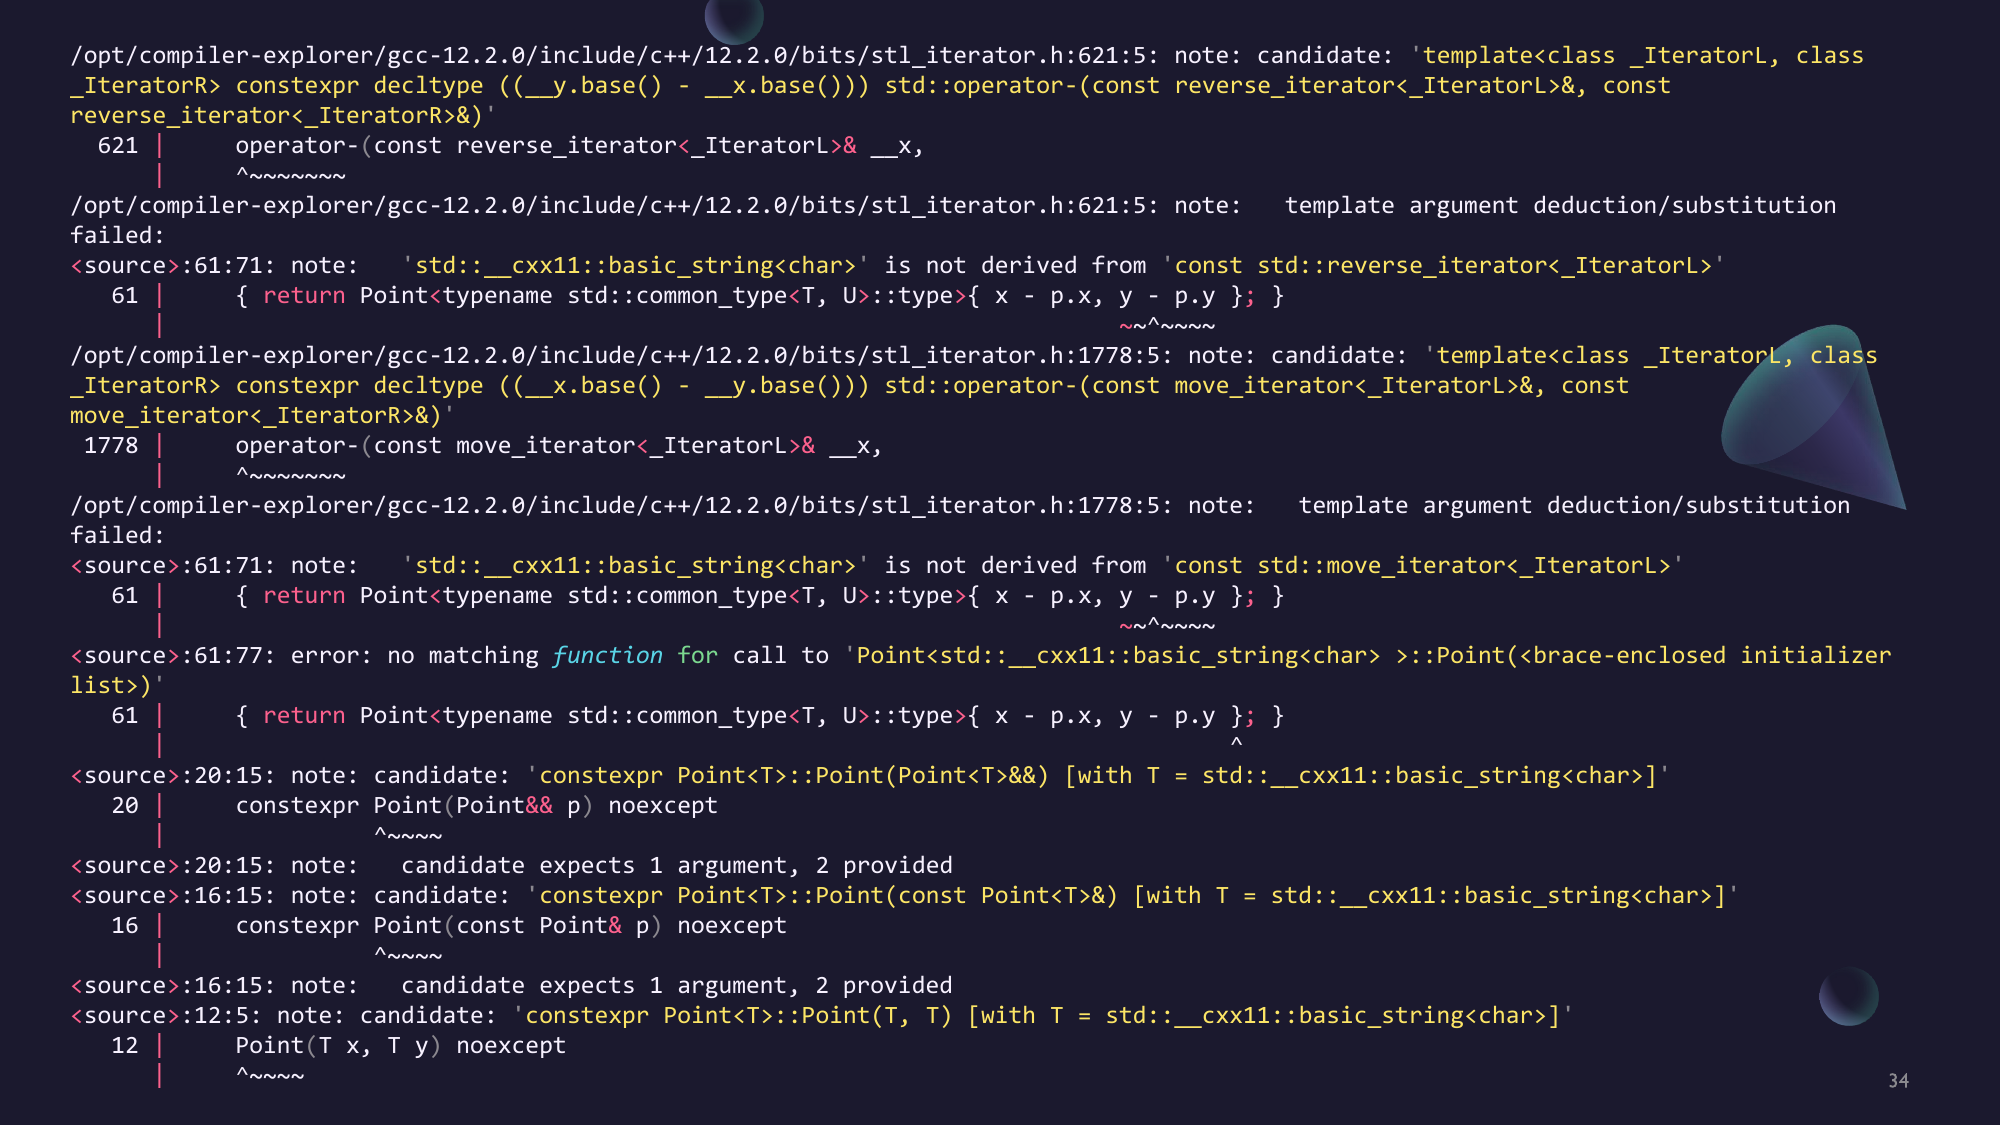
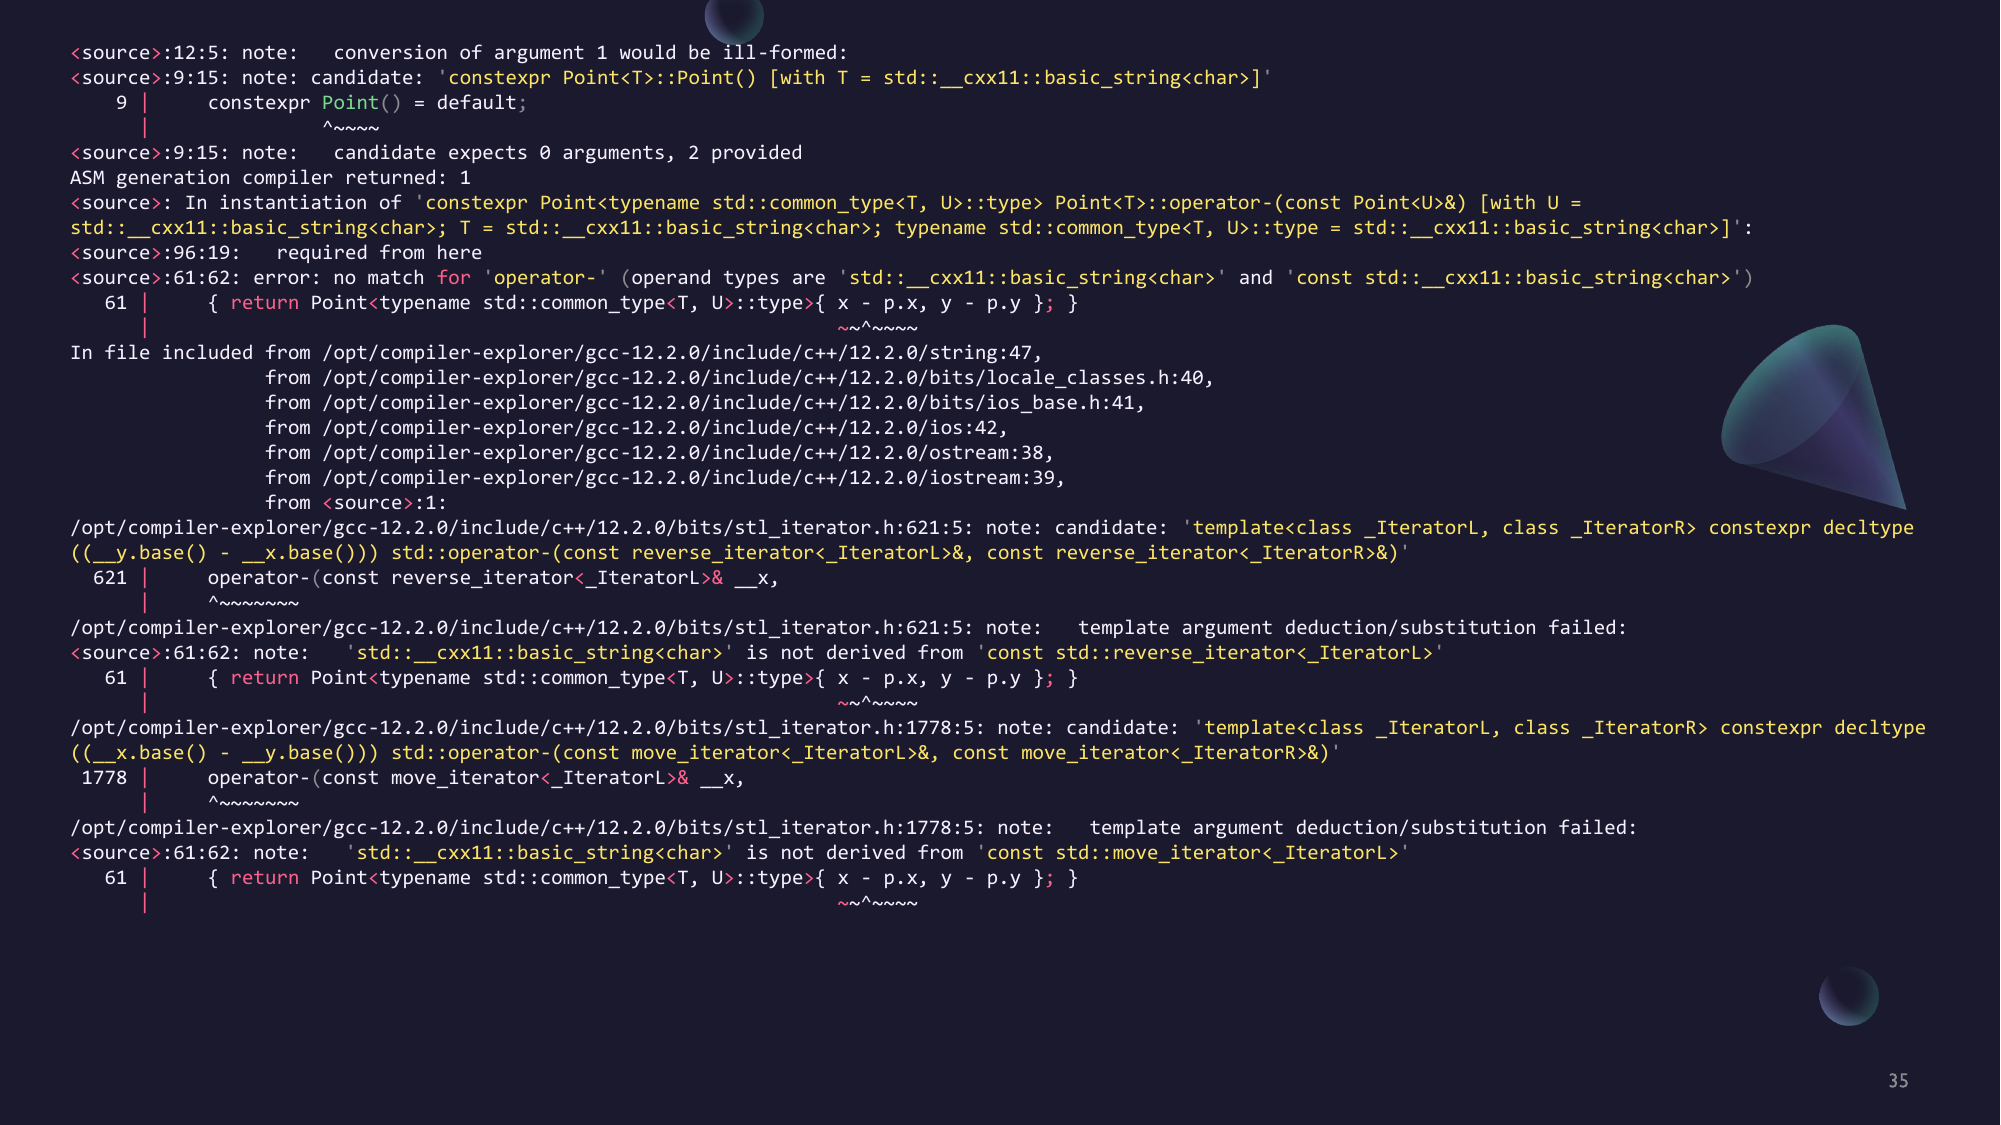
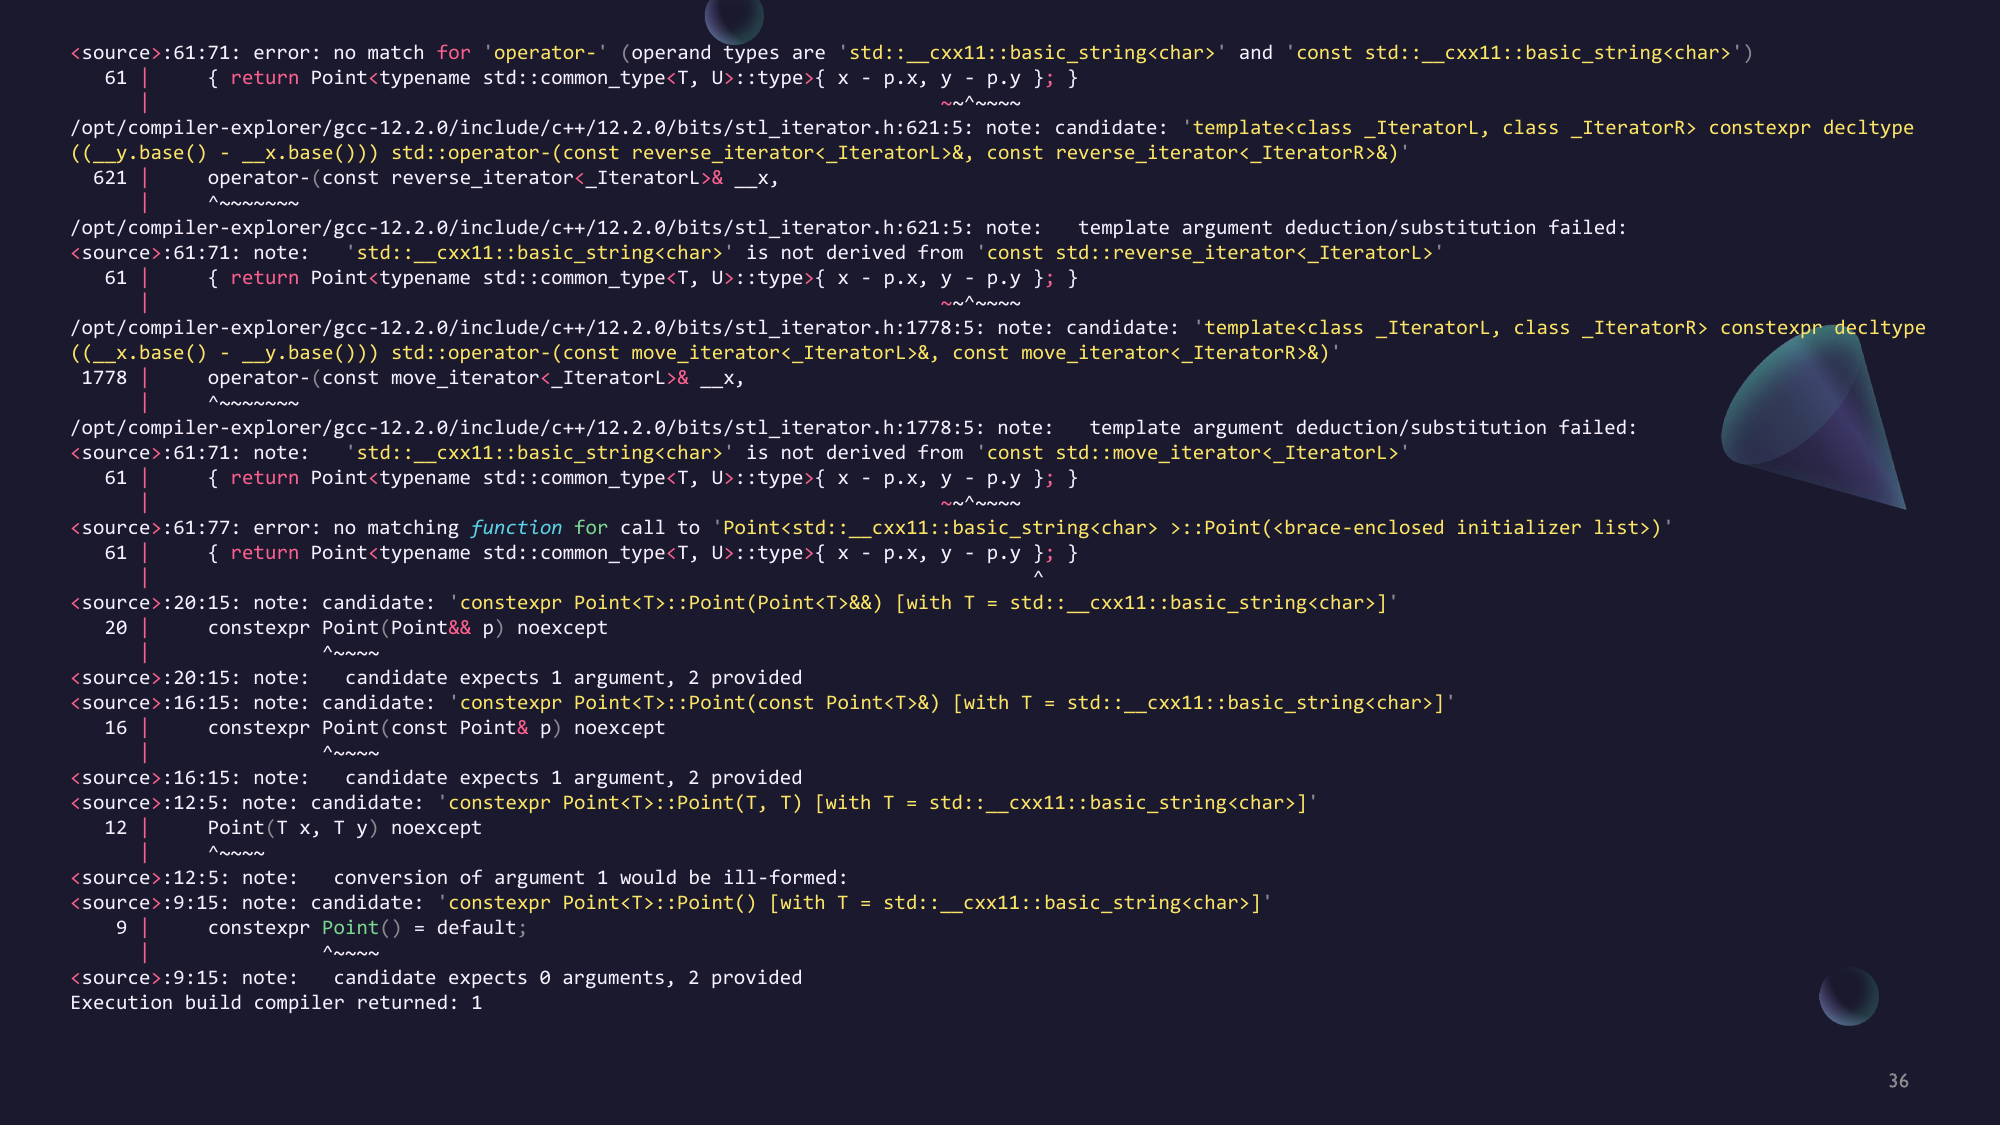
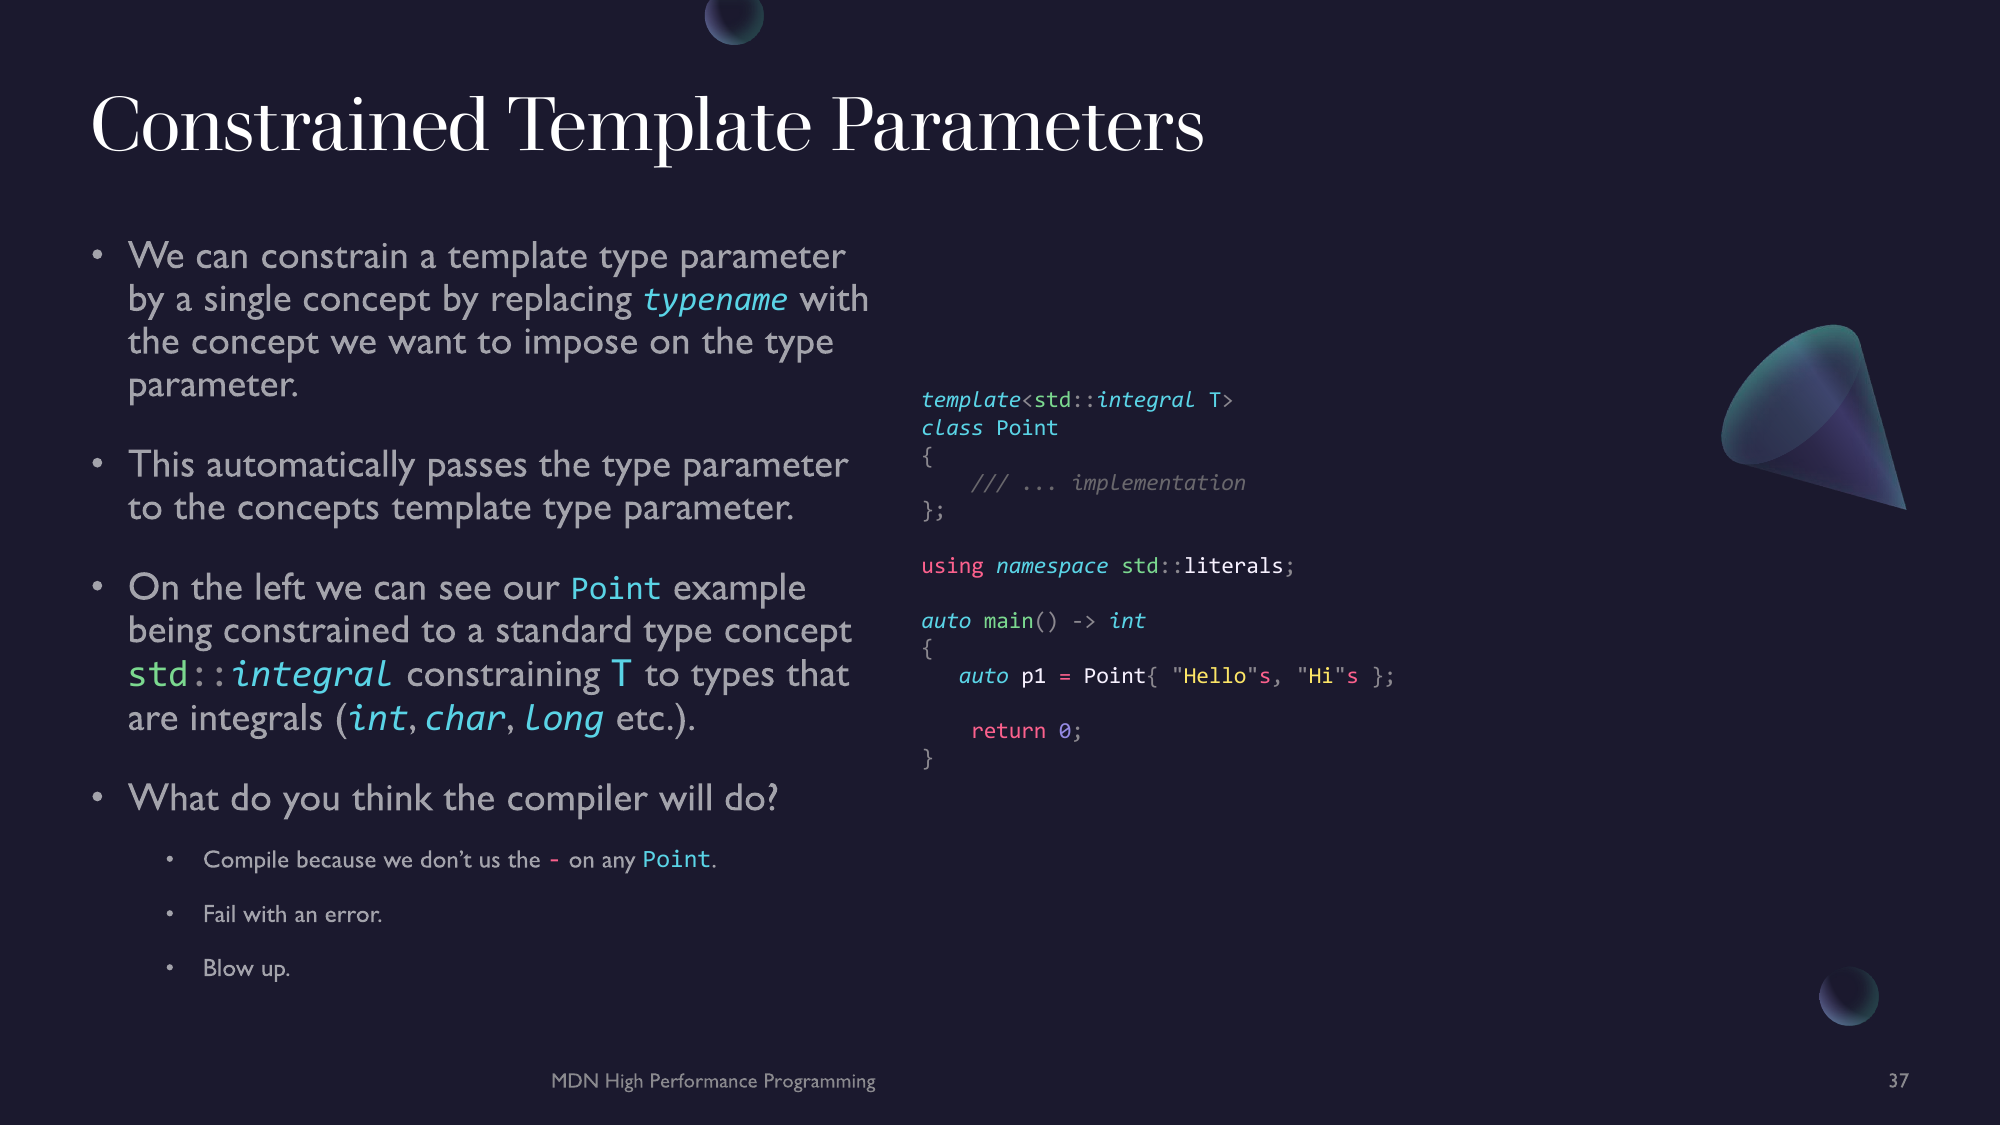
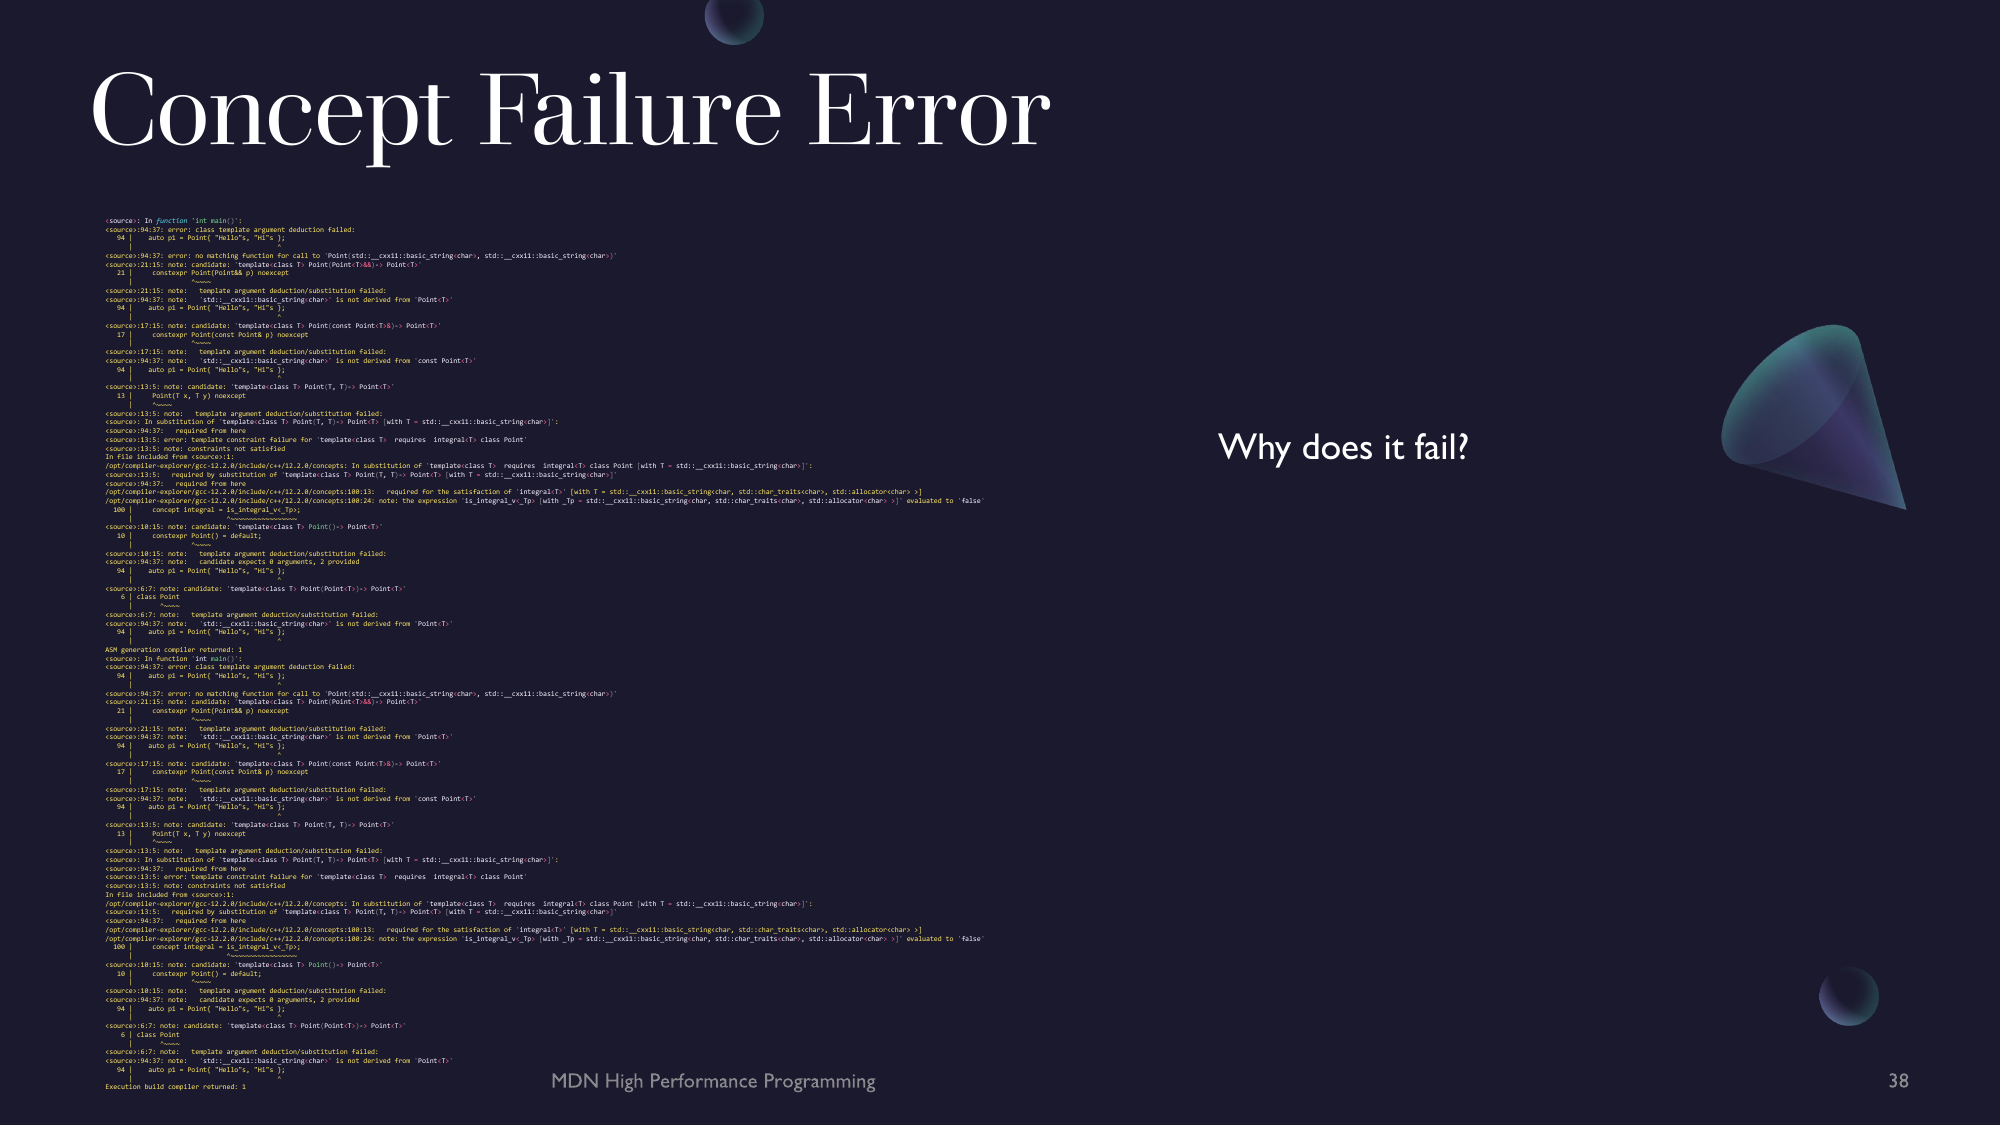
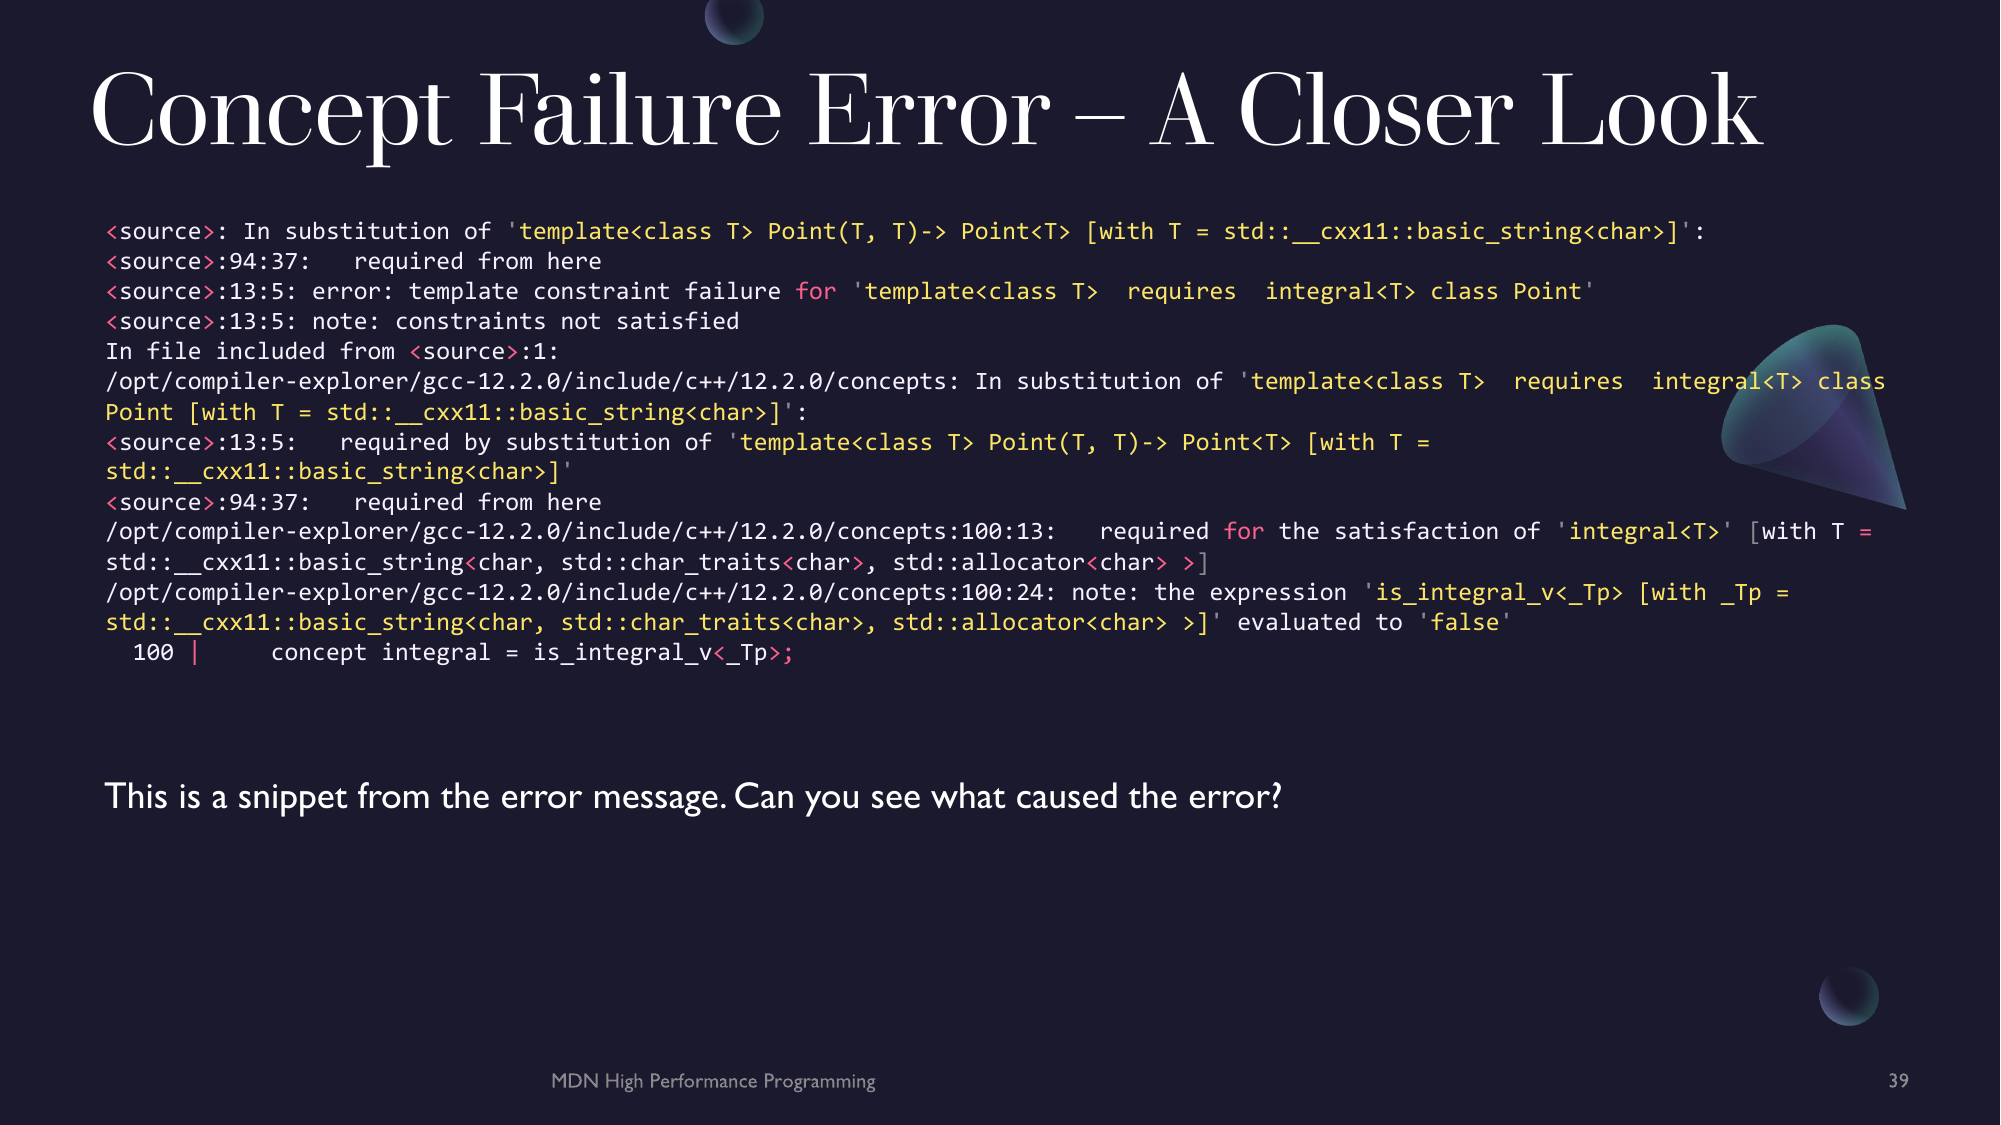
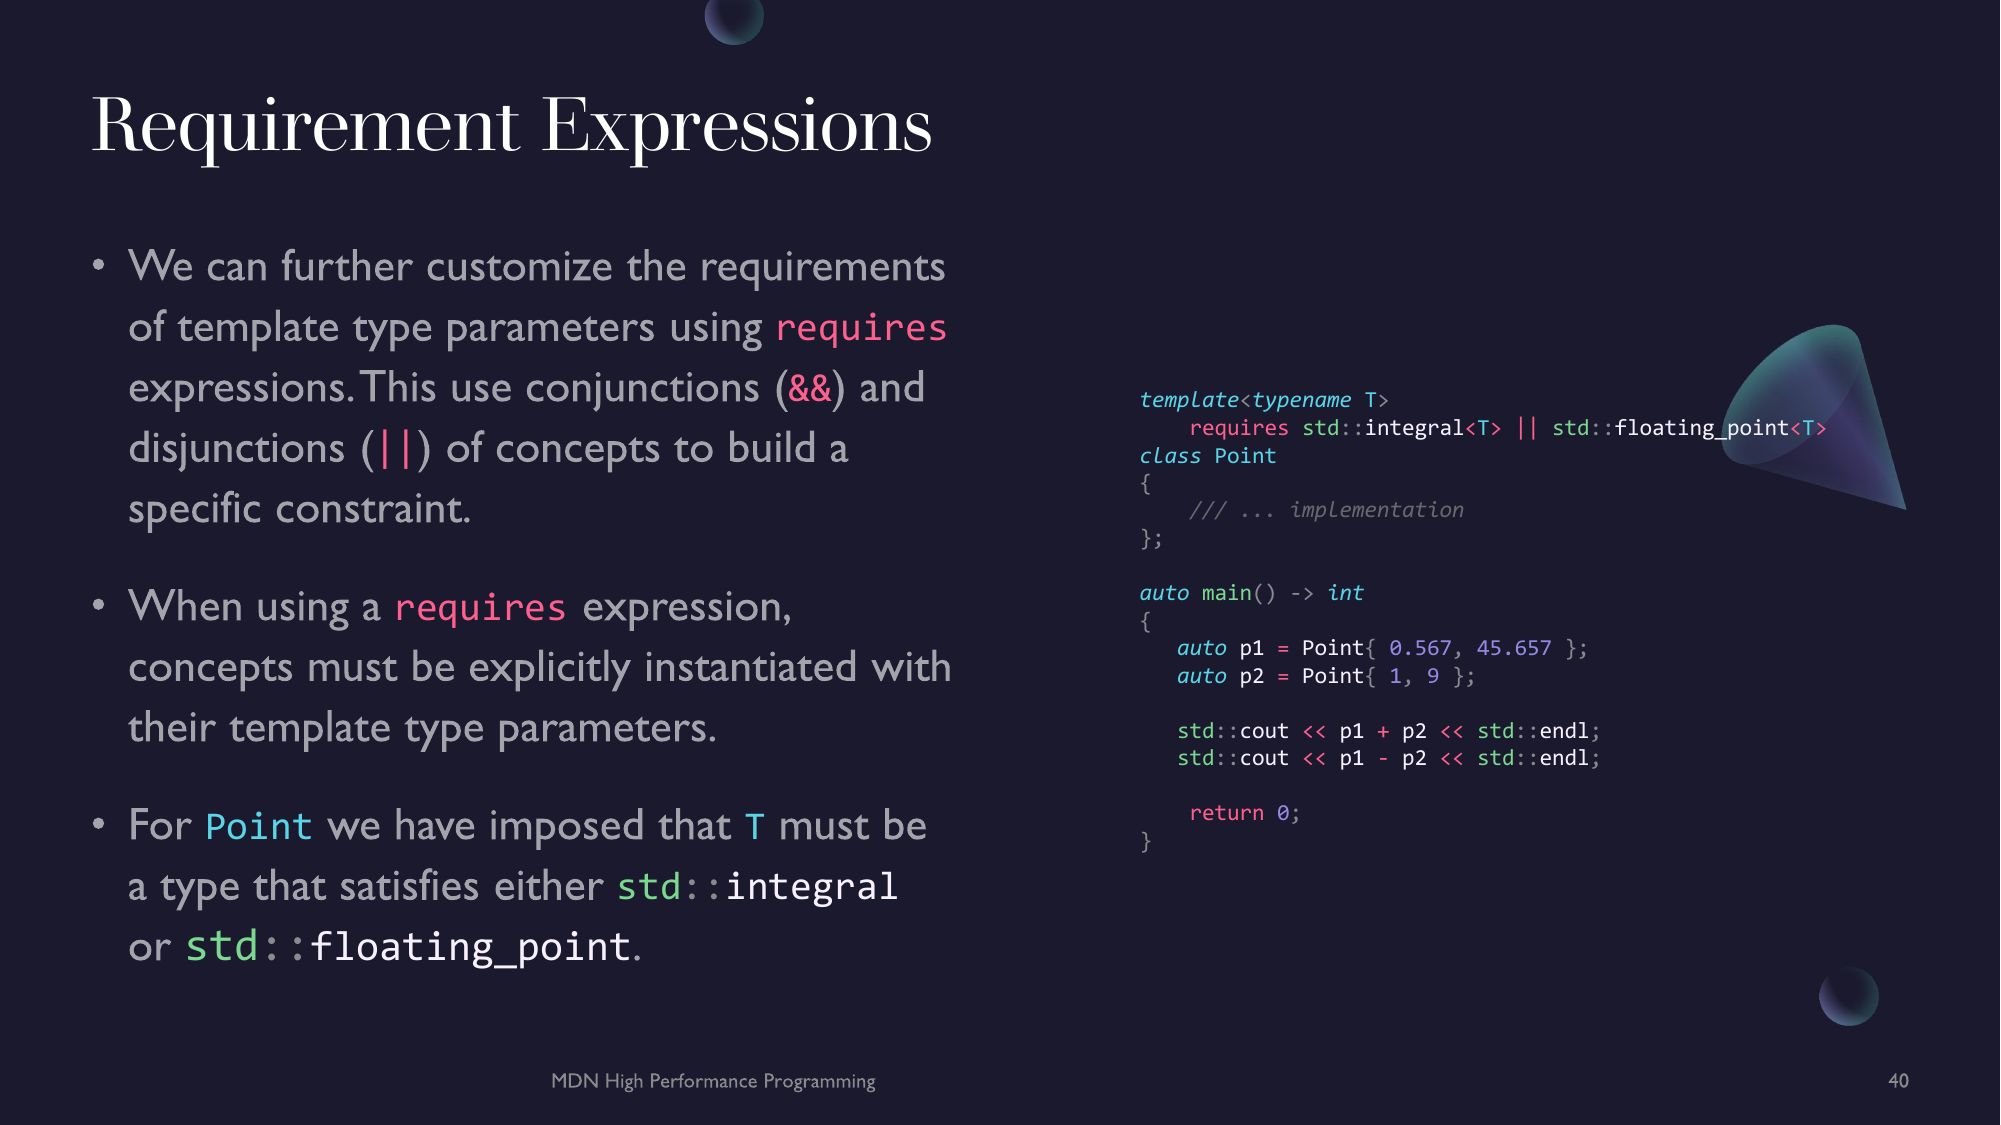
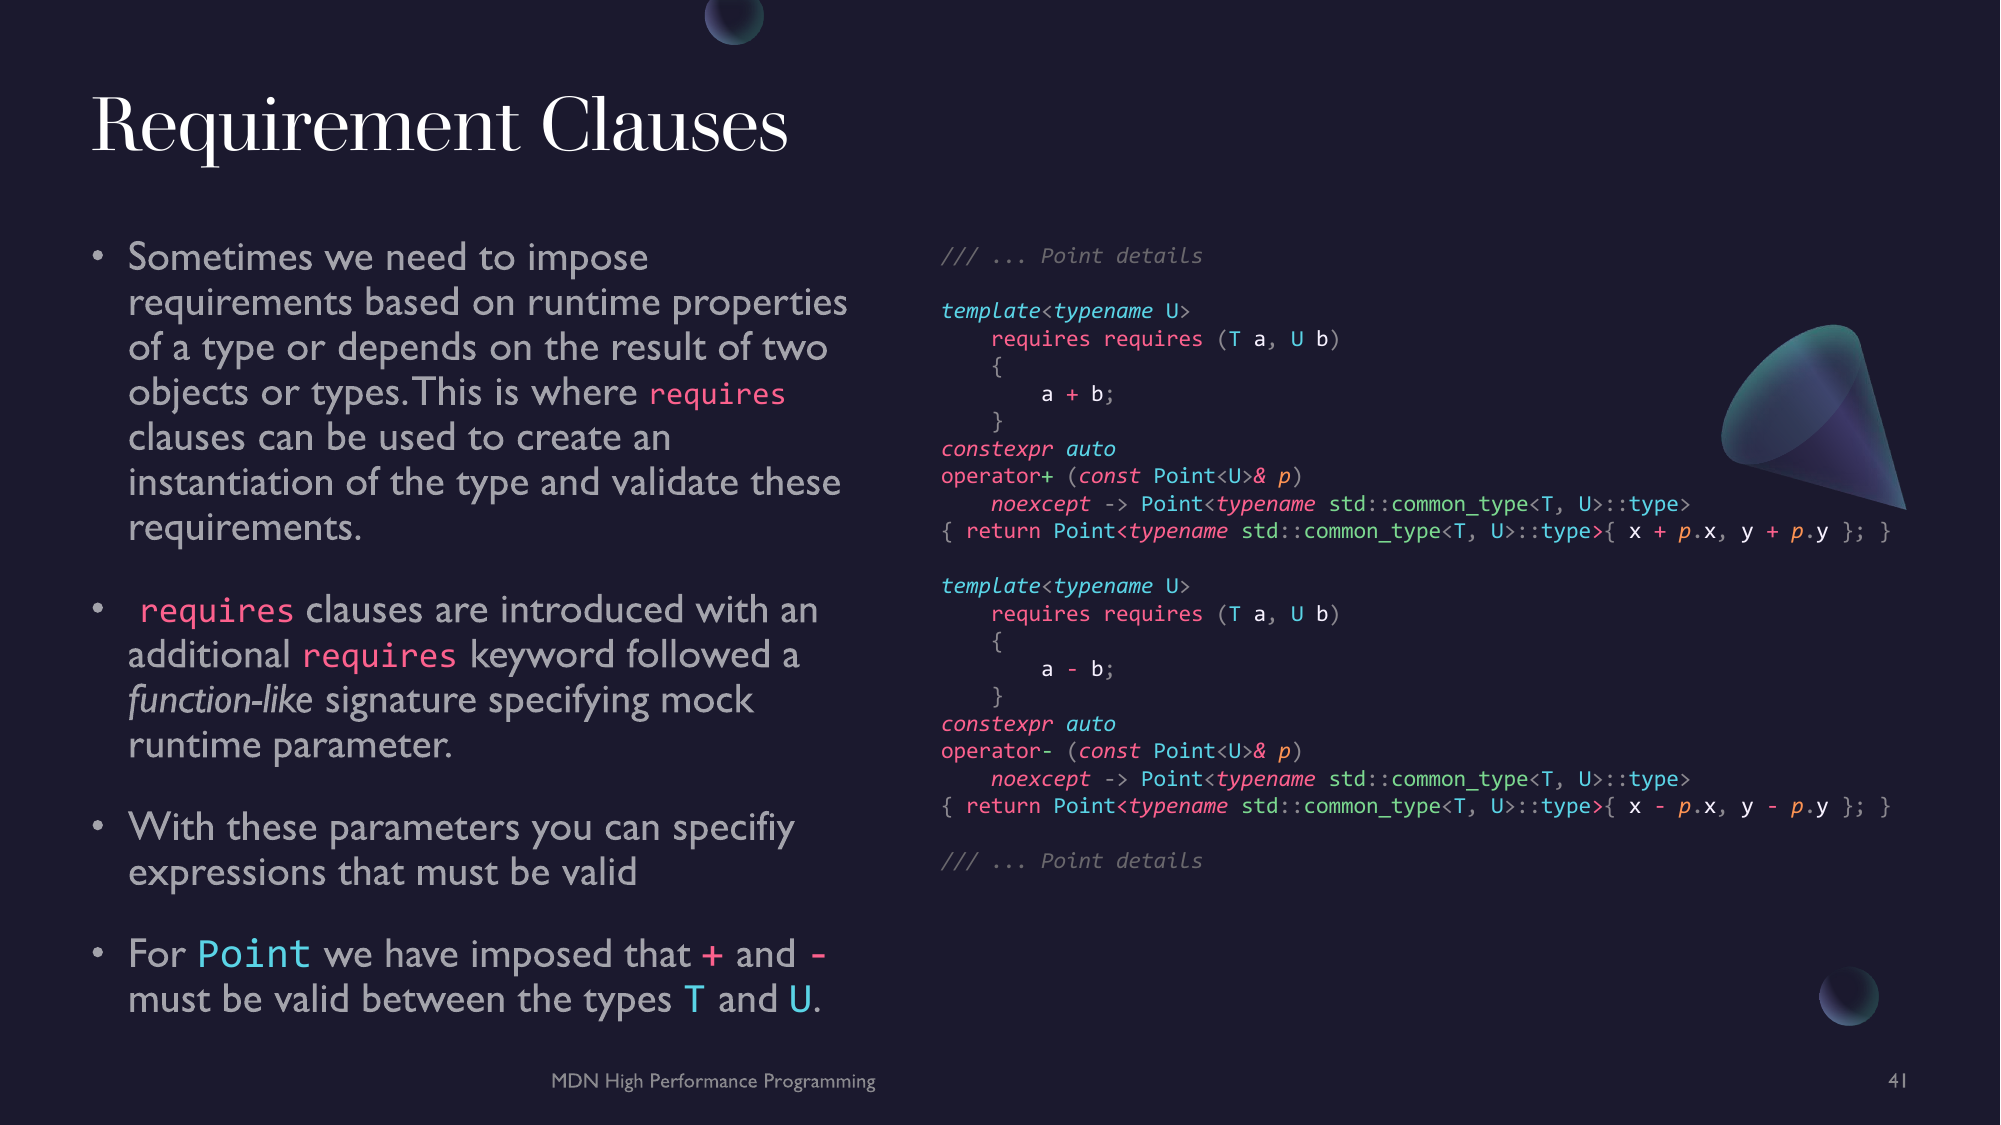
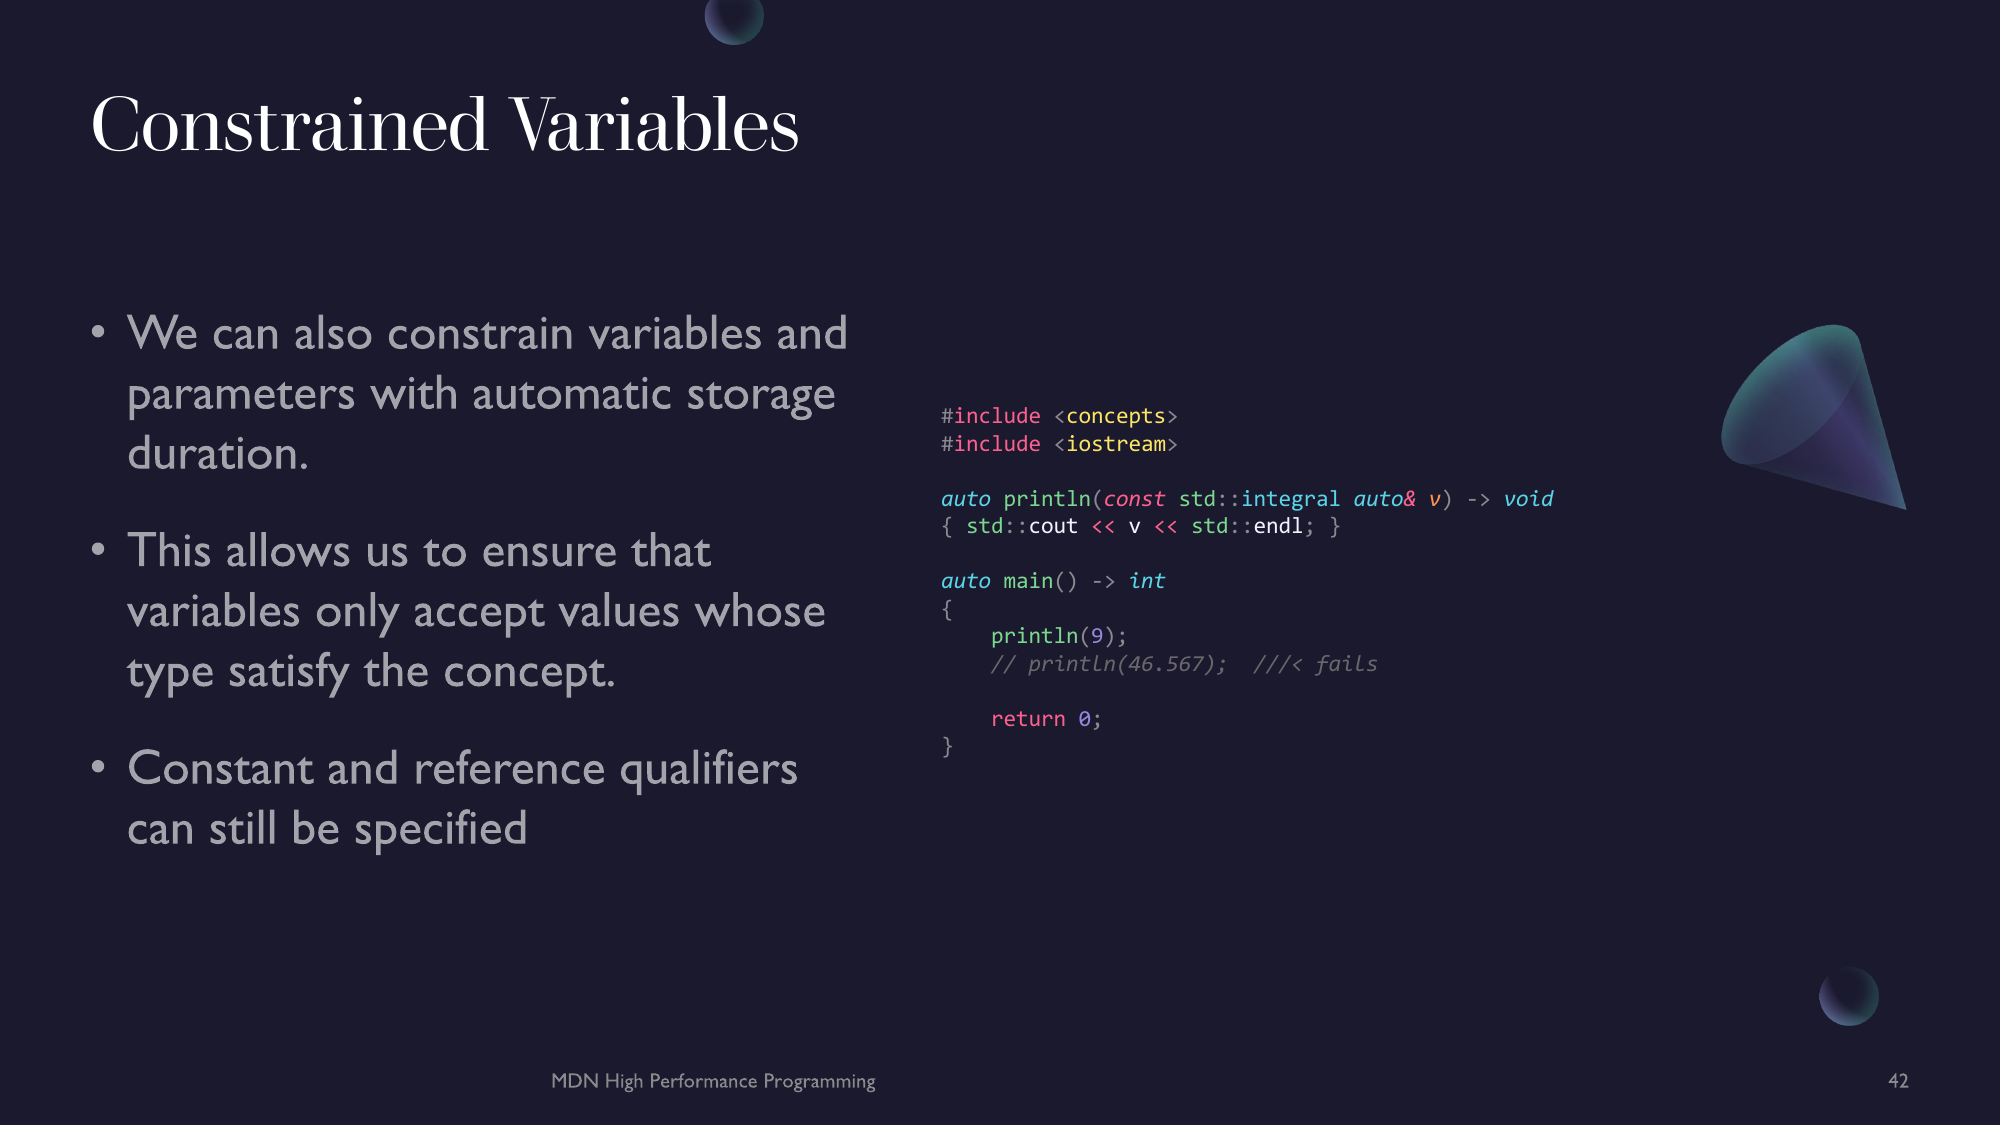

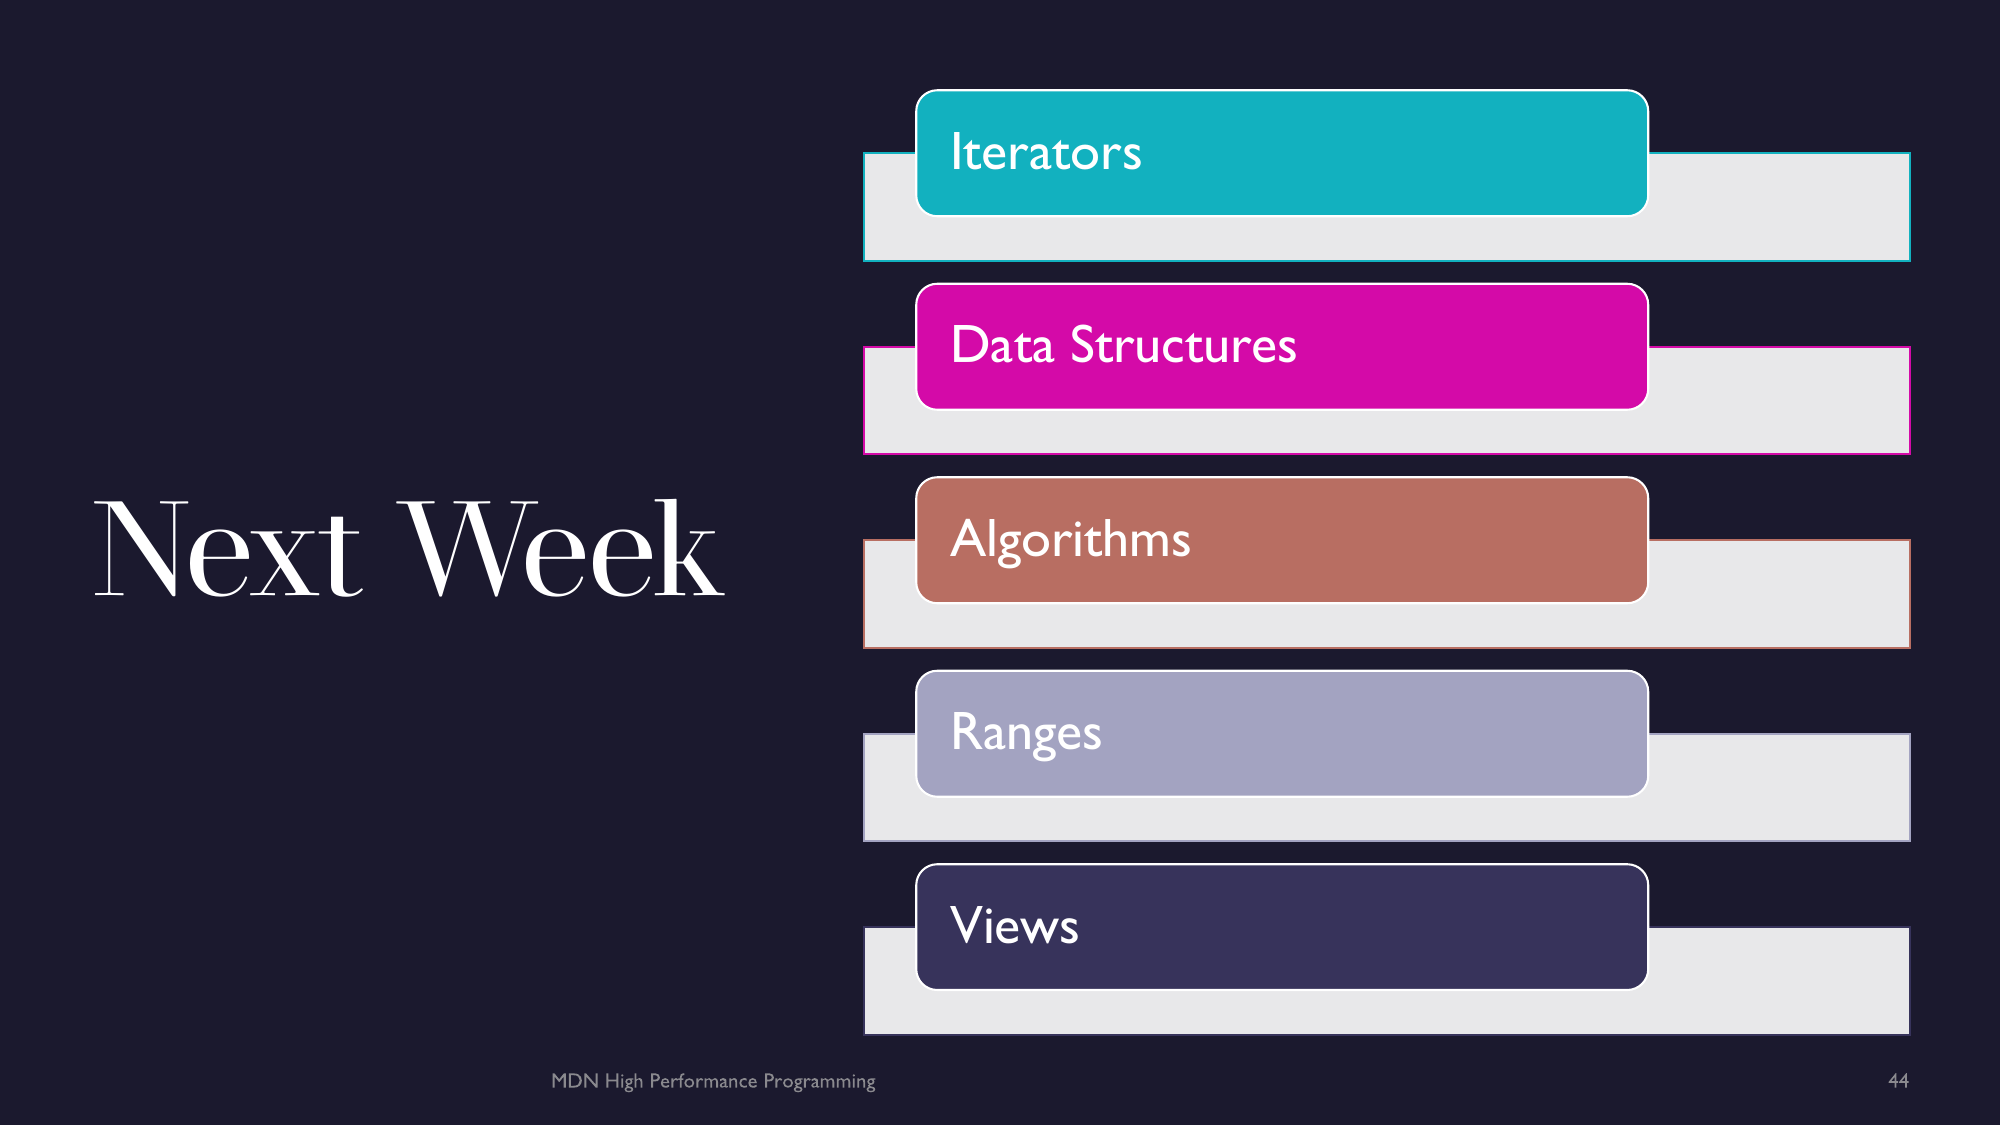

Algorithms & Data Structures
So far you have learnt a lot about the C++ language from user-defined types with classes, to generic programming with templates and concepts as well as (almost) all of the languages primitive types, control flow and looping mechanisms. With all of this you can pretty much get a computer to do anything. However, this is only the foundation; mind you all taught at once, what comes next is the fun chapter. We cover some the of facilities, techniques and practices focused on actually manipulating data and performing actual computation. Many of these facilities are available in the C++ standard library; after all this isn't C, we don't have to build everything from scratch. This will include everything from building up your algorithm intuition to exploring different data structures and how they work under the hood. We will also cover topics such as evaluation techniques, function composition and lifting.
Iterators
What is an iterator?
An iterator is an abstraction for representing an item, element, value etc. in a collection or container of values that also has some notion how to get to a obtain or yield a new item from the container. In C++ iterators a lot like pointers in the sense that they hold some value, usually the location of it and has a means of either yielding the value for reading or allows for writing to that value.
Iterator Categories
There are 6 main iterator categories considered in C++. Each subsequent iterator category builds upon the previous categories requirements with increasingly more requirements.
| Iterator Category | Valid Operations | ||||||
|---|---|---|---|---|---|---|---|
| write | read | increment | multiple passes | decrement | random access | contiguous storage | |
| Output | ✅ | ✅ | |||||
| Input | might support writing | ✅ | ✅ | ||||
| Forward (Satisfies Input) |
✅ | ✅ | ✅ | ✅ | |||
| Bidirectional (Satisfies Forward) |
✅ | ✅ | ✅ | ✅ | ✅ | ||
| Random Access (Satisfies Bidirectional) |
✅ | ✅ | ✅ | ✅ | ✅ | ✅ | |
| Contiguous (Satisfies Random Access) |
✅ | ✅ | ✅ | ✅ | ✅ | ✅ | ✅ |
Note: A pointer actually satisfies the Contiguous Iterator Category
Before C++20, there were empty structs used as tags to help categorise an iterator into its respective category. Since C++ there have been concepts introduces to perform this check more elegantly along with other iterator-related concepts to all for anything modelling an iterator to satisfy the constraints.
Obtaining Iterators
Almost all collections or containers have iterators to their first and last element. To obtain these iterator from any container kinds we call the std::begin() and std::end functions from the <iterator> header respectively. There are also constant and reverse and constant reverse versions of the functions.
#include <array>
#include <iostream>
#include <iterator>

auto main() -> int
{
    auto a = std::to_array<int>({1, 3, 4, 565, 868, 5, 46});

    std::cout << std::begin(a) << std::endl;
    std::cout << *std::begin(a) << std::endl;
    std::cout << std::end(a) << std::endl;
    std::cout << *(std::end(a) - 1) << std::endl;

    return 0;
}
<iterator>std::begin()&std::cbegin()std::end()& std::cend()`std::rbegin()& std::crbegin()`std::rend()& std::crend()`
Iterator Functionalities
There are a few ways to interact with an iterator directly. One is to use the overloaded operators for the iterator object. Most iterators implement and overload the same operator set that is used by pointers. The other way is to use functions to interact with iterators, allowing for a more generic interface if a iterator doesn't support the common operator overload set and the implementer preferred to overload the functions. The only way to yield or write to the item held by an iterator is to use the dereference operator *.
Common Operator Interface
| Operation | |||
|---|---|---|---|
| dereference | *i | *i = v | v = *i |
| increment | i++ | ++i | |
| decrement | i-- | --i | |
| difference | i - j | ||
| advance | i + n | i - n | |
| index | i[n] |
Note: Where
iis an iterator object
#include <array>
#include <iostream>
#include <iterator>

auto main() -> int
{
    auto a  = std::to_array<int>({1, 3, 4, 565, 868, 5, 46});
    auto it = std::begin(a);

    std::cout << *it << std::endl;
    std::cout << *(it++) << std::endl;
    std::cout << *(++it) << std::endl;
    std::cout << *(it--) << std::endl;
    std::cout << *(--it) << std::endl;
    std::cout << *(it + 4) << std::endl;
    std::cout << *(std::end(a) - 4) << std::endl;
    std::cout << it[6] << std::endl;

    auto v { *it };
    *it = 757657;
    std::cout << v << std::endl;
    std::cout << *it << std::endl;

    return 0;
}
Iterator Functions
There are four functions involved in manipulating an object of iterator kind. These are used to move an iterator between elements.
std::next- Obtains the next iterator from the passed iterator. Can be passed an integralnto obtain the nth next iterator. Ifnis negative, the iterator must satisfy Bidirectional Iterator.std::prev- Obtains the previous iterator from the pass iterator. Can be passed an integral to obtain the nth previous iterator. The iterator must satisfy the requirements of a Bidirectional Iterator.std::distance- Obtains the number of increments required by the first iterator to reach the second iterator.std::advance- Advances the passed iterator by n increments. If n is negative, the iterator must satisfy Bidirectional Iterator.
#include <array>
#include <iostream>
#include <iterator>

auto main() -> int
{
    auto a  = std::to_array<int>({1, 3, 4, 565, 868, 5, 46});
    auto it = std::begin(a);

    std::cout << *it << std::endl;
    std::cout << *std::next(it) << std::endl;
    std::cout << *std::prev(it) << std::endl;
    std::cout << *std::next(it, 4) << std::endl;

    auto end = std::end(a);

    std::cout << *std::next(end, -4) << std::endl;

    std::cout << std::distance(it, end - 3) << std::endl;

    std::advance(it, 3);
    std::cout << *it << std::endl;

    return 0;
}
Sentinels
Iterators are able to move through a container indefinitely however this can lead to iterators being dereferenced for a value that doesn't belong to the container. To fix this, we need some notion of the end of a container. Sentinels are a kind that behaves like a marker representing the end of a container. There are many different things you can use as a sentinel from specific values that appear in a container (\0 is used as a sentinel for char slices in C), to iterators. Before C++20, the 'end' iterator was the most common sentinel kind used. The iterator holds the item that is one-past-the-end of a container. When another iterator reaches it the container has been exhausted. Since C++20, the notion of the end of a container has been formalised to be sentinels over 'end' iterators. This allows for containers to be infinite with an unreachable sentinel type or have regular bounds.
#include <array>
#include <iostream>
#include <iterator>

auto main() -> int
{
    auto a = std::to_array<int>({1, 3, 4, 565, 868, 5, 46});

    /// Uses the iterator obtained by `std::end` from `a` as sentinel
    for (auto it = std::begin(a); it != std::end(a); ++it)
        std::cout << *it << (std::distance(it, std::end(a)) - 1 ? ", " : "");

    return 0;
}
Iterator Adaptors
There are a few iterator adaptors in the C++ standard library allowing for regular iterators, often supplied by container kind types have certain operational semantics. This include a reverse, inserter, counted and move iterators. This allows for efficient operations between containers and containers to be implemented through iterators. Many of these iterators come with a factory function (often prefixed with make_) that can make the desired iterator and perform the necessary argument type deductions.
std::reverse_iteratorstd::move_iteratorstd::common_iteratorstd::counted_iteratorstd::back_insert_iteratorstd::front_insert_iteratorstd::insert_iteratorstd::istream_iteratorstd::ostream_iteratorstd::istreambuf_iteratorstd::ostreambuf_iterator
Data Structures
What is a Data Structure
Data structures are a fundamental concept in computer science. Data structures are types or classes used to organise and manage data. Data structures differ primarily by their internal means of organising the data they manage to be as optimal as possible and often support various different operations. Using the correct data structure can be a difficult question to answer, particularly in C++ where many operation on these most basic data structures are expected to have as little size and time overhead.
This section mostly goes into a high level look at the data structures or containers available in C++, how they work and to give an idea of when one might use them. All containers have methods for obtaining iterators to their first and last element and all work with a range-for loop.
Sequence Containers
Sequence containers are Array-Like containers in the sense that they model their data as a 1D array of values. Along with slices and std::array, C++ offers four other sequence based containers.
Vector
std::vector is the most fundamental container in C++. It models a contiguous dynamic array. It has constant (\( O(1) \)) index-based random access to elements. Vectors offer random access insertion and erasure of elements as well as efficient pushing and popping of elements at the end of the vector. Indexing is 0-based which is the same for all index based containers. Insertion and erasure is less efficient anywhere in the vector that is not the back (\( O(n) \) where \( n \) is the number elements past the insertion or erasure) as all elements past the insertion or erasure have to be moved back one cell. Insertion and erasure also (has a chance of [invalidating]) invalidates any iterators or references of the shifted elements. Vectors can reserve more memory then it currently uses in order to make any operations involving potential allocations more efficient by pre-allocating the resources. Erasures also do not remove the memory owned by the vector but save it for later use.
#include <iostream>
#include <vector>

template<typename T>
auto println(const std::vector<T>& v) -> void
{
    std::cout << "[ ";
    for (auto i { v.size() }; const auto& e : v)
        std::cout << e << (--i ? ", " : "");
    std::cout << " ]" << std::endl;
}

auto main() -> int
{
    auto v = std::vector<int>{ 1, 2, 3, 4, 5 };

    println(v);
    v.push_back(6);
    println(v);
    v.pop_back();
    v.pop_back();
    println(v);
    v.insert(v.begin() + 3, 77);
    println(v);
    v.erase(v.end() - 4);
    println(v);

    std::cout << "v[4] = " << v[4] << std::endl;        ///< Unsafe version
    std::cout << "v.at(2) = " << v.at(2) << std::endl;  ///< Range checked

    std::cout << "Before v.shrink_to_fit()" << std::endl;
    std::cout << "Size: " << v.size() << std::endl;
    std::cout << "Capacity: " << v.capacity() << std::endl;
    println(v);

    v.shrink_to_fit();

    std::cout << "After v.shrink_to_fit()" << std::endl;
    std::cout << "Size: " << v.size() << std::endl;
    std::cout << "Capacity: " << v.capacity() << std::endl;
    println(v);

    v.clear();
    std::cout << "After v.clear()" << std::endl;
    std::cout << "Size: " << v.size() << std::endl;
    std::cout << "Capacity: " << v.capacity() << std::endl;
    println(v);

    return 0;
}
Deque
std::deque is a double ended queue that offers efficient (\( O(1) \)) insertion and erasure at both the front and back of a deque while also never invalidating iterators and references to the rest of the elements. Deques elements are not stored contiguously resulting in a larger memory footprint due to 'book-keeping' data for smaller deques when compared to vectors. Deques also have two indirections to get elements compared to vectors single indirection. Deques also cannot reserve extra memory for later use.
#include <iostream>
#include <deque>

template<typename T>
auto println(const std::deque<T>& dq) -> void
{
    std::cout << "[> ";
    for (auto i { dq.size() }; const auto& e : dq)
        std::cout << e << (--i ? ", " : "");
    std::cout << " <]" << std::endl;
}

auto main() -> int
{
    auto dq = std::deque<int>{ 1, 2, 3, 4, 5 };

    println(dq);
    dq.push_back(6);
    println(dq);
    dq.pop_back();
    dq.pop_back();
    println(dq);
    dq.push_front(33);
    dq.push_front(914);
    dq.push_front(-44);
    dq.push_front(0);
    println(dq);
    dq.pop_front();
    dq.pop_front();
    println(dq);

    dq.insert(dq.begin() + 3, 77);
    println(dq);
    dq.erase(dq.end() - 4);
    println(dq);

    std::cout << "dq[4] = " << dq[4] << std::endl;        ///< Unsafe version
    std::cout << "dq.at(2) = " << dq.at(2) << std::endl;  ///< Range checked

    std::cout << "Before dq.shrink_to_fit()" << std::endl;
    std::cout << "Size: " << dq.size() << std::endl;
    println(dq);

    dq.shrink_to_fit();

    std::cout << "After dq.shrink_to_fit()" << std::endl;
    std::cout << "Size: " << dq.size() << std::endl;
    println(dq);

    dq.clear();
    std::cout << "After dq.clear()" << std::endl;
    std::cout << "Size: " << dq.size() << std::endl;
    println(dq);

    return 0;
}
Forward List
std::forward_list is an implementation of a singly-linked-list offering fast access, insertion and erasure to the beginning of the list. Forward lists also allows for easy merging of two sorted lists as well as operations for reversing and sorting the list. Insertion and erasure has _after semantics meaning that these operations occur to the element after the passed iterator.
Forward lists are not indexable.
#include <iostream>
#include <forward_list>

template<typename T>
auto println(const std::forward_list<T>& f_lst) -> void
{
    std::cout << "[ ";
    for (auto i { std::distance(f_lst.cbegin(), f_lst.cend()) }; const auto& e : f_lst)
        std::cout << e << (--i ? " -> " : "");
    std::cout << " ]" << std::endl;
}

auto main() -> int
{
    auto f_lst = std::forward_list<int>{ 1, 2, 3, 4, 5 };

    println(f_lst);
    f_lst.push_front(33);
    f_lst.push_front(914);
    f_lst.push_front(-44);
    f_lst.push_front(0);
    println(f_lst);
    f_lst.pop_front();
    f_lst.pop_front();
    println(f_lst);

    f_lst.insert_after(f_lst.begin(), 77);
    println(f_lst);
    f_lst.erase_after(f_lst.begin());
    println(f_lst);
    f_lst.clear();
    println(f_lst);

    return 0;
}
List
Along with a singly-linked-list C++ offers a doubly-linked-list called std::list. This offers constant (\( O(1) \)) insertion and erasure anywhere within the container with the biggest benefits occurring at the beginning and end of the list. Lists allow for bidirectional iteration through the container. Iterators and references are not invalidated during insertion and erasure except for the element that got erased.
#include <iostream>
#include <list>

template<typename T>
auto println(const std::list<T>& lst) -> void
{
    std::cout << "[ ";
    for (auto i { lst.size() }; const auto& e : lst)
        std::cout << e << (--i ? " <-> " : "");
    std::cout << " ]" << std::endl;
}

auto main() -> int
{
    auto lst = std::list<int>{ 1, 2, 3, 4, 5 };

    println(lst);
    lst.push_back(6);
    println(lst);
    lst.pop_back();
    lst.pop_back();
    println(lst);
    lst.push_front(33);
    lst.push_front(914);
    lst.push_front(-44);
    lst.push_front(0);
    println(lst);
    lst.pop_front();
    lst.pop_front();
    println(lst);

    lst.insert(lst.begin(), 77);
    println(lst);
    lst.erase(++lst.begin());
    println(lst);

    lst.clear();
    std::cout << "After lst.clear()" << std::endl;
    std::cout << "Size: " << lst.size() << std::endl;
    println(lst);

    return 0;
}
A harsh truth
While many of these sequences offer a variety of different ways to organise data and offer different performance guarantees to fit different needs when it comes to searching, insertion and erasure, the harsh reality is often this doesn't matter outside of semantics. 99.9% of the time (I'm exaggerating a bit) the best data structure; particularly for sequences based organisation of data, are vectors. Even for searching, sorting, insertion and erasure. This is because computers are so much faster then they were two decades ago and CPU's have much larger (L2) caches. What does this have to do with it? Well, computer memory is sequential in nature meaning that all data that is stored contiguously. Copying, allocating and transfer of sequential memory is almost always faster as the CPU will often vectorize the operation, assuming that it can move sequential from memory to the cache even if it doesn't explicitly know this. Compare this to other data structures, particularly linked-lists which 'optimise' insertion and erasure by having nodes of data spread out throughout memory, removing the restriction on the data needing to be contiguous. What this actually does is prevent the CPU from predicting what memory it might use maximizing the opportunity for a cache miss to occur which is much slower than copying more data. Copies are cheap, especially for std::vector as it contains only three pointers. One to the start of the data, one to the end of the used memory and one to the end of the owned memory. All of this pointers are reachable from each other. To get to the data, it costs one pointer indirection to the data and one jump of size n to the desired value. This jump happens in constant time as the CPU will already know exactly how many bytes over this is (exactly $n \cdot sizeof(element)$) and can add this directly to the pointer to the start of the data. If the CPU can figure out that memory near the current memory being fetched will ned to be fetched as well it will take as much as it can from the region, optimising the IO the CPU does which is one of the largest bottlenecks of performance. Compare this to many pointer indirections that have to go into getting a single node from a linked list. Not to mention the CPU has no way of determining where the next memory it needs might be, increasing the fetching time the CPU execute. Not to mention that is has to make room in its cache and eject memory every time it reads.
What does this all mean? Don't think too much about which data structure is best based on the \( BigO \) complexities. Start with using vectors and arrays and adapt your programs to use specific data structures as you need. After all; for C++, the \( BigO \) complexity are minimum requirements for the standard library that must be met by a particular implementation and not their real world average performance. That is not to say that linked lists or deques do not have there uses. Linked lists are used in the Linux kernel to connect and organise related data. It looks very different to lists in C++ but has a pretty intuitive implementation and use. It is implemented as a intrusive linked list. How this works is that a data structure will have a member that is node containing a pointer to the previous and next node. The benefit to this is that the list is not tied to any type as the nodes don't hold any data themselves, instead the data holds information on how to get to the nxe or previous node. This list structure is used everywhere in the Linux kernel and is very efficient.
Associative Containers
Associative containers are used for sorted data. They allow for very fast searching as well as efficient insertion, erasure and access. Associative containers work by ordering keys and (sometimes) mapping values to these keys.
Set
std::set is an ordered collections of unique keys usually sorted in ascending order. Search, insertion and erasure occur in logarithmic time (\( O(\log{n}) \)). Sets also offer merging operations for combining two sets into a single set with all elements merged and sorted. Sets can be accessed using extraction methods that moves the node-type that owns the key value out of the set and gives it to the caller.
Note: node-type is an exposition only type that is implemented as chapter of the set. It is not to be used as an independent type.
#include <iostream>
#include <set>

template<typename T>
auto println(const std::set<T>& st) -> void
{
    std::cout << "{ ";
    for (auto i { st.size() }; const auto& e : st)
        std::cout << e << (--i ? ", " : "");
    std::cout << " }" << std::endl;
}

auto main() -> int
{
    auto st = std::set<int>{ 1, 2, 3, 4, 5 };

    st.insert(77);
    println(st);
    st.erase(++st.begin());
    println(st);

    std::cout << "st.extract(++st.begin()).value() = " << st.extract(++st.begin()).value() << std::endl;
    std::cout << "st.extract(5).value() = " << st.extract(5).value() << std::endl;
    println(st);

    st.merge(std::set<int>{ -1, 5, 4, 2, 0, 8, 6 });
    std::cout << "After st.merge(...): " << std::endl;
    println(st);

    st.clear();
    std::cout << "After st.clear()" << std::endl;
    std::cout << "Size: " << st.size() << std::endl;
    println(st);

    return 0;
}
Map
std::map is the most general associative container available in C++. Maps are made up of ordered key value pairs with strictly unique key values. Searching, key-indexing, insertion and erasure of elements is logarithmic (\( O(\log{n}) \)) in time. Values are obtained using the associated key using indexing syntax. It also offers similar extraction and merging functionalities as sets. Maps in C++ are typically implemented as Red-Black Trees.
#include <iostream>
#include <map>
#include <string>

template<typename K, typename V>
auto println(const std::map<K, V>& m) -> void
{
    std::cout << "[ ";
    for (auto i { m.size() }; const auto& [k, v] : m)
        std::cout << k << ": " << v << (--i ? ", " : "");
    std::cout << " ]" << std::endl;
}

auto main() -> int
{
    auto m = std::map<std::string, int>{ {"z", 1}, {"f", 2}, {"a", 3}, {"g", 4}, {"x", 5} };

    println(m);
    m["a"] = 5;         ///< Can read, write and insert
    println(m);
    m["q"] = 7;
    println(m);
    m.at("g") = 265;    ///< Can only be used for read or write, not insert
    println(m);
    m.insert({"w", 77});
    println(m);
    m.insert_or_assign("w", 354658);
    println(m);

    m.erase("a");
    println(m);
    m.erase(++m.begin());
    println(m);

    m.clear();
    std::cout << "After m.clear()" << std::endl;
    std::cout << "Size: " << m.size() << std::endl;
    println(m);

    return 0;
}
Note: In the range-for if
println(), you may notice a weird syntax for the element. Because iterators tostd::mapyield astd::pairwe can destructure it straight into individual variables using structured bindings.
Multiset & Multimap
Along with the regular set and map classes, C++ offers std::multiset and std::multimap which hold ordered keys (and values) but allow for duplicate keys. They offer pretty much the exact same interface as the key-exclusive counterparts except that the order of duplicate keys is the same order as their insertion. This order between duplicates remains constant unless the node holding a particular key (and value) is extracted and it's ownership given to the caller. Searching, insertion and erasure take logarithmic time (\( O(\log{n}) \)).
#include <iostream>
#include <map>
#include <string>

template<typename K, typename V>
auto println(const std::multimap<K, V>& m) -> void
{
    std::cout << "{ ";
    for (auto i { m.size() }; const auto& [k, v] : m)
        std::cout << k << ": " << v << (--i ? ", " : "");
    std::cout << " }" << std::endl;
}

auto main() -> int
{
    auto mm = std::multimap<std::string, int>{ {"z", 12}, {"f", 2}, {"a", 3}, {"g", 4}, {"x", 5} };

    println(mm);
    mm.insert({"z", 77});
    println(mm);

    mm.erase("a");
    println(mm);
    mm.erase(++mm.begin());
    println(mm);

    mm.clear();
    std::cout << "After mm.clear()" << std::endl;
    std::cout << "Size: " << mm.size() << std::endl;
    println(mm);

    return 0;
}
Unordered Associative Containers
Unordered associative containers are data structures that do not sort their key values but instead use a hashing function to create bucket based access to elements. Hashing functions are designed to avoid hash collisions however, many hashed data structures account for hash collisions. Hashing is the process of computing a discrete hash value for a key indicating the index in an internalised array or bucket. Which bucket a key (and value) is placed in relies solely on the result of hashing that key, with keys creating duplicate hash results being placed in the same bucket (typically).
Unordered Set
std::unordered_set is the first of our unordered associative containers. Unlike sets, hashed sets do not need to order their keys. Searching, insertion and erasure in a hashed set occurs in constant time (\( O(1) \)). Elements of a hashed set cannot be changes as this would invalidate the hash table. Instead erasure and insertion must be used instead.
#include <iostream>
#include <unordered_set>
#include <string>

template<typename K>
auto println(const std::unordered_set<K>& ust) -> void
{
    std::cout << "{ ";
    for (auto i { ust.size() }; const auto& k : ust)
        std::cout << k << (--i ? ", " : "");
    std::cout << " }" << std::endl;
}

auto main() -> int
{
    auto ust = std::unordered_set<std::string>{ "z", "f", "a", "g", "x" };

    println(ust);
    ust.insert("k");
    println(ust);

    ust.erase("a");
    println(ust);
    ust.erase(++ust.begin());
    println(ust);

    std::cout << "Loading Factor: " << ust.load_factor() << std::endl;
    std::cout << "Max Loading Factor: " << ust.max_load_factor() << std::endl;

    std::cout << "Size: " << ust.size() << std::endl;
    std::cout << "# Buckets: " << ust.bucket_count() << std::endl;
    ust.insert("m");
    println(ust);
    std::cout << "Size: " << ust.size() << std::endl;
    std::cout << "# Buckets: " << ust.bucket_count() << std::endl;

    auto bckt = ust.bucket("f");  ///< returns index of bucket
    std::cout << "Bucket Size: " << ust.bucket_size(bckt) << std::endl;

    ust.clear();
    std::cout << "After ust.clear()" << std::endl;
    std::cout << "Size: " << ust.size() << std::endl;
    println(ust);

    return 0;
}
Unordered Map
std::unordered_map is a hashed version of a regular map but like its hash set counterpart, instead of ordering keys it uses a hashing functions to create an index into buckets. Search, insertion and erasure all happen in constant time (\( O(1) \)). Unlike hashed sets, values can be accessed and inserted using key-based indexing.
#include <iostream>
#include <unordered_map>
#include <string>

template<typename K, typename V>
auto println(const std::unordered_map<K, V>& umap) -> void
{
    std::cout << "{ ";
    for (auto i { umap.size() }; const auto& [k, v] : umap)
        std::cout << k << ": " << v << (--i ? ", " : "");
    std::cout << " }" << std::endl;
}

auto main() -> int
{
    auto umap = std::unordered_map<std::string, int>{ {"z", 12}, {"f", 2}, {"a", 3}, {"g", 4}, {"x", 5} };

    println(umap);
    umap["h"] = 576;
    println(umap);
    umap.at("f") = 368548;
    println(umap);

    println(umap);
    umap.insert({"k", 56});
    println(umap);

    umap.erase("a");
    println(umap);
    umap.erase(++umap.begin());
    println(umap);

    std::cout << "Loading Factor: " << umap.load_factor() << std::endl;
    std::cout << "Max Loading Factor: " << umap.max_load_factor() << std::endl;

    std::cout << "Size: " << umap.size() << std::endl;
    std::cout << "# Buckets: " << umap.bucket_count() << std::endl;
    umap.insert({"m", 78});
    println(umap);
    std::cout << "Size: " << umap.size() << std::endl;
    std::cout << "# Buckets: " << umap.bucket_count() << std::endl;

    auto bckt = umap.bucket("f");  ///< returns index of bucket
    std::cout << "Bucket Size: " << umap.bucket_size(bckt) << std::endl;

    umap.clear();
    std::cout << "After umap.clear()" << std::endl;
    std::cout << "Size: " << umap.size() << std::endl;
    println(umap);

    return 0;
}
Unordered Multiset & Multimap
Much like how there are sets and maps that can store duplicate keys, there are hashed versions of these data structures called std::unordered_multiset and std::unordered_multimap respectively. Search, insertion and erasure occur in constant time (\( O(n) \)). Hashed multimaps cannot be accessed using key-based indexing as it cannot be determined which key to return if duplicates exist.
#include <iostream>
#include <unordered_map>
#include <string>

template<typename K, typename V>
auto println(const std::unordered_multimap<K, V>& ummap) -> void
{
    std::cout << "{ ";
    for (auto i { ummap.size() }; const auto& [k, v] : ummap)
        std::cout << k << ": " << v << (--i ? ", " : "");
    std::cout << " }" << std::endl;
}

auto main() -> int
{
    auto ummap = std::unordered_multimap<std::string, int>{ {"z", 1}, {"f", 2}, {"a", 3}, {"g", 4}, {"x", 5} };

    println(ummap);
    ummap.insert({"w", 77});
    println(ummap);
    ummap.insert({"w", 879});
    println(ummap);
    ummap.insert({"w", -23});
    println(ummap);
    ummap.insert({"w", 209538});
    println(ummap);

    std::cout << "Loading Factor: " << ummap.load_factor() << std::endl;
    std::cout << "Max Loading Factor: " << ummap.max_load_factor() << std::endl;

    std::cout << "Size: " << ummap.size() << std::endl;
    std::cout << "# Buckets: " << ummap.bucket_count() << std::endl;
    ummap.insert({"m", 78});
    println(ummap);
    std::cout << "Size: " << ummap.size() << std::endl;
    std::cout << "# Buckets: " << ummap.bucket_count() << std::endl;

    auto bckt = ummap.bucket("w");  ///< returns index of bucket
    std::cout << "Bucket Size: " << ummap.bucket_size(bckt) << std::endl;

    std::cout << "w: { ";
    auto i { ummap.bucket_size(bckt) };
    for (auto it = ummap.begin(bckt); it != ummap.end(bckt); ++it)
        std::cout << it->first << ": " << it->second << (--i ? ", " : "");
    std::cout << " }" << std::endl;

    ummap.erase("a");
    println(ummap);
    ummap.erase(++ummap.begin());
    println(ummap);

    ummap.clear();
    std::cout << "After ummap.clear()" << std::endl;
    std::cout << "Size: " << ummap.size() << std::endl;
    println(ummap);

    return 0;
}
std::unordered_multiset
std::unordered_multimap
Miscellaneous
Bitset
std::bitset allows for efficient storage of individually addressable bits. The size of a bitset is fixed at compile time allowing for bitsets to be evaluated in constexpr context. The standard bit manipulation operators are available for bitwise manipulation between bitsets. Bitset also allow for single bit access as well as testing of single or all bits in the bitset. Bitsets also have conversion methods for obtaining the string, and integral representations of the bits. Bitsets can be constructed from string representations of bits or or from binary literal integrals. The bit to the right is the least significant bit ie. the first bit.
#include <iostream>
#include <bitset>
#include <string>

template<std::size_t N>
auto println(const std::bitset<N>& b) -> void
{ std::cout << "0b" << b << std::endl; }

auto main() -> int
{
    auto b = std::bitset<6>(0b011010uLL);

    println(b);
    b[2] = true;
    println(b);
    b.set(4) = false;

    b.flip(0);
    println(b);
    b.flip();
    println(b);
    b.reset();
    println(b);

    std::cout << std::boolalpha;
    std::cout << (b.test(5) == false) << std::endl;
    std::cout << b.any() << std::endl;
    std::cout << b.all() << std::endl;
    std::cout << b.none() << std::endl;
    std::cout << std::noboolalpha;

    return 0;
}
Any
std::any is a unique data structure that can hold any Copy-Constructable type. It can also be changed to any new type simply through assignment. You can introspect the type contained as well as destroy the contained object. The only way to access the contained value is through an std::any_cast<> which will yield the value which is cast to the template type of the any cast. Any also comes with a factory function for creating a any object.
#include <iostream>
#include <any>

template<typename T>
auto println(const std::any& a) -> void
{ std::cout << std::any_cast<T>(a) << std::endl; }

auto main() -> int
{
    auto a = std::make_any<int>(6);

    println<int>(a);
    a.emplace<double>(6.797898);
    println<double>(a);

    std::cout << a.type().name() << std::endl;

    std::cout << std::boolalpha;
    std::cout << a.has_value() << std::endl;
    a.reset();
    std::cout << a.has_value() << std::endl;
    std::cout << std::noboolalpha;

    return 0;
}
Algorithms
What is an algorithm?
What is an algorithm? The simplest definition is that is is a function. The longer definition is that an algorithm is a set of instructions that occur in a finite number of steps. Algorithms are used to manipulate data, perform computation or even perform introspection on data. Powerful algorithms when paired with efficient data structures are what make programs. So far we have seen how to create our own data structures in C++ through classes and concepts. We have also seen the data structures already offered by C++, we will now look at how you can use any algorithm available in C++ with all of these data structures and perform computation (almost) entirely independent of how it is organised.
Algorithm Intuition
This section is not really about how to implement any particular algorithm. Instead it is aimed at building what is called algorithm intuition. This focuses not on how I do make an algorithm that performs the steps X, Y and Z to some data, taking into account A, B and C but rather on knowing about existing algorithms, what they do and how you can piece and compose different algorithms together to create a more general solution. This idea of composition is a super power to programming as it enables creating solutions from smaller reusable components.
The Standard Template Library
The C++ algorithms library as it stands today was created by the brilliant mind of Alexander Stepanov. Alex Stepanov was a pioneer in practical generic programming and created what is known as the Standard Template Library (STL). The STL was the predecessor to everything in the C++ Standard Library that uses templates which is almost everything. The biggest edition to the C++ standard from the STL was the container and algorithm libraries. All algorithms in C++ use iterator pairs (with identical types), one to the beginning of a sequence and one to the end. This means that any container just has to provide an iterator to its first and last elements and any algorithm can work with it. A pair of iterators is called a range in C++. All algorithms take at least a pair of iterators with some taking more.
General
The most general algorithm is std::for_each. This algorithm can take a single ranges and an unary function that will be applied to each element. std::for_each is often used to replace for-loops in certain context, mostly when a function has a side effect.
#include <algorithm>
#include <iostream>
#include <vector>

auto main() -> int
{
    auto v = std::vector<int>{ 1, 2, 3, 4, 5 };

    std::for_each(v.begin(), v.end(), [](const auto& e){ std::cout << e << ' '; });

    return 0;
}
Sorting
Sorting is a very common operation in programming. It allows us to more efficiently search for particular elements and guarantee certain properties and relationships between elements. In C++ there are a few different kinds of sorting algorithms including partitioning and introspection of data.
Sort
std::sort is C++ sorting algorithm. Along with the input range, it can also take in a predicate (a binary function returning a Boolean) which is used for the comparison. This defaults to < making std::sort sort in ascending order. std::sort sorts in-place and is often implemented as an Introsort algorithm.
#include <algorithm>
#include <functional>
#include <iostream>
#include <vector>

auto main() -> int
{
    auto v = std::vector<int>{ 2, 576, -3, 678, 3, -2543, 6 };

    println(v);
    std::sort(v.begin(), v.end());
    println(v);

    std::sort(v.begin(), v.end(), std::greater<>{});
    println(v);

    return 0;
}
Partition
Partitioning is the process of sorting elements based on a predicate such that any element for which the predicate is true precedes any element for which the predicate is false. This can be used to separate evens and odds or positive and negatives or even implement quicksort. The individual partitions are not necessarily sorted.
#include <algorithm>
#include <functional>
#include <iostream>
#include <vector>

auto main() -> int
{
    auto v = std::vector<int>{ -1, 2, -3, -4, 5 };

    println(v);
    std::partition(v.begin(), v.end(), [](const auto& e){ return e % 2 == 0; });
    println(v);

    std::partition(v.begin(), v.end(), [](const auto& e){ return e > 0; });
    println(v);

    return 0;
}
Nth Element
std::nth_element sorts a range such that the element pointed to by nth is the element that would occur in that position if the range was sorted. std::nth_element is a partial sorting algorithm.
#include <algorithm>
#include <functional>
#include <iostream>
#include <vector>

auto main() -> int
{
    auto v = std::vector<int>{ -24, 573, -3, 677, 3, -2543, 6 };

    println(v);
    auto m = v.begin() + (v.size() / 2);
    std::nth_element(v.begin(), m, v.end());
    std::cout << v[v.size() / 2] << std::endl;
    println(v);

    std::nth_element(v.begin(), v.end() - 2, v.end(), std::greater<>{});
    std::cout << *(v.end() - 2) << std::endl;
    println(v);

    return 0;
}
Searching
More often than not, you do not know anything about which values actually exists in your range. This is why searching algorithms are important chapter of computer programming. They allow us to find elements what we need or handle the case when they do not exist.
Find
std::find is used to find a particular value in range. returning the iterator to its location. It is not very efficient but is the most general searcher.
#include <algorithm>
#include <functional>
#include <iostream>
#include <vector>

auto main() -> int
{
    auto v = std::vector<int>{ 1, 2, 3, 4, 5 };

    println(v);
    auto result1 = std::find(v.begin(), v.end(), 3);
    auto result2 = std::find(v.begin(), v.end(), 68);

    (result1 == v.end() ? std::cout << 3 << " not found" << std::endl
                        : std::cout << 3 << " found at " << std::distance(v.begin(), result1) << std::endl);

    (result2 == v.end() ? std::cout << 68 << " not found" << std::endl
                        : std::cout << 68 << " found at " << std::distance(v.begin(), result2) << std::endl);

    return 0;
}
Search
std::search is used fo find the first occurrence of a subsequence in a range. std::search can also be passed a different searcher to change how it searches for the subsequence.
#include <algorithm>
#include <functional>
#include <iostream>
#include <vector>

auto main() -> int
{
    auto v = std::vector<int>{ 1, 2, 3, 4, 5 };
    auto s = std::vector<int>{ 2, 3, 4 };

    println(v);
    println(s);
    auto result = std::search(v.begin(), v.end(), s.begin(), s.end());

    (result == v.end() ? std::cout << "sequence { 2, 3, 4 } not found" << std::endl
                       : std::cout << "sequence { 2, 3, 4 } found at offset " << std::distance(v.begin(), result) << std::endl);


    return 0;
}
Adjacent Find
std::adjacent_find returns the location of the first pair of adjacent elements in a ranges that satisfy a predicate. The default predicate is ==.
#include <algorithm>
#include <functional>
#include <iostream>
#include <vector>

auto main() -> int
{
    auto v = std::vector<int>{ 1, 2, 3, 3, 4, 5 };

    println(v);
    auto result = std::adjacent_find(v.begin(), v.end());

    (result == v.end() ? std::cout << "no equal adjacent elemnts" << std::endl
                       : std::cout << "first equal adjacent elements occured at offset: "
                                   << std::distance(v.begin(), result)
                                   << " with *result = "
                                   << *result
                                   << std::endl);


    return 0;
}
Binary Search
Everyone knows the binary search algorithm however, std::binary_search is a little different. Instead of returning the location of the desired element it returns true if the desired value exists in the range and false otherwise. std::binary_search iin C++ is more commonly spelt in. std::binary_search one works on a partially ordered ranged with respect to the desired value. Partitioning with respect to the desired value is the minimum sorting requirement.
#include <algorithm>
#include <functional>
#include <iostream>
#include <vector>

auto main() -> int
{
    auto v = std::vector<int>{ 1, 2, 3, 4, 5 };

    println(v);

    std::cout << std::boolalpha
              << "Found 2? -- "
              << std::binary_search(v.begin(), v.end(), 2)
              << std::endl
              << "Found 6? -- "
              << std::binary_search(v.begin(), v.end(), 6)
              << std::noboolalpha
              << std::endl;


    return 0;
}
Equal Range, Lower Bound & Upper Bound
These algorithms work on partitioned ranges with respect to some value (similar to std::binary_search). std::equal_range returns a pair of iterators representing the sub-range of elements that are equal to the desired value. std::lower_bound and std::upper_bound will return an iterator representing the first value do not satisfy a predicate (default <) with the right argument always being the desired value for std::lower_bound and the left argument always being the desired value for std::upper_bound.
Note: These algorithms are also member functions of all associative containers and some of the unordered associative containers.
#include <algorithm>
#include <functional>
#include <iostream>
#include <vector>

auto main() -> int
{
    auto v = std::vector<int>{ 1, 2, 3, 4, 4, 4, 5 };

    println(v);

    auto [eq1, eq2] = std::equal_range(v.begin(), v.end(), 4);
    auto lwbnd4 = std::lower_bound(v.begin(), v.end(), 4);
    auto upbnd4 = std::upper_bound(v.begin(), v.end(), 4);

    std::cout << "Range containing 4:" << std::endl;
    println(std::vector<int>(eq1, eq2));
    std::cout << "Lower bound of 4: " << *lwbnd4 << std::endl;
    std::cout << "Upper bound of 4: " << *upbnd4 << std::endl;


    return 0;
}
Modifiers
Modifiers are the bread and butter of the algorithms library. They are used to modify the values of sequences sometimes in-place and other times using an output iterator that becomes the writer of the algorithm. The writer iterator can be the same iterator as the one representing the start of the input ranges as long as it supports write operations (assignment to). These algorithms will often return void for in-place modifications or return the end iterator of the output range.
Copy & Move
The copy and move algorithms are pretty self explanatory, they well copy of move the elements from one range to another. These algorithms eliminate 90% of the use of a manual for-loop and allow for copying and moving from completely different ranges, as long as the underlying copy of move is support ie. they types are copyable or movable.
#include <algorithm>
#include <iostream>
#include <string>
#include <vector>

auto main() -> int
{
    auto v1 = std::vector<std::string>{ "a", "b", "c", "d", "e" };
    auto v2 = std::vector<std::string>{};       ///< Empty vector
    auto v3 = std::vector<std::string>(5, "");  ///< Preallocated memory

    println(v1);
    println(v2);
    println(v3);

    /// Use back inserted to push copies to the back
    /// of the vector as v2 has no allocated memory
    std::copy(v1.begin(), v1.end(), std::back_inserter(v2));

    /// Can us v3 iterator directly as it has
    /// preallocated memory
    std::move(v1.begin(), v1.end(), v3.begin());
    std::cout << std::endl;

    println(v1);
    println(v2);
    println(v3);

    return 0;
}
Swap Range
std::swap_range is a range based form of std::swap. It will swap the values of two ranges until the end of the first rnage is reached.
#include <algorithm>
#include <iostream>
#include <string>
#include <vector>

auto main() -> int
{
    auto v1 = std::vector<std::string>{ "a", "b", "c", "d", "e" };
    auto v2 = std::vector<std::string>{ "v", "w", "x", "y", "z" };

    println(v1);
    println(v2);

    std::swap_ranges(v1.begin(), v1.end(), v2.begin());
    std::cout << std::endl;

    println(v1);
    println(v2);

    return 0;
}
Remove & Replace
std::remove and std::replace are also fairly simple algorithms. They will remove or replace all instances of a particular value or replacing it with a new value respectively. std::remove doesn't actually free memory, usually it just moves any other value forward in the range. To free the removed memory, a call to std::remove is followed by a call to the containers erase method or std::erase (for sequence containers), taking the iterator returned by std::remove and the containers end iterator forming the remove-erase idiom.
#include <algorithm>
#include <iostream>
#include <vector>

auto main() -> int
{
    auto v = std::vector<int>{ 2, 3, 5, 1, 2, 2, 3, 4, 2, 5, 3 };

    println(v);
    auto r = std::remove(v.begin(), v.end(), 3);
    std::cout << std::endl;
    println(v);
    v.erase(r, v.end());
    std::cout << std::endl;
    println(v);
    std::replace(v.begin(), v.end(), 2, -2);
    std::cout << std::endl;
    println(v);

    return 0;
}
Reverse
std::reverse is an in-place modifier that reverses the elements of the container by swapping iterators.
#include <algorithm>
#include <iostream>
#include <vector>

auto main() -> int
{
    auto v = std::vector<int>{ 1, 2, 3, 4, 5 };

    println(v);
    std::reverse(v.begin(), v.end());
    println(v);

    return 0;
}
Transform
std::transform one of the most important algorithms in any programming language. std::transform will apply an unary function on every element in a range, writing it to a new output range. It also is overloaded to take an additional input iterator allowing for binary transformations. std::transform is most commonly spelt as map in Computer Science however, this name was taken be std::map.
#include <algorithm>
#include <iostream>
#include <vector>

auto main() -> int
{
    auto v1 = std::vector<int>{ 0, 1, 2, 3, 4 };
    auto v2 = std::vector<int>{ 9, 8, 7, 6, 5 };

    println(v1);
    std::transform(v1.begin(), v1.end(), v1.begin(), [](const auto& x){ return x * x; });
    println(v1);
    std::cout << std::endl;
    std::cout << "  ";
    println(v1);
    std::cout << "+ ";
    println(v2);
    std::transform(v1.begin(), v1.end(),
                   v2.begin(), v1.begin(),
                   [](const auto& x, const auto& y){ return x + y; });
    std::cout << "= ";
    println(v1);


    return 0;
}
Rotate
std::rotate takes three iterators first, pivot and end respectively. As normal, first and end form the range the algorithm operates on while pivot is swapped such that it becomes the new starting element of the range and the element preceding the pivot becomes the new end of the range.
#include <algorithm>
#include <iostream>
#include <vector>

auto main() -> int
{
    auto v = std::vector<int>{ 0, 1, 2, 3, 4, 5, 6 };

    println(v);
    std::rotate(v.begin(), v.begin() + 3, v.end());
    println(v);


    return 0;
}
Sample
std::sample will sample \( n \) random elements a range without replacement such that each sampled element has an equal probability of appearing. std::sample takes in a random number generator from the <random> header in order to generate the random access.
#include <algorithm>
#include <iostream>
#include <random>
#include <vector>

auto main() -> int
{
    auto v = std::vector<int>{ 0, 1, 2, 3, 4, 5, 6, 7, 8, 9, 10 };
    auto s = std::vector<int>(4);

    println(v);
    std::sample(v.begin(), v.end(),
                s.begin(), s.size(),
                std::mt19937{ std::random_device{}() });
    println(s);

    return 0;
}
Shuffle
std::shuffle will randomly reorganize a range. Like std::sample, std::shuffle takes in a random number generator in order to randomly generate the index sequence.
#include <algorithm>
#include <iostream>
#include <random>
#include <vector>

auto main() -> int
{
    auto v = std::vector<int>{ 0, 1, 2, 3, 4, 5, 6, 7, 8, 9, 10 };

    println(v);
    std::shuffle(v.begin(), v.end(), std::mt19937{ std::random_device{}() });
    println(v);

    return 0;
}
Numeric
Numerical algorithms are powerful algorithms for performing numerical computation on ranges. Many of the numerical algorithms in C++ are specialised forms of a reduction. Reductions will take a range of values and reduce the the number of elements in the resulting range. Reductions often come in the form of a folding algorithm which take and initial value, a range and a binary function. They break a range of elements into a Head and Tail component, with the Head being the first element and Tail being the rest. There are two version folds called left and right folds. A left fold will apply the initial value along with the result of left folding the Tail; with Head being the new initial value, to the binary function. Right folds will invert this process applying Head and the result of right folding the Tail of the range; passing the initial value to the bottom of the fold, to the binary function. Folds spelt as reductions are often left folds with the initial value being the Head of the range.
Minimums & Maximums
Minimum and maximum reductions are used to find the smallest and largest number in a range. In C++ these are spelt as std::min_element, std::max_element. These algorithms return an iterator to the element most satisfying the predicate which is defaulted to < but can be customised. There is also std::minmax_element which returns a pair of iterators indicating the minimum and maximum element in a range.
#include <algorithm>
#include <iostream>
#include <vector>

auto main() -> int
{
    auto v = std::vector<int>{ 1, 3, 5, 0, 2, 6 };

    println(v);
    auto min1 = std::min_element(v.begin(), v.end());
    auto max1 = std::max_element(v.begin(), v.end());
    auto [min2, max2] = std::minmax_element(v.begin(), v.end());

    std::cout << "Min: " << *min1 << " @ " << std::distance(v.begin(), min1) << std::endl;
    std::cout << "Max: " << *max1 << " @ " << std::distance(v.begin(), max1) << std::endl;
    std::cout << "Min, Max: ["
              << *min2 << ", " << *max2
              << "] @ ["
              << std::distance(v.begin(), min2)
              << ", "
              << std::distance(v.begin(), max2)
              << "]"
              << std::endl;

    return 0;
}
std::min_element
std::max_element
std::minmax_element
Count
std::count will count that number of occurrences of a particular value. The default predicate is == but it can be customised.
#include <algorithm>
#include <iostream>
#include <vector>

auto main() -> int
{
    auto v = std::vector<int>{ 2, 1, 3, 5, 2, 2, 3, 0, 2, 6, 2 };
    auto e = int{ 2 };

    println(v);
    std::cout << "Number of " << e << "'s = " << std::count(v.begin(), v.end(), e) << std::endl;

    return 0;
}
Clamp
std::clamp is a scalar algorithm (doesn't work for ranges) that will clamp a value between a set range. If the value is smaller then the lower bound it is clamped to the lower bound and if it is larger than the upper bound it clamps to the upper bound, returning the value otherwise. std::clamp is not a reduction.
Note: If the return value is bound to a reference and the value is a temporary to the call to
std::clampthe reference is dangling.
#include <algorithm>
#include <iostream>
#include <vector>

auto main() -> int
{
    auto low = int{ 2 };
    auto high = int{ 3 };


    auto v = std::vector<int>{ 0, 1, 2, 3, 4, 5, 6 };

    println(v);
    std::transform(v.begin(), v.end(), v.begin(),
                   [&](const auto& x){ return std::clamp(x, low, high); });
    println(v);

    return 0;
}
Accumulate
std::accumulate is the most general numeric algorithm and can be used to implement almost all of the algorithms in the C++ standard. Accumulate takes a range of values, an initial value and a binary function defaulting to +. Accumulate is most commonly spelt as left-fold or foldl. std::accumulate is one of the only algorithms that returns a value. One point to note about std::accumulate is that the initial values type is unrelated to the type of the range of elements. This can cause unintended side effects due to implicit conversions. std::accumulate is not found in <algorithm> but rather <numeric>.
One algorithm
std::accumulateshould not try and model is function application or maps (ie.std::transform).
#include <functional>
#include <iostream>
#include <numeric>
#include <vector>

auto main() -> int
{
    auto v = std::vector<int>{ 1, 2, 3, 4, 5, 6, 7, 8, 9 };

    println(v);

    auto sum     = std::accumulate(v.begin(), v.end(), 0);
    auto product = std::accumulate(v.begin(), v.end(), 1, std::multiplies<>{});
    std::cout << "Sum of v = " << sum << std::endl;
    std::cout << "Product of v = " << product << std::endl;

    return 0;
}
Inner Product
std::inner_product is a very powerful algorithm. It performs a binary transformation of two ranges and then performs a reduction on the resulting range. The most common form of this algorithm is known as the dot-product which applies the binary * on the two sets of coordinates and then a binary reduction on the resulting range using +. This is the default operation set for C++ std::inner_product but it can be customised to using any binary transformation and reduction. Like std::accumulate is takes an initial value which is applied to the and returns the result of the reduction. std::inner_product also lives in the <numeric> header.
#include <iostream>
#include <numeric>
#include <vector>

auto main() -> int
{
    auto v = std::vector<int>{ 1, 3, 5, 7, 9 };
    auto u = std::vector<int>{ 0, 2, 4, 6, 8 };

    auto r = std::inner_product(v.begin(), v.end(), u.begin(), 0);

    std::cout << "v: ";
    println(v);
    std::cout << "     x  x  x  x  x   + => " << r << std::endl;
    std::cout << "u: ";
    println(u);

    return 0;
}
Partial Sum
std::partial_sum is another reduction algorithm but with a twist. Instead of reducing the range to a scalar, it partially reduces the range, saving the intermediate accumulation values. std::partial_sum does not take an initial but does take an iterator to the beginning of the output range. Returns the element pointing to one-past-the-end element of the output range. This algorithm is most commonly spelt as left scan or scanl (in particular scanl1 due to it not taking an initial accumulator value).std::partial_sum is in the <numeric> header. The default binary function is +.
#include <functional>
#include <iostream>
#include <numeric>
#include <vector>

auto main() -> int
{
    auto v = std::vector<int>{ 0, 1, 2, 3, 4, 5, 6, 7, 8, 9 };
    auto u = std::vector<int>(v.size(), 0);
    auto w = std::vector<int>(v.size() - 1, 0);

    std::partial_sum(v.begin(), v.end(), u.begin());
    std::partial_sum(v.begin() + 1, v.end(), w.begin(), std::multiplies<>{});

    println(v);
    println(u);
    println(w);

    return 0;
}
Adjacent Difference
std::adjacent_difference applies the the binary function - (by default) to every pair of neighboring elements writing them to a new range. This range begins at one after the passed output iterator.
#include <functional>
#include <iostream>
#include <numeric>
#include <vector>

auto main() -> int
{
    auto v = std::vector<int>{ 4, 6, 9, 13, 18, 19, 19, 15, 10 };
    auto u = std::vector<int>(v.size(), 0);
    auto w = std::vector<int>(v.size(), 0);
    w[0] = 1;

    std::adjacent_difference(v.begin(), v.end(), u.begin());
    std::adjacent_difference(w.begin(), std::prev(w.end()), std::next(w.begin()), std::plus<>{});

    println(v);
    println(u);
    std::cout << std::endl << "Fibonacci: ";
    println(w);

    return 0;
}
Comparisons
The following algorithms are used to perform comparisons and conditional checks both between ranges and within a range. They all return a Boolean indicating the result of the comparison.
Equal
std::equal performs applies a predicate to two ranges. The default predicate is == but any can be used.
#include <algorithm>
#include <iostream>
#include <vector>

auto main() -> int
{
    auto v1 = std::vector<int>{ 0, 1, 2, 3, 4, 5 };
    auto v2 = std::vector<int>{ 1, 2, 3, 4, 5, 6 };

    println(v1);
    println(v2);

    std::cout << std::boolalpha
              << std::equal(v1.begin(), v1.end(), v2.begin(), std::less<>{})
              << std::endl;

    return 0;
}
Lexicographical Compare
std::lexicographical_compare checks if the first range is lexicographically less then the second range. The predicate less can be changed.
#include <algorithm>
#include <iomanip>
#include <iostream>
#include <string>

auto main() -> int
{
    auto s1 = std::string{ "Hello" };
    auto s2 = std::string{ "Hi" };

    std::cout << std::quoted(s1) << std::endl;
    std::cout << std::quoted(s2) << std::endl;

    std::cout << std::boolalpha
              << std::lexicographical_compare(s1.begin(), s1.end(),
                                              s2.begin(), s2.end())
              << std::endl;

    return 0;
}
All, Any & None Of
The three algorithms std::all_of, std::any_of and std::none_of will apply an unary predicate on a range returning true if all of, any of or none of the elements satisfy the predicate and false otherwise.
#include <algorithm>
#include <iostream>
#include <vector>

auto main() -> int
{
    auto v = std::vector<int>{ 0, 1, 2, 3, 4, 5 };

    println(v);

    std::cout << std::boolalpha
              << "All Odd? -- "
              << std::all_of(v.begin(), v.end(), [](const auto& e){ return !(e % 2 == 0); })
              << std::endl
              << "Any Even? -- "
              << std::any_of(v.begin(), v.end(), [](const auto& e){ return e % 2 == 0; })
              << std::endl
              << "None are 7? -- "
              << std::none_of(v.begin(), v.end(), [](const auto& e){ return e == 7; })
              << std::endl;

    return 0;
}
std::all_of, std::any_of & std::none_of
Mismatch
Finds the first mismatch between two ranges returning an std::pair of the iterators to the mismatch in the ranges. The binary predicate (default ==) can be changed so that mismatch triggers on the first evaluation of false from the predicate.
#include <algorithm>
#include <functional>
#include <iostream>
#include <vector>

auto main() -> int
{
    auto v1 = std::vector<int>{ 1, 2, 3, 4, 5 };
    auto v2 = v1;
    v2[3] = 465;

    println(v1);
    println(v2);
    std::cout << std::endl;

    const auto [v1ms, v2ms] = std::mismatch(v1.begin(), v1.end(), v2.begin());

    std::cout << "v1: " << *v1ms << ", v2: " << *v2ms << std::endl;

    return 0;
}
Generators
Generators allow for ranges to be filled with values after their initial construction. They are useful for manufacturing values without the need of literals.
Fill
std::fill is the most simple generator. It fills an entire range with a single value, modifying the range in-place.
#include <algorithm>
#include <iostream>
#include <vector>

auto main() -> int
{
    auto v = std::vector<int>{ 0, 1, 2, 3, 4, 5 };

    println(v);
    std::fill(v.begin(), v.end(), 8);
    println(v);

    return 0;
}
Iota
std::iota is a powerful factory based generator. It is supplied and initial value and will increment (using ++) that initial value as it iterates through the range and assigns the current iterator with the incremented value. Iota is a common factory used in many different programming languages. Its original name is iota but it is often spelt range. std::iota is chapter of the <numeric> header. Like std::fill, std::iota modifies a sequence in-place.
#include <iostream>
#include <numeric>
#include <vector>

auto main() -> int
{
    auto v = std::vector<int>{ 0, 1, 2, 3, 4, 5 };

    println(v);
    std::iota(v.begin(), v.end(), -2);
    println(v);

    return 0;
}
Generate
std::generate is the most primitive generator algorithm. Instead of taking an initial value, it takes a function that gets called repeatedly on each iteration. This algorithm modifies the range in-place.
#include <algorithm>
#include <iostream>
#include <random>
#include <vector>

auto main() -> int
{
    auto v    = std::vector<int>(10);
    auto rd   = std::random_device{};
    auto gn   = std::mt19937{ rd() };
    auto dist = std::uniform_int_distribution<>{ 0, 10 };

    println(v);
    std::generate(v.begin(), v.end(), [&]() { return dist(gn); });
    println(v);

    return 0;
}
Algorithm Extensions
Many algorithms have customised counterparts. These customisations include variants that take a predicate, or a size n instead of and end iterator. This are suffixed with markers such as _if or _n in the algorithm functions name. Look at cppreference for a comprehensive list of these variants.
Ranges
What is a range?
What is a range? So far we have considered a range as a pair of iterators pointing to the beginning and end of a collection of elements. C++ formalised this idea by defining a range as an iterator and sentinel pair. This allowed for C++ to introduced the Ranges Library. One problem with the main C++ standard algorithms library is that is was made in the 1990's. As such the algorithms were designed with implicit constraints but had no way to enforce them. Because of backwards compatibility the standard library algorithms could not be updated to use concepts, instead C++ introduces new overloads for the standard library algorithms in the nested std::ranges namespace. Along with the original iterator (now iterator and sentinel design) interface, these algorithms accept a range object as an input sequence (output ranges are still modelled using an output iterator). This allowed for algorithm calls to be much simpler while also enforcing constraints on ranges. Almost all of the original algorithms have a std::ranges counterpart. If you can use the range version, even with the iterator interfaces as they impose stricter but safer requirements on the iterators to ensure that algorithms behave correctly. Range algorithms also support projections, allowing for in-place temporary transformations of data. This is defaulted to std::identity. All containers in the C++ standard library are considered valid ranges.
#include <algorithm>
#include <iostream>
#include <vector>

auto main() -> int
{
    auto v = std::vector<int>{ 0, 1, 2, 3, 4, 5, 6, 7, 8, 9 };

    println(v);
    std::ranges::transform(v, v.begin(), [](const auto& x){ return x * x; });
    println(v);

    return 0;
}
Range Concepts & Categories
Like iterators, there are different categories describing the requirements of a range type. These categories have concept definitions so you can constrain your own algorithms. Here is a table of different sequence containers and how they match up against the different range concepts.
| Concept | std::forward_list | std::list | std::deque | std::array | std::vector |
|---|---|---|---|---|---|
std::ranges::input_range | ✅ | ✅ | ✅ | ✅ | ✅ |
std::ranges::forward_range | ✅ | ✅ | ✅ | ✅ | ✅ |
std::ranges::bidirectional_range | ✅ | ✅ | ✅ | ✅ | |
std::ranges::random_access_range | ✅ | ✅ | ✅ | ||
std::ranges::contiguous_range | ✅ | ✅ |
Note:
std::output_rangeis not shown here. This is because anstd::output_rangeis similar tostd::input_rangeexcept it models writing to as opposed to reading.
Views
What is a View?
A view is a simple abstraction on a range. Views can be thought of as a reference or pointer to a range that is cheap to copy, move, assign and destroy. Views allow for a ranges to be used in a lazy evaluation contexts. Views are found in the std::ranges namespace from the <range> header, often with a '_view' suffix or can be found in the std::views namespace of the same header without the suffix. Views can be passed to range based algorithms or even used as the range evaluated in a range-for.
Ranges can be created from an iterator and sentinel pair or a range using std::subrange.
#include <algorithm>
#include <iostream>
#include <ranges>
#include <vector>

auto main() -> int
{
    auto v = std::vector<int>{ 1, 2, 3, 4, 5 };

    /// Note: This is unnecessary and is only a showcase
    for (const auto& e : std::ranges::subrange(v.begin(), v.end()))
        std::cout << e << " ";

    std::cout << std::endl;

    return 0;
}
Lazy Evaluation
What is lazy evaluation? Lazy evaluation is the process of delaying evaluation of functions and expressions until the result of the evaluation is actually needed. This reduces the amount of memory, compute cycles and evaluations the function undergoes and allows for easier composition of functions.
Factories
Some views are used convert ranges and scalars into views. These views are called factories as they generate a view from its arguments.
std::views::empty- A view containing no element. It still takes an unused template type parameter.std::views::single- A owning view containing a single element.std::views::iota- A range factory, generating a elements from a repeatedly incremented initial value. This view can be bound to a final value or unbounded, generating an infinite view. Bounded iota views are exclusive ie. the bound is excluded from the resulting range.std::views::istream- A range factory, generating elements by repeated calls to>>on a input stream eg.std::cin.
#include <algorithm>
#include <iostream>
#include <ranges>

auto main() -> int
{
    /// Prints "0 1 2 3 4 5 6 7 8 9 10"
    std::ranges::copy(std::views::iota(0, 11), std::ostream_iterator<int>(std::cout, " "));

    return 0;
}
Range Adaptors, Composition & The Pipe Operators
So far views aren't all that interesting. The true power of views comes from their ability to be composed. Composition allows for views to be combined to build more complex views over data while still adhering to lazy evaluation. Instead of evaluating each function one at a time a single function, which is the composition of all the view functions gets evaluated once for every access to the element. Views are composed using the pipe operator (|) and are read from left-to-right as opposed to inside-out. This makes function composition far more expressible and extensible. Range (including containers) or view object are 'piped' to the range adaptor with the resulting view; when evaluated, applying the range adaptor on the every element.
Standard View Range Adaptors
std::views::transform- a range adapter whose resulting view maps an unary function to the input range.std::views::filter- a range adaptor that whose resulting view excludes any element that do not satisfy an unary predicate.std::views::reverse- a range adaptor returning a view of the input range as if its order was reversed.std::views::take- a range adaptor whose resulting view take only \( n \) elements from the input range. Performs bound checks to ensure that it doesn't take more elements then the view can see.std::views::take_while- a range adaptor whose resulting view contains every element until an unary predicate returnsfalse.std::views::drop- a range adapter whose resulting view skips the first \( n \) elements from a input range.std::views::drop_while- a range adaptor whose resulting view starts at the first element for which the unary predicate evaluatesfalse.std::views::join- a range adaptor whose resulting view will flatten nested range or view object a single view.std::views::split- a range adaptor whose resulting view contains subranges split by a given deliminator. Is not entirely lazy and will eagerly move forward through the view at each iteration during evaluation.std::views::lazy_split- a range adaptor whose resulting view contains subranges split by a given deliminator Is entirely lazy evaluated but is unable to model the subranges as a common range(a range with the same type for the iterator and sentinel) and cannot be used in algorithms expecting a bidirectional range (or higher).std::views::common- a range adaptor whose resulting view adapts the input range to have the same type for its iterator and sentinels.std::views::element- a range adaptor that accepts an input range with Tuple-Like elements and whose resulting view contains the \( Nth \) entry from every Tuple-Like element of the input range.std::views::keys- a range adaptor who is a specialisations ofstd::views::elementstaking the \( 0th \) entry of a view of Tuple-Like elements. This can be used to obtain a view of just the keys of an associative container.std::views::values- a range adaptor who is a specialisations ofstd::views::elementstaking the \( 1st \) entry of a view of Tuple-Like elements. This can be used to obtain a view of just the values of an associative container.
#include <algorithm>
#include <iostream>
#include <ranges>

auto square = [](const auto& x){ return x * x; };
auto even = [](const auto& x){ return x % 2 == 0; };

auto main() -> int
{
    auto nums = std::views::iota(0)
              | std::views::transform(square)
              | std::views::filter(even)
              | std::views::take(10);

    std::ranges::copy(nums, std::ostream_iterator<int>(std::cout, " "));

    std::cout << std::endl;

    return 0;
}
std::views::transformstd::views::filterstd::views::reversestd::views::takestd::views::take_whilestd::views::dropstd::views::drop_whilestd::views::joinstd::views::splitstd::views::lazy_splitstd::views::commonstd::views::elementsstd::views::keysstd::views::values
Task 3 : Circular Buffer
This assignment is a tricker one. Your job is to implement a circular buffer or a ring buffer. Circular buffers are First-In-First-Out buffers
Requirements
- Must be a
class(orstruct). - Must have these constructors
- Default
- Copy
- Move
- Assignment Copy
- Assignment Move
- A destructor
- Must be templated for any element type
T. - Can either be dynamic in size (adds memory as it needs) or semi-static (fixed maximum but variable current size)
- Methods for pushing in a new element to the front and popping the oldest from the back.
- Introspection methods
- Current size
- Current capacity
- One that returns a pointer to the first element
- A method to check if the buffer is full
- A method to check if the buffer is empty
- Element access
- at-like method with index checking
- subscript operator overload (
[])
You can manually create and destroy the memory, use smart pointers or use a container to store the underlying memory.
Optional
- Have a custom iterator type with the relevant methods in the circular buffer for obtaining them.
- front and and back element access.
- Equality (
==) and inequality (!=) operator overloads. - Output stream operator overload (
>>). - Constructor and assignment operator overload (
=) that take anstd::initializer_list. - Uses an allocator (eg.
std::allocator) to allocate memory. - Takes an additional template argument that correlates to a generic allocator type.
- Takes an additional template parameter that correlates to the type of the underlying container used to for storage of elements (eg.
std::vector) making the circular buffer an adaptor.
Submitting
You can use Godbolt or bpt to build and test your struct. Once you have created your implementation:
- Clone this repo using
git clone https://github.com/MonashDeepNeuron/HPP.git. - Create a new branch using
git checkout -b triple/<your-name>. - Create a folder in the
/submissionsdirectory with your name. - Create a folder with the name of this task.
- Copy your mini project into this directory (bpt setup, cmake scripts etc.) with a
README.mdor comment in the code on how to run the program (verify it still works). There is a sample header file in/templatesthat you can use. - Go to https://github.com/MonashDeepNeuron/HPP/pulls and click 'New pull request'.
- Change the branches in the drop down so that your branch is going into
mainand `Create new pull request. - Give the pull request a title and briefly describe what you were able to implement and any struggles you had.
- On the right side-panel, under the 'Assignees' section, click the cog and assign me.
- Click 'Create pull request' and I'll take it from there.
Note: If you created a GodBolt instance, put the link in a comment at the top of the file (under your copy comments). This is generated by clicking the
sharebutton in the top-right-most corner of the webpage and clicking the 'short link' option.
Slides


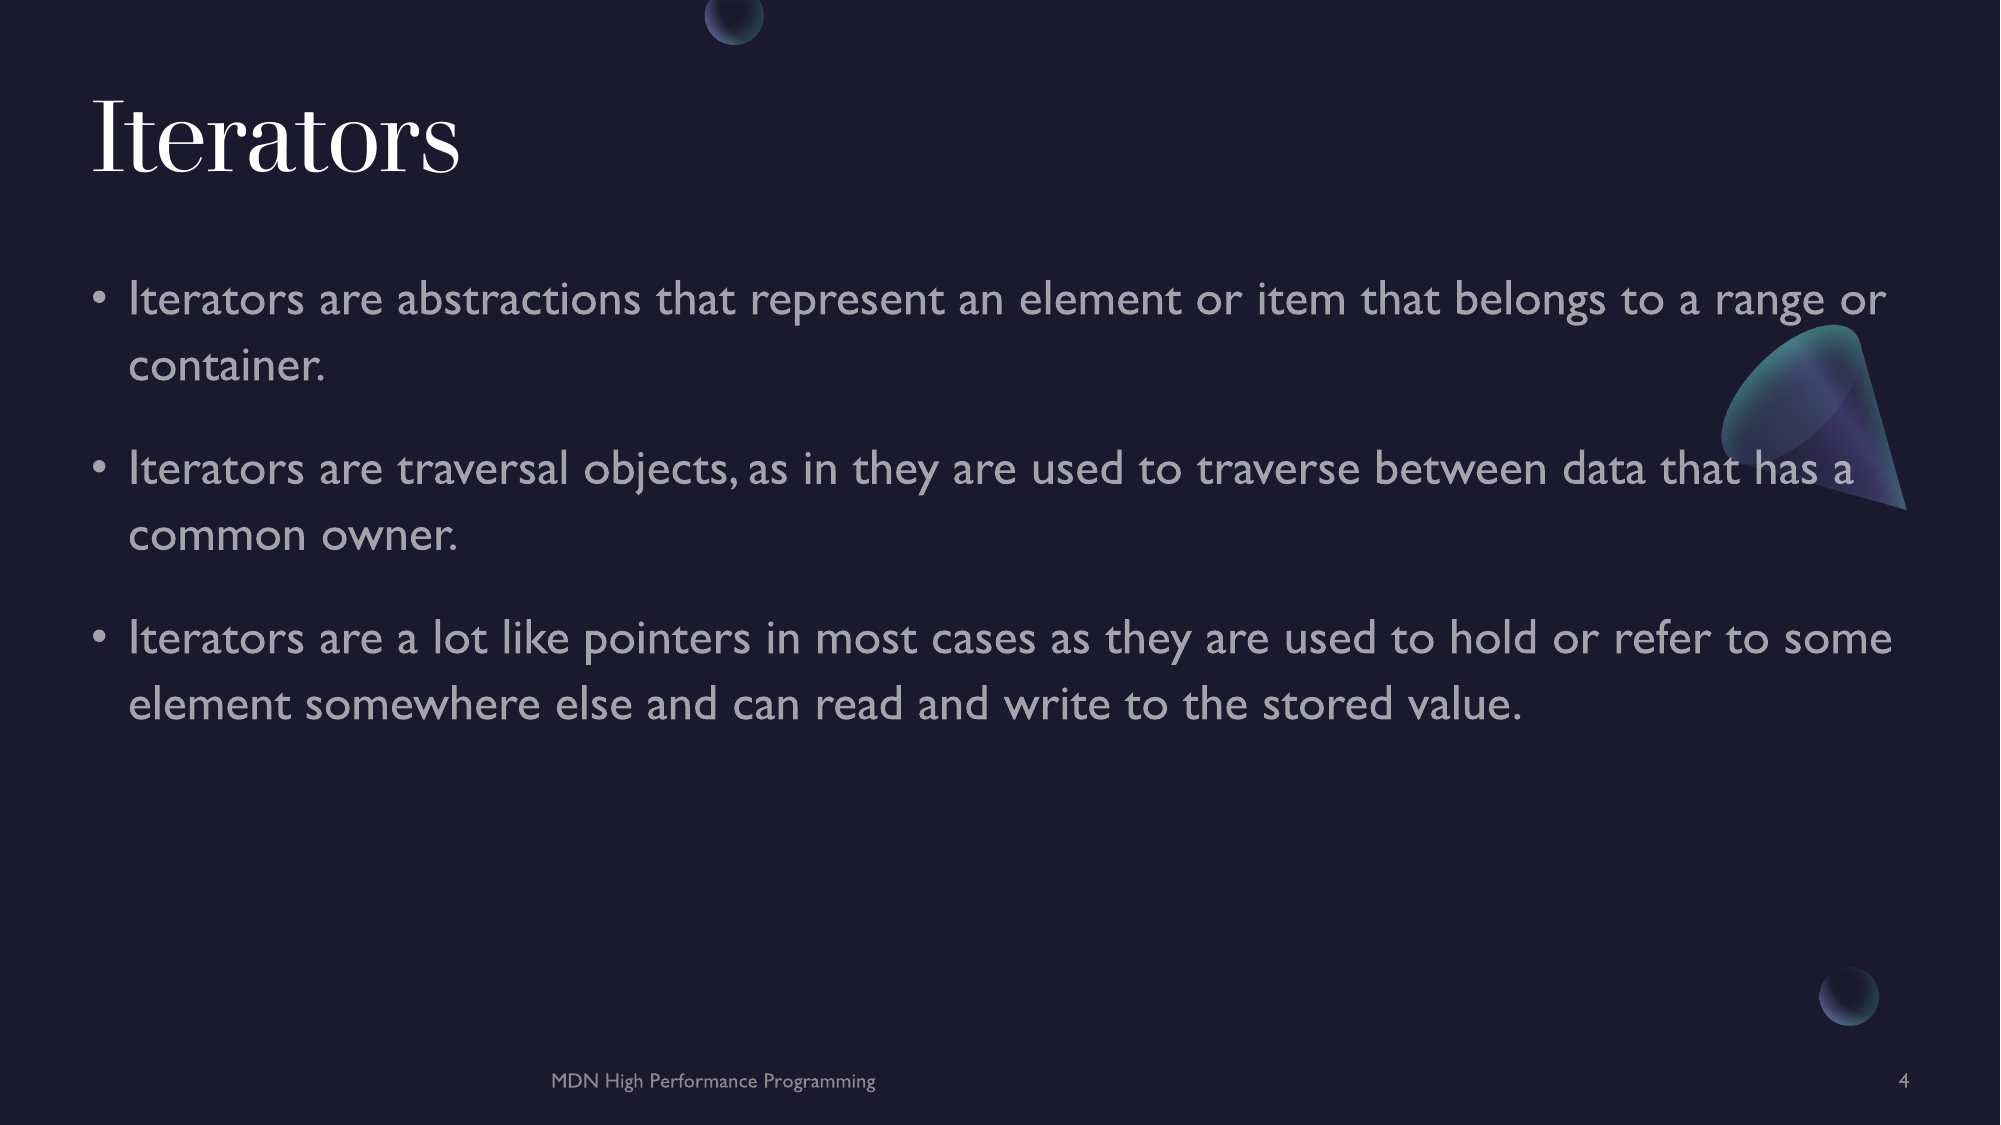
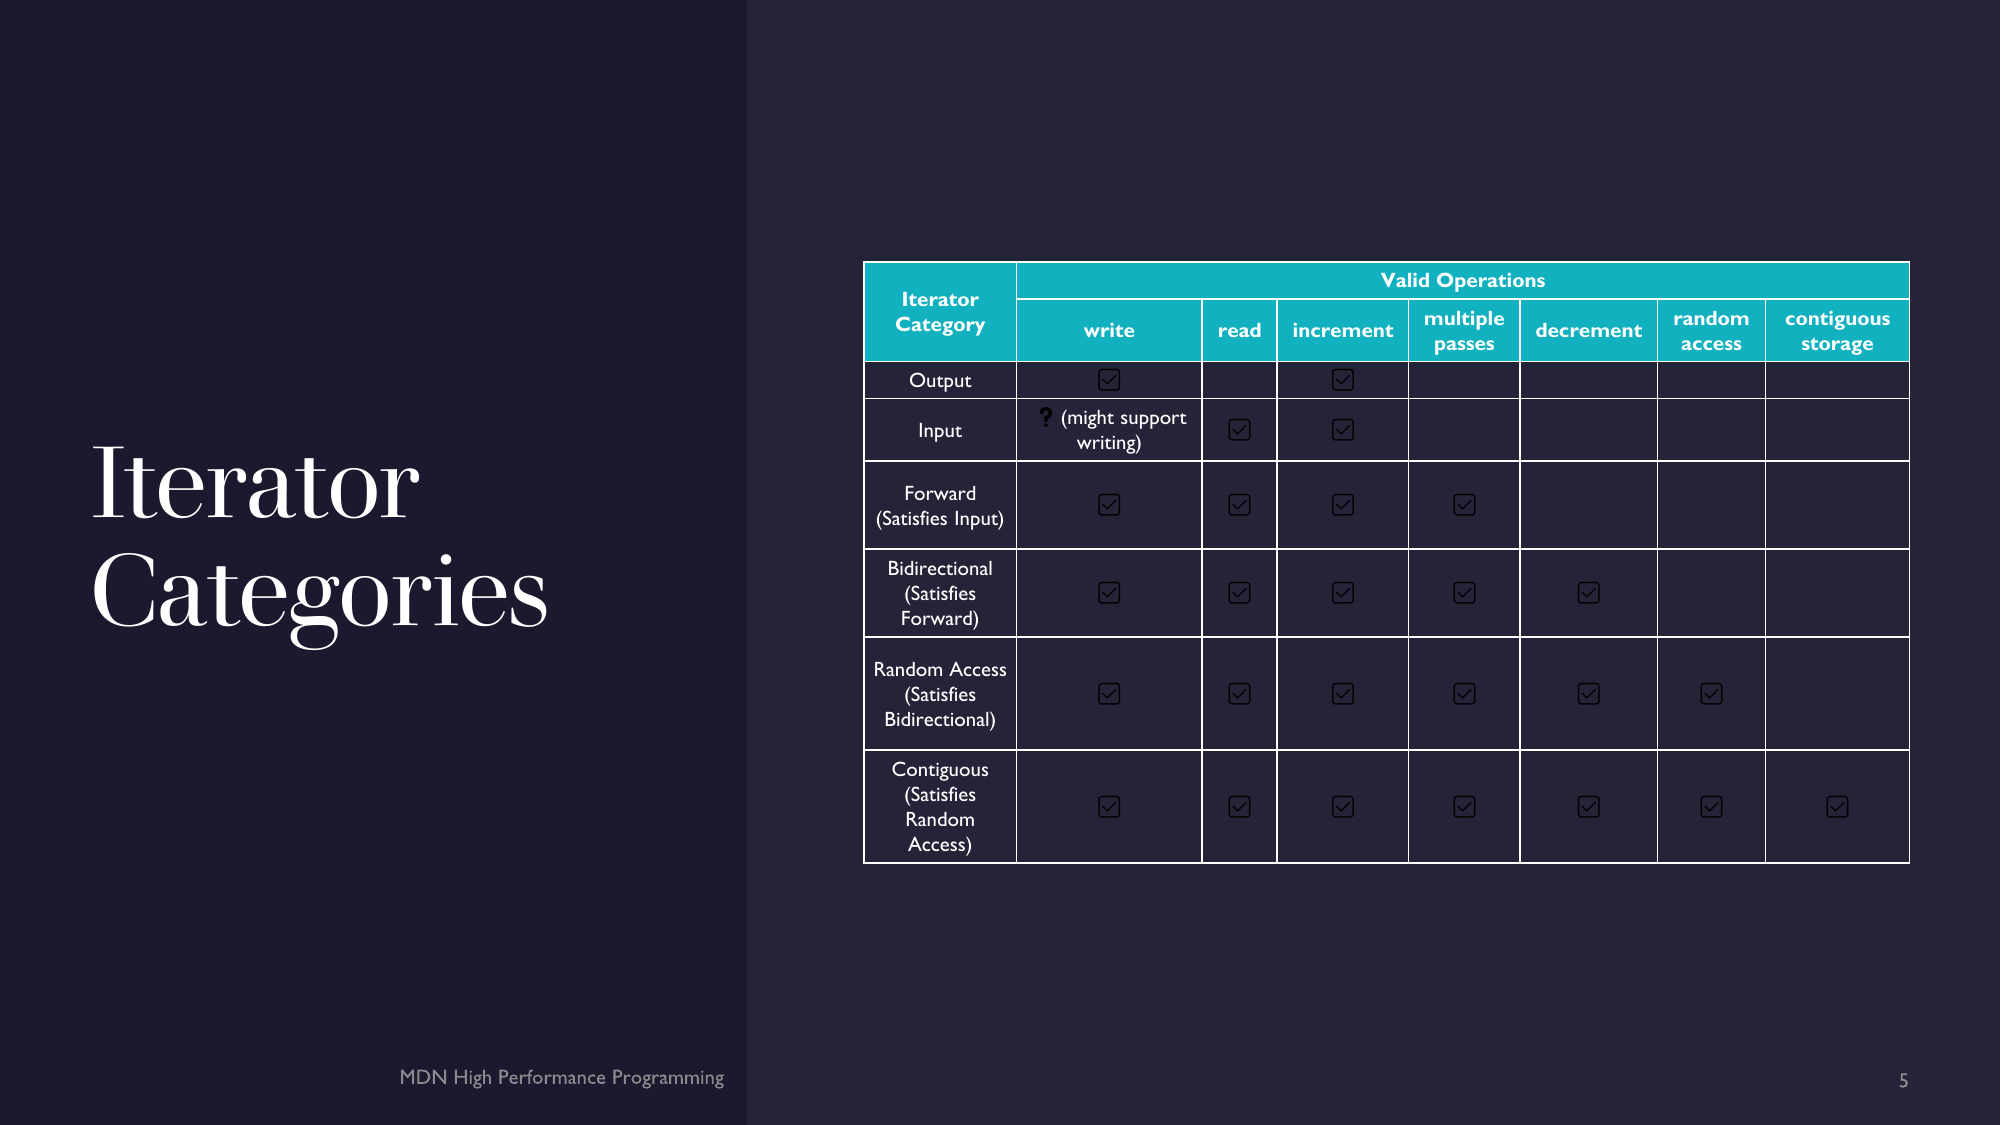
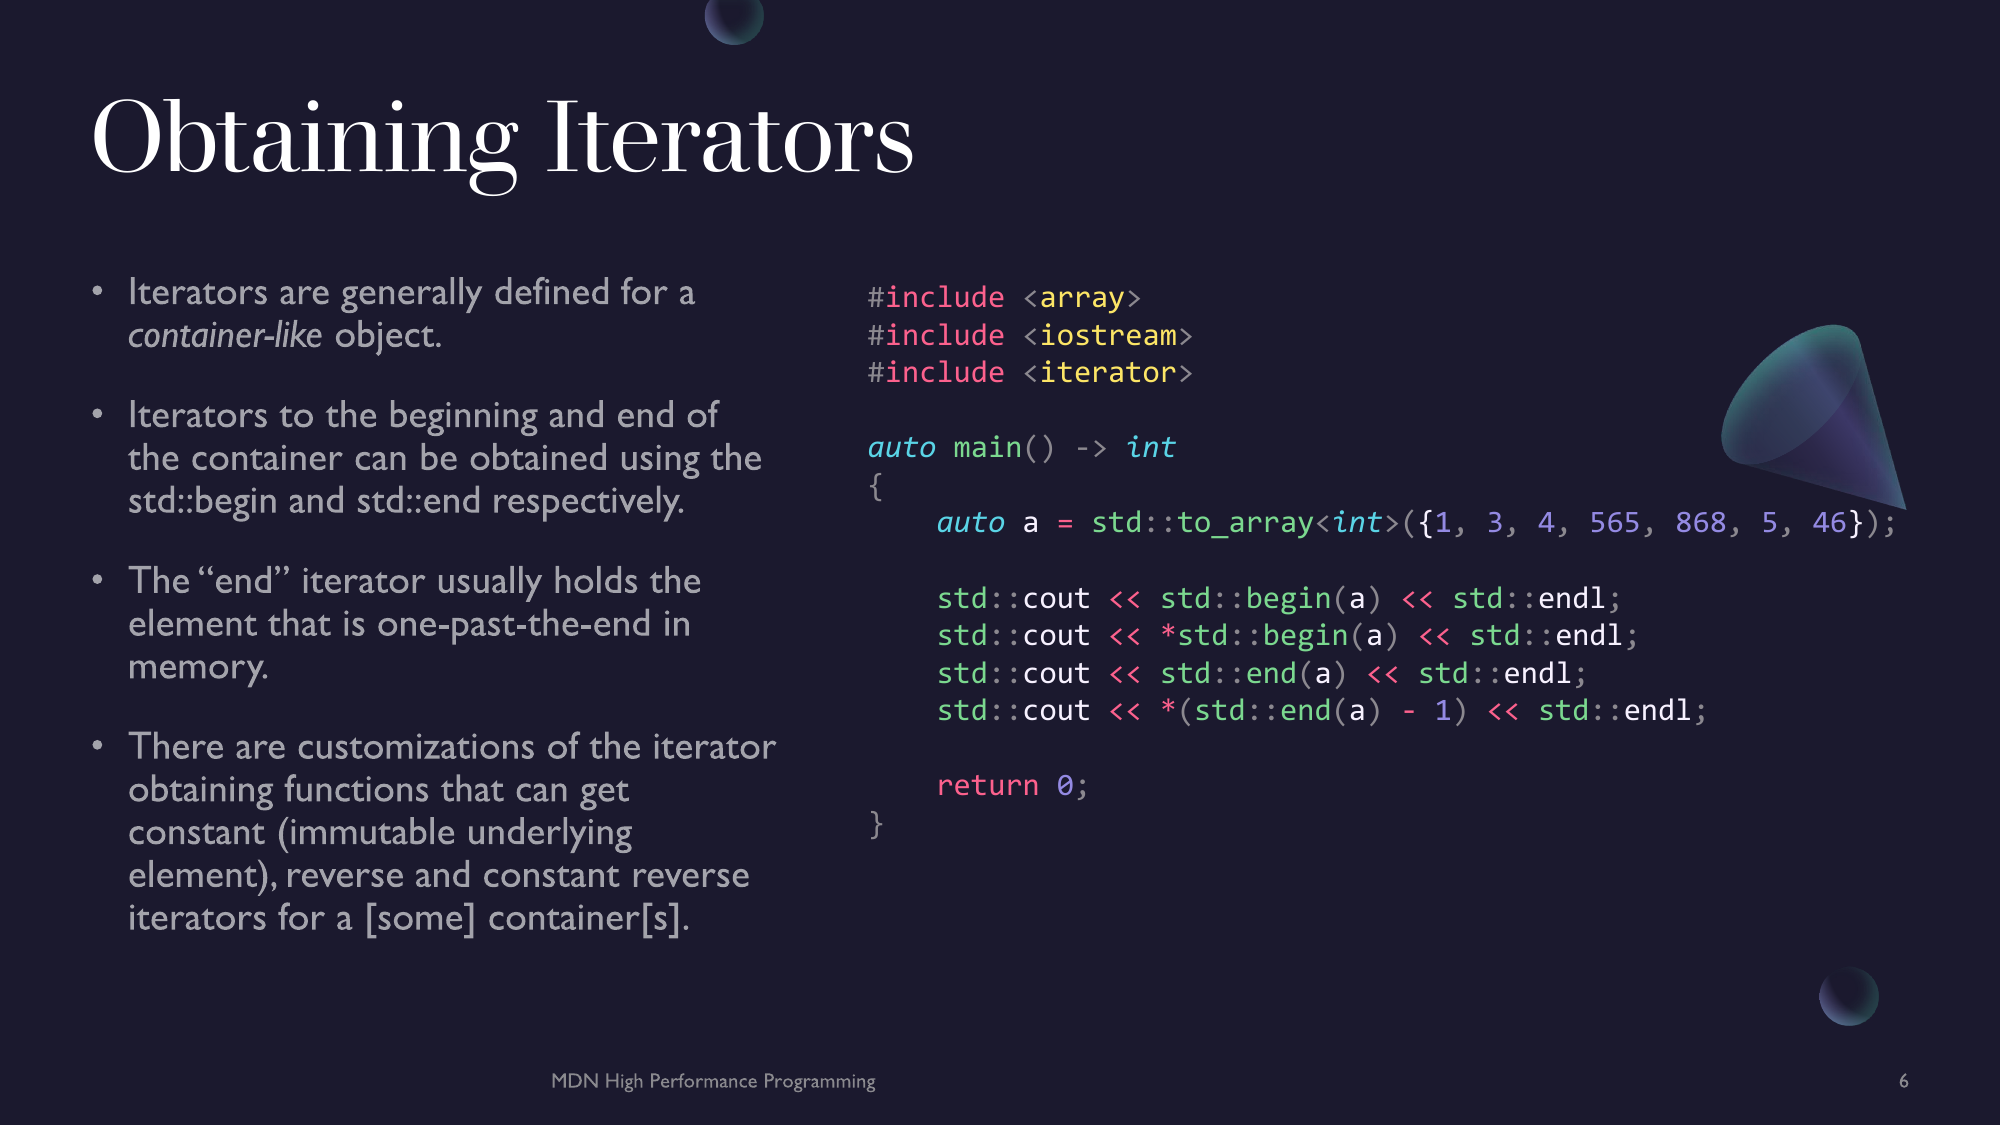

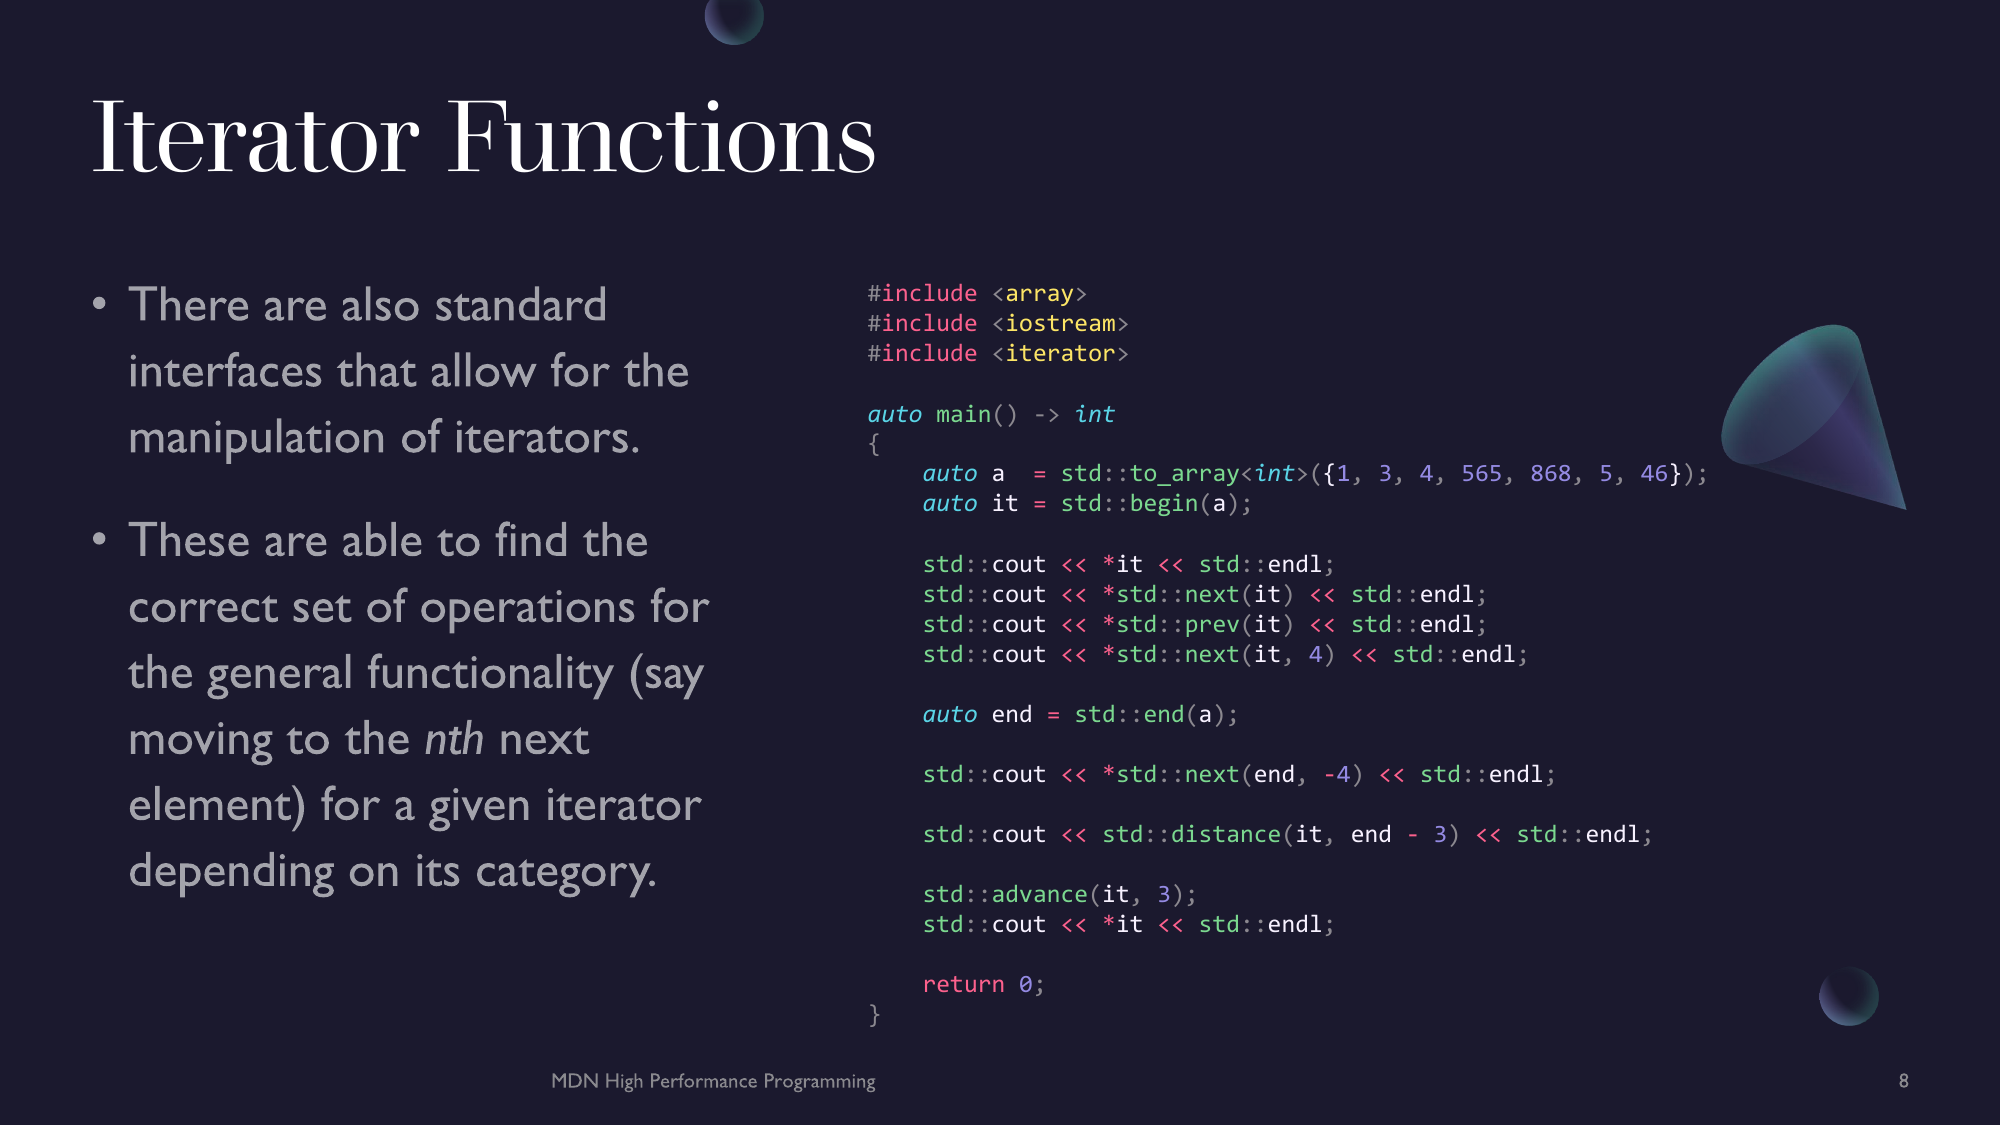


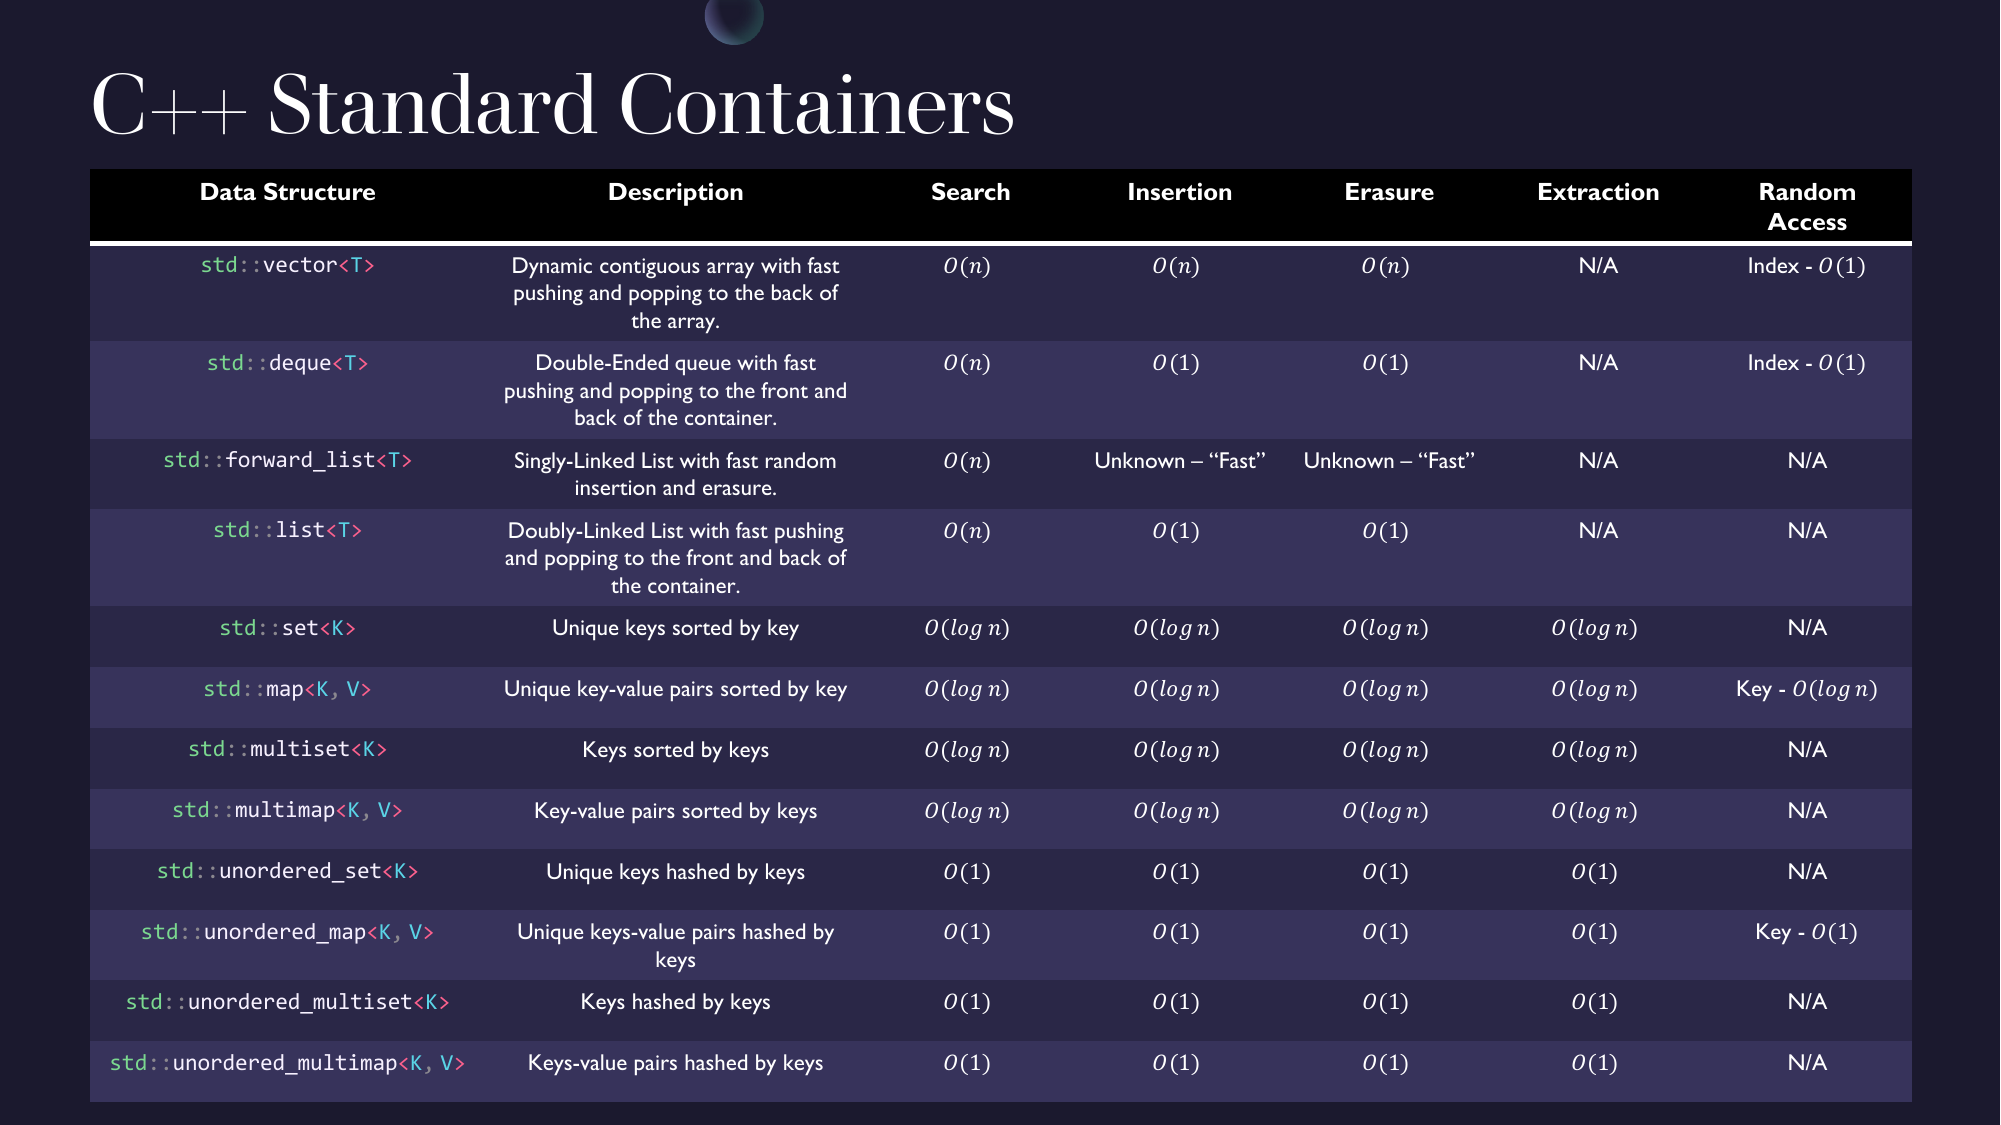
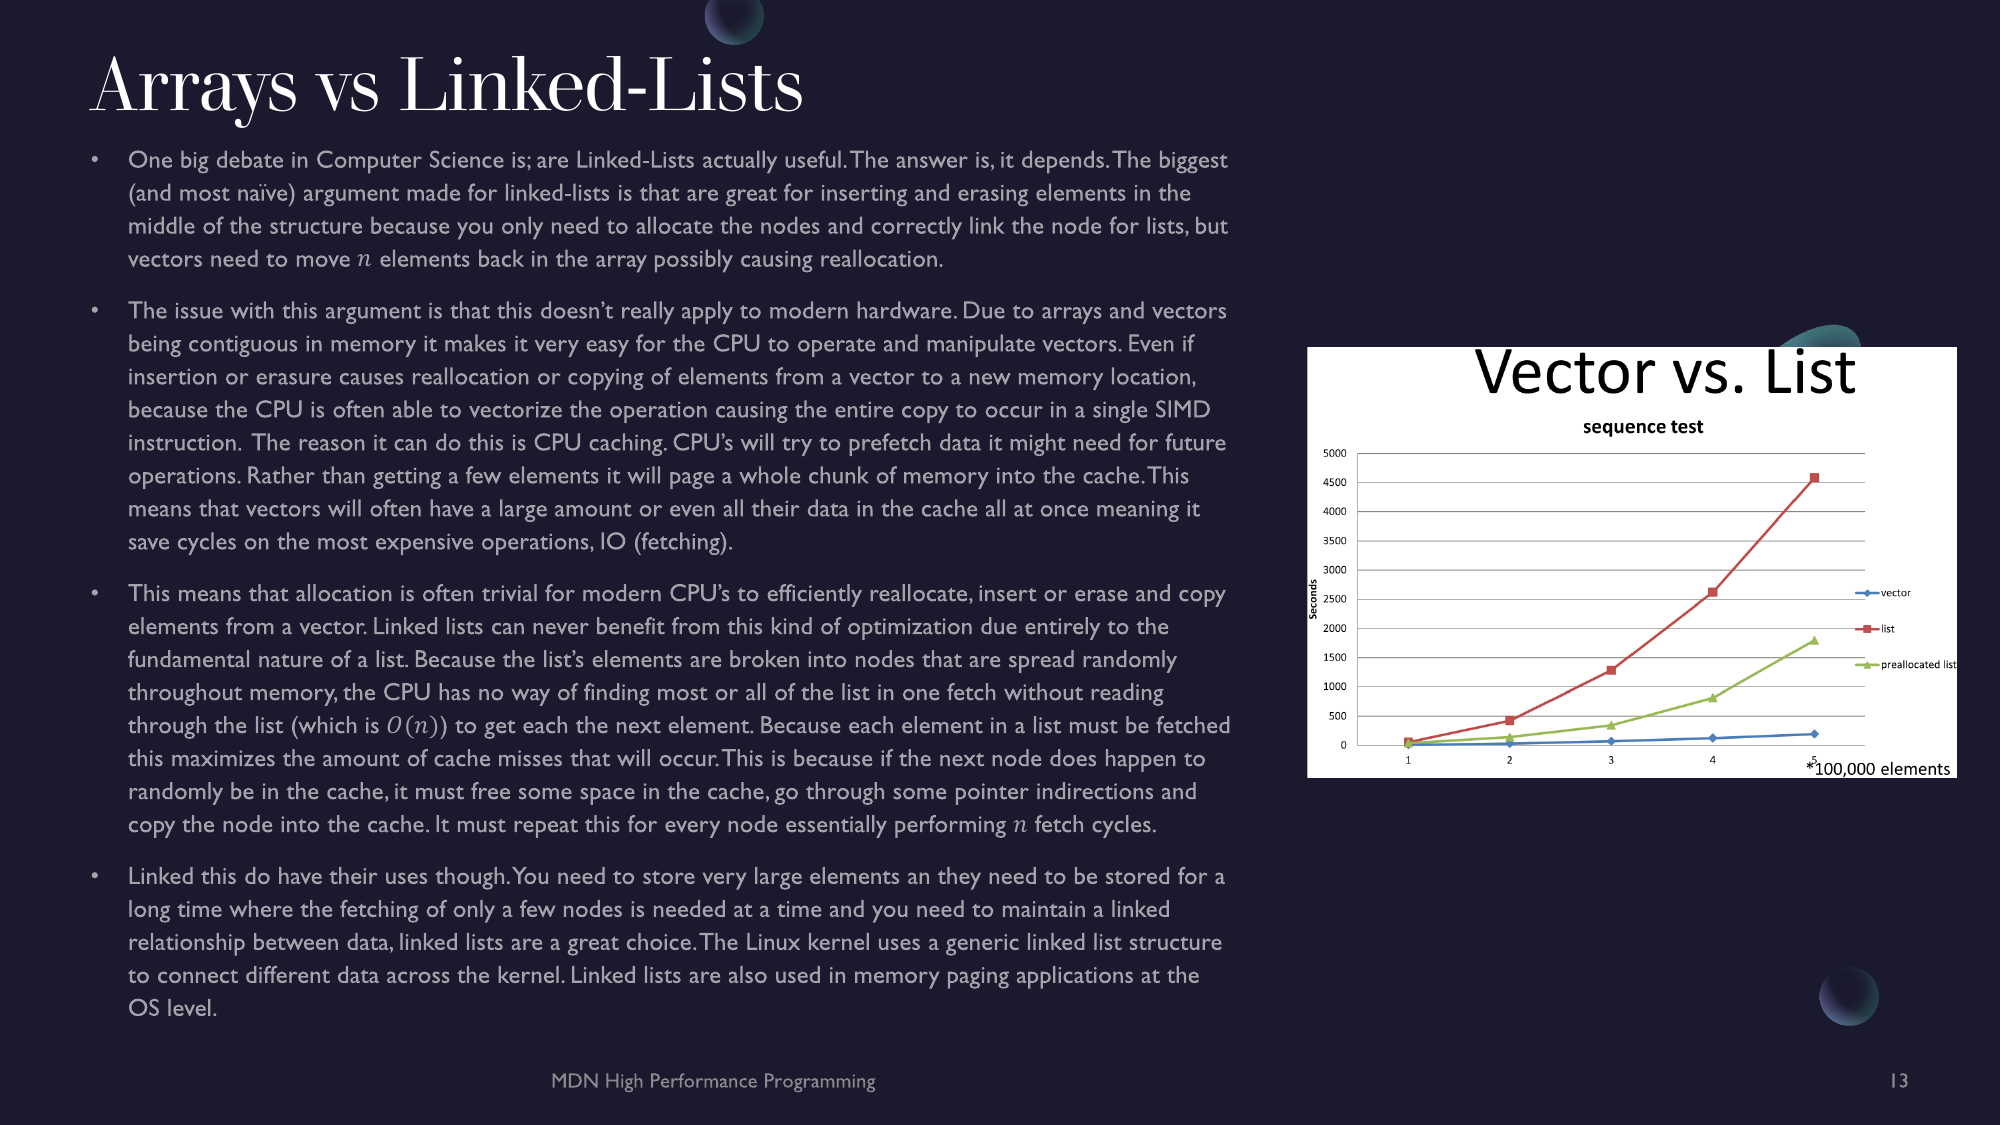
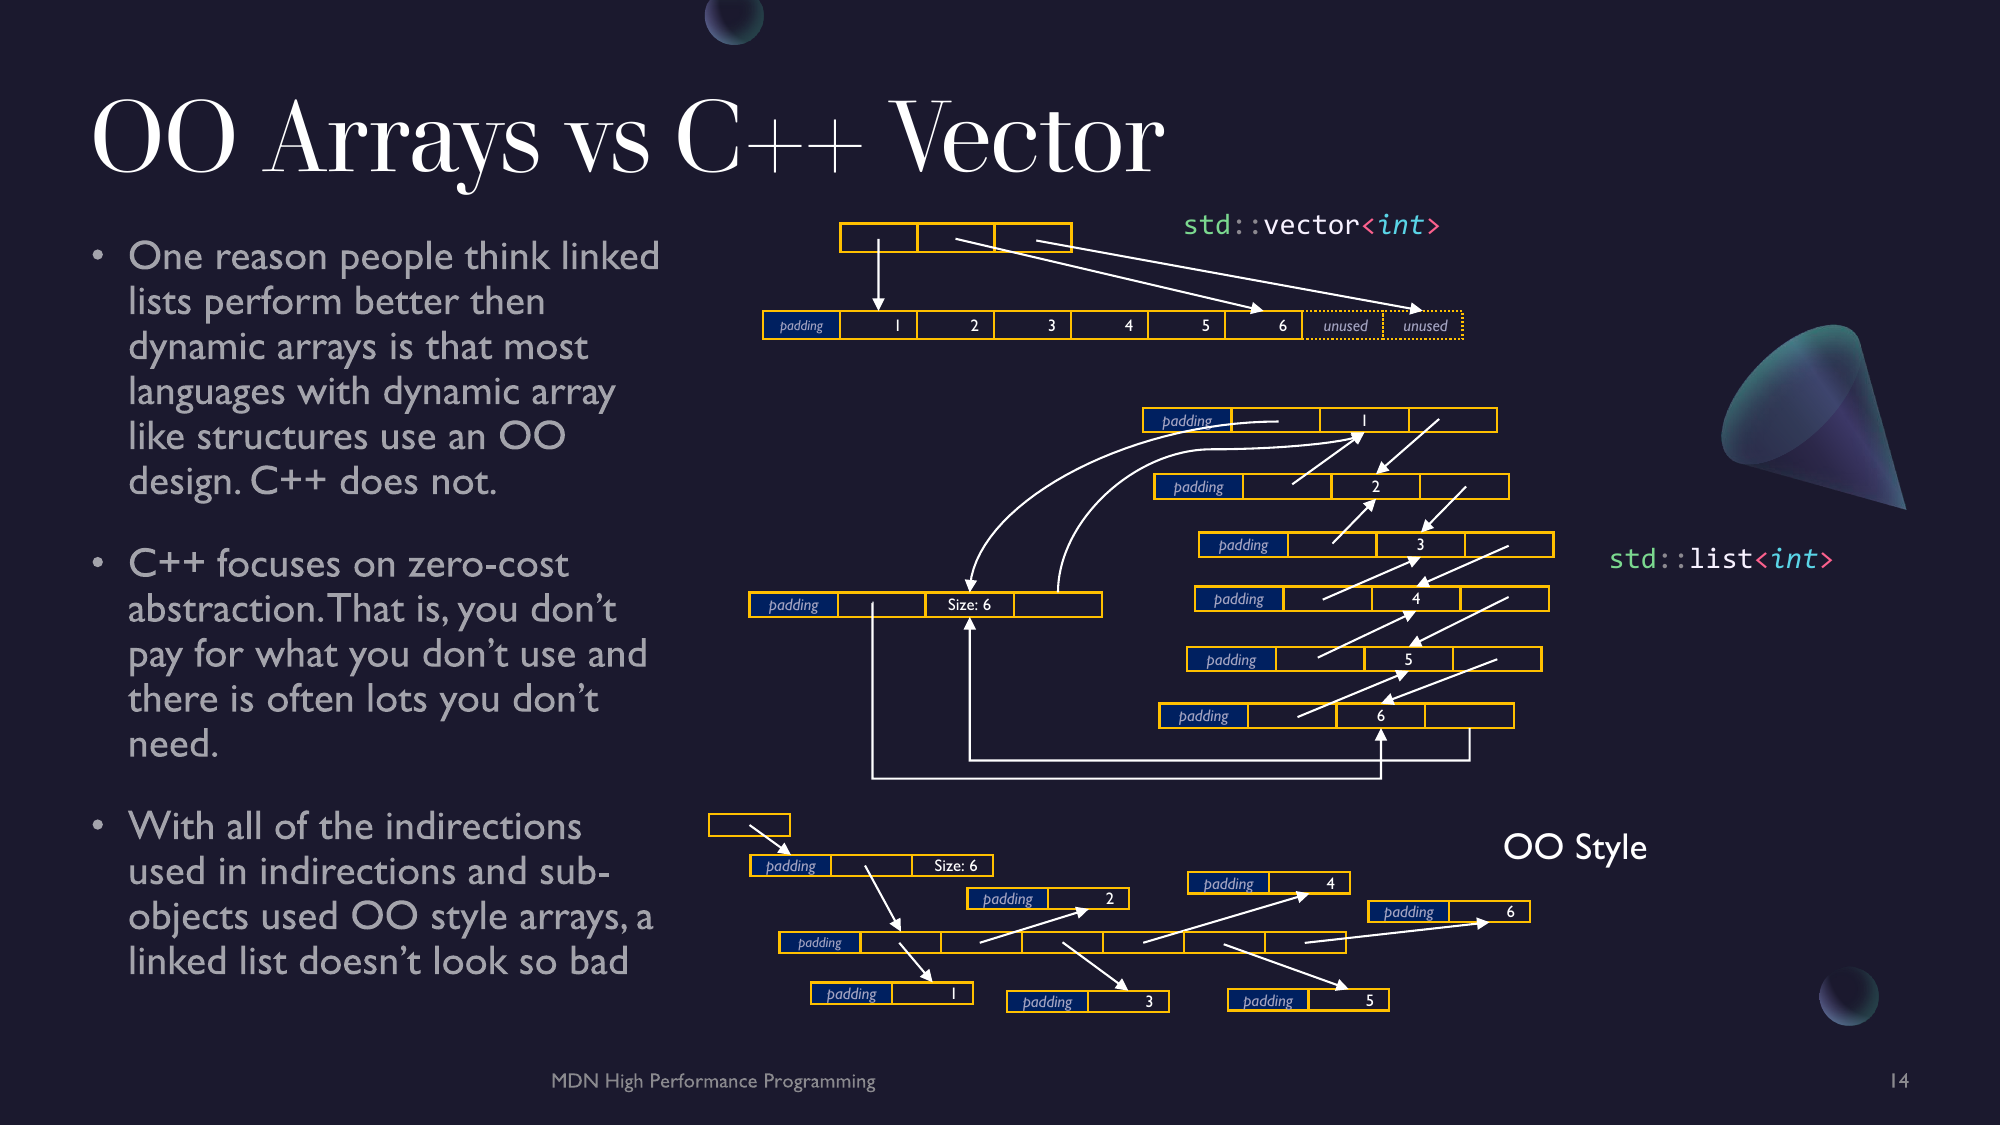
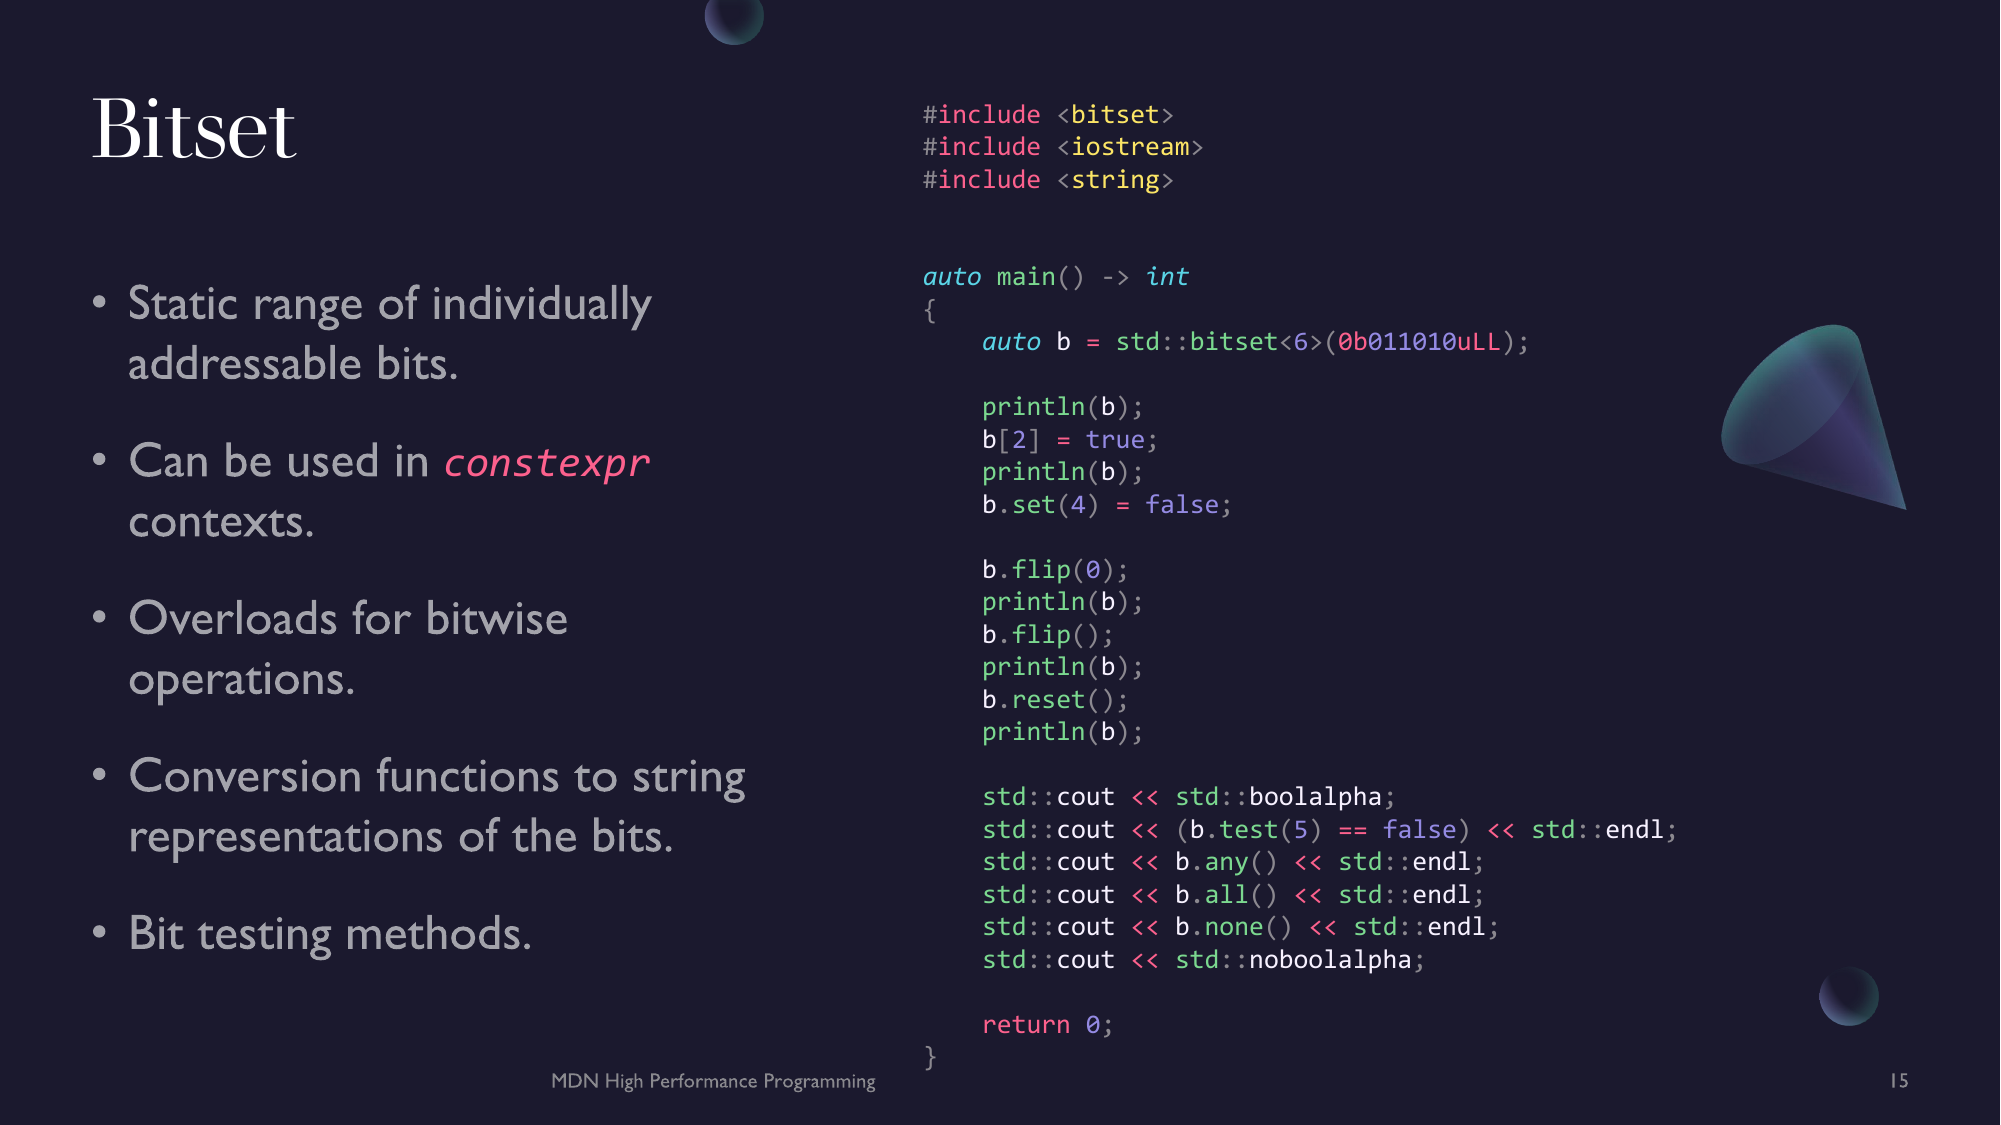
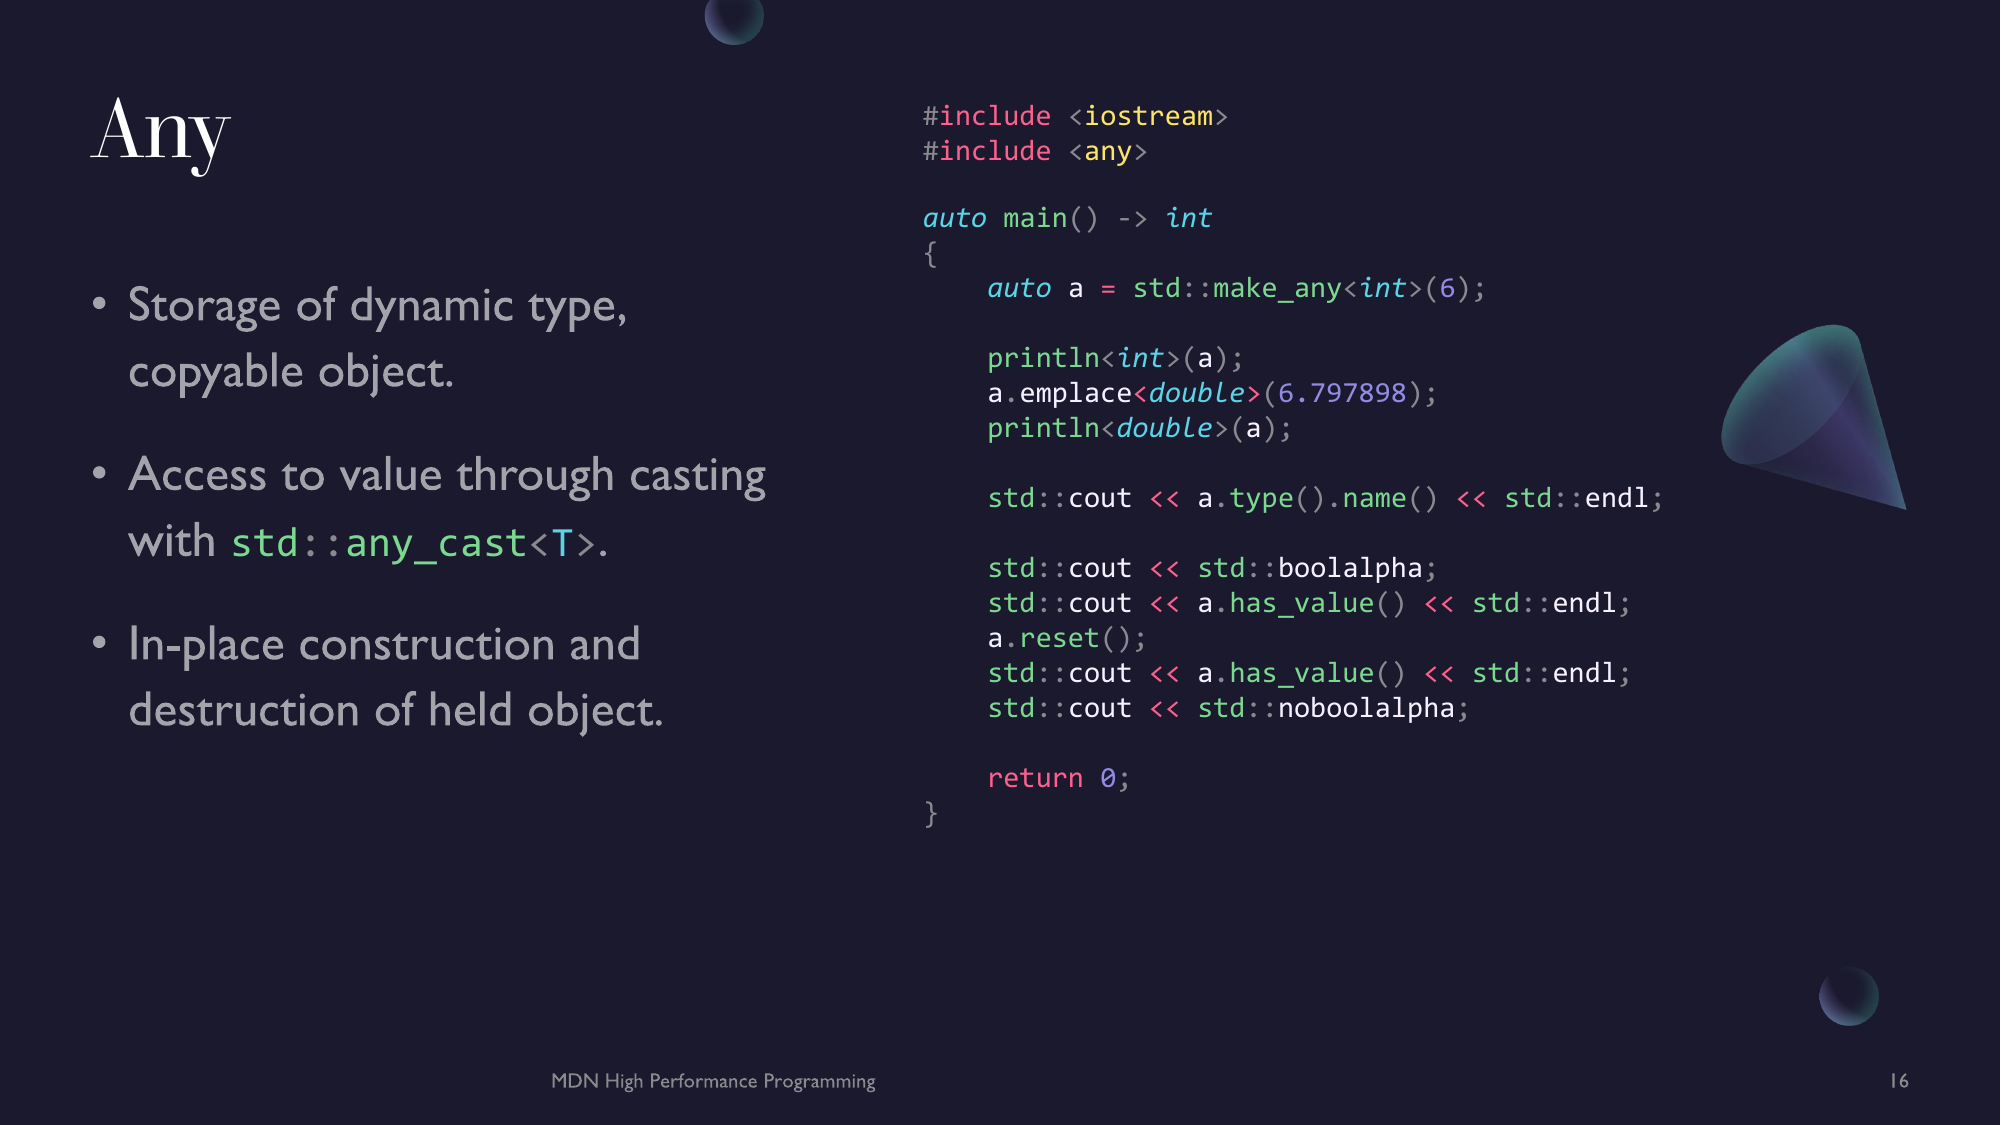

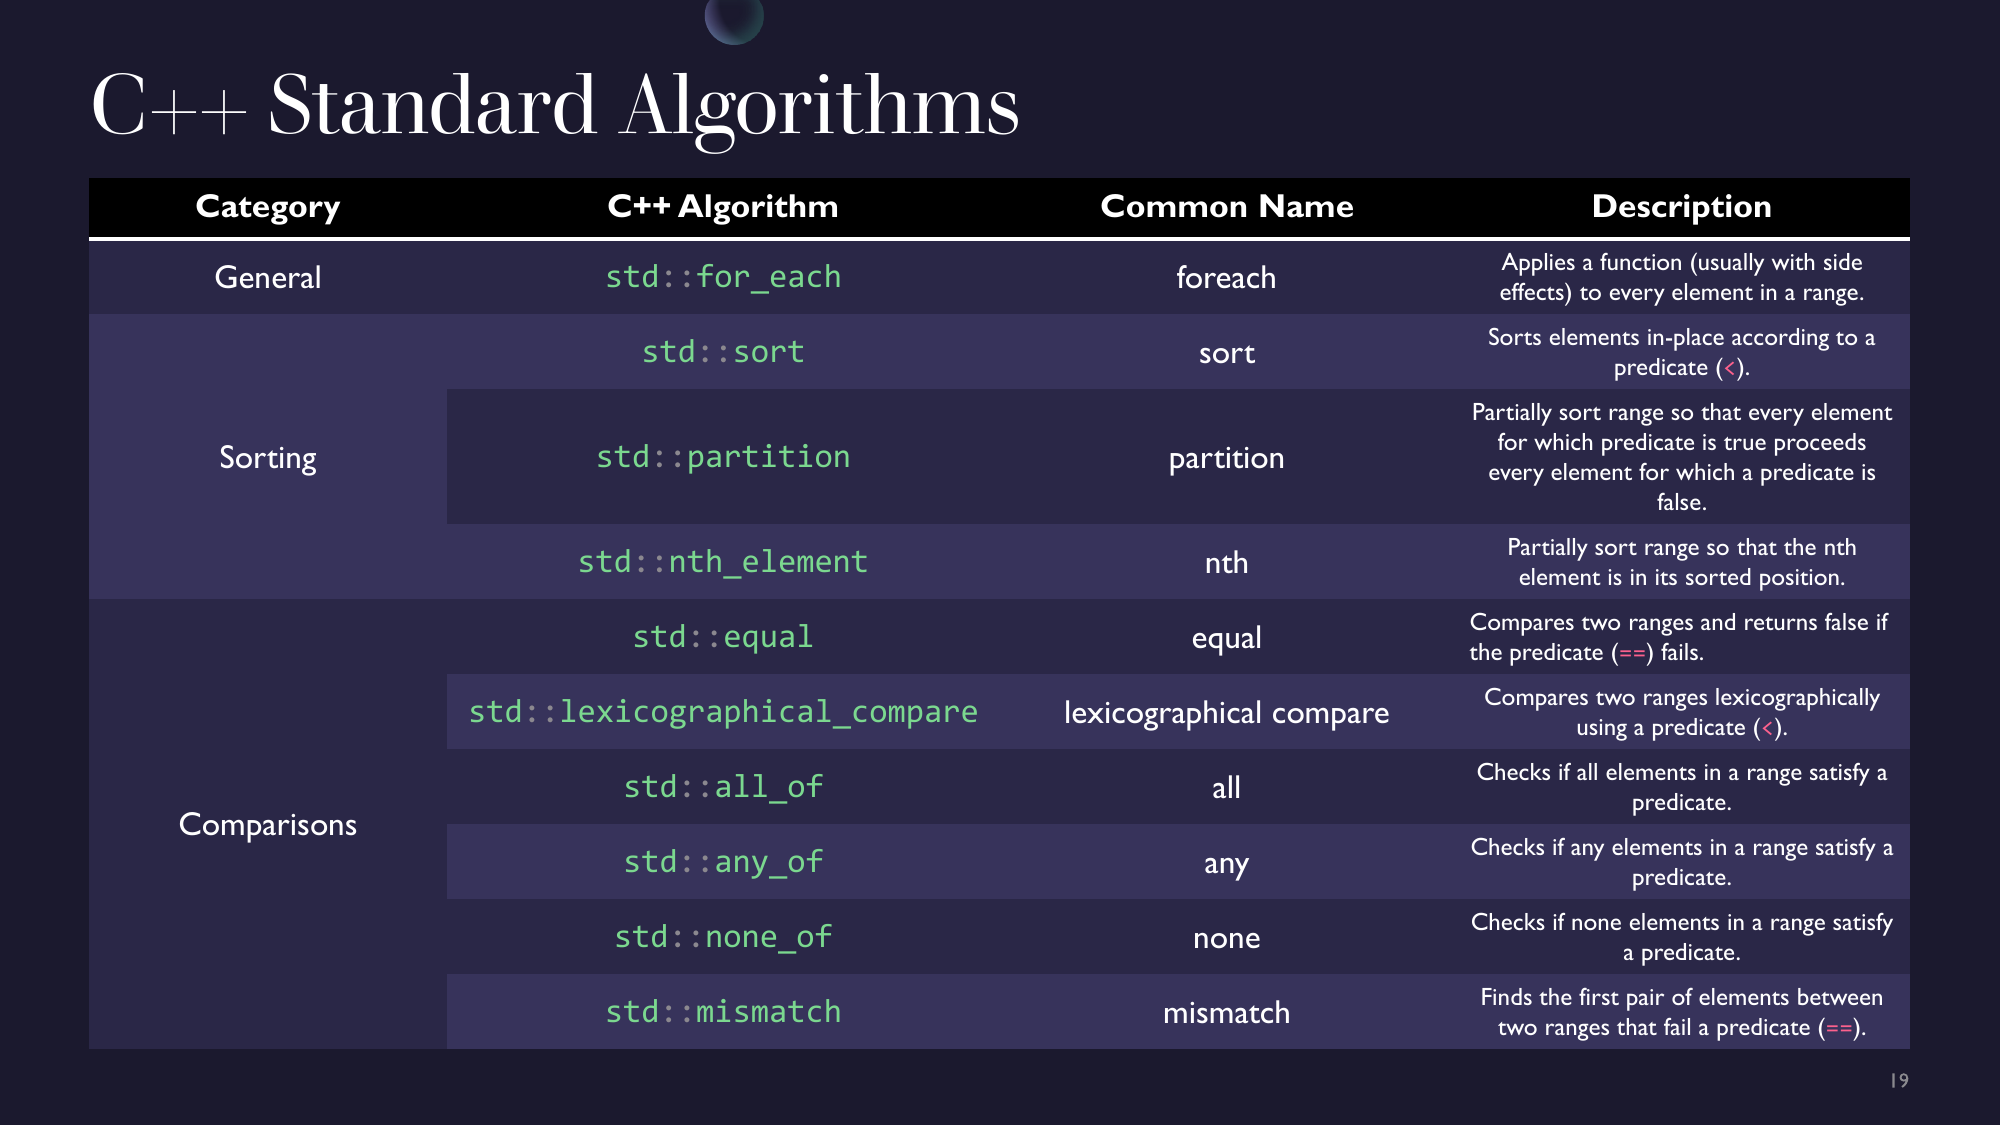
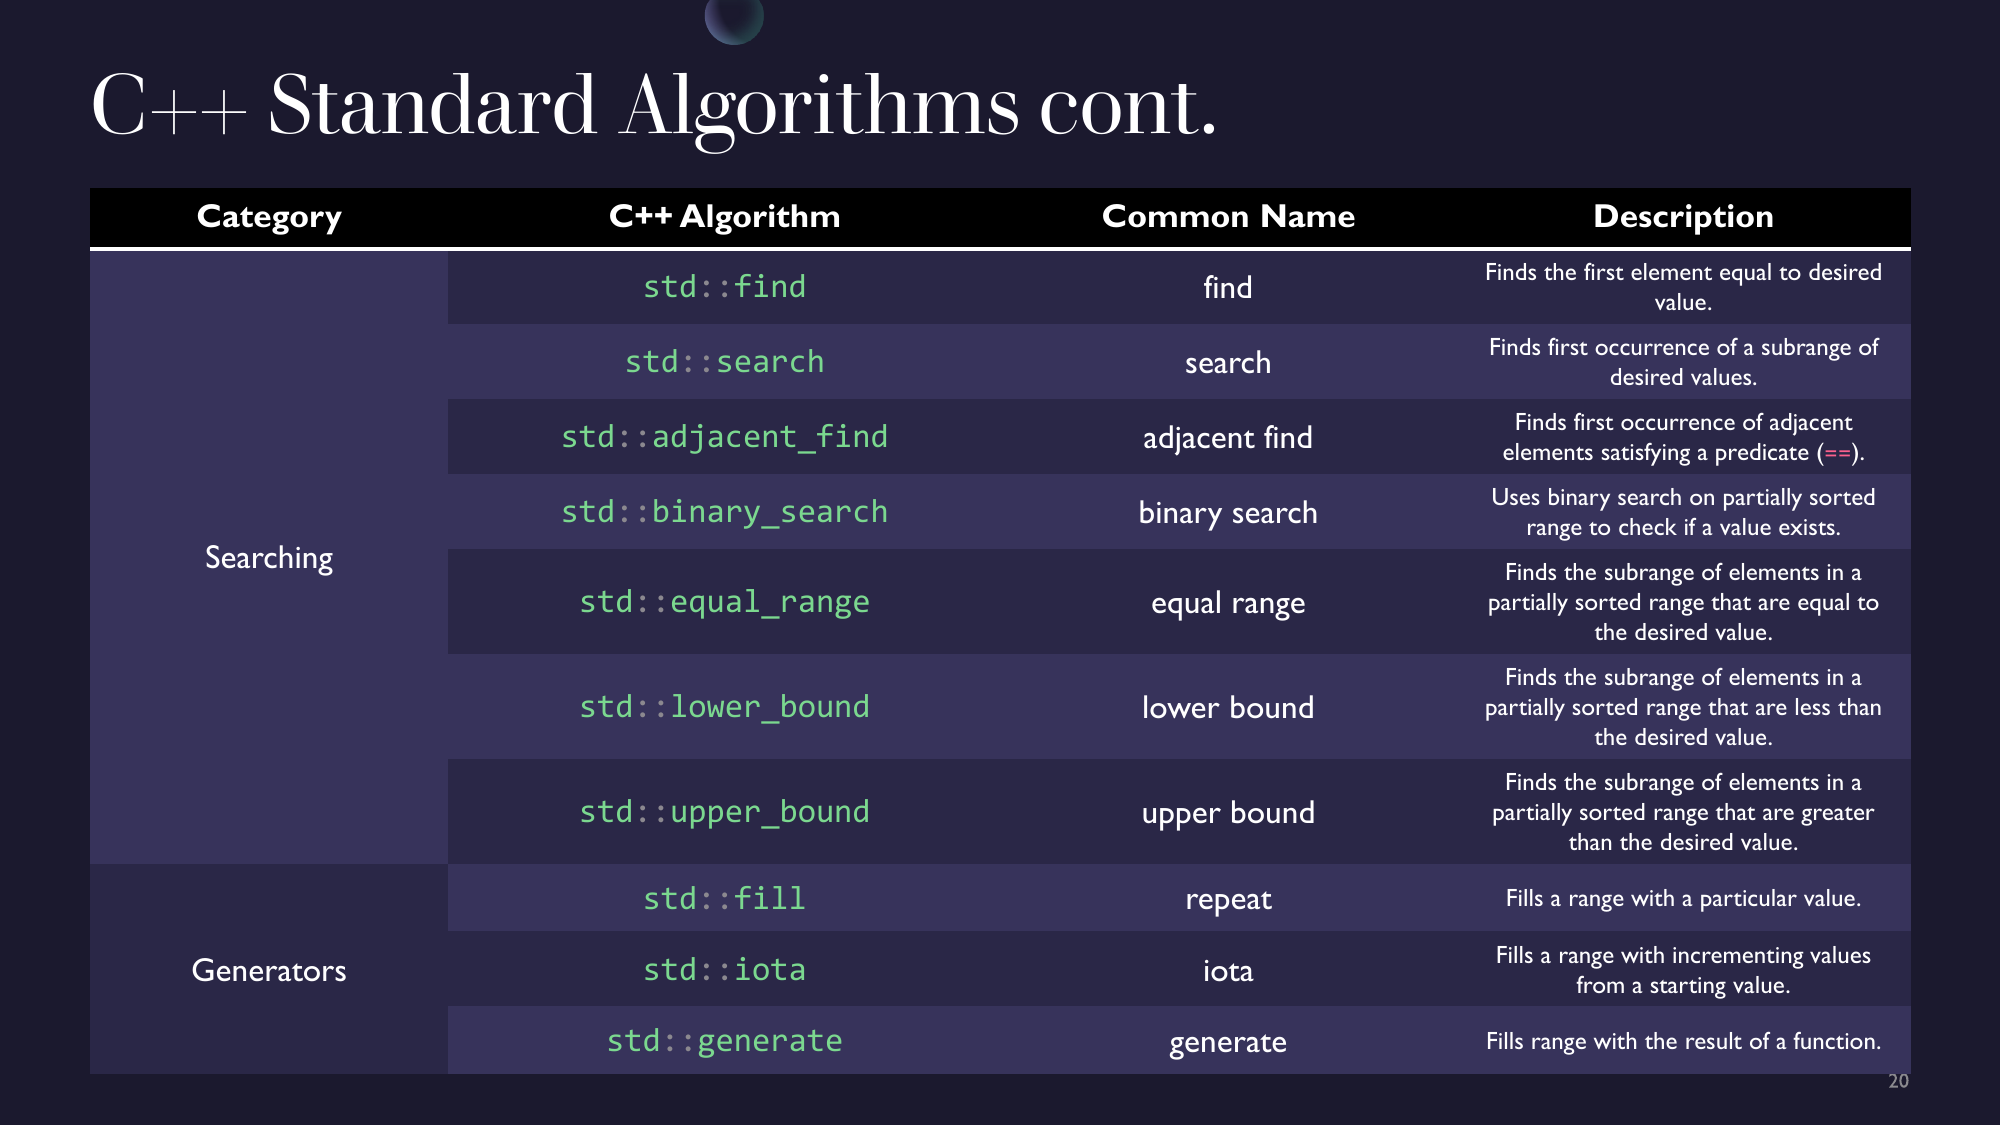
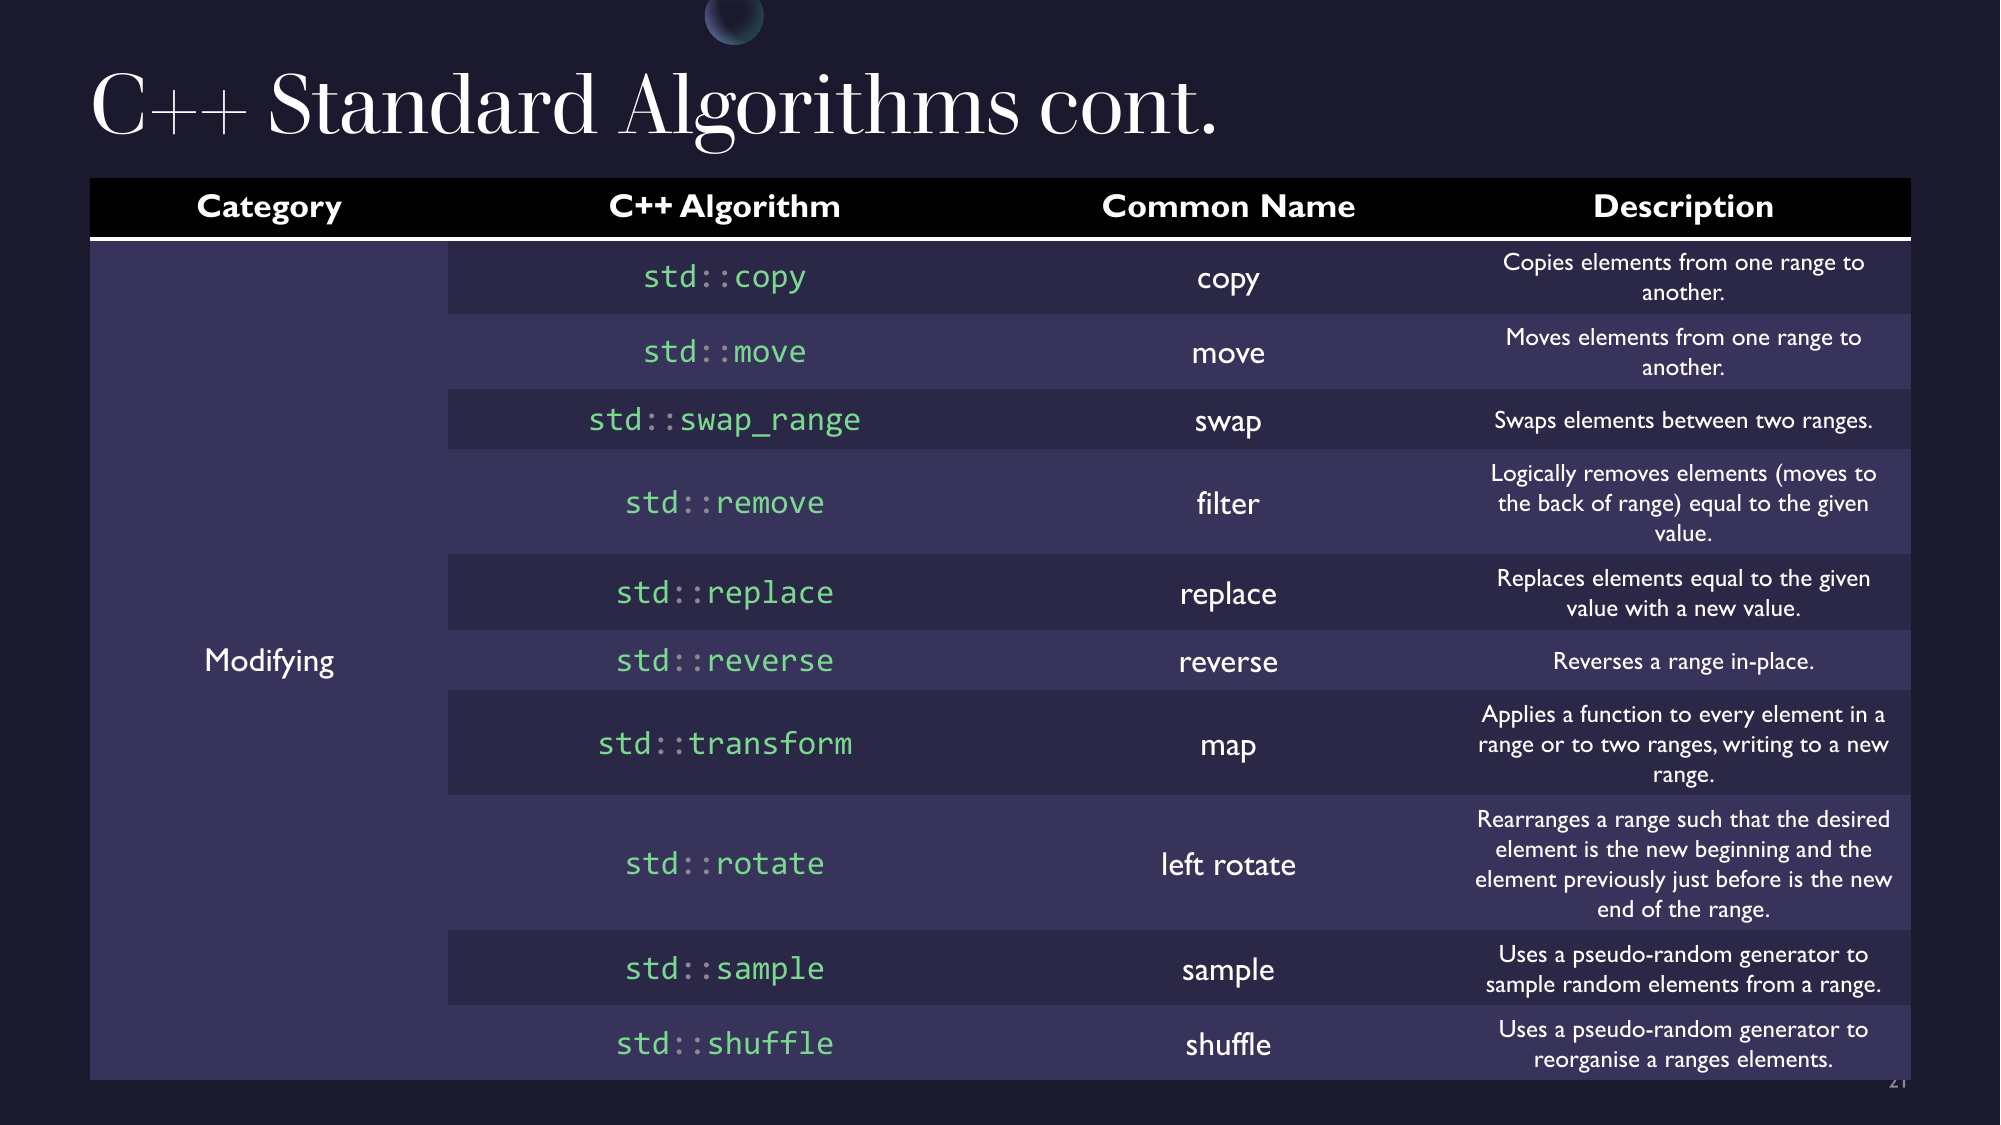
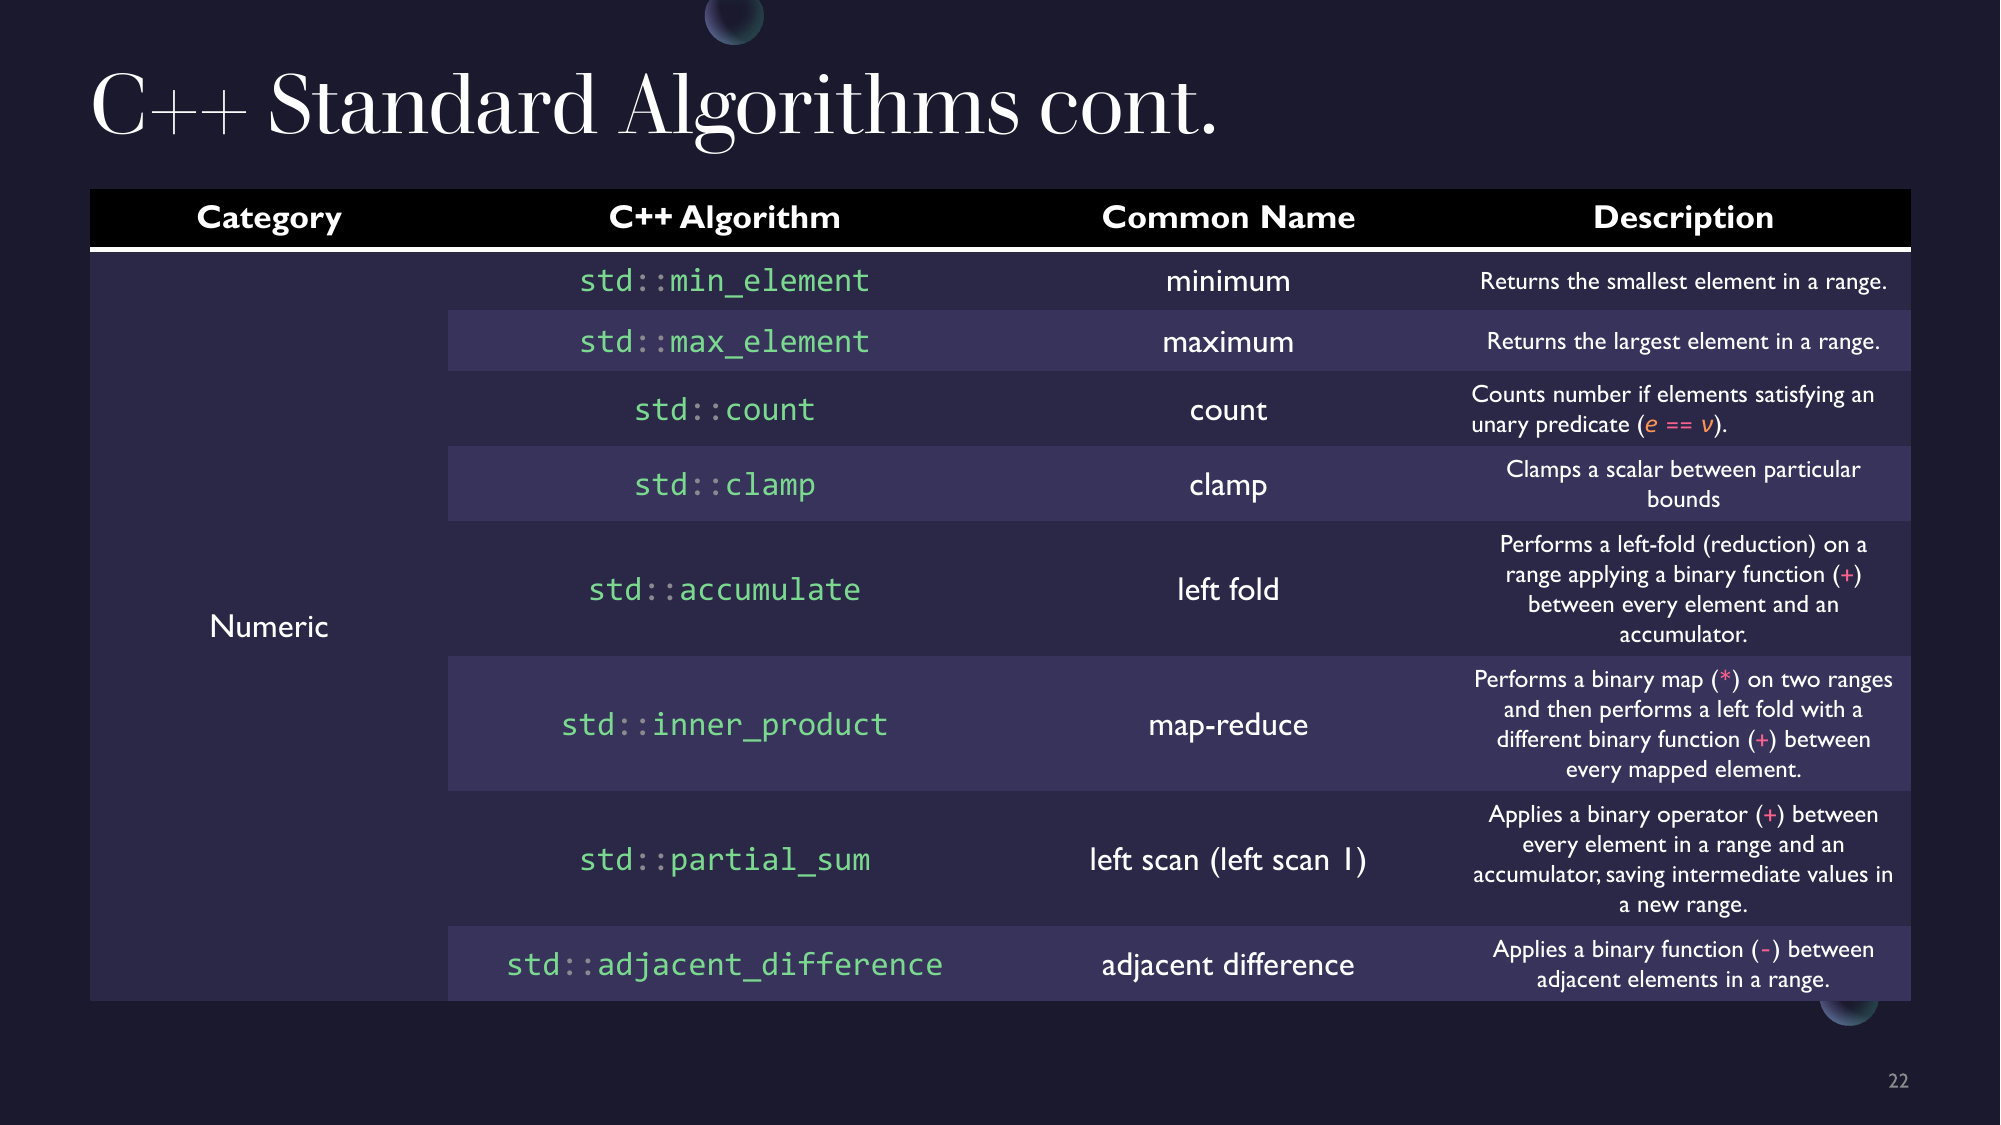
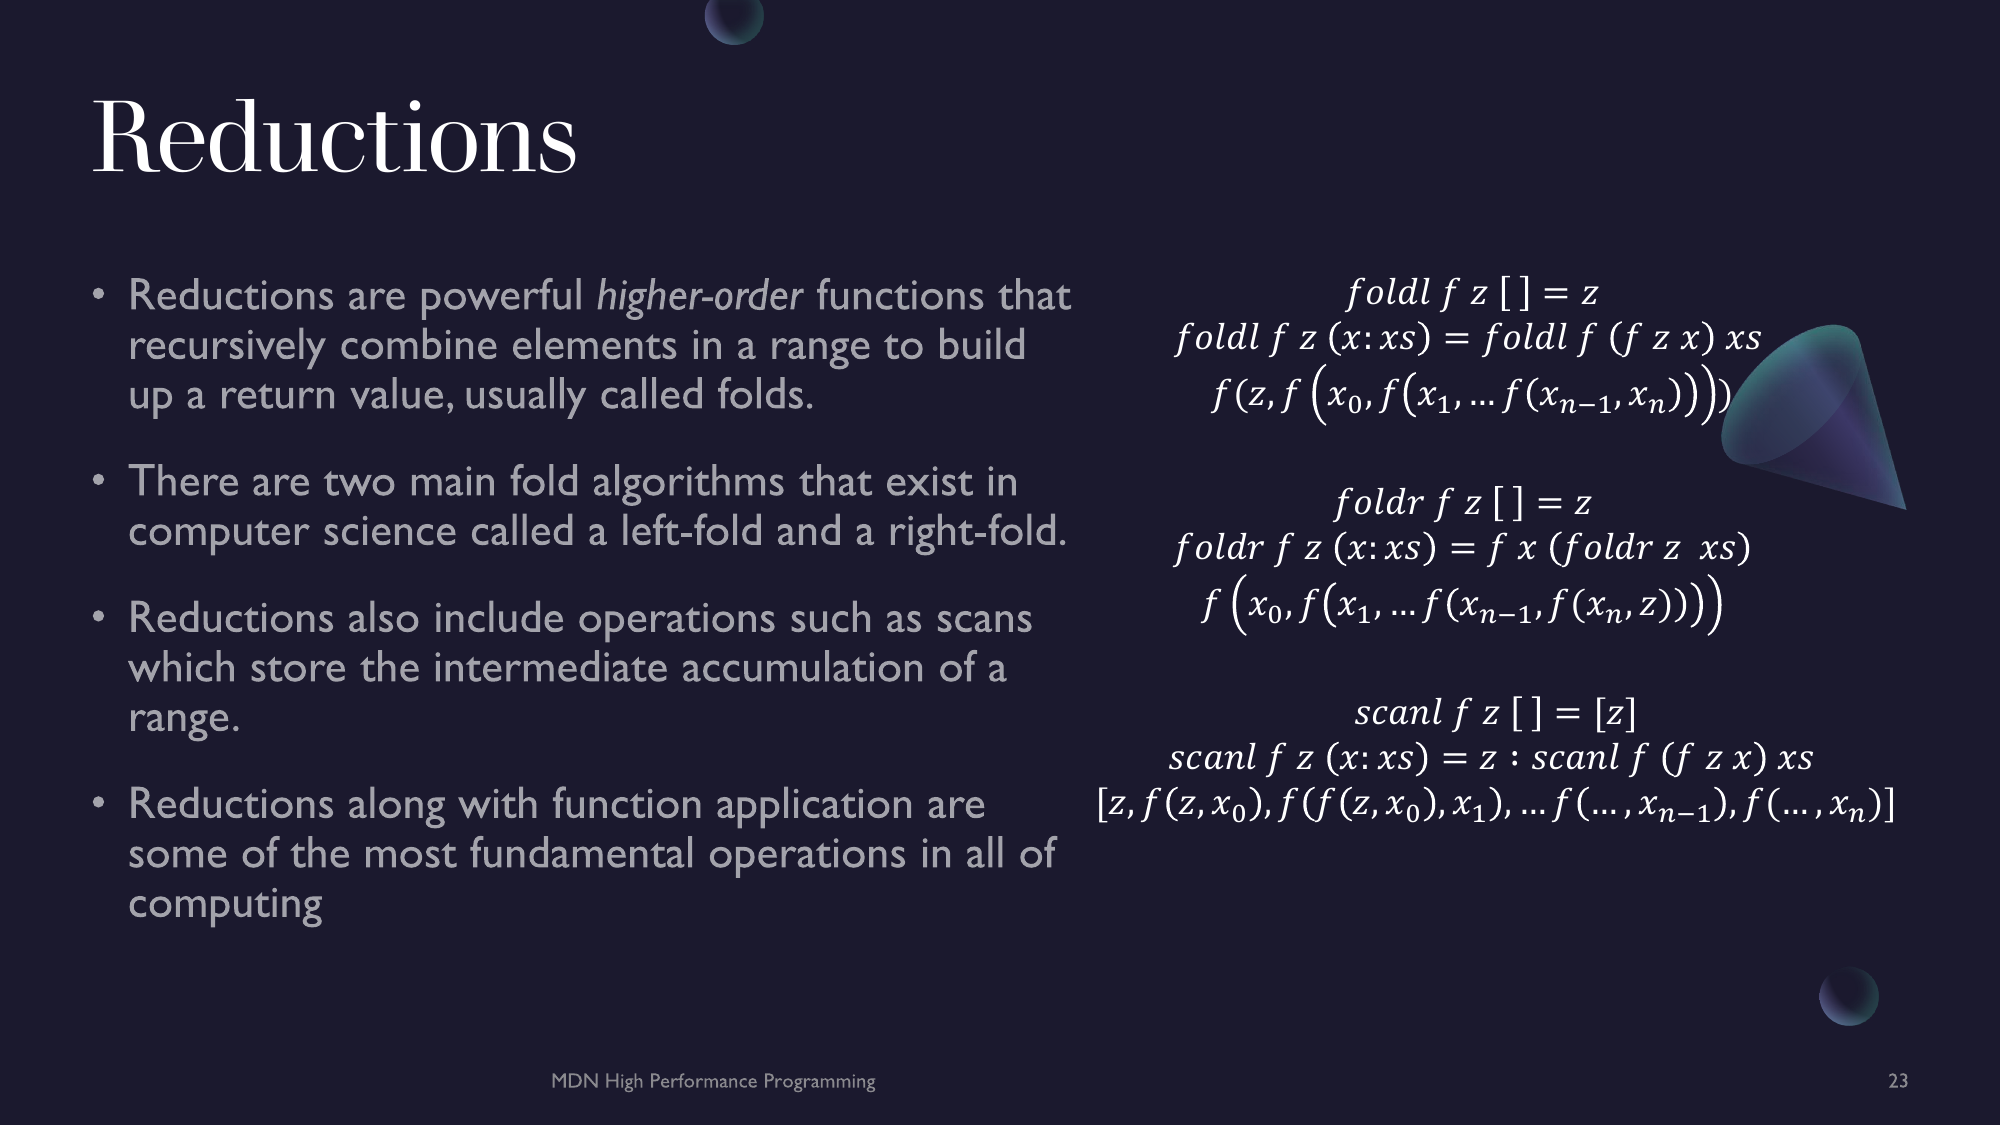

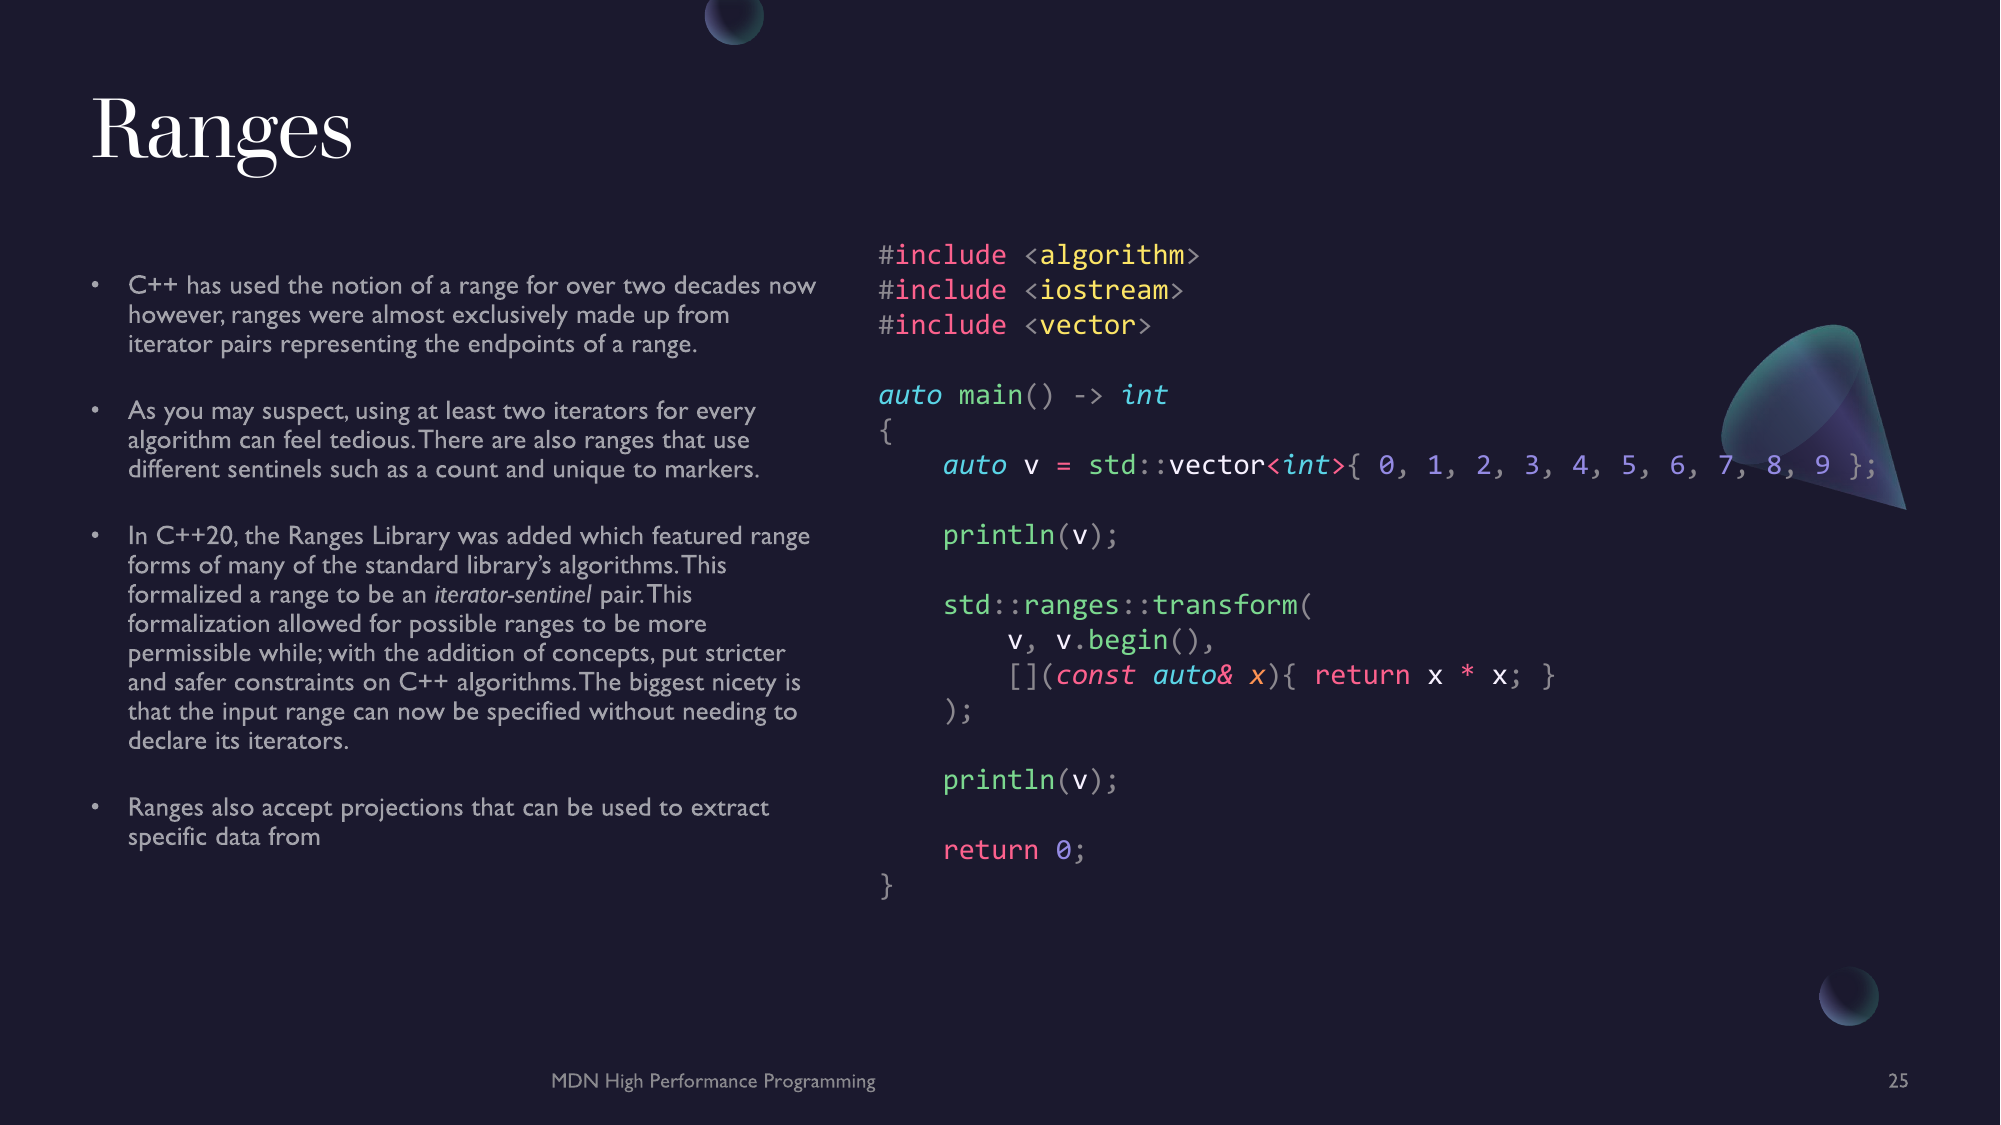
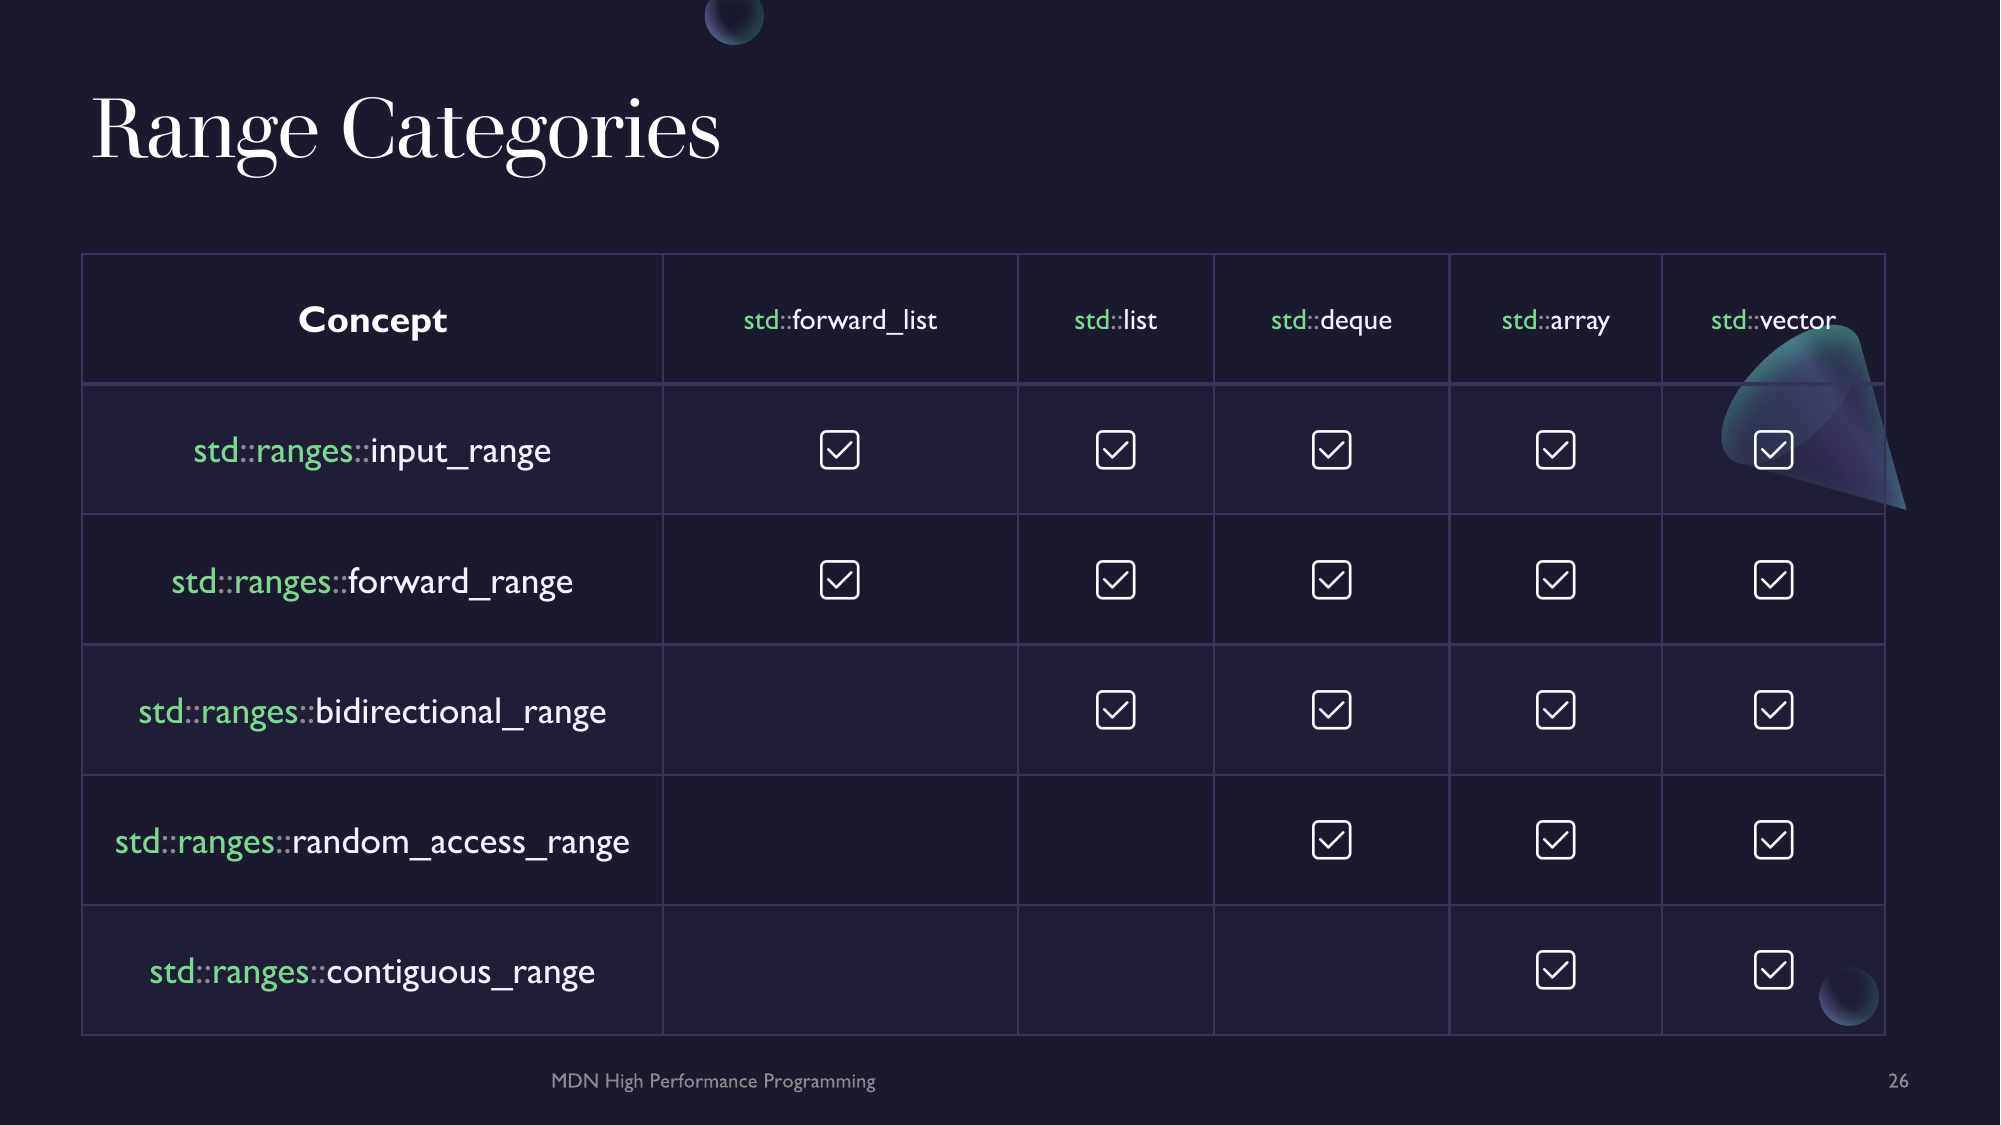

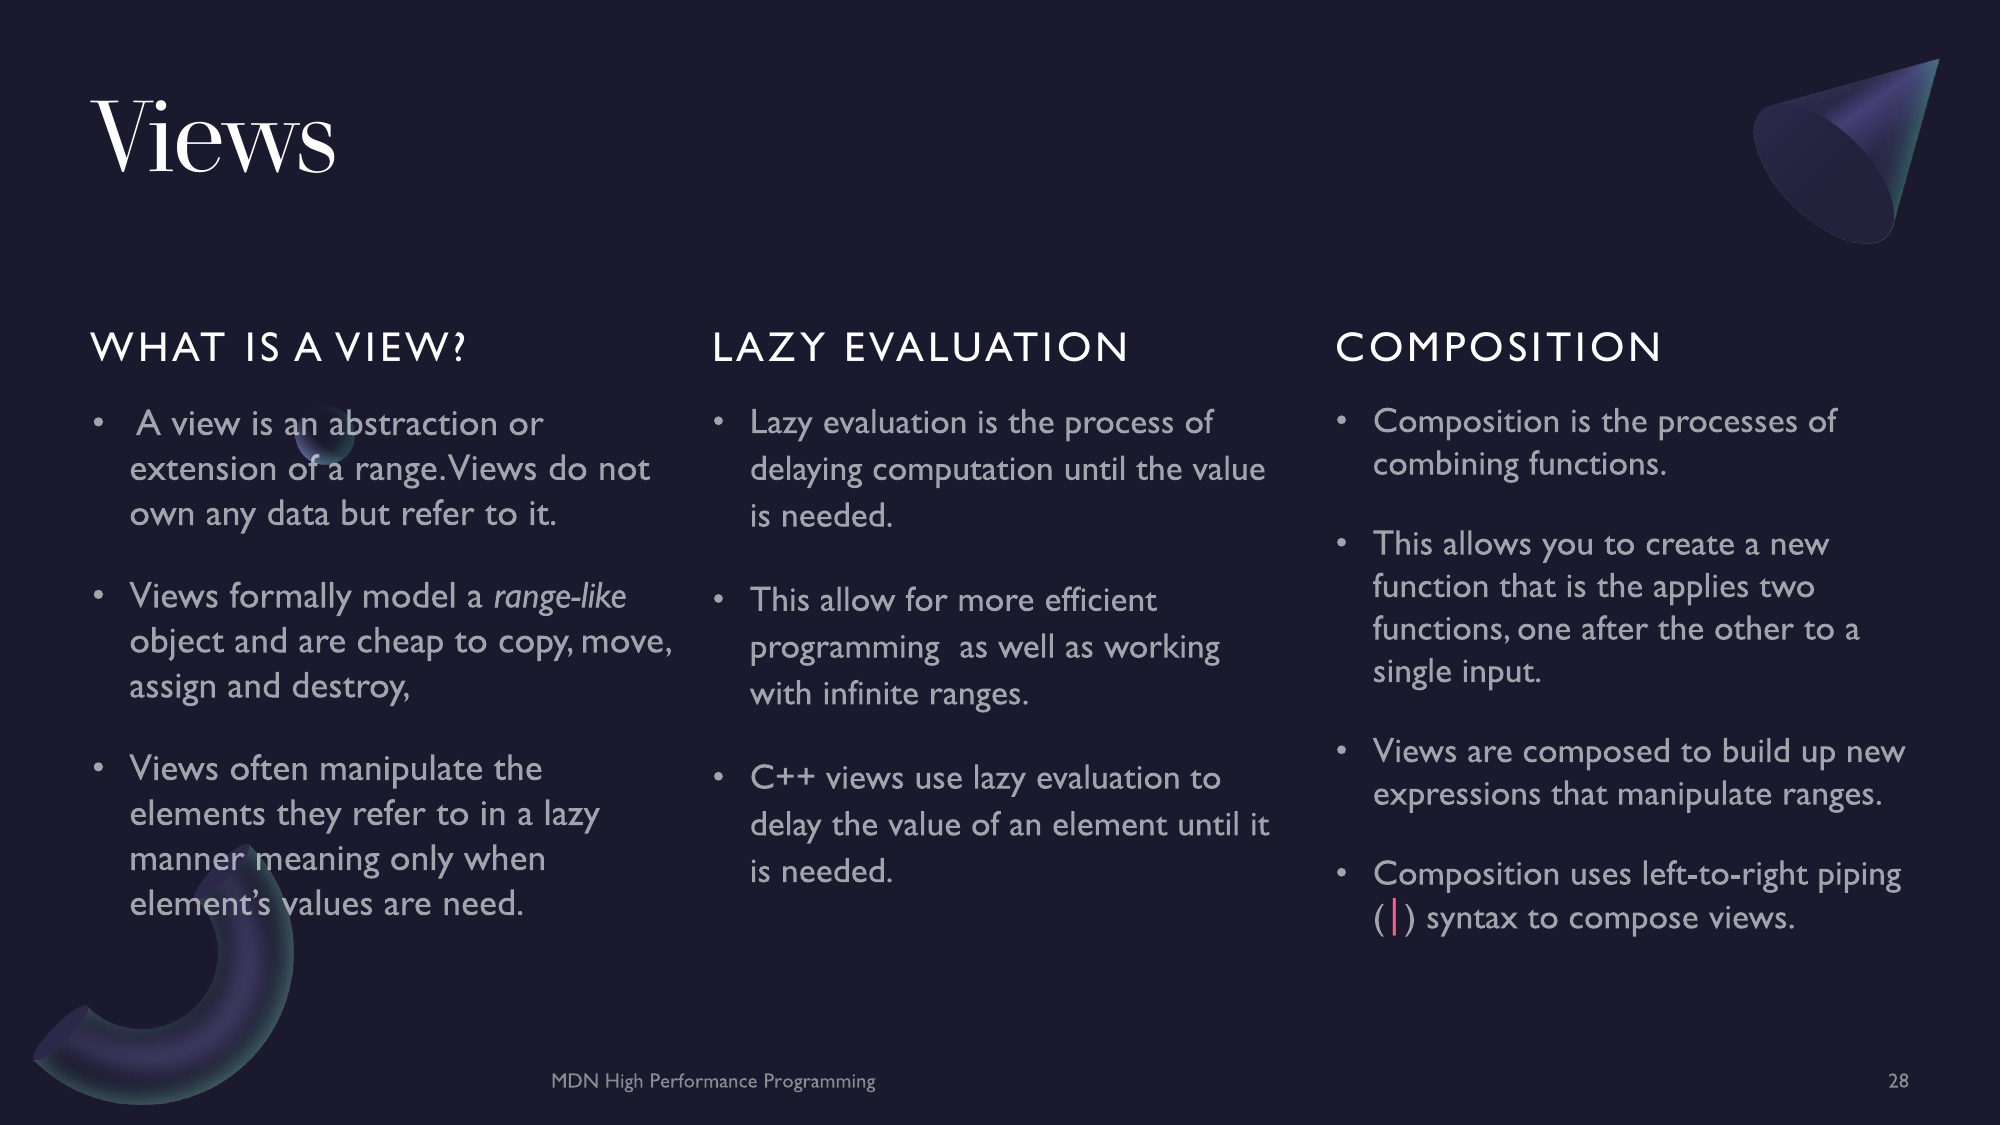
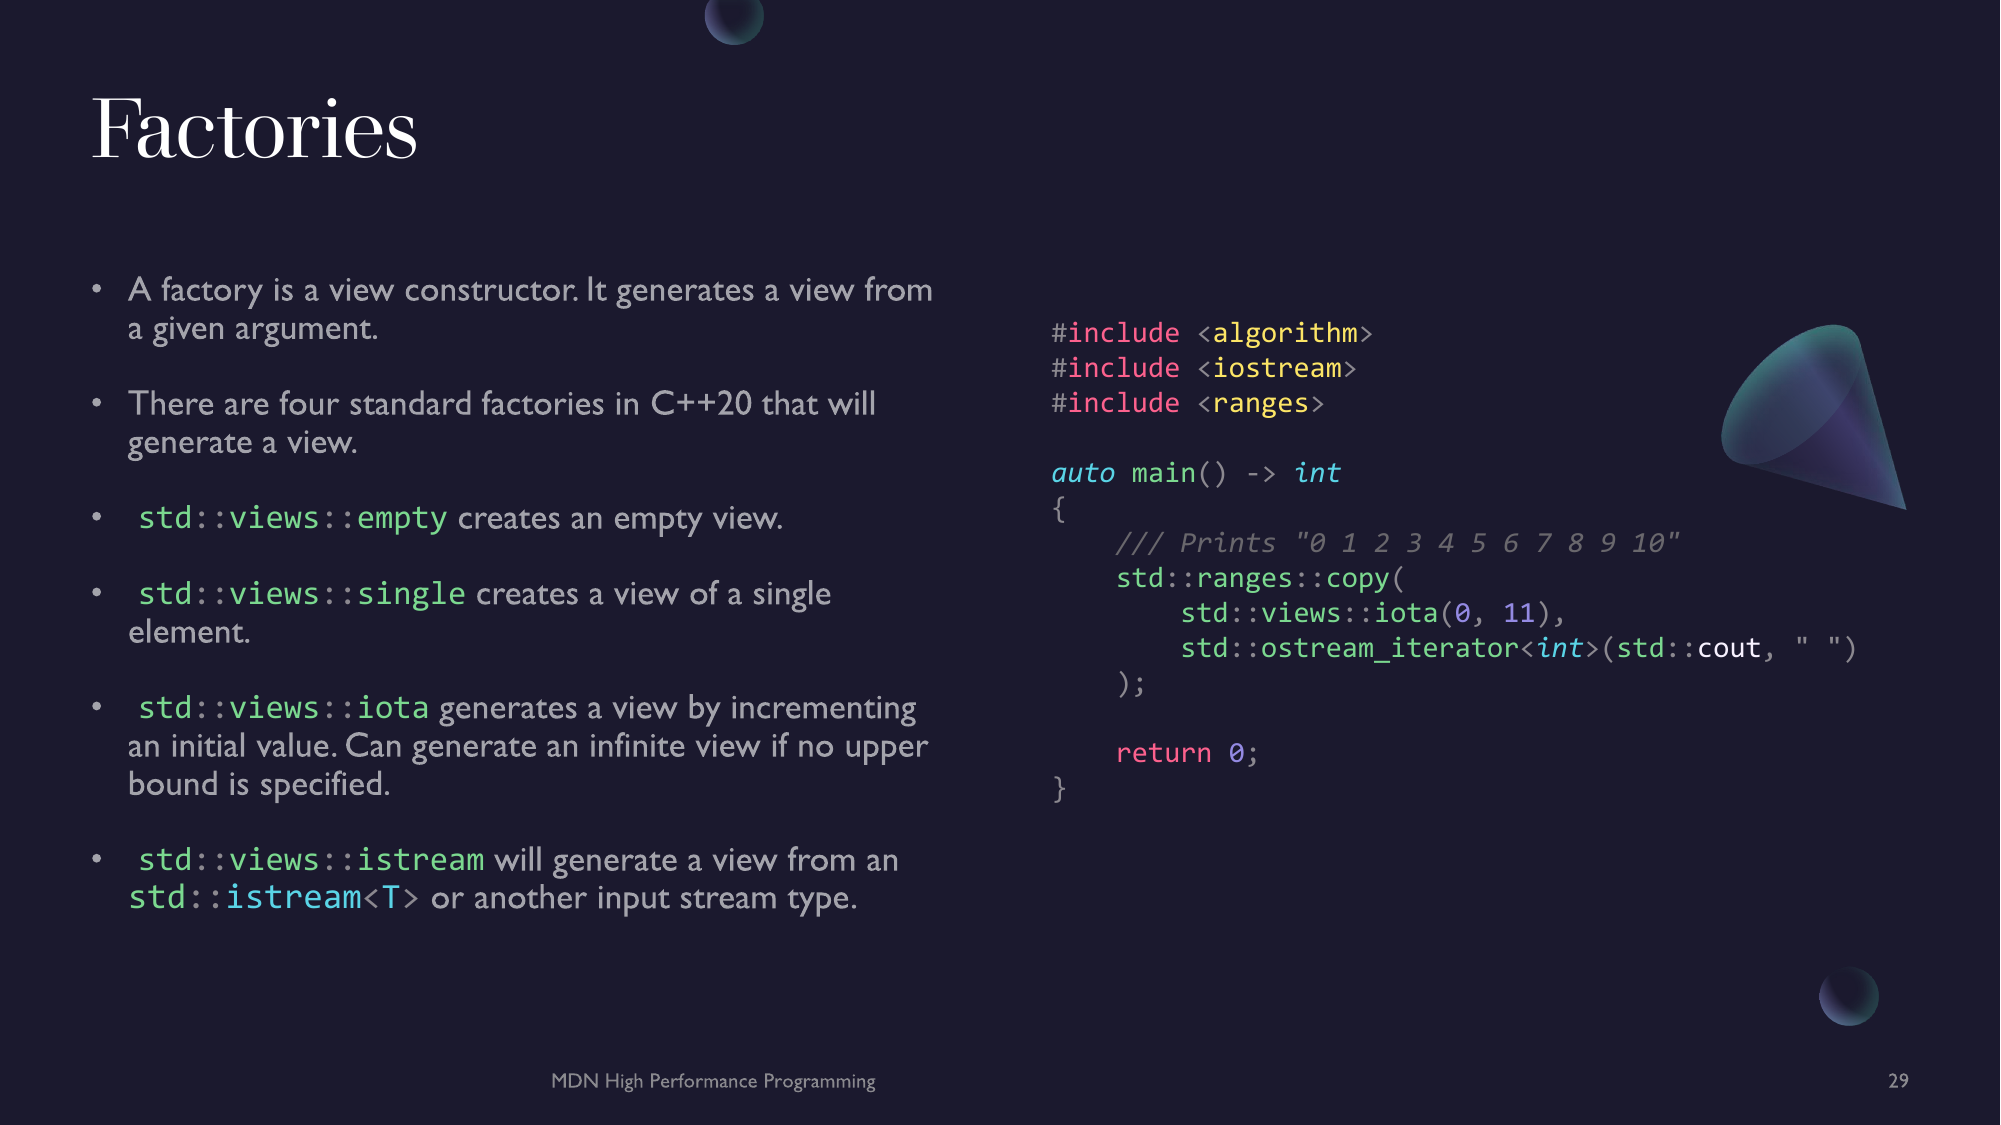


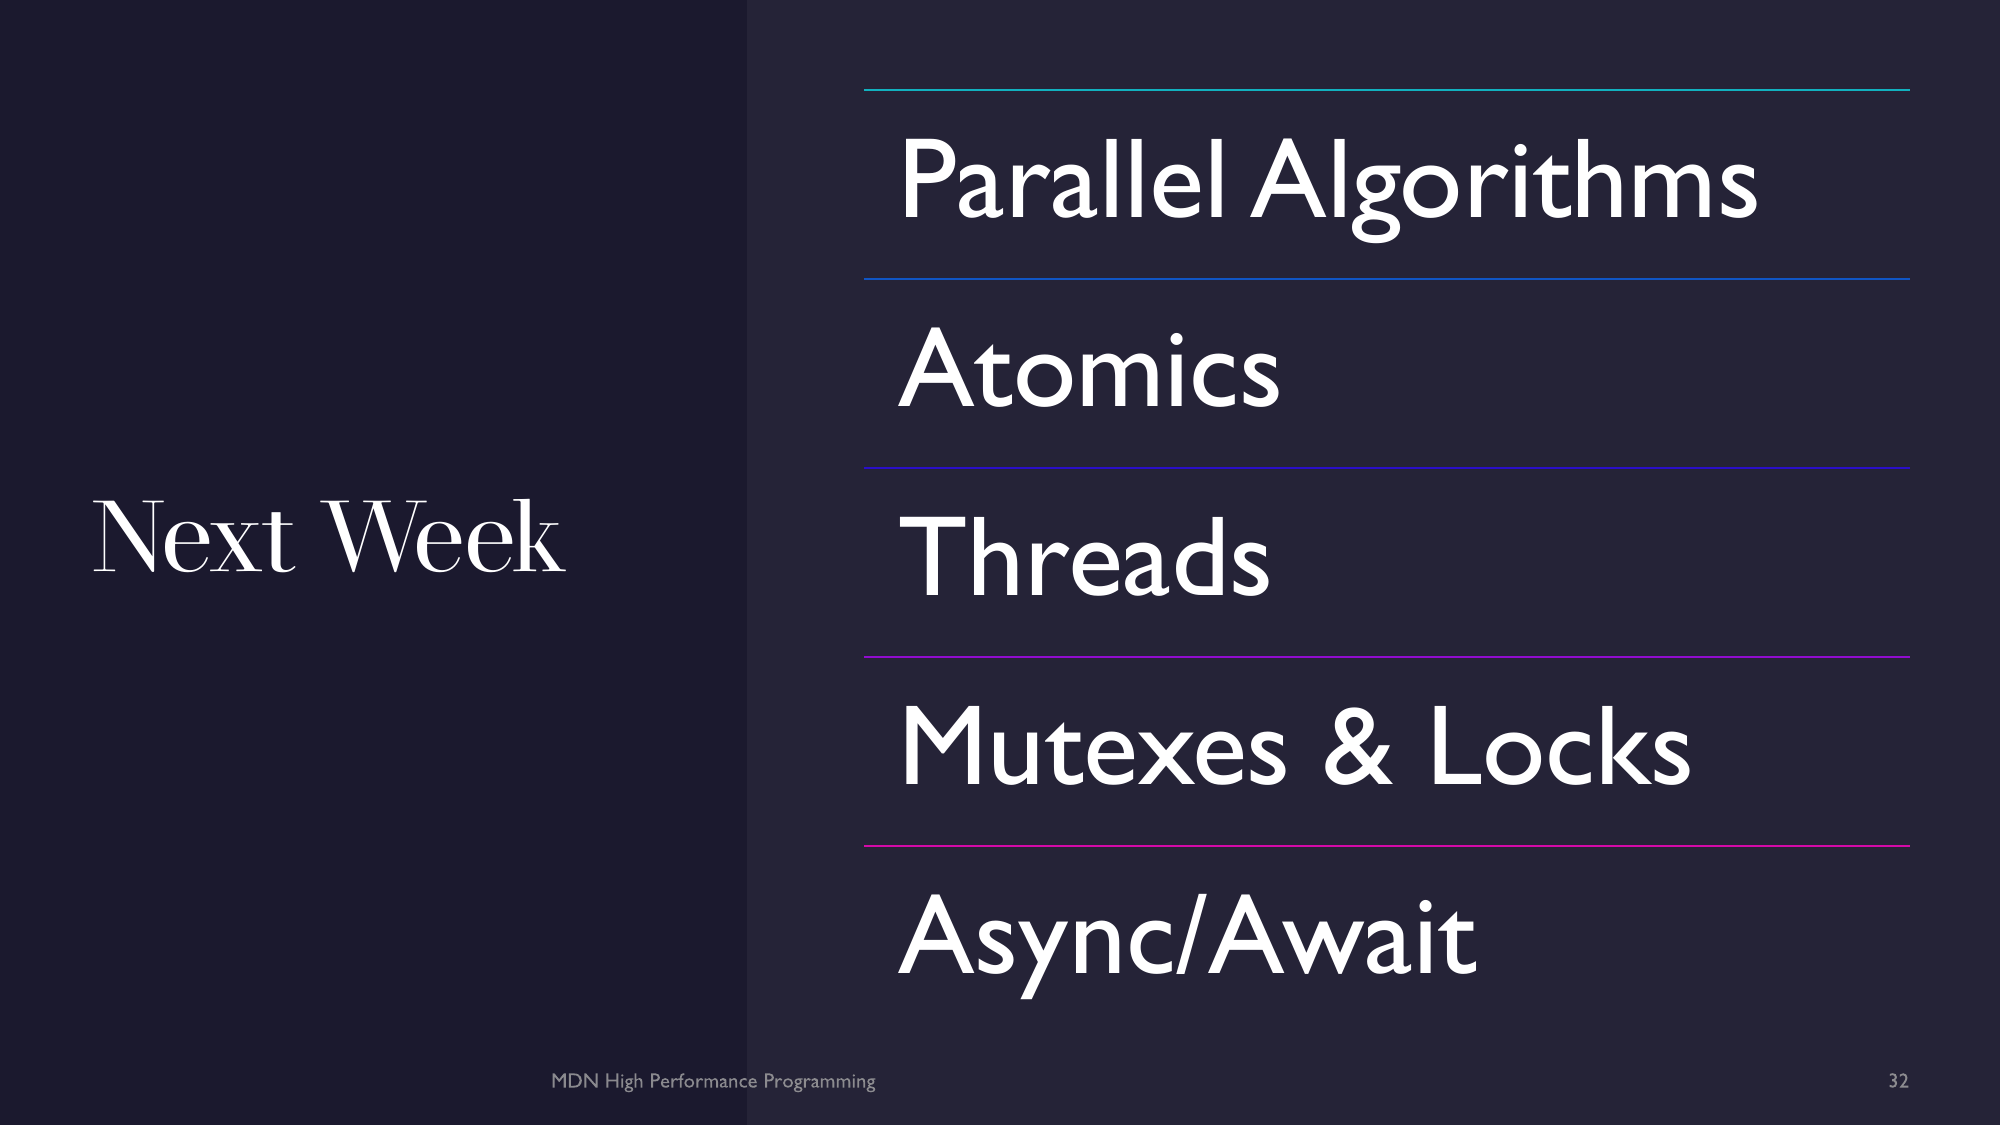

Concurrent Programming
The focus of this chapter is parallelism and concurrency. Parallelism allows for large amount data to be broken into smaller chunks and processed at the same time. Even undergoing different transformations. Concurrency is the ability to run multiple jobs, sections or functions simultaneously and communicate data and transfer between the states of the jobs. Together, these allow programs to expand the amount of work they are able to do and separate a program into multiple moving pieces. C++ has many primitives that make parallel and concurrent programming simple and effective.
Parallel Algorithms
Execution Policies
The most basic parallelism comes from the algorithms library. Since C++17 almost all of the algorithms (iterator-based not range-based) in the standard library feature an overload that allows for the algorithm to potentially perform in parallel. These overloads accepts as their first arguments an execution policy. This is an object that represent the level of freedom an algorithms implementation has to try and parallelize its operation. Execution policies are found in the <execution> header under the std::execution namespace. Execution policies are suggestions, they indicate that a algorithm may be able to be parallelized. How the parallelism is achieve is up to the implementation and requires a parallelism backend library that the implementations will use. The most common is Intel's Thread Building Blocks (TBB) library. Using parallel overloads does require some due-diligence from the programmer to not create deadlocks or data races. The parallel algorithms will not automatically stop these from happening.
| Execution Policy | Description |
|---|---|
std::execution::seq | Forbids an algorithm from being parallelized. Invocations of element access functions within the algorithm are indeterminately sequenced in the calling thread. |
std::execution::par | Specifies that an algorithm can be parallelized. Invocations of element access functions within the algorithm are permitted to execute in the working thread or in a thread implicitly created by the underlying parallel library. Invocations executing in the same thread are indeterminately sequenced in the calling thread. |
std::execution::unseq | Specifies that an algorithm can be vectorized such that a single thread using instructions that operate on multiple data items. |
std::execution::par_unseq | Specifies that an algorithm can be parallelized, vectorized or migrated across threads. Invocations of element access functions within the algorithm are permitted to execute in unordered fashion in unspecified threads and can be un-sequenced with respect to one another within each thread. |
Alternative Algorithms
There are a few algorithms in C++ that did not get parallel overloads. Namely a few of the numerical reductions. This is because reduction algorithms typically use binary operators in order to combine elements. The issue with this is not all binary operators are commutative or associative. This can cause problems when making an algorithm work in parallel because the order of operations can affect the result of the reduction. C++ regular reduction algorithms apply their operations in-order meaning that the commutative and associative properties of the binary operator do not matter. For parallel algorithms, commutativity and associativity must be assumed of the binary operator so that operations can be out-of-order.
Reduce
std::reduce is the parallel form of std::accumulate. It performs a regular left-fold and can take an optional initial value.
#include <algorithm>
#include <chrono>
#include <execution>
#include <iomanip>
#include <iostream>
#include <numeric>
#include <utility>
#include <vector>

template <typename time_t = std::chrono::microseconds>
struct measure
{
    template <typename F, typename... Args>
    static auto execution(F func, Args&&... args)
        -> std::pair<typename time_t::rep, std::invoke_result_t<F, Args...>>
    {
        auto start = std::chrono::system_clock::now();
        auto result = std::invoke(func, std::forward<Args>(args)...);
        auto duration = std::chrono::duration_cast<time_t>(std::chrono::system_clock::now() - start);
        return std::pair<typename time_t::rep, std::invoke_result_t<F, Args...>>{ duration.count(), result };
    }
};

auto main() -> int
{
    auto v = std::vector<double>(100'000'007, 0.1);
    std::cout.imbue(std::locale("en_US.UTF-8"));
    std::cout << std::fixed << std::setprecision(1);

    std::cout << "+-----------------+-------------+-----------+--------+------------+----------------+" << std::endl;
    std::cout << "|    Algorithm    | Exec Policy | Binary-Op |  Type  |    Time    |     Result     |" << std::endl;
    std::cout << "+-----------------+-------------+-----------+--------+------------+----------------+" << std::endl;

    std::cout << "| std::accumulate |   Serial    |     +     | double | ";
    auto [acc_time, acc_result] = measure<>::execution([](const auto& v){ return std::accumulate(v.begin(), v.end(), 0.0); }, v);
    std::cout << std::setw(7) << acc_time << " us |  " << acc_result << "  |" << std::endl;
    std::cout << "+-----------------+-------------+-----------+--------+------------+----------------+" << std::endl;

    std::cout << "|   std::reduce   | Sequencial  |     +     | double | ";
    auto [seq_time, seq_result] = measure<>::execution([](const auto& v){ return std::reduce(std::execution::seq, v.begin(), v.end(), 0.0); }, v);
    std::cout << std::setw(7) << seq_time << " us |  " << seq_result << "  |" << std::endl;
    std::cout << "+-----------------+-------------+-----------+--------+------------+----------------+" << std::endl;

    std::cout << "|   std::reduce   |  Parallel   |     +     | double | ";
    auto [par_time, par_result] = measure<>::execution([](const auto& v){ return std::reduce(std::execution::par, v.begin(), v.end(), 0.0); }, v);
    std::cout << std::setw(7) << par_time << " us |  " << par_result << "  |" << std::endl;
    std::cout << "+-----------------+-------------+-----------+--------+------------+----------------+" << std::endl;

    std::cout << "|   std::reduce   | Unsequenced |     +     | double | ";
    auto [unseq_time, unseq_result] = measure<>::execution([](const auto& v){ return std::reduce(std::execution::unseq, v.begin(), v.end(), 0.0); }, v);
    std::cout << std::setw(7) << unseq_time << " us |  " << unseq_result << "  |" << std::endl;
    std::cout << "+-----------------+-------------+-----------+--------+------------+----------------+" << std::endl;

    std::cout << "|   std::reduce   |  Par-Unseq  |     +     | double | ";
    auto [par_unseq_time, par_unseq_result] = measure<>::execution([](const auto& v){ return std::reduce(std::execution::par_unseq, v.begin(), v.end(), 0.0); }, v);
    std::cout << std::setw(7) << par_unseq_time << " us |  " << par_unseq_result << "  |" << std::endl;
    std::cout << "+-----------------+-------------+-----------+--------+------------+----------------+" << std::endl;

    return 0;
}
$ bpt build -t build.yaml -o build

# ...

$ ./build/reduce
+-----------------+-------------+-----------+--------+------------+----------------+
|    Algorithm    | Exec Policy | Binary-Op |  Type  |    Time    |     Result     |
+-----------------+-------------+-----------+--------+------------+----------------+
| std::accumulate |   Serial    |     +     | double | 151,861 us |  10,000,000.7  |
+-----------------+-------------+-----------+--------+------------+----------------+
|   std::reduce   | Sequencial  |     +     | double |  76,011 us |  10,000,000.7  |
+-----------------+-------------+-----------+--------+------------+----------------+
|   std::reduce   |  Parallel   |     +     | double |  21,098 us |  10,000,000.7  |
+-----------------+-------------+-----------+--------+------------+----------------+
|   std::reduce   | Unsequenced |     +     | double | 135,906 us |  10,000,000.7  |
+-----------------+-------------+-----------+--------+------------+----------------+
|   std::reduce   |  Par-Unseq  |     +     | double |  23,752 us |  10,000,000.7  |
+-----------------+-------------+-----------+--------+------------+----------------+
Transform Reduce
std::transform_reduce is akin to std::inner_product performing the same default unary transformation (*) and reduction (+). Takes an initial value that is used as the base accumulator.
#include <algorithm>
#include <chrono>
#include <execution>
#include <iomanip>
#include <iostream>
#include <numeric>
#include <utility>
#include <vector>

template <typename time_t = std::chrono::microseconds>
struct measure
{
    template <typename F, typename... Args>
    static auto execution(F func, Args&&... args)
        -> std::pair<typename time_t::rep, std::invoke_result_t<F, Args...>>
    {
        auto start = std::chrono::system_clock::now();
        auto result = std::invoke(func, std::forward<Args>(args)...);
        auto duration = std::chrono::duration_cast<time_t>(std::chrono::system_clock::now() - start);
        return std::pair<typename time_t::rep, std::invoke_result_t<F, Args...>>{ duration.count(), result };
    }
};

auto main() -> int
{
    auto v1 = std::vector<double>(100'000'007, 0.145);
    auto v2 = std::vector<double>(100'000'007, 0.524);
    std::cout.imbue(std::locale("en_US.UTF-8"));
    std::cout << std::fixed << std::setprecision(4);

    std::cout << "+-----------------------+-------------+------------+--------+------------+----------------+" << std::endl;
    std::cout << "|       Algorithm       | Exec Policy | Binary-Ops |  Type  |    Time    |     Result     |" << std::endl;
    std::cout << "+-----------------------+-------------+------------+--------+------------+----------------+" << std::endl;

    std::cout << "|  std::inner_product   |   Serial    | (*) -> (+) | double | ";
    auto [in_prod_time, in_prod_result] = measure<>::execution([](const auto& v1, const auto& v2){ return std::inner_product(v1.begin(), v1.end(), v2.begin(), 0.0); }, v1, v2);
    std::cout << std::setw(7) << in_prod_time << " us | " << in_prod_result << " |" << std::endl;
    std::cout << "+-----------------------+-------------+------------+--------+------------+----------------+" << std::endl;

    std::cout << "| std::transform_reduce | Sequencial  | (*) -> (+) | double | ";
    auto [seq_time, seq_result] = measure<>::execution([](const auto& v1, const auto& v2){ return std::transform_reduce(std::execution::seq, v1.begin(), v1.end(), v2.begin(), 0.0); }, v1, v2);
    std::cout << std::setw(7) << seq_time << " us | " << seq_result << " |" << std::endl;
    std::cout << "+-----------------------+-------------+------------+--------+------------+----------------+" << std::endl;

    std::cout << "| std::transform_reduce |  Parallel   | (*) -> (+) | double | ";
    auto [par_time, par_result] = measure<>::execution([](const auto& v1, const auto& v2){ return std::transform_reduce(std::execution::par, v1.begin(), v1.end(), v2.begin(), 0.0); }, v1, v2);
    std::cout << std::setw(7) << par_time << " us | " << par_result << " |" << std::endl;
    std::cout << "+-----------------------+-------------+------------+--------+------------+----------------+" << std::endl;

    std::cout << "| std::transform_reduce | Unsequenced | (*) -> (+) | double | ";
    auto [unseq_time, unseq_result] = measure<>::execution([](const auto& v1, const auto& v2){ return std::transform_reduce(std::execution::unseq, v1.begin(), v1.end(), v2.begin(), 0.0); }, v1, v2);
    std::cout << std::setw(7) << unseq_time << " us | " << unseq_result << " |" << std::endl;
    std::cout << "+-----------------------+-------------+------------+--------+------------+----------------+" << std::endl;

    std::cout << "| std::transform_reduce |  Par-Unseq  | (*) -> (+) | double | ";
    auto [par_unseq_time, par_unseq_result] = measure<>::execution([](const auto& v1, const auto& v2){ return std::transform_reduce(std::execution::par_unseq, v1.begin(), v1.end(), v2.begin(), 0.0); }, v1, v2);
    std::cout << std::setw(7) << par_unseq_time << " us | " << par_unseq_result << " |" << std::endl;
    std::cout << "+-----------------------+-------------+------------+--------+------------+----------------+" << std::endl;

    return 0;
}
$ bpt build -t build.yaml -o build

# ...

./build/transform_reduce
+-----------------------+-------------+------------+--------+------------+----------------+
|       Algorithm       | Exec Policy | Binary-Ops |  Type  |    Time    |     Result     |
+-----------------------+-------------+------------+--------+------------+----------------+
|  std::inner_product   |   Serial    | (*) -> (+) | double | 144,255 us | 7,598,000.5455 |
+-----------------------+-------------+------------+--------+------------+----------------+
| std::transform_reduce | Sequencial  | (*) -> (+) | double | 119,467 us | 7,598,000.5455 |
+-----------------------+-------------+------------+--------+------------+----------------+
| std::transform_reduce |  Parallel   | (*) -> (+) | double |  53,172 us | 7,598,000.5318 |
+-----------------------+-------------+------------+--------+------------+----------------+
| std::transform_reduce | Unsequenced | (*) -> (+) | double | 131,677 us | 7,598,000.5455 |
+-----------------------+-------------+------------+--------+------------+----------------+
| std::transform_reduce |  Par-Unseq  | (*) -> (+) | double |  51,095 us | 7,598,000.5319 |
+-----------------------+-------------+------------+--------+------------+----------------+
Exclusive Scan
std::exclusive_scan is akin to std::partial_sum except is takes in an initial value and excludes the \( ith \) input element from the \( ith \) sum (reduction).
#include <algorithm>
#include <chrono>
#include <execution>
#include <iomanip>
#include <iostream>
#include <numeric>
#include <utility>
#include <vector>

template <typename time_t = std::chrono::microseconds>
struct measure
{
    template <typename F, typename... Args>
    static auto execution(F func, Args&&... args)
        -> typename time_t::rep
    {
        auto start = std::chrono::system_clock::now();
        std::invoke(func, std::forward<Args>(args)...);
        auto duration = std::chrono::duration_cast<time_t>(std::chrono::system_clock::now() - start);
        return duration.count();
    }
};

template<typename T>
auto operator<<
(std::ostream& os, const std::vector<T>& v) -> std::ostream&
{
    os << "[ ";
    for (auto i { v.size() }; const auto& e : v)
        if (--i > (v.size() - 3))
            os << e << ", ";

    auto last = v.end() - 3;
    os << "..., " << *++last << ", ";
    os << *++last << " ]";
    return os;
}

auto main() -> int
{
    auto v = std::vector<double>(100'000'007, 0.1);
    auto r = std::vector<double>(100'000'007, 0.0);
    std::cout.imbue(std::locale("en_US.UTF-8"));
    std::cout << std::fixed << std::setprecision(1);

    std::cout << "+---------------------+-------------+-----------+--------+------------+-----------------------------------------------+" << std::endl;
    std::cout << "|      Algorithm      | Exec Policy | Binary-Op |  Type  |    Time    |                    Result                     |" << std::endl;
    std::cout << "+---------------------+-------------+-----------+--------+------------+-----------------------------------------------+" << std::endl;

    std::cout << "|  std::partial_sum   |   Serial    |     +     | double | ";
    auto scan_time = measure<>::execution([](const auto& v, auto& r){ std::partial_sum(v.begin(), v.end(), r.begin()); }, v, r);
    std::cout << std::setw(7) << scan_time << " us | " << r << " |" << std::endl;
    std::cout << "+---------------------+-------------+-----------+--------+------------+-----------------------------------------------+" << std::endl;

    std::cout << "| std::exclusive_scan | Sequencial  |     +     | double | ";
    auto seq_time = measure<>::execution([](const auto& v, auto& r){ std::exclusive_scan(std::execution::seq, v.begin(), v.end(), r.begin(), 0.0); }, v, r);
    std::cout << std::setw(7) << seq_time << " us | " << r << " |" << std::endl;
    std::cout << "+---------------------+-------------+-----------+--------+------------+-----------------------------------------------+" << std::endl;

    std::cout << "| std::exclusive_scan |  Parallel   |     +     | double | ";
    auto par_time = measure<>::execution([](const auto& v, auto& r){ std::exclusive_scan(std::execution::par, v.begin(), v.end(), r.begin(), 0.0); }, v, r);
    std::cout << std::setw(7) << par_time << " us | " << r << " |" << std::endl;
    std::cout << "+---------------------+-------------+-----------+--------+------------+-----------------------------------------------+" << std::endl;

    std::cout << "| std::exclusive_scan | Unsequenced |     +     | double | ";
    auto unseq_time = measure<>::execution([](const auto& v, auto& r){ std::exclusive_scan(std::execution::unseq, v.begin(), v.end(), r.begin(), 0.0); }, v, r);
    std::cout << std::setw(7) << unseq_time << " us | " << r << " |" << std::endl;
    std::cout << "+---------------------+-------------+-----------+--------+------------+-----------------------------------------------+" << std::endl;

    std::cout << "| std::exclusive_scan |  Par-Unseq  |     +     | double | ";
    auto par_unseq_time = measure<>::execution([](const auto& v, auto& r){ std::exclusive_scan(std::execution::par_unseq, v.begin(), v.end(), r.begin(), 0.0); }, v, r);
    std::cout << std::setw(7) << par_unseq_time << " us | " << r << " |" << std::endl;
    std::cout << "+---------------------+-------------+-----------+--------+------------+-----------------------------------------------+" << std::endl;

    return 0;
}
$ bpt build -t build.yaml -o build

# ...

./build/exclusive_scan
+---------------------+-------------+-----------+--------+------------+-----------------------------------------------+
|      Algorithm      | Exec Policy | Binary-Op |  Type  |    Time    |                    Result                     |
+---------------------+-------------+-----------+--------+------------+-----------------------------------------------+
|  std::partial_sum   |   Serial    |     +     | double | 119,096 us | [ 0.1, 0.2, ..., 10,000,000.6, 10,000,000.7 ] |
+---------------------+-------------+-----------+--------+------------+-----------------------------------------------+
| std::exclusive_scan | Sequencial  |     +     | double | 143,338 us | [ 0.0, 0.1, ..., 10,000,000.5, 10,000,000.6 ] |
+---------------------+-------------+-----------+--------+------------+-----------------------------------------------+
| std::exclusive_scan |  Parallel   |     +     | double | 146,967 us | [ 0.0, 0.1, ..., 10,000,000.5, 10,000,000.6 ] |
+---------------------+-------------+-----------+--------+------------+-----------------------------------------------+
| std::exclusive_scan | Unsequenced |     +     | double | 140,900 us | [ 0.0, 0.1, ..., 10,000,000.5, 10,000,000.6 ] |
+---------------------+-------------+-----------+--------+------------+-----------------------------------------------+
| std::exclusive_scan |  Par-Unseq  |     +     | double | 145,098 us | [ 0.0, 0.1, ..., 10,000,000.5, 10,000,000.6 ] |
+---------------------+-------------+-----------+--------+------------+-----------------------------------------------+
Inclusive Scan
std::inclusive_scan is identical to std::partial_sum. It does not take an initial value and unlike std::exclusive_scan includes the \( ith \) element from the input range in the \( ith \) reduction.
#include <algorithm>
#include <chrono>
#include <execution>
#include <iomanip>
#include <iostream>
#include <numeric>
#include <utility>
#include <vector>

template <typename time_t = std::chrono::microseconds>
struct measure
{
    template <typename F, typename... Args>
    static auto execution(F func, Args&&... args)
        -> typename time_t::rep
    {
        auto start = std::chrono::system_clock::now();
        std::invoke(func, std::forward<Args>(args)...);
        auto duration = std::chrono::duration_cast<time_t>(std::chrono::system_clock::now() - start);
        return duration.count();
    }
};

template<typename T>
auto operator<<
(std::ostream& os, const std::vector<T>& v) -> std::ostream&
{
    os << "[ ";
    for (auto i { v.size() }; const auto& e : v)
        if (--i > (v.size() - 3))
            os << e << ", ";

    auto last = v.end() - 3;
    os << "..., " << *++last << ", ";
    os << *++last << " ]";
    return os;
}

auto main() -> int
{
    auto v = std::vector<double>(100'000'007, 0.1);
    auto r = std::vector<double>(100'000'007);
    std::cout.imbue(std::locale("en_US.UTF-8"));
    std::cout << std::fixed << std::setprecision(1);

    std::cout << "+---------------------+-------------+-----------+--------+------------+-----------------------------------------------+" << std::endl;
    std::cout << "|      Algorithm      | Exec Policy | Binary-Op |  Type  |    Time    |                    Result                     |" << std::endl;
    std::cout << "+---------------------+-------------+-----------+--------+------------+-----------------------------------------------+" << std::endl;

    std::cout << "|  std::partial_sum   |   Serial    |     +     | double | ";
    auto scan_time = measure<>::execution([](const auto& v, auto& r){ std::partial_sum(v.begin(), v.end(), r.begin()); }, v, r);
    std::cout << std::setw(7) << scan_time << " us | " << r << " |" << std::endl;
    std::cout << "+---------------------+-------------+-----------+--------+------------+-----------------------------------------------+" << std::endl;

    std::cout << "| std::inclusive_scan | Sequencial  |     +     | double | ";
    auto seq_time = measure<>::execution([](const auto& v, auto& r){ std::inclusive_scan(std::execution::seq, v.begin(), v.end(), r.begin()); }, v, r);
    std::cout << std::setw(7) << seq_time << " us | " << r << " |" << std::endl;
    std::cout << "+---------------------+-------------+-----------+--------+------------+-----------------------------------------------+" << std::endl;

    std::cout << "| std::inclusive_scan |  Parallel   |     +     | double | ";
    auto par_time = measure<>::execution([](const auto& v, auto& r){ std::inclusive_scan(std::execution::par, v.begin(), v.end(), r.begin()); }, v, r);
    std::cout << std::setw(7) << par_time << " us | " << r << " |" << std::endl;
    std::cout << "+---------------------+-------------+-----------+--------+------------+-----------------------------------------------+" << std::endl;

    std::cout << "| std::inclusive_scan | Unsequenced |     +     | double | ";
    auto unseq_time = measure<>::execution([](const auto& v, auto& r){ std::inclusive_scan(std::execution::unseq, v.begin(), v.end(), r.begin()); }, v, r);
    std::cout << std::setw(7) << unseq_time << " us | " << r << " |" << std::endl;
    std::cout << "+---------------------+-------------+-----------+--------+------------+-----------------------------------------------+" << std::endl;

    std::cout << "| std::inclusive_scan |  Par-Unseq  |     +     | double | ";
    auto par_unseq_time = measure<>::execution([](const auto& v, auto& r){ std::inclusive_scan(std::execution::par_unseq, v.begin(), v.end(), r.begin()); }, v, r);
    std::cout << std::setw(7) << par_unseq_time << " us | " << r << " |" << std::endl;
    std::cout << "+---------------------+-------------+-----------+--------+------------+-----------------------------------------------+" << std::endl;

    return 0;
}
$ bpt build -t build.yaml -o build

# ...

./build/inclusive_scan
+---------------------+-------------+-----------+--------+------------+-----------------------------------------------+
|      Algorithm      | Exec Policy | Binary-Op |  Type  |    Time    |                    Result                     |
+---------------------+-------------+-----------+--------+------------+-----------------------------------------------+
|  std::partial_sum   |   Serial    |     +     | double | 121,801 us | [ 0.1, 0.2, ..., 10,000,000.6, 10,000,000.7 ] |
+---------------------+-------------+-----------+--------+------------+-----------------------------------------------+
| std::inclusive_scan | Sequencial  |     +     | double | 120,705 us | [ 0.1, 0.2, ..., 10,000,000.6, 10,000,000.7 ] |
+---------------------+-------------+-----------+--------+------------+-----------------------------------------------+
| std::inclusive_scan |  Parallel   |     +     | double | 150,662 us | [ 0.1, 0.2, ..., 10,000,000.6, 10,000,000.7 ] |
+---------------------+-------------+-----------+--------+------------+-----------------------------------------------+
| std::inclusive_scan | Unsequenced |     +     | double | 120,440 us | [ 0.1, 0.2, ..., 10,000,000.6, 10,000,000.7 ] |
+---------------------+-------------+-----------+--------+------------+-----------------------------------------------+
| std::inclusive_scan |  Par-Unseq  |     +     | double | 145,441 us | [ 0.1, 0.2, ..., 10,000,000.6, 10,000,000.7 ] |
+---------------------+-------------+-----------+--------+------------+-----------------------------------------------+
Transform Exclusive Scan
std::transform_exclusive_scan will perform a unary transformation and then performs a left exclusive scan on a range.
#include <algorithm>
#include <chrono>
#include <execution>
#include <iomanip>
#include <iostream>
#include <numeric>
#include <utility>
#include <vector>

template <typename time_t = std::chrono::microseconds>
struct measure
{
    template <typename F, typename... Args>
    static auto execution(F func, Args&&... args)
        -> typename time_t::rep
    {
        auto start = std::chrono::system_clock::now();
        std::invoke(func, std::forward<Args>(args)...);
        auto duration = std::chrono::duration_cast<time_t>(std::chrono::system_clock::now() - start);
        return duration.count();
    }
};

template<typename T>
auto operator<<
(std::ostream& os, const std::vector<T>& v) -> std::ostream&
{
    os << "[ ";
    for (auto i { v.size() }; const auto& e : v)
        if (--i > (v.size() - 3))
            os << e << ", ";

    auto last = v.end() - 3;
    os << "..., " << *++last << ", ";
    os << *++last << " ]";
    return os;
}

auto main() -> int
{
    auto v = std::vector<double>(100'000'007, 0.1);
    auto r = std::vector<double>(100'000'007, 0.0);
    auto times2 = [](const auto& x){ return x * 2; };
    std::cout.imbue(std::locale("en_US.UTF-8"));
    std::cout << std::fixed << std::setprecision(1);

    std::cout << "+-------------------------------+-------------+-------------+--------+------------+-----------------------------------------------+" << std::endl;
    std::cout << "|           Algorithm           | Exec Policy | Operations  |  Type  |    Time    |                    Result                     |" << std::endl;
    std::cout << "+--------------------+----------+-------------+-------------+--------+------------+-----------------------------------------------+" << std::endl;

    std::cout << "| std::transform_inclusive_scan | Sequencial  | (*2) -> (+) | double | ";
    auto seq_time = measure<>::execution([&](const auto& v, auto& r){  std::transform_inclusive_scan(std::execution::seq, v.begin(), v.end(), r.begin(), std::plus<>{}, times2, 0.0); }, v, r);
    std::cout << std::setw(7) << seq_time << " us | " << r << " |" << std::endl;
    std::cout << "+--------------------+----------+-------------+-------------+--------+------------+-----------------------------------------------+" << std::endl;

    std::cout << "| std::transform_inclusive_scan |  Parallel   | (*2) -> (+) | double | ";
    auto par_time = measure<>::execution([&](const auto& v, auto& r){  std::transform_inclusive_scan(std::execution::par, v.begin(), v.end(), r.begin(), std::plus<>{}, times2, 0.0); }, v, r);
    std::cout << std::setw(7) << par_time << " us | " << r << " |" << std::endl;
    std::cout << "+--------------------+----------+-------------+-------------+--------+------------+-----------------------------------------------+" << std::endl;

    std::cout << "| std::transform_inclusive_scan | Unsequenced | (*2) -> (+) | double | ";
    auto unseq_time = measure<>::execution([&](const auto& v, auto& r){  std::transform_inclusive_scan(std::execution::unseq, v.begin(), v.end(), r.begin(), std::plus<>{}, times2, 0.0); }, v, r);
    std::cout << std::setw(7) << unseq_time << " us | " << r << " |" << std::endl;
    std::cout << "+--------------------+----------+-------------+-------------+--------+------------+-----------------------------------------------+" << std::endl;

    std::cout << "| std::transform_inclusive_scan |  Par-Unseq  | (*2) -> (+) | double | ";
    auto par_unseq_time = measure<>::execution([&](const auto& v, auto& r){  std::transform_inclusive_scan(std::execution::par_unseq, v.begin(), v.end(), r.begin(), std::plus<>{}, times2, 0.0); }, v, r);
    std::cout << std::setw(7) << par_unseq_time << " us | " << r << " |" << std::endl;
    std::cout << "+--------------------+----------+-------------+-------------+--------+------------+-----------------------------------------------+" << std::endl;

    return 0;
}
$ bpt build -t build.yaml -o build

# ...

./build/transform_exclusive_scan
+-------------------------------+-------------+-------------+--------+------------+-----------------------------------------------+
|           Algorithm           | Exec Policy | Operations  |  Type  |    Time    |                    Result                     |
+--------------------+----------+-------------+-------------+--------+------------+-----------------------------------------------+
| std::transform_exclusive_scan | Sequencial  | (*2) -> (+) | double | 125,675 us | [ 0.0, 0.2, ..., 20,000,001.0, 20,000,001.2 ] |
+--------------------+----------+-------------+-------------+--------+------------+-----------------------------------------------+
| std::transform_exclusive_scan |  Parallel   | (*2) -> (+) | double | 150,095 us | [ 0.0, 0.2, ..., 20,000,001.0, 20,000,001.2 ] |
+--------------------+----------+-------------+-------------+--------+------------+-----------------------------------------------+
| std::transform_exclusive_scan | Unsequenced | (*2) -> (+) | double | 167,813 us | [ 0.0, 0.2, ..., 20,000,001.0, 20,000,001.2 ] |
+--------------------+----------+-------------+-------------+--------+------------+-----------------------------------------------+
| std::transform_exclusive_scan |  Par-Unseq  | (*2) -> (+) | double | 146,167 us | [ 0.0, 0.2, ..., 20,000,001.0, 20,000,001.2 ] |
+--------------------+----------+-------------+-------------+--------+------------+-----------------------------------------------+
Transform Inclusive Scan
std::transform_inclusive_scan will perform a unary transformation and then performs a left inclusive scan on a range.
#include <algorithm>
#include <chrono>
#include <execution>
#include <iomanip>
#include <iostream>
#include <numeric>
#include <utility>
#include <vector>

template <typename time_t = std::chrono::microseconds>
struct measure
{
    template <typename F, typename... Args>
    static auto execution(F func, Args&&... args)
        -> typename time_t::rep
    {
        auto start = std::chrono::system_clock::now();
        std::invoke(func, std::forward<Args>(args)...);
        auto duration = std::chrono::duration_cast<time_t>(std::chrono::system_clock::now() - start);
        return duration.count();
    }
};

template<typename T>
auto operator<<
(std::ostream& os, const std::vector<T>& v) -> std::ostream&
{
    os << "[ ";
    for (auto i { v.size() }; const auto& e : v)
        if (--i > (v.size() - 3))
            os << e << ", ";

    auto last = v.end() - 3;
    os << "..., " << *++last << ", ";
    os << *++last << " ]";
    return os;
}

auto main() -> int
{
    auto v = std::vector<double>(100'000'007, 0.1);
    auto r = std::vector<double>(100'000'007, 0.0);
    auto times2 = [](const auto& x){ return x * 2; };
    std::cout.imbue(std::locale("en_US.UTF-8"));
    std::cout << std::fixed << std::setprecision(1);

    std::cout << "+-------------------------------+-------------+-------------+--------+------------+-----------------------------------------------+" << std::endl;
    std::cout << "|           Algorithm           | Exec Policy | Operations  |  Type  |    Time    |                    Result                     |" << std::endl;
    std::cout << "+--------------------+----------+-------------+-------------+--------+------------+-----------------------------------------------+" << std::endl;

    std::cout << "| std::transform_exclusive_scan | Sequencial  | (*2) -> (+) | double | ";
    auto seq_time = measure<>::execution([&](const auto& v, auto& r){  std::transform_exclusive_scan(std::execution::seq, v.begin(), v.end(), r.begin(), 0.0, std::plus<>{}, times2); }, v, r);
    std::cout << std::setw(7) << seq_time << " us | " << r << " |" << std::endl;
    std::cout << "+--------------------+----------+-------------+-------------+--------+------------+-----------------------------------------------+" << std::endl;

    std::cout << "| std::transform_exclusive_scan |  Parallel   | (*2) -> (+) | double | ";
    auto par_time = measure<>::execution([&](const auto& v, auto& r){  std::transform_exclusive_scan(std::execution::par, v.begin(), v.end(), r.begin(), 0.0, std::plus<>{}, times2); }, v, r);
    std::cout << std::setw(7) << par_time << " us | " << r << " |" << std::endl;
    std::cout << "+--------------------+----------+-------------+-------------+--------+------------+-----------------------------------------------+" << std::endl;

    std::cout << "| std::transform_exclusive_scan | Unsequenced | (*2) -> (+) | double | ";
    auto unseq_time = measure<>::execution([&](const auto& v, auto& r){  std::transform_exclusive_scan(std::execution::unseq, v.begin(), v.end(), r.begin(), 0.0, std::plus<>{}, times2); }, v, r);
    std::cout << std::setw(7) << unseq_time << " us | " << r << " |" << std::endl;
    std::cout << "+--------------------+----------+-------------+-------------+--------+------------+-----------------------------------------------+" << std::endl;

    std::cout << "| std::transform_exclusive_scan |  Par-Unseq  | (*2) -> (+) | double | ";
    auto par_unseq_time = measure<>::execution([&](const auto& v, auto& r){  std::transform_exclusive_scan(std::execution::par_unseq, v.begin(), v.end(), r.begin(), 0.0, std::plus<>{}, times2); }, v, r);
    std::cout << std::setw(7) << par_unseq_time << " us | " << r << " |" << std::endl;
    std::cout << "+--------------------+----------+-------------+-------------+--------+------------+-----------------------------------------------+" << std::endl;

    return 0;
}
$ bpt build -t build.yaml -o build

# ...

./build/transform_inclusive_scan
+-------------------------------+-------------+-------------+--------+------------+-----------------------------------------------+
|           Algorithm           | Exec Policy | Operations  |  Type  |    Time    |                    Result                     |
+--------------------+----------+-------------+-------------+--------+------------+-----------------------------------------------+
| std::transform_inclusive_scan | Sequencial  | (*2) -> (+) | double | 120,220 us | [ 0.2, 0.4, ..., 20,000,001.2, 20,000,001.4 ] |
+--------------------+----------+-------------+-------------+--------+------------+-----------------------------------------------+
| std::transform_inclusive_scan |  Parallel   | (*2) -> (+) | double | 148,472 us | [ 0.2, 0.4, ..., 20,000,001.2, 20,000,001.4 ] |
+--------------------+----------+-------------+-------------+--------+------------+-----------------------------------------------+
| std::transform_inclusive_scan | Unsequenced | (*2) -> (+) | double | 135,489 us | [ 0.2, 0.4, ..., 20,000,001.2, 20,000,001.4 ] |
+--------------------+----------+-------------+-------------+--------+------------+-----------------------------------------------+
| std::transform_inclusive_scan |  Par-Unseq  | (*2) -> (+) | double | 150,443 us | [ 0.2, 0.4, ..., 20,000,001.2, 20,000,001.4 ] |
+--------------------+----------+-------------+-------------+--------+------------+-----------------------------------------------+
Atomics
Data Races & Shared Resources
In any program, data is shared across multiple chapters of the system. This is largely not a problem because there is only a single thread accessing the data meaning all operations occur sequentially. This guarantees that data will only every be read from or written to but not both at the same time. However, when a program starts to introduce concurrency data now may be shared between different execution processes. This means that data can be read from or written at the same time causing a Race Condition. Race Conditions are UB in almost all programming languages as there is no way for the compiler or interpreter to tell which operation will happen first. There are many techniques to prevent and outright disallow race conditions from occur while still allowing for data to exist in a shared state. The first of which we will look at is std::atomic.
Atomic Types
std::atomic is a template class type that represents an atomic-object. Reading from and writing to an atomic-object at the same time is considered well defined. This is because operations are performed atomically meaning that no race conditions can occur as the memory order must be specified. std::atomic can accept template types that are integrals, floating-points, pointers, std::shared_ptr or std::weak_ptr. It can also accept custom types that are trivially copyable and copy and move constructible/assignable. std::atomic also can be used to synchronize execution by blocking and notifying different executions processes. std::atomic itself cannot be copied or move. There is also std::atomic_ref which creates a reference to existing data for which all operations are atomic. The referred object's lifetime must exceed that of the atomic reference the underlying object can only be access through atomic references for the lifetime of all atomic references. std::atomic_ref can by copied.
#include <algorithm>
#include <atomic>
#include <chrono>
#include <execution>
#include <iomanip>
#include <iostream>
#include <numeric>
#include <utility>
#include <vector>

template <typename time_t = std::chrono::microseconds>
struct measure
{
    template <typename F, typename... Args>
    static auto execution(F func, Args&&... args)
        -> std::pair<typename time_t::rep, std::invoke_result_t<F, Args...>>
    {
        auto start = std::chrono::system_clock::now();
        auto result = std::invoke(func, std::forward<Args>(args)...);
        auto duration = std::chrono::duration_cast<time_t>(std::chrono::system_clock::now() - start);
        return std::pair<typename time_t::rep, std::invoke_result_t<F, Args...>>{ duration.count(), result };
    }
};

auto main() -> int
{
    auto count = std::atomic<int>{ 0 };
    auto v = std::vector<double>(100'000'007, 0.1);

    auto alg = [&count](const auto& v)
    {
        return std::reduce(
            std::execution::par_unseq,
            v.begin(),
            v.end(),
            0.0,
            [&count](const auto& x, const auto& y) {
                count.fetch_add(1, std::memory_order_relaxed);
                return x + y;
            }
        );
    };

    std::cout.imbue(std::locale("en_US.UTF-8"));
    std::cout << std::fixed << std::setprecision(4);

    auto [time, result] = measure<>::execution(alg, v);

    std::cout << "std::reduce (parallel-unsequenced execution):\n"
              << "Result: " << result << "\n"
              << "Time: " << time << " us\n"
              << "Atomic Count: " << count.load() << std::endl;

    return 0;
}
bpt build -t build.yaml -o build

# ...

./build/atomic
std::reduce (parallel-unsequenced execution):
Result: 10,000,000.7000
Time: 1,699,214 us
Atomic Count: 100,000,007
Threads
What are Threads?
Threads or threads of execution are the smallest sequence of instructions that is managed by a schedular of an operating system. Threads are a sub-object of a process. A process can have multiple threads allowing chapters of a process to run concurrently. In C++ we can spawn thread objects that will run a function until completion and then must be rejoined to the main thread or detached.
Thread
C++ thread object is called std::thread. It takes as its first argument a function to run as well as any arguments that must be forwarded to the function. The function will begin to run immediately at the threads construction. Along with std::thread there is the std::this_thread namespaces which can get the ID or make the current thread sleep for some time. std::thread cannot be copied but can be moved.
#include <atomic>
#include <chrono>
#include <iostream>
#include <syncstream>
#include <thread>
using namespace std::literals;
auto work = [](std::atomic_ref<int> counter)
{
std::osyncstream(std::cout) << "Doing work on thread: " << std::this_thread::get_id() << " ...\n";
auto count = counter.fetch_add(1, std::memory_order_relaxed);
std::osyncstream(std::cout) << "Call count: " << count << "\n";
std::this_thread::sleep_for(1.5s);
std::osyncstream(std::cout) << "Thread " << std::this_thread::get_id() << " Done!\n";
};
auto main() -> int
{
auto counter { 1 };
auto atomic_counter = std::atomic_ref<int>{ counter };
std::thread t1(work, atomic_counter);
std::thread t2(work, atomic_counter);
std::thread t3(work, atomic_counter);
std::thread t4(work, atomic_counter);
std::cout << "Waiting in main...\n";
t1.join();
t2.join();
t3.join();
t4.join();
return 0;
}
Note: Uses
std::osyncstreamto synchronize output.
$ bpt build -t build.yaml -o build
# ...
$ ./build/thread
Waiting in main...
Doing work on thread: 139836157400640 ...
Call count: 1
Doing work on thread: 139836174186048 ...
Doing work on thread: 139836149007936 ...
Call count: 3
Doing work on thread: 139836165793344 ...
Call count: 4
Call count: 2
Thread 139836157400640 Done!
Thread 139836149007936 Done!
Thread 139836165793344 Done!
Thread 139836174186048 Done!
Automatic Threads
Since C++20 there has been a thread type that automatically joins on destruction. This is called std::jthread. std::jthread also supports the use of std::stop_token and std::stop_source. These are primitives for preemptively cancelling a std::jthread from other threads. The std::stop_source is obtained from a std::jthread object and can be passed to other threads. For a std::jthread to be able to listen for stop requests, the function it runs must takes as its first argument a std::stop_token.
#include <atomic>
#include <chrono>
#include <iostream>
#include <syncstream>
#include <thread>
using namespace std::literals;
auto job = [](std::stop_token tkn)
{
for (auto i { 10 }; i; --i)
{
std::this_thread::sleep_for(150ms);
if (tkn.stop_requested())
{
std::cout << " The job has be requested to stop\n";
return;
}
std::cout << " Continuing with job\n";
}
};
auto stop_job = [](std::stop_source source)
{
std::this_thread::sleep_for(500ms);
std::cout << "Request stop for worker via source\n";
source.request_stop();
};
auto main() -> int
{
auto worker = std::jthread(job);
std::cout << "\nPass source to other thread:\n";
std::stop_source stop_source = worker.get_stop_source();
auto stopper = std::thread(stop_job, stop_source);
stopper.join();
std::this_thread::sleep_for(250ms);
return 0;
}
$ bpt build -t build.yaml -o build
# ...
$ ./build/jthread
Pass source to other thread:
Continuing with job
Continuing with job
Continuing with job
Request stop for worker via source
The job has be requested to stop
Thread Pools
A thread pool is a very common idiom in Computer Science. It involves creating a pool or array of threads that sit idle, waiting for work. Jobs are then pushed to the pool which get assigned to an available thread. Once the thread has finished the section the thread goes idle again. The most basic way to create a thread pool is to use a vector of threads and emplace jobs at the back of the vector and then join all joinable threads.
#include <chrono>
#include <iostream>
#include <syncstream>
#include <thread>
#include <vector>
using namespace std::literals;
auto job = [](auto job_id)
{
std::this_thread::sleep_for(150ms);
std::osyncstream(std::cout) << "Thread: "
<< std::this_thread::get_id()
<< " is running job: "
<< job_id
<< "\n";
std::this_thread::sleep_for(150ms);
};
auto main() -> int
{
auto thr_count { std::thread::hardware_concurrency() };
auto pool = std::vector<std::thread>();
/// Queue jobs
for (auto i { 0u }; i < thr_count; ++i)
pool.emplace_back(job, i);
std::this_thread::sleep_for(200ms);
/// Join all job threads
for (auto& th : pool)
if (th.joinable())
th.join();
return 0;
}
$ bpt build -t build.yaml -o build
# ...
$ ./build/thread-pools
Thread: 140166858589760 is running job: 4
Thread: 140166841804352 is running job: 6
Thread: 140166866982464 is running job: 3
Thread: 140166816626240 is running job: 9
Thread: 140166875375168 is running job: 2
Thread: 140166833411648 is running job: 7
Thread: 140166766270016 is running job: 15
Thread: 140166774662720 is running job: 14
Thread: 140166892160576 is running job: 0
Thread: 140166825018944 is running job: 8
Thread: 140166883767872 is running job: 1
Thread: 140166850197056 is running job: 5
Thread: 140166799840832 is running job: 11
Thread: 140166783055424 is running job: 13
Thread: 140166791448128 is running job: 12
Thread: 140166808233536 is running job: 10
Mutexes & Locks
What is a Mutex?
A mutex is a mutually-exclusive-object. It is used to synchronize access to shared memory resources across multiple threads. C++ mutex type is called std::mutex from the <mutex> header. Threads can own a std::mutex by locking it. Other threads will block when they try to lock a std::mutex owned by another thread. std::mutex also implement a try-lock that returns a Boolean indicating the result off the lock attempt. A thread cannot own a std::mutex before it tries to lock it. Mutexes are generally implemented as a OS primitive. Because std::mutex (and C++ other mutex types) use locking and unlocking methods to control access, these types are not considered to be RAII types. Instead there are locking types that will lock a mutex on construction and unlock it on destruction (more below).
#include <chrono>
#include <iostream>
#include <map>
#include <mutex>
#include <sstream>
#include <thread>
#include <vector>
using namespace std::literals;
auto mx = std::mutex{};
auto map = std::map<int, long long>{};
auto job = [](auto job_id)
{
std::this_thread::sleep_for(150ms);
auto ss = std::stringstream{};
ss << std::this_thread::get_id();
auto thread_id = std::stoll(ss.str());
while (!mx.try_lock())
std::this_thread::sleep_for(150ms);
map.insert({ job_id, thread_id });
mx.unlock();
std::this_thread::sleep_for(150ms);
};
auto main() -> int
{
auto thr_count { std::thread::hardware_concurrency() };
auto pool = std::vector<std::thread>(thr_count);
/// Queue jobs
for (auto i { 0u }; i < thr_count; ++i)
pool.emplace_back(job, i);
std::this_thread::sleep_for(200ms);
/// Join all job threads
for (auto& th : pool)
if (th.joinable())
th.join();
std::cout << "{ ";
for (auto i { map.size() }; auto& [k, v] : map)
std::cout << k << ": " << v << (i-- ? ", " : "");
std::cout << " }" << std::endl;
return 0;
}
bpt build -t build.yaml -o build
# ...
./build/mutex
{ 0: 140667719128640, 1: 140667710735936, 2: 140667702343232, 3: 140667693950528, 4: 140667685557824, 5: 140667677165120, 6: 140667668772416, 7: 140667660379712, 8: 140667651987008, 9: 140667643594304, 10: 140667635201600, 11: 140667626808896, 12: 140667618416192, 13: 140667610023488, 14: 140667601630784, 15: 140667593238080, }
Other Mutex Types
-
std::timed_mutex- Mutex that offers timeout based locking methods. Locking will be attempted for a certain duration. -
std::recursive_mutex- Mutex that can be repeatedly locked by the same thread multiple times. Must be unlocked the same number of times to become fully unlocked. -
std::recursive_timed_mutex- Recursive mutex with timeout locking. -
std::shared_mutex- A mutex that offers to levels of access, shared or exclusive. Shared locking allows for multiple threads to share a mutex and read the shared memory resources while exclusive only allows one thread to access the shared resources with write privileges. If one thread has a shared lock an a mutex other threads can only gain a shared lock on it as well prohibiting the ability to gain exclusive access from another thread until all threads have unlocked the shared lock. Similarly, a thread with an exclusive lock on a thread disallows other threads from gaining any lock on the mutex until it has been unlocked. -
std::shared_timed_mutex- Same as astd::shared_mutexbut offers timeout based exclusive and shared locking.
What is a lock?
A lock is another kind of synchronization primitive. Locks can be used to wrap other synchronization primitives like mutexes and bind the locking and unlocking if the mutex to the lifetime of the lock using RAII or can themselves be synchronization primitives that must be acquires and released. Most locks in C++ perform the former which allow for mutex locking to be scoped ensuring proper releasing of resources even if exceptions are thrown. Locks however, can also be used erroneously creating deadlocks for which two threads rely on the releasing of each others locks in order to release their respective locks. They also have a little more overhead as you have to create and destroy locks. Locks will often be created in an unnamed scope to ensure that it only lives as long as it needs.
Semaphores
The most simple type of lock is a semaphore. Semaphores allow multiple threads to access the same resource. The number of accessors is dictated by a count which decrements when the semaphore is acquires and blocks for any acquisitions for which the count is zero. C++ semaphore type which supports arbitrary size counts is called std::counting_semaphore. There is also a specialisation for which only a single accessor is allowed, called std::binary_semaphore. Both of these live in the semaphore header.
#include <chrono>
#include <iostream>
#include <semaphore>
#include <thread>
using namespace std::literals;
auto toMain = std::binary_semaphore{ 0 };
auto fromMain = std::binary_semaphore{ 0 };
auto work = []()
{
fromMain.acquire();
std::cout << "[thread]: Got signal" << std::endl;
std::this_thread::sleep_for(3s);
std::cout << "[thread]: Sent signal" << std::endl;
toMain.release();
};
auto main() -> int
{
auto th = std::thread{ work };
std::cout << "[Main]: Sent signal" << std::endl;
fromMain.release();
toMain.acquire();
std::cout << "[Main]: Got signal" << std::endl;
th.join();
return 0;
}
$ bpt build -t build.yaml -o build
# ...
$ ./build/semaphores
[Main]: Sent signal
[thread]: Got signal
[thread]: Sent signal
[Main]: Got signal
std::counting_semaphore & std::binary_semaphore
Lock Types
std::lock_guard- The most basic kind of mutex locking wrapper. It binds the locking lifetime of a mutex to the lifetime of the lock. It takes a template type parameter of the mutex type and a mutex as a constructor argument. It can also adopt the ownership of a mutex by passing a second constructor argumentstd::adopt_lockwhich does not lock the mutex but ensuring the calling thread will unlock it.std::lock_guardis non-copyable.std::scoped_lock- A lock for acquiring ownership of zero or more mutexes for the duration of a scope block. When constructed and given ownership of multiple mutexes, the locking and unlocking of mutexes uses a deadlock avoidance algorithm.std::unique_lock- Used to acquire an exclusive lock on a mutex with deferred, time-constrained, recursive and transfer semantics for locking. It is non-copyable but is moveable.std::shared_lock- Used to gain shared access to a mutex with similar semantics tostd::unique_lock. Used for locking astd::shared_mutexin a shared ownership model.
#include <chrono>
#include <iostream>
#include <map>
#include <mutex>
#include <sstream>
#include <thread>
#include <vector>
using namespace std::literals;
auto mx = std::mutex{};
auto map = std::map<int, long long>{};
auto job = [](auto job_id)
{
std::this_thread::sleep_for(150ms);
auto ss = std::stringstream{};
ss << std::this_thread::get_id();
auto thread_id = std::stoll(ss.str());
/// Acquire a lock on mx that lasts for this scope
{
auto lk = std::lock_guard{ mx };
map.insert({ job_id, thread_id });
}
std::this_thread::sleep_for(150ms);
};
auto main() -> int
{
auto thr_count { std::thread::hardware_concurrency() };
auto pool = std::vector<std::thread>(thr_count);
/// Queue jobs
for (auto i { 0u }; i < thr_count; ++i)
pool.emplace_back(job, i);
std::this_thread::sleep_for(200ms);
/// Join all job threads
for (auto& th : pool)
if (th.joinable())
th.join();
std::cout << "{ ";
for (auto i { map.size() }; auto& [k, v] : map)
std::cout << k << ": " << v << (i-- ? ", " : "");
std::cout << " }" << std::endl;
return 0;
}
$ bpt build -t build.yaml -o build
# ...
$ ./build/locks
{ 0: 139998766057024, 1: 139998757664320, 2: 139998749271616, 3: 139998740878912, 4: 139998732486208, 5: 139998724093504, 6: 139998715700800, 7: 139998707308096, 8: 139998698915392, 9: 139998690522688, 10: 139998682129984, 11: 139998673737280, 12: 139998665344576, 13: 139998656951872, 14: 139998648559168, 15: 139998640166464, }
Latches
A std::latch is count-down synchronization primitive with the count is initialized on construction. Threads can wait at a std::latch until the count reaches zero. Once this happens, all the threads waiting on the latch are released. std::latch cannot increment or reset its counter after construction making it a single use barrier. std::latch is non-copyable and lives in the <latch> header.
#include <chrono>
#include <iostream>
#include <latch>
#include <syncstream>
#include <thread>
#include <vector>
using namespace std::literals;
auto thr_count = std::thread::hardware_concurrency();
auto done = std::latch{ thr_count };
auto cleanup = std::latch{ 1 };
auto job = [](auto job_id)
{
std::this_thread::sleep_for(2s);
std::osyncstream(std::cout) << "Job " << job_id << " done.\n";
done.count_down();
cleanup.wait();
std::osyncstream(std::cout) << "Job " << job_id << " cleaned up.\n";
};
auto main() -> int
{
auto pool = std::vector<std::thread>(thr_count);
std::cout << "Starting jobs...\n";
for (auto i { 0u }; i < thr_count; ++i)
pool.emplace_back(job, i);
done.wait();
std::cout << "All jobs done.\n";
std::this_thread::sleep_for(200ms);
std::cout << "\nStarting cleanup...\n";
cleanup.count_down();
std::this_thread::sleep_for(200ms);
for (auto& th : pool)
if (th.joinable())
th.join();
std::cout << "All jobs cleaned up.\n";
return 0;
}
$ bpt build -t build.yaml -o build
# ...
$ ./build/latch
Starting jobs...
Job 1 done.
Job 0 done.
Job 3 done.
Job 5 done.
Job 4 done.
Job 7 done.
Job 6 done.
Job 8 done.
Job 2 done.
Job 10 done.
Job 9 done.
Job 13 done.
Job 12 done.
Job 11 done.
Job 14 done.
Job 15 done.
All jobs done.
Starting cleanup...
Job 4 cleaned up.
Job 6 cleaned up.
Job 7 cleaned up.
Job 12 cleaned up.
Job 13 cleaned up.
Job 0 cleaned up.
Job 14 cleaned up.
Job 10 cleaned up.
Job 11 cleaned up.
Job 2 cleaned up.
Job 15 cleaned up.
Job 5 cleaned up.
Job 3 cleaned up.
Job 9 cleaned up.
Job 8 cleaned up.
Job 1 cleaned up.
All jobs cleaned up.
Barriers
std::barrier is a more general version of std::latch. The lifetime of a std::barrier consists of one or more phases. The first is a synchronization phase for which threads will block where once the counter has reach zero for the std::barrier the threads will unblock. Right before unblocking, a completion function will run which is optionally supplied at the std::barrier construction. After this the std::barrier will reset its counter and can be reused. The overall count can be reduced on arrival by a thread. std::barrier is non-copyable and lives in the <barrier> header.
#include <chrono>
#include <iostream>
#include <barrier>
#include <syncstream>
#include <string>
#include <thread>
#include <vector>
using namespace std::literals;
auto thr_count = std::thread::hardware_concurrency();
auto on_completion = []() noexcept
{
static auto message = "All jobs done.\nWorkers are at lunch before cleaning up...\n"s;
std::osyncstream(std::cout) << message;
std::this_thread::sleep_for(3s);
message = "All cleaned up.\n"s;
};
auto barrier = std::barrier{ thr_count, on_completion };
auto job = [](auto job_id)
{
std::this_thread::sleep_for(2s);
std::osyncstream(std::cout) << "Job " << job_id << " done.\n";
barrier.arrive_and_wait();
std::osyncstream(std::cout) << "Job " << job_id << " cleaned up.\n";
barrier.arrive_and_wait();
};
auto main() -> int
{
auto pool = std::vector<std::thread>(thr_count);
std::cout << "Starting jobs...\n";
for (auto i { 0u }; i < thr_count; ++i)
pool.emplace_back(job, i);
std::this_thread::sleep_for(200ms);
for (auto& th : pool)
if (th.joinable())
th.join();
return 0;
}
$ bpt build -t build.yaml -o build
# ...
$ ./build/barrier
Starting jobs...
Job 2 done.
Job 1 done.
Job 3 done.
Job 5 done.
Job 0 done.
Job 4 done.
Job 8 done.
Job 7 done.
Job 6 done.
Job 12 done.
Job 11 done.
Job 10 done.
Job 9 done.
Job 15 done.
Job 13 done.
Job 14 done.
All jobs done.
Workers are at lunch before cleaning up...
Job 2 cleaned up.
Job 8 cleaned up.
Job 1 cleaned up.
Job 0 cleaned up.
Job 6 cleaned up.
Job 3 cleaned up.
Job 14 cleaned up.
Job 4 cleaned up.
Job 11 cleaned up.
Job 15 cleaned up.
Job 12 cleaned up.
Job 9 cleaned up.
Job 13 cleaned up.
Job 7 cleaned up.
Job 5 cleaned up.
Job 10 cleaned up.
All cleaned up.
Asynchronous Programming
Asynchronous programming is the ability to run functions an computations simultaneously while being able to communicate the results between different functions and execution paths.
Futures and Promises
A promise; represented by the class std::promise, is a object that stores a value or exception that is retrieved by a std::future object. Semantically, this means that a; generally asynchronous function has promised a value to the caller of the asynchronous function but however, does not yet have the value. The future of a promised value is obtained directly from the std::promise object. The caller of the promised value can query, wait for or extract the value from the corresponding std::future object however, these may block if the result is not yet ready. The timeout methods will return a std::future_status object which is an enum indicating if the wait timed out, if the future is deferred (lazy loading) or ready. The value of a promise is communicated via a shared memory state between the std::future and std::promise objects. This shared state cannot be shared between different threads meaning that only one std::future can be used to obtain the result of a promised value. To enforce this std::future is move-only. A shared future can be obtained by called std::future::share to create a std::shared_future which claims ownership of the shared state such that the future can be copied between different threads. Promises and futures are found in the <future> header.
#include <chrono>
#include <future>
#include <iostream>
#include <thread>
#include <utility>
using namespace std::literals;
auto job = [](std::promise<int>&& p, auto a, auto b)
{
std::this_thread::sleep_for(3s);
auto r = a + b;
p.set_value(r);
std::this_thread::sleep_for(3s);
};
auto main() -> int
{
auto p = std::promise<int>{};
auto f = p.get_future();
auto th = std::thread(job, std::move(p), 4, 5);
auto start = std::chrono::high_resolution_clock::now();
std::cout << "Waiting for job...\n";
auto r = f.get();
auto finish = std::chrono::high_resolution_clock::now();
auto duration = std::chrono::duration_cast<std::chrono::milliseconds>(finish - start).count();
std::cout << "Result: " << r << std::endl;
std::cout << "Took: " << duration << " ms" << std::endl;
th.join();
return 0;
}
$ bpt build -t build.yaml -o build
# ...
$ ./build/futures
Waiting for job...
Result: 9
Took: 3000 ms
Async
Another way to create asynchronous functions without having to deal with threads directly is to use std::async. This function will create an asynchronous section that will run according to a launch policy. The standard only defines two policies, this being std::launch::async; which will run a function a separate thread, or std::launch::deferred which will run the function lazily on the calling thread the first time the value is requested. std::async returns a std::future object that is used to query, wait for or extract the result of the asynchronous function. std::async is found in the <future> header.
#include <algorithm>
#include <chrono>
#include <concepts>
#include <execution>
#include <future>
#include <iomanip>
#include <iostream>
#include <iterator>
#include <numeric>
#include <utility>
#include <vector>
template <typename time_t = std::chrono::microseconds>
struct measure
{
template <typename F, typename... Args>
static auto execution(F func, Args&&... args)
-> std::pair<typename time_t::rep, std::invoke_result_t<F, Args...>>
{
auto start = std::chrono::system_clock::now();
auto result = std::invoke(func, std::forward<Args>(args)...);
auto duration = std::chrono::duration_cast<time_t>(std::chrono::system_clock::now() - start);
return std::pair<typename time_t::rep, std::invoke_result_t<F, Args...>>{ duration.count(), result };
}
};
template<std::random_access_iterator I, std::sentinel_for<I> S, std::movable A>
auto parallel_sum(I first, S last, A init) -> A
{
auto middle = first + ((last - first) / 2);
/// Launch async sum on last half of the values
auto future = std::async(std::launch::async, parallel_sum<I, S, A>, middle, last, A{});
/// Sum first half of the range locally.
auto result = parallel_sum(first, middle, init);
/// Obtain the future and sum with the result
return result + future.get();
}
auto main() -> int
{
auto v1 = std::vector<double>(999, 0.1);
auto v2 = std::vector<double>(100'000'007, 0.1);
std::cout << std::fixed << std::setprecision(5);
auto [acc_time_v1, acc_result_v1] = measure<>::execution([](const auto& rng){ return std::accumulate(rng.begin(), rng.end(), 0.0); }, v1);
std::cout << "std::accumulate : [v1 - 999 elements]\n";
std::cout << "Time: " << acc_time_v1 << " us\n";
std::cout << "Result: " << acc_result_v1 << std::endl;
auto [reduce_time_v1, reduce_result_v1] = measure<>::execution([](const auto& rng){ return std::reduce(std::execution::par, rng.begin(), rng.end(), 0.0); }, v1);
std::cout << "std::reduce(std::execution::par) : [v1 - 999 elements]\n";
std::cout << "Time: " << reduce_time_v1 << " us\n";
std::cout << "Result: " << reduce_result_v1 << std::endl;
auto [par_time_v1, par_result_v1] = measure<>::execution([](const auto& rng){ return std::accumulate(rng.begin(), rng.end(), 0.0); }, v1);
std::cout << "parallel_sum : [v1 - 999 elements]\n";
std::cout << "Time: " << par_time_v1 << " us\n";
std::cout << "Result: " << par_result_v1 << std::endl;
std::cout << "------------------------------------------------------\n";
auto [acc_time_v2, acc_result_v2] = measure<>::execution([](const auto& rng){ return std::accumulate(rng.begin(), rng.end(), 0.0); }, v2);
std::cout << "std::accumulate : [v2 - 100'000'007 elements]\n";
std::cout << "Time: " << acc_time_v2 << " us\n";
std::cout << "Result: " << acc_result_v2 << std::endl;
auto [reduce_time_v2, reduce_result_v2] = measure<>::execution([](const auto& rng){ return std::reduce(std::execution::par, rng.begin(), rng.end(), 0.0); }, v2);
std::cout << "std::reduce(std::execution::par) : [v2 - 100'000'007 elements]\n";
std::cout << "Time: " << reduce_time_v2 << " us\n";
std::cout << "Result: " << reduce_result_v2 << std::endl;
auto [par_time_v2, par_result_v2] = measure<>::execution([](const auto& rng){ return std::accumulate(rng.begin(), rng.end(), 0.0); }, v2);
std::cout << "parallel_sum : [v2 - 100'000'007 elements]\n";
std::cout << "Time: " << par_time_v2 << " us\n";
std::cout << "Result: " << par_result_v2 << std::endl;
return 0;
}
$ bpt build -t build.yaml -o build
# ...
$ ./build/async
std::accumulate : [v1 - 999 elements]
Time: 2 us
Result: 99.90000
std::reduce(std::execution::par) : [v1 - 999 elements]
Time: 750 us
Result: 99.90000
parallel_sum : [v1 - 999 elements]
Time: 2 us
Result: 99.90000
------------------------------------------------------
std::accumulate : [v2 - 100'000'007 elements]
Time: 178779 us
Result: 10000000.68113
std::reduce(std::execution::par) : [v2 - 100'000'007 elements]
Time: 19993 us
Result: 10000000.70009
parallel_sum : [v2 - 100'000'007 elements]
Time: 153180 us
Result: 10000000.68113
Packaged Sections
The final way to create a future value is the use of std::packaged_task. This wraps a callable such that its result type is held in a shared state that can be accesses by a std::future object created from the section. std::packaged_task objects can be moved to std::thread and std::jthread objects so that the return value of a section can be acquired from a thread (which usually discards it). std::packaged_task is move-only and is found in the <future> header.
#include <chrono>
#include <future>
#include <iostream>
#include <thread>
#include <utility>
using namespace std::literals;
auto job = [](auto a, auto b)
{
std::this_thread::sleep_for(150ms);
auto r = a + b;
std::this_thread::sleep_for(150ms);
return r;
};
auto main() -> int
{
auto pkg = std::packaged_task<int(int, int)>{ job };
auto f = pkg.get_future();
auto th = std::thread(std::move(pkg), 4, 5);
auto start = std::chrono::high_resolution_clock::now();
std::cout << "Waiting for job...\n";
auto r = f.get();
auto finish = std::chrono::high_resolution_clock::now();
auto duration = std::chrono::duration_cast<std::chrono::milliseconds>(finish - start).count();
std::cout << "Result: " << r << std::endl;
std::cout << "Took: " << duration << " ms" << std::endl;
th.join();
return 0;
}
$ bpt build -t build.yaml -o build
# ...
$ ./build/packaged_task
Waiting for job...
Result: 9
Took: 300 ms
Slides


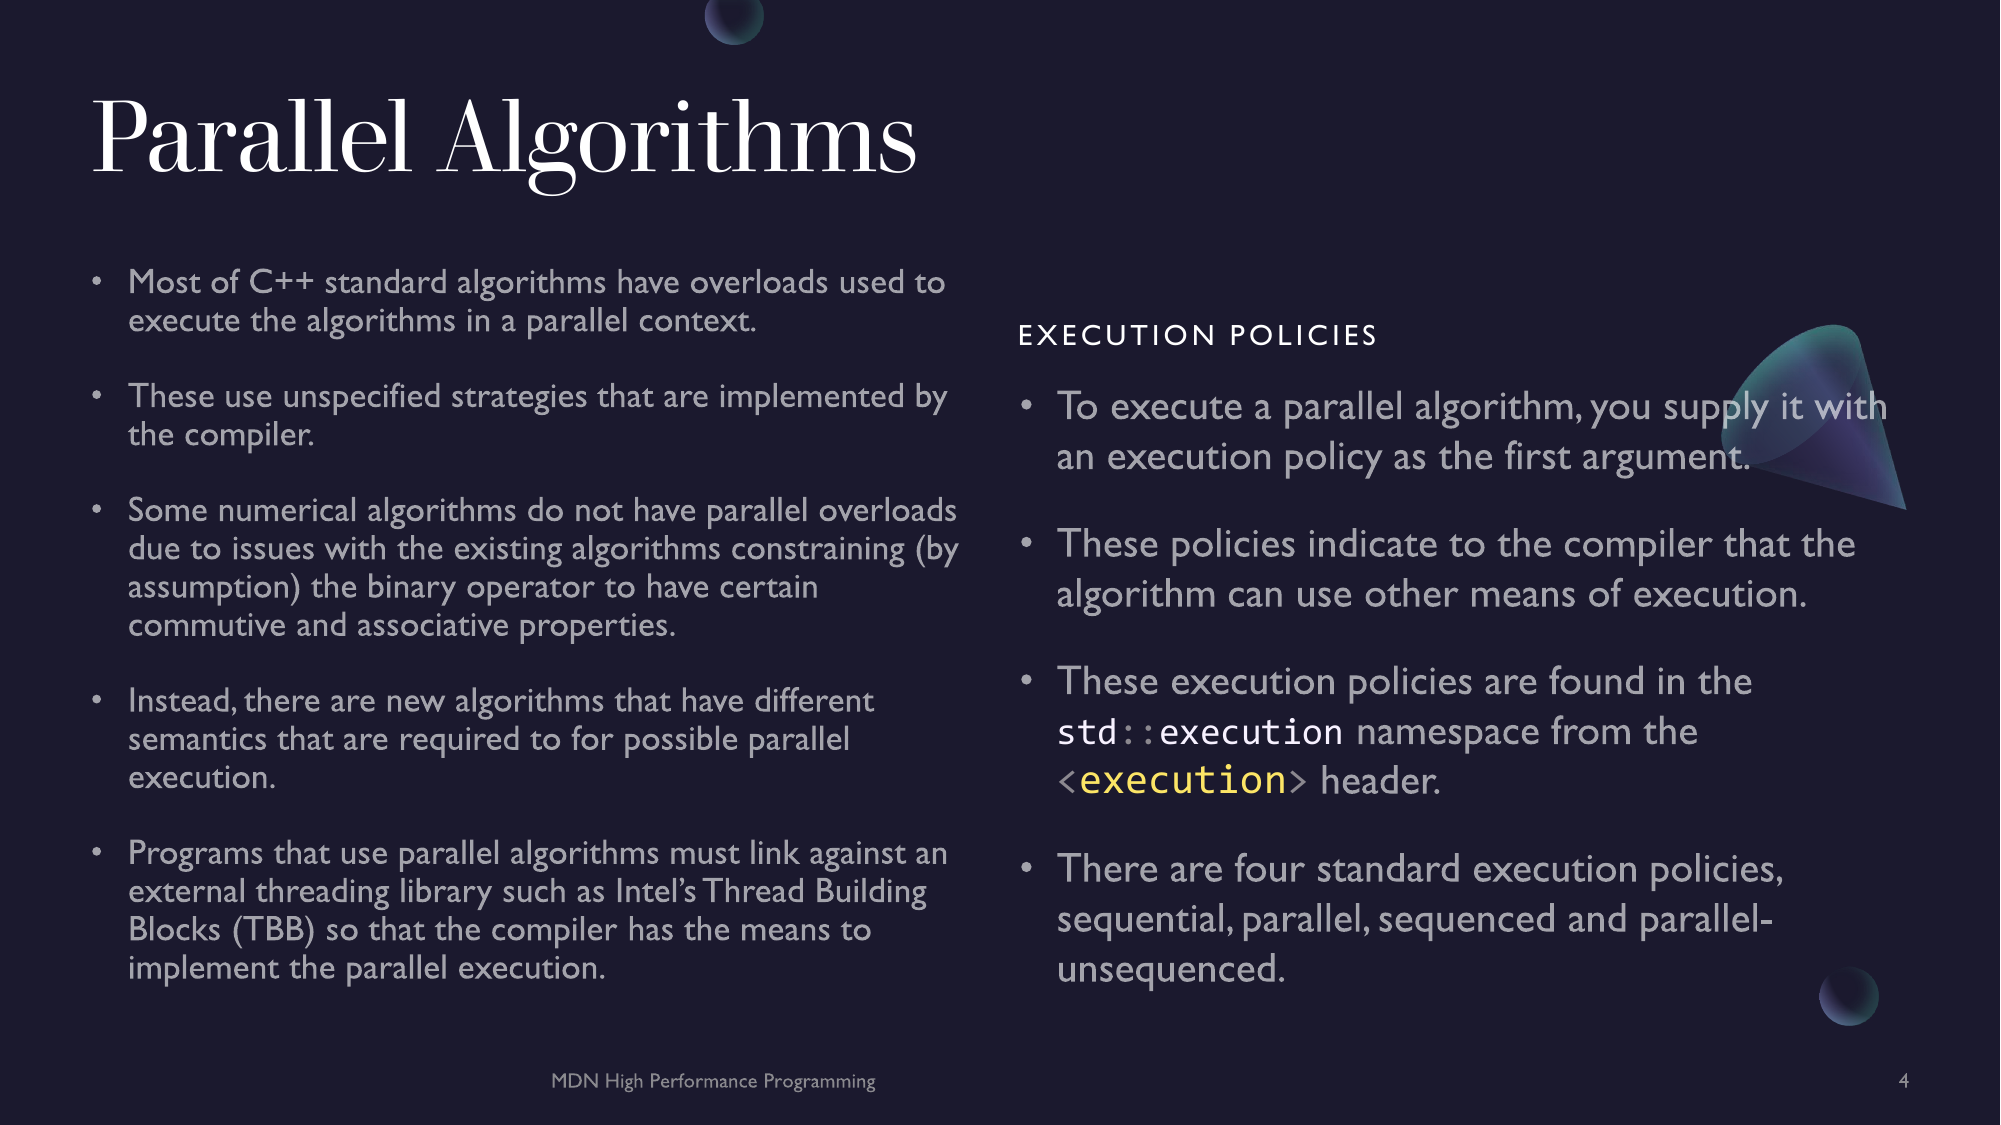
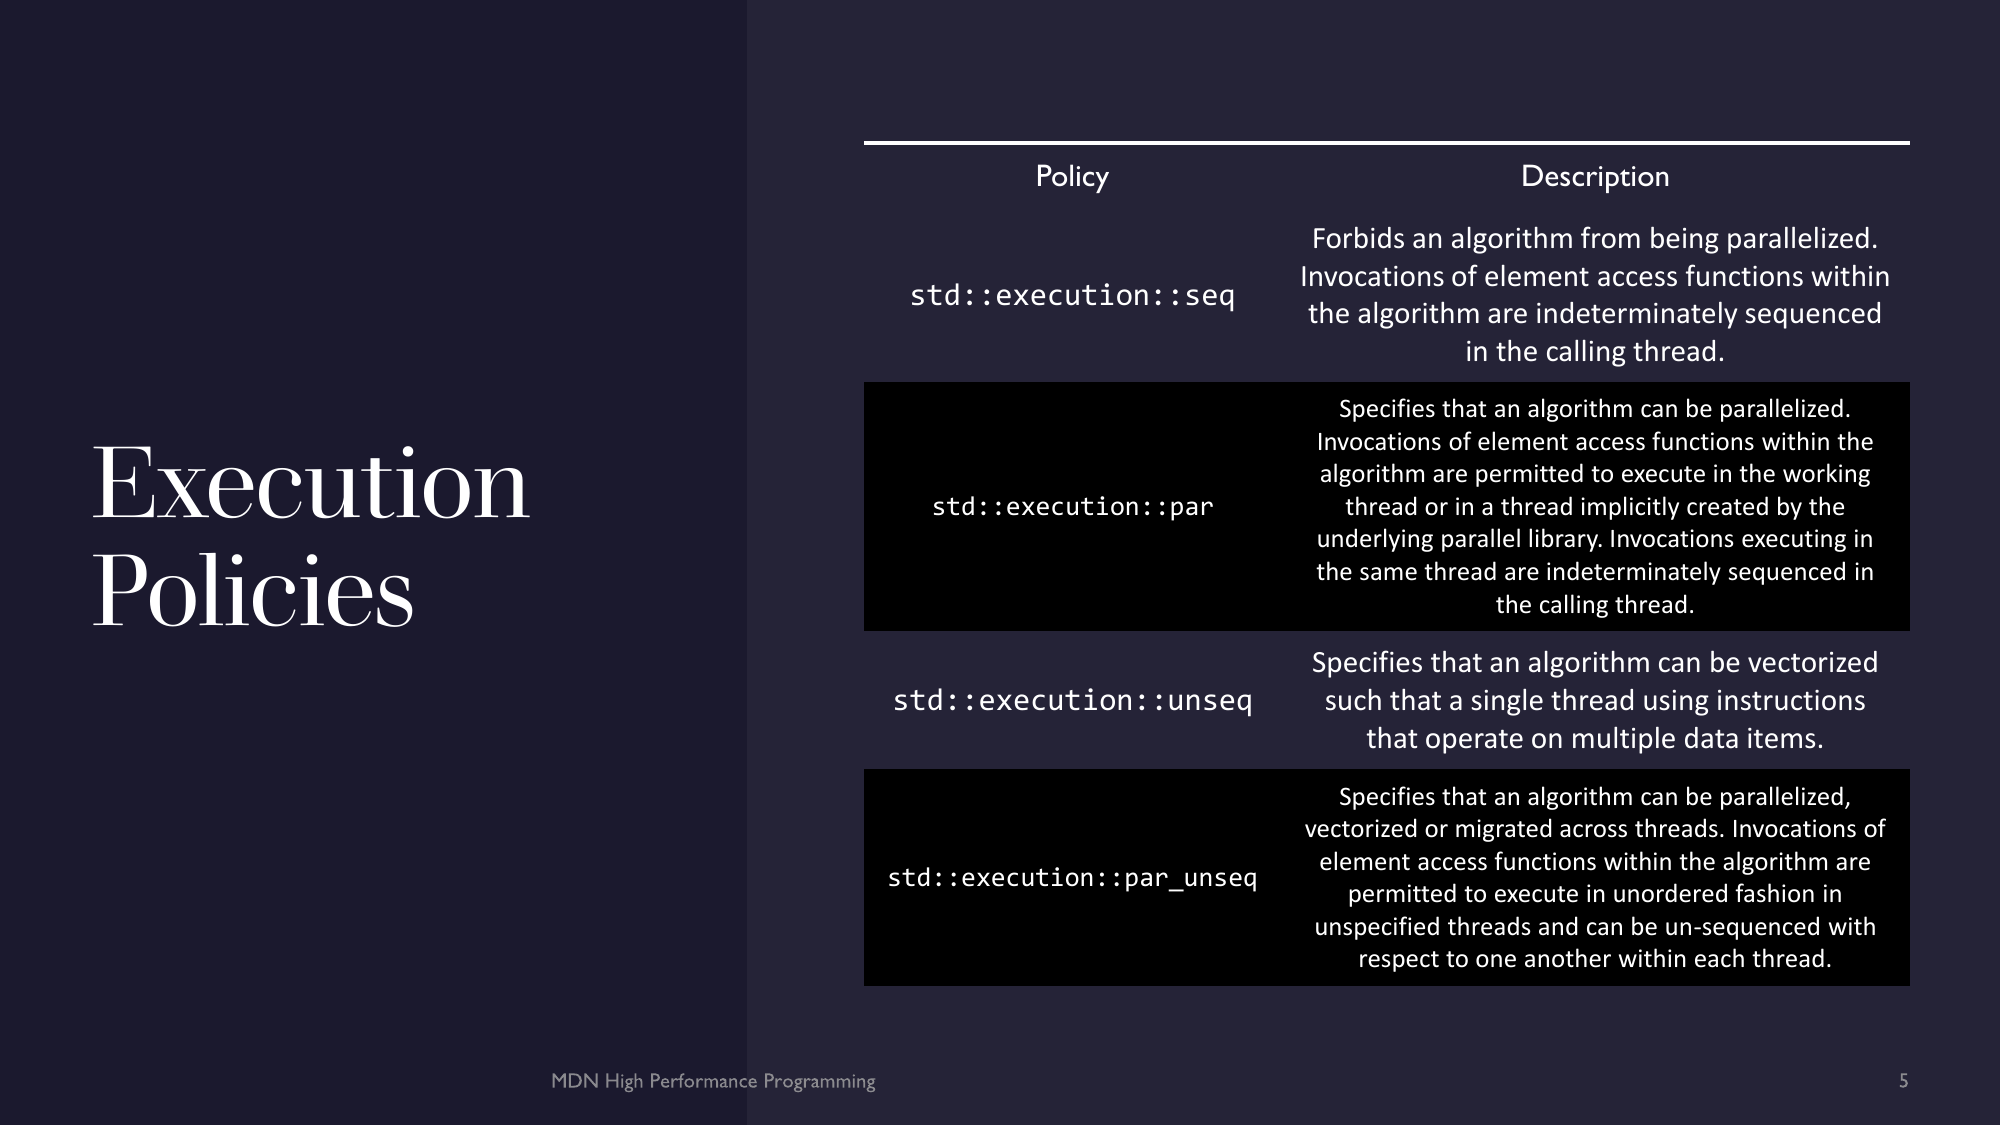
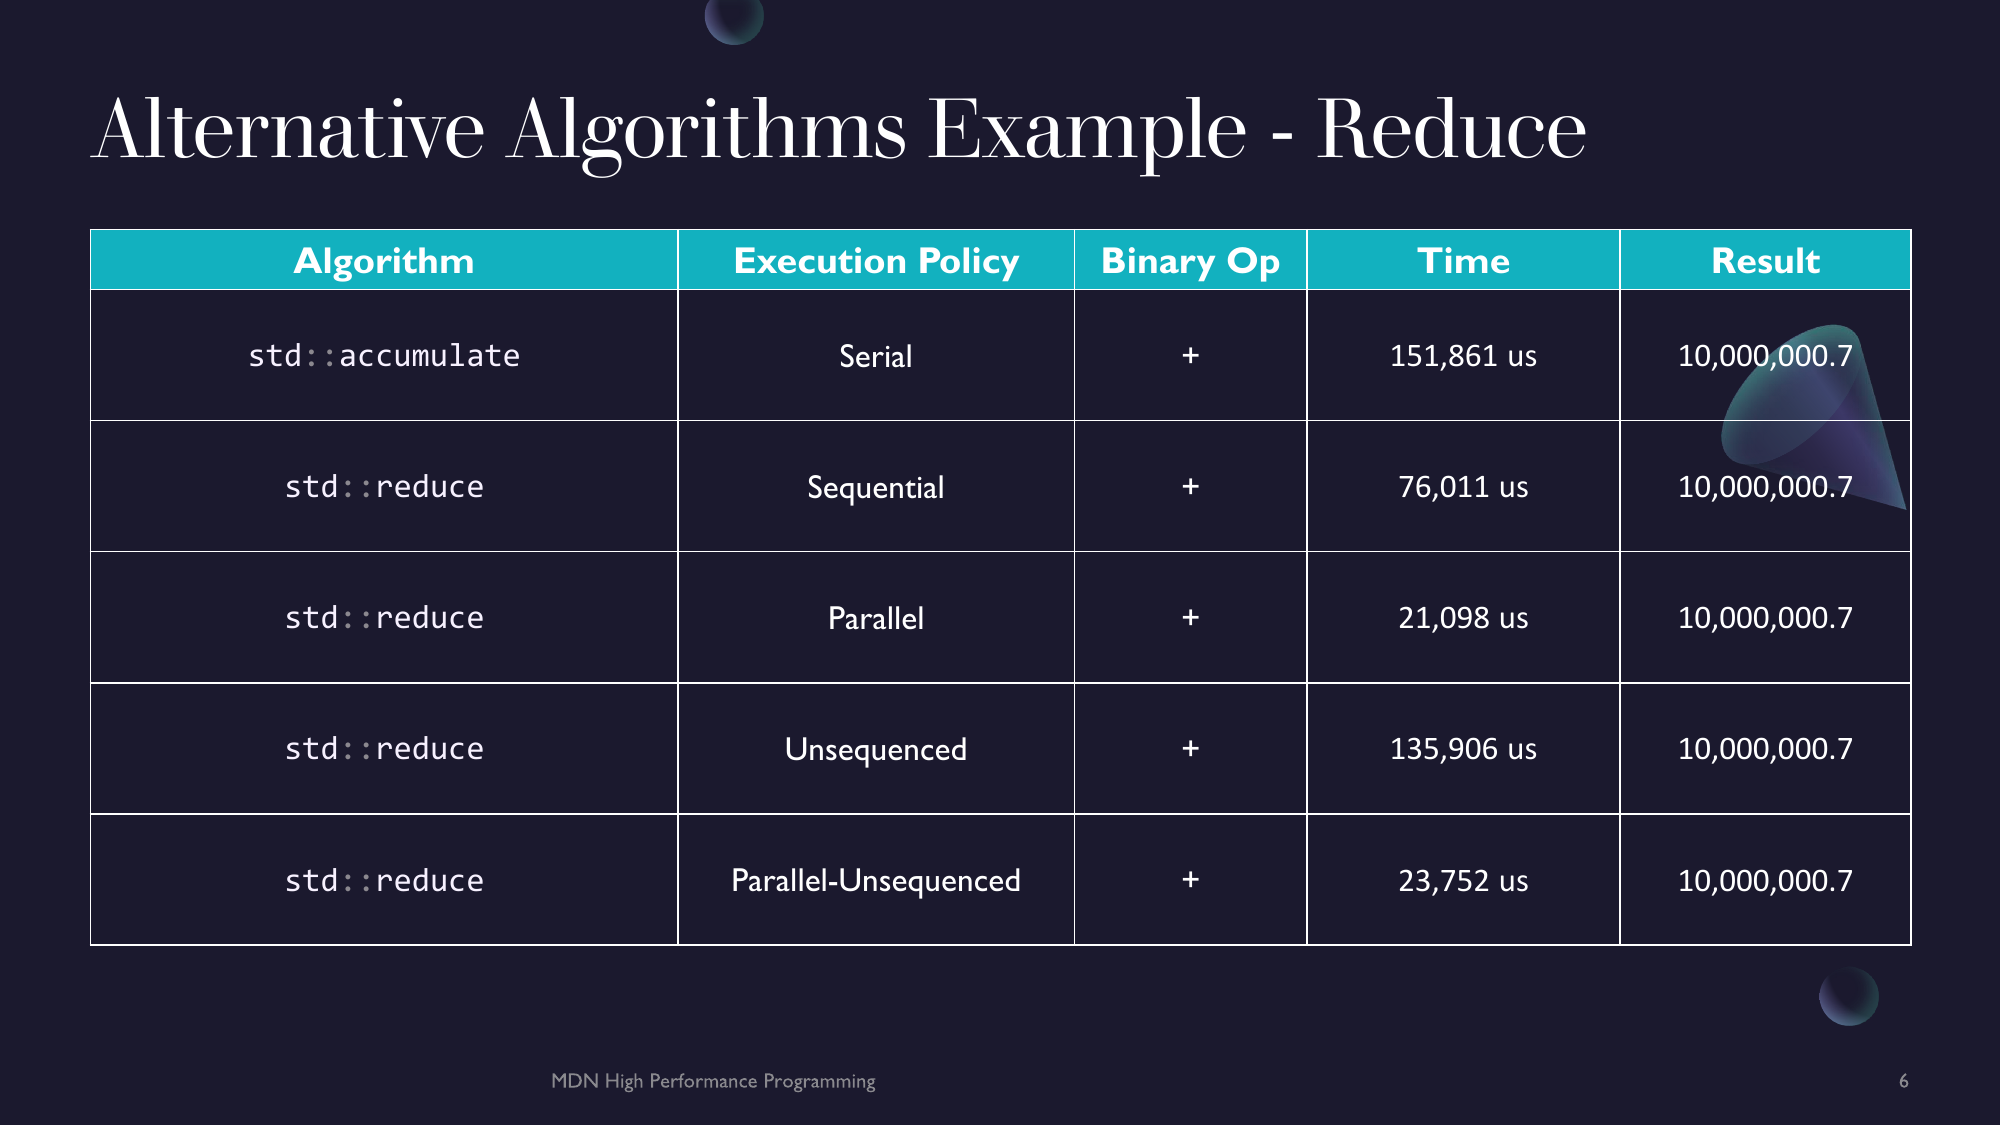
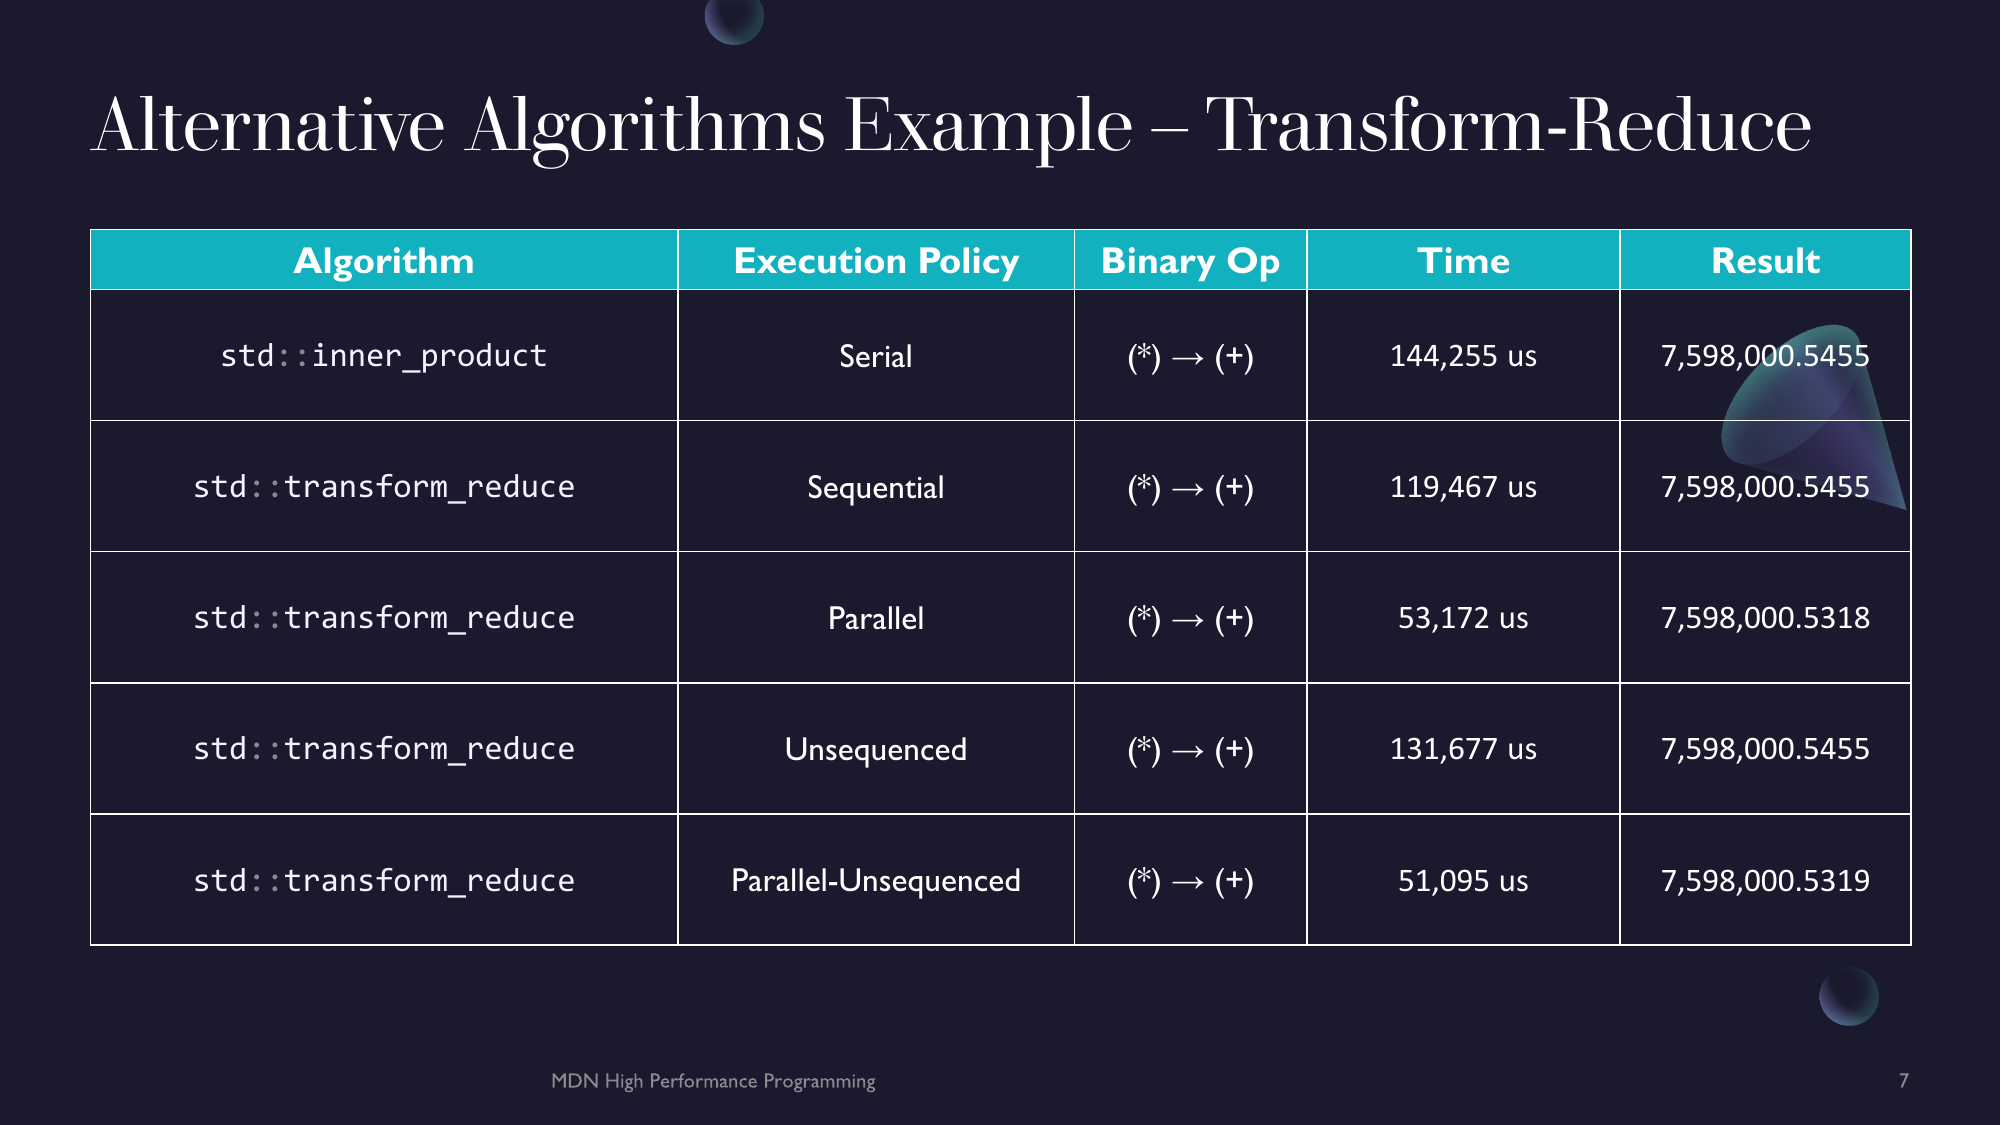
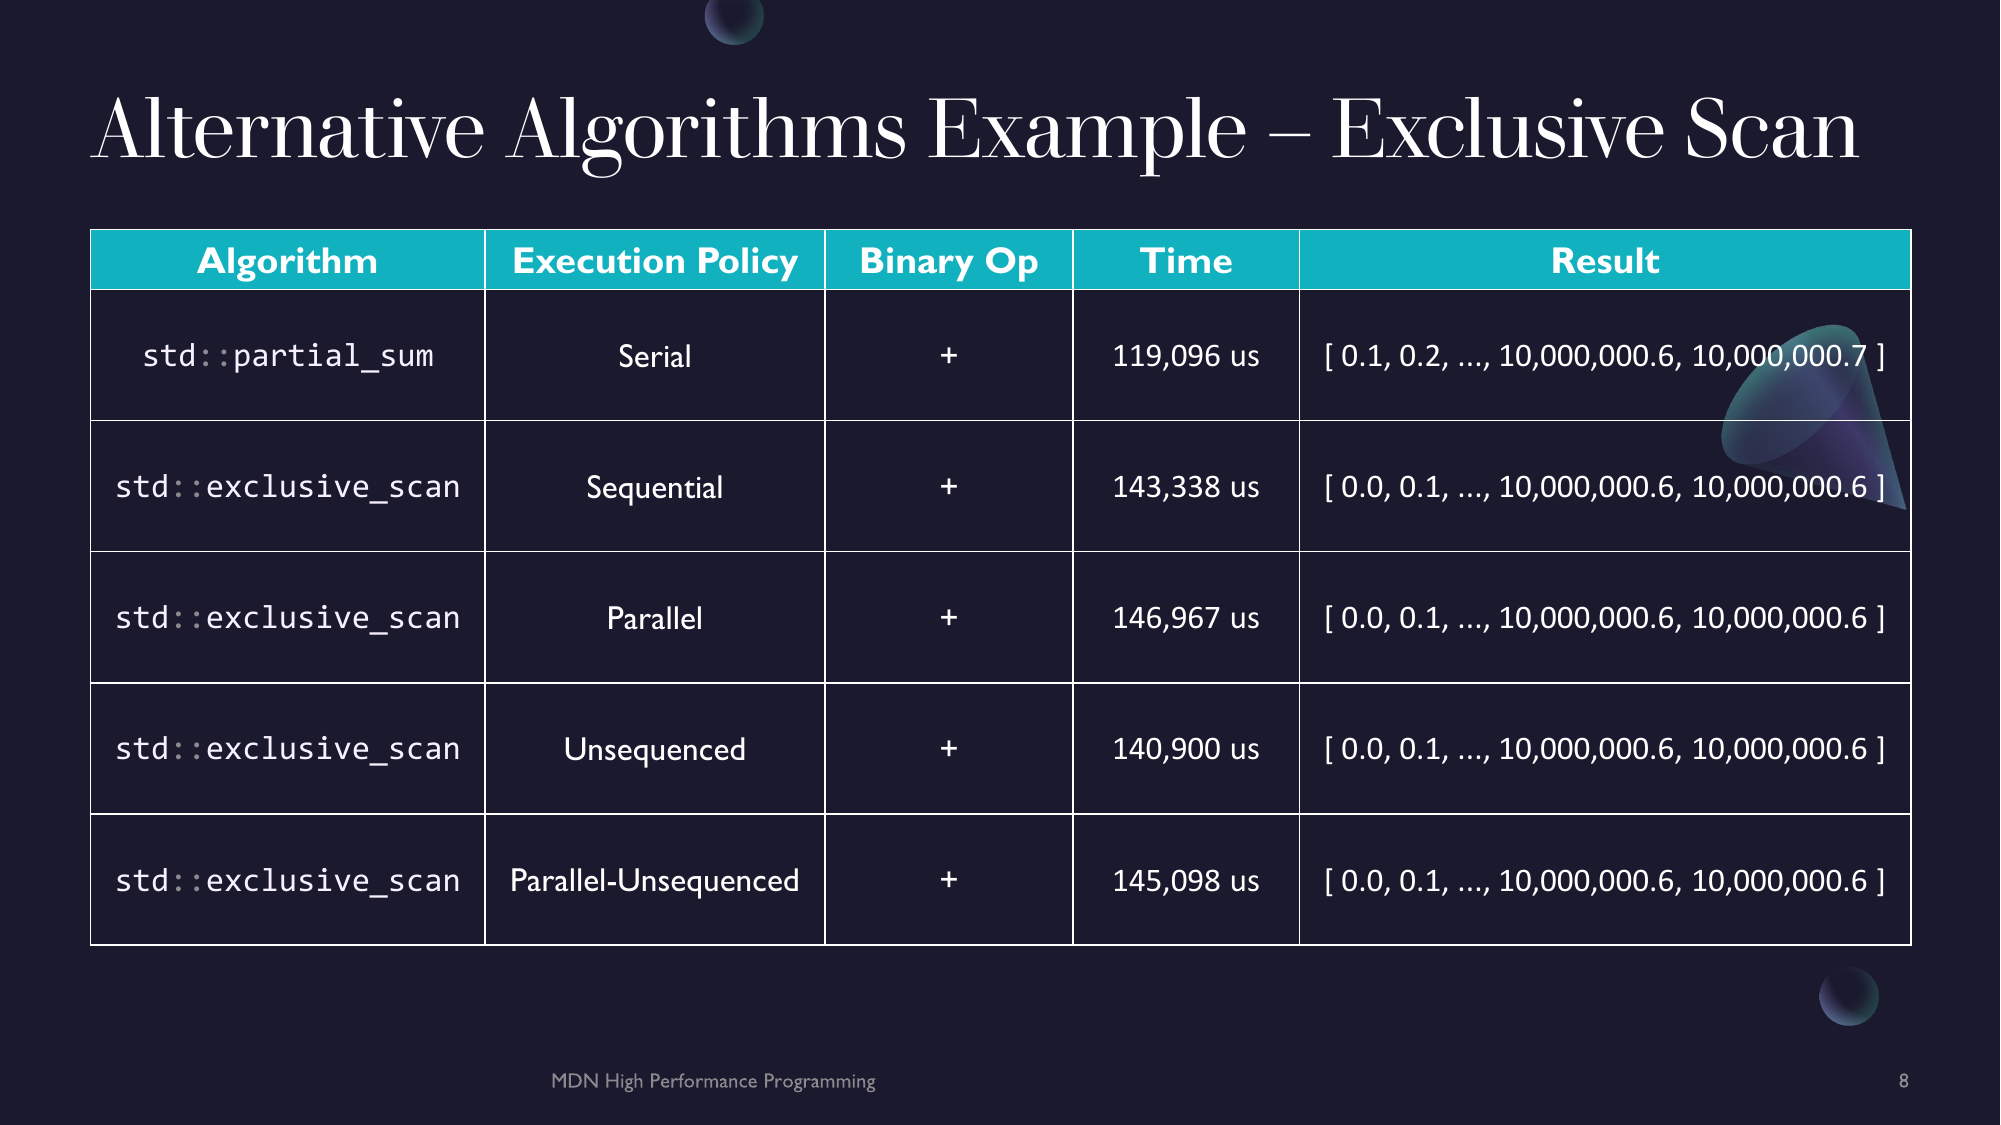
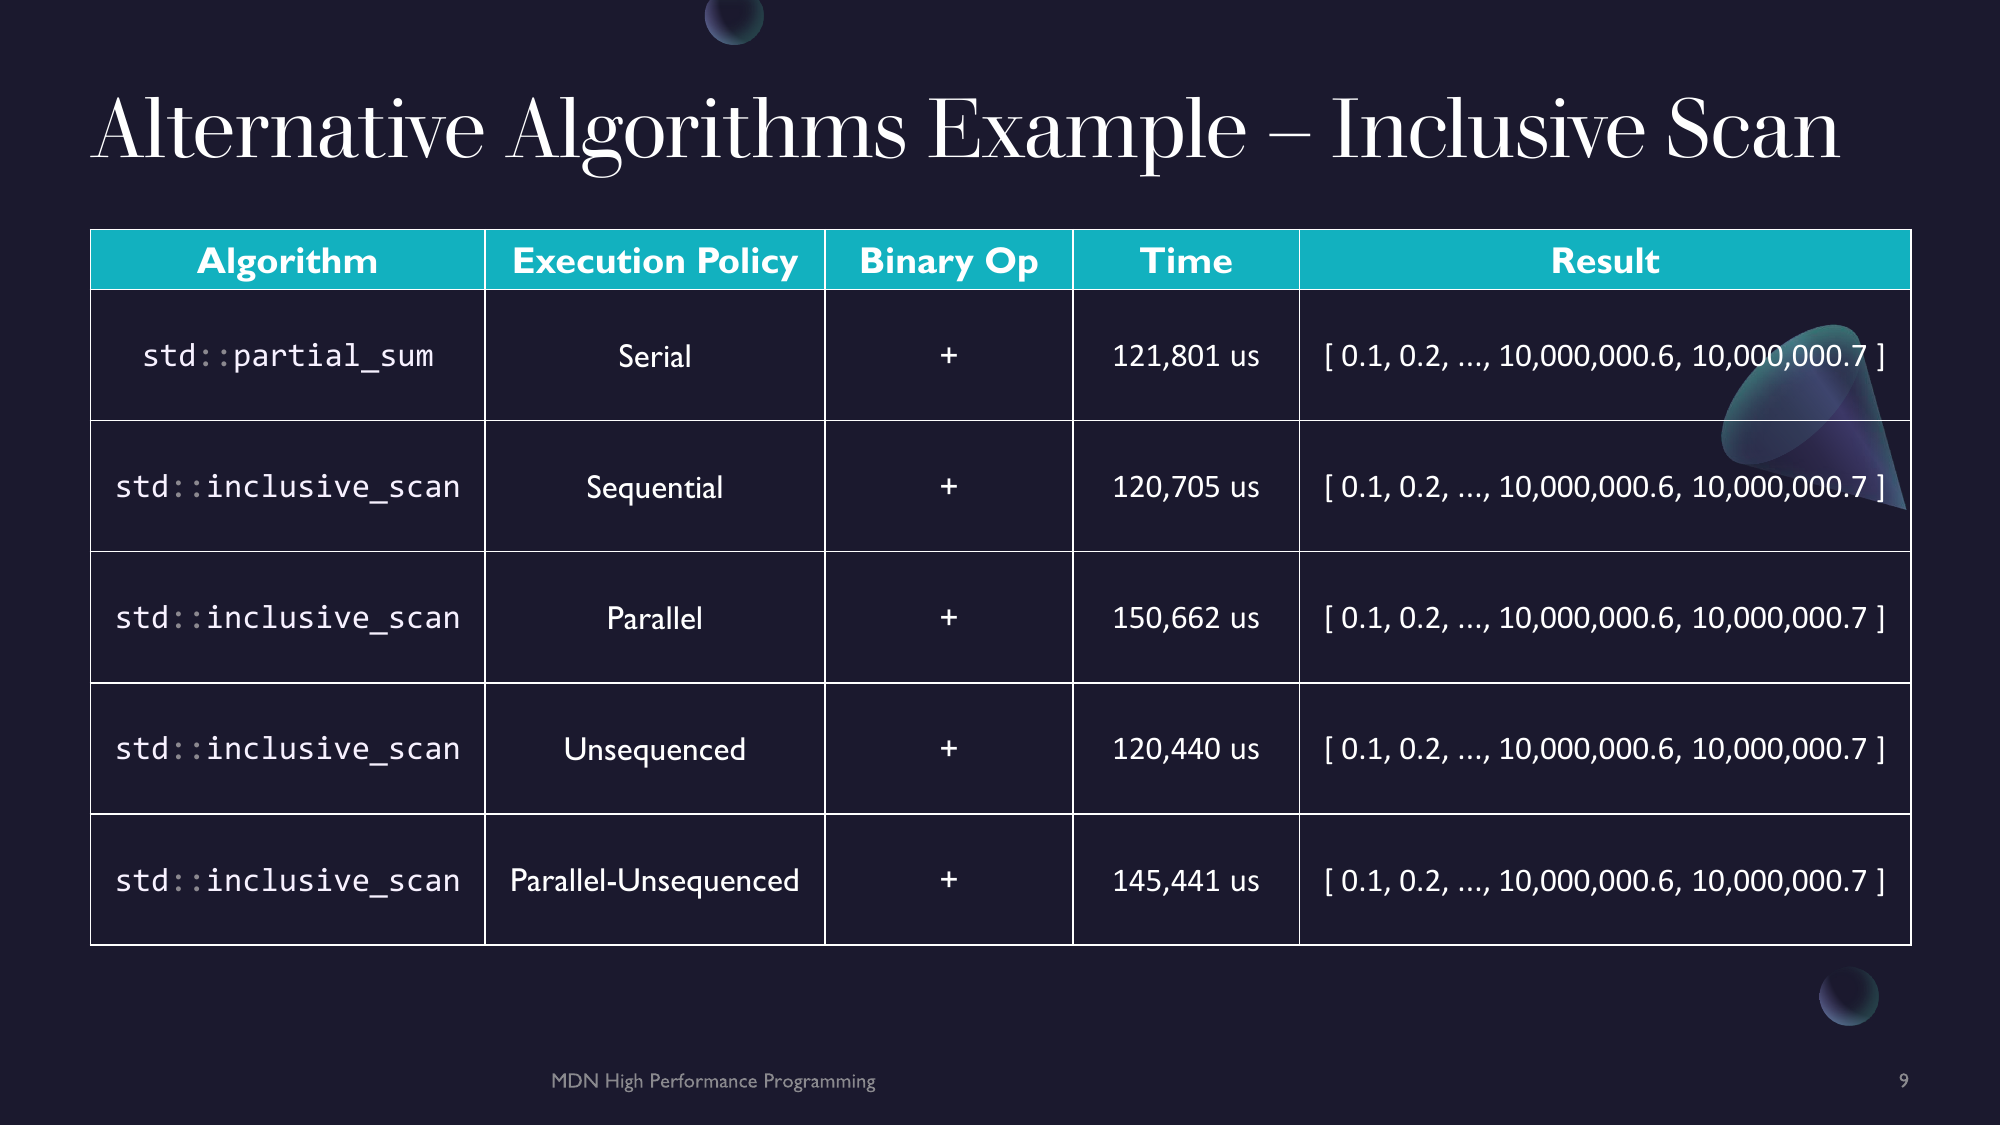
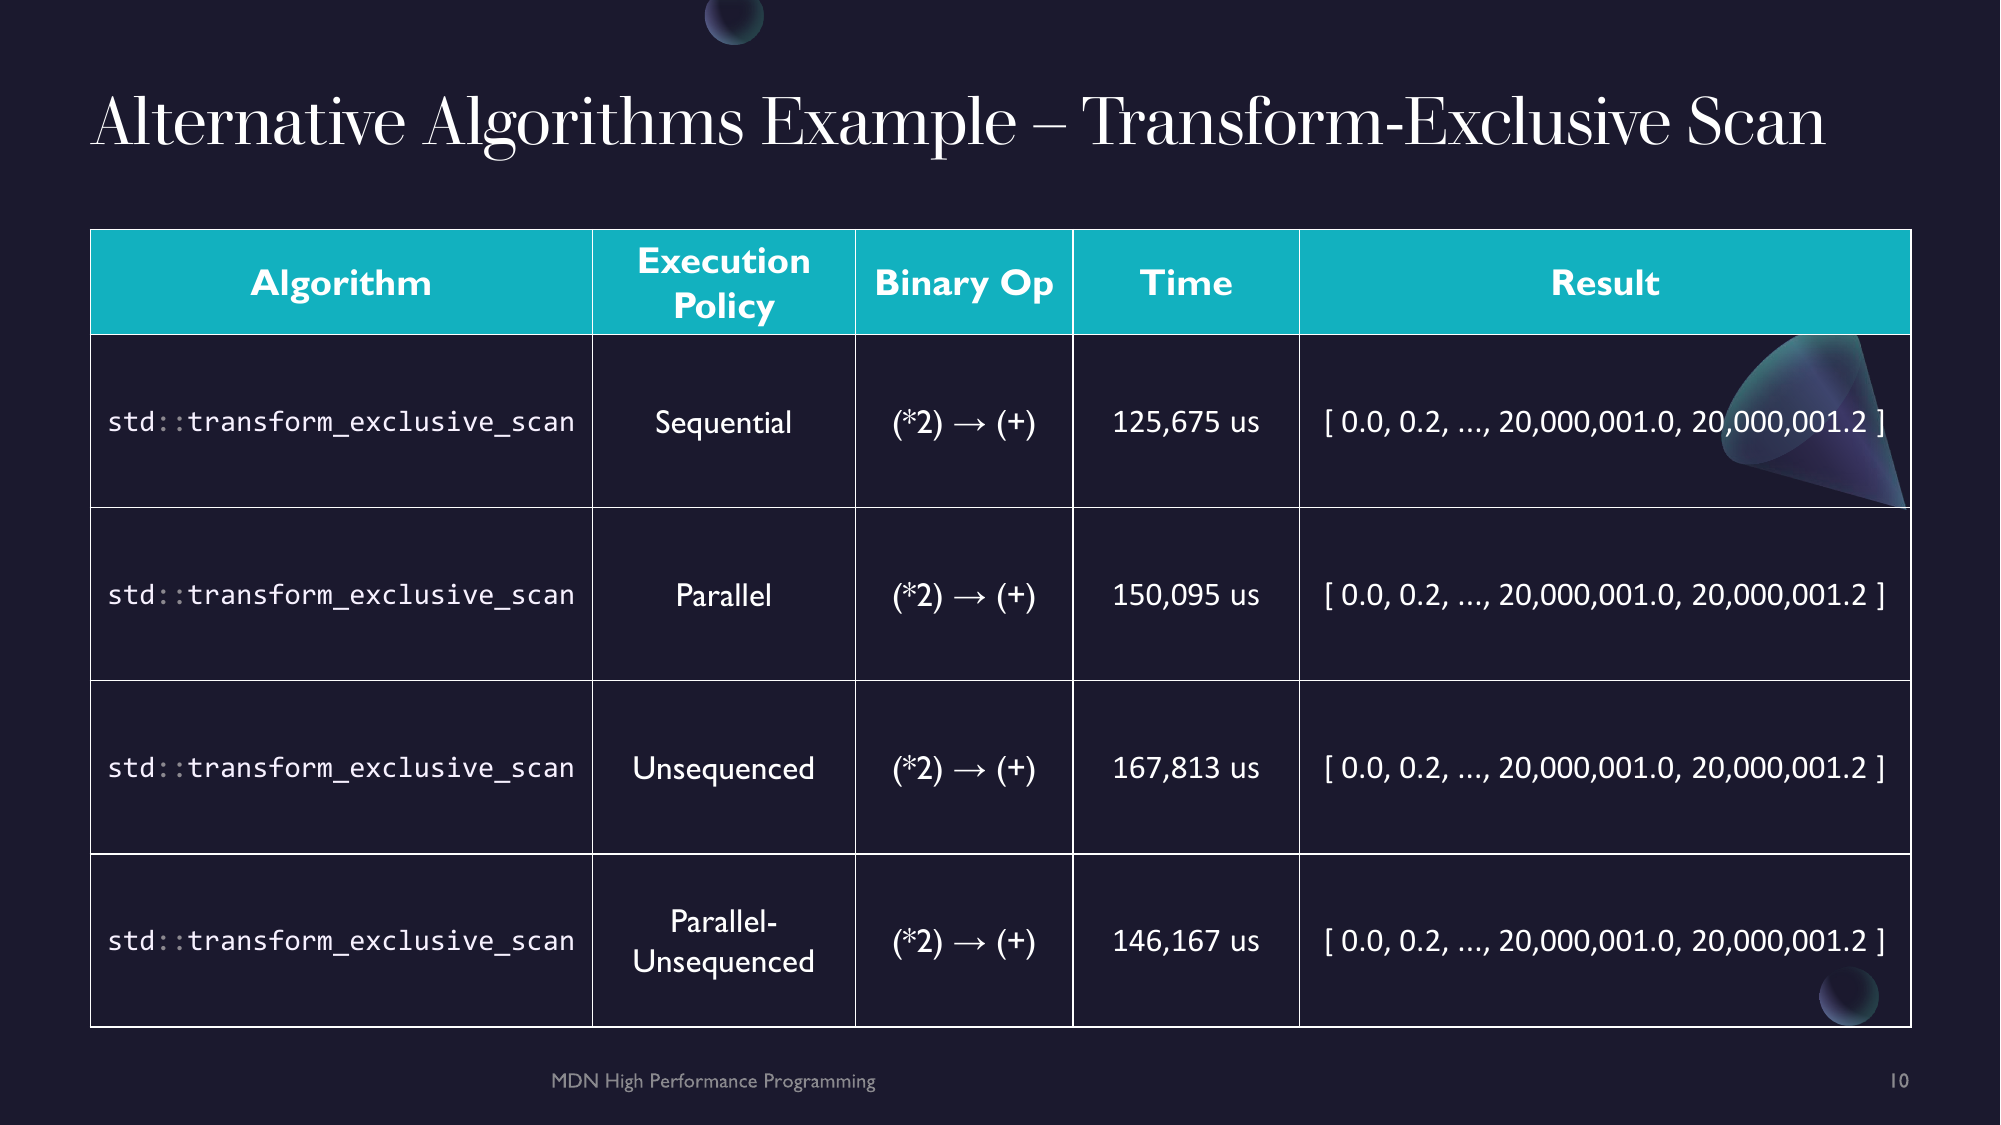
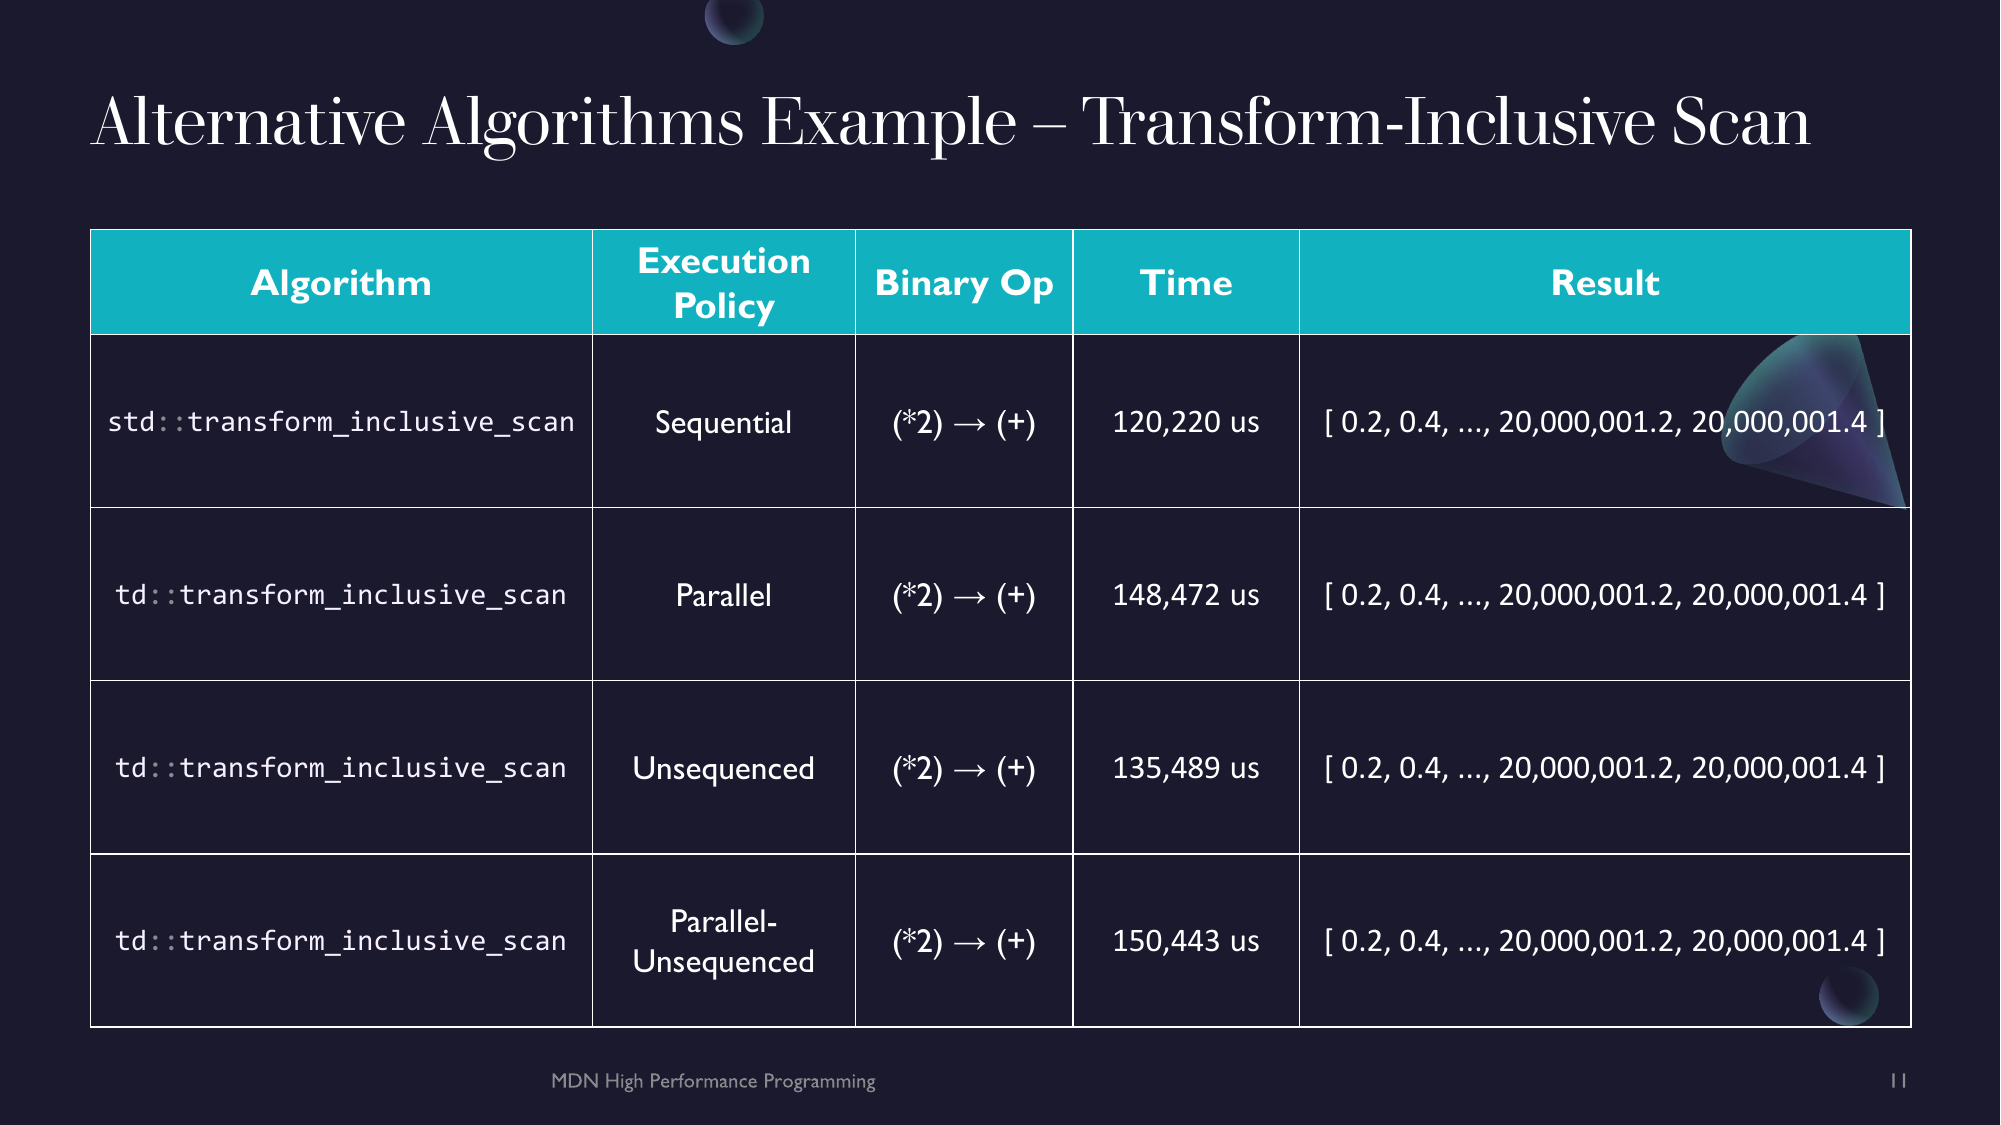

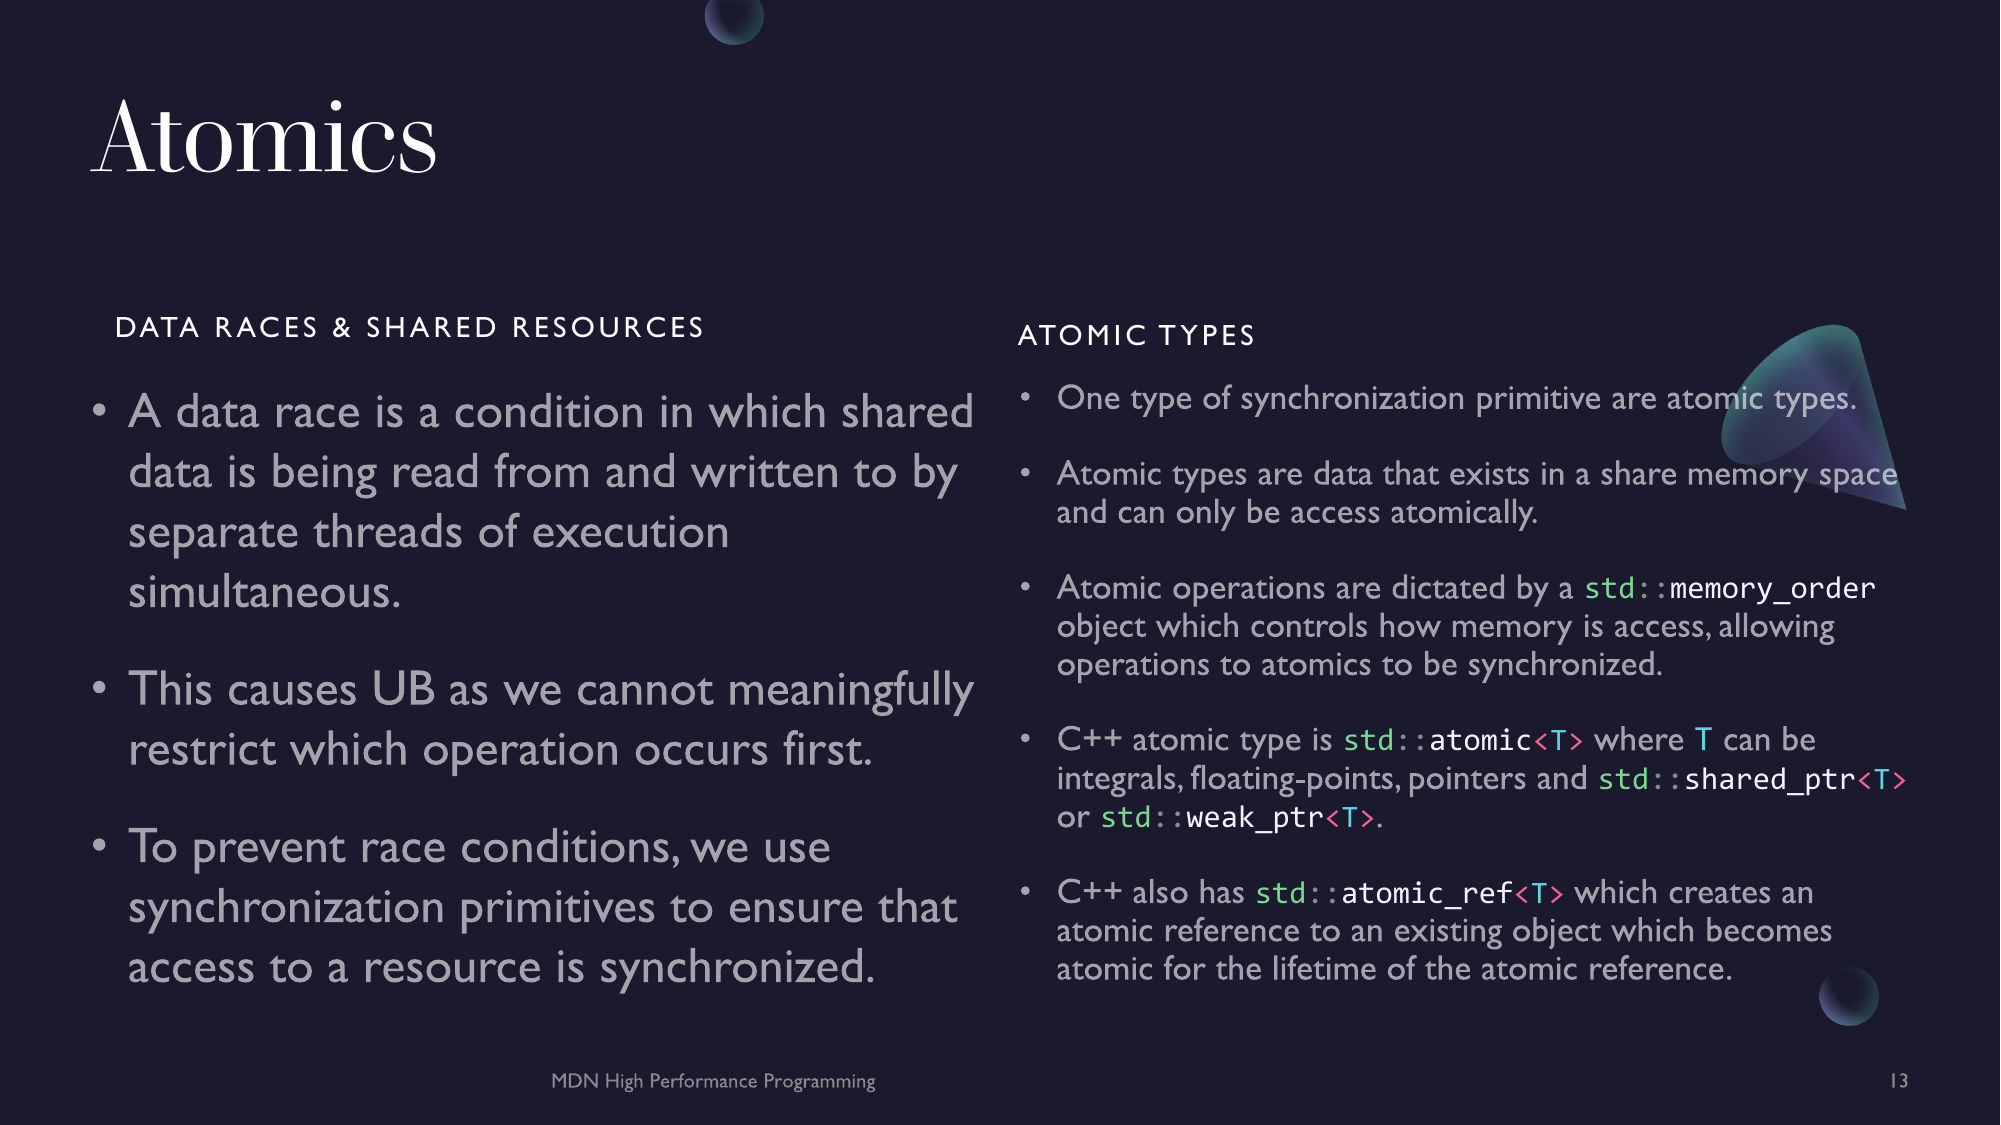
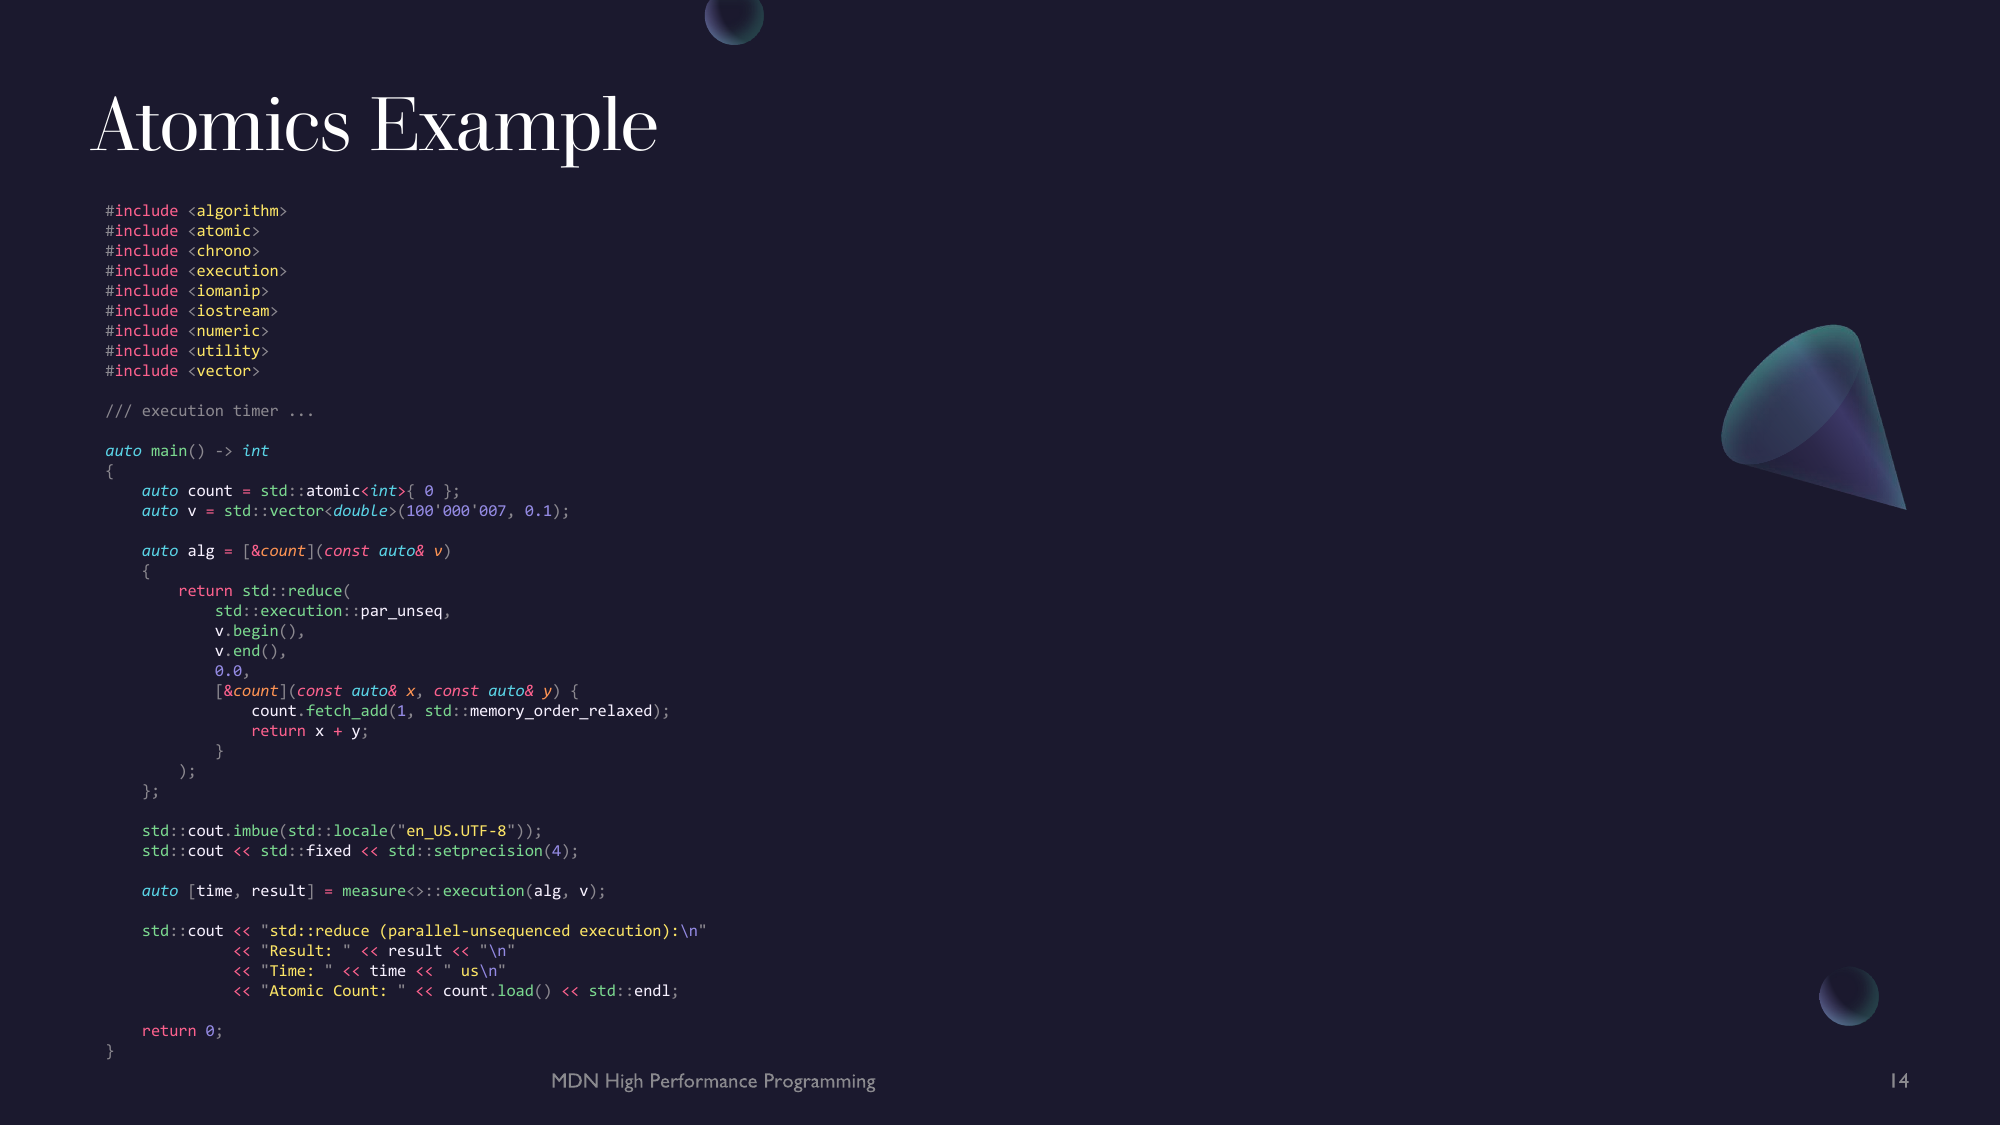

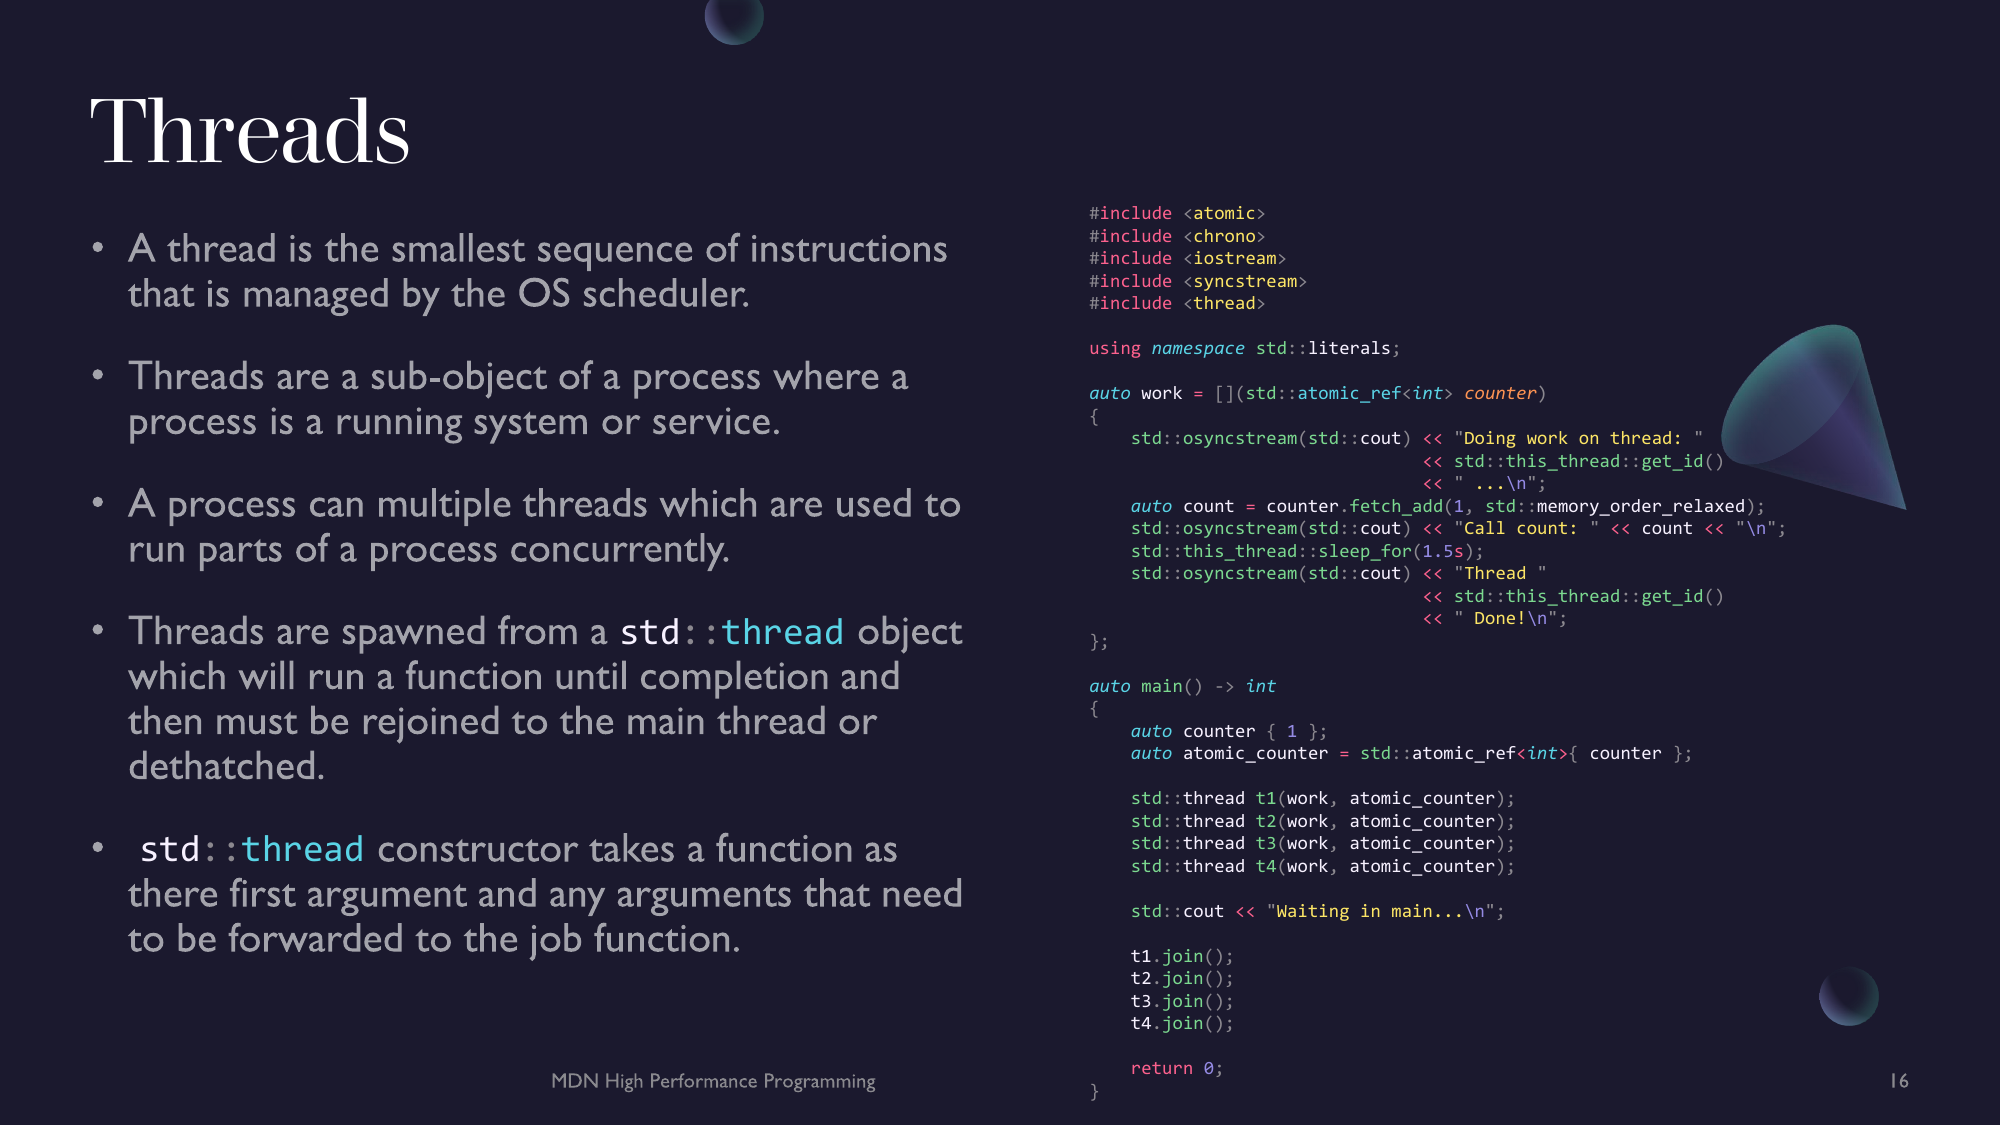

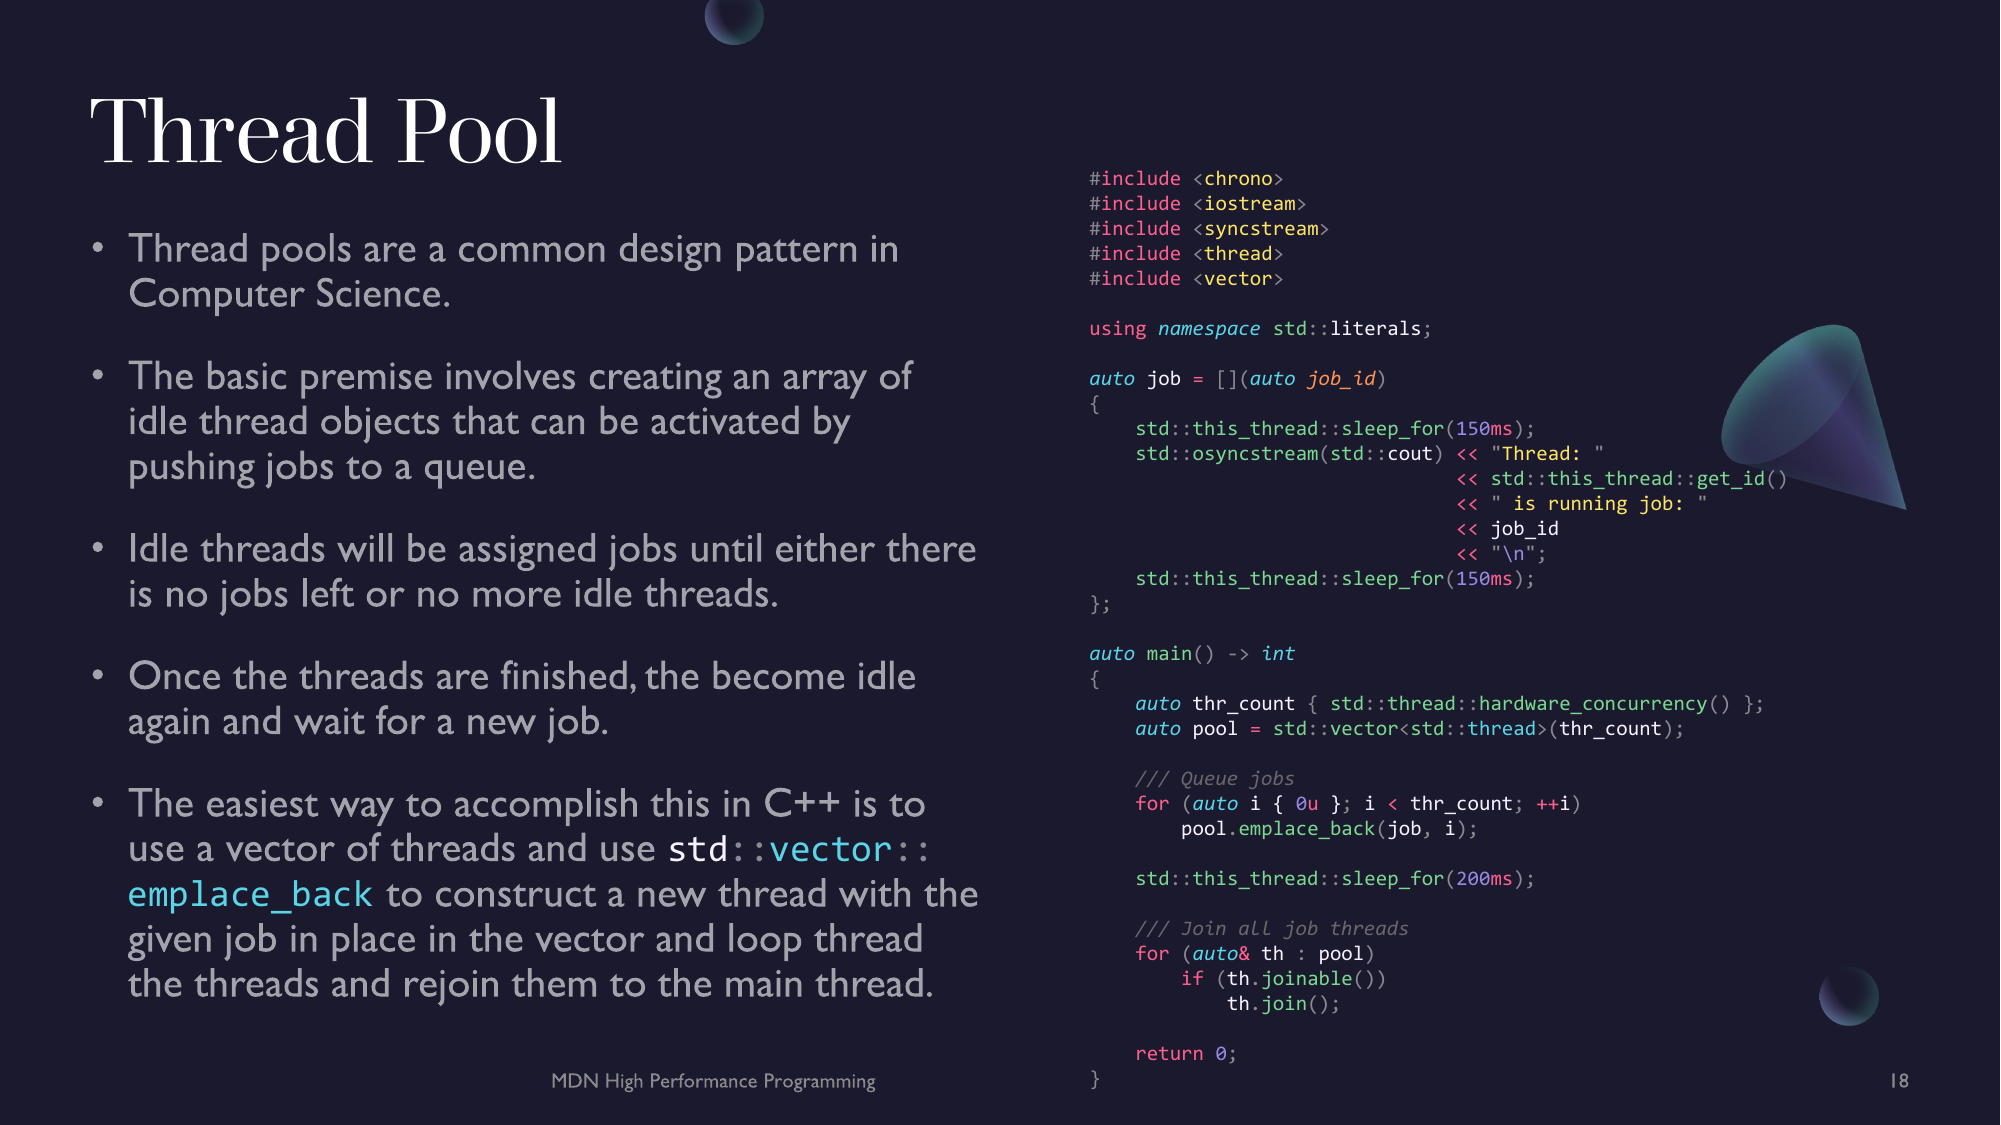

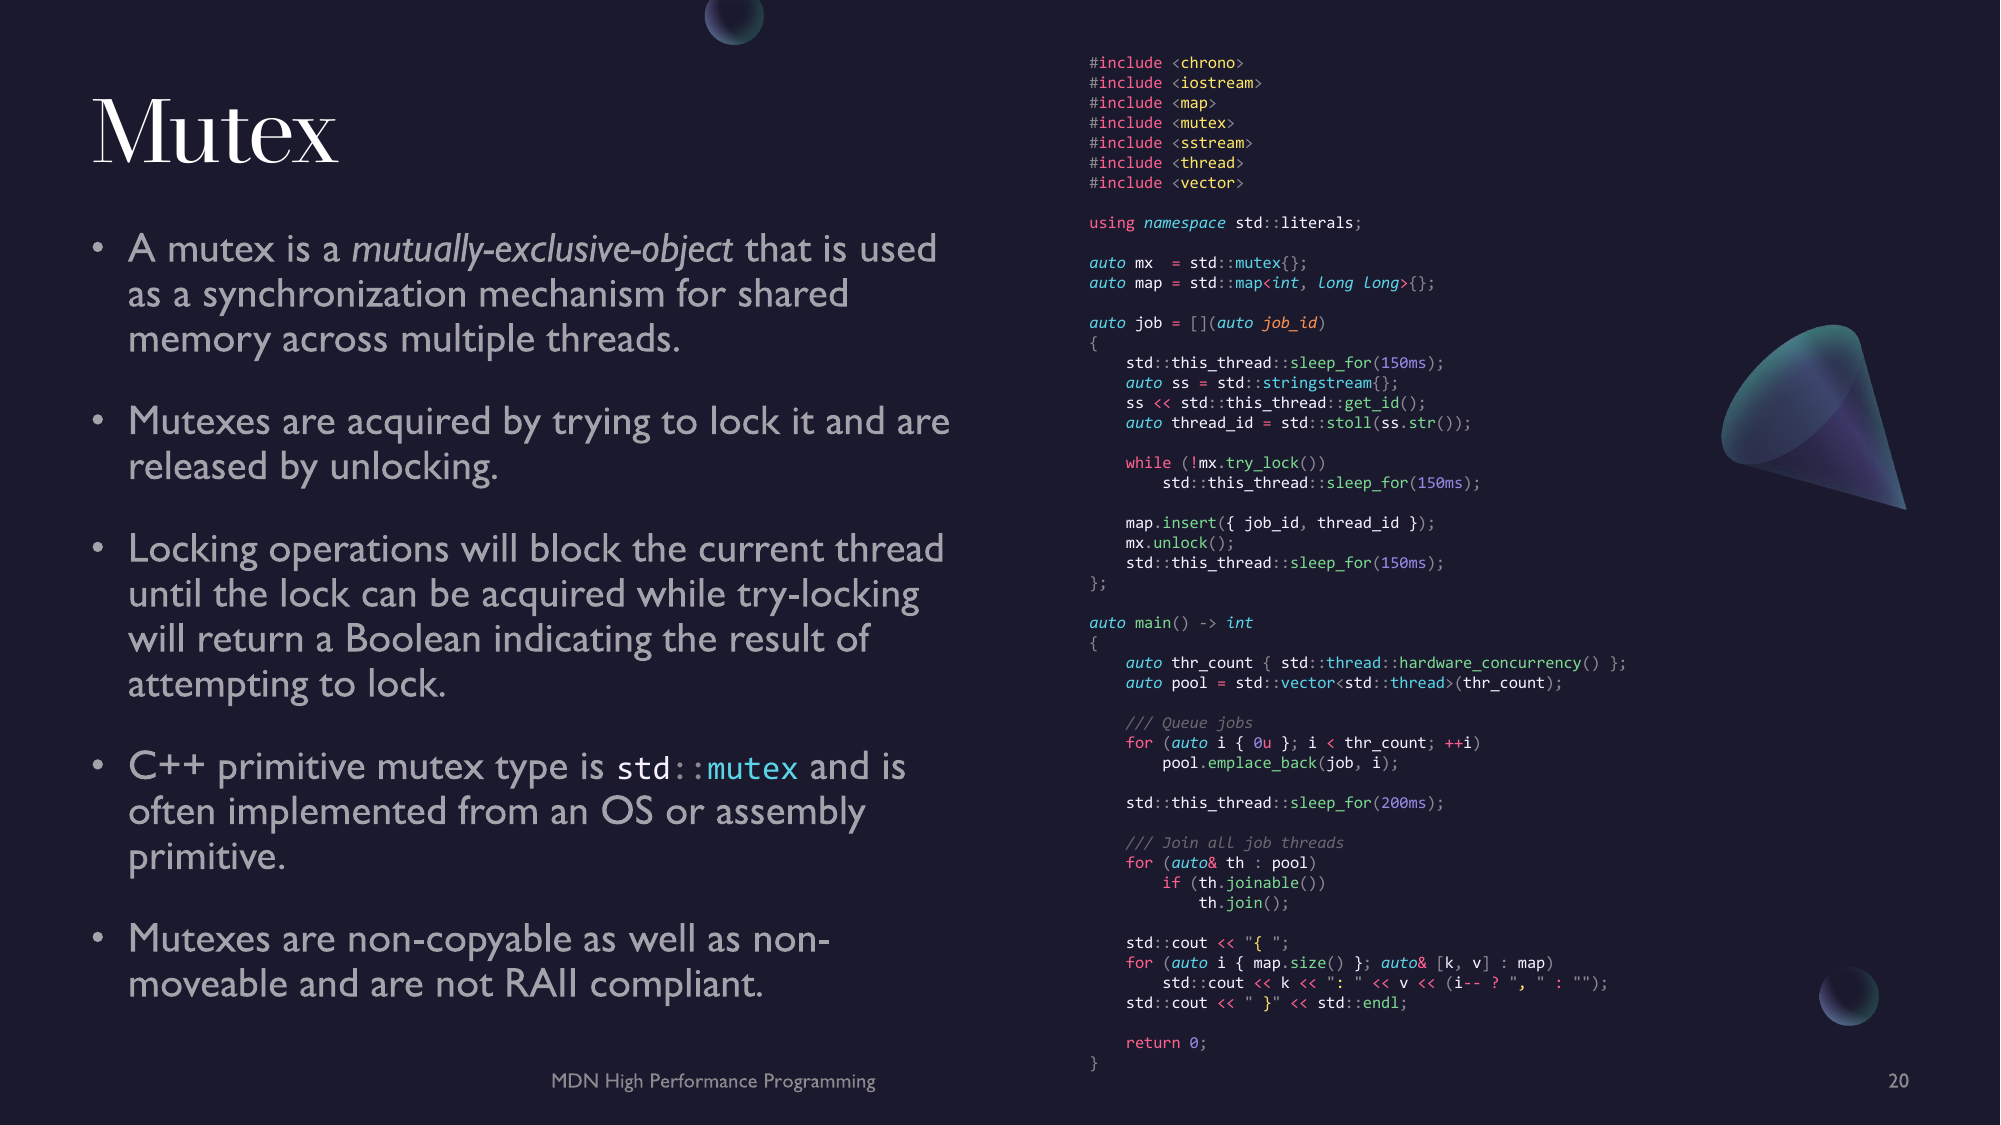
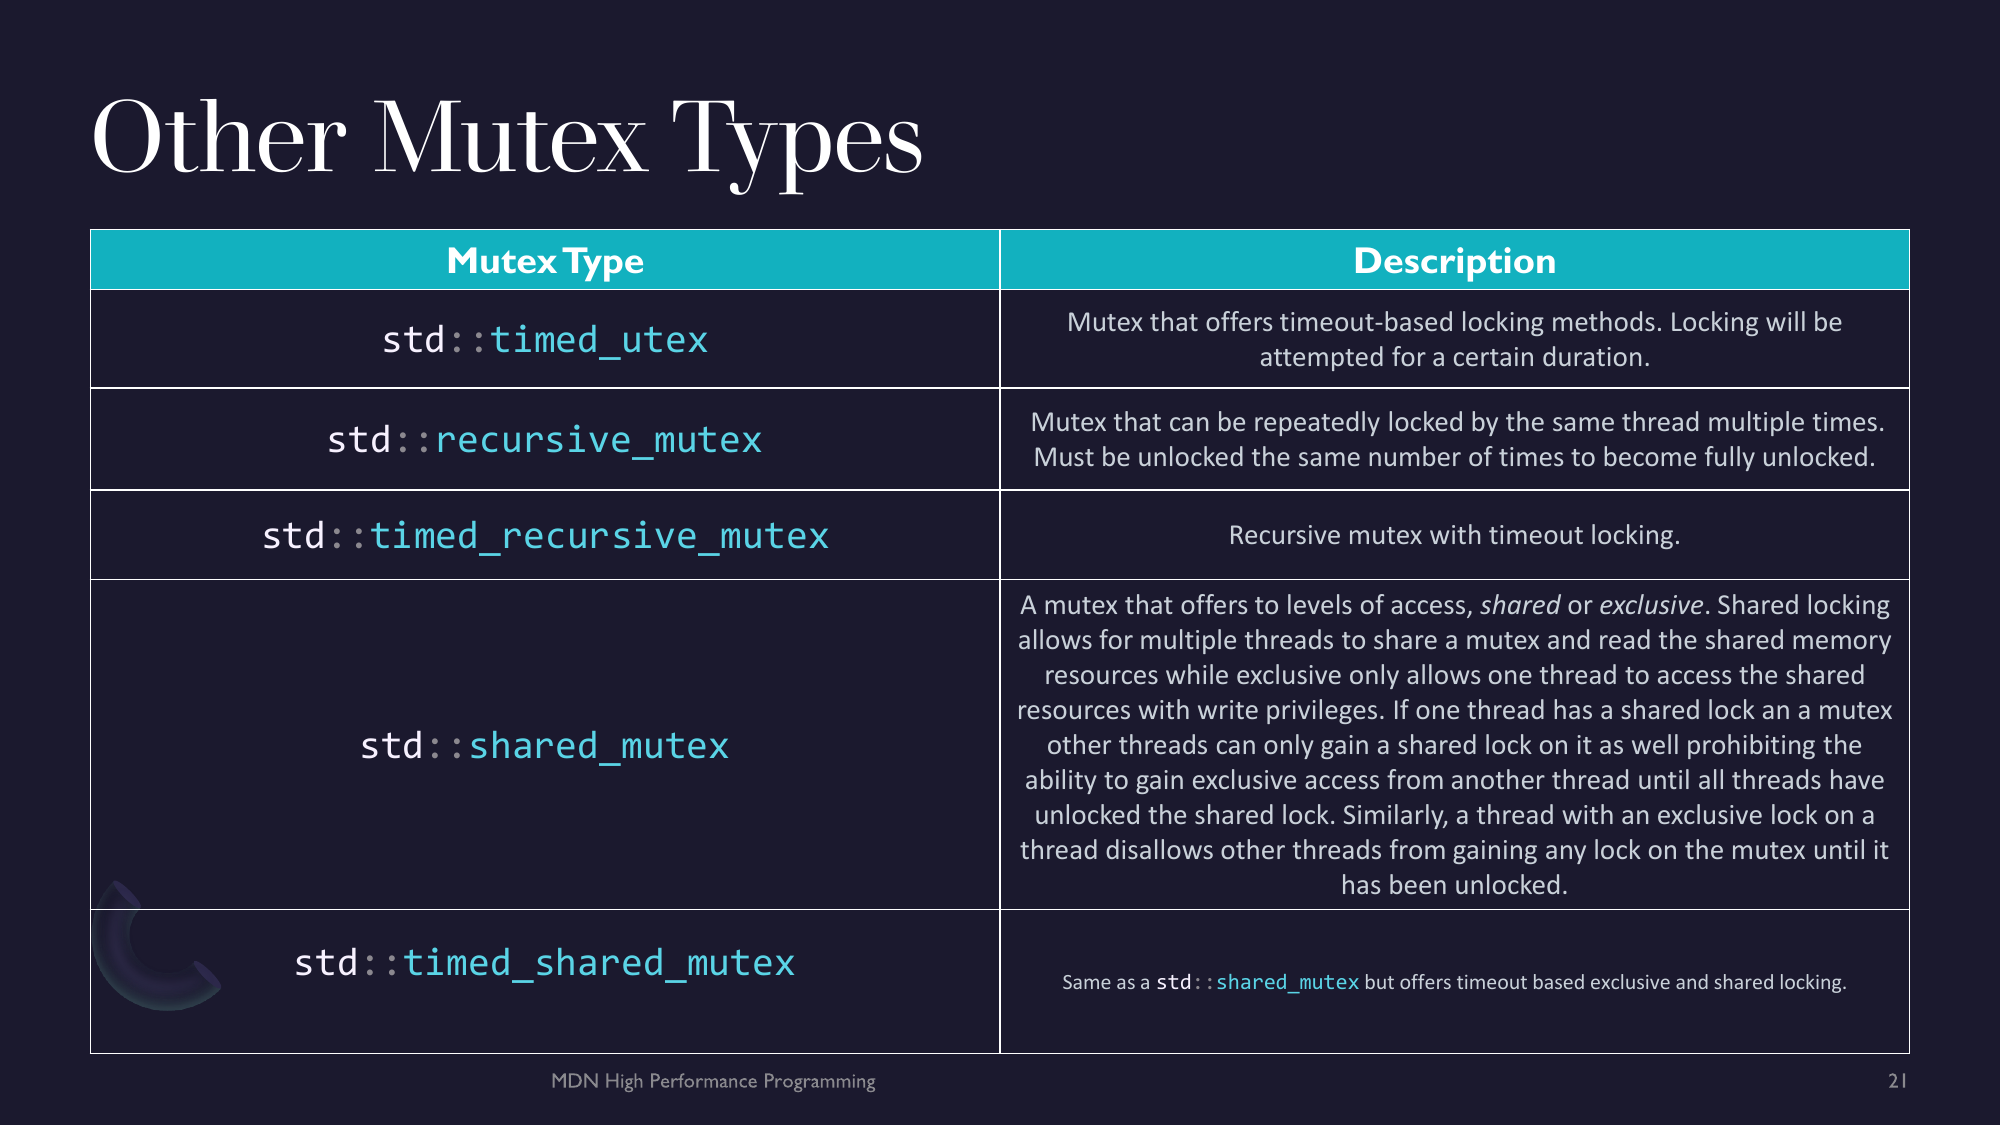
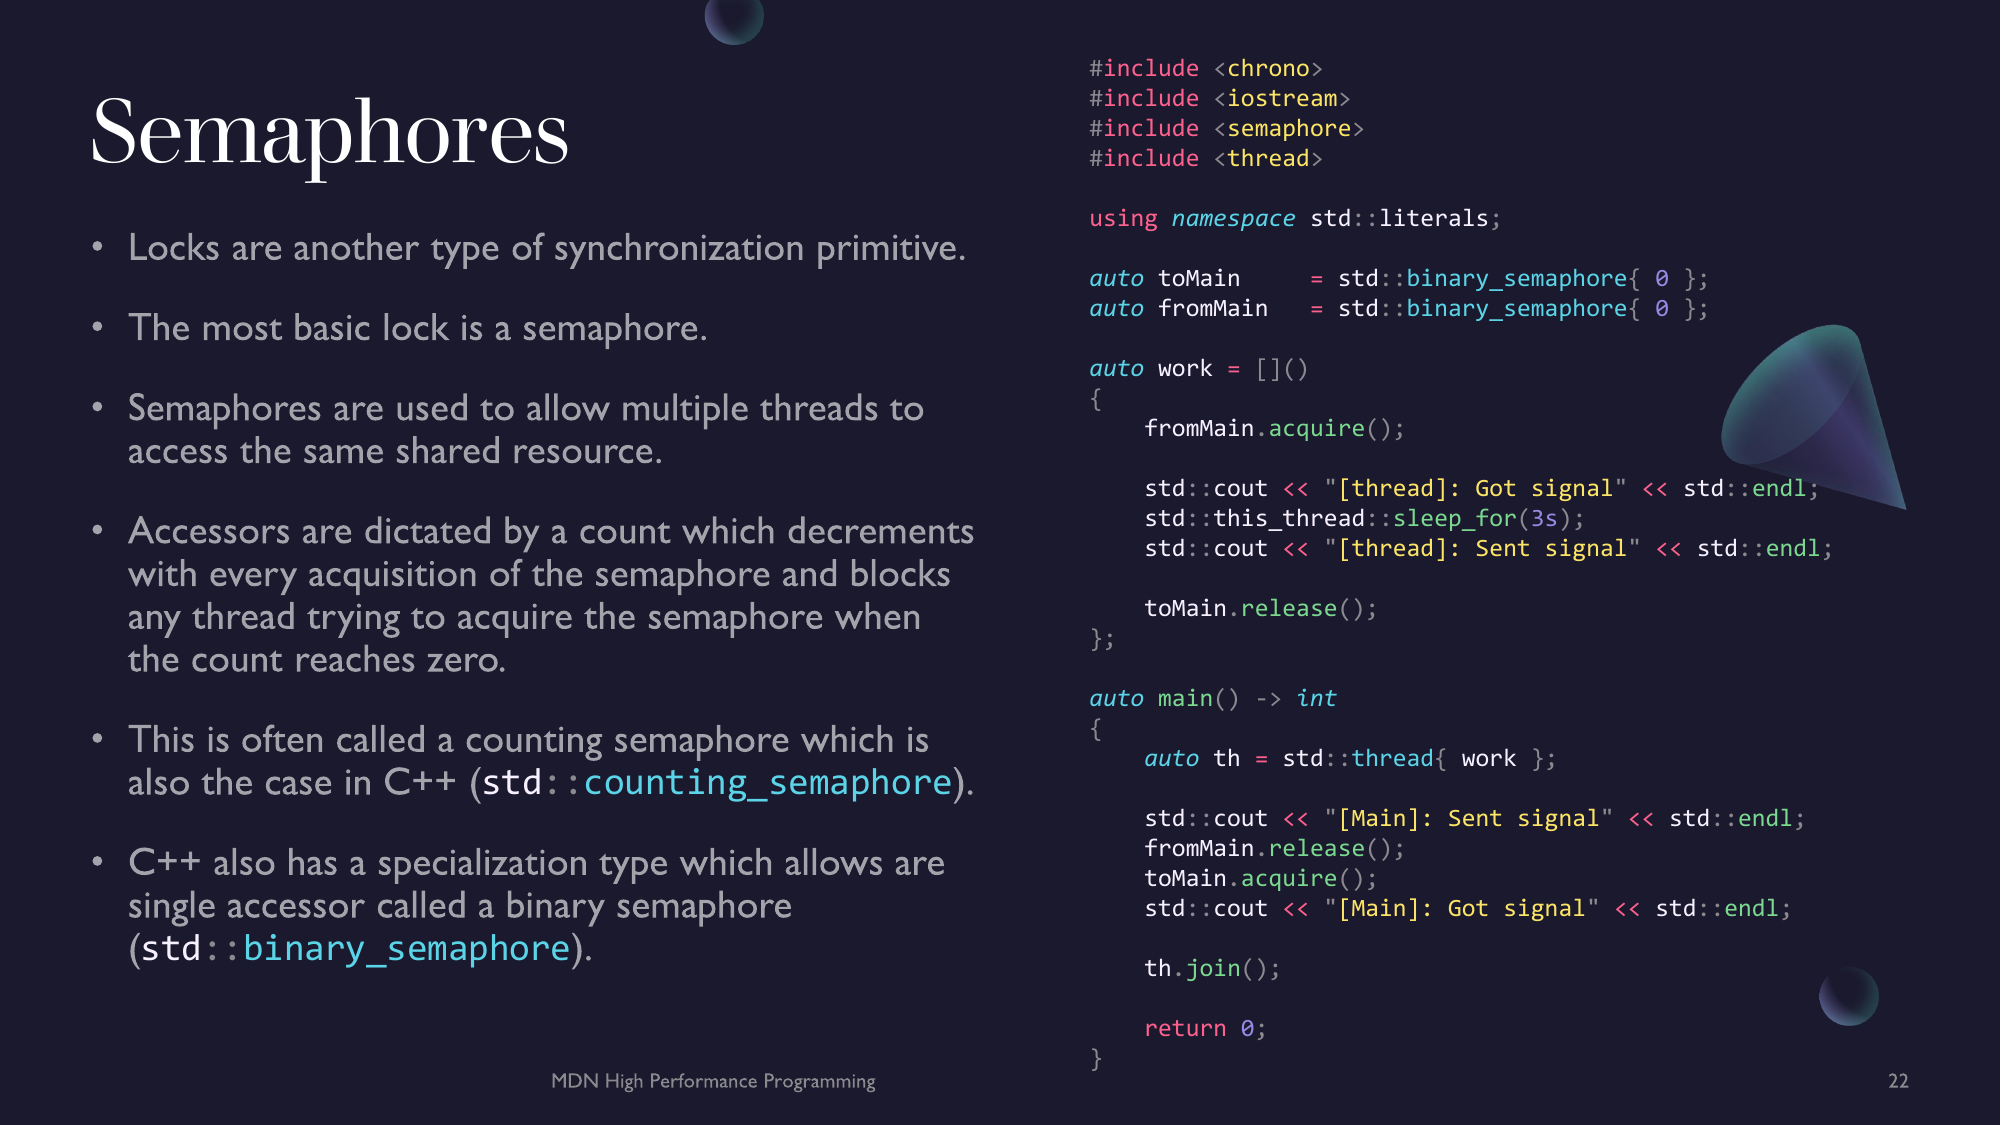

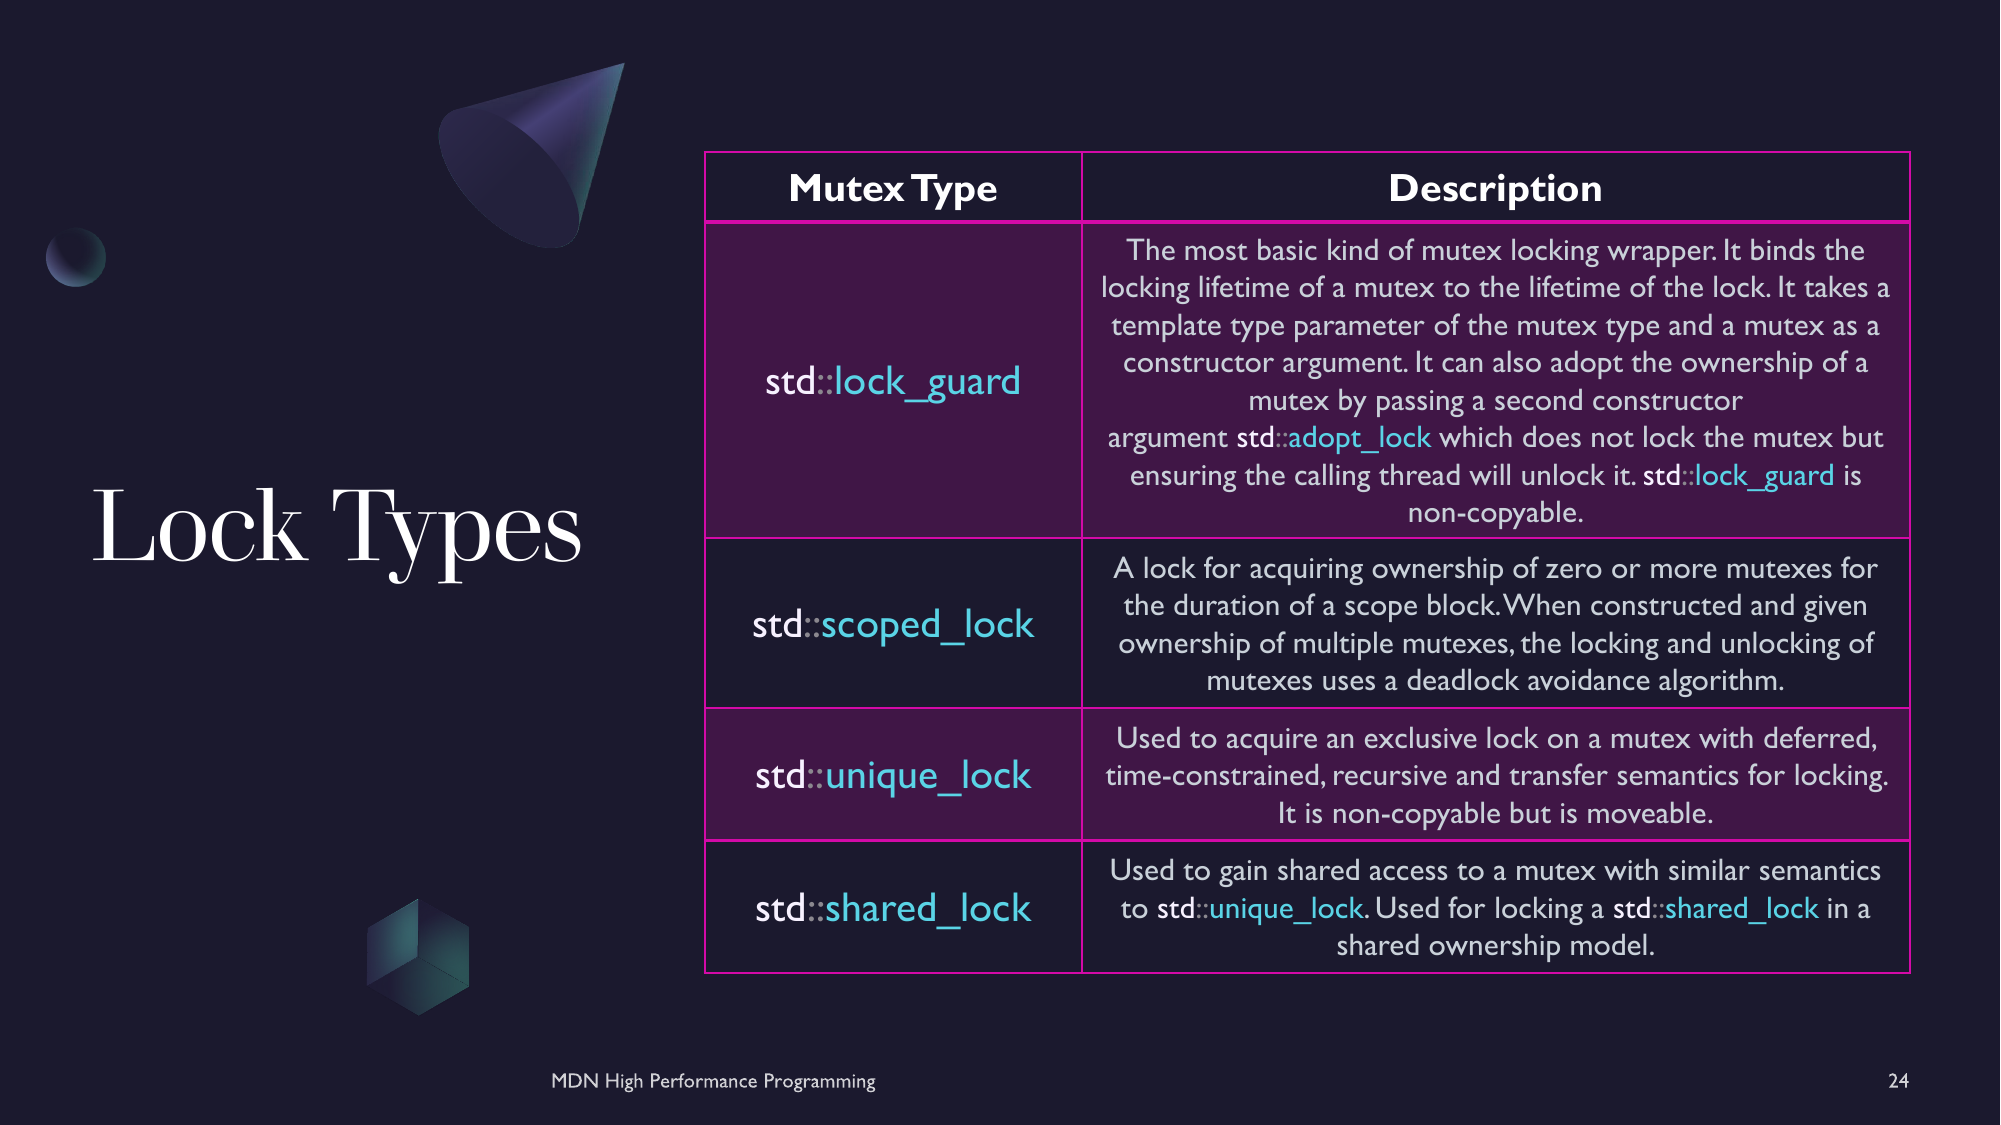
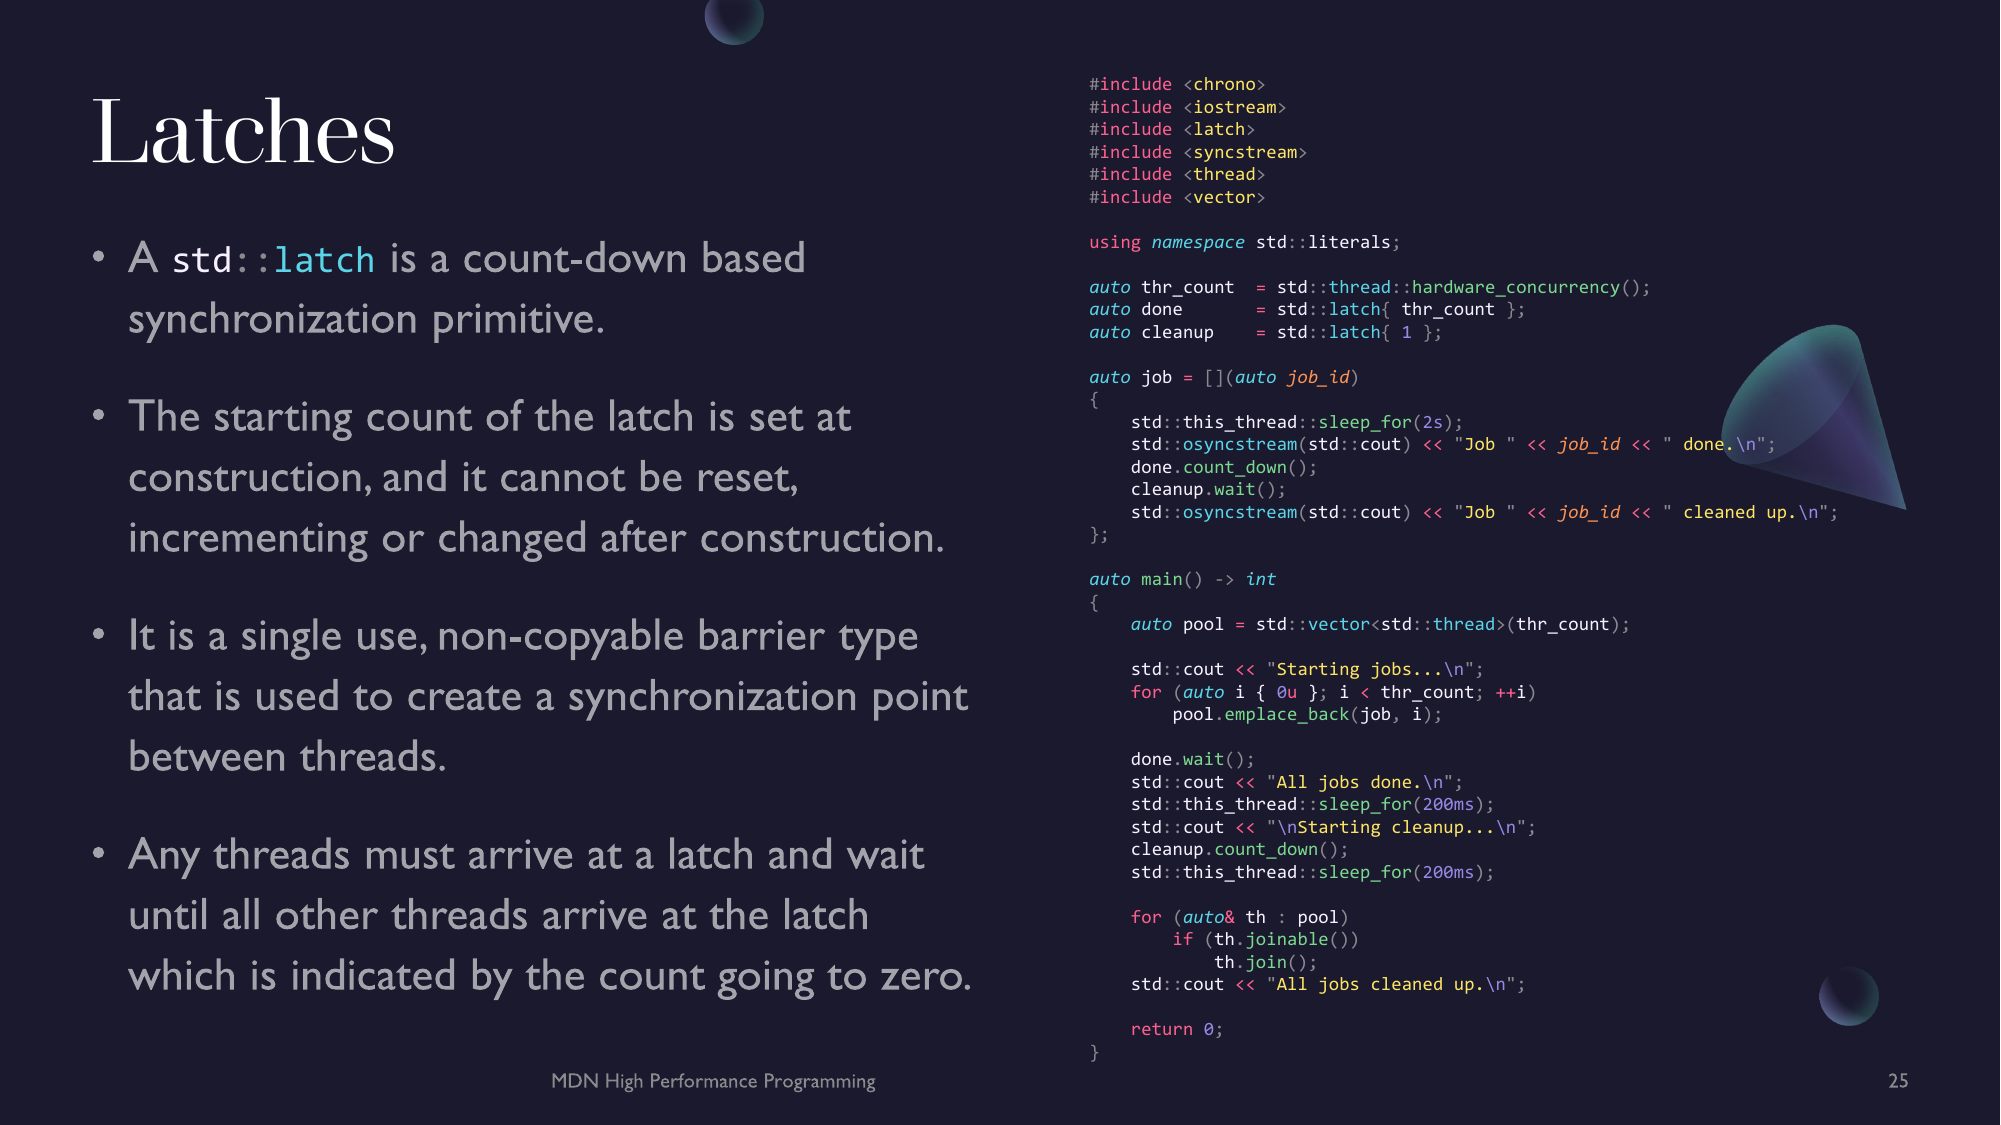
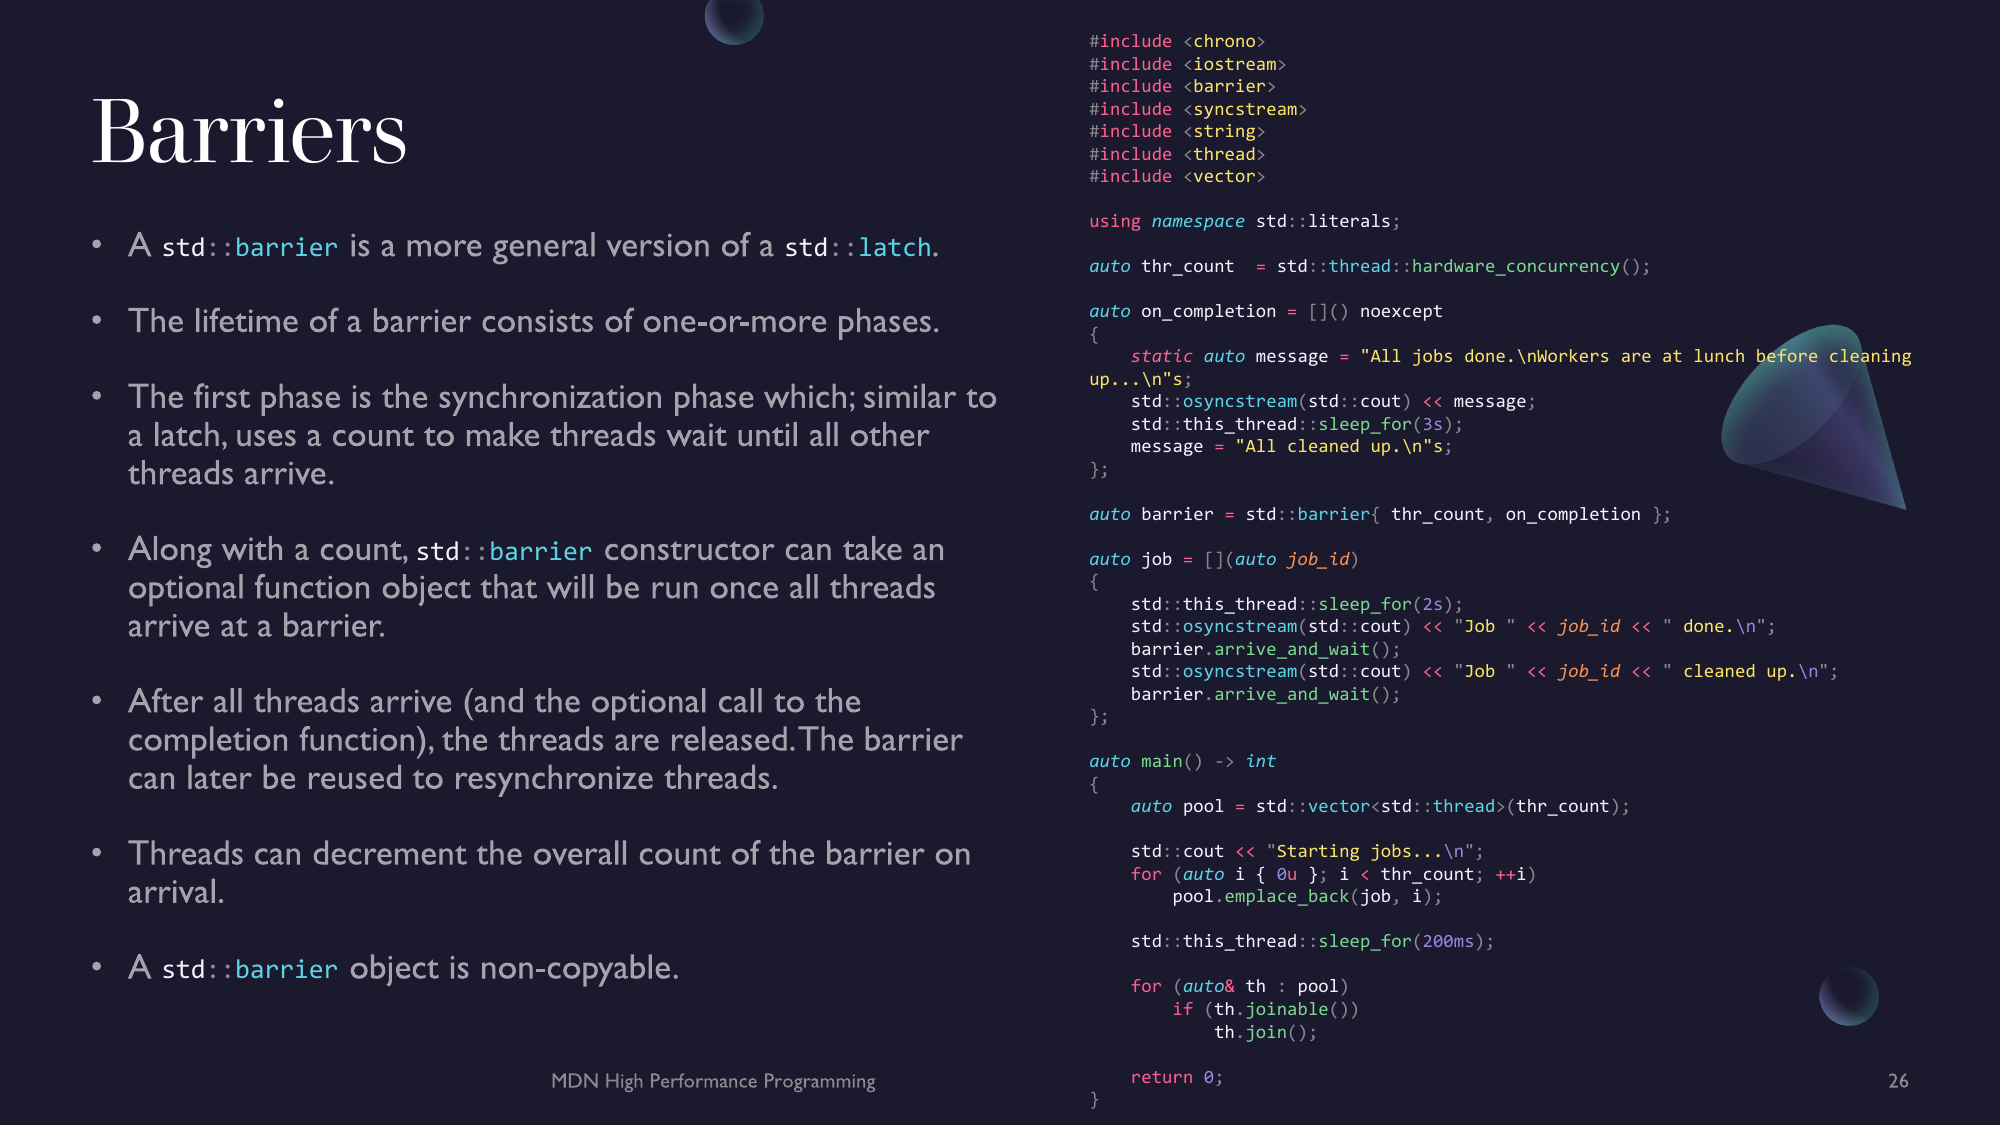

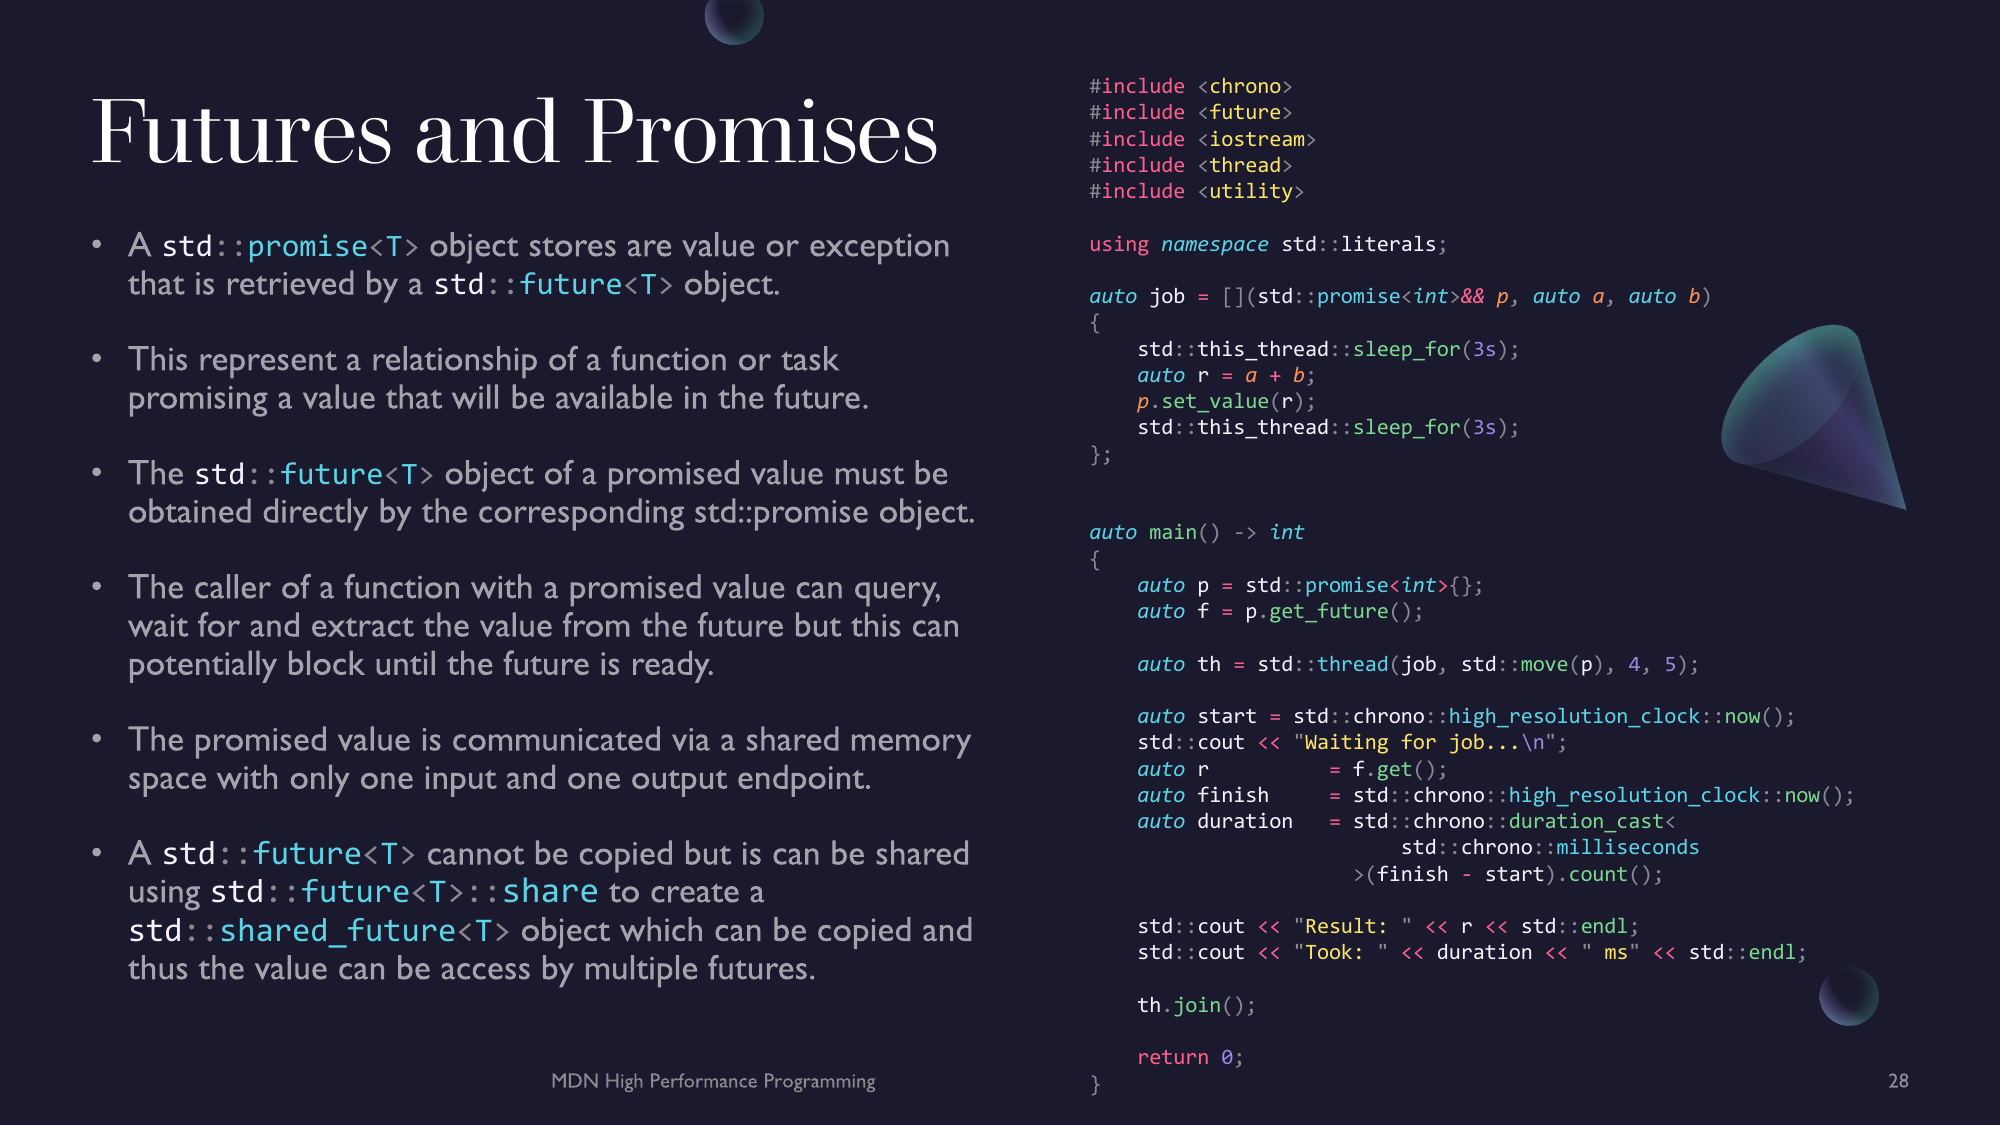
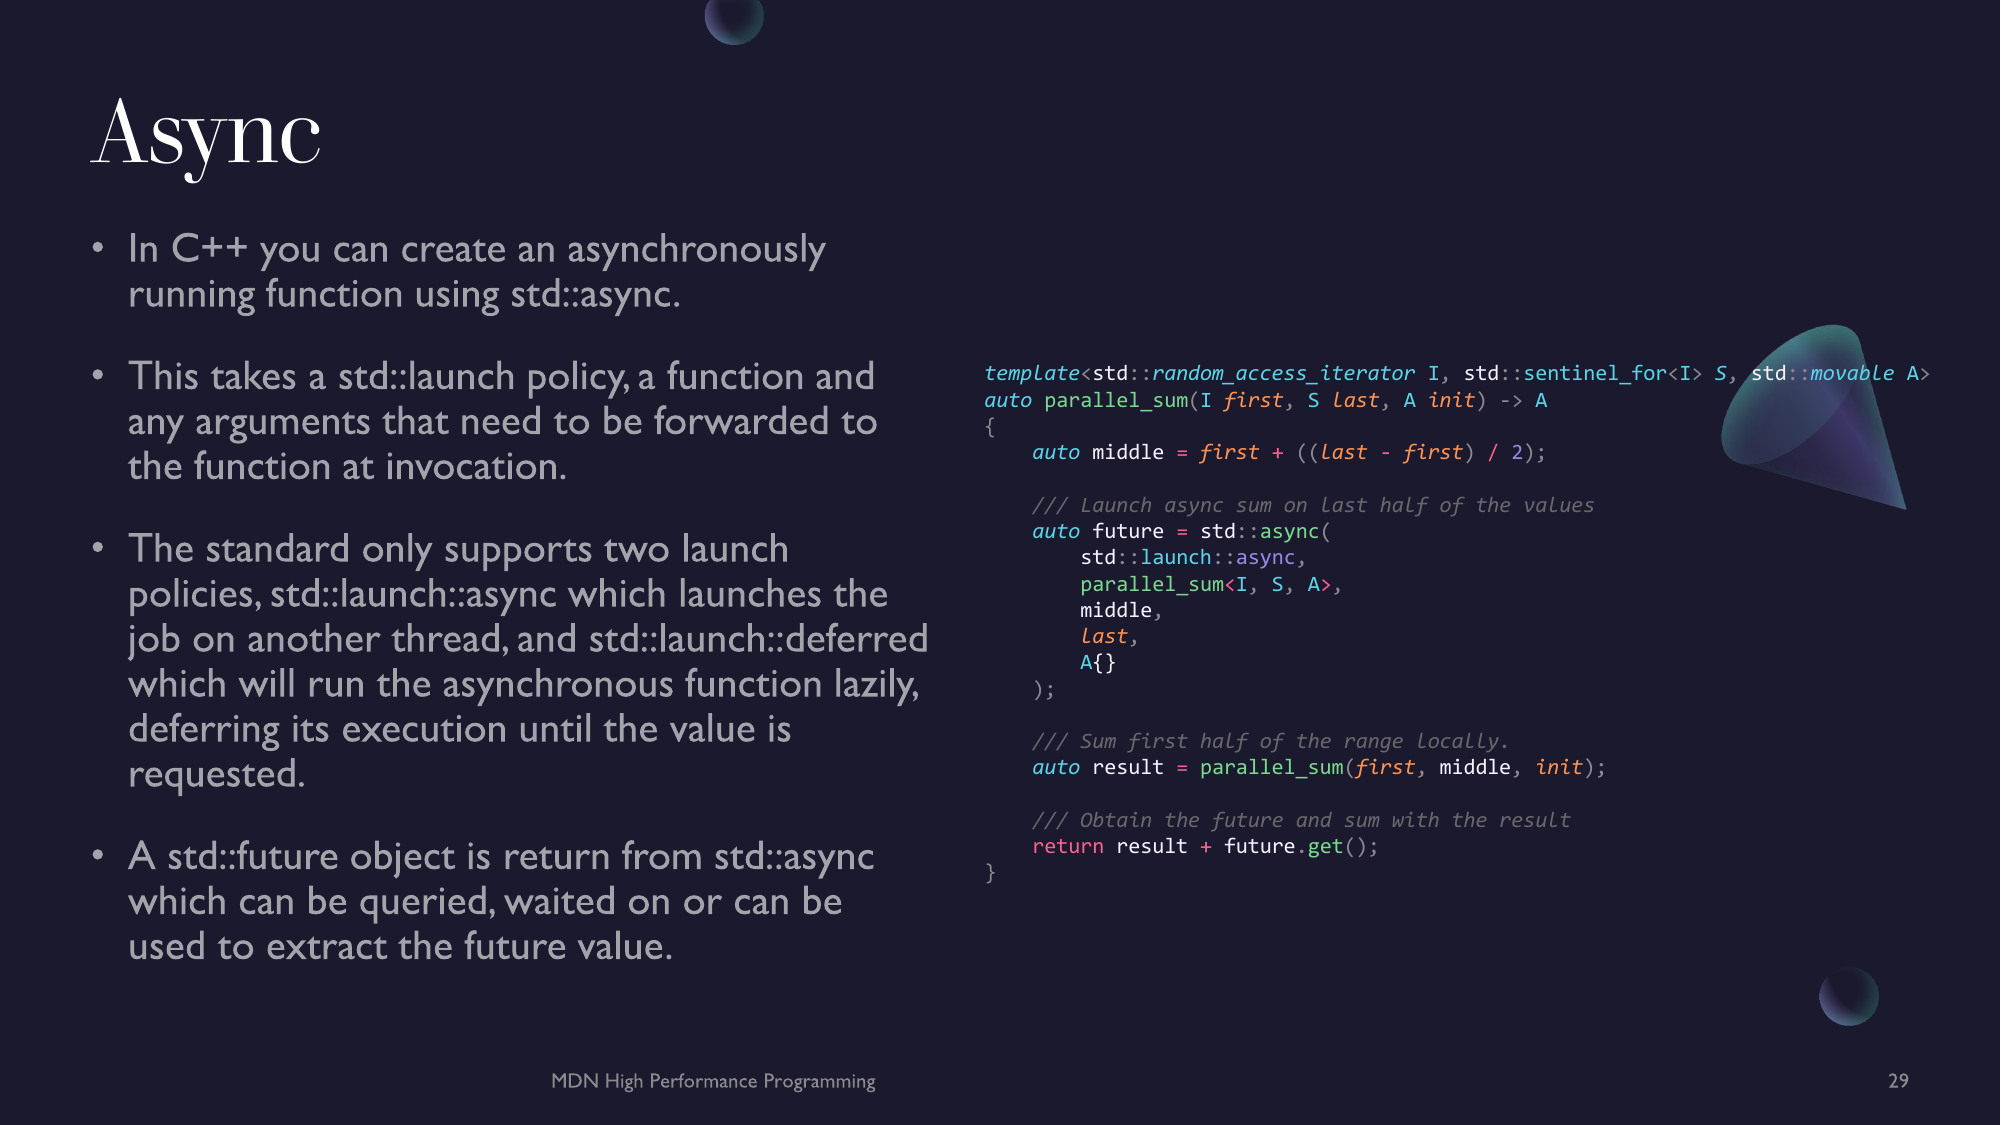
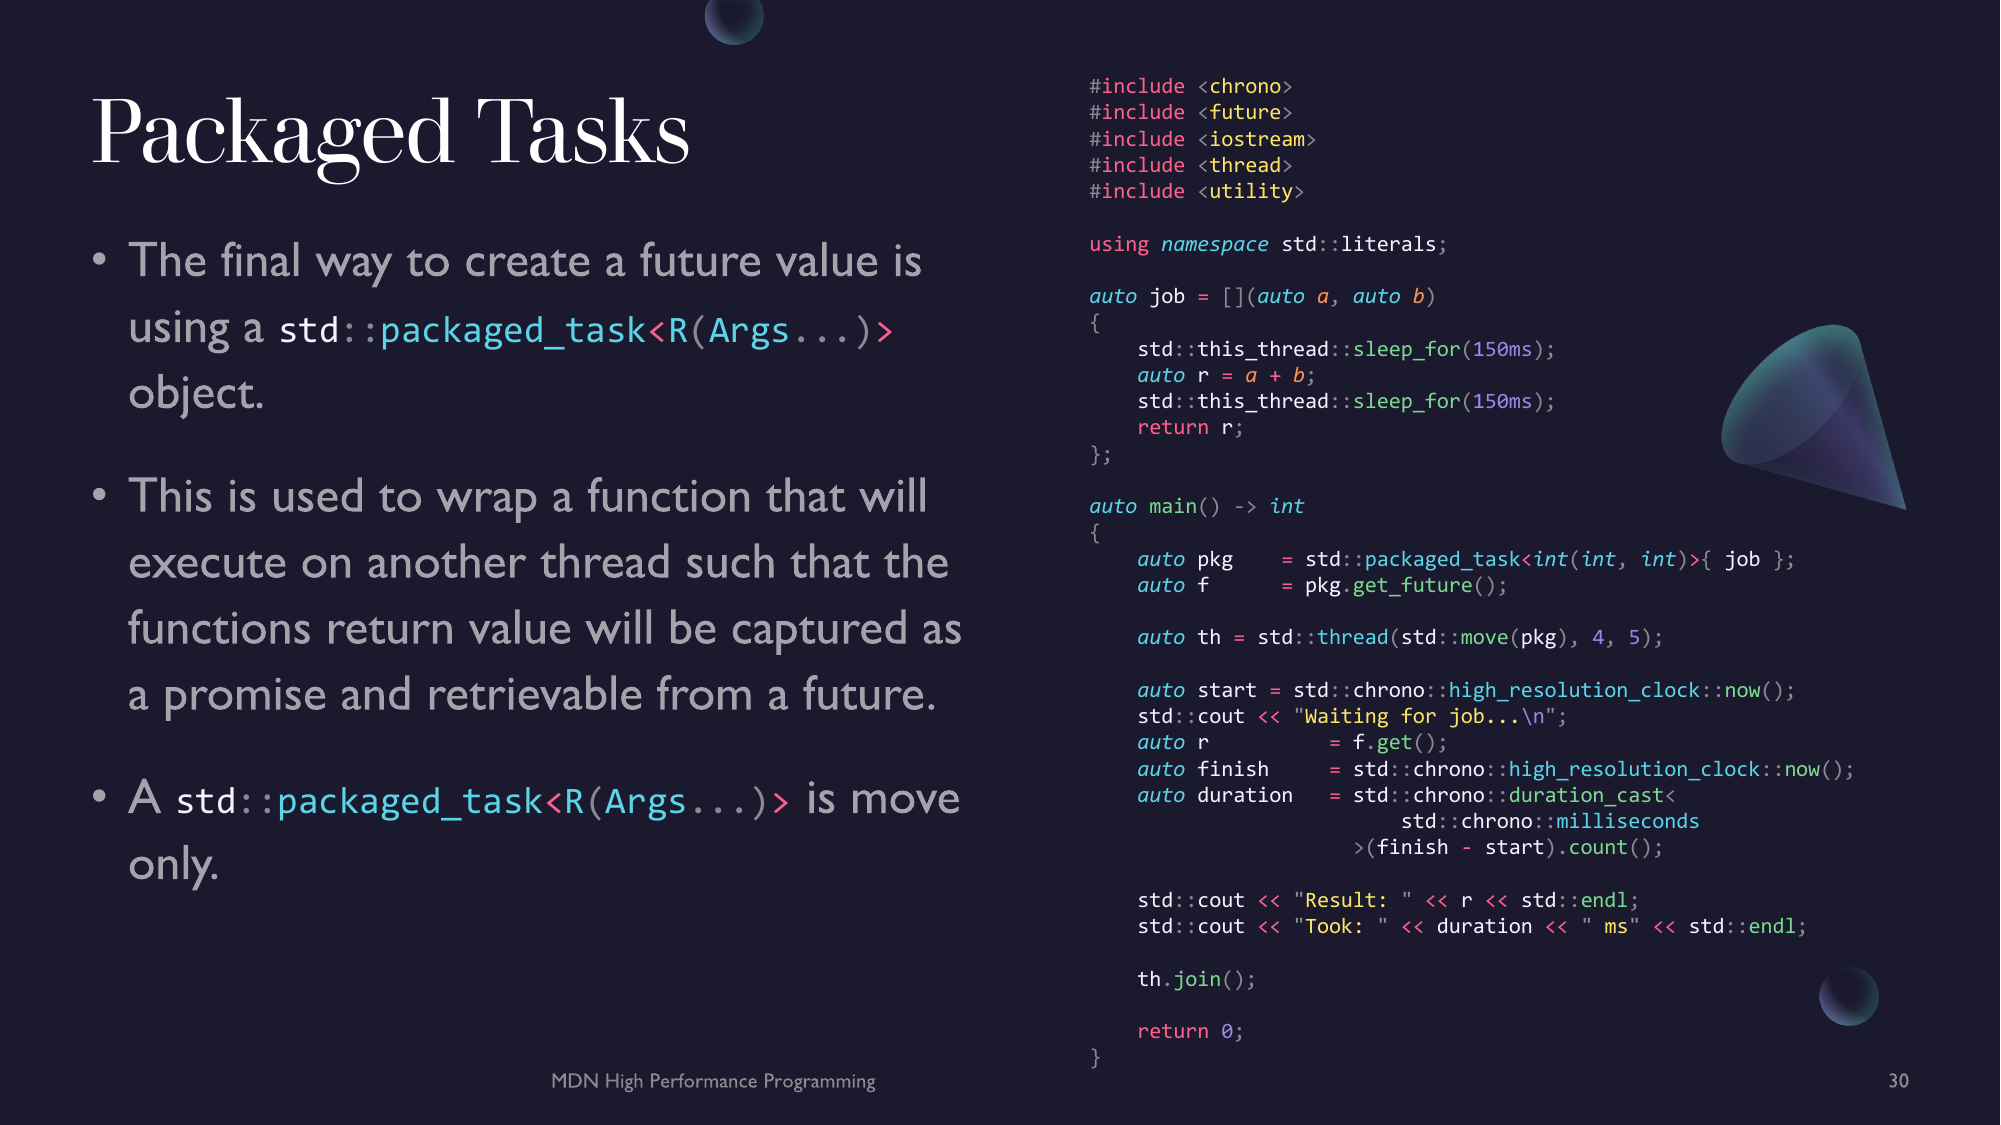


Godbolt Links
All Compiler Explorer links used.
format: <chapter.task.subsections~unnamed>
- Example : 1.6.2
- Example : 1.6.5
- Example : 1.7.1
- Example : 2.4.1~1
- Example : 2.4.1~2
- Example : 2.4.1~3
- Example : 2.4.1~4
- Example : 2.4.2
- Example : 2.4.3
- Example : 2.4.4
- Example : 2.4.5
- Example : 2.5.2.1
- Example : 2.5.3
- Example : 2.6.1
- Example : 2.6.2
- Example : 2.6.3.3
- Example : 2.6.4
- Example : 2.7.1
- Example : 2.7.2~1
- Example : 2.7.2~2
- Example : 2.7.2~3
- Example : 2.7.3
- Example : 2.7.4
- Example : 2.7.4.1
- Example : 2.8.1
- Example : 2.8.2
- Example : 2.8.3
- Example : 2.8.4
- Example : 2.9.2~1
- Example : 2.9.2~2
- Example : 2.9.2.3
- Example : 3.1.2
- Example : 3.1.3
- Example : 3.1.4
- Example : 3.1.5
- Example : 3.1.6
- Example : 3.1.7
- Example : 3.2.2.1
- Example : 3.2.3
- Example : 3.3.2
- Example : 3.3.3
- Example : 3.4.2
- Example : 3.4.3
- Example : 3.5.3
- Example : 3.5.4
- Example : 3.5.5
- Example : 3.5.5.1
- Example : 3.5.5.2
- Example : 3.5.6.1
- Example : 3.5.6.2
- Example : 3.5.6.3
- Example : 4.1.2.1
- Example : 4.1.3.2~1
- Example : 4.1.3.2~2
- Example : 4.1.4.1
- Example : 4.1.4.2
- Example : 4.1.4.3~1
- Example : 4.1.4.3~2
- Example : 4.2.1
- Example : 4.2.2
- Example : 4.2.3
- Example : 4.3.1
- Example : 4.3.1.2
- Example : 4.3.2
- Example : 4.4.1
- Example : 4.4.2
- Example : 4.4.3.1
- Example : 4.4.3.2
- Example : 4.5.1
- Example : 5.1.2
- Example : 5.1.2.1.1
- Example : 5.1.2.1.2
- Example : 5.1.3.1
- Example : 5.1.3.2
- Example : 5.1.3.3
- Example : 5.1.3.4
- Example : 5.1.4.1
- Example : 5.1.4.3
- Example : 5.1.4.3.1
- Example : 5.1.4.4
- Example : 5.1.5
- Example : 5.1.5.1
- Example : 5.1.5.2
- Example : 5.1.5.3
- Example : 5.2.4
- Example : 5.2.5
- Example : 5.2.5.1
- Example : 5.2.6
- Example : 5.3.2
- Example : 5.3.2.1
- Example : 5.3.2.2
- Example : 5.3.3
- Example : 5.3.3.1
- Example : 5.3.3.2
- Example : 5.4.1
- Example : 5.4.2
- Example : 5.4.3
- Example : 5.4.4
- Example : 5.4.4.1
- Example : 5.4.4.2
- Example : 5.4.5
- Example : 6.1.3
- Example : 6.1.4.1
- Example : 6.1.4.2
- Example : 6.1.5
- Example : 6.2.2.1
- Example : 6.2.2.2
- Example : 6.2.2.3
- Example : 6.2.2.4
- Example : 6.2.3.1
- Example : 6.2.3.2
- Example : 6.2.3.3
- Example : 6.2.4.1
- Example : 6.2.4.2
- Example : 6.2.4.3
- Example : 6.2.5.1
- Example : 6.2.5.2
- Example : 6.3.3
- Example : 6.3.4.1
- Example : 6.3.4.2
- Example : 6.3.4.3
- Example : 6.3.5.1
- Example : 6.3.5.2
- Example : 6.3.5.3
- Example : 6.3.5.4
- Example : 6.3.5.5
- Example : 6.3.6.1
- Example : 6.3.6.2
- Example : 6.3.6.3
- Example : 6.3.6.4
- Example : 6.3.6.5
- Example : 6.3.6.6
- Example : 6.3.6.7
- Example : 6.3.6.8
- Example : 6.3.7.1
- Example : 6.3.7.2
- Example : 6.3.7.3
- Example : 6.3.7.4
- Example : 6.3.7.5
- Example : 6.3.7.6
- Example : 6.3.7.7
- Example : 6.3.8.1
- Example : 6.3.8.2
- Example : 6.3.8.3
- Example : 6.3.8.4
- Example : 6.3.9.1
- Example : 6.3.9.2
- Example : 6.3.9.3
- Example : 6.4.1
- Example : 6.5.1
- Example : 6.5.3
- Example : 6.5.5
Planned Additions
- Separate installation for different OS
- Windows
- Linux
- MacOS
- WSL
- Coroutines (Chapter 7)